Category: Home & Garden

  • Mushroom Growing Kits – Do They Work?

    Mushroom Growing Kits – Do They Work?

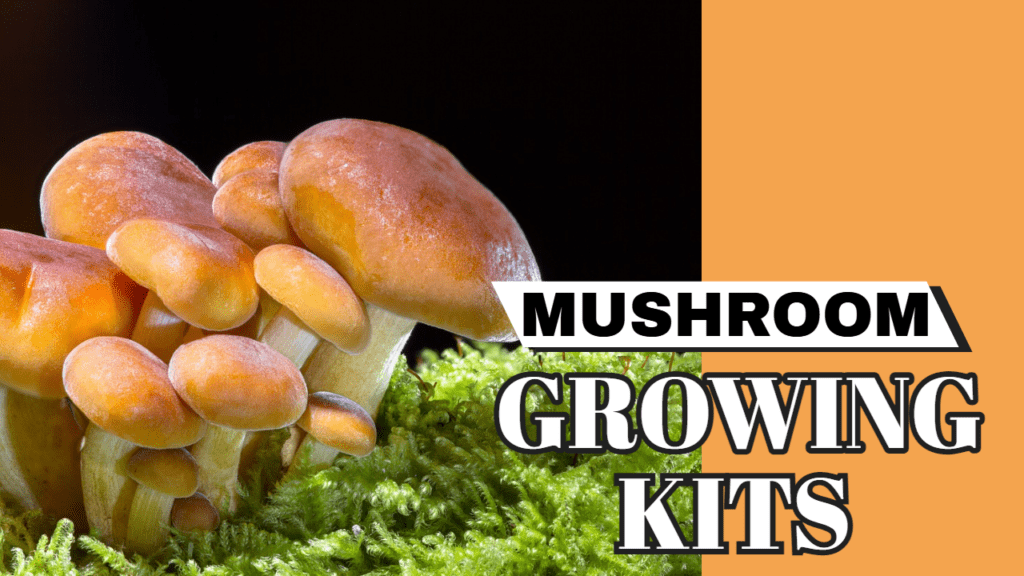
    Indoor Mushroom Growing Kit

    There are many kinds of mushroom growing kits available on the market today. They come with growing medium, and are already inoculated with spores.

    The mycelium-covered block is typically in a mushroom growing bag that can sit for some time, especially if kept cool in the refrigerator.

    All kits should contain some type of substrate. Psilocybin and psilocin are illegal to possess, obtain or produce without a prescription or license as they are Schedule iii. Psilocybin cultivation in Canada and other areas is gaining momentum. Once grown indoors some can transfer with great success outdoors of your home.

    Alternatively, you can grow mushrooms in straw or sawdust blocks – with less effort, but also less substrate for the mycelium. You can find mushrooms in the supermarket, but where’s the fun in that? A mushroom grow kit is easy to grow with lots of fun results!

    Harvest gourmet mushrooms – indoors

    mushroom growing kits

    If you are looking for organic, gourmet mushrooms, you are in luck.

    An organic mini mushroom growing kit can provide a harvest in 15-21 days. The oyster mushroom kit comes ready to grow and all you need to do is keep it inside and spray into the top hole. The mushrooms will sprout in clumps from the hole, although not always at the same time. Keep spraying until you are ready to pick. Then cut off the whole clump and remove it. Keep spraying and you will get more growth a week or three later. Ideal temperature 18-19°c.

    A back-to-the-roots mushroom garden produces a pound and a half of gourmet oyster mushrooms in less than two weeks! Recycled coffee grounds serve as soil; simply spray twice daily (mister included) and you’re ready to harvest. Grow the whole year (Right in the box!) and harvest multiple crops.

    These can grow indoors, and fresh air and indirect sunlight are perfect!! Simple. Fun. Delicious.

    How many magic mushrooms will you get from the grow kit?

    Start your mycology experience here!

    The mushroom growing kits in this category must be started from scratch. These mushroom growing boxes do not contain mycelium; they are just sterilized substrates. Use the advanced mushroom growing kits to grow magical, edible, medicinal mushrooms and even truffles.

    Please note that since December 2008, it has been illegal to sell magic mushrooms commercially in Holland and many other places. Therefore, fresh or dried magic mushrooms are no longer for sale. However, Magic Mushroom Grow Kits to grow Magic Mushrooms on a small scale have not been banned. It is still legal to buy them in many places or on the internet. The best way to get magic mushrooms is to grow them yourself. It’s fun, too.

    The Magic Mushroom Grow Kits are just what mushroom lovers need to maximize their growth. These mycelia grow boxes contain 2100ml of Psilocybe cubensis mycelium and guarantee a large harvest of magic mushrooms in a few short weeks. Along with the Mycelium kit, you will also receive a grow bag for the best possible growing conditions, a huge yield, and multiple flushes. All you need to do is mist and aerate regularly – and maintain. The kit will do all the hard work for you.

    A mushroom growing kit is a way to easily grow your own magic mushrooms. The mushroom growing kit includes:

    • 1x grow box with substrate containing live mycelium (the spores that have developed).
    • 1x transparent grow bag with air filter
    • 2x paper clips

    The substrate contained in the Magic Mushroom Grow Kit contains rye, rice flour, vermiculite and perlite. The development of the spores into mycelium has been in a lab under sterile conditions. The only thing necessary to grow the mushrooms from this mycelium is to place the grow box in a warm, bright, and humid environment. For this, use the transparent grow bag and paper clip.

    Psychedelic Mushroom Growing Kit USA Possession

    The purchase or possession of grow kits is not illegal in the USA or Netherlands or many other countries, but the sale of shrooms is. Simply put, it is legal to grow your own magic mushrooms, so it is also legal to be in possession of grow kits. Dutch and US law refers to “mushrooms”, so all types of shrooms are still for sale. These are primarily truffles, where the fruiting bodies of the mushroom are not used. These are the parts that are specifically prohibited.

    It is possible to buy “magic mushrooms” growing kits – that is, kits for growing hallucinogenic mushrooms. Of course, there is the small caveat that the kits might be illegal in your jurisdiction. The reason the kits are available is that in many countries, there is no law against possessing spores or mycelium of hallucinogenic mushroom species – only possessing the fruiting bodies is a crime. So a company can legally produce and sell the kits, provided they never allow their mushrooms to fructify. It is only the customer who bears the risk of prosecution.

    Although possession of dried mushrooms is illegal, there appear to be no restrictions on the possession and consumption of fresh mushrooms. It is also legal to purchase mushroom growing kits and spores. However, there appears to be some uncertainty around these regulations, as psilocybin is a Schedule iii drug in Canada, with possession and manufacture (possibly interpreted as cultivation) punishable by jail time.

    Although it is illegal to possess dried mushrooms, there do not appear to be any restrictions on possessing and consuming fresh mushrooms. It is also legal to purchase grow kits and spores. Since psilocybin is a Schedule iii drug in Canada, with possession and manufacture (possibly interpreted as cultivation) punishable by imprisonment, there appears to be some uncertainty in these interpretations.

    What can go wrong with the Magic Mushroom Grow Kit?

    Mushroom grow kits are made with care in a sterile laboratory. Suppliers ensure they are shipped as fresh as possible. There are dozens of manufacturers of magic mushroom grow kits. Look for growing kits that are the most reliable and have a good yield. Since the market is dynamic, it is recommended to be constantly testing new types of kits and looking for those that meet your standards.

    One company offers over 20 varieties of 100% pure mycelium, all grown using the same simple method. Their kits are shipped worldwide and can deliver up to five flushes per grow box. You will find that their grow kits are made from the same high-quality ingredients, including fresh, mineral-rich water and high-quality seasonal grains. While all of their products benefit from care in manufacturing, some of their products are difficult to keep in stock.

    Before you buy a mushroom growing kit, you need to consider first what you want to grow. You don’t want to try and grow any old mushroom. The first thing to consider is the variety of mushrooms. The person you will be gifting the kit to might have an interest in a specific kind of mushroom. Get the mushroom growing kit that will make him or her happy. The second thing you should consider is how beginner-friendly the kit is. Finally, make sure whether the kit contains all the components or not.

    You can decide when and where to use your magic mushrooms because you will be growing them yourself.

    Buying and selling magic mushrooms is illegal, but it is perfectly legal to order a mushroom grow kit. The growing method for most mushrooms is similar, but the effect of the mushrooms can be very different! If you are just starting to grow (and consume), you may not know exactly what to expect.

    Ready, Set, Grow! When you should start your garden

    After two weeks, the mycelium should already be sprouting on the surface of your garden. If not, there’s no harm in waiting a little longer. As soon as the mycelium appears on the surface, you should apply a generous layer of damp moss throughout your garden. Make sure the damp moss is evenly distributed over the surface before covering every inch with old newspaper. Water generously over the next ten days and allow the sprouts to grow until they are fully mature. Again, be careful not to overwater.

    Gourmet mushroom varieties like oyster and shiitake mushrooms fetch a high price and are actually relatively easy to grow. For those who have just started learning how to grow mushrooms, you can learn the basics in just a few hours.

    Oyster mushrooms are ready to harvest just seven days after growing from the bag.

    Mushroom growing is a lot different than walking in a pine forest at the right time of year and picking a basket full of wild mushrooms. Although, if you set up your mushroom gardens well, it can feel a lot like that experience. It’s smart to start with a species that will definitely grow. There’s nothing like a feast of successfully homegrown mushrooms to spur you on to keep growing. Of course, once you’ve mastered the process, you can branch out (like a mycelium!) to other mushrooms that have more specific needs.

    Mushroom Growing On A Budget

    If you are on a budget, a kit is highly recommended. It likely includes everything you need for your first grow (except the spores, of course): 6 substrate jars (already sterilized and premixed), a fruiting chamber for your mycelium (think of it as a planter box), a temperature/humidity meter, perlite (which is like soil for your mushrooms and goes into the fruiting chamber), and even a grow light – all for under $70. That’s really a bargain. If you were to buy everything separately, not only would it take your time to go to various garden and home stores to find all that stuff, it would probably cost you double.

    How to grow successfully with organic mushroom growing kits

    Mushroom growing kits have been commercially available in Australia for many years. They have become quite popular as more and more mushroom varieties are available for growing in kits. Growing mushrooms from kits are fairly easy and a great activity for the family. You will need a dark space for your kit, but most people can successfully grow a variety of mushrooms at home with little effort.

    Want to know how to successfully grow oyster mushrooms without having to buy a new kit every time? Maybe you want to grow a variety not typically found in kits? It’s not hard to get started with a kit and then keep it growing if you know what to do.

    Most oyster mushrooms are low-calorie, high-protein foods that are high in vitamins and minerals. Although they are said to have medicinal properties, especially in Asian medicine, they are still being studied for their medicinal properties.

    Also known as sponge mushrooms, morel mushrooms are a culinary delicacy found wild in many regions of the world. To successfully grow morel mushrooms, rather than foraging for them in the forest, gardeners must provide morels with a special growing environment. Morel spores or “seeds” are available from commercial companies, usually in the form of a morel mushroom kit. The spores are spread on a prepared plot and cultivated once they appear in the spring.

    Grow Your Own Mushroom Kit

    Want to learn everything you need to know about growing your own mushrooms at home? Some courses provide online classes. You’ll also receive a kit containing everything you need. Then you can follow the live course and ask any questions you have to our experienced mushroom growers. They’ll walk you through the process step-by-step on how to successfully grow your mushrooms.

    How to grow delicious edible mushrooms at home for all your favorite recipes

    It may surprise you to learn that there are over 14,000 kinds of mushrooms. A number of them are deadly to eat, but there are also many that are delicious to eat. A mushroom kit can help you get started and learn how to grow your favorite varieties at home. You can find kits for growing shiitake, oyster mushroom, lion’s mane, button, portobello and more. These are just some of the popular mushroom varieties for cooking.

    Button-leaf mushrooms should not be too small.

    Can You Reuse Mushroom Grow Kits?

    Button mushrooms should appear within three to four weeks. Harvest them when the caps open, and the stem can be cut from the stalk with a sharp knife. Avoid pulling the mushrooms up, or you risk damaging surrounding mushrooms that are still developing. Daily harvesting should result in a continuous harvest for about six months. Once you’ve established a mushroom growing station in your home, it’s super easy to grow them. You may need to add fresh fry from time to time to grow more mushrooms, but as long as you keep the cloth moist and harvest the mushrooms as they appear, you should have a steady supply.

    The variety of mushrooms you can grow at home is amazing, and you can grow an abundance of them, so you may even have to figure out how to use them all. Portobello mushrooms are the meaty mushrooms you typically get in restaurants – when you sink your teeth into them, they taste almost like steak. Blue oyster mushrooms are a favorite. Many say they taste like chicken. Lion’s mane mushrooms have a light, delicate, seafood-like flavor, similar to scallops.

    Morel mushroom hunting is a favorite pastime for many in the Midwest regions. Now you can grow morel mushrooms in your own backyard with a black morel mushroom kit. Set aside some of your fireplace ash to pour on the ground. They’ll love it!

    How do mushrooms grow

    You can grow Portobello mushrooms indoors or outdoors, and it should only take a few short weeks. Before getting started, you’ll need a wooden box in which to grow the mushrooms. Layer manure-based compost covered with a piece of cardboard and a layer of black plastic wrap. Leave the box outside for two weeks to allow sunlight to kill all bacteria. Then place it in the shade or in a room where the temperature stays below 70 degrees Fahrenheit. Mix the spores into the compost and cover it with peat moss and a layer of newspaper.

    The compost must provide a smorgasbord of food for the fungal mycelium. Not only are the lignin-humus complex and cellulose important, but also protein, fat and oils. A good analogy is that protein serves as the mushroom’s “steak,” carbohydrates as its “potatoes,” and lipids (fats and oils) as its “butter.” ” Like humans, mushrooms should eat a balance of all these food types. The main source of “steak and butter” for the mushroom is the Phase II microbes. The dead cells of thermophilic fungi, bacteria, and actinomycetes “catching fire” are the packages that provide protein and fat to the fungus.

    Patience is required if you choose to grow these fungi on stems.

    Advanced Grow Kits

    Some growing kits are for advanced users only and come with only the most basic materials. The basic grow kit is available in b+, Cambodia, golden teacher and Ecuador strains. The basic grow kit also uses the rice flour cake method (pf tek) to create a substrate but requires daily maintenance and watering. You will learn how to sterilize your kit before adding water and injecting the spores provided. Check your precious babies daily to make sure they are properly moistened. In 6 weeks, you’ll have about 400 grams of fresh magic mushrooms ready to harvest.

    No matter if you are just beginning to learn to grow or already have considerable experience cultivating your own mushrooms, you can find everything that you will ever need online. Some kits already include everything, while others still require spore syringes or spore prints to complete the kit.

    Buying golden teacher mushrooms is by far the least demanding approach to start growing mushrooms at home. This is because grow kits include the mycelium and a grow box. This makes the growing process very simple and straightforward – they already contain almost everything you need, and you can grow without spores. This is because edible mushroom development units are absolutely amateur and do not require any unusual skills, equipment or other hardware. Other than the mushroom pack itself, you probably have everything you need at home.

    Are you ready to get started with mushroom growing kits?

    Have You Seen: Health Benefits Of Green Tea

    The Article Mushroom Growing Kits – Do They Work? was found on https://limitsofstrategy.com

  • Electrical Fires – How To Avoid Them

    Electrical Fires – How To Avoid Them

    Electrical fires in a home involving appliance faults or electrical faults are more common than you might think.
    They are the third leading cause of home fires.
    Most of these sad accidents are due to improper or lack of maintenance or repairs of electrical components in the home. It is always tragic as they are very preventable mistakes.
    Electrical fires can happen in moments, so it’s essential for the safety of you and your loved ones to check your home’s electrical system regularly.

    Electrical Safety Warnings

    Sometimes it’s relatively easy to recognize electrical hazards.
    Other times, it takes an experienced eye to spot concerns.
    Electrical work is a skilled trade that requires in-depth training and years of knowledge to master.
    That’s you must hire an electrician for all electrical work including fixing up faults
    9 Ways to Avoid Electrical Fires

    Determine the age of your electrical system

    If your home was built in the ’90s or before there have been no electrical upgrades, it’s time to perform a thorough safety inspection and electrical audit for your home.
    Modern appliances require more electricity and can put outdated wiring and circuits under pressure and overload them because they can’t handle the amount of electricity needed by today’s technology.
    Overloaded wiring becomes hot, and this is how electrical fires start
    If you are unsure about your home’s wiring, hire a certified electrician to check your home’s electrical connections and wiring.


    Inspect power cords for frayed and exposed wires.

    Faulty wiring is one of the most common causes of residential electrical fires.
    Wires can fray or break due to their age, heat, corrosion or being bent out of shape. The protective cover and lining can also be nicked, pinched or pierced by nails or screws and these make contact with the live wires encased in the cord.
    When a wire is frayed, it is not adequately insulated. Frayed wires can easily catch fire if electric current flows through them and they come in contact with combustible material (e.g., carpet, clothing, etc.).
    If you suspect a wire is frayed, try disconnecting it safely to stop the flow of electricity.
    When a frayed cord is an old extension cord, replacing the frayed wiring with a new unit is probably sufficient.
    Call a certified electrician if ever in doubt to do a more thorough investigation.


    electrical fires

    Don’t overload your power outlets.

    Try not to plug too many appliances into one power strip or extension cord. For example, if your power strip has eight outlets, plug in only six or seven devices.
    Overloading is another common cause of home fires. It is recommended that you purchase power boards with internal overload protection.
    This acts as a failsafe, immediately cutting off power to your appliances if an unacceptable amount of current flows through the power strip. This drastically reduces the risk of a fire.

    Watch for burning odours and smoke

    Visible smoke or a burning smell is perhaps the most obvious signs and indications of an electrical fire hazard.
    Smoke results from some overheating causes: Overload, faulty wiring, frayed wires, old outlets, etc.
    If you notice smoke in your home you must go and investigate.
    If you think smoke is coming from an appliance, immediately unplug it and any other appliances on that circuit or in the room.
    Then start searching where the smoke is the strongest to try and identify where it is coming from.

    For extra safety, you can also shut off the power with the main switch in your switchboard.
    Calling an electrician can be a way to make sure you also get the right advice in what to do.
    A clear sign of overheating is discolouration around an electrical outlet, light switch or light fixture.
    Other dangerous signs include sparks when plugging in appliances, devices or outlets that feel hot to the touch and the sensation of electric shock when plugging in power cords.


    Make sure smoke detectors are working correctly.

    They won’t stop an electrical fault but they will warn you if there is smoke which is the first sign that there is a fire or smouldering.
    Modern smoke alarms are now connected to your home’s electrical supply, so there are no more beeping batteries or flat batteries. Speak to an electrician to get new smoke detectors installed!


    Check for flickering lights.

    Have you noticed that sometimes your lights flicker when you plug in multiple appliances in the same room?
    If the flickering is happening it is an indicator that you may be overloading your circuits or wiring. Check the wiring and circuit breaker for that part of your home and call an electrician to ensure your home’s electrical system is operating under safe conditions.


    Bulb wattage

    Installing a light bulb with too high a wattage for the lamps and light fixtures is another leading cause of electrical fires. Before installing a high wattage light bulb, make sure the socket you are plugging the bulb into can handle the power you need.  Never drape fabric over a light bulb.


    Damage caused by rodents

    Rats and mice are known to have an appetite for electrical wiring. During your electrical inspection, look for droppings or other signs of rodent activity.
    If you see telltale signs of rodents, make sure to inspect the area for wire damage. Rodents chew on electrical wires, which can strip away vital insulation and ultimately put your home at high risk for fire.
    Also, check that your pets have no being chewing on cords.
    Puppies are known to chew on cords.


    Be careful when using heaters.

    Space heaters are a great tool if you only want to heat a specific area of your home, especially if your home doesn’t have air conditioning.
    However, their mobility poses a higher fire risk. Often, homeowners place these portable heating systems next to combustible materials such as curtains, beds, clothing, chairs, couches and rugs.
    Heating coils in the heater are most likely to cause fires because the coils that generate the heat get so hot that most household materials catch fire immediately when they contact the coils.
    If possible, switch to a heater that dissipates electricity evenly across the unit. This will drastically reduce heat dissipation and the risk of accidental fire.

    Make your home electrical system safer today by calling your local electrician to get the right advice.


    The Article Electrical Fires – How To Avoid Them was found on https://limitsofstrategy.com

  • Soundproofing Your Home

    Soundproofing Your Home

    Soundproofing your home is a topic that is becoming more popular.

    As homes are built closer together, most new homes have lighter building materials like stud walls with gypsum board.

    Noise levels can get loud.

    People want to enjoy their homes without causing friction with neighbours due to noise complaints.

    Noisy neighbours are the number one reason why people considering soundproofing. 


    Reasons Why People Need To Have Soundproofing

    •     Theatre rooms 
    •     Home office
    •     bedrooms of young children
    •     Traffic noise or train track
    •     Under an aircraft flight path
    •     Shift workers
    •     Musicians

    A well-soundproofed home will provide a more harmonious lifestyle and increase your home’s value when you want to sell it.

    It will also be more energy-efficient to heat and cool.

    What Soundproofing Does:

    Enjoy your music or movies at any time without disturbing others.

    You can work from home without disturbing the family or having general household noise interfering with your work on a conference call or webinar.

    Get It Done During The Home Build

    The simplest and cost-effective way to soundproof a room is to do it during the construction of your home or extension.

    When you build your home or have a renovation done – Make sure you have better soundproofing methods and materials used.

    The most common are acoustic plaster, soundproofing and mass elastic vinyl.

    Suppose you need a soundproofed area, such as a recording studio. In that case, this will require additional planning as it is the equivalent of building a room within a room.

    What is noise?

    You need to understand that noise is generated by sound waves, which can be described as energy waves. That sound can be divided into two noise categories:

     Airborne Or Impact Sound. 

     Airborne sound is just that: sound that is transmitted through the air.

     Examples include people talking, television noise, traffic noise, appliances, music or dogs barking.

    Impact sound is caused by objects hitting a surface in the home. 

    Closing doors, furniture being moved, and footsteps cause this on hard floors.

    To stop or reduce sound transmission, we need to control the sound waves or try to minimise the energy/power of the waves.

    The Basic Overview Of Soundproofing

    First, inspect the walls for gaps or weak spots and use an acoustic sealant to seal any cracks.
    Treat soundproofing like waterproofing, it is only as good as the weakest point. 

    The example we like to give is when you roll down your car window and hear a loud noise. 

    If you roll it back up and leave a small gap, the noise is still loud, but if you roll it up, it disappears).

    Improve the mass of the wall by adding high mass/density products.

    Improve the wall’s ability to absorb sound energy and vibration. Without this improvement, the added mass will have little effect.

    Add acoustical insulation between wood battens to eliminate sound reverberation. 


    soundproofing rooms


    Use A Variety Of High Mass Materials. 

    Different materials are better suited for different sound frequencies, so a combination of high mass materials will perform better than using multiple materials of the same type.

    Blocking: Try to prevent sound waves from entering an area. This can be done by double glazing windows, sealing cracks and holes in walls, and using door sweeps to prevent sound from penetrating under a door and around window frames. 

    Absorbing and Damping – These two terms are very similar. Absorb means it “soaks up” the sound vibrations – carpet, cork flooring, acoustic foam or ceiling insulation.

    Dampening stops the energy wave by not vibrating and allowing it to go further. A solid wood door will work better than a particleboard door.

    Decoupling: Separating the two sides of a structure so that they do not touch and the vibrations do not pass through to each other. It is very effective to isolate sound on one side of a wall and prevent sound from passing through to the other side.

    What rooms need to be soundproofed?

    Any room in your home that you think will benefit from it. 

    If you are building or renovating, you should have the foresight to install additional soundproofing products. It brings more comfort to any home when outside noise is blocked and the house has been acoustically treated.

    Soundproofing A Recording Studio

    If you want to build a professional recording studio or sound booth, you will build a “room within a room.”

    The interior room has no physical connection to the external, and that’s what decoupling refers to. It prevents sound vibrations from passing through the walls and creating a sound interruption.

    Both rooms use dense materials such as acoustic plasterboard, have acoustic insulation or foam between the walls. The room is sealed with acoustic sealant to ensure there are no gaps around the door frame to stop all unwanted noise and outside sounds.

    Soundproofing a home theatre room

    Soundproofing a home theatre room effectively can be done with acoustic gypsum board and noise resilient mounting clips.

    This will create a sound barrier between the gypsum board and the stud framing. 

    Add extra sound absorption with suitable, high-quality carpets and upholstered furniture to reduce echos.


    sound proofing options


    Soundproofing A Home Office:

    When working from home, the last thing you need is unnecessary noise distracting you.

    Loud neighbours, noisy kids, people mowing their lawns, or a barking dog can be a significant distraction and negatively impact your productivity.

    For a home office, you can follow the same steps as for a home theatre above. 

    Soundproofing  Bedrooms

    A bedroom is a space where minimal noise is a must.

    Minimal noise or disturbances are crucial to a good night’s sleep, and minimising outside noise will improve your sleep.

    To soundproof bedrooms, you typically only need a medium-density acoustic insulation mat in the interior walls and a higher-density acoustic insulation mat in the exterior walls.

    Use a draft stopper or door sweep on the bedroom door.

    What about an existing room?

    Typical gypsum board walls are not suitable for sound reduction because they are thin. The area between the boards and the wall cavity creates an echo chamber, allowing sound waves to bounce in the gap and pass through the wall studs and walls.

    Depending on the level of soundproofing desired and the budget available, we recommend the following steps.

    Option 1

    To reduce sound in a room or area, – Think open plan. Use soft furnishings such as upholstered furniture, rugs, carpets and blackout curtains or drapes. All of this will help reduce the transmission of sound waves.

    Floor coverings absorb sound, and curtains help block sound coming through windows.

    Option 2

    If this is not sufficient, you can add sound-absorbing ceiling tiles and exterior sound-absorbing acoustic tiles to the walls. 

    If you are considering carpeting, you can also place an acoustic underlayment on the floor. The extra step with the carpets will help if you live in an apartment with neighbours below you.

    Option 3

    If the noise comes from outside, such as living near a busy street or near noisy neighbours.

    You’ll need to opt for a change in your walls and doors. 

    Add a layer of acoustic plasterboard over an existing wall and replace hollow doors with a solid-core door. 

    You should also add a draft stopper to prevent noise from passing under the door.

    Option 4

    The next step is to remove the current gypsum board, fill the wall cavity with acoustic wall insulation, and then re-plaster it with an acoustic gypsum board.

    Option 5

    Finally, suppose the highest level is needed. In that case, you will need to build an acoustic wall as described in Building a Recording Studio.

    You will need a contractor to build a new wall frame that detached from the existing walls. 

    The wall cavities will be filled with the proper insulation and then covered with an acoustic gypsum board.

    Mass elastic vinyl can also be used.

    Remember that you will also need to line the floors with good quality carpeting and an acoustic underlayment.

    Professional Advice And Construction

    For more advice on how or what soundproofing material you should use to find an effective solution to excessive noise levels and soundproofing ideas

    We can help with Brisbane Soundproofing techniques.


    The Article Soundproofing Your Home was found on https://limitsofstrategy.com

  • Interior Lighting Options For Your Home

    Interior Lighting Options For Your Home

    Choosing interior lighting options for your home could seem like an easy thing to do.
    Have you ever been to a lighting showroom and seen the thousands of options?
    When faced with all the different lighting options, you need to understand a little bit about what you need for your home so you do not end up with a space that is not suitable for the purpose you had planned.

    The Goal Of Lighting Any Room Is To Make It Suitable For Its Planned Use. 

    So before you begin, you need to ask yourself the question:

    What are you using the space for, or what will you be doing?

    Think about how you will use the room throughout the day and let the lighting work for you. 

    Since living rooms tend to have various uses, add different lighting options in your living room and make it easy to control the light levels.

    Understanding the basic types of lighting and how and when to layer them is the most important aspect of lighting your home. 

    There are three basic lighting types that you should keep in mind:

       Ambient or General lighting

        Task lighting

        Accent lighting

    Ambient or General Lighting

    Ambient lighting is the general level of light in a room. 

    It provides general illumination to a room and allows you to move and see safely. 

    It is usually created by the first light switch you turn on when you enter a room, and it’s the light that is left on most of the time. It is the perfect place to use energy-efficient LED bulbs

    It is the foundation for all interior lighting.

    Although you can use individual fixtures such as floor lamps or table lamps, ambient light is typically created with overhead fixtures, such as:

    •     Recessed lighting
    •     Track lighting
    •     Chandeliers
    •     Ceiling fans
    •     Area lights

    When choosing light bulbs for your room lighting, think in terms of lumens, not watts. 

    Oldstyle bulbs measure the brightness in watts, which is actually a measure of energy consumption. 

    With the wide usage of energy-efficient bulbs like CFLs and LEDs, lumens are a more accurate brightness measure.

    Choosing The Right Lights For Your Space

    Suspended Lighting or Pendant lighting is ideal for higher ceilings or for hanging over islands or dining areas. 

    Ensure pendant lights are no lower than 75cm (30 inches) from a benchtop or table. They can block your view or be an obstruction.

    When choosing pendant lights, consider the size of your space. 

    For smaller rooms, opt for smaller, lighter pendant lights. 

    Larger spaces can handle more significant and dramatic lighting fixtures.

    If extra light is needed, you can add other light sources.

    It Is OK To Choose Bulbs With A Lower Lumen Output

    When it is for general lighting, the room lighting does not need to be as bright and focused as Task or Accent lighting.

    Your electrician will be able to help you calculate what lumen output you will need to light up a room. 

    A single light fitting maybe be sufficient with the correct lightbulb. 

    You can add extra light fittings or even go for recessed downlights for a more even spread of ambient lighting.

    If you are considering recessed lighting, you should aim for approximately one fixture per 4 square feet of ceiling.

    Task Lighting Adds Extra Light When Needed

    Think about when you are doing an activity that requires extra light.

    It can be reading in bed, food prep in the kitchen, craft activities or doing your makeup in the bathroom.  

    Task lighting is to help you do a task. 

    This type of lighting is localized and can come from various sources, such as spotlights, recessed lights or desk lamps and table lamps.

    Consider These Tips For Task Lighting:

    Brightness is crucial, but it shouldn’t illuminate the entire room.

    Look for adjustability. Opt for fixtures and lamps that can be dimmed (or install a dimmer switch), as well as positionable fixtures such as movable arms that can be moved as needed.

    Consider The Colour Of The Light. 

    Warmer bulbs are ideal for reading, especially at night. In comparison, cooler bulbs around your bathroom mirror will give you realistic daylight, so your makeup looks great in natural light.

    Placement matters. Desk lamps and table lamps should be adjustable and pointed downward, so the light is focused on the task at hand and not in your eyes. They should also be placed on the side of your workstation to avoid glare and limit shadows.

    Accent Lighting Or Feature Lighting

    Where to use accent lighting

        To draw attention to artwork or plants

        To highlight architectural elements

        As decorative lighting

    Accent lighting, also known as directional lighting, aims to create a focal point.

    Typically it is used to draw attention to a specific feature, such as a piece of art or a plant, or highlight architectural elements such as wall textures decorative coving.

    Adequate accent lighting draws the eye to the desired feature without drawing attention to the type of lighting. 

    This is often accomplished with spotlights, wall sconces or recessed lighting. 

    To effectively attract attention, accent lighting should direct at least three times as much light to the focal point as to the rest of the room.

    When it comes to accent lighting, it’s okay to focus on form rather than function. 

    Don’t forget about natural light. 

    Perhaps your room is brightly lit by natural light during the day, so you underestimate the amount of ambient light you need at night.

    You can use dimmers to add more flexibility to your room’s lighting.

    The Kitchen Lighting

    The kitchen is the central hub of most homes and families.

    We do more than just cook and eat in our kitchens, which means this space needs different lighting types.

    A common mistake when planning kitchen lighting is is using a single light or a lighting track. It results in uneven light distribution, with glare and shadows on the countertop.

    Flexible lighting is needed with the right placement of lights to help use the space functionality day and night. 

    Task and accent lighting help supplement natural light during the day and add general lighting in the evening hours.

    The kitchen light is often left on longer than any other lights in the home. Upgrade your lights to energy-efficient bulbs like CFLs or LEDs. They emit less heat, which is perfect for under-cabinet and other Task lighting.

    Task lighting provides focused illumination for a work area. 

    In the kitchen, this can include the following areas:

    •   Countertops
    •     Islands
    •     Sinks
    •     Stovetops
    •     Inside cabinets and drawers
    •     Under-cabinet lighting

    Under-Cabinet Lighting

    Is an effective way of creating task lighting and puts light where it’s needed most, without the risk of shadows.

    Many surfaces, including granite and marble, are reflective. 

    Look for under-cabinet lighting that provides a diffused light source to avoid glare, such as LED strips positioned toward the wall.

    Suspended Lighting

    Pendant lights can be both decorative and functional in a kitchen. 

    They provide ambient light is distributed in all directions, and when properly positioned, these fixtures can also serve as stylish task lighting over spaces like your kitchen island or sink. 

    Recessed Lighting

    Is excellent for low ceiling heights. If you choose recessed lighting, make sure the lights are close enough to the cabinets to provide a useful layer of light overhead where you will be working. If they are set back from the cabinets, there will be shadows on the benchtops. 

    Position the lights about 60cms from the walls so that the light beam’s centre hits the countertop’s edge.

    Accent lighting

    Accent lighting in your kitchen shows features such as artwork on the wall or a feature on a benchtop like a plant or a fruit bowl 

    There are several ways to add accent lighting to your kitchen:

    LED light strips under a cupboard or even baseboard lighting 

    If you have high ceilings, pendant lights, or wall sconces above the sink, can provide both accent and task lighting.


    chandelier

    The Living Room

    The living room is where family members spend time. 

    It’s also usually one of the first rooms you enter. It needs to be well lit while keeping both function and form in mind. 

    The room lighting needs to support the activities you do (or want to do) while using the space.

    If there is a TV in your living room, avoid placing ceiling lights directly above or in front of the TV,

    Use accent lighting that you can dim or easily turn off. 

    The lights can be distracting by creating glare and making it difficult to see during dark scenes.

    Ambient Light Ideas:

     Use a large central ceiling light such as a stylish chandelier or pendant, If you use multiple light sources, make sure to distribute them evenly to avoid bright areas and harsh shadows. 

    Opaque lampshades and frosted glass diffusers can also help balance the lighting.

    For entertaining, the proper ambient lighting is essential. Use warm-toned, dimmable bulbs to create an inviting environment that makes your guests feel comfortable and encourages conversation.

    Task Lighting

    Task lighting creates focused, bright light that allows you to easily see what you’re looking at while providing eye relief. 

    For avid readers or crafters, the right light allows you to focus on your activity and avoid eye strain. 

    Lamps that are adjustable for brightness and position are the most useful sources of task lighting.

    Lamps with dimming options or 3-level dimming options are perfect.

    Place task lights at desks, tables used for work or hobbies, and next to your favourite reading chair.

    Accent Lighting

    Accent lighting helps create more visual interest and highlight important aspects of your living room. 

    Highlight artwork, architectural details like textures or decorative mouldings.

    Cabinets And Shelves: 

    Lighting open shelves or cabinets is a great way to feature the items you want to display, such as china, glassware or other decorative pieces.

     Use fairy lights or LED strips in display cases and on bookshelves to subtly highlight a collection of items, or hang fairy lights around houseplants to create soft pockets of light and an enchanting atmosphere.

    To help you plan the lighting of your home, speak to a qualified electrician who is a lighting consultant and passionate about lighting design


    The Article Interior Lighting Options For Your Home was found on https://limitsofstrategy.com

  • How to Garden Organically

    How to Garden Organically

    Aquaponics 4 You

    How to Start an Organic Garden in 9 Easy Steps

    How to Garden Organically: It’s that time of year when you might want to think about starting an organic garden, and you should! Gardening with young children in tow can indeed have its challenges. But gardening also offers virtually unlimited learning opportunities for kids and adults alike, so here are five simple tips for planning a garden with your kiddos.

    Despite the economic downturn, the gardening industry has grown year on year since 2008, with sales totalling more than £4.6 billion in 2010. Meanwhile, “grow your own” and self-sufficiency are fast becoming gardening buzzwords, as both cash-strapped and environmentally conscious people turn to their gardens in search of a cheap – and ethical – the source of fresh food. According to the Horticultural Association, half of the garden owners intended to grow food in their gardens last year, 12 per cent of whom were first-time gardeners. Most gardeners’ obvious starting point is seeds, which are both plentiful and cheaper than investing in seedlings.

    First, not all beetles are destructive. Many are good, like ladybirds. Organic gardening encourages beneficial insects while discouraging pests. Crop rotation is one way to deal with pests. The idea is that when pests wake up in spring, their favourite snack is now in a completely different place, far away (at least within bug distance). If bugs are plaguing your garden, sometimes the best thing to do is to remove them and put them in some soapy water. You can also make a natural pest spray at home that is simple to make, safe, and effective.

    A garden is an easy way for aspiring homeowners to become more self-sufficient and grow some of their food. And going organic is the way to go. It’s not difficult to start an organic vegetable garden, but it can be daunting. The steps to making your own are outlined below. My daughters and I have a lot of fun gardening.

    Birds in your garden

    You will get bugs in your organic garden—a lot of bugs. You want bugs in your organic garden for pollination and healthy soil and more. Bugs only really become pests if there are no predators to keep them in balance. The best predators for most garden pests are, of course, birds, so you want as many birds as possible in your organic garden from the start. That means feeding them.

    Organic pest and disease control methods mean a healthier garden for you, the plants and the insects, birds, and animals around you. Organic vegetable pest control does not attempt to eradicate all insects. The vast majority, 95 per cent of insects, are benign or beneficial. Take Insects and diseases are drawn to stressed, harmed, or otherwise unhealthy plants, so taking good care of your plants is necessary for prevention. It means giving them plenty of attention and creating the conditions they need for healthy, vigorous growth.

    A powerful natural insecticide extracted from the seeds of the neem tree can interrupt the life cycle of insects at any time (adults, larvae and eggs), making it an excellent organic gardener’s resource. Neem oil acts as a hormone disruptor and an “antifeedant” for insects that feed on leaves and other plant parts. Pets, birds, fish, and other animals are not poisoned by neem oil because it is biodegradable. It is effective against a wide range of garden pests and is a natural fungicide that can control powdery mildew and other fungal infections on plants.

    garden

    Open-pollinated seeds are just that they are allowed to pollinate naturally. This can happen outdoors by wind, bees, butterflies or other pollinators or even birds and humans. Open pollination creates a more diverse plant population, and this diversity can lead to more vigorous plant varieties in future generations if you save the seed. However, if you save the seed for future gardens, make sure that the plant has not been cross-pollinated with other varieties. The seed produced may be a hybrid variety even though it was produced by natural means.

    Growing a community garden

    Most plant nerds like me are happy to share our knowledge and plants. Part of it is selfish, and I have to admit. Look, I know I’m not going to find all the best techniques and plants on my own, but if I can spread my love of gardening, I can trade my plants and produce with friends and neighbours for what they have. Growing local food is a great way to build community, and it’s one of the core things we do at the nature hub. So when I decided to grow pumpkins in half of my front garden this year, I expected some neighbours to express at least mild dismay at the disruption to the perfectly mown suburbia on our street.

    If you don’t have land where you live, many cities have community gardens where you can get a plot. Community gardens in some urban settings have changed the landscape and the community itself. Read about some community gardens in New York City from beyond pesticides’ pesticides and you. If you don’t mind getting your hands dirty but don’t have space or inclination to start a garden, see if any community-run farms near you could use your helping hands with weeding or other projects.


    The Basics for Gardening Organically

    Once you’ve mastered the basics of organic growing, you’ll soon be ready to get started. Regardless of how new to organic gardening you are, the following fundamentals will help put your mind at ease and reassure you that growing organic fruits and vegetables is not a magical process.

    Organic gardening is the way of the future, with a nod to tradition. It entails returning to our roots and planting in the manner of our forefathers and foremothers. It entails reclaiming our agricultural heritage from multinational companies and returning to its roots. The key to success in organic gardening is to take the time from the beginning to plan how the different parts of your garden system will work together to achieve the best results. Any garden is only as strong as the weakest part of its system.

    A healthy organic garden is easy to achieve if you know the basics of gardening. Growing organically needs a little more effort than using artificial pesticides and herbicides. Read on for some organic gardening tips that any gardener can use.

    Learning the basics of mulch is an essential part of organic gardening. There are many different types available, depending on your needs and budget and things to avoid like the pest.

    potatoes-

    Ten tips for a healthy garden

    Eating healthy doesn’t have to mean paying exorbitant rates for fresh produce from the town’s only big store. nor should it mean crossing your fingers hoping your local grocer will have something good in the tiny organic section of their department of produce Follow these ten tips to successfully grow your organic garden in a greenhouse, on your patio, or in the ground, and save yourself some money and the hassle of finding new, nutritious food!

    Vegetable growing tips
    Organic vegetables are more flavourful than regular vegetables and taste better than regular vegetables. You can grow your fruits and vegetables instead of getting them from the shop. Read this article to learn how you can grow your organic vegetable garden right at home!
    If you have healthy soil in your vegetable garden, your plants will avoid pests. Healthy plants are more robust and have more power to fight off these insects and various diseases. To increase your garden’s prospects of giving you the healthiest plants, start with a good quality soil that contains fewer chemicals than accumulate salts over time.

    How would you like to grow healthy and delicious organic fruits and vegetables in your vegetable garden? Here are just a few pointers to help you get your greenhouse up and running. 1. Stay away from greenhouses made of synthetic materials. 1. avoid greenhouses that are made of synthetic materials. Many greenhouses have sidewalls that are made of various types of plastics and polycarbonates. For a truly organic garden, opt for a glass greenhouse. The material the panels are made of is important because moisture will collect on the surface of the panels and drip onto your plants.

    Scotts Turf Builder lawn food protects the lawn while also preventing potential issues. Like their winter version, this fertiliser creates stronger and deeper roots, making your lawn more resilient. It also promotes the ability to absorb water and nutrients compared to a natural lawn. You are featuring Scott’s exclusive all-in-one particle technology to ensure a consistently green, healthy lawn. Unlike other garden fertilisers, this one is suitable for all lawn types, so if you’re unsure about Whatever sort of lawn you have, you can rest assured that it will boost it.

    What Is Organic Matter?

    Organic material is decaying plant and animal waste. This includes compost, grass clippings, dried leaves and kitchen waste to manure and fish heads.
    Organic material is used as a soil conditioner or conditioner. It can be incorporated into the soil of a new garden or used as a top dressing or mulch in an existing garden.

    So how do you start growing your organic vegetable garden? You start the year before. Organic gardens depend on good soil, and good soil depends on compost. Compost is decomposed organic waste materials that include garden clippings, grass, leaves and kitchen scraps. Building a compost heap is simple. It can be as simple as 6 feet of wire mesh formed into a circle. Start by putting leaves or grass clippings in the bottom and putting in all kitchen scraps (including eggshells, coffee grounds, scraps and animal waste).

    Many garden plots do not have the deep, well-drained, fertile soil ideal for growing vegetables. If you do, you will need to amend the soil to ensure good drainage and aeration. If the soil is heavy clay, you can improve it by adding organic material, sand or gypsum. In late winter or early spring, add 1 to 2 inches of healthy soil and the surface with sand and 2 to 3 inches of organic matter, then transform then turn it over to completely blend with the soil.

    What’s so Important About the Soil?

    The health of the soil is essential. Urban soils can sometimes contain contaminants such as heavy metals (e.g. lead, cadmium) that find their way into fruit and vegetables. Check if local organisations that promote urban gardening test soil samples for free! And learn more about healthy gardening practices.

    One of the many best ways to protect your organic garden is to use a tried and tested method called ‘crop rotation’, which means putting plant species in a different place each year. Here’s why this is important: If members of the same plant family ((nightshade family members include onions, peppers, and aubergines)) are always planted in the same place, pests and diseases attack that particular plant species can accumulate in the soil and overwinter. Then they are ready to attack the plant the next time it is planted.

    Flower boxes and planters are also used to create a vegetable garden. You can hang them from an existing railing or place them on the ground. It’s completely up to you if you use them. In these planters, do not use normal garden soil. Use either good quality potting soil or compost-rich soil. Fertilising is also essential to improve productivity, but it varies depending on the plant: peppers and tomatoes are heavy growers, while green leafy vegetables do not need much fertiliser.

    Planning and Starting a Vegetable Garden

    I have a few tips that I wanted to share on organic vegetable gardening for beginners. I will lay out my top 7 organic gardening tips for starting a vegetable garden. Full sun means at least 8 hours a day. I am lucky to have some areas with the only partial sun (4 to 8 hours) where I can grow some lettuces, greens and certain herbs, but most of the main vegetables and fruits I want to plant need lots of light and heat to photosynthesise.

    Starting your organic vegetable garden in the correct position from the start makes a huge difference.
    The espoma ss16 mix is an American-made organic seed starter potting mix. It’s fine for root cuttings and seedlings. It’s also a great option for starting seeds indoors in the early spring and winter before transplanting vegetables to the garden. This vegetable-growing soil encourages root growth and increases your soil’s water-holding ability. It’s made up of an outstanding blend of around 80% peat. Lime, earthworm droppings, hummus, and perlite make up the majority of the mix.

    Is there anything more discouraging than planting your vegetable garden with high hopes, only to be disappointed when the garden doesn’t produce as much as you had imagined? The soil is often the cause of the problem. More specifically, a lack of nutrients in the soil. Many vegetables are heavy feeders and need the right amount of nutrients to grow and thrive. This is where fertilising your vegetables comes into play. With proper planning and a little knowledge, Your vegetable garden will have all it needs to produce the harvest you want.

    vegetables-

    Placing Your Vegetable Garden

    To help beginners, we thought it might be helpful to see a garden design. Here is an example of a beginner’s family garden, using mainly the easy-to-grow vegetables listed above. Also, plants that do well together are planted near other plants. You will see that we have given the garden decent-sized paths and mixed in some herbs and flowers too. Honestly, if we had planted this garden in our first year, we would be thrilled! By planning the garden this way, we have made it so much easier for you to succeed.

    Organic Fish & Seaweed

    One of the main problems with organic fertilisers is the smell. Some of the fertilisers smell bad and sometimes even worse. This is because they are made from unique ingredients like algae or fish. When you add this fertiliser, the smell remains around the pot. If you plant indoors, then this can cause a lot of problems for you. It is also not suitable for outside.

    At johnny’s, we offer a wide range of omri-listed gardening products approved for use in organic farms. Choose from environmentally friendly products for sowing, such as biodegradable pots and compost-based soilless mixes. We select the highest quality products on the market to control plant diseases and pests in organic systems. We also offer nop-compliant fertilisers derived from natural ingredients such as algae and fish extracts, and solubles build your soil, not destroy it.

    Starting From Seeds vs. Buying Plants

    Seeds can be started indoors to get a head start. in the garden and a longer growing season. It is almost necessary for plants like tomatoes and peppers to grow indoors to have a good growing season. You can, of course, buy starter plants, but growing some of your own from seed is a fun learning experience!

    You will need to decide if you want to grow all your plants from seed or buy starts (established seedlings) from your local garden shop or farmers market. You can also choose to do a combination. You can choose a start if you have limited space or want to try a few different varieties rather than a large quantity of one plant.

    Hybrid seeds were developed to improve the growth and fruiting as well as the resistance of a plant. Cross-pollinating plants of different varieties create hybrids to improve the characteristics of the resulting offspring. However, hybrid seeds do not consistently reproduce true to type. That is, second-generation plants may give different results. When buying hybrid seeds, look for seeds that are labelled “true to type”.

    Organic farming does not limit your choice of vegetables. A wide range of vegetables is available to you if you choose organic. Consider the sense of accomplishment you’ll feel when you serve an organically grown salad that you grew yourself. Choose bonnie plants® organics certified as USDA organic when buying seedlings to ensure you get organic plants. Another choice is to start from scratch and grow your vegetables from seed. This is easy, and you can be sure you are growing your vegetables this way. One way to start the season is to plant the seeds indoors in trays or paper cups and bring them outside when the weather warms up.

    Designing Your Vegetable Garden

    Permaculture can be briefly defined as sustainable and artisanal living. Midsummer Farm had always used the words “sustainable” and “artisanal” as buzzwords for our values, even before we heard the word “permaculture”. Permaculture is notoriously difficult to define clearly, as it always feels like something is being left out of the definition. Permaculture is a broad term that includes all facets of life. But one of the main focuses is food production in connection with nature, working in all aspects of the landscape, creating and designing spaces where people can thrive without depleting natural resources.
    It would be beneficial if you begin planning your garden well in advance of the planting season. If you are starting a new garden in Colorado, preparation includes choosing a suitable site, designing the layout and preparing the soil. If you are a novice gardener, it is essential not to get carried away with your garden’s size or scope, as this will only lead to frustration. Start with a few plants that you can easily handle to give you an idea of what you can handle and how things grow in your area.

    The Article How to Garden Organically was found on https://limitsofstrategy.com

  • Air Conditioning Maintenance Tips From Expert Technicians

    Air Conditioning Maintenance Tips From Expert Technicians

    Helpful Air Conditioning Tips For Maintaining Your AC Unit

    Spring is here, and it’s time to get your air conditioning system ready to handle the hard work of summer. When it gets hot, your ac unit is a blessing for sure. No one is comfortable when they are sweltering in the heat. Central air is one thing most of us tend to take for granted until it stops working, and these Air Conditioning Maintenance Tips are sure to help.

    An air conditioner’s coils, filters, and fins require consistent maintenance for the unit to work efficiently and effectively during its lifetime. Ignoring necessary maintenance ensures a steady decline in air conditioning performance while energy use steadily increases.

    By keeping your airconditioning system maintained, you can not only extend the lifespan of the unit, but you’ll also save money on energy while also expanding its lifespan. This in turn will save on costly early replacement. Inadequate maintenance can spell the death of your airconditioning system over time. By allowing your ac filters and coils to get dirty, you can cause the system to not work at peak efficiency. Then the compressor or fans are likely to fail prematurely.

    Air conditioners need a bit of love and attention to ensure that the ac unit operates at the highest efficiency. The best time for maintenance is just before you start using the system to cool down the house.

    Set out below, we will look at some of the most common air conditioner maintenance tips to keep your home cool and comfy.

    Air Conditioning Maintenance Tips From AC Maintenance Technicians-Griffin GA

    AC Maintenance Tip #1 – The Importance of Changing Your Filter

    A new filter helps optimize airflow, which keeps the air conditioner running efficiently. This enables you to avoid potentially costly repairs later on. Your basic air filter needs to be changed every 30 days, while the thicker pleated filters typically have a longer lifespan. Noting replacement dates on your calendar will help remind you to change your filters on a regular schedule.

    The filter in your HVAC system ought to be changed a minimum of four times a year. If you live in a dusty part of the country or have pets in the house, you may consider changing your filter more frequently. Always make sure that you replace the filter with a new filter that has the same airflow rating. Be mindful of air purifying filters or HEPA filters as they can drastically reduce the airflow in your ac system. Because of the reduced airflow, the indoor coil can freeze.

    Locate the filter housing on the indoor furnace/air conditioner. Quite possibly, you might need a screwdriver to turn the latch and open the filter housing door. You then need to remove the old filter and insert the new filter. Be sure to match the airflow direction arrows on the filter with the arrows on the unit. Close and latch the door.

    AC Maintenance Tip #2 – Clean your condenser

    Important: Shut Off Power First!

    Because there is high risk of working around electrical power. And the fact that the air-conditioner’s parts move and can be dangerous, it’s essential to turn off power to the system entirely. On the exterior condenser/compressor, search for an outside shut-off box near the device or turn the power off at the breaker box.

    Another essential maintenance step is to keep your condenser cleaned. A thorough spray with the garden hose once a year or more often if needed will help dislodge grass clippings, leaves, dirt, and other debris to improve airflow. Although these ac units are designed for outdoor installation and most can handle a spray from the hose, be sure to check your owner’s manual first or consult an HVAC professional. It is most vital to turn off the power at the circuit panel before cleaning. And leave it off for at least half an hour after you’re done. Rain doesn’t typically wet the fan motor inside the condenser, but the hose spray might. Don’t try to clean your condenser with a brush. The the fins are easily bent. Bending the fins impedes airflow and reduces efficiency.

    Remove All Visible Debris From The AC Unit

    Remove the fan cage on the outer condenser/compressor unit. Using a wrench or screwdriver, remove the fasteners and lift the enclosure or fan grille off the top of the ac unit. Clear out all accumulated leaves and other debris from the interior by hand or with a wet/dry vacuum.
    On the exterior condenser/compressor, open and remove the fan cage from the unit. Also, while using a screwdriver or wrench, remove the fasteners as well and lift the fan grill or cage away from the top part of the ac unit. This action can be done by hand or with a wet/dry vacuum cleaner. This will remove all leaves and various other caked-on debris from the interior.

    Clean And Straighten Bent Fins

    Take off the outer covers and use the brush attachment on a shop vac to eliminate all caked dirt. Then, spray a gentle stream of water from your garden hose; spray the water through the fins from the inside out to eliminate any built-up dirt or debris in between the fins. Never use a pressure washer because extreme pressure can harm the fins. If the fins are filthy, utilize a commercially available fin cleaning spray (offered by your local home-improvement store; (read and follow the manufacturer’s guidelines.

    Aligning The Fins

    Bent fins can significantly decrease the efficiency of your ac unit. Considering that any decrease in airflow via the fins can reduce efficiency, it is crucial to carefully straighten bent fins using a butter knife or a readily available fin-straightening device. Be very gentle so that the tubing embedded within the fins is not damaged.

    AC Maintenance Tip #3 – Keep Area Around Air Conditioner Condenser Clean

    Keep the surrounding area around the condenser clear of weeds and keep lawn furniture and other items at least a few feet away. This will promote good circulation around the unit and allow easy access for service personnel.

    Many people plant shrubs around their condenser to hide it from view and help it blend into the landscaping. Growing plants around the condenser can be a great idea. However, if you decide to have shrubs around your condenser, keep them trimmed back so that you have at least a couple of feet of clearance around the unit on all sides. Your air conditioning unit has to breathe freely to operate at maximum efficiency. But properly positioned shrubbery serves more than a decorative function. It can also shade the condenser from the hot sun to protect the finish, improve efficiency and even help prolong the life of the unit. Evergreen shrubs are best for this purpose because they don’t lose their leaves in the winter.

    Advanced Planning Is A Great Air Conditioning Tip

    If you’re going to plant new shrubs, look into the future and keep the mature size in mind as you determine planning locations, and remember to leave enough space in the back of the unit for accessibility. Do you have pets that spend a lot of time in the yard around the condenser? If so, it is recommended by experts to install a protective fence around the unit. Protective fencing will help keep both your pet and your condenser safe. Choose a fencing material that won’t impede airflow. And be sure to include a gate and leave enough clearance around the unit for accessibility.

    If you cover the condenser in the winter to help keep it clean, the best way to go is to only the top of the unit to allow for adequate airflow through the sides, thereby preventing moisture buildup, which can damage the unit. Be sure to remember to remove the cover before you turn on the air-conditioner in the spring. It’s also crucial to be sure your outdoor unit is indeed an air conditioning condenser and not a heat pump because you should never cover a heat pump.

    Check The Level Of The AC Pad

    If the condenser unit is out of level, it can cause the condenser to fail earlier than its natural life span.

    Over time, the platform upon which the condenser unit sits can begin to lean as the soil settles beneath it.

    Check the condenser for levelness and use rot-resistant shims to bring it back to the proper height. But, if you have a heat pump system, it’s okay if the pad slopes slightly away from the foundation of the house to allow for defrosting in the winter.

    Clean A Plugged Evaporator Drain

    Inside your home, warm, moist air from your residence’s inside is circulated through the evaporator coil. The cold coil takes in warmth from the air, cooling it before the air is flowing back into your home. The moisture buildup in the air condenses on the evaporator coil’s surface as liquid water, trickling right into a pan below. The water moves into a drainpipe tube that is generally routed right into a cellar floor drainpipe, utility sink, or outdoors from the pan.

    With time, mold and algae can accumulate and also potentially clog up the drain hose. If the drain is either flowing slowly or not flowing at all, it will need to be unclogged. A clogged drain can either trigger damages by spilling out all over the floor or, if the unit is equipped with a drain float, cause the system to quit cooling to avoid flooding.

    Locate Drain Line Exit

    First things first! You will need to locate where the drain line leaves the evaporator coil enclosure. Under normal circumstances, the drain is usually a one-inch PVC pipe. Follow it to the end of the pipe, where it drains out. Most times, the line drains outside near the condenser unit. In other circumstances, it can drain into a floor drain in the basement or a utility sink or, in the case of a unit located in an attic, down an outside wall.

    When you have found the drain line location, use a wet/dry vacuum to clear out the drain. Be sure to take out the paper filter from the wet/dry vacuum so as not to wreck the filter. Hold the tube of the wet/dry vacuum to the end of the drain line. You can utilize duct tape or hold a cloth around the gaps. Then turn on the vacuum cleaner for a couple of minutes, then turn it off. This process will remove the drain of any growing organic matter.

    Maintenance Tips For Central Air Conditioning Systems

    While these simple DIY steps will help keep your AC system in top running shape, keep in mind that there are upkeep things, some maintenance tasks that just a qualified HVAC technician will certainly have the ability to do. For example, a slow leak in the refrigerant line in your air conditioner system can result in costly compressor failure. However, your average homeowner does not have the equipment or necessary skills essential to inspect the refrigerant levels properly.

    Clean Air Ducts Are Essential

    Also, the importance of clean ac ducts and proper airflow cannot be overstated. These are essential to a well-functioning system, but most homeowners lack the necessary skills, tools, and equipment for the work. The bottom line takeaway? While some airconditioning recommendations are twice a year, a savvy homeowner can do simple tasks and maintenance. However, it’s still essential to have an a/c specialist technician inspect the system periodically. The recommendation by experts is twice a year: Spring and Fall.

    A professional inspection also helps to catch and to resolve most minor problems before they have a chance to morph into a significant and expensive ordeal.
    These ac maintenance tips will help you keep your air conditioner at peak operating condition!

    These helpful air conditioning maintenance tips have been provided by Blake Heating and Cooling Griffin GA

    The Article Air Conditioning Maintenance Tips From Expert Technicians was found on https://limitsofstrategy.com

  • Furnace vs Heat Pump Systems for Heating Homes and Offices Compared

    Furnace vs Heat Pump Systems for Heating Homes and Offices Compared

    Furnace vs heat pump. What are the advantages of a heat pump when compared with a furnace? It is clear that a heat pump emits less carbon dioxide per unit of heat produced, but the cost for the initial installation is higher. Is the furnace which uses the fossil which is fuel natural gas really so bad? Does the heat pump really provide cleaner heating? And, why do you say “reducing carbon emissions can’t wait, or it’ll be too late.”

    What Goes on in a Heat Pump?

    It is not always clear to people who are not familiar with the science and history of heat pumps that they were developed from day 1 to reduce the emission of carbon dioxide. It is principally carbon emissions that are proven to be heating up our planet. This will have dire consequences for mankind if it is allowed to continue. A heat pump is an appliance that transfers the heat from one area from one source to another. In other words, it transfers heat from a cooler part of space to a warmer part of space.

    Image with text: "Furnace vs heat pump".

    Even a Heat Pump is Not Perfect for Our Planet

    A heat pump does not currently produce zero carbon emissions because it needs electricity to run the pump. However, as globally all nations reduce their use of fossil fuels in old power stations and electricity generation moves on to renewable sources heat pumps will become “cleaner”. That’s because the power used by heat pumps, running on electricity from the grid, the carbon emissions they reduce will also go down as decarbonization progresses. That’s a point often missed in the Furnace Vs Heat Pump debate.

    Heat Pump Was Though to be an “Impossible Invention” When First Sold

    The invention of the heat pump was amazing to everyone when the concept was first explained in the 1960s because people said that you cannot take something cold, and pull warmth out of it. “How would you use that heat to make another cold thing warm-up?”; they asked. But it was shown to be perfectly possible to do in a heat pump. During heat pumping that “warmed up thing” becomes warmer than the original cold thing, and can be used to heat homes, offices etc! When people started to use the heat pump to heat up their homes it was not believed that this could be possible. They said entropy is an inviolable principle of nature! Everything in the universe gets cooler and heat dissipates everywhere all the time. The entire universe has been running down since it was created and one day everything will turn cold. As that continues, all reactions, eons into the future will slow down to a stop. But, they forgot that science is clever and can (in this small way) for a while (by expending energy in a particular way) reverse an inviolable Law of Nature, namely “entropy”.

    However, we all have refrigerators and inside their systems, they have been quietly reversing “entropy” by pumping heat out of the food in the fridge. The pumped heat warms up the radiator wires on the back of every fridge. Yes, a fridge is a form of heat pump, but nobody quite thought of it that way.

    In fact, if the original inventors had not thought outside the box about fridges, we wouldn’t even be having a Furnace Vs Heat Pump debate, because heat pumping would never have been discovered.

    Furnaces Which Burn Natural Gas are Damaging Our World – The Truth

    The great majority of furnaces in the US and Europe burn natural gas. The name “natural gas” is to a degree deceptive because most people assume that what is natural is also “green” and in harmony with nature. However, natural gas is just as much a fossil fuel as coal and oil, which once burnt releases fresh new carbon into the atmosphere. Carbon dioxide from burning natural gas is almost as damaging as that from coal, or oil, and that’s highly relevant to the Furnace Vs Heat Pump debate.

    Thankfully though, natural gas is both:

    1. warms the globe less than coal and oil from the point of view of the fact that releasing each calorie of heat causes less carbon dioxide when using natural gas, and hence for the same heat output, less carbon is emitted
    2. the result of burning it releases far fewer impurities than are emitted from within the coal or oil, when those are burnt. This means that there is far less air pollution from burning natural gas then when using coal or oil.

    Furnaces are OK – Except “Not Renewable” Powered By Natural Gas and Oil

    Furnaces are damaging simply because the energy source is not renewable. If a renewable replacement was available for natural gas the furnace in your home could be replaced by another when it is worn out, and there would be no need for a heat pump instead. If that was true I doubt we would even be having this Furnace Vs Heat Pump debate. People have been talking for the last 20 years or so of hydrogen as the new fuel and there are plans afoot in Europe to construct a completely new gas grid distribution for hydrogen. In other countries, including the UK the idea is to add hydrogen in with natural gas, and “renewable natural gas” (natural gas made through the use of anaerobic digestion of organic waste – for example from sewage sludge).

    Converting Gas Grids to Hydrogen/ Renewables Can’t Happen Any Day Soon

    Unfortunately, in all nations, the conversion of gas grid distribution systems to renewable gases and especially hydrogen will take at least 20 years to progress. At the moment solar and wind turbines are used to make renewable electricity. Once enough of those have been built to replace all fossil fuel used to generate electricity for day to day grid supply, a huge quantity of yet more renewable energy will be needed for heating and transport use.  In fact, three or more times more solar and wind sources will need to be built to decarbonize heating, transport, and industry and used to electrolyze water and make hydrogen gas to replace natural gas for heating our living spaces and powering all transport.

    While the more permanent renewable solution of hydrogen gas grid distribution is developed, heat pumps plus much-improved heat insulation will tide us over. It is often said that hydrogen is “the future for energy”, and so it most probably is, but it isn’t here yet! Hydrogen is a much better option than batteries as a 24/7 always available power source. Batteries need rare elements in their construction and present major problems for the environment when disposed of.

    Furnace vs Heat Pump – How Does a Heat Pump Work?

    There are 3 main components to a heat pump:

    • a low-grade heat source, such as a fan to collect the ambient air around a building, or a pump and a loop of pipe buried in the ground in the garden. Swimming pools in the home have also been used.
    • a compressor and condenser system to do the heat pumping
    • a fan or a water pump to convey the pumped heat into the property. If so designed, this system can also cool the property in summer.

    It is a closed-loop system. The most common type is an air heat pump. The air heat pump uses a fan to collect low-grade heat from the ambient air outside the property. A compressor is used in a condenser pump system similar to the workings of a fridge in reverse and releases the heat during the process which emanates as very warm (not hot) water. Just don’t get the idea anything particularly high-tech is going on in a heat pump! It is exactly the same principle as a refrigerator. It just works in reverse. The main component is a compressor to compress the gas in the condensing system that will be the energy source to power the system. The heat exchanger is normally a system of warm water pipes laid beneath the floors of the property. An alternative is to provide heat as hot air which flows out via fans into the rooms to be heated. For more information on heat pumps visit: https://sites.google.com/site/groundsourceheatpumpuk/

    Air-Source and Ground-Source Heat Pumps

    The other basic heat pump in the market is often called a fluid heat exchanger usually fed by water from a ground heat source (Ground Source heat pump). It acts in exactly the same way as an air heat pump. The fluid heat pump will extract the heat from an intermediate fluid, typically water which has passed for example, through buried pipes in the ground, outside the property. This fluid will become cooled as it flows through the heat exchanger, the warmth will then be emitted to heat the property. The cooled water will flow back through the loop into the ground and its temperature will be raised again in a repeating cycle. It is the same principle as for the air heat pump except rather than from the air around the building, the fluid heat pump extracts warmth from the ground. When the heat exchange air is released from a heat pump of both types, it will become warm air.

    The Unique Advantage of Heat Pumps Which Double as Air-Conditioners in Summer

    Now you might ask, what is cooling and heating? It is when there is a need for both heating in winter, and air conditioning (air cooling) in summer. Heat pumps can do both, although for summer cooling they may need some additional controls. Furnace technology simply can not provide any air-conditioning.

    It is important to keep in mind that while heat pump appliances are perfectly easily run in reverse to bring immediate cool relief, there are no guarantees that it will work that way after a long winter if the equipment is not maintained regularly. It is important to make sure that all appliances are kept up to date and maintained. It will give you peace of mind.

    Heat Pump Maintenance Versus Furnace Maintenance

    Whether you have a heat pump system or a furnace is also important to remember not to panic when you feel that something isn’t right. Heat pumps tend to be more complex than a traditional furnace. There is more to go wrong in a heat pump than for a furnace central heating system. For example, if the fluid of a heat pump is not flowing through properly or the fan is not functioning then your heat pump will not function.

    Furnace vs Heat Pump – Heat Pump Air Filter Problems

    Another cause could be the air filter. The air filter is what removes the dust and other particles that are floating around in the air outside or the air of the room, depending on your system type. With the air filter clogged, you will not be receiving the cooling effect as well as the heat removal. Make sure that you always change your air filter at least once every few months. If you don’t it is possible that you will be losing the heat as well as the comfort of your home. There are several other causes of heat pump system failure, but the most common ones can cause your house to feel like a furnace during the summer season.

    Furnaces Cannot Do Cooling But Heat Pumps Can…

    However, as we have said earlier no furnace will ever cool a home or office, so if you have a furnace you will have to buy and maintain a separate air-conditioning system for the summer. That increases the complexity of your home systems and once again raises the chances of things going wrong and costing you money on maintenance and repair.

    You may also find it relevant to know, that it is just as possible for you to experience a malfunction when it’s a problem in the furnace. You might feel that the furnace is not bringing you heat, but it is possible that the furnace is not delivering the hot water or air that it is supposed to deliver. This is the main cause for complaint from furnace users, it may also be possible that the furnace water pump is circulating cold water to the radiators when you need hot water for the room heating.

    Heat Pumps vs Furnaces and Technical Complexity

    On balance, heat pump systems are more complicated than a fossil fuel burning natural gas furnace central heating system. But, as natural gas furnaces have been made to condense for greater efficiency, and gas safety controls applied, furnaces have become more complex and more prone to failures.

    When you also take into account that with global warming raising summer temperature more and more people require air conditioning, there is very little benefit in lower maintenance bills from having a furnace. This is because the maintenance costs, including maintenance of a separate air-conditioner, are likely to be very similar.

    Heat Pump Materials Used in Manufacture Versus Furnace Construction Material Use

    Both heat pump and furnace product can equally be made with eco-friendly, reusable and recycled materials, which can help save the earth and its environment. You can also take note that air conditioner prices vary according to the features they have. However, it is always wise, to pay attention not only to the price you will require, which means that a unit with an additional feature is probably more costly than a unit without the additional feature, both ecologically and in terms of cash expenditure.

    Furnace vs Heat Pump – Which is Best for Temperature Control?

    There are many reasons for buying an air conditioner, but the primary and major reason is always temperature control. This is the reason why a unit with an additional temperature control summer cooling feature is always more costly than air conditioning without a temperature control feature. If you want to have an air conditioner that controls the temperature with 100% accuracy, you will need to pay around $1,000.00 or more for a unit. There are some air conditioners that can control the temperature with 65% to 75% accuracy. This is less expensive but more complicated to install. A thermostat is a device that is placed in the room to control the temperature.

    Why Should I Buy a Heat Pump if I am Not a Green Eco Freak?

    There are many reasons for people to buy an air conditioner beyond the intention to be “green”. The main reasons are to have a cool and comfortable room during the summer and winter seasons and to have the protection of the environment. If you want a unit that can control the temperature with 100% accuracy and you want to control the temperature of your room with high accuracy, then you’ll need to pay $800.00 to $1,200.00. The best temperature control units are less complicated to install and are slightly less expensive than the less accurate air conditioners, but more expensive than the units that can control the temperature with 65% to 75% accuracy. These units are less costly to purchase but more expensive to operate and are the most expensive overall.

    Comparing Furnace vs Heat Pump Systems – The Verdict

    For convenience and minimizing the initial installation cost, there is no doubt that a furnace heating system, even with a separate air-conditioner system in the main rooms, wins. But despite that fact society needs to stop using furnaces and go for heat pumping systems in a big way! That’s due to the rate at which the planet is warming which is exceeding the rate predicted by scientists even a few years ago. The Furnace Vs Heat Pump debate is becoming more urgent every month. The increased risk from a much more variable and volatile climate is there for us all to see, from melting glaciers to forest fires, drought and floods.

    Choosing a Heat Pump System in preference to a new Furnace is not all bad news either. Once installed the cost of running it may be as low as just one-third of your past monthly energy bill, even allowing for the cost of the electricity to run the heat pump system. Over a period of 8 to 12 years, the cost of the heat pump will be recouped in lower monthly power bills.

    Now, most will say, “that’s too long”.

    But if you have children they will tell you 8 to 12 years is nothing to them, because they hope to be around in 50 years and if carbon emissions are not abated now, their lives will be extremely uncomfortable by then…

    The verdict:  We all should consider installing heat pumps and stop buying new furnaces. Like it or lump it. Heat pumps ain’t perfect, but they are the best tried and tested technology to decarbonize home and office heating. The climate change reality is that reducing carbon emissions can’t wait, or it’ll be too late.

    The Article Furnace vs Heat Pump Systems for Heating Homes and Offices Compared was found on https://limitsofstrategy.com

  • When To Call A Pest Control Company

    When To Call A Pest Control Company

    When to call a pest control company is a question we are asked so we have listed the top signs that you have unwanted house guests.

    Your​ ​home​ ​is​ ​an​ ​investment​ ​in​ ​your​ ​future,​ ​so​ ​you​ ​want​ ​to​ ​ensure​ ​it​ ​is​ ​well​ ​protected.​ ​
    ​Our​ ​Brisbane​ ​pest​ ​and​ ​termite​ ​control​ ​and​ ​inspections​ ​team​ ​are​ ​trained, certified​ ​and​ ​knowledgeable​ ​in​ ​all​ ​facets​ ​of​ ​pest​ ​control.​ ​
    We​ ​have​ ​all​ ​the​ ​knowledge​ ​and​ ​experience​ ​you​ ​need to​ ​have​ ​the​ ​job​ ​completed​ ​quickly​ ​and​ ​to​ ​maintain​ ​a​ ​pest-free​ ​zone.​

    pest control Brisbane

    Signs Of Termites

    Termites are very destructive and can enter a home and start causing damage without you being aware of it until it is too late

    • Frass is termite waste and it looks like sawdust. It tends to accumulate near the entrances to their nests.
    • If you see mud tunnels on the outside of your house, they are no thicker than a drinking straw.
    • The appearance of discarded wings or a clump or winged insects likely warrants an immediate termite inspection.
    • Trouble opening and closing doors and windows in cooler weather.In warm weather timber can swell and then in cooler weather the swelling subsides.When termites destroy the wood around door frames, they weaken the timber and moisture can enter into the area. These two factors can cause frames to shift or warp, which is why you’re having difficulty opening or closing doors and windows.
    • The noises they make!You can actually hear termites eating and if danger is detected, the termites bang against their surrounds to warn the colony


    Signs of Cockroaches

    Cockroaches are not loners. If you see one, then there is likely 100 that you have not seen.
    That’s why proper cockroach control is a tricky business.

    • Strange smell happens when cockroaches in larger numbers give off a bad odour which is like a wet dog. It’s an oily, musty smell that comes from a mix of their pee and poo.
    • Cockroach droppings  look like little patches of what look like coffee grounds on the floor, they are probably pellets of poo.
    • Cockroach egg casings can also be found around the place. These casings are brown in colour and shaped like a cylinder. Depending on which species of cockroach, they can hold between 10 and 50 eggs in each one.

    If you don’t get the pest control problem sorted quickly, you can easily have a full-on infestation happening and that’s not fun or funny. Calling a trusted team of professionals in pest control is your best bet.


    Signs of Wasps

    Whenever you see a group of insects or bees swarming around your  home it means it is either a food source or a nest.

    • Look for these nests under decks, eaves, and balconies as this keeps them protected from the elements.
    • If it is a swarm of bees, contact your local pest control company and they will arrange for a local bee keeper to come and remove the swarm.
    • If it is wasps then these can be treated and care needs to be taken as wasps can quickly swarm and attack a person or pet.

    There are three main types of wasp in Australia:

    Paper wasps: Build nests from eaves, the underside of branches and leaves. Nests are normally quite small (maximum 100-200 wasps) and hang by a stalk. They tend not be aggressive, only stinging when defending their nest.

    Mud-daubing wasps: These are large solitary wasps than build a small nest consisting of a number of cells made of mud, often plastered to the wall or ceiling. They tend not to be aggressive, only stinging when defending their nest.

    European wasps: These bright yellow and black striped wasps are capable of forming very large nests of up to 100,000 individuals! The majority of nests are found in the ground (80%), often visible only by a hole (with wasps flying in and out), with the remainder of nests found in buildings (roof spaces, wall voids and eaves). These are not often found in Queensland.


    Signs of Ants

    In Brisbane we mainly deal with a Black ants, Green ants and Carpenter ants
    Ant infestations inside the home are pretty obvious and you see them.
    Often, these may be ants nesting outside coming in looking for food and moisture. Act as soon as you see them and to put all food away if this is what they are targeting.

      • If you find ants in your house and cannot see where they are coming in from, you may have ants nesting in or under your house. They quite often nest in wall voids, roof spaces and behind cupboards. This can take some searching to find the nest and apply a treatment.
      • Signs of an infestation outside are piles of dirt and sand appearing between pavers and mounds in the lawn.


    • Also if you find family members or pets being bitten, then it is time to treat the ants


    Signs Of Fleas

    If your pet has fleas then you may have fleas in your house!

    • If you have bites appearing on your lower legs , then you may already know you have fleas. You will have to start treating them.
    • Your pet’s bed should be the first place you look, as well as any other spots your pet is allowed to sleep. Flea eggs are tiny, off-white ovals that can be hard to see on light-colored upholstery and rugs.
    • Put on long white socks and walk around your home and shuffle around areas where your pet sleeps. Then, check the socks for fleas. If they’ve taken up residence in your home, odds are that a few will be visible on your socks.

    cat bedding

    Your Neighbours Have A Pest Problem

    Many pests are able to travel into the surrounding properties and from one home to the next. It is especially true for mice control and cockroach infestations.
    Look for the signs pests leave
    In doubt call in a professional pest control and carpet cleaning service to check the property and put in place monitors or a preventive treatment.

    You Have Been Trying To Do Your Own Pest Control

    You have spent money on baits and sprays but the problem still exists
    They do not know how often and how thoroughly they need to treat. Professional Brisbane pest control  are your local expert team and are available when it is time to call in the professionals

    The post When To Call A Pest Control Company appeared first on GQ Central.

  • Brisbane Window Cleaning Professionals

    Brisbane Window Cleaning Professionals

    When it comes to window cleaning, many homeowners try and do this themselves!
    Window cleaning supplies are readily available and they are easy to use when windows are easy to get to.

    When it comes time to clean them it can be daunting to know where to even start.
    Because once you clean one window – You know you will have to clean all the rest of them and that includes the high set windows that you will need to get a ladder or step stool out.
    Window cleaning is not an easy task. It is difficult to reach the high set windows and every streak and smear is highly noticeable.


    window cleaning tips


    Windows Need To Be Cleaned On Both Sides

    You have to clean both sides of the glass. It is no good cleaning only the outsides when the insides have not been cleaned and vice a versa.
    The window tracks and frames also require cleaning. Cleaning the window tracks is the most time consuming part of getting your windows perfectly clean.
    If you are in a rental property, all window tracks must be left in a spotless state.
    Although you may have never considered hiring a professional window cleaner, and may even wonder why your windows should be cleaned regularly.
    We can all agree to the fact that having a window covered with grit, dust and dirt is not attractive.


    HOUSE FOR SALE

    The Benefits Of Using A Window Washing Company


    Brisbane is an area prone to dust haze and that is why it makes sense and is highly beneficial to use the services of a professional window cleaner.  When it is time to do a spring clean on your home, call in the professionals

    Just in case you are still considering the cost of hiring a Brisbane window cleaning service, we have highlighted a couple of reasons why it is actually worth it to hire one.

    • It Saves Time And Stress:

      One would agree that having to clean your windows yourself, can be a daunting task and highly time consuming. No one really wants to spend their free time cleaning windows when they could be doing something more productive or fun!
      This is why having a professional window cleaner is a great option for you.
      These professionals save you the time and stress you would spend in having to clean these windows yourself. While you have the professionals in to clean, consider having your carpets steam cleaned at the same time.


    • Durability Of Your Windows :

      Ever wonder why glass can become brittle and crack easily?
      This can be linked with poor maintenance in form of proper cleaning of dust and debris that have accumulated for weeks, months or even years on the surface.
      A Build up of dust and debris speeds up depreciation and damage of the glass and also of the window frames. With the services of a professional window cleaning company here in Brisbane however, you can be assured of extending the lifespan of the glass in your windows and frames.
      Dirt, dust, sand and contaminants from acid rain and dust haze can cause etching in the glass and causes damage to the window framework which subsequently weakens the windows.
      By engaging the services of professional widow cleaners, you can prolong their useful life and avoid spending on window replacements.


    • Windows Are The Eyes Of  Your Home:

      It is popularly said that the first impressions matter. One of the best benefits of having a professional window cleaning service for your home is, it leaves your guests with a positive first impression. When going on a visit to someone else’s home or even at an office, one of the first things that gets our attention at first glance is the windows.
      Streak free windows give a great boost in confidence if you are planning on a function at your home. The overall effect in your home is a lighter and brighter feeling in all your rooms.
      The effect this has on your visitors definitely makes hiring professionals worth every cent.


    • Safety First:

      Cleaning windows is a chore that requires you to be using ladders and step stools.
      Falling off ladders is is the number one DIY injury that requires hospital treatment.
      1 in 10 ladder falls will result in a brain injury and males aged between 65 and 74 were the most likely to fall off a ladder.
      Please consider hiring a professional team of window cleaners who use the right equipment and set up their ladders and cleaning gear properly
      Look after you health and safety by keeping your feet on the ground!
      Window cleaning is also a dusty job and if you suffer from asthma or dust allergies, you are likely to suffer from a difficulties breathing.


    • Look After Your Home:

      Window cleaning often results in some sort of damage being done to the glass, fly screens or to the frames if it is not done correctly.
      To effectively clean windows we do lift sliding windows out of their frames. They are big and heavy and them slipping and dropping often happens if you are not able to hold them correctly.
      With a professional window cleaner like ourselves,  you are assured that window cleaning services are insured with a good policy as they would take responsibility for any damage caused in the process of cleaning.
      They are also trained to carefully handle these windows and to be aware of looking after the frames, sills, window tracks and any window covering like curtains and blinds.


    The benefits of using a professional window cleaner in keeping our windows clean  and family members safe and sound on the ground cannot be overemphasized.
    From aesthetic benefits, to health and eventual financial gains, it is clear that you definitely have to consider hiring one today!

    The post Brisbane Window Cleaning Professionals appeared first on GQ Central.