Discover the Transformative Power of DIY Herbal Face Masks in the UK
Unlock the Best Herbs to Enhance Your Skincare Routine
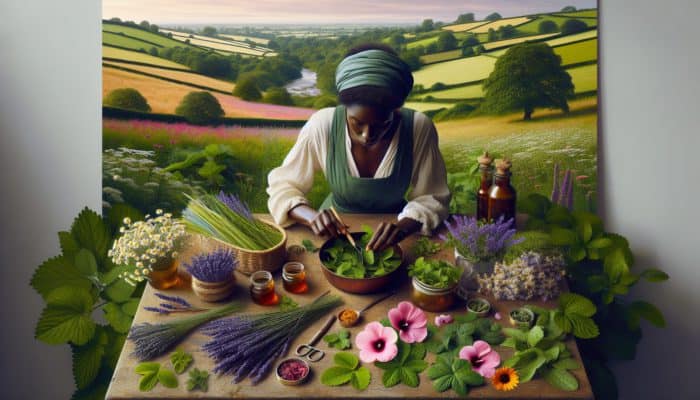
Creating DIY herbal face masks is not only a delightful hobby; it also becomes an enriching experience, especially with the abundant array of natural resources found across the UK. By integrating herbs into your skincare routine, you greatly enhance the effectiveness of your masks while fostering a deep connection to local customs and the natural environment. Some of the most highly regarded herbs for crafting personalized herbal face masks in the UK include:
- Lavender: Renowned for its calming properties, lavender excels at soothing irritated skin, making it a cherished option among skincare enthusiasts.
- Chamomile: Valued for its anti-inflammatory effects, chamomile is an excellent choice for individuals with sensitive skin.
- Rosehip: Packed with antioxidants, rosehip oil is celebrated for its ability to rejuvenate and deeply hydrate the skin.
- Nettle: Rich in vitamins A, C, and K, nettle can significantly improve skin tone and texture.
- Calendula: Known for its healing properties, calendula is particularly beneficial for skin conditions such as eczema.
- Yarrow: This herb possesses antiseptic qualities that effectively address acne-prone skin.
- Hibiscus: Often called nature’s Botox, hibiscus is full of alpha hydroxy acids that encourage a youthful appearance.
- Peppermint: With its invigorating and cooling effects, peppermint refreshes dull skin and helps reduce the appearance of pores.
Each of these herbs offers distinct benefits, making them indispensable in the realm of herbal skincare. By harnessing the natural power of local flora, you can easily create face masks that not only cater to your skin’s specific needs but also celebrate the rich botanical heritage of the UK.
Experience the Advantages of Using Locally Sourced Ingredients in Your Face Masks
Incorporating local ingredients into your DIY herbal face masks significantly elevates your skincare regimen. The benefits are plentiful, as herbs cultivated within the UK are typically fresher and more potent, perfectly adapted to the local climate. For example, using herbs like lavender and chamomile not only ensures high-quality ingredients but also supports local farmers and minimizes your carbon footprint.
Furthermore, local herbs are often abundant in essential vitamins and minerals that can rejuvenate and nourish your skin effectively. For instance, rosehip oil, derived from wild rose bushes found in various UK regions, is recognized for its exceptional ability to diminish scarring and improve skin texture. Likewise, nettle offers anti-aging benefits and is widely available in the wild during the spring and summer months.
By opting for local herbs, you also reduce exposure to pesticides and chemicals that are often present in imported ingredients, rendering your DIY face masks not only more organic but also safer for your skin. Additionally, utilizing seasonal herbs allows you to take full advantage of the freshest produce available at local markets, thereby enhancing both the quality and effectiveness of your skincare products.
Smart Strategies for Sourcing UK Herbs for Your Herbal Masks
Finding high-quality herbs for your DIY face masks is a straightforward endeavor in the UK, thanks to the plethora of local suppliers and markets available. To facilitate this process, here are some recommended sources to consider:
- Local Farmers’ Markets: These venues are perfect for discovering fresh, organic herbs while connecting with local growers.
- Herb Shops: Specialty herb stores often carry a broad selection of both dried and fresh herbs suitable for skincare applications.
- Online Suppliers: Websites like The Organic Herb Company provide a diverse range of herbs that can be conveniently delivered to your doorstep.
- Community Gardens: Engaging with local gardening groups can grant you access to organically cultivated, homegrown herbs.
- Wild Foraging: With appropriate guidance, foraging for herbs like nettle or dandelion can be an enjoyable and rewarding adventure.
- Health Food Stores: These establishments frequently stock dried herbs that are ideal for creating face masks.
- Craft Fairs: Many artisanal vendors offer custom herbal products, including skincare ingredients and other natural remedies.
- Local Herbalists: Consulting with herbalists in your area can provide tailored advice on effectively sourcing and utilizing herbs.
Efficiently sourcing your herbs not only guarantees their quality but also contributes to sustainability and supports local economies. By exploring these options, you can enrich your DIY herbal face mask experience while forging a deeper connection with the botanical diversity surrounding you.
Best Practices for Preparing and Storing Your Herbal Face Masks to Ensure Optimal Freshness

The preparation and storage of your DIY herbal face masks are pivotal in maintaining their potency and ensuring they stay fresh. To prepare your herbal face masks effectively, start by selecting your preferred herbs and any additional ingredients you wish to incorporate. Proper preparation usually involves drying or steeping the herbs to fully extract their beneficial compounds.
Once your masks are crafted, proper storage is essential. Generally, masks made with fresh ingredients should be consumed within three days, while those created with dried herbs can last up to two weeks when stored in airtight containers. Here are some key storage tips:
- Utilize Airtight Containers: Glass jars or plastic containers with secure seals are ideal for preventing contamination and preserving freshness.
- Store in a Cool, Dark Place: Keeping your masks away from sunlight and heat is critical for maintaining the potency of the herbs.
- Label Your Masks: Clearly label all containers with the preparation date to effectively track their freshness.
- Avoid Moisture: Ensure that all tools and containers are completely dry before storing your masks to prevent mold growth.
- Refrigeration: For masks containing fresh ingredients, refrigeration can significantly extend their shelf life.
By adhering to these best practices, you can ensure that your DIY herbal face masks remain effective and safe for use, allowing you to fully enjoy the advantages of your homemade skincare products.
Expert Insights on Crafting Effective DIY Herbal Face Masks
Recommendations from Leading UK Skincare Professionals
Prominent skincare experts in the UK consistently emphasize the importance of using high-quality ingredients and customized formulations when creating DIY herbal face masks. They advocate for incorporating herbs that align with your specific skin type while delivering targeted benefits. For instance, skincare specialist Dr. Emma Smith, esteemed for her expertise in natural skincare, recommends using lavender for its calming effects, particularly for individuals with sensitive skin.
A notably effective DIY mask that she frequently suggests is a blend of lavender and oatmeal. Oatmeal serves as an excellent exfoliant, while lavender soothes the skin, creating a mask that is especially beneficial for those experiencing irritation or redness. Other experts also advocate incorporating green tea due to its robust antioxidant properties, which combat signs of aging and promote a more radiant complexion.
In her practice, Dr. Smith encourages clients to experiment with various combinations and observe how their skin responds. She often shares a case where a client suffering from dryness saw significant improvement by adding honey and rosehip oil to her masks, which effectively nourished her skin. This personalized approach not only embodies the principles of natural skincare but also empowers individuals to take control of their skincare routines.
Tailoring Your Masks to Suit Your Individual Skin Type
Customizing your herbal face masks to address different skin types is a crucial aspect of DIY skincare. Each skin type has distinct needs, and understanding these can lead to the creation of more effective masks. For example, if you have oily or acne-prone skin, incorporating ingredients like tea tree oil or yarrow can be advantageous due to their antibacterial properties.
If your skin is dry, consider using herbs such as aloe vera and rosehip oil, which are well-known for their hydrating properties. Here’s a practical guide to personalizing your masks:
- Identify Your Skin Type: Determine whether your skin is dry, oily, combination, or sensitive.
- Select Ingredients Accordingly: Choose herbs based on your skin type — for oily skin, consider mint or witch hazel; for dry skin, opt for chamomile or honey.
- Test and Adjust: Start with small batches and modify the ratios of your ingredients based on your skin’s reactions.
- Add Carrier Oils: For dry skin, incorporate carrier oils like jojoba or sweet almond oil to enhance moisture levels.
By personalizing your masks, you can effectively address specific concerns, ensuring that your DIY skincare routine is not only enjoyable but also impactful. Understanding your skin type and selecting corresponding ingredients enables you to create tailored solutions that promote healthier skin.
Emerging Trends in DIY Herbal Face Masks in the UK
The landscape of DIY herbal face masks in the UK is continually evolving, with new trends emerging that reflect a growing interest in natural and sustainable skincare practices. One significant trend is the rising popularity of superfoods in skincare, with ingredients such as spirulina and matcha gaining traction. These components are celebrated for their high antioxidant levels and their rejuvenating effects on the skin.
In addition to these superfoods, there is a noticeable shift towards utilizing *seasonal ingredients*, encouraging skincare enthusiasts to make the most of what is available in their gardens or local markets. This approach not only adds freshness but also aligns with the sustainability and environmental consciousness that many consumers now prioritize. Experts like skin therapist Sarah Jones recommend keeping an eye on seasonal herbs, such as *elderflower* in spring, known for its brightening effects.
Moreover, the minimalist trend in skincare is also influencing DIY practices. Busy individuals are gravitating towards straightforward, multi-functional masks that can address multiple skin concerns simultaneously without the need for extensive routines. Masks featuring honey and oatmeal, for example, can cleanse, exfoliate, and hydrate all in one application. Skincare professionals assert that this trend is not solely about simplicity but also about enhancing the skincare experience with fewer, high-quality ingredients.
Ensuring Safety and Hygiene in Your DIY Skincare Routine
Maintaining safety and hygiene during the preparation and application of DIY herbal face masks is vital to avoid adverse skin reactions. Skincare professionals in the UK recommend implementing several best practices to ensure your skincare routine remains safe and enjoyable.
First and foremost, always make sure your hands and any tools you use are clean. Begin by washing your hands with warm, soapy water before preparing your mask, and utilize clean utensils and containers. This simple action significantly reduces the risk of contamination. Secondly, remember to perform a patch test before applying any new mask to your face. Apply a small amount of the mask to a discreet area, such as your wrist or behind your ear, and wait 24 hours to monitor for any allergic reactions.
When it comes to storage, adhere to the guidelines mentioned earlier to keep your masks fresh and effective. It is crucial to avoid using any masks that have changed in color or developed an unusual smell, as these may indicate spoilage. Additionally, experts recommend maintaining a log of the ingredients and preparation dates to help track the freshness of your masks.
Lastly, consider the quality of your ingredients. Opt for organic or locally sourced herbs whenever possible, as these are less likely to contain pesticides or harmful additives. By following these guidelines, you can ensure that your DIY herbal face masks are safe, hygienic, and effective in maintaining your skin’s health.
Exploring the Benefits of Using Seasonal Ingredients in Your Masks
Incorporating seasonal ingredients into your DIY herbal face masks presents significant advantages, not only for your skin but also for your overall wellbeing. UK skincare experts advocate for this practice, as it guarantees you are using the freshest and most potent ingredients available. Seasonal herbs often possess enhanced nutritional profiles, as they are harvested at their peak, providing maximum benefits.
For example, using spring herbs like nettles and chickweed can offer invigorating and revitalizing effects on the skin after a long winter. These herbs are loaded with vitamins and minerals that help rejuvenate dull skin. In the summer, lavender and calendula can provide soothing properties for sun-exposed skin, helping to alleviate irritation and redness.
Moreover, utilizing seasonal ingredients fosters a connection with nature and promotes a sustainable approach to skincare. It minimizes the environmental impact associated with transporting out-of-season produce. This practice also supports local farmers and economies, creating a holistic approach to beauty. By aligning your skincare routine with seasonal rhythms, you can enhance your skin’s health while nurturing a deeper appreciation for the changing landscape around you.
Crafting Your Own Basic Herbal Face Mask: A Step-by-Step Guide
Essential Ingredients for a Simple Herbal Mask
Creating a basic herbal face mask is both simple and satisfying, especially when you have the right ingredients at your disposal. Here’s a list of essential components you might consider incorporating into a foundational herbal face mask:
- Base Ingredients: Natural components like honey, yogurt, or oatmeal serve as excellent bases for your mask.
- Herbs: Select one or two herbs based on your skin type, such as chamomile for sensitive skin or nettle for oily skin.
- Liquid Additives: Use herbal teas or aloe vera gel to mix with your base for additional benefits.
- Essential Oils: Consider adding a few drops of essential oils, such as tea tree oil for acne-prone skin or lavender for a calming effect.
- Binding Agents: If your mask requires thickening, you can include ingredients like cornstarch or kaolin clay.
- Exfoliants: Incorporate natural exfoliants like ground oats or sugar for a mask that also removes dead skin cells.
- Moisturisers: Add oils such as jojoba or almond oil to ensure hydration.
These ingredients can be easily sourced from local markets or health food stores, ensuring your mask is both effective and environmentally friendly. The combination of these components offers flexibility in crafting a mask tailored to your unique skincare needs.
Step-by-Step Instructions for Crafting Your Herbal Mask
Creating your herbal face mask is a straightforward process that can be personalized to your preferences. Here’s a step-by-step guide to get you started.
1. Select Your Ingredients: Choose your base ingredient, herb, and any additional components you wish to include. For example, you might select yogurt as your base and chamomile as your herb.
2. Prepare the Herbs: If using fresh herbs, finely chop them or steep dried herbs in hot water to extract their beneficial properties. Allow the infusion to cool before usage.
3. Combine the Base: In a bowl, mix your base ingredient with the prepared herbs. For instance, combine yogurt with finely chopped chamomile, adjusting the consistency to your liking by adding more base or liquid additives as needed.
4. Add Extras: Incorporate any additional ingredients, such as essential oils or exfoliants, mixing thoroughly until the mask achieves a uniform texture.
5. Apply the Mask: Gently apply the mask to your cleansed face using fingers or a brush, avoiding the eye area.
6. Relax and Wait: Leave the mask on for approximately 10-20 minutes, depending on your skin’s sensitivity and the ingredients used.
7. Rinse Off: Rinse thoroughly with warm water and follow up with your regular moisturizer.
This simple process empowers you to create a personalized skincare treatment that is both effective and enjoyable. Remember to take notes on your formulations, allowing you to refine your recipes over time.
Determining the Ideal Duration for Your Herbal Face Mask Application
Establishing the optimal duration for leaving your herbal face mask on can significantly influence the results you achieve. Generally, it is advisable to leave a mask on for 10 to 20 minutes, depending on the ingredients and your skin type. For individuals with sensitive skin, a shorter duration of about 10-15 minutes is recommended to prevent irritation.
Those using masks with more potent ingredients, such as clays or exfoliants, should consider starting with a 10-minute limit and gradually increasing it as their skin adjusts. Conversely, individuals with dry skin may find it beneficial to leave hydrating masks on for a longer period, up to 20 minutes, to facilitate maximum absorption of the nourishing ingredients.
It is essential to listen to your skin throughout this process. If you experience any discomfort or tingling sensations, it is advisable to rinse the mask off sooner rather than later. Always follow up with a quality moisturizer to lock in hydration after rinsing the mask, as this can enhance the overall benefits of your DIY herbal face mask.
Exploring the Benefits of Herbal Face Masks for Skin Health
How Herbal Masks Nourish and Revitalize Your Skin
Herbal face masks provide a plethora of benefits that go far beyond superficial aesthetics, primarily due to the nourishing properties of the herbs used. These masks can effectively rejuvenate and hydrate the skin, especially when formulated with local UK herbs. For instance, rosehip is celebrated for its high vitamin C content, which supports collagen production and improves skin elasticity.
Similarly, chamomile is recognized for its calming properties, making it ideal for soothing irritated or inflamed skin. Its anti-inflammatory benefits can significantly reduce redness and puffiness, resulting in a more even skin tone. Lavender, in addition to its delightful fragrance, acts as a natural cleanser and antiseptic, helping to eliminate impurities from the skin’s surface while providing a sense of relaxation.
Moreover, herbs like yarrow can help balance oily skin, making it less prone to acne while maintaining essential moisture levels. The antioxidants present in many herbs combat oxidative stress, which can lead to premature aging, keeping your skin looking youthful and vibrant. By harnessing these natural ingredients, herbal face masks become a powerful ally in nourishing your skin and sustaining its overall health.
Targeting Specific Skin Concerns with Herbal Face Masks
Indeed, herbal face masks can effectively address specific skin issues, making them versatile solutions for a variety of dermatological concerns. For instance, individuals battling acne may find masks containing tea tree oil or nettle particularly beneficial due to their antibacterial and anti-inflammatory properties. These ingredients can help unclog pores and significantly reduce breakouts.
For those experiencing dryness or flakiness, masks that incorporate honey and aloe vera can provide intense hydration and nourishment. Honey acts as a natural humectant, drawing moisture into the skin, while aloe vera has soothing properties that promote healing and restore the skin’s moisture barrier.
Furthermore, individuals dealing with hyperpigmentation may benefit from masks infused with rosehip oil or hibiscus, both known for their brightening effects. These ingredients help even out skin tone and diminish the appearance of blemishes, scars, or age spots. By identifying the specific issues you’re experiencing, you can select herbs that directly address these concerns, rendering your herbal face masks an effective and personalized treatment option.
Potential Side Effects of Herbal Face Masks: What to Watch For
While herbal face masks are generally safe and well-tolerated, certain side effects can occur, particularly for individuals sensitive or allergic to specific ingredients. It is vital to remain vigilant regarding potential reactions, especially when using potent herbs or essential oils.
For example, some individuals may experience irritation or allergic reactions to strong ingredients like chamomile or lavender. To mitigate this risk, always perform a patch test before applying a new mask to your face. Apply a small amount of the mask to a less visible area and wait for 24 hours to monitor any adverse reactions.
Furthermore, exercise caution when using exfoliating agents. Masks containing natural scrubs, such as sugar or ground oats, can cause micro-abrasions if left on for extended periods or used excessively. It is advisable to limit usage to 1-2 times per week, depending on your skin type.
Lastly, ensure all ingredients are fresh and stored properly to avoid spoilage, which can lead to skin infections or irritations. By being mindful of these factors, you can enjoy the benefits of herbal face masks while minimizing potential side effects.
Effective Strategies for Your DIY Herbal Face Masks
Safe Storage Practices for Your Herbal Face Masks
Properly storing your DIY herbal face masks is crucial for maintaining their freshness and effectiveness. To ensure your creations retain their beneficial properties, adhere to these expert recommendations.
Firstly, always use airtight containers for storage to prevent contamination from external elements. Glass jars are preferable, as they do not react with the ingredients and are easy to clean. Clearly label each container with the preparation date and ingredients used. This practice helps you monitor how long the masks have been stored and when they should be discarded.
Secondly, store your masks in a cool, dark place, away from direct sunlight and heat, as these factors can degrade the quality of the ingredients over time. For masks that include fresh ingredients, refrigeration can be particularly beneficial, extending their shelf life up to 3-5 days.
Lastly, always inspect your masks before use. If you notice any changes in color, smell, or texture, it’s best to err on the side of caution and discard them. By adhering to these guidelines, you can maximize the efficacy of your DIY herbal face masks while ensuring they remain safe and enjoyable to use.
Best Practices for the Application of Your Herbal Masks
Applying your DIY herbal face masks correctly can significantly enhance their effectiveness. Here are some best practices recommended by skincare experts for optimal application.
1. Start with Clean Skin: Before applying a mask, cleanse your face thoroughly to remove any dirt or makeup. This ensures that the active ingredients can penetrate the skin more effectively.
2. Use Clean Tools: Employ clean brushes or spatulas for application. If using your fingers, ensure they are washed to prevent introducing bacteria to your skin.
3. Apply Evenly: Gently spread the mask over your face, avoiding sensitive areas like your eyes and mouth. Applying an even layer allows for consistent absorption of the ingredients.
4. Relax while Masking: Find a comfortable position to unwind while the mask is on. This not only enhances your experience but also allows the ingredients to work their magic.
5. Follow Recommended Time: Adhere to the suggested duration for leaving the mask on, typically between 10-20 minutes, depending on your skin type and the mask’s formulation.
6. Rinse Thoroughly: After the recommended time, rinse off the mask with lukewarm water. You can use a soft cloth to gently remove the mask if necessary.
7. Follow with Moisturiser: After rinsing, pat your skin dry and follow up with a moisturizer to lock in hydration and maximize the benefits of the mask.
By following these best practices, you can ensure that your DIY herbal face masks deliver the desired results while enriching your overall skincare regimen.
Seamlessly Integrating Masks into Your Skincare Routine
Incorporating DIY herbal face masks into your skincare routine can be a transformative experience that enhances your overall skin health. To effectively integrate masks, consider the following steps:
1. Determine Frequency of Use: It is generally advisable to use herbal face masks 1-2 times a week, depending on your skin type and the specific properties of the mask. For instance, those with oily skin may benefit from more frequent applications, while individuals with dry skin might prefer weekly usage.
2. Schedule Your Mask Days: Designate specific days each week for your masking routine. This consistency helps create a self-care ritual to look forward to, making it easier to maintain.
3. Pair with Other Treatments: Consider using your masks alongside other skincare treatments, such as exfoliation or serums. For example, you could use a gentle scrub followed by a nourishing mask for optimal results.
4. Listen to Your Skin: Pay attention to how your skin responds to the masks. If you notice any irritation or dryness, adjust the frequency or ingredients accordingly.
5. Create a Relaxing Environment: Transform your mask application into a spa-like experience by dimming the lights, playing calming music, and taking time to unwind. This not only enhances the effectiveness of the products but also benefits your mental well-being.
By thoughtfully incorporating herbal face masks into your skincare routine, you can create a personalized approach that nurtures your skin while promoting overall health and relaxation.
Choosing the Right Ingredients for Your Skin Type
Selecting the appropriate ingredients for your specific skin type is crucial when creating DIY herbal face masks. Each skin type benefits from different components, and understanding these needs can lead to more effective results.
For oily skin, consider using ingredients like witch hazel or tea tree oil, known for their astringent and antibacterial properties. Incorporating *nettle* can also help control excess oil and prevent breakouts.
Individuals with dry skin should focus on hydration. Ingredients such as aloe vera and honey are excellent choices; they provide moisture while calming any irritation. Adding *rosehip oil* can enhance hydration and improve skin texture.
Those with combination skin may benefit from balancing ingredients. A mask that combines green tea (for oil control) with chamomile (for soothing) can offer a well-rounded approach.
For sensitive skin, opt for gentle, calming ingredients like oatmeal and lavender. These components can help soothe irritation and redness without causing further sensitivity.
By carefully selecting ingredients based on your skin type, you can create a customized herbal face mask that maximizes benefits and enhances your skincare experience.
Safe Testing of New Mask Recipes
Testing new DIY herbal face mask recipes safely is crucial to avoiding adverse skin reactions. Following a systematic approach can help you identify suitable formulations without risking irritation.
Firstly, always perform a patch test before applying a new mask to your face. Apply a small amount of the mask mixture to an inconspicuous area of your skin, such as behind your ear or on your wrist, and wait for 24 hours to observe any reactions.
If you experience redness, itching, or discomfort, it is best to avoid using that particular recipe on your face. This precaution is particularly important when using new essential oils or potent herbal ingredients.
Secondly, start with simple formulations that include one or two primary ingredients. This approach allows you to monitor how your skin reacts to each component rather than overwhelming it with multiple new ingredients at once.
Lastly, keep notes on your experiences, including any reactions or improvements in skin condition. This information can help you refine your mask-making process and create more effective recipes in the future.
By implementing these testing strategies, you can confidently explore new DIY herbal face mask recipes while ensuring the safety and health of your skin.
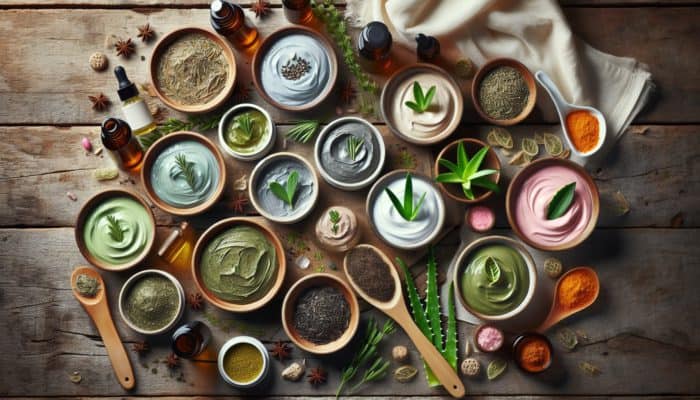
Advanced Recipes for Herbal Face Masks
Crafting a Hydrating Herbal Mask
Creating a hydrating herbal face mask is an excellent way to nourish and rejuvenate dry skin. One standout recipe utilizes aloe vera and cucumber, both recognized for their hydrating and soothing properties. Here’s how to craft this refreshing mask:
1. Ingredients Needed:
– 2 tablespoons of fresh aloe vera gel
– 1/2 a small cucumber (peeled and blended)
– 1 tablespoon of honey
– Optional: a few drops of lavender essential oil for added soothing effects.
2. Preparation Steps:
– Begin by blending the cucumber in a food processor until smooth.
– In a bowl, combine the blended cucumber, fresh aloe vera gel, and honey, mixing until well combined.
– If using, add the lavender essential oil and stir to blend.
3. Application:
– After cleansing your face, apply the mask evenly, avoiding the eye area.
– Leave the mask on for 15-20 minutes to allow your skin to absorb the hydrating ingredients.
– Rinse off with lukewarm water followed by a splash of cold water to close the pores.
This hydrating mask not only replenishes moisture but also delivers essential nutrients to keep your skin looking fresh, radiant, and healthy.
Creating an Exfoliating Herbal Mask
Absolutely! An exfoliating herbal face mask can effectively remove dead skin cells while promoting cell turnover. One popular recipe uses oatmeal and lavender, both easily accessible in the UK, offering the dual benefits of exfoliation and soothing.
1. Ingredients Needed:
– 1/2 cup of finely ground oatmeal
– 1 tablespoon of dried lavender buds
– 1 tablespoon of honey
– 1/4 cup of warm water or herbal tea (like chamomile).
2. Preparation Steps:
– Combine the ground oatmeal and dried lavender in a bowl.
– Add honey and warm water (or herbal tea) to the mixture, stirring until a paste forms.
– Adjust the consistency as needed by adding more water or oatmeal to achieve your desired thickness.
3. Application:
– Apply the mask to a cleansed face, gently massaging it in circular motions to provide exfoliation.
– Leave the mask on for 10-15 minutes before rinsing with warm water, followed by a cool rinse to close the pores.
This exfoliating mask not only removes dead skin but also leaves your skin glowing and refreshed, promoting a smoother texture.
Designing a Detoxifying Herbal Mask
Detoxifying your skin can be achieved through a well-crafted herbal face mask designed to eliminate impurities and toxins. A simple yet effective recipe incorporates green tea and clay, both known for their purifying properties.
1. Ingredients Needed:
– 1 tablespoon of dried green tea leaves
– 2 tablespoons of kaolin clay or bentonite clay
– 1 tablespoon of apple cider vinegar (or water for a milder option)
– Optional: a few drops of tea tree oil for added antibacterial benefits.
2. Preparation Steps:
– In a bowl, combine the dried green tea leaves and clay.
– Gradually mix in the apple cider vinegar (or water), stirring until you create a smooth paste.
– If using, add the tea tree oil and mix well.
3. Application:
– Apply the mask evenly over your cleansed face, avoiding the eye area.
– Leave the mask on for about 10-15 minutes or until it hardens.
– Rinse off thoroughly with lukewarm water, followed by a splash of cold water.
This detoxifying mask not only cleanses the skin but also helps draw out impurities, leaving your complexion fresh and revitalized.
How to Personalize Your Herbal Face Masks
Enhancing Your DIY Masks with Essential Oils
Incorporating essential oils into your DIY herbal face masks can significantly amplify their benefits, offering targeted treatment for various skin concerns. Here’s a selection of essential oils that pair beautifully with herbal ingredients, particularly those readily found in the UK:
1. Lavender: Renowned for its calming properties, lavender oil can soothe irritated skin while providing a relaxing aroma.
2. Tea Tree: This oil is celebrated for its antibacterial properties, making it an ideal choice for those with acne-prone skin.
3. Rosemary: Often used for its invigorating scent, rosemary can also stimulate circulation and improve skin tone.
4. Chamomile: This essential oil is excellent for sensitive skin, offering anti-inflammatory benefits and calming effects.
5. Geranium: Known for balancing oil production, geranium oil can help both oily and dry skin types, promoting a harmonious complexion.
6. Peppermint: Provides a refreshing sensation and can help invigorate dull skin while reducing the visibility of pores.
When adding essential oils, it is crucial to use them sparingly. Generally, just a few drops per mask are sufficient to reap their benefits. Always conduct a patch test when introducing new essential oils to ensure your skin reacts positively.
Utilizing Seasonal Ingredients in Your Masks
Utilizing seasonal ingredients in your herbal face masks not only enhances their effectiveness but also aligns your skincare routine with nature’s cycles. In the UK, this practice encourages the use of fresh, potent herbs available at different times of the year.
For example, in spring, consider incorporating nettles — abundant and rich in vitamins, which can rejuvenate tired winter skin. As summer approaches, elderflower becomes an excellent choice due to its brightening properties, ideal for counteracting the effects of sun exposure.
During autumn, pumpkins can be utilized, containing enzymes that exfoliate and assist in clearing away dead skin cells. In winter, ginger can warm and invigorate the skin, stimulating circulation and adding radiance during the colder months.
By adapting your masks to include these seasonal ingredients, you maximize the benefits of what’s available while creating a more sustainable and effective skincare routine. This practice reflects a deeper understanding of the environment and your skin’s evolving needs throughout the year.
Experimenting with Different Textures in Your Masks
Experimenting with various textures in your herbal face masks can elevate your DIY skincare experience, making it enjoyable and effective. The texture of a mask can influence how it interacts with your skin, offering diverse benefits based on its composition.
To start, consider incorporating honey or yogurt for a creamy, hydrating texture, ideal for dry skin. These ingredients impart a luxurious feel while providing moisture and nourishment. Alternatively, using *oatmeal* creates a grainy texture that offers gentle exfoliation, promoting skin renewal while delivering a soothing effect.
For a more indulgent experience, you can mix finely ground nuts or seeds into your mask for added texture and exfoliation. *Clay* can be included for a thicker, more detoxifying mask that effectively draws out impurities from your skin.
Incorporating ingredients like aloe vera can also adjust the texture, providing a lighter, refreshing feel that’s perfect for oily skin types. By varying the ratios of these components, you can create unique textures that cater specifically to your skin’s needs and preferences.
Through these experiments, you can discover which textures resonate best with your skin, crafting a more personalized DIY skincare routine that enhances your overall wellbeing.
Frequently Asked Questions about DIY Herbal Face Masks
What are the best herbs for DIY face masks?
Some of the best herbs for DIY face masks include lavender, chamomile, rosehip, nettle, and calendula, each offering unique benefits for the skin.
How often should I use a herbal face mask?
It is generally recommended to use herbal face masks one to two times a week, depending on your skin type and the specific ingredients of the mask.
Can I use fresh herbs in my face mask?
Yes, fresh herbs can be used in face masks; they often provide more potent benefits. Just be sure to use them promptly for maximum freshness.
What should I do if I have an allergic reaction to a mask?
If you experience an allergic reaction, discontinue use immediately, rinse your face with cool water, and apply a soothing moisturizer. If symptoms persist, consult a healthcare professional.
Are DIY herbal face masks suitable for all skin types?
While many DIY herbal face masks can be tailored for various skin types, it’s essential to select ingredients that cater specifically to your skin’s needs.
How can I ensure my masks are safe to use?
To ensure safety, always perform a patch test on a small area of skin before applying the mask to your face, and store your masks properly to prevent spoilage.
What are the benefits of using local ingredients?
Using local ingredients enhances the efficacy of your masks, supports local economies, and reduces environmental impact due to lower transportation emissions.
How do I know when my DIY mask has gone bad?
Signs of spoilage include changes in color, texture, or smell. If your mask looks or smells unusual, it’s best to discard it.
Can I add essential oils to my face mask?
Yes, adding essential oils can enhance the benefits of your mask. Just a few drops are usually sufficient; be sure to select oils that are suitable for your skin type.
What is the best way to store my herbal face masks?
Store your masks in airtight containers in a cool, dark place, or refrigerate them for maximum freshness, especially when using fresh ingredients.
Connect with us on Facebook!
The Article: DIY Herbal Face Masks: UK’s Natural Beauty Secrets appeared first on https://mcrtherapies.co.uk
The Article Herbal Face Masks: Discover the UK’s Natural Beauty Tips Was Found On https://limitsofstrategy.com
Leave a Reply