Category: Plumbing Tips

  • Emergency Plumber Tips for Burst Pipes and Flexi Hoses

    Emergency Plumber Tips for Burst Pipes and Flexi Hoses

    Immediate Actions to Take When a Flexi Hose or Pipe Bursts in Your Home

    Upon discovering a burst flexi hose or pipe in your home, your first crucial step is to locate and turn off the main water supply at the meter. This swift action will effectively halt the flow of water and significantly reduce further potential damage. If water has reached any electrical outlets, it’s imperative to turn off the power at the switchboard immediately, avoiding any contact with wet surfaces to prevent the risk of electric shock. To relieve stress in the plumbing system, open nearby taps and utilize towels or buckets to catch the escaping water. Clear the affected area of furniture and rugs to minimize additional damage, and take comprehensive photographs of the impacted regions for your insurance claims. Finally, reach out to a certified emergency plumber who specializes in addressing burst hoses for prompt repairs and thorough evaluations of your plumbing system.

    burst flexi hose

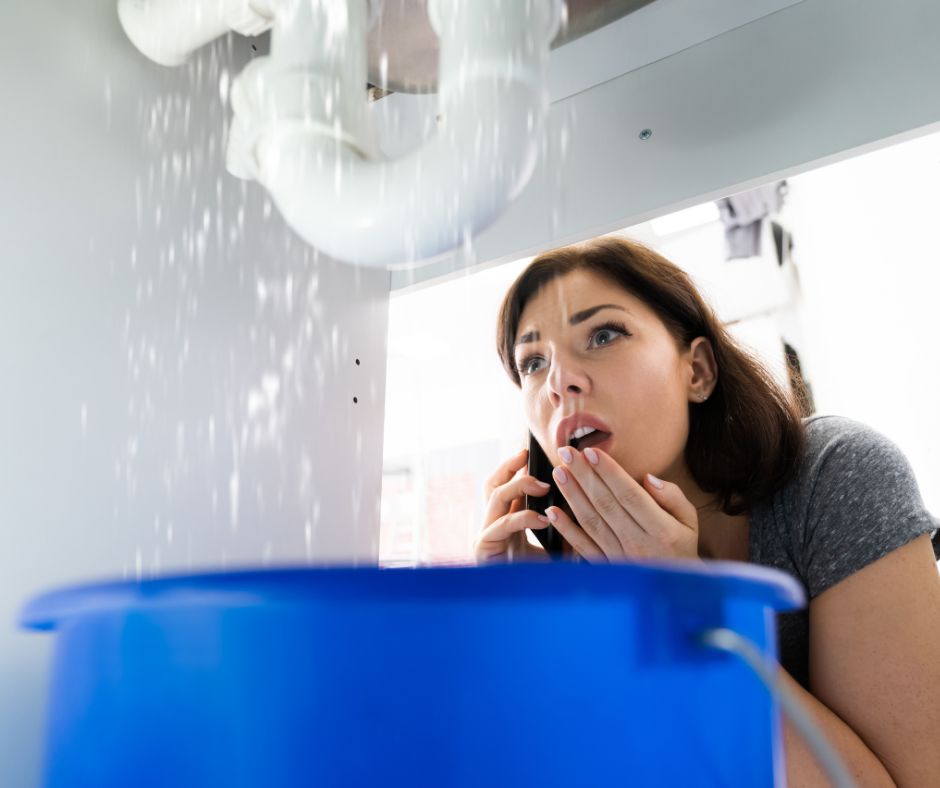
    In the brief moment it takes to brew a cup of tea, a burst pipe or malfunctioning flexi hose can unleash a torrent of water, flooding your kitchen, damaging floorboards, and soaking internal walls. The severity of these plumbing emergencies can escalate rapidly, underscoring the urgent need for immediate action. In Wollongong, homeowners, particularly in older structures or coastal areas, frequently encounter burst flexi hoses, which have become a prevalent cause of unforeseen water damage.

    These plumbing crises often arise without warning, and your response time can make the difference between a minor repair and a significant renovation. For residents in Wollongong, especially those living in older homes or coastal regions, burst flexi hoses are increasingly recognized as a major contributor to sudden and severe water damage.

    Essential Immediate Steps to Take After a Flexi Hose or Pipe Burst

    1. Quickly Shut Off the Main Water Supply

    Locate your water meter, which is usually positioned at the front of your property. Turn the valve clockwise to instantly stop the water supply to your home. If you reside in an apartment or unit, check beneath the kitchen sink or in the laundry area for an isolation valve that regulates the water flow. Acting swiftly at this stage is essential to prevent additional flooding and damage.

    2. Disconnect Power at the Switchboard If Water Has Reached Electrical Outlets

    It is critical to turn off power at the main switchboard immediately. Avoid making contact with any wet surfaces or switches located near live electrical outlets, as this can pose a serious safety risk. Prioritizing your safety during these emergencies is essential.

    3. Open Nearby Sinks or Showers to Release Plumbing Pressure

    Open taps throughout your home to effectively drain any remaining pressure from the plumbing system. Focus on the tap nearest to the leak, as this action will help reduce the ongoing flow of water and lessen potential damage. This step is vital for efficiently managing the water flow and mitigating further issues.

    4. Contain the Flow of Water to Minimize Damage

    Utilize buckets, towels, or outdoor bins to capture the flowing water. Be sure to remove rugs, papers, electronics, and furniture from the affected area to avert additional damage. The faster you dry the floor, the better you will minimize the risk of long-lasting harm to your property.

    5. Document the Damage for Your Insurance Claims

    Take clear and detailed photographs of the source of the leak, the extent of the water spread, and any visibly damaged items or surfaces. This documentation will be invaluable if you need to file an insurance claim, as it provides solid evidence of the incident and the resulting damage, aiding in the claims process.

    6. Reach Out to a Licensed Emergency Plumber for Immediate Assistance

    Contact a local, licensed plumber who offers after-hours service and possesses relevant experience in addressing flexi hose failures. Quick action is critical, especially in Wollongong homes that may feature older materials susceptible to salt-related damage. Prompt professional assistance can significantly mitigate further complications.

    For immediate help, you can call CS Plumbing’s Emergency Service for a rapid, local response and same-day repair solutions.

    Call: 0416 101 022

    Get A Free Quote

    emergency plumber

    Understanding the Causes Behind Flexi Hose Failures in Wollongong Homes

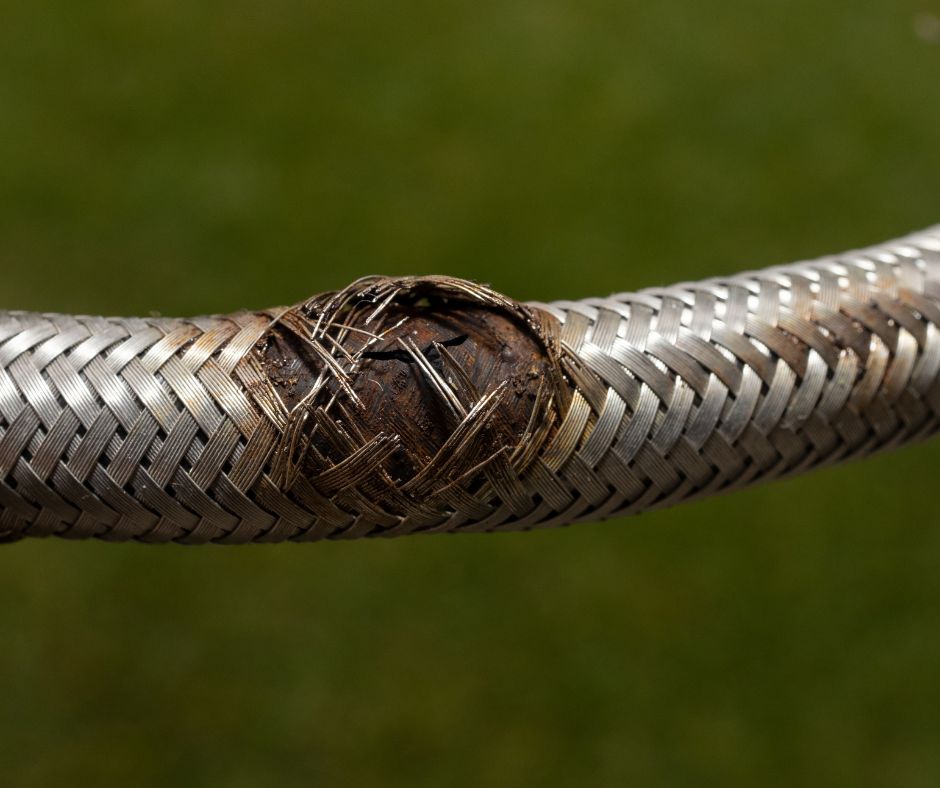
    Flexible braided hoses, commonly known as flexi hoses, are frequently utilized under sinks, basins, and behind toilets to connect taps to water supply lines. Over time, the inner rubber lining of these hoses can deteriorate, and the steel braid may suffer from corrosion, especially in coastal environments like Wollongong. Such deterioration can precipitate sudden and catastrophic failures.

    In numerous homes throughout the Illawarra region, these hoses have gone unchecked since their initial installation, with some being over a decade old—well beyond their recommended service life. When these hoses fail, they typically split open, releasing high-pressure water into cabinetry, floor cavities, or wall spaces, leading to extensive water damage and costly repairs.

    Several factors contribute to these failures, including:

    • Salt air and high humidity, which can weaken fittings over time
    • Poor-quality or unbranded hoses that lack durability and reliability
    • Pressure spikes in older pipework that may stress the hoses and lead to failures
    • Lack of fixture-level isolation valves complicating immediate shutoff during emergencies

    The Critical Importance of Upgrading and Isolating Every Flexi Hose in Your Home

    Merely replacing one failed hose is insufficient. If one flexi hose has ruptured, it is highly likely that others in your home are of a similar age and are equally at risk of failure. To safeguard your property in the long run, your plumber should implement the following measures:

    • Replace all old or unbranded hoses to prevent future complications and potential emergencies
    • Utilize WaterMark-certified, pressure-rated flexi hoses to guarantee safety and reliability
    • Install mini stop taps (isolation valves) at every flexi hose connection for convenient control and accessibility

    These isolation taps empower you to shut off water at the source—whether under the sink, behind the toilet, or in the laundry—without cutting off the supply to the entire home. This capability allows you to address a burst hose immediately, even before a plumber arrives, drastically reducing the risk of extensive damage and costly repairs.

    This practice is now recognized as best practice for all new installations and is particularly essential for older homes, especially in areas like Figtree, Shellharbour, and Woonona, where outdated and legacy fittings continue to pose significant concerns.

    Post-Emergency Care: Essential Steps to Implement Once the Crisis is Resolved

    After your plumber has successfully resolved the issue, it is vital to carry out the following aftercare measures:

    • Run fans and dehumidifiers to prevent mould growth throughout your home
    • Remove toe kicks or panels from flooded cabinetry to ensure adequate drying and ventilation
    • Schedule a comprehensive plumbing inspection throughout your home to identify additional risk points and ensure everything is functioning properly
    • Add regular hose checks to your seasonal home maintenance checklist to prevent recurrence and ensure your plumbing system is in optimal condition

    If the burst caused structural damage, it is crucial to contact your insurer immediately with all documented evidence to ensure you are properly covered for necessary repairs.

    Call: 0416 101 022

    Get A Free Quote

    Crucial Knowledge for Wollongong Homeowners on Preventing Burst Hose Disasters

    The unfortunate reality is that most burst pipe emergencies we respond to in Wollongong can be traced back to a $10 hose. A failed flexi hose can lead to an astonishing $10,000 in water damage within a mere 15 minutes. Many of these incidents are preventable with simple preventive measures. The upgrade process is straightforward, and the valves are compact and easy to install. However, the impact they have when an emergency arises is monumental and can save homeowners both stress and significant financial loss.

    If your home was constructed or renovated over five years ago and your hoses have never been inspected, it is imperative to consider an upgrade. Replace them, isolate them, and take proactive steps to prevent yourself from experiencing the shock and stress of an emergency that could have easily been avoided in just seconds.

    Emergency Plumber: Burst Pipe or Flexi Hose The Immediate Steps

    The Article: Emergency Plumber: Steps for Burst Pipes and Flexi Hoses first appeared on https://writebuff.com

    The Article Emergency Plumber: How to Handle Burst Pipes and Flexi Hoses Was Found On https://limitsofstrategy.com

  • Leaking Shower Solutions: Repair Without Tile Removal

    Leaking Shower Solutions: Repair Without Tile Removal

    A leaking shower can cause severe and costly damage long before any visible signs are apparent.
    Even minor issues like small cracks in grout, deteriorating silicone joints, or slight structural shifts can allow water to seep behind tiles, leading to damage in walls, subfloors, and surrounding areas.
    The good news is that most leaking showers can be effectively repaired without needing to remove tiles.

    By promptly addressing these surface problems through professional regrouting and resealing, homeowners can stop leaks quickly, avoid expensive renovations, and restore the integrity of their bathrooms without the hassle of demolition.

    Before and After Repair of Leaking Shower

    Master the Art of Repairing Your Leaking Shower Without Removing Tiles

    For many homeowners, the sight of a leaking shower can incite anxiety due to worries about broken tiles, exorbitant repair costs, and extended periods without a functional bathroom. However, the reassuring news is that most shower leaks can be effectively fixed without removing any tiles. If detected early, the processes of regrouting and resealing can quickly resolve leaks in a cost-effective way, while avoiding the disruption that comes with major renovations. This detailed guide outlines the crucial steps involved, assesses the efficacy of these methods, and provides insights into when these solutions are most suitable for your home.

    Uncover Effective Techniques to Fix Shower Leaks Without Removing Tiles

    Indeed, you can repair many shower leaks without the need to take out tiles. In fact, most leaks arise not from broken tiles or faulty plumbing, but from surface-level issues such as cracked grout, failing silicone seals, or minimal structural movement. By utilizing professional regrouting and resealing techniques, these imperfections can be effectively corrected without disturbing your existing tiles or the waterproofing membrane, thereby preserving both the aesthetic and functional integrity of your bathroom.

    Reach Out Today for Expert Assistance

    1300 815 512

    Identify the Common Factors Leading to Shower Leaks

    Shower leaks typically begin as minor issues that can escalate significantly over time if not addressed. The primary culprits behind these leaks include:

    • Cracked or missing grout: Water can seep through tiny gaps between tiles, leading to infiltration behind walls.
    • Damaged silicone sealant: Failing joints around the shower base, fixtures, or screens can initiate leaks.
    • Subtle structural movement: As buildings settle, micro-movements can develop cracks in grout lines or stretch seals.
    • Poor or deteriorated waterproofing: Older bathrooms may lack sufficient membrane protection beneath the tiles, making them susceptible to leaks.

    If you wish to delve deeper into the underlying causes of shower leaks, consider reading our comprehensive article on the major causes of leaking showers to gain further insight.

    Infographic on Fixing Leaking Showers Without Removing Tiles

    Understand the Advantages of Repairing Shower Leaks Without Removing Tiles

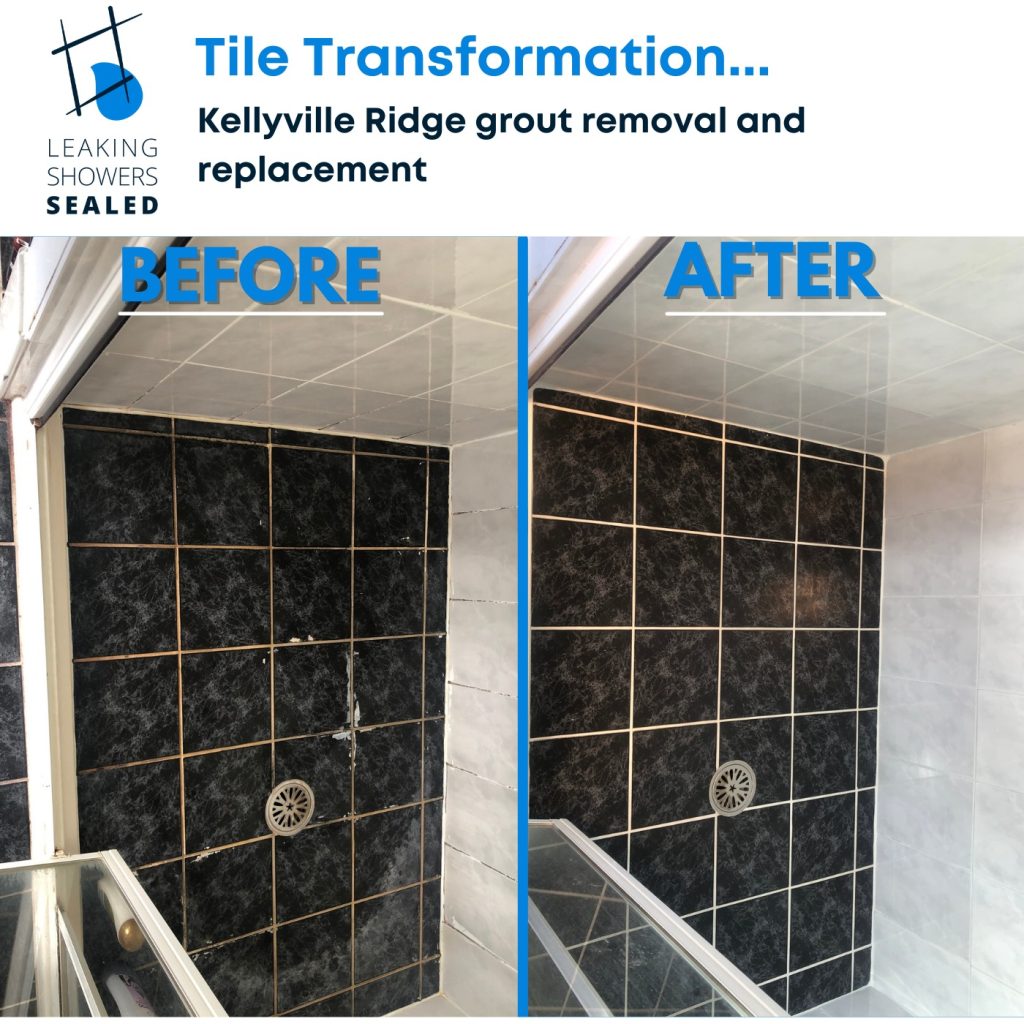
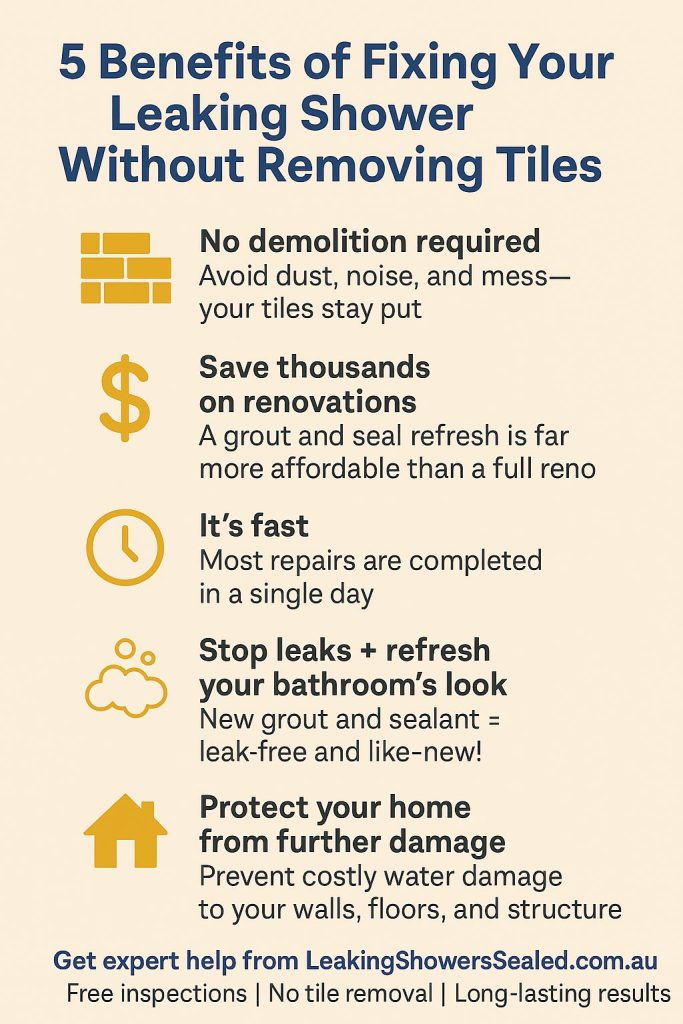
    ✅ No mess or demolition: Avoid the chaos of dust, jackhammers, and tile removal. Our resealing process keeps your bathroom intact.
    ✅ Affordable and quick: The cost of tile removal can soar into the thousands, while resealing is a fraction of that cost and can often be completed in a single day.
    ✅ Durable results: High-quality waterproof grout and sealants provide long-lasting protection when applied by professionals.
    ✅ Preserve existing tiles: Maintain your bathroom’s design aesthetic without the interruption of tile replacements, ensuring continuity in style and functionality.

    Step-by-Step Overview of the No-Tile-Removal Repair Process

    At Leaking Showers Sealed, we have crafted a streamlined and effective method for addressing leaks:

    • Free inspection and quote: Our experts accurately diagnose the leak and provide a transparent cost breakdown for the proposed work, ensuring trust and clarity.
    • Remove old grout and sealant: Using specialized tools, we carefully extract damaged materials without harming your existing tiles, thus protecting your investment.
    • Apply fresh waterproof grout: We utilize new, mold-resistant grout that not only halts leaks but also rejuvenates the appearance of your bathroom, enhancing its overall appeal.
    • Reseal and protect: Premium silicone is meticulously applied to all joints, corners, and fittings, ensuring a watertight seal that withstands the test of time.
    • Curing time: Most showers will be ready for use within 24 to 48 hours after the repair work is completed, minimizing downtime.

    Weighing the Pros and Cons of DIY Repairs for Leaking Showers

    While DIY regrouting kits are available on the market, they often offer only cosmetic fixes that may not address the root issues. Without proper preparation and expertise, leaks can persist undetected, leading to hidden damage that can be costly to rectify later. Professionals have the necessary tools, experience, and high-quality sealing products required to effectively address leaks the first time. Investing in a specialist repair not only saves time and frustration, but it also helps prevent future costs that could arise from insufficient repairs. Below is a comparison of DIY versus professional regrouting to assist you in making an informed decision.

    Determining Whether Resealing is the Best Solution for Your Shower

    If your tiles remain intact and the leak is due to grout or sealant failure—rather than significant plumbing or structural issues—you are an ideal candidate for this solution. We offer a free inspection to evaluate the condition of your shower before recommending the most effective course of action tailored to your specific needs.

    Why Trust Leaking Showers Sealed for Your Shower Repair Needs?

    At Leaking Showers Sealed, we specialize in shower repairs that do not require tile removal. Our efficient resealing process offers homeowners a fast, reliable, and cost-effective method to address leaks without the need for disruptive renovations. We proudly serve [insert areas], assisting countless Australian homeowners in achieving peace of mind, protecting their properties, and saving thousands of dollars in unnecessary expenses through our expert services.

    Take Urgent Action to Permanently Stop Your Shower Leak!

    Don’t let a leaking shower escalate into a major renovation. By taking immediate action with a simple reseal, you can protect your bathroom, your home’s value, and your finances.
    Schedule your FREE inspection and quote today at LeakingShowersSealed.com.au

    Contact Us Today for Professional Support

    1300 815 512

    Your Complete Resource for Frequently Asked Questions About Shower Repairs

    Q1. Can all leaking showers be fixed without removing tiles?
    While not every shower can be repaired this way, many can be. If the leak is due to grout or sealant failure and the tiles are undamaged, regrouting and resealing are excellent solutions that can save you time and money.

    Q2. How long does the no-tile-removal repair procedure take?
    Most repairs are completed within a day, with showers typically ready for use after a 24 to 48-hour curing period, ensuring minimal disruption to your daily routine.

    Q3. Will resealing alter the appearance of my shower?
    No, resealing generally enhances the look by providing a clean and refreshed appearance to the joints and tile lines while preserving the overall style of your bathroom.

    Q4. Is resealing a more economical choice compared to a full renovation?
    Yes, significantly. Professional resealing is a fraction of the cost compared to the expenses involved in removing tiles and re-waterproofing, making it a wise financial decision.

    Q5. How can I be certain that resealing will effectively solve my leak?
    Our trained specialists conduct a complimentary inspection and will only recommend resealing if it is a suitable and long-lasting solution for your specific leak, ensuring peace of mind.

    The Article: Stop a Leaking Shower Without Removing Tiles: Essential Tips for Homeowners first appeared on https://writebuff.com

    The Article Leaking Shower Solutions: Fix Without Removing Tiles Was Found On https://limitsofstrategy.com

  • Leaking Shower: Fix It Before It Causes Major Damage

    Leaking Shower: Fix It Before It Causes Major Damage

    Understanding the Significant Risks Associated with a Leaking Shower

    While a leaking shower may seem like a minor annoyance, it frequently acts as a crucial indicator of more severe and damaging problems lurking beneath the surface. If left unaddressed, even a small leak can allow moisture to infiltrate walls, floors, and foundational structures, leading to extensive structural damage, encouraging mould growth, and potentially resulting in denied insurance claims.
    This article delves into the serious risks posed by leaking showers, explores the common reasons homeowners postpone essential repairs, and outlines actionable steps you can take to prevent costly damage—all without the hassle of removing your tiles.

    Uncovering the Hidden Dangers and Financial Implications of Ignoring Shower Leaks

    Many homeowners may downplay the seriousness of a seemingly minor water leak, but this perspective can be perilously misguided, particularly when the leak originates from your shower and infiltrates unintended spaces.

    Leaking showers represent one of the most frequently overlooked sources of long-term property damage. Initially, symptoms may appear subtle, such as a cracked grout line or a faint, musty odor. However, disregarding these early warning signs can lead to significant repair expenses, health hazards, and may ultimately necessitate a complete bathroom renovation.

    Why Never Ignore Leaking Shower Infographic V2

    Here are compelling reasons to take even seemingly minor shower leaks seriously and act without delay.

    1. The Rapid Escalation of Hidden Water Damage

    Shower leaks seldom remain confined to a single area. Water can silently migrate behind tiles, infiltrating wall spaces and flooring, gradually compromising the structural integrity of your home.
    Common consequences of unchecked leaks include:

    • Rotten timber framing that can jeopardize the entire structure
    • Buckled floorboards or tiles that may require replacement
    • Ceiling staining (especially in rooms directly beneath upper-level bathrooms)
    • Comprehensive bathroom rebuilds if damage becomes extensive and unmanageable

    Delaying necessary repairs only complicates the situation and escalates costs significantly.

    2. The Threat of Mould and Mildew Outbreaks

    Behind tiles, a leaking shower creates an optimal environment for mould to thrive—dark, damp, and devoid of airflow. Once it takes root, mould can proliferate rapidly and uncontrollably.
    Potential health risks are considerable and include:

    • Respiratory issues and allergy symptoms associated with mould exposure
    • Unpleasant odours and airborne spores that can affect indoor air quality
    • Costly mould remediation (averaging $2,000–$6,000 in Australia)
    • Long-term damage to internal walls and flooring if not addressed promptly

    3. Severe Risks of Structural Deterioration

    Leaks are not merely superficial; they can threaten the very framework of your home. Continuous water exposure can weaken subfloors, lead to the corrosion of fixtures, and may ultimately result in the collapse of plasterboard.

    Signs of structural damage can include:

    • Soft or ‘bouncy’ floors within the bathroom area
    • Cracked tiles or distorted grout lines that indicate underlying issues
    • Walls that feel unstable or soft when touched

    Repairing structural damage can frequently exceed $10,000+, making early detection crucial.

    4. The Risk of Voided or Denied Insurance Claims

    Most insurance providers in Australia typically do not cover preventable or gradual water damage. If you delay repairs after noticing signs of a leak, your insurance claim could be dismissed.
    You could find yourself responsible for the entire financial burden of:

    • Repairs that could have been mitigated
    • Mould remediation that can be extensive and costly
    • Replacement of fixtures or subflooring that may have been salvageable
    • Alternative accommodation if your bathroom becomes unusable

    5. Leaks Will Not Resolve Themselves

    Grout does not reseal itself, and cracks in silicone won’t magically repair over time. A leaking shower only deteriorates as time passes, quietly expanding the damage area and increasing the extent of necessary repairs.

    Examining Reasons Homeowners Postpone Vital Repairs

    • “It’s just a minor crack; it can wait.”
    • “I don’t want to deal with tile removal.”
    • “We’ll eventually get around to renovating.”

    While these thoughts may seem reasonable, they can be perilously misleading. In many cases, most leaks can be resolved promptly and effectively without the need for tile removal, especially when caught early through professional sealing techniques. This is precisely why regrouting serves as such an effective solution!

    Identifying the Key Warning Signs of a Leaking Shower

    Not every leak is immediately visible to the naked eye. Here’s what to keep an eye out for:

    • Damp or musty odours within or around the bathroom area
    • Bubbling paint or plaster in adjacent areas that may indicate moisture
    • Discolored silicone, cracked grout, or loose tiles that require immediate attention
    • Moisture marks on ceilings below, signaling possible leakage
    • Warped skirting boards or door frames that may indicate prolonged exposure to water

    Evaluating the Financial Implications of Ignoring a Shower Leak

    Issue Estimated Cost
    Water-damaged walls/floors $1,500 – $10,000+
    Mould removal and treatment $2,000 – $6,000+
    Complete bathroom rebuild $10,000 – $25,000+
    Depreciation in property value Potentially tens of thousands
    Rejected insurance claims Full personal liability

    Crucial Steps to Take If You Suspect a Shower Leak

    If you observe any of the aforementioned signs, it’s imperative to take immediate action.

    1. Conduct a thorough inspection of the bathroom and surrounding areas for any signs of water damage.
    2. Limit shower usage to prevent further water exposure and damage.
    3. Schedule a leak inspection with a certified technician to identify the source of the problem.
    4. Refrain from patch jobs or DIY fixes — these may only serve to conceal the underlying issue without providing a lasting solution.
    Contact Us for Immediate Assistance

    1300 815 512

    Why Choose Leaking Showers Sealed for Your Repair Needs?

    We effectively target leaks at their source — swiftly, permanently, and without the inconvenience of tile removal. Our specialized resealing and regrouting services address the root cause before it escalates into a major financial disaster.

    Our comprehensive approach includes:

    • Thorough leak diagnosis to identify the problem
    • Non-invasive resealing techniques to minimize disruption
    • Quick and clean application for your convenience
    • Transparent and competitive pricing without hidden fees
    • Industry-leading warranties to provide you with peace of mind

    We have assisted thousands of Australian homeowners in safeguarding their properties long before leaks necessitated costly renovations.

    Visit LeakingShowersSealed.com.au today to schedule your complimentary leak inspection.

    Get in Touch with Us Today

    1300 815 512

    Grouting

    Your Frequently Asked Questions About Leaking Showers Answered

    Q1. Can a small leak from my shower lead to substantial damage?
    Absolutely. Even a seemingly minor leak can cause severe damage over time, resulting in timber rot, mould growth, and deterioration of the subfloor. Often, this damage occurs out of sight, hidden behind tiles or within walls.

    Q2. Is my home insurance likely to cover repairs for a shower leak?
    Not necessarily. Many policies do not cover gradual or preventable water damage. If your insurer determines that you delayed repairs or ignored obvious warning signs, your claim could be denied.

    Q3. Do I need to remove tiles to fix a leaking shower?
    No — in many instances, a professional regrouting and resealing service can effectively resolve the leak without requiring tile removal, particularly if the problem is addressed promptly.

    Q4. What is the typical cost for repairing a leaking shower?
    Repair costs can range from $300 to $1,200 if addressed quickly. However, if neglected, complete rebuilds can surpass $20,000. Taking early action can save you significantly on repair expenses.

    Q5. What early warning signs should I look for regarding a leaking shower?
    Watch for cracked grout, musty odours, warped skirting boards, bubbling paint, and water stains on nearby walls or ceilings.

    The Article: Leaking Shower: Don’t Ignore It, Even If It Seems Minor first appeared on https://writebuff.com

    The Article Leaking Shower: Address It Before It Becomes Major Was Found On https://limitsofstrategy.com

  • Frequently Asked Questions For Plumbing Issues

    Frequently Asked Questions For Plumbing Issues

    FAQ’s For Residential Plumbing Issues

    Welcome to Downie Plumbing And Gas, your trusted emergency plumbers serving the Wynnum and Bayside areas of Brisbane
    As a top plumbing service provider, we know how inconvenient plumbing problems can be for homeowners. We can handle any plumbing emergencies you may encounter because of this. We’ve compiled a list of plumbing-related, frequently asked questions from our Australian clients. We hope that our responses will give you useful information and aid in your ability to avoid similar plumbing-related accidents in the future.


    wynnum plumber

    How Can I Tell If I Have Plumbing Problems?

    In Australia, if you own a home, it’s likely that you will come across issues with the plumbing at some point. But how can you tell when it’s necessary to contact a plumber? There are several tell-tale signs of an issue:

    • First and foremost, watch out for poor water pressure! This is usually caused by blocked pipes somewhere in your system – which can be tricky to pinpoint without professional help. 
    • Look out for odd noises coming from appliances like washing machines and dishwashers; these could also indicate blockages. 
    • If there’s water pooling around fixtures such as sinks and toilets, this may suggest leaky pipes – so get on the blower straight away!

    It pays to be vigilant when identifying potential issues with your plumbing. Doing regular checks yourself can save money down the line – plus put your mind at ease knowing everything is running smoothly. It’s important to be aware of any unusual sounds or smells that may indicate a plumbing issue. This can assist you in identifying the issue quickly and ceasing it from becoming more serious and expensive. With just a bit of extra effort here and there, you can keep your home’s pipes healthy – no drama is required!

    Is It Safe To DIY A Plumbing Repair?

    Plumbing – that age-old conundrum that strikes fear into the heart of many Aussies! We’ve all been there: you notice a strange dripping sound coming from below, and your first thought is, “Do I need to call a plumber?” Now, when it comes to DIY repairs, we know it can be tempting to save on costs – but how safe is it really? Is it possible to do home repairs yourself without risking an even bigger disaster?

    The truth is some plumbing problems are relatively easy for homeowners to fix themselves. If you’re comfortable with basic tools like wrenches or saws, then you might just be able to repair minor leaks or clogs. However, more complicated issues – such as burst pipes or gas leaks – should always be left up to the professionals. You don’t want something going wrong down the line and having to pay out even more for emergency services!

    So whether you’re dealing with a leaky tap or a dodgy drainage system, give some serious thought before trying any DIY fixes. It could save time if you get an expert opinion first. Keep your home and yourself in good shape by keeping in mind that not every issue has an easy fix – better safe than sorry!

    What Is The Most Budget-Friendly Way To Repair A Plumbing Issue?

    Plumbing can be a real headache when something goes wrong. If you encounter a common plumbing problem in your Aussie home, the good news is that it doesn’t have to cost much. So what’s the most cost-effective way to repair those pesky little issues?

    Well, let’s face it: sometimes DIYing isn’t always the best option — even if you’re handy with tools and have experience fixing things around the house. However, there are certainly more complex jobs that require specialised skills and knowledge of local regulations, so investing in a professional could be beneficial to ensure everything is done properly without any nasty surprises later on down the line. Plus, they’ll likely get the job done faster than you could ever hope for!

    So if money or time is tight – or hiring a competent plumber could be the ideal choice if your objective is to have the assurance that all your plumbing requirements will be handled by an expert who possesses the necessary knowledge and skills. That way, you won’t need to worry about tackling tricky tasks yourself, leaving you free to do whatever else needs doing around your place instead.

    Do You Need To To Call A Professional Plumber For Every Plumbing Issue?

    It’s common to encounter plumbing problems in Aussie homes, but is it necessary to call a professional plumber for every issue? Well, not always. Three ways you can save yourself some cash are:

    • Conduct thorough research – read up on how to fix the problem online or ask friends and family who may have had similar issues before.
    • Check if DIY solutions are available – this could mean anything from buying some new parts at the hardware store or using drain cleaners instead of more expensive chemical treatments. But it is risky when you have no idea of how to deal with plumbing issues, so move on to the next point.
    • If alternative solutions prove ineffective, obtaining estimates from multiple plumbers to ascertain the approximate cost range associated with the plumbing service required is prudent.

    Many simple tasks like replacing washers or unclogging drains can be done by anyone with basic knowledge of household tools and equipment! Plus, having a go yourself gives you a sense of accomplishment too!

    If none of the alternatives is satisfactory, feel free to seek assistance from our proficient professionals, who can accomplish the task swiftly and proficiently. Their expertise provides the reassurance of a job well done and peace of mind.


    How Can I Prevent Plumbing Problems From Occurring In The Future?

    Plumbing issues can be exasperating as they can occur unexpectedly. However, adopting a few preemptive measures can frequently prevent their occurrence. So how exactly can we do this?

    First off, it’s important to stay on top of regular maintenance checks and repairs as needed. For example, regularly check your taps for any drips or leakages, and ensure all pipes are properly sealed and insulated so that temperature changes don’t cause cracks over time. 

    Additionally, be mindful when using chemical cleaners in drains or toilets; these products may work temporarily but could potentially damage your pipes down the line.


    Using these DIY drain cleaning tips will help prevent blocked drains from food and gunk build up in your pipes

    No food waste down the sink

    One of the main reasons for  kitchen sink blocks is the the disposal of food waste down the drains.
    Instead of allowing food scraps to go down the drain, dispose of them into the rubbish bin.
    S
    crape leftover food into the bin or if it can go into the compost bin, even better.
    Never pour oil into the sink! Oil is also a culprit when it comes to causing blockages.

    Regular drain maintenance

    Regular maintenance is key to preventing clogged kitchen sink drains. Making it a habit to clean your drain on a

    blocked drain plumberregular basis can help remove any minor build-up before it becomes a major issue.
    One simple trick is to flush your drain with hot water. adding a squirt of dish washing liquid will also help with any oily residue in the pipes.
    This can help in dissolving grease or food residue that may be clinging to the pipe walls.

    Use of drain strainers

    A drain strainer is an invaluable tool when it comes to preventing clogged kitchen sink drains. By placing a strainer over the plug hole, you can capture any solid food particles or even small utensils , preventing them from entering the drainpipe. This not only helps to maintain the flow of water but also prevents the need for extensive cleaning or repairs. Drain strainers are available in various sizes and materials, making it easy to find one that suits your specific needs.

    Buy Decent Quality Fixtures

    Investing in quality fixtures like showerheads, tapware, and toilets will ensure their longevity – plus, they’ll look great too!
    In Australia you can purchase plumbing fixtures directly at plumbing outlets like Reece or Tradelink. Hardware stores can also carry ranges of tapware. Avoid fixtures that are plastic with a chrome look painted on. They do not last.
    Or you can ask your plumber to order directly from Dorf and Caroma if there is a particular style or model you are after.


    Prevention For Plumbing Problems

    It might also be worth considering some preventive measures, such as installing a water pressure regulator or backflow prevention device to protect against pipe bursts caused by fluctuations. Finally, know what type of tree roots are growing near your house, as these can sometimes grow into underground piping systems causing blockages.

    By doing all these things, hopefully, you won’t have to deal with those pesky plumbing issues anytime soon! 

    Keeping an eye out for potential problems now could save both money and hassle in the long run – not to mention giving yourself peace of mind knowing everything’s running smoothly at home.

    In case of any other queries regarding plumbing, feel free to ask for a quote. We are here for you 24/7!
    Downie Plumbing And Gas


    The Article Frequently Asked Questions For Plumbing Issues First Appeared ON
    : https://ad4sc.com

  • 7 Expert Tips for Unblocking a Badly Blocked Drain In Sydney

    7 Expert Tips for Unblocking a Badly Blocked Drain In Sydney

    Our Expert Tips for Unblocking a Badly Blocked Drain 

    Dealing with a badly blocked drain is an all too familiar scenario for many Australian homeowners. Blocked drains can be a frustrating and unpleasant experience. Whether it’s caused by tree roots infiltrating the pipes, food debris clogging the kitchen sink, or other stubborn blockages in your indoor or outdoor drains, finding a solution becomes a top priority. While some clogs can be easily remedied with natural methods, there are instances where calling in a professional plumber becomes necessary.

    This blog will explore seven effective tips for unblocking a badly blocked drain while highlighting the importance of seeking expert assistance when DIY efforts fall short.


    1. Prevention Is Better Than Cure: Mind Your Drains!

    The first step to avoid the hassle of a badly blocked drain is prevention. Be mindful of what goes down your drains, especially in the kitchen and bathroom.

    Avoid disposing of food scraps, sanitary products, and wet wipes down the sink or toilet, as they can lead to severe blockages over time. Installing drain strainers and regular cleaning can go a long way in preventing potential clogs.

    Educating everyone in your household about proper drain care and maintenance can go a long way in preventing the need for costly and time-consuming repairs. By being proactive and following these prevention tips, you can keep your plumbing system in good working order and avoid the headaches of dealing with a badly blocked drain.

    2. The Power of Natural Methods: Vinegar and Boiling Water

    When faced with a minor blockage, consider turning to natural remedies before reaching for harsh chemical drain cleaners. A cup of vinegar followed by boiling water can be a potent solution to break down grease, soap scum, and minor food debris. The acidity of white vinegar helps dissolve the substances clinging to the pipe walls, and the boiling water flushes them away.

    However, it’s essential to note that natural remedies may not always be effective for severe blockages or when dealing with issues caused by tree roots or solid obstructions.

    If the problem persists, it’s time to seek the expertise of professional plumbers. Professional plumbers have the knowledge and specialised tools to diagnose the root cause of the potential issues and implement appropriate solutions. They can conduct a thorough inspection of your plumbing system and recommend the best course of action to tackle the issue effectively.


    3. Caution with Caustic Cleaners: Understand the Risks

    While caustic drain cleaners may provide a quick fix for blockages, they come with potential risks. The chemicals in these cleaners can be harmful to both your plumbing and the environment.

    Furthermore, their effectiveness is limited when it comes to severe blockages caused by tree roots or solid obstructions. It’s essential to use caustic cleaners sparingly and follow safety guidelines meticulously. Consider calling in the experts who can save you time, effort, and potentially costly repairs in the long run, ensuring that your drains and plumbing system are in optimal condition.

    4. Professional Plumbing Tools To Clear Obstructions

    A drain snake, or a drain auger, is a handy tool that can be used to dislodge stubborn clogs. Insert the flexible cable into the drain and rotate it to catch and break up the blockage.

    Drain snakes are particularly useful for dealing with blockages caused by hair, soap scum, and small objects. However, it’s crucial to exercise caution and avoid using excessive force to prevent damaging the pipes. In case you think you might damage the pipes during the cleaning process, look for “plumbers near me” to get it done safely and soundly.

    Hydro jetting is the other method that plumbers will use to clear a blocked drain and  it is  highly effective and environmentally friendly method, is commonly used to clear stubborn blockages and clogs from drains and sewer lines. This advanced technique employs a powerful stream of high-pressure water to break down and flush away accumulated debris, grease, tree roots, and other obstructions that can impede the flow of wastewater. Hydro jetting has gained widespread recognition for its efficiency in restoring drainage systems to optimal functionality.

    At the heart of hydro jetting lies its ability to exert a forceful stream of water at pressures that can range from 1,500 to 4,000 pounds per square inch (psi) or even higher, depending on the severity of the blockage. The specialized equipment consists of a flexible hose connected to a high-pressure water source and a multifunctional nozzle. As the nozzle is inserted into the drain or sewer line, it propels itself forward while simultaneously emitting pressurized water in multiple directions. This 360-degree coverage ensures that every nook and cranny of the pipe is thoroughly cleaned, dislodging and disintegrating any debris in its path.

    One of the most significant advantages of hydro jetting is its ability to remove even the toughest obstructions without causing damage to the pipes themselves. Unlike mechanical methods like snaking, which can sometimes break or damage pipes, hydro jetting is gentler on the infrastructure while still achieving exceptional results. Additionally, hydro jetting doesn’t rely on harsh chemicals, making it an environmentally friendly choice that eliminates the risk of chemical residue lingering in the pipes.

    Hydro jetting is particularly effective in tackling recurring blockages caused by grease buildup. In commercial settings such as restaurants, where grease can accumulate over time and lead to persistent clogs, hydro jetting can be an invaluable solution to maintaining smooth drainage operations. Furthermore, it can prevent the need for frequent interventions and help extend the lifespan of the drainage system.

    It’s important to note that hydro jetting should be performed by trained professionals who understand the intricacies of the equipment and the dynamics of water pressure. Inappropriately administered hydro jetting can potentially cause damage to older pipes or systems with existing weaknesses. Therefore, a comprehensive assessment of the drainage system’s condition should precede the hydro jetting process to ensure its suitability and effectiveness.

    In conclusion, hydro jetting stands as a cutting-edge solution for addressing blocked drains and sewer lines. With its high-pressure water stream and comprehensive cleaning approach, it swiftly and thoroughly eradicates blockages, leaving the pipes clear and free-flowing. Its minimal environmental impact, ability to prevent future blockages, and preservation of pipe integrity make hydro jetting a preferred method for maintaining efficient drainage systems in various residential, commercial, and industrial settings.


    5. When DIY Isn’t Enough: Call in a Professional Plumber

    If natural methods and DIY tools fail to clear the blockage, it’s time to seek assistance from a professional plumber. Expert plumbers possess the skills, knowledge, and specialised equipment to tackle even the most stubborn blockages. 

    A drain expert can perform a thorough inspection of your plumbing system, identify the root cause of the problem, and offer targeted solutions.

    6. The Perils of Stormwater Drains: Outdoor Drain Maintenance

    Guttering

    Outdoor drains, such as stormwater drains, can get easily blocked by leaves, debris, and roots invading the pipes. Regular maintenance, especially during the rainy season, is essential to ensure smooth water flow and prevent flooding. Professional plumbers can perform routine inspections and perform necessary cleaning and pipe relining to keep your outdoor drains in top condition.

    By relying on licensed plumbers for outdoor drain maintenance, you can ensure that your guttering and stormwater drains function optimally, reducing the risk of flooding and maintaining a safe and dry environment around your property.

    7. Pipe Relining: A Non-Invasive Solution for Persistent Blockages

    In cases where there are severe blockages or damaged pipes, pipe relining can be a game-changer. This non-invasive method involves creating a new pipe within the existing one, effectively sealing cracks and preventing root intrusions. Pipe relining eliminates the need for costly and disruptive excavation, offering a long-lasting solution to persistent plumbing issues.

    Professional plumbers follow a systematic and efficient process to ensure a successful and durable outcome when it comes to pipe relining. Upon completion of the pipe relining process, the plumber will conduct a final CCTV camera inspection to ensure everything is in place and functioning correctly. The relined pipe is now fortified against future blockages and damage, providing you with a long-lasting solution to persistent plumbing issues.

    Experiencing Stubborn Drain Blockages In Sutherland Shire? 

    Don’t let clogged drains ruin your day! Call The Blocked Drain Guys now for expert drain plumbers specialising in clearing kitchen drains, shower drains, sink drains, and more.

    Out tips are always as follows:

    Prevention: The First Line of Defense
    Preventive measures. Regularly clear debris, such as hair and food particles, from sink and shower drains using screens or filters. Avoid the temptation of flushing grease, oil, or foreign objects down toilets and drains.
    Natural Cleaning Remedies
    Using of baking soda and vinegar, followed by hot water, can work wonders in dislodging small obstructions. This eco-friendly approach showcases the symbiotic relationship between man and nature.

    Drain Clearing Tools
    A plunger, drain snake and hydro jetters can can all help in breaking down and extracting stubborn clogs. Approach these tools with a measured hand and follow tutorials to maximize their efficacy.

    Vigilance in Detecting Early Signs
    Proactivity land watching for the subtle hints of a looming blockage. Slow drainage, gurgling sounds, or unpleasant odors are early harbingers of potential trouble. Swiftly addressing these signs can avert major disruptions down the line.

    Expertise of Professional Plumbers
    Say goodbye to plumbing woes and hello to hassle-free flowing drains! Contact us today for quick and reliable solutions.
    https://theblockeddrainguys.com.au/


    The Article 7 Expert Tips for Unblocking a Badly Blocked Drain In Sydney First Appeared ON
    : https://ad4sc.com

  • Plumbing Help And Tips That Anyone Can Use

    Plumbing Help And Tips That Anyone Can Use

    Are you in need of some plumping help and tips? Look no further! In this article, we will provide you with practical advice that anyone can use. Whether you’re a seasoned DIY enthusiast or just starting out, these tips will empower you to tackle common plumbing issues with confidence. From fixing leaky faucets to unclogging drains, we’ve got you covered. Get ready to become your own plumber and save money on costly repairs by following our expert advice. So let’s dive right in and discover the world of plumbing hacks together!

    Common Plumbing Problems and How to Fix Them

    Plumbing problems can be frustrating, but with a little know-how, you can tackle many of them on your own. Here are some common plumbing issues and step-by-step solutions to help you fix them:

    1. Leaky Faucets
      • Turn off the water supply to the faucet.
      • Remove the handle by unscrewing it.
      • Use an adjustable wrench or pliers to loosen the packing nut.
      • Replace the old washer with a new one of the same size.
      • Reassemble all parts and check for leaks.
    2. Clogged Drains
      • Try using a plunger to remove any debris or blockage in sinks or toilets.
      • If plunging doesn’t work, use a drain snake or auger to dislodge the clog.
      • For stubborn clogs, mix equal parts baking soda and vinegar, pour it down the drain, and let it sit for about 30 minutes before flushing with hot water.
    3. Running Toilets
      1. Check if the flapper valve is sealing properly:
        • Open up your toilet tank and inspect if there’s any damage or misalignment of the flapper valve.
        • If necessary, replace it with a new one that fits properly.
      2. Adjusting float height:
        • Ensure that water level in tank is not overflowing by adjusting float height accordingly (lowering will reduce water flow).
    4. Low Water Pressure
      • Clean mineral deposits from faucet aerators by soaking them in vinegar overnight then scrubbing gently with an old toothbrush before rinsing thoroughly.
    5. Water Heater Issues
      1. No hot water:
        • Check if pilot light is on; relight if necessary according to manufacturer instructions.
        • Inspect thermostat settings; increase temperature as needed.
      2. Leaking water heater:
        • Turn off power supply and water source.
        • Drain the tank by attaching a hose to the drain valve, then replace any faulty valves or connections.

    Remember, if you are unsure about tackling a plumbing problem yourself, it’s always best to call a professional plumber.


    Top Plumbers in Apache Junction AZ

    Essential Tools for DIY Plumbing Projects

    When it comes to tackling your own plumbing projects, having the right tools is crucial. Here are some essential tools that anyone can use for their DIY plumbing needs:

    1. Adjustable Wrench: This versatile tool will help you tighten or loosen nuts and bolts of various sizes.
    2. Pipe Wrench: Designed specifically for working with pipes, a pipe wrench provides a strong grip and leverage to handle tough jobs.
    3. Plunger: A must-have tool for any homeowner, a plunger helps clear clogs in sinks, toilets, and drains.
    4. Teflon Tape: Also known as plumber’s tape, this thin tape creates a watertight seal when wrapped around threaded connections.
    5. Pipe Cutter: When you need to cut through pipes cleanly and accurately, a pipe cutter is the tool for the job.
    6. Hacksaw: Useful for cutting through metal pipes or removing stubborn fittings when necessary.
    7. Auger/Snake: An auger or snake is used to unclog stubborn blockages deep within pipes by breaking them apart or pulling them out.
    8. Pliers: Different types of pliers such as slip-joint pliers and needle-nose pliers can be handy in gripping small objects or adjusting components during repairs.
    9. Tongue-and-Groove Pliers: These adjustable pliers are great for gripping large objects like faucets or tightening supply lines securely.
    10. Propane Torch Kit (for soldering): If you plan on doing any soldering work involving copper pipes, a propane torch kit will be necessary to create strong connections.

    Remember that safety should always come first when handling plumbing tasks yourself! Before starting any project, make sure you have familiarized yourself with proper techniques and precautions associated with each tool’s usage.

    Understanding the Basics of Plumbing Systems

    To ensure smooth functioning and prevent costly repairs, it’s essential to have a basic understanding of plumbing systems. Here are some key points to help you grasp the basics:

    1. Water Supply: The water supply system brings fresh water into your home while removing wastewater. It consists of two parts:
      • Supply Lines: These pipes transport clean water from the main water source (like a well or municipal supply) to your fixtures.
      • Drainage System: This network of pipes carries used water away from sinks, toilets, showers, and appliances.
    2. Pipe Materials: Various materials are used for plumbing pipes, such as:
      • Copper: Durable and resistant to corrosion.
      • PEX (Cross-linked Polyethylene): Flexible and less expensive than copper.
      • PVC (Polyvinyl Chloride): Commonly used for drain lines and vent stacks.
    3. Fixture Components: Understanding basic fixture components helps in troubleshooting common issues:
      • Faucets: Composed of handles, spouts, cartridges/valves that control flow.
      • Toilets: Consist of tanks with fill valves, flush mechanisms like flappers or flush valves.
    4. Common Plumbing Problems:
      1. Leaks: Inspect regularly for signs like dampness or mold growth on walls/floors.
      2. Clogs: Avoid flushing non-flushable items down toilets or pouring grease down drains.
    5. Tools Every Homeowner Should Have:
      Tool Purpose
      Plunger Clears minor clogs in sinks/toilets
      Pipe Wrench Tightens/loosens pipe fittings
      Adjustable Pliers Useful for various tasks like gripping, twisting, and cutting pipes
      Teflon Tape Seals pipe threads to prevent leaks
    6. Safety Tips:
      • Always shut off water supply before making repairs or installations.
      • Use caution when working with tools or around hot water systems.

    By understanding these basics of plumbing systems, you’ll be better equipped to handle minor issues and make informed decisions about professional assistance when needed. Remember, regular maintenance and addressing problems promptly can save you time, money, and headaches in the long run.

    Preventing Clogs: Tips for Maintaining Free-Flowing Drains

    To ensure your drains remain free-flowing and avoid the hassle of clogs, follow these simple tips:

    1. Use a drain strainer: Install a drain strainer in all sinks and showers to catch hair, food particles, and other debris before they can enter the pipes.
    2. Dispose of waste properly: Avoid pouring grease, oil, or coffee grounds down the sink as they can solidify inside the pipes and cause blockages. Instead, dispose of them in a designated container or compost bin.
    3. Flush with hot water: Regularly flush your drains with hot water to help eliminate any buildup that may be accumulating over time.
    4. Clean regularly: Clean your bathroom and kitchen drains periodically using natural cleaners such as baking soda mixed with vinegar or lemon juice. These solutions can effectively remove residue without harsh chemicals.
    5. Avoid chemical drain cleaners: While tempting for their quick fixes, chemical drain cleaners can actually corrode your pipes over time due to their harsh ingredients. Opt for natural cleaning methods instead.
    6. Be mindful when using toilets: Only flush toilet paper down the toilet; avoid flushing wet wipes, feminine hygiene products, cotton balls/swabs, or any other non-biodegradable items that could result in clogs.
    7. Regular maintenance checks: Schedule regular inspections by a professional plumber to identify potential issues before they become major problems.

    By following these preventive measures consistently, you’ll significantly reduce the chances of encountering stubborn clogs in your plumbing system while keeping it running smoothly for years to come.

    Tips for Choosing the Right Plunger for Different Types of Clogs

    When it comes to dealing with clogged drains, having the right plunger can make all the difference. Here are some tips to help you choose the right plunger for different types of clogs:

    1. Cup Plungers: Cup plungers are the most common type and work best on flat surfaces such as sinks and bathtubs. They have a rubber cup that creates suction when pressed against the drain opening.
    2. Flange Plungers: Flange plungers, also known as toilet plungers, are designed specifically for unclogging toilets. They feature an extra piece of rubber called a flange that helps create a better seal around curved surfaces like toilet bowls.
    3. Accordion Plungers: Accordion plungers, also referred to as bellows plungers, have a accordion-like design that allows them to generate more force compared to other types of plungers. They are particularly effective at clearing stubborn clogs in toilets and tubs.
    4. Taze-It Drain Cleaner Tool: The Taze-It drain cleaner tool is ideal for removing hair clogs from bathroom drains or shower traps without using chemicals or damaging pipes. It features tiny hooks that grab onto hair and pull it out when inserted into the drain.
    5. Plumber’s Snake: For more serious blockages deep within your plumbing system, consider using a plumber’s snake (also known as an auger). This long flexible cable can be manually fed into pipes to break up or retrieve obstructions.

    Remember these additional tips when choosing a plunger:

    • Look for sturdy construction: A durable plunger will last longer and provide better results.
    • Opt for non-marking rubber: Choose a plunger made from non-marking rubber material to avoid leaving unsightly marks on your fixtures.
    • Consider handle length: Ensure that the plunger’s handle is long enough to provide sufficient leverage when applying force.

    By selecting the right type of plunger for each specific clog, you can increase your chances of successfully unclogging drains and avoiding costly plumbing repairs.

    How to Replace a Leaky Faucet in Simple Steps

    Replacing a leaky faucet doesn’t have to be a daunting task. With the right tools and some basic knowledge, you can fix that annoying drip in no time. Follow these simple steps to replace your leaky faucet:

    1. Gather the necessary tools: Before starting, make sure you have all the tools you’ll need:
      • Adjustable wrench
      • Screwdriver
      • Plumber’s tape
      • Replacement parts (such as washers or cartridges)
    2. Turn off the water supply: Locate the shut-off valves under your sink and turn them clockwise until they are fully closed. This will prevent any water from flowing while you work.
    3. Remove the old faucet: Use an adjustable wrench to loosen and remove the nuts holding the old faucet in place. Once loose, lift it out of its position.
    4. Inspect and clean: Take this opportunity to inspect the area around where the old faucet was installed for any debris or mineral buildup. Clean it thoroughly before proceeding with installation.
    5. Install new components: If your replacement kit includes new washers or cartridges, follow the manufacturer’s instructions to install them correctly.
    6. Apply plumber’s tape: Wrap plumber’s tape around threaded areas of pipes before connecting them together again; this will help create a tight seal and prevent leaks.
    7. Secure everything back into place: Carefully align and tighten all nuts using an adjustable wrench until everything is securely fastened.
    8. Turn on water supply: Open both shut-off valves by turning them counterclockwise until they are fully open, allowing water to flow back into your newly replaced faucet.

    9 .Check for leaks: Turn on your new faucet and check for any signs of leakage around connections or handles.

    10 .Enjoy your leak-free faucet!

    By following these simple steps, you can replace a leaky faucet on your own without the need for professional help. Not only will this save you money, but it will also give you a sense of accomplishment knowing that you can tackle basic plumbing tasks yourself. So don’t let a dripping faucet annoy you any longer – grab your tools and get to work!

    Maintaining and Extending the Lifespan of Your Water Heater

    To ensure your water heater continues to function efficiently and lasts for years to come, it’s essential to implement proper maintenance practices. Here are some tips that will help you maintain and extend the lifespan of your water heater:

    1. Flush the tank annually: Sediments like sand, dirt, or minerals can accumulate at the bottom of your water heater tank over time. This buildup can reduce its efficiency and lead to corrosion. To prevent this, flush the tank annually by following these steps:
      • Turn off power supply (electricity or gas) to the water heater.
      • Connect a hose to the drain valve located near the bottom of the tank.
      • Place the other end in a suitable draining area (e.g., floor drain).
      • Open both hot water taps in your home.
      • Open the drain valve on your water heater, allowing it to empty completely.
      • Close all valves once drained and remove any accumulated sediments.
    2. Check pressure relief valve: The pressure relief valve is an important safety feature that prevents excessive pressure from building up inside your water heater. Regularly check if it’s functioning correctly by performing these simple steps:
      1. Position a bucket beneath the discharge pipe connected to the relief valve.
      2. Lift or lower its lever slightly so that some water trickles out.
      3. If no water flows out or there are signs of leakage after releasing it back into place, consider replacing the valve.
    3. Insulate exposed pipes: Insulating exposed hot-water pipes helps minimize heat loss during transit from your heater to faucets, reducing energy consumption while maintaining consistent temperature levels.
    4. Test temperature & pressure (T&P) relief valve: Ensure optimal performance by testing this crucial component every six months:
      • Position a bucket beneath its discharge pipe (usually located on the side or top of the water heater).
      • Lift its lever for a few seconds to allow some water to flow out.
      • If there’s no discharge or signs of leakage, contact a professional plumber to inspect and repair it.
    5. Schedule professional maintenance: Regularly hire a licensed plumber to perform annual maintenance checks on your water heater. They can identify potential issues early and provide necessary repairs or replacements, ensuring optimal performance and longevity.

    By following these simple tips, you can maintain your water heater effectively, extend its lifespan, and enjoy reliable hot water throughout your home for years to come.

    Conclusion

    house soft washIn conclusion, these helpful tips and tricks for plumbing can be used by anyone to tackle common issues around the house. Remember to always prioritize safety and take necessary precautions when working with plumbing systems.

    By following these simple steps, you can save yourself time, money, and frustration. Regular maintenance and proactive measures are key to preventing major plumbing problems in the future.

    Keep in mind that while some tasks may seem daunting at first, with a little practice and patience, you can become more confident in handling minor plumbing repairs on your own. However, it’s important to know your limits and seek professional help for complex or dangerous situations.

    So go ahead and put these plumping tips into action! With a bit of knowledge and the right tools, you’ll be able to handle most common plumbing issues that arise in your home.

    The Article Plumbing Help And Tips That Anyone Can Use First Appeared ON
    : https://ad4sc.com

  • 5 Easy DIY Plumbing Tips to Keep Your Home Running Smoothly

    5 Easy DIY Plumbing Tips to Keep Your Home Running Smoothly

    Homeownership is a rewarding experience but comes with many new responsibilities. One of the most important of these is maintaining your plumbing system in a good working condition.

    While calling a plumber for any major issues is always recommended, homeowners can use several DIY plumbing tips to tackle small repairs or prevent problems altogether. These easy plumbing tips include knowing where the main water valve is and how to remove clogs. Check out the following list of key items.

    1. Turn off the Water

    A plumbing emergency can happen anytime, so knowing how to shut off the water is important. Whether you’re making a home improvement project that requires the water to be shut off, or going on vacation, it’s important to know how to do this quickly in an emergency.

    One of the first things a new homeowner should do is find out where the main water valve is for the house. The valve usually has a round handle that controls a gate that moves up and down inside the pipe to allow or block water. A new homeowner should also familiarize themselves with the layout of their pipes and how to shut off the water for each fixture in the home. This will help them avoid flooding their house if there’s ever an emergency situation.

    Quality Plumbers in Aurora IL

    For example, if the washing machine or dishwasher experiences an issue that could flood the room, shutting off the water supply to this fixture will prevent the problem from spreading and save the entire house from a costly repair bill. Another reason to shut off the water is to reduce the risk of a “water hammer” from occurring, which can cause damage to pipes and fixtures. This problem can happen when a sudden increase in pressure occurs in a short period of time. Typically, the source of the pressure is a leak in a valve or a fitting.

    Finally, homeowners should turn off the water before leaving for a vacation to prevent a small leak from becoming a huge problem while away. This is especially important for winter trips, as freezing temperatures can make pipes burst and cause expensive water damage.

    2. Turn off the Drains

    The plumbing system in our homes is a complex, intricate network that brings in water, heats it for washing and distributes it throughout the house. It’s easy to take this essential service for granted, until something goes wrong with it — like a leak or clog. But with a few DIY plumbing tips, you can tackle many problems quickly and easily.

    Rather than using chemical drain cleaners, it is recommended to check the p-trap and turn off the water supply valve underneath each sink (it usually looks like circular knob valves or levers). Then you can easily remove and clean out the trap to prevent future clogs. To keep your sinks smelling fresh, try pouring baking soda and vinegar down each drain once a week. This non-toxic solution is more effective than chemical cleaners, and won’t leave behind the noxious chemicals that can irritate your lungs.

    If you’re planning a major plumbing project, consider installing separate shut off valves so that you can turn off only the water to the area you need to work on. This eliminates the “all or nothing” problem that can occur when a single fixture stops working, and makes it much easier to fix problems with your kitchen or bathroom.

    If you’re getting ready to winterize your home, you can prevent damage to pipes by draining the entire house before putting it away for the season. Start by opening the faucets on the top floor to let the water flow out, then open a faucet on the lowest level to drain any remaining water. Make sure to open the laundry tub and sinks, as well as toilets, and flush each one before storing them. You can also add plumbing anti-freeze, available at most hardware stores, to all your sinks, bathtubs and toilets.

    3. Turn off the Water Heater

    One of the most important things you can do for your home plumbing system is to turn off your water heater. This will help prevent leaks, water damage, and even fires. It is simple to do and can save you a lot of time, money, and headaches in the long run. It is also a good idea to do this before leaving on vacation, as it will help prevent costly damages in the event that something goes wrong while you’re away.

    You can turn off the water heater easily enough by turning a valve. This is usually located in the garage or in a room where the water heater is stored. If you are unfamiliar with where the valve is or how to turn it off, you should consult a plumber before you try it on your own. There are different ways to shut off gas or electric water heaters depending on the type you have, so be sure you know how to do this before trying it yourself.

    If you do have a water leak, it is a good idea to shut off the main water supply to your house before leaving on vacation. This will stop any further damage if the leak is bad enough to burst a pipe while you’re gone. Having someone check in on your house during your vacation is also a good idea to ensure no water leaks are occurring.

    Most homeowners have heard that it is a good idea to turn off the water when they go on vacation. This can prevent expensive water damage that might occur in the event of a broken water heater or leaking pipe. It is also a good idea to shut off the water when you are also making repairs to your plumbing system.

    4. Check for Leaks

    Some leaks are obvious – they’re gushing from a pipe, or perhaps you notice puddles around the house. But other leaks are harder to detect and can cause a lot of damage over time. These include hidden leaks in hot water tanks or boilers, leaking taps or showers and blocked drains. They can also rack up your water bills, leading to mildew and mould.

    It’s worth doing a little investigation before you call in your plumber to find these hidden leaks. Start by turning off all the water-use appliances in your home (dishwasher, washing machine and even the outdoor faucet). Then read your meter and note the numbers. Wait 1 or 2 hours and check again – if the dials have moved, you probably have a leak.

    You can try some simple DIY fixes like tightening a compression nut or coating the fitting with Teflon joint compound (available at most home centres and hardware stores). But for hard-to-reach leaks, it’s often best to call in a plumber who can pinpoint and repair the problem more easily.

    Having good plumbing is about more than just being comfortable in your home or reducing the cost of your water bill – it’s also about preserving our precious resources. According to the EPA, a typical household wastes up to 10,000 gallons of water a year due to leaks and inefficient toilets and faucets. If you catch and fix these leaks before they become a big problem, it can save you thousands in repairs and reduce your environmental impact. So make checking for leaks a regular part of your home maintenance routine. And be sure to watch what you put down your drains, too – pouring fats and cooking oil down the drain will harden and block your pipes in no time.

    5. Remove Clogs

    Everyone knows how important a home’s plumbing system is. It brings in freshwater, heats it for washing and other uses, and removes waste. It’s easy to take this system for granted until something goes wrong with it. The good news is that most problems are preventable with simple steps.

    marble tile polish

    Clogs are a common problem for homeowners, especially in the kitchen drain. Using a catcher in your sink can help to keep solid materials from going down the drain. This can be as simple as a wire coat hanger bent into a hook to reach the clog. It’s also helpful to regularly clean your drains with a mixture of baking soda and vinegar. This can remove soap scum and break down food particles. It’s much safer and more environmentally friendly than chemical drain cleaners, which can also be harmful to your pipes.

    If you can’t remove a clog with hot water and dish soap, it may be time to use a plunger or a snake. Investing in these tools can be cheaper than calling in a professional plumber and could save you from a costly emergency.

    Only three things should be flushed down the toilet: #1, #2 and toilet paper. Anything else will likely clog the toilet or cause a backup in your home’s plumbing system. Be sure to keep a trash can in your bathroom and only flush items that go down the drain or into a toilet. If you still find yourself dealing with clogged drains or toilets, it might be worth investing in a wet-dry vacuum to suck up any small objects that have fallen down the pipes and avoid expensive repairs.

    The Article 5 Easy DIY Plumbing Tips to Keep Your Home Running Smoothly First Appeared ON
    : https://ad4sc.com