Safeguard Your Property with Professional Interior Drainage Services
Why Interior Drainage Services are Critical for Ensuring Home Safety

In South Vancouver, interior drainage services serve as a vital component in maintaining a safe and healthy living space within any property. These systems create a robust barrier against the detrimental effects of water intrusion, which can lead to severe complications for both residential and commercial structures. By committing to effective drainage solutions, homeowners can significantly reduce the likelihood of various water-related challenges, ensuring their properties remain durable and structurally sound. The key advantages of engaging professional drainage services include:
- Minimizing Water Damage Risks: Properly installed drainage systems dramatically lower the chances of water damage, thus preserving the overall integrity of the building.
- Controlling Mould and Mildew Growth: Effective moisture management through interior drainage solutions curtails the proliferation of mould and mildew, fostering healthier indoor air quality.
- Preserving Structural Integrity: Well-designed drainage systems shield the foundation and structural elements of a building from deterioration caused by moisture exposure.
- Enhancing Indoor Air Quality: A dry indoor atmosphere reduces allergens and pollutants, boosting the comfort of living spaces.
- Providing Peace of Mind: Homeowners gain confidence knowing their property is protected against water infiltration and its associated hazards.
What Common Water-Related Issues Can Drainage Services Address?
Interior drainage services effectively tackle a variety of prevalent issues that can adversely affect a property. Many of these dilemmas arise from inadequate drainage practices and can lead to both visible damage and functional complications. Some common concerns include:
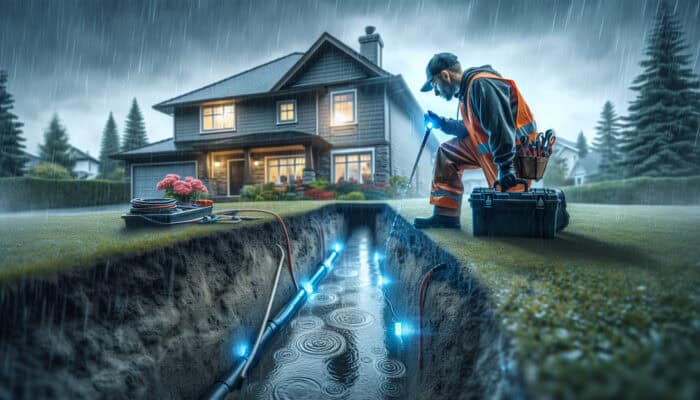
- Basement Flooding: Intense rainfall or rising groundwater levels can overwhelm insufficient drainage systems, leading to basement flooding. The installation of sump pumps and French drains effectively channels water away from vulnerable areas.
- Water Seepage: Water infiltrating through walls and flooring can undermine the structural integrity of the building. Interior drainage systems can redirect this intruding water before it inflicts damage.
- Poor Water Flow: Clogged or improperly installed drainage systems can result in stagnant water accumulation. Regular maintenance and correct installations ensure effective water movement.
- Soil Erosion: Uncontrolled runoff can lead to the erosion of soil surrounding foundations. Surface drains and proper grading can mitigate this issue.
How Do Effective Drainage Solutions Impact Property Value?
Investing in comprehensive interior drainage solutions can significantly enhance a property’s market value. Homes equipped with reliable drainage systems tend to attract more prospective buyers, as they indicate a well-maintained living environment. The ways in which drainage systems influence property value encompass:
- Appeal to Prospective Buyers: Properties featuring effective drainage systems are less likely to encounter water-related problems, making them more attractive to potential buyers.
- Reduced Repair Expenses: Homes with well-maintained drainage solutions typically incur lower repair costs associated with water damage, serving as a key selling point.
- Enhanced Marketability: Real estate listings that highlight efficient drainage solutions can stand out in the competitive South Vancouver market.
- Long-Term Investment Value: Properties with well-maintained drainage systems tend to retain their value over time, making them a wise long-term investment for homeowners.
Professional Insights on Interior Drainage Solutions in South Vancouver
What Unique Drainage Challenges Does South Vancouver Encounter?
The distinct geological and climatic characteristics of South Vancouver necessitate tailored drainage solutions. The region is known for clay soils that retain moisture poorly, compounded by significant rainfall throughout the year. These conditions create a heightened demand for effective drainage systems. Experts indicate that:
The local soil types often hold moisture, which makes it essential for homeowners to implement drainage solutions that adequately address this challenge. Furthermore, South Vancouver experiences varied rainfall patterns, with sudden heavy downpours increasing the risk of basement flooding. Therefore, drainage systems must be robust enough to handle excessive water flow during peak rainfall while also functioning effectively during drier periods.
How Do Professionals Determine Drainage Needs?
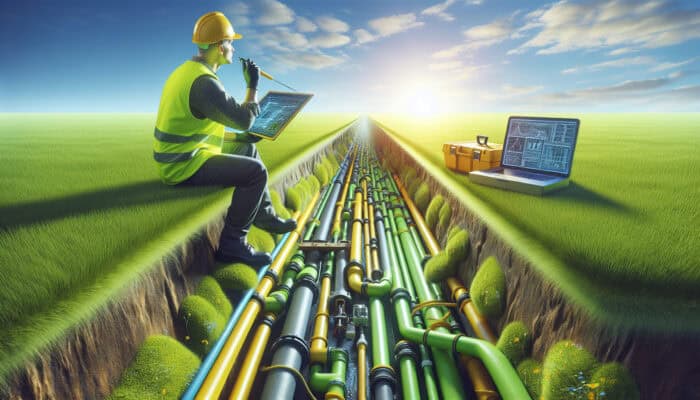
Professionals assess drainage needs through a comprehensive evaluation of the property, employing various techniques to identify the most effective solutions. Common methods include:
- Conducting Site Inspections: Experts carry out thorough on-site evaluations to pinpoint existing drainage issues and vulnerabilities.
- Performing Soil Testing: Analyzing soil composition allows experts to gauge the ground’s water absorption capabilities and devise the best strategies for managing runoff.
- Water Flow Analysis: Assessing the natural water flow across the property helps identify areas needing attention and effective methods for water redirection.
- Mapping Existing Drainage Systems: Professionals create detailed maps of current drainage systems to plan necessary improvements and enhancements.
This multifaceted approach enables drainage specialists to devise customized solutions that address the unique challenges faced by properties in South Vancouver, ensuring their long-term effectiveness.
Best Practices for Successful Drainage Installation

Adhering to best practices during the installation of drainage systems is essential for their long-lasting performance and reliability. Key practices include:
- Ensuring Proper Grading: Adequate grading away from the foundation prevents water from pooling near structures.
- Utilizing High-Quality Materials: Using durable, high-quality materials during installation enhances the longevity of drainage systems.
- Establishing Regular Maintenance Plans: Creating scheduled maintenance ensures drainage systems remain unobstructed and functional over time.
- Professional Installation: Engaging experienced professionals guarantees that installations are performed correctly and in accordance with industry standards.
Real-world examples underscore the effectiveness of these best practices. For instance, a property in South Vancouver that implemented proper grading and utilized premium materials reported a significant reduction in water intrusion during heavy rainfall, highlighting the importance of meticulous planning and execution in drainage installation.
Exploring Different Types of Interior Drainage Systems
French Drains: Design, Functionality, and Effectiveness
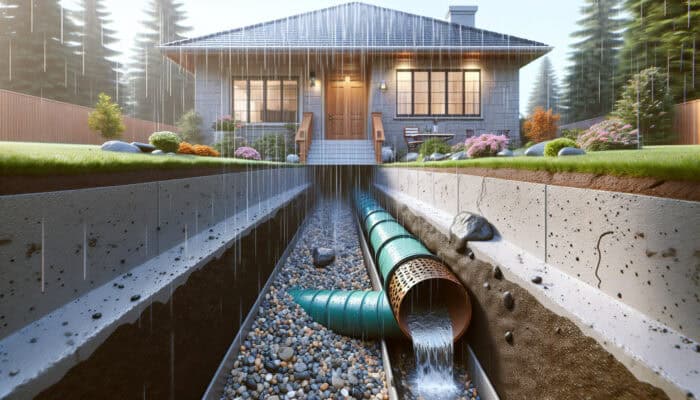
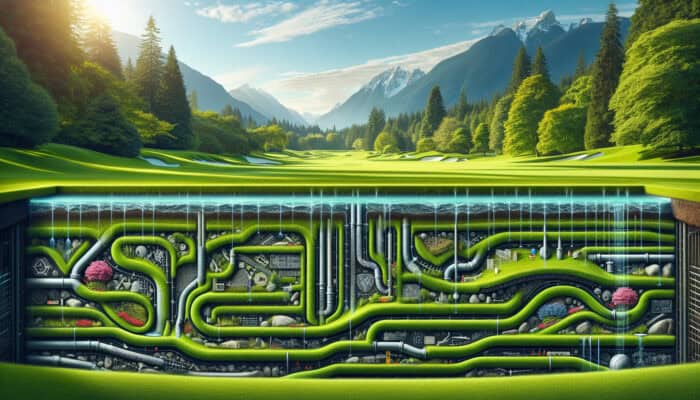
French drains have become a favored solution for managing water in residential properties, particularly in the challenging soil conditions of South Vancouver. These systems consist of a trench filled with gravel and a perforated pipe that redirects water away from the building. Their design is especially effective across various soil types, facilitating efficient drainage even in clay-heavy areas.
When installed correctly, French drains can effectively manage both groundwater and surface water. They operate by collecting water in the trench, which then travels through the perforated pipe away from the foundation. For properties facing chronic water pooling or seepage, French drains provide a dependable and efficient solution. However, their effectiveness may vary based on soil saturation levels and the drain’s proximity to the building’s foundation.
Understanding Sump Pumps: Key Installation Considerations and Advantages
Sump pumps serve a critical role in preventing basement flooding by collecting water in a basin and pumping it away from the home. For residents of South Vancouver, it is essential to consider several key factors when installing a sump pump to ensure optimal performance. Homeowners should focus on selecting a pump capable of handling expected water volumes during heavy rains and ensuring the installation area is adequately sized.
The installation process typically involves excavating a pit at the lowest point of the basement, where the sump pump will be placed. Proper drainage away from the house is crucial to prevent water from pooling near the foundation. The benefits of sump pumps include:
- Flood Mitigation: Sump pumps significantly lower the risk of basement flooding, ensuring that living spaces stay dry.
- Energy Efficiency: Many modern sump pumps are designed for efficient operation, which can help reduce energy costs.
- Automatic Functionality: Most sump pumps are equipped with automatic triggers that activate when water levels rise, providing homeowners with peace of mind.
- Longevity: With appropriate maintenance, sump pumps can last for many years, making them a valuable investment.
Surface Drains: Strategic Placement for Optimal Performance
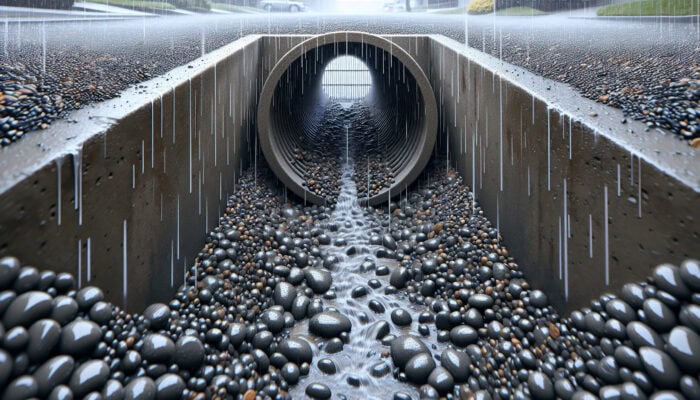
Surface drains are essential for managing water on flat surfaces, effectively preventing pooling and erosion. They prove particularly beneficial in areas like driveways, patios, and yards, where water accumulation can cause structural damage or landscape erosion. Integrating surface drains with other drainage systems is key for comprehensive water management.
For successful installation, surface drains should be strategically placed in low-lying areas to capture and redirect water flow efficiently. They collect surface water and channel it into underground drainage systems or away from the property. Combining surface drains, French drains, and sump pumps establishes a holistic drainage strategy. This integration not only enhances water management but also extends the life of the property’s foundation and landscaping.
Understanding the Comprehensive Process of Interior Drainage Services
Beginning with a Detailed Consultation and Assessment
The journey to effective interior drainage begins with an initial consultation, during which drainage professionals gather information regarding the client’s concerns and specific requirements. During this phase, homeowners can expect a thorough evaluation of their property’s existing drainage conditions. Professionals typically inspect both the interior and exterior of the building, identifying potential water entry points and assessing the performance of current drainage systems.
Clients should be prepared to discuss any previous flooding incidents or moisture-related issues they have encountered. This information is crucial for professionals to develop a tailored drainage plan. Following the assessment, clients will receive personalized recommendations based on their property’s unique challenges, ensuring a customized approach to drainage solutions.
Crafting a Strategic and Effective Drainage Plan
After completing the assessment, the design and planning phase commences. Professionals will develop a customized drainage plan that addresses the specific needs of the property while adhering to local regulations and best practices. This phase typically involves determining the type and placement of drainage systems, such as French drains or sump pumps, and how they will integrate with existing infrastructure.
Clients can expect this phase to take from a few days to several weeks, depending on the project’s complexity. Detailed plans will be provided, outlining the proposed solutions, associated costs, and installation timelines. This thorough planning process ensures that all potential drainage issues are addressed before construction begins, optimizing the effectiveness of the final solution.
Installation and Follow-Up Procedures for Drainage Systems
The installation phase brings the planning to fruition. Professionals will begin by excavating areas designated for drainage systems, such as trenches for French drains and sump pump pits. It is essential that installations adhere to design specifications to guarantee proper water flow and functionality.
After installation, the systems will undergo a comprehensive inspection to ensure they operate as intended. Indicators of a successful drainage installation include:
- Effective Water Diversion: Water should be redirected away from the property to eliminate pooling in lower areas.
- Clear Drainage Lines: No blockages should exist within the drainage systems, ensuring smooth water flow.
- Proper Functionality: All pumps and drainage systems should operate as expected, without any unusual noises or leaks.
- Client Satisfaction: Homeowners should feel confident in the durability and efficiency of the installed systems.
Maintaining and Caring for Your Drainage Systems
Regular maintenance is essential for ensuring the longevity and effectiveness of interior drainage systems. Homeowners should establish a routine maintenance schedule to keep the systems functioning optimally. Basic maintenance tasks include:
- Conduct Regular Inspections: Evaluate drainage systems at least once a year to identify potential issues early.
- Cleaning Drains: Remove debris and sediment from drainage systems to prevent clogs and ensure efficient operation.
- Testing Sump Pumps: Regularly check sump pump functionality to ensure activation when needed, especially before heavy rain seasons.
- Monitoring for Signs of Failure: Remain vigilant for warning signs such as slow drainage or unusual odours, which may indicate underlying issues.
By committing to these maintenance practices, homeowners can extend the lifespan of their drainage systems and reduce the likelihood of costly repairs.
Troubleshooting Common Drainage Problems Effectively
Even well-installed drainage systems may encounter challenges over time. Awareness of common issues and their solutions is essential for homeowners in South Vancouver. Frequent challenges include:
- Standing Water: This may indicate blockages in the drainage system. Homeowners should inspect the drains and remove any debris.
- Slow Drainage: Slow drainage can signal clogs or improperly graded surfaces. Professional assistance may be necessary to resolve grading issues or clear clogs.
- Unusual Noises: If sump pumps or drains emit strange sounds, this may indicate mechanical failure or blockages. Regular checks can help prevent system failure.
- Moisture Odours: Persistent odours suggest moisture issues that require immediate attention to prevent mould growth.
By proactively troubleshooting and addressing these common concerns, homeowners can maintain the integrity and effectiveness of their interior drainage systems.
Key Benefits of Interior Drainage Services
Preventing Water Damage and Controlling Mould Growth
One of the most significant advantages of interior drainage services is their capacity to prevent water damage and control mould growth. Water intrusion can inflict extensive damage that is costly to repair and poses health risks related to mould exposure. Effective drainage systems minimize the risk of water intrusion, keeping basements and walls dry. Proper drainage can save homeowners substantial repair costs by mitigating potential damage before it escalates.
Moreover, drainage systems help maintain the integrity of structural components, such as foundations and walls. By keeping these areas dry, homeowners can avoid costly repairs stemming from compromised structures. The initial investment in interior drainage services pays off long-term through reduced repair costs and a healthier living environment.
Enhancing Indoor Air Quality for Healthier Living Spaces
Interior drainage services are crucial in improving indoor air quality by preventing conditions that foster mould and mildew growth. Controlling moisture levels in the home is essential for creating a comfortable and healthy living space. Properties facing chronic dampness and mould issues often suffer from poor air quality, leading to respiratory problems and allergic reactions.
By effectively managing water intrusion and moisture levels, interior drainage services contribute to a cleaner, healthier indoor environment. Homeowners enjoy improved air quality, which can lead to long-term health benefits for their families. This underscores the importance of investing in adequate drainage solutions that prioritize both structural integrity and occupant well-being.
Increasing Property Resale Value with Effective Drainage Solutions
Effective drainage systems can significantly elevate a property’s resale value. Buyers are becoming increasingly aware of the significance of proper drainage in preventing health-related issues. Homes equipped with well-designed drainage systems are more appealing to potential buyers, as they indicate lower risks of flooding and water damage.
Research indicates that properties with effective drainage solutions can command higher prices in the real estate market, particularly in flood-prone areas like South Vancouver. Homeowners can anticipate that an investment in quality drainage solutions may yield substantial returns when it comes time to sell. This proactive approach enhances both current living conditions and future property value.
Reducing Flood Risk and Lowering Insurance Costs
Interior drainage services effectively mitigate flood risks, which is a critical consideration for homeowners in South Vancouver, where heavy rainfall is frequent. By implementing robust drainage solutions, homeowners can significantly lower the chances of flooding and related damages. This proactive approach not only protects the home but also has financial ramifications.
Many insurance companies offer reduced premiums for homes equipped with effective drainage systems. By demonstrating a commitment to flood prevention through proper drainage, homeowners can enjoy peace of mind and potentially lower insurance expenses. This financial incentive further underscores the importance of investing in professional interior drainage services.
Evidence-Based Advantages of Interior Drainage Services in South Vancouver
Research Highlighting Water Damage Prevention Effectiveness
Research consistently demonstrates that appropriate interior drainage significantly reduces the risk of water damage, especially in areas like South Vancouver that experience heavy rainfall. For example, homes fitted with installed drainage systems reported fewer instances of flooding and associated damages. The effectiveness of these systems is highlighted by positive outcomes reported by homeowners who have invested in professional drainage solutions.
Numerous real-world examples illustrate significant reductions in water intrusion following the installation of effective drainage systems. Homeowners who proactively addressed their drainage needs have not only preserved their properties but also protected their investments from the high costs of water damage.
Data Indicating Increases in Property Value
Data suggests that homes with effective drainage systems experience notable increases in property value, particularly in flood-prone areas. Homeowners in South Vancouver have reported property value increases of up to 15% after implementing comprehensive drainage solutions. This finding is particularly relevant in regions facing frequent rainfall, where buyers are willing to pay a premium for properties demonstrating effective flood mitigation measures.
For homeowners aiming to maximize their property value, investing in quality drainage solutions is a strategic move. Actions such as conducting a drainage assessment and implementing appropriate systems can significantly enhance market appeal and resale potential.
Health Benefits Associated with Improved Drainage Solutions
Enhanced drainage reduces mould and mildew levels, directly contributing to better health outcomes for residents. Research indicates that homes with effective moisture control experience fewer respiratory issues and allergic reactions among occupants. Proper drainage systems help maintain a dry environment, which is crucial for preventing mould growth that can negatively affect health.
Expert analysis shows that families living in homes with effective drainage systems report improved overall health and well-being. By investing in interior drainage services, homeowners protect their properties while promoting a healthier living environment for their families.
How to Choose the Right Drainage Service Provider
What Essential Factors Should You Consider When Selecting a Drainage Company?
Choosing the right drainage service provider is crucial for ensuring effective drainage solutions. Homeowners should evaluate several factors when assessing potential companies. Experience is vital; companies with a proven track record in drainage installation and maintenance are more likely to deliver high-quality results. Certifications and industry affiliations can also reflect a company’s commitment to best practices.
Positive customer reviews and testimonials are essential for evaluating a company’s reputation. Homeowners should seek providers with a history of satisfied clients, as this indicates the level of service and expertise offered. By verifying a company’s credentials and checking references, clients can make informed decisions and select a provider that aligns with their specific drainage needs.
What Questions Should You Ask Before Hiring a Drainage Service Provider?
Before engaging a drainage service provider, homeowners should ask relevant questions to assess the company’s qualifications and experience. Key questions to consider include:
- What is your experience with similar projects? Understanding the provider’s background with comparable drainage issues can indicate their expertise.
- What warranties do you offer? Inquire about warranties for materials and craftsmanship to ensure protection against future problems.
- What materials do you use? High-quality materials contribute to the longevity and effectiveness of drainage systems, making this a crucial question.
- Can you provide references from past clients? Positive feedback from previous customers can provide insights into the company’s reliability and performance.
By asking these questions, homeowners can confidently select a drainage service provider that meets their specific needs and expectations.
How to Effectively Compare Quotes and Services
When seeking drainage services, homeowners should carefully compare quotes to ensure they receive the best value. It is essential to consider not just the price but also the range of services offered, materials used, and the company’s reputation. Requesting detailed quotes that outline the scope of work can help homeowners make informed comparisons.
Clients should also evaluate each company’s transparency regarding its pricing structure. Hidden fees or unclear terms can lead to unexpected expenses in the future. By thoroughly comparing quotes and services, homeowners can select a drainage provider that offers both quality and affordability.
Maintaining and Caring for Your Drainage Systems
Establishing Regular Inspections and Cleaning Routines
Regular inspections and cleaning are critical components of maintaining effective drainage systems. Homeowners should establish a routine schedule to evaluate their drainage systems, ideally at least once a year. Inspections enable early detection of potential issues, such as clogs or malfunctions. Consistently cleaning drains and sump pumps prevents buildup and ensures optimal performance.
During inspections, homeowners should check for debris, sediment, and other obstructions that can impede water flow. Engaging professional cleaning services can extend the lifespan of drainage systems and prevent costly repairs. By prioritizing regular maintenance, homeowners can protect their properties against water-related issues.
Recognizing the Signs of Drainage System Failure
Identifying signs of drainage system failure is crucial for homeowners to take timely action. Common indicators of failure include standing water in yards or basements, slow drainage from sinks or bathtubs, and unusual sounds from sump pumps or drains. Homeowners should also be attentive to persistent moisture odours, as these can signal underlying drainage issues.
If any of these signs are detected, it is essential to address them promptly. Homeowners should contact a drainage professional to diagnose and resolve the issue, preventing further damage and ensuring the drainage system remains effective.
Modernizing and Upgrading Drainage Systems for Enhanced Performance
Upgrading drainage systems can greatly enhance their efficiency and longevity, particularly in response to changing needs or environmental conditions. Homeowners should consider modernizing their systems to incorporate the latest advancements in drainage technology. Innovations such as smart sump pumps and automated monitoring systems offer improved performance and reliability.
Adapting drainage systems to meet evolving challenges, such as increased rainfall patterns, can be a proactive measure for homeowners. Engaging professionals for assessments and upgrades ensures that drainage systems remain effective and aligned with current best practices, ultimately safeguarding the property for years to come.
Strategies for Effective Interior Drainage Services in South Vancouver
Customizing Solutions for Individual Property Requirements
Every property has unique drainage needs, making it essential to customize solutions accordingly. Homeowners in South Vancouver should closely collaborate with drainage professionals to develop tailored drainage strategies that address specific challenges. For instance, properties with heavy clay soils may require more robust drainage solutions to effectively manage moisture.
Real-world examples emphasize the significance of tailored solutions. A residential property that underwent a comprehensive assessment received customized drainage modifications, resulting in a significant decrease in basement flooding incidents. By focusing on the specific needs of each property, homeowners can ensure that their drainage systems perform optimally and provide long-lasting protection against water damage.
Integrating New Systems with Existing Infrastructure for Optimal Performance
Effective drainage solutions must seamlessly integrate with existing infrastructure to enhance efficiency and minimize disruptions. Homeowners should collaborate with drainage professionals to evaluate how new systems will interact with current landscaping, driveways, and foundations. This holistic approach ensures that drainage improvements do not compromise the integrity of existing structures.
To facilitate integration, actionable steps include analyzing drainage patterns and identifying potential barriers to water flow. By conducting thorough assessments of the entire property, professionals can design solutions that optimize water management while preserving the functionality and aesthetics of the landscape. Integrating new systems with existing infrastructure enhances the overall effectiveness of drainage solutions.
Ensuring Long-Term Effectiveness of Drainage Systems
Achieving long-term effectiveness in drainage systems requires a combination of quality materials, proper installation, and ongoing maintenance. Homeowners should prioritize engaging experienced professionals to ensure systems are installed correctly according to industry standards and best practices. Utilizing high-quality materials is essential for durability and reliability.
Regular maintenance checks and cleaning are vital for preserving the effectiveness of drainage systems over time. Homeowners should commit to establishing maintenance schedules that include inspections and cleaning to prevent clogs and ensure optimal performance. By investing in quality installation and proactive maintenance, homeowners can secure the long-term effectiveness of their interior drainage systems.
Frequently Asked Questions About Interior Drainage Services
What are interior drainage services?
Interior drainage services encompass the installation and maintenance of systems designed to manage water intrusion, effectively preventing flooding and water damage in residential properties.
How can I determine if I need interior drainage services?
Signs indicating a need for interior drainage services include water pooling in the basement, damp walls, mould growth, and persistent moisture odours.
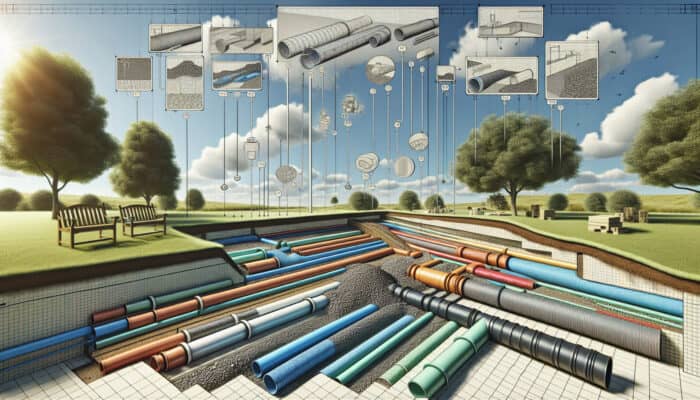
What types of drainage systems are available for use?
Common types of interior drainage systems include French drains, sump pumps, and surface drains, each serving specific functions in managing water.
How frequently should I inspect my drainage system?
It is advisable to inspect your drainage system at least once a year to identify potential issues before they escalate.
Can I install a drainage system on my own?
While some homeowners may attempt DIY installations, it is highly recommended to hire professionals to ensure proper design, materials, and installation techniques.
What maintenance is required for interior drainage systems?
Regular maintenance includes inspections, cleaning debris, testing sump pumps, and monitoring for signs of failure or blockages.
What is the typical lifespan of drainage systems?
With proper installation and maintenance, drainage systems can last anywhere from 10 to 30 years, depending on the materials used.
Will installing a drainage system increase the value of my property?
Yes, effective drainage systems can enhance property value by reducing potential flood risks and water damage, making homes more appealing to buyers.
How can I select the right drainage service provider?
When choosing a provider, look for experience, positive reviews, and their ability to offer tailored solutions for your specific drainage needs.
What should I do if my drainage system fails?
If you suspect drainage system failure, contact a professional immediately to assess and address the issue to prevent further damage.
Connect with us on Facebook!
Presented By: Interior Drainage in South Vancouver
The Article: Interior Drainage Services in South Vancouver: Expert Solutions First Published On: https://pacificbluemechanical.ca/
The Article Interior Drainage Services: Expert Solutions in South Vancouver Was Found On https://limitsofstrategy.com