Comprehensive Hot Water Tank Services for Your Home in Burnaby
Explore the Different Types of Hot Water Tanks Available for Your Home

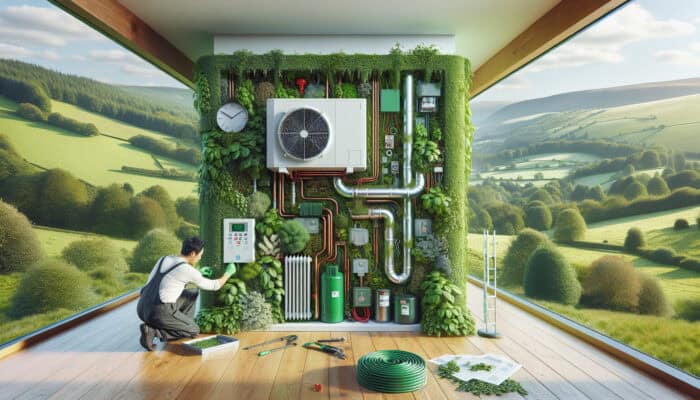
Hot water tank services in Burnaby are indispensable for homeowners across Canada, given that these systems are fundamental to daily living. Understanding the various types of hot water tanks available can greatly aid you in making an informed choice that aligns with your home’s needs. The primary categories of hot water tanks include conventional, tankless, and hybrid models. Each category offers distinct benefits tailored to different household requirements and financial situations. By gaining knowledge about these options, you can enhance energy efficiency while ensuring optimal comfort in your living environment.
Conventional hot water tanks are the most widely used type, typically equipped with a storage tank that holds a predetermined volume of heated water. These units can operate on electricity, natural gas, or propane, making them versatile and adaptable for various household configurations. In contrast, tankless water heaters provide hot water only when needed, eliminating the necessity for a storage tank. This on-demand capability enhances energy efficiency by heating water solely as required, making them particularly advantageous for homes with variable hot water needs. Hybrid models merge features from both conventional and tankless systems, employing heat pump technology to optimize energy efficiency while guaranteeing a steady supply of hot water.
- Conventional: Lower initial costs, larger capacity, reliable availability of hot water.
- Tankless: Space-saving, energy-efficient, unlimited supply of hot water.
- Hybrid: Energy-conserving, environmentally friendly, flexible installation options.
- Electric: Lower operating costs, simple installation, quiet operation.
- Gas: Faster heating times, higher recovery rates, and potentially reduced energy bills in some regions.
Understanding the Importance of Regular Maintenance for Your Hot Water Tank
Consistent maintenance of your hot water tank is vital for optimizing its operational efficiency and extending its lifespan. Neglecting necessary care can lead to complications that may result in costly repairs or even the need for complete replacement of the tank. By keeping your hot water tank in excellent working condition, you can avert substantial headaches and expenses down the line.
Key routine maintenance tasks, including flushing the tank, inspecting the anode rod, and regularly checking for leaks, can significantly enhance the longevity and performance of your appliance. Overlooking these essential responsibilities can lead to sediment accumulation, which diminishes overall efficiency and raises energy consumption, resulting in higher utility bills. Regular maintenance is an investment in the reliability and efficiency of your hot water system.
- Annual tank flushing to remove sediment build-up and maintain efficiency.
- Inspecting and replacing the anode rod every three to five years to prevent corrosion.
- Regularly checking for leaks around fittings and valves to ensure safe operation.
- Testing the temperature and pressure relief valve once a year to guarantee safety.
- Inspecting insulation for signs of damage or wear that could affect efficiency.
Discover the Advantages of Professional Hot Water Tank Installation
Choosing to have your hot water tank installed by a professional ensures that it is set up correctly, which is essential for both optimal performance and safety. A certified technician will evaluate your home’s specific requirements, ensuring the tank you select meets your household’s hot water demands efficiently. The quality of the installation process can significantly influence the efficiency and dependability of your hot water system.
Additionally, professional installation minimizes the risk of future complications arising from improper setup, such as water leaks, pressure irregularities, and inefficient operation. Engaging an experienced technician often includes warranties, giving you peace of mind regarding any necessary repairs or maintenance services in the future. Investing in professional installation is a proactive step towards ensuring the longevity and reliability of your hot water system.
In-Depth Exploration of Hot Water Tank Services Available in Burnaby
Identifying Common Hot Water Tank Issues and Their Solutions
While hot water tanks are generally reliable, they can experience a variety of common issues that, if not promptly addressed, can lead to significant inconveniences and expenses. One prevalent problem is leaks, which may stem from corroded tanks or faulty fittings. If you observe water pooling around the base of your tank, it’s imperative to contact a service provider immediately to prevent water damage and additional complications that could arise.
Another frequent concern is sediment buildup, particularly in traditional tanks. Over time, minerals from hard water can accumulate at the bottom of the tank, diminishing efficiency and increasing energy costs. Conducting an annual tank flush can effectively mitigate this issue, helping to ensure optimal performance and energy savings while maximizing the lifespan of your system.
Moreover, temperature fluctuations often arise due to a malfunctioning thermostat or heating element. If you notice inconsistencies in water temperature, it may be time to have these components evaluated and potentially replaced to restore reliable hot water delivery throughout your home.
Exploring the Latest Innovations in Hot Water Tank Technology
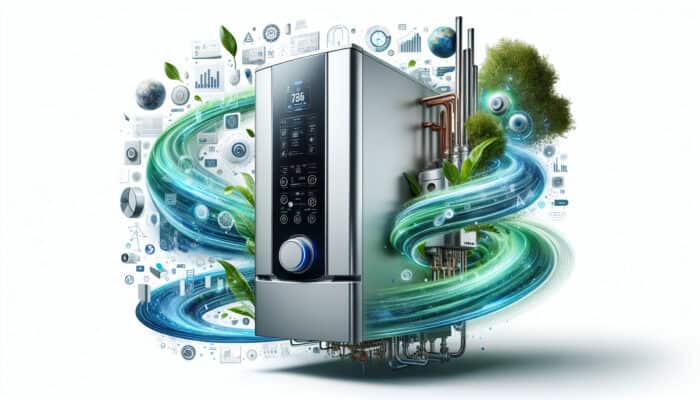
Recent advancements in hot water tank systems are significantly enhancing user experiences and improving operational efficiency. A noteworthy innovation is the emergence of smart controls, which enable homeowners to monitor and manage their hot water systems remotely. These advanced devices can send alerts regarding maintenance needs or performance issues, allowing users to stay informed and proactive in managing their systems.
Additionally, energy-efficient designs are gaining popularity, with many manufacturers producing models that significantly reduce energy consumption. These tanks often incorporate superior insulation and advanced heating elements, leading to lower utility costs over time, making them an economically sound choice for homeowners.
Furthermore, the integration of eco-friendly materials in the construction of hot water tanks is on the rise. New designs focus on sustainability, offering options that minimize environmental impact while maintaining high-performance levels, catering to environmentally conscious consumers who prioritize green solutions.
Choosing the Right Service Provider for Your Hot Water Tank Requirements
Selecting a reputable service provider for your hot water tank needs is crucial to ensuring quality installation and maintenance. Begin by researching local companies, focusing on those with established reputations in Burnaby. Customer reviews and testimonials can provide invaluable insights into the provider’s reliability and service quality.
When evaluating service providers, consider their industry experience, qualifications, and whether they possess the necessary licenses and insurance. Furthermore, inquire about service warranties and guarantees, which can provide additional reassurance. Always request a detailed estimate before commencing any work to avoid unexpected costs later on, ensuring a smooth and transparent process.
The Process of Hot Water Tank Services: What You Need to Know
Step-by-Step Guide to Hot Water Tank Installation
The installation process for a hot water tank involves several essential steps that guarantee optimal performance and safety. Initially, a qualified technician performs a site assessment to identify the best location for the new tank, taking into account factors such as proximity to plumbing and electrical sources for efficient operation.
Following the assessment, the old tank is removed to make way for the new unit. The installation process includes setting up the new tank, connecting it to the water supply and power source, and ensuring that all connections are secure and free of leaks. After installation, the technician conducts system testing to verify that the tank operates correctly, checking for issues related to water pressure and temperature consistency.
Proper installation not only maximizes performance but also ensures compliance with local building codes and regulations, underscoring the importance of hiring a qualified professional for this critical task.
Effective Repair and Troubleshooting Techniques for Hot Water Tanks
When a hot water tank malfunctions, it can disrupt daily routines and create considerable inconvenience. Professional repair services specialize in diagnosing and resolving common issues such as leaks, heating problems, and pressure irregularities. For instance, if your tank isn’t heating water effectively, the heating element may require inspection or replacement to restore functionality and efficiency.
Additionally, technicians can address sediment buildup by performing a thorough tank flush, effectively removing deposits and reinstating efficiency. If the issue lies with the thermostat, it can be recalibrated or replaced to ensure consistent water temperatures, thereby enhancing user comfort and satisfaction.
Promptly addressing these issues with the assistance of a professional not only resolves immediate concerns but also extends the lifespan of your hot water tank, ensuring dependable service for years to come.
Establishing Effective Maintenance Schedules for Hot Water Tanks
Creating regular maintenance schedules is imperative for keeping hot water tanks functioning optimally. Ideally, homeowners should arrange annual inspections with qualified technicians who will carry out comprehensive checks and maintenance tasks to guarantee the system’s longevity and efficiency.
Routine maintenance should encompass flushing the tank to eliminate sediment buildup, checking the anode rod for corrosion, and testing the temperature and pressure relief valve. It’s equally important to inspect insulation and fittings for any signs of leaks or wear that could compromise performance and safety.
- Annual tank flush to prevent sediment accumulation and enhance efficiency.
- Inspection of the anode rod every 3-5 years to ensure corrosion prevention.
- Testing the temperature and pressure relief valve annually for safety.
- Regular checks for visible leaks or corrosion around the tank.
- Periodic inspection of water quality and pressure to maintain optimal performance.
Key Considerations for Hot Water Tank Replacement
Determining the right time to replace a hot water tank necessitates a careful assessment of several factors. A primary consideration is the tank size, which must correspond with your household’s hot water demands. Larger families may require a more substantial tank to accommodate simultaneous usage, while smaller households might find a compact model more suitable for their needs.
Energy efficiency is another crucial factor; investing in a high-efficiency model can lead to lower utility bills over time. Assessing the cost of replacement versus ongoing repair expenses is also vital, as older tanks may become less reliable and incur higher costs over time.
Finally, consider the lifespan of your current tank; most conventional hot water tanks last between 10 and 15 years. If your tank is nearing this age and requires frequent repairs, it may be prudent to contemplate a replacement to avoid future complications and expenses.
The Comprehensive Benefits of Hot Water Tank Services
Enhancing Energy Efficiency for Significant Cost Savings
Ensuring that hot water tanks are properly maintained enables them to operate at peak efficiency, which in turn reduces energy consumption and lowers utility bills. Regular maintenance tasks such as tank flushing and anode rod inspection contribute to the smooth functioning of the system, preventing unnecessary strain and leading to long-term savings for homeowners.
By promptly addressing issues like sediment buildup, homeowners can maximize the lifespan and efficiency of their hot water tanks. Energy-efficient models further enhance savings by utilizing advanced technologies that minimize overall energy usage, making them a wise investment for any household.
As utility costs continue to rise, maintaining your hot water tank not only preserves its functionality but also contributes to substantial long-term savings for your household budget, ensuring financial stability.
Promoting Longevity and Durability of Hot Water Tanks
Regular servicing of your hot water tank is essential for extending its lifespan and ensuring durability. A well-maintained hot water tank can last significantly longer than one that is neglected, resulting in fewer replacements and lower costs over the years. Routine checks and minor repairs can prevent major breakdowns, which often lead to costly replacements and inconveniences.
For instance, periodically replacing the anode rod can help prevent tank corrosion, a frequent cause of tank failures. Regular maintenance ensures the tank operates under optimal conditions, significantly enhancing its durability and reducing the likelihood of unexpected issues arising.
This proactive approach not only saves money on potential replacements but also guarantees a consistent supply of hot water whenever needed, elevating overall comfort in your home and ensuring uninterrupted service.
Ensuring Safety and Compliance with Regulations
Professional hot water tank services ensure that your system adheres to all safety standards and local regulations. Complying with these safety standards is crucial for preventing hazards such as leaks, pressure buildup, and potential fire risks that could threaten your home and family’s safety.
Service providers are trained to identify safety concerns that the average homeowner might overlook, ensuring that your hot water tank operates safely and efficiently. This compliance not only protects your household but also provides peace of mind regarding the safe operation of your appliances and systems.
By selecting a qualified service provider, you can ensure that your hot water tank is not only functional but also installed and maintained according to the highest safety standards, safeguarding your investment and well-being.
Implementing Effective Strategies for Hot Water Tank Services in Burnaby
Taking Preventive Measures for Hot Water Tanks
Implementing preventive measures is vital for avoiding common issues associated with hot water tanks. Regular inspections and maintenance can assist in identifying potential problems before they escalate into costly repairs. For example, routine checks can uncover leaks or signs of corrosion early, allowing for timely interventions that save homeowners both money and inconvenience.
Homeowners can also benefit from monitoring the temperature settings of their hot water tanks. Maintaining an optimal temperature not only enhances comfort but also curbs energy consumption, preventing unnecessary wear on heating elements and prolonging the tank’s lifespan.
Additionally, replacing worn components such as the anode rod at regular intervals can significantly extend your tank’s life. Proactive measures like these help maintain efficiency and minimize the likelihood of unexpected outages, ensuring a steady supply of hot water for all household needs.
Exploring Cost-Effective Solutions for Hot Water Tank Services
Implementing cost-effective solutions for hot water tank services can significantly help manage expenses. When selecting a hot water tank, consider the size and type that best suits your household’s unique needs. Oversized tanks often lead to increased energy consumption and higher operating costs that can strain your budget.
Exploring options such as energy-efficient models can also lead to reduced long-term expenses. While these models may require a higher initial investment, they frequently pay for themselves through lower utility bills over time, making them a financially savvy choice.
Additionally, scheduling regular maintenance can prevent costly repairs and extend the lifespan of your tank, making it a wise financial decision. Ultimately, a strategic approach to hot water tank services can yield substantial savings while ensuring reliability and comfort for your household.
Focusing on Customer Satisfaction in Hot Water Tank Services
Ensuring customer satisfaction in hot water tank services hinges on several key factors. Timely service and transparent communication are crucial in building trust and confidence among homeowners. Service providers should be responsive to inquiries and offer detailed explanations of the services performed, ensuring customers feel informed and valued throughout the process.
Efficiently addressing concerns related to installation, maintenance, or repairs is vital for maintaining customer loyalty and fostering positive relationships. Follow-up services, such as maintenance reminders and check-ins regarding customers’ system performance, can further enhance the overall customer experience and satisfaction.
By prioritizing customer satisfaction through exceptional service and clear communication, providers can cultivate a reputation for reliability and quality in the competitive Burnaby market, ultimately leading to long-term success and customer retention.
Making the Right Choice for Your Hot Water Tank
Assessing Your Household’s Hot Water Needs Effectively
Choosing the best hot water tank begins with a thorough evaluation of your household’s hot water requirements. Factors such as family size, daily usage patterns, and peak demand times are crucial in determining the appropriate tank size and type that will best serve your household effectively.
For larger families, a conventional tank that provides a higher volume of hot water may be necessary to accommodate simultaneous usage. Conversely, smaller households may find a tankless or hybrid model sufficient, as it provides hot water on demand without requiring storage, potentially saving valuable space.
Conducting a comprehensive assessment of your household’s specific needs ensures that you select a system that not only meets current requirements but also anticipates future demands, ultimately providing long-term satisfaction and efficiency in your hot water supply.
Comparing Different Tank Types for Informed Decision Making
Understanding the advantages and disadvantages of various types of hot water tanks is essential for making an informed decision. Conventional tanks usually have lower upfront costs and provide a consistent supply of hot water, but they require more space and may be less energy-efficient compared to newer technologies.
Tankless systems, while initially more expensive, offer substantial energy savings over time due to their on-demand heating capabilities. However, they may struggle to meet high simultaneous demands, which is an important consideration for larger households. Hybrid systems combine the best features of both types, delivering energy efficiency while maintaining a consistent hot water supply. Evaluating the pros and cons of each type will enable you to select the ideal system tailored to your home and lifestyle.
Budgeting Considerations for Your Hot Water Tank Investment
Budget considerations play a significant role in selecting the right hot water tank for your needs. The initial cost of the tank, along with installation fees, can vary widely based on the type and size of the system you choose. While conventional tanks are generally less expensive upfront, it’s essential to consider the long-term operating costs associated with energy consumption.
Investing in a high-efficiency model may require a larger initial investment, but it can lead to substantial savings over the system’s lifespan. Additionally, factor in maintenance costs and potential repair expenses when determining your budget to ensure you have a comprehensive view of your overall investment.
Understanding these factors allows you to make a financially sound choice that balances upfront costs against long-term savings, ensuring you select the best option for your household’s needs.
Evaluating Energy Efficiency Ratings for Optimal Performance
When selecting a hot water tank, evaluating energy efficiency is critical for maximizing savings. Look for models with high energy efficiency ratings, as these consume less energy and ultimately reduce your utility bills over time, contributing to a more sustainable household.
Recent technological advancements in hot water tanks have led to improved energy efficiency, with many models featuring enhanced insulation, advanced heating elements, and smart controls. These features can significantly decrease overall energy consumption while maintaining optimal performance, making them a wise choice for environmentally conscious consumers.
Researching various models and their energy ratings will help you identify the best options that align with your budget and environmental concerns, ensuring a responsible choice for your home and family.
Understanding Installation and Maintenance Requirements
Considering the installation process and ongoing maintenance requirements is crucial when selecting a hot water tank. Professional installation is advisable, as it ensures compliance with safety standards and local regulations while optimizing performance and efficiency to meet your household’s specific needs.
Different tank types may have varying installation requirements; for example, tankless systems often necessitate additional electrical or gas supply modifications. Understanding these prerequisites can help you prepare adequately for the installation process and avoid unexpected challenges.
Ongoing maintenance is equally important; regular checks can prevent unexpected breakdowns and extend the lifespan of your hot water tank. By factoring in both installation and maintenance needs, you can make a well-rounded decision that guarantees reliable hot water for years to come.
Identifying Key Indicators of a Failing Hot Water Tank
Recognizing Leaks and Water Damage Promptly
One of the most telling signs of a failing hot water tank is the presence of leaks. If you observe water pooling around the base of your tank, it may indicate a serious issue, such as corrosion or a faulty connection. This situation can lead to significant water damage in your home if not addressed promptly, making immediate action essential to prevent further complications.
If you notice leaks, it is advisable to turn off the water supply to the tank and contact a professional service provider immediately. Quick action can prevent further damage and ensure that the issue is resolved before it escalates into a more serious problem, safeguarding your home and investment.
Staying vigilant for signs of leaks can protect your home from costly repair bills and ensure the reliable operation of your hot water tank, providing peace of mind for homeowners.
Identifying Inconsistent Water Temperature Issues
Experiencing inconsistent water temperatures can signal underlying issues with your hot water tank. If you find that the water is frequently too hot or too cold, it may indicate a malfunctioning thermostat or heating element, both of which require professional evaluation for resolution.
Temperature fluctuations not only disrupt comfort but can also lead to increased energy consumption, as the tank works harder to compensate for these inconsistencies. If you encounter these issues, it’s essential to consult with a technician who can diagnose and fix the underlying problem promptly, restoring reliable hot water availability in your home.
By acting quickly, you can improve the overall efficiency of your system while ensuring consistent hot water availability, which is essential for daily activities and comfort.
Listening for Unusual Noises from Your Hot Water Tank
Unusual noises emanating from your hot water tank can serve as another warning sign of potential issues. Sounds such as banging, rumbling, or hissing often indicate problems like sediment buildup or malfunctioning components within the tank.
Sediment can accumulate at the bottom of the tank, causing noise as the heating element works harder to heat the water. If left unchecked, this can lead to reduced efficiency and premature failure of the tank, resulting in higher repair costs and inconveniences.
Consulting a professional to evaluate the source of these noises can help mitigate issues early on, thereby preserving the functionality and lifespan of your hot water tank and ensuring reliable service for your household.
Future Trends Shaping Hot Water Tank Services
Emphasizing Sustainability and Eco-Friendly Solutions
The future of hot water tank services is increasingly focused on sustainability, with a growing emphasis on eco-friendly options. Solar-powered hot water tanks are becoming more popular as homeowners strive to reduce their carbon footprint and energy expenses, thereby contributing to a more sustainable future.
These systems harness solar energy to heat water, providing a renewable energy source that lessens reliance on fossil fuels. Many manufacturers are also innovating units constructed from sustainable materials, minimizing environmental impact while delivering high performance and efficiency.
By investing in eco-friendly hot water tanks, homeowners can positively contribute to environmental conservation while enjoying reduced energy costs and improved efficiency within their homes.
Integrating Smart Home Technology with Hot Water Tanks
The integration of hot water tanks with smart home systems is another emerging trend. Homeowners can now monitor and control their hot water systems remotely through mobile applications, enabling real-time adjustments to temperature settings and usage patterns.
This cutting-edge technology not only enhances convenience but also facilitates proactive maintenance alerts, helping to prevent issues before they escalate into costly repairs. As smart technology continues to evolve, homeowners can expect even more innovative features that improve efficiency and user experience, ensuring seamless integration with their smart home ecosystems.
By embracing these advancements, homeowners can enjoy a more responsive and efficient hot water system that aligns with modern living standards and enhances overall comfort.
Innovations in Materials and Design Enhancing Performance
Innovations in materials and design are leading to the creation of more durable and efficient hot water tanks. Manufacturers are exploring new materials that enhance longevity and performance while simultaneously minimizing overall weight and environmental impact.
For instance, advanced insulation techniques are improving energy efficiency, significantly reducing heat loss and boosting overall performance. Design enhancements, such as superior drainage systems and ergonomic features, are also making hot water tanks more user-friendly, simplifying both installation and maintenance.
As technology continues to advance, homeowners can anticipate even more improvements that promote energy efficiency, user satisfaction, and overall operational excellence in hot water tank services.
Frequently Asked Questions (FAQs) About Hot Water Tanks
What is the average lifespan of a hot water tank?
The average lifespan of a conventional hot water tank typically ranges between 10 and 15 years, while tankless systems can last up to 20 years with proper maintenance and care.
How often should I flush my hot water tank?
It is recommended to flush your hot water tank at least once a year to remove sediment buildup and maintain optimal efficiency, ensuring consistent performance throughout its lifespan.
What are the signs that my hot water tank needs to be replaced?
Signs that your hot water tank may require replacement include frequent leaks, inconsistent water temperatures, and unusual noises that indicate internal issues needing urgent attention.
Can I install a hot water tank myself?
While it is possible to install a hot water tank independently, it is highly advisable to hire a professional to ensure safety, compliance with local codes, and optimal performance, ultimately saving time and potential costs.
What is the most energy-efficient option for hot water tanks?
Tankless water heaters are generally considered more energy-efficient, as they heat water on demand rather than maintaining a reservoir of hot water, making them ideal for energy-conscious homeowners.
How can I improve the efficiency of my hot water tank?
Improving efficiency can be achieved through regular maintenance practices, such as flushing the tank, insulating pipes to prevent heat loss, and setting the thermostat to an appropriate temperature for your household’s needs.
What maintenance tasks should I perform on my hot water tank?
Essential maintenance tasks include flushing the tank annually, checking for leaks, inspecting the anode rod for corrosion, and testing the temperature and pressure relief valve to ensure safe operation.
Is professional installation worth the cost?
Yes, professional installation is worth the cost as it ensures safety, compliance with regulations, and optimal performance, ultimately saving money on repairs and extending the lifespan of your hot water tank.
What factors should I consider when choosing a hot water tank?
Factors to consider include household hot water needs, energy efficiency ratings, budget constraints, and installation and maintenance requirements specific to the tank type you are considering.
Are there eco-friendly hot water tank options available?
Yes, eco-friendly options such as solar-powered hot water tanks and models made from sustainable materials are increasingly available, promoting energy efficiency and environmental conservation while meeting modern household needs.
Connect with us on Facebook!
Presented By: Hot Water Tank in Burnaby
The Article: Hot Water Tank Services in Burnaby: Expert Solutions First Published On: https://pacificbluemechanical.ca/
The Article Hot Water Tank Services: Expert Solutions in Burnaby Was Found On https://limitsofstrategy.com