Discover Proven Strategies for Effective Yard Drainage Solutions in Gastown, Vancouver
Understanding the Essential Principles of Yard Drainage Systems
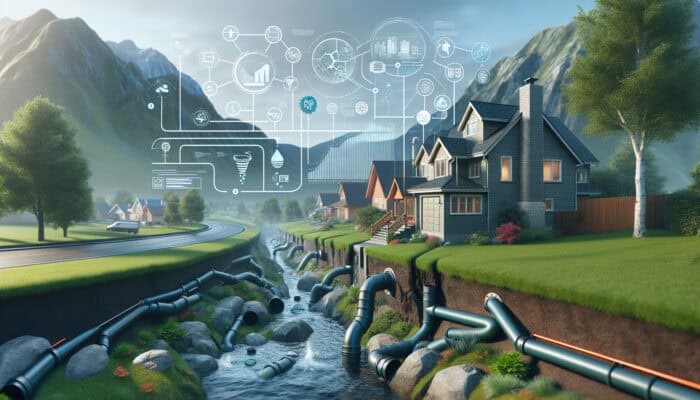
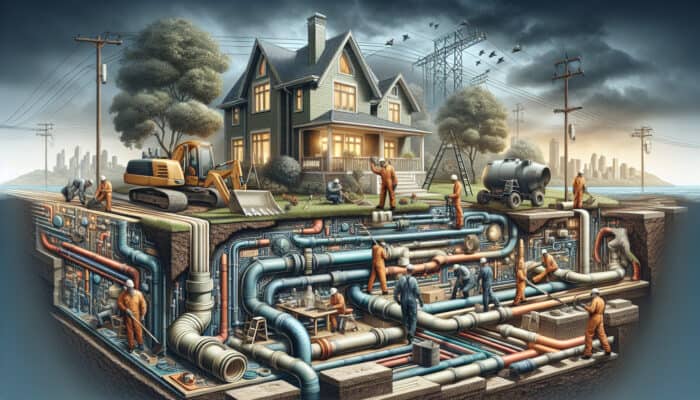
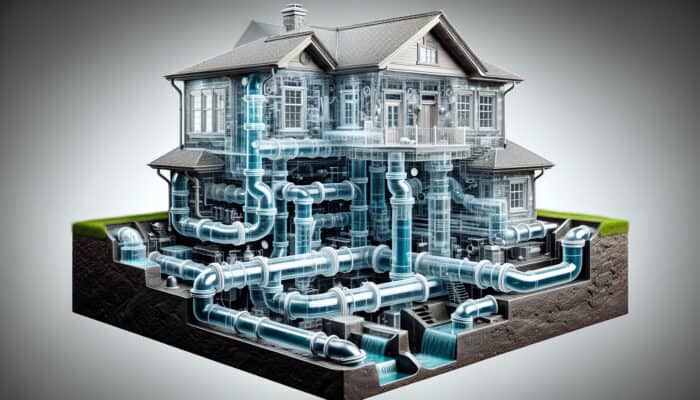
Yard drainage is a complex yet essential system designed to effectively redirect water away from your home, significantly reducing the risks of flooding and moisture-related damage. In the vibrant district of Gastown, Vancouver, where rainfall can be both heavy and frequent, creating a dependable yard drainage system is crucial. This system typically includes key components like trenches, drains, and pipes that work together to divert water from critical areas, such as your foundation, gardens, and walkways. With a thoughtfully designed drainage plan, homeowners can effectively minimize the risks associated with excess water accumulation and preserve the integrity of their landscapes.
To maintain the health of your yard and home, it’s essential to grasp how effective yard drainage systems operate. These systems leverage gravity and strategically placed channels to guide water toward designated drainage points, such as municipal storm drains or dry wells. A well-functioning yard drainage setup not only protects your property from flooding but also promotes the health and vitality of your garden and landscaping. This contributes to robust plant growth while reducing soil erosion, ensuring that your outdoor space flourishes throughout the seasons.
The Importance of a Well-Designed Yard Drainage System for Your Property
Establishing a highly efficient drainage system is essential for averting water buildup, which can result in serious complications like soil erosion, foundation damage, and stunted plant growth. In the densely populated environment of Gastown, the necessity for a reliable drainage system is amplified due to unique urban challenges. Proper drainage systems facilitate the rapid evacuation of excessive water, significantly lowering the chances of pooling that can create unsightly muddy patches in your yard.
Moreover, a well-engineered drainage system extends the lifespan of your landscaping features, such as flower beds and shrubs, by preventing issues like root rot and other moisture-related conditions. Effectively directing water away from your property not only protects the structural integrity of your home but also enhances your outdoor living experience. This proactive approach can save homeowners from costly repair bills while allowing them to fully enjoy their yards without the concern of standing water.
Common Drainage Problems Faced in Gastown and Their Solutions
The unique urban topology of Gastown presents specific drainage challenges, particularly due to its historical significance and the limited availability of space for traditional drainage solutions. Common drainage issues in this area include:
- Water pooling in streets and yards due to inadequate slope
- Soil erosion caused by heavy rainfall on steep inclines
- Basement flooding resulting from rising groundwater levels
- Clogged drainage systems due to debris and sediment accumulation
- Insufficient drainage in compact yards with restricted space
These challenges necessitate innovative, tailored solutions that consider the architectural characteristics and aesthetic appeal of the area. For instance, property owners may need to explore options like trench drains or permeable pavers, which allow water to seep through while maintaining the historic charm of the neighborhood. Collaborating with local professionals who understand the intricate drainage needs of Gastown can lead to effective and visually pleasing solutions.
Professional Insights on Yard Drainage Services in Gastown, Vancouver

Key Factors Influencing Gastown’s Drainage Needs
The drainage requirements in Gastown are shaped by several critical factors, making it imperative for service providers to thoroughly comprehend these unique characteristics. These factors include:
- Historical preservation regulations that limit certain drainage modifications
- Urban density that restricts space for conventional drainage solutions
- The distinctive topography of Gastown, featuring hills and slopes
- Local climate conditions that lead to heavy rainfall and potential flooding
- The necessity for discreet solutions that maintain the area’s aesthetic charm
Addressing these specific needs necessitates a comprehensive understanding of Gastown’s history and landscape. Professionals in the field must integrate modern drainage technology with sensitivity to the district’s architectural heritage, ensuring that solutions are not only functional but also enhance the overall aesthetic appeal of the area. Balancing these priorities is crucial for preserving Gastown’s historic character while tackling contemporary drainage issues.
How Experts Tackle Drainage Challenges in Gastown
Experts employ innovative solutions tailored to the unique environment of Gastown, ensuring effective drainage while preserving the area’s historic allure. For example, the implementation of <a href="https://limitsofstrategy.com/french-drain-services-expert-solutions-in-vancouver/">French drains</a> can efficiently redirect water away from residences while minimizing disruption to the landscape. A notable project in Gastown involved upgrading existing drainage systems with modern materials and designs, significantly enhancing water flow and lowering flooding risks.
Furthermore, professionals often recommend permeable surfaces for walkways and driveways, which enable rainwater to percolate into the ground rather than flowing into streets. This method alleviates flooding and contributes to groundwater replenishment. By collaborating closely with city planners and adhering to local regulations, drainage specialists can devise solutions that respect Gastown’s heritage while implementing necessary modern improvements.
Emerging Trends in Yard Drainage Solutions for Sustainable Living

Recent trends in yard drainage focus on environmentally friendly solutions and smart technology that enhance both efficiency and sustainability. As environmental consciousness rises, numerous homeowners are incorporating green drainage solutions such as bioswales and rain gardens that utilize native plants to naturally absorb excess water. These systems effectively manage drainage while supporting local ecosystems and promoting urban biodiversity.
Additionally, advancements in smart drainage technology allow homeowners to monitor and manage their drainage systems remotely. Smart sensors can detect water levels and send alerts or trigger automated adjustments to the drainage systems, ensuring optimal functionality during adverse weather events. This innovative strategy not only boosts efficiency but also provides peace of mind, knowing that your drainage system operates effectively even when you are not present.
Choosing the Right Drainage Service Provider in Gastown, Vancouver
Key Considerations When Selecting a Drainage Service Provider
When selecting a drainage service provider, it is crucial to evaluate their experience, certifications, and customer reviews to ensure you choose a trustworthy and competent company. Look for providers with a solid track record in Gastown, who have a deep understanding of the area’s unique needs and challenges. Reviewing their portfolio for previous projects, especially those similar to your own, is essential.
Additionally, inquire about their approach to drainage solutions. A reputable company should provide customized assessments rather than generic one-size-fits-all solutions. Ensure they have a strong knowledge of local regulations governing drainage installations to avoid potential issues with permits and compliance. Clearly communicating your specific concerns and requirements will help ascertain whether the provider aligns well with your project goals.
Assessing the Quality of Drainage Services: Key Indicators
Assessing the quality of drainage services involves verifying proper installation, effective water management, and durability over time. It is essential to select a provider that offers warranties and maintenance follow-ups, ensuring the longevity of your system. An optimally installed drainage system should not only address the immediate needs of your yard but also endure over time, preventing frequent repairs or replacements.
Seek testimonials and reviews from previous clients to gauge satisfaction levels regarding the quality of work performed. Additionally, consider requesting references from past projects. This will provide insight into the reliability and effectiveness of the service provider, enabling you to make a well-informed decision.
Understanding the Costs Associated with Drainage Services
The costs associated with drainage services can vary significantly based on project complexity, materials selected, and the size of the area being addressed. In Gastown, it is prudent to obtain multiple quotes to compare services and ensure fair pricing. Keep in mind that while the initial investment in effective drainage solutions may appear substantial, the long-term savings from avoiding water damage can far outweigh these costs.
When reviewing quotes, focus on the value of the services offered rather than solely on price. Cheaper options may not deliver the quality necessary to effectively address your specific drainage challenges. Investing in a reputable drainage service provider that prioritizes quality and customer satisfaction will ultimately safeguard your home and yard for the future.
Advantages of Engaging Professional Yard Drainage Services in Gastown, Vancouver
Enhancing Property Value through Professional Drainage Solutions
Professional yard drainage services greatly enhance your property by ensuring effective water management, reducing the risk of flooding, and promoting the overall health of your yard. In Gastown, where urban features and rainfall can create distinct challenges, customized solutions are essential for addressing specific drainage issues. Professionals bring their expertise and knowledge to apply best practices, creating systems that integrate seamlessly into your landscape.
Well-designed drainage solutions minimize the risk of unsightly mud and water accumulation, allowing you to fully enjoy your outdoor space. Moreover, these systems protect your investments in landscaping and gardening, ensuring that your plants flourish and your yard remains visually appealing throughout the year. A properly drained yard is not only functional but also increases the property’s aesthetic value, making it a desirable asset in Gastown’s real estate market.
Long-Term Benefits of Hiring Professional Drainage Services
The long-term advantages of professional drainage services include preventing costly repairs associated with water damage, maintaining your property’s structural integrity, and enhancing the usability of your yard. By investing in expert services, homeowners can trust that their drainage systems are designed to withstand adverse weather conditions and prevent water accumulation.
Additionally, a well-maintained drainage system ensures that your yard remains a pleasant space for social gatherings and relaxation. This proactive strategy can help you avoid unexpected expenses related to mold remediation, foundation repairs, and landscaping replacements caused by inadequate drainage. Ultimately, professional drainage services provide a safeguard for your property and represent a long-term investment in its value.
Boosting Market Appeal through Professional Drainage Services
Professional drainage services can significantly elevate your home’s market value by ensuring it remains dry and well-maintained. A property free from water damage and flooding is appealing to potential buyers, making it a critical selling point in Gastown’s competitive real estate market. Well-executed drainage solutions improve functionality while also enhancing the overall curb appeal of the home.
Furthermore, effective drainage systems support the health of your landscape, a key factor for buyers interested in outdoor spaces. A yard that is both visually attractive and functional can greatly influence a buyer’s decision, often resulting in higher offers. By investing in professional drainage services today, homeowners can position themselves advantageously in the market for the future.
Promoting Environmental Sustainability with Professional Services
Professional drainage services contribute to environmental sustainability by minimizing runoff and erosion, protecting local ecosystems, and reducing the ecological footprint of water management in Gastown. Efficient drainage systems can be designed to manage excess water while filtering out pollutants, thereby preserving the quality of water in nearby waterways.
In addition, eco-friendly practices such as installing rain gardens and using permeable paving materials promote sustainable stormwater management. These strategies not only mitigate flooding but also foster a healthier environment for local wildlife and plant life. By opting for professional services that prioritize sustainability, homeowners can help maintain ecological balance in their neighborhoods while effectively managing their drainage challenges.
Enhancing Aesthetic Appeal through Professional Drainage Solutions
Professional drainage services improve curb appeal by ensuring a well-kept, visually attractive yard. In Gastown, where aesthetic standards are high, a thoughtfully designed drainage system can integrate seamlessly with landscaping features, ensuring that functional systems enhance rather than detract from the property’s beauty.
Effective drainage solutions can be customized to harmonize with existing elements, utilizing materials that complement the historic character of the area. Homeowners achieve a dual benefit of a functional and aesthetically pleasing yard, which is essential for maintaining property values and meeting neighborhood expectations. A yard that effectively manages water while retaining its beauty is an investment that yields dividends in both enjoyment and marketability.
Best Practices for Yard Drainage Management in Gastown, Vancouver
How to Maintain Your Yard Drainage System Effectively
Maintaining your yard drainage system involves regular inspections, cleaning gutters and downspouts, and ensuring that the system remains clear of debris. Consistent upkeep is critical to prevent clogs that can hinder your drainage system’s performance. Homeowners should examine their systems at least twice a year, ideally during spring and fall, to guarantee optimal functionality.
During these inspections, it’s essential to look for signs of wear or damage to components such as pipes, catch basins, and grates. Additionally, homeowners should remove any leaves, dirt, or other debris that might obstruct water flow. By proactively maintaining your drainage system, you can extend its lifespan and avoid costly repairs associated with neglect.
Optimal Drainage Solutions for Gastown Properties
Effective drainage solutions for properties in Gastown include French drains, dry wells, and permeable pavers, all designed to address the area’s unique challenges. French drains are particularly effective at redirecting excess water away from your home, while dry wells can capture runoff from impermeable surfaces, allowing for natural absorption into the soil.
Permeable pavers provide the dual benefit of functional pathways and effective water management, allowing rainwater to infiltrate and reducing surface runoff. Each of these solutions can aid in effective water management while preserving the aesthetic appeal of Gastown. Collaborating with local drainage professionals can help homeowners choose the best system tailored to their specific yard conditions and drainage requirements.
Preventing Common Drainage Issues in Your Yard
Preventing common drainage problems necessitates proper grading of your yard, selecting suitable vegetation, and ensuring downspouts direct water away from your home. Correct grading allows water to flow away from your foundation, significantly lowering the risk of flooding and erosion.
Selecting drought-resistant and native plants can also promote effective water management, as these plants typically require less water and can absorb excess moisture. Moreover, downspouts should be extended to divert water at least six feet away from the foundation, preventing pooling near your home. By implementing these preventive strategies, homeowners can greatly reduce the likelihood of future drainage complications.
Research-Backed Insights on the Benefits of Yard Drainage Services in Gastown, Vancouver
How Effective Drainage Impacts Property Value
Research shows that properties equipped with effective drainage systems can experience an increase in value due to a reduced risk of water damage and improved usability of the yard. Properties that suffer from flooding or drainage issues are often perceived as less desirable by potential buyers, leading to lower offers or extended time on the market.
Well-drained properties maintain their attractiveness by demonstrating effective water management, which resonates positively with buyers. Studies indicate that homes featuring robust drainage systems are regarded as more appealing, making them competitive in Gastown’s real estate landscape. Thus, investing in professional yard drainage services can yield substantial financial advantages over time.
Environmental Sustainability Through Effective Drainage
Effective drainage is vital for promoting environmental sustainability by curbing runoff and preventing soil erosion, which supports the health of local ecosystems. Properly designed drainage systems can filter pollutants from stormwater before they enter local waterways, safeguarding aquatic life and enhancing water quality.
Furthermore, these systems can be engineered to replenish groundwater supplies, which is crucial in urban areas characterized by impermeable surfaces. Key environmental benefits of effective drainage systems include:
- Reduction of urban flooding and waterlogging
- Improved water quality in local streams and rivers
- Enhanced habitats for local wildlife and vegetation
- Increased groundwater replenishment
By prioritizing sustainable drainage practices, homeowners can positively influence their local environments while effectively addressing their drainage challenges.
Health Benefits Linked to Proper Yard Drainage Management
Proper yard drainage can help prevent the growth of mold and mildew, reducing health risks associated with damp environments. A dry yard fosters a healthier living atmosphere for residents, minimizing allergens and pathogens that thrive in wet conditions.
Additionally, effective drainage prevents water pooling, which can attract pests such as mosquitoes that breed in stagnant water. By ensuring your yard drains effectively, you create a more comfortable and safer outdoor space for families and guests alike. Healthy yards not only enhance outdoor living enjoyment but also promote overall well-being.
Identifying the Need for Yard Drainage Services in Gastown, Vancouver
Recognizing Signs of Drainage Problems in Your Yard
Indicators of drainage issues include pooling water, overly saturated soil, and erosion. Homeowners should be vigilant in observing these signs as they may indicate underlying problems that require immediate attention. For instance, if you observe water pooling after rainstorms or persistent wet patches in your yard, it could suggest inadequate drainage or soil compaction.
Moreover, if your garden plants are struggling despite regular watering, they may be suffering from root rot due to excessive moisture. Erosion along pathways or near the foundation can also point to drainage deficiencies that need urgent attention. Early identification of these signs can help prevent more significant problems in the future, saving homeowners both time and money.
The Consequences of Neglecting Drainage Issues
Ignoring drainage problems can lead to significant foundation damage, basement flooding, and unhealthy plant growth. Over time, accumulated water can compromise your home’s foundation, resulting in cracks and costly repairs. Additionally, prolonged exposure to moisture can promote mold growth in damp basements, posing health risks to residents.
Furthermore, poorly drained yards can create unfavorable conditions for plants, leading to root drowning and increased susceptibility to diseases. Promptly addressing drainage issues is critical for maintaining your property’s integrity and ensuring a safe and healthy living environment.
When to Seek Professional Help for Drainage Services
Engage a professional if you notice persistent water pooling, erosion, or if DIY solutions fail to rectify the issue. If standard methods like adjusting downspouts or manual grading do not produce favorable results, it may be time to consult an expert. Professionals can perform a comprehensive assessment, identifying the root causes of your drainage issues and recommending tailored solutions.
Moreover, if you reside in an area with a history of flooding or heavy rainfall, proactive consultations can help mitigate future issues before they escalate. Consulting with drainage specialists not only provides peace of mind but also ensures your property remains protected against water-related damages.
Effective Strategies for Yard Drainage Services in Gastown, Vancouver
Implementing Proven Drainage Strategies for Your Property in Gastown
Implementing effective drainage strategies in Gastown involves several actionable steps, including the installation of French drains and the use of permeable materials. French drains, designed to redirect water away from your property, are especially advantageous in urban settings where space is at a premium. These systems can be subtly integrated alongside landscaping features, preserving the historical charm of the area.
Additionally, employing permeable paving for driveways and walkways allows rainwater to infiltrate the ground rather than running off into storm drains. This approach not only relieves the pressure on municipal drainage systems but also enhances your property’s visual appeal. Collaborating with local drainage experts can assist you in customizing these strategies to fit the unique characteristics of your yard and community.
Ensuring the Longevity of Your Drainage System
Maintaining the longevity of your drainage system requires regular upkeep, utilizing high-quality materials, and promptly addressing any issues. Homeowners should establish a maintenance routine that includes inspecting drainage components for blockages and wear. Regular cleaning of gutters and downspouts is crucial to prevent clogs that can lead to overflow and ineffective drainage.
Selecting durable materials for installation can significantly extend the lifespan of your drainage system. Opting for high-quality piping and gravel ensures that your system can withstand the test of time. Additionally, addressing any signs of wear or malfunction immediately can prevent minor issues from escalating into costly repairs, ensuring your drainage system remains effective for years to come.
Optimal Materials for Drainage Systems in the Gastown Area
The most suitable materials for drainage systems in Gastown include high-quality PVC pipes, gravel, and permeable pavers, chosen for their durability and effectiveness. PVC pipes are favored for their resistance to corrosion and clogging, making them an excellent choice for underground drainage systems. Additionally, utilizing clean gravel in drainage installations provides exceptional filtration, ensuring that water flows smoothly while preventing soil and debris entry.
Permeable pavers also serve as an effective solution for driveways and walkways, allowing water to percolate while providing a solid surface for foot traffic. These materials not only manage water effectively but also align with Gastown’s architectural integrity, ensuring that drainage solutions enhance rather than detract from the neighborhood’s historic character. Working with experienced professionals can help homeowners select the most suitable materials for their specific drainage needs.
Enhancing the Visual Appeal of Gastown through Yard Drainage Services
The Aesthetic Benefits of Well-Designed Drainage Systems
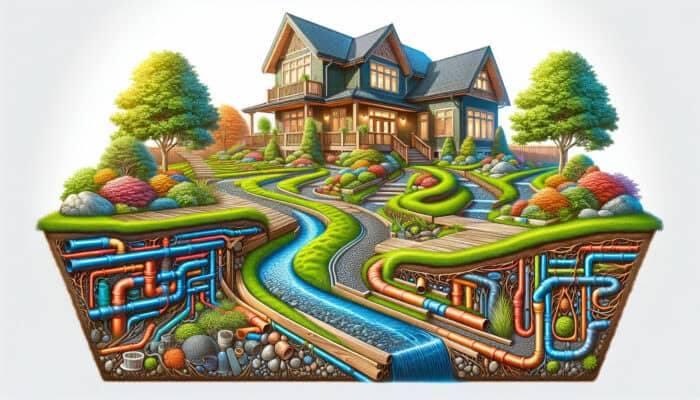
Well-designed drainage systems can significantly enhance the visual appeal of your yard by integrating seamlessly with landscaping and ensuring a dry, usable space. Effective drainage solutions should not only manage water efficiently but also complement the existing design of the property. For example, incorporating decorative drains and integrating drainage features into garden beds can elevate both functionality and beauty.
Moreover, a properly drained yard fosters healthier plants and vibrant gardens, contributing to an inviting outdoor atmosphere. When homeowners prioritize drainage alongside aesthetics, they can create a cohesive environment that enhances the overall character of their property. This thoughtful approach is especially important in Gastown, where historical and modern elements coexist, making it vital for homeowners to maintain visual harmony.
Supporting Gastown’s Unique Character with Effective Drainage Solutions
Effective drainage systems can enhance the historic charm of Gastown by utilizing materials and designs that harmonize with the area’s aesthetic, thereby boosting its overall appeal. For instance, incorporating drainage solutions that feature cobblestones or brick can reflect the area’s architectural style while effectively managing water flow.
Additionally, incorporating native plant species in landscaping around drainage features not only supports local ecosystems but also reinforces the area’s natural beauty. Homeowners can work closely with landscape designers and drainage professionals to create systems that are both functional and visually pleasing, ensuring that the unique character of Gastown is preserved while addressing modern drainage needs.
Frequently Asked Questions (FAQs) About Yard Drainage
What constitutes a yard drainage system?
Yard drainage refers to a system designed to redirect excess water away from your property to prevent flooding and water damage. It typically includes components like trenches, drains, and pipes.
Why is proper yard drainage essential?
Proper yard drainage prevents water accumulation, which can lead to soil erosion, foundation damage, and unhealthy plant growth, thereby ensuring the functionality and aesthetics of your yard.
What are common drainage challenges found in Gastown?
Common drainage issues in Gastown include pooling water, soil erosion from heavy rainfall, blocked drainage systems, and inadequate drainage in limited yard spaces.
How can I assess the quality of a drainage service provider?
To evaluate a drainage service provider, review their experience, certifications, customer feedback, and past project portfolios to ensure they are equipped to meet your needs effectively.
What are the long-term benefits of hiring professional drainage services?
Long-term advantages of professional drainage services include preventing costly repairs, maintaining property value, and enhancing yard usability through effective water management strategies.
How can I identify drainage problems in my yard?
Signs of drainage issues include pooling water, excessively soggy soil, and visible erosion. These indicators suggest that the drainage system may require attention or repair.
When is it advisable to consult a professional for drainage issues?
Consult a professional if you notice persistent water pooling, erosion, or if DIY attempts to resolve drainage issues are unsuccessful. Experts can provide tailored solutions.
What materials are most suitable for drainage systems in Gastown?
The best materials for drainage systems in Gastown include high-quality PVC pipes, gravel, and permeable pavers, known for their durability and effectiveness in managing water.
How can effective drainage systems contribute to environmental sustainability?
Effective drainage systems reduce runoff and erosion, protect water quality, and support local ecosystems by allowing for natural water infiltration into the ground.
What aesthetic benefits do drainage systems provide?
Well-designed drainage systems enhance the visual appeal of a yard by integrating with landscaping, maintaining a dry space, and promoting healthy plant life for a welcoming outdoor environment.
Connect with us on Facebook!
The Article: Yard Drainage Services in Gastown, Vancouver: Enhancing Your Property First Published On: https://pacificbluemechanical.ca/
The Article Yard Drainage Services: Improve Your Gastown Property Was Found On https://limitsofstrategy.com