Category: DIY Projects

  • Restore a Travertine Floor: A DIY Guide for Success

    Restore a Travertine Floor: A DIY Guide for Success

    Article by David Allen – Abbey Floor Care, Tile and Stone Floor Cleaning Expert
    Supporting readers across the United Kingdom for over 30 years.
    Abbey Floor Care elucidates the limitations of DIY travertine floor restoration and the professional techniques required for comprehensive restoration.

    Essential Insights from the In-Depth DIY Travertine Floor Restoration Guide

    • Boosting the Aesthetic Appeal of Your Travertine Floor can be effectively accomplished through various DIY restoration techniques such as removing superficial grime, applying a fresh sealer, and achieving a polished finish with topical treatments—ideal for lightly soiled or lackluster surfaces.
    • Understanding the Boundaries of DIY Restoration Techniques: Tackling deeply embedded dirt, etches, uneven surfaces, and resin crack repairs usually necessitates professional-grade equipment and specialized skill sets.
    • Selecting Appropriate Cleaning Products is Crucial—pH-neutral cleaners are safe for routine upkeep, while alkaline cleaners like LTP Grimex can effectively address tougher grime when utilized properly.
    • Repairing Minor Holes and Cracks with Grout can be achieved using a DIY travertine repair kit; however, for resin-based repairs and achieving a color-matched finish, seeking professional assistance is recommended.
    • This article offers actionable guidance to empower homeowners in the UK to make educated decisions, featuring a clear table that outlines what DIY efforts can realistically achieve.

    How Can I Effectively Restore My Travertine Floor?

    Travertine floor with visible improvement after DIY cleaning and sealing, showing enhanced sheen and reduced surface dullness.
    A revitalised travertine floor following DIY deep cleaning and topical sealing—ideal for enhancing appearance but not a replacement for comprehensive restoration.

    Engaging in a DIY travertine restoration project can greatly enhance the visual appeal and tactile quality of your floors, particularly if they appear dull, slightly dirty, or have remained unsealed for an extended duration. By utilizing the right products and dedicating some time, you can effectively remove surface grime, apply a new layer of sealer, and even achieve a sheen or glossy finish through the application of a topical sealer. This approach is particularly beneficial for homeowners who aim to rejuvenate their floors while avoiding the expenses associated with hiring a professional.

    Nevertheless, it is essential to recognize the limitations inherent in DIY methodologies. DIY methods often struggle to effectively eliminate deeply embedded dirt, etching marks, or uneven wear caused by years of foot traffic or spills. Such challenges typically require specialized tools like diamond honing or pressurized rinse-and-capture equipment, which are not commonly available to most homeowners.

    If your travertine floor shows signs of cracking, you can address these imperfections with grout as a cosmetic fix. However, resin fillers, which provide a more durable bond and seamlessly blend with the stone, necessitate specific tools and a certain level of craftsmanship for proper application. Thus, consider DIY restoration primarily as a deep clean and reseal rather than an all-encompassing restoration solution.

    Comparing the Benefits of DIY vs. Professional Travertine Restoration

    Task or Outcome DIY Possible Professional Recommended
    Remove surface dirt, grime and light sealer residue ✅
    Apply an impregnating or topical sealer ✅
    Add sheen or gloss with a topical sealer ✅
    Fill small cracks with grout ✅
    Remove deep ingrained soil ❌ ✅
    Correct etching or dull patches ❌ ✅
    Polish with diamond pads ❌ ✅
    Fill cracks with resin fillers ❌ ✅
    Flatten uneven tiles (lippage) ❌ ✅
    Remove heavy build-up of topical sealers ❌ ✅

    This in-depth guide provides you with all the necessary information to evaluate surface damage, choose stone-safe products, and implement efficient sealing and maintenance practices to extend the life of your travertine floor. Whether your travertine is honed, tumbled, or polished, you will acquire the knowledge needed to restore its natural beauty—safely, efficiently, and confidently.

    Exploring the Unique Characteristics of Travertine as a Natural Stone

    Tumbled travertine floor showing visible before-and-after contrast after professional restoration.
    A professionally restored tumbled travertine floor by Abbey Floor Care—illustrating how deep cleaning and sealing rejuvenate its natural texture and colour variation.

    What Sets Travertine Apart from Other Natural Stones?

    Travertine is a unique sedimentary stone that forms through the accumulation of mineral deposits, typically found around hot springs. Its surface showcases natural pits, subtle variations in color, and a soft texture that provides a warm, organic aesthetic. These distinctive features make travertine tiles particularly appealing for UK homes seeking rustic or timeless design elements.

    Popular Finishes of Travertine Available in the UK: Honed, Tumbled, and Polished

    In the UK, homeowners often encounter travertine in three primary finishes. Honed travertine features a smooth yet matte surface, making it ideal for high-traffic areas such as kitchens and hallways. Tumbled travertine offers a weathered, antique look with rounded edges, frequently preferred in country-style interiors. Polished travertine exhibits a glossy surface, which requires more maintenance to retain its shine.

    Why Is Travertine Sensitive to Acids and Moisture?

    Due to its high calcium carbonate content, travertine reacts negatively to acidic substances such as vinegar, wine, or citrus, potentially leading to etching and a dull appearance if spills are not addressed promptly. Additionally, its porous nature makes it susceptible to moisture absorption, emphasizing the importance of sealing as a crucial component of long-term care and maintenance.

    What Are the Steps for Successful DIY Restoration?

    Homeowner repairing cracks in a travertine floor with a small amount of cement grout.
    DIY travertine care involves meticulous cleaning, minor repairs, and sealing—suitable for routine maintenance but ineffective for addressing deep damage or uneven tiles.

    Restoring travertine independently requires a systematic approach that includes cleaning, sealing, and maintaining the stone. Begin by assessing the surface for signs of wear, selecting stone-safe products, and adhering to a detailed process that respects the stone’s natural characteristics. DIY restoration emphasizes understanding how travertine responds to treatment and working in harmony with its porous structure.

    When Should I Consider Professional Assistance?

    While many homeowners in the UK can manage basic cleaning and sealing tasks, more significant issues such as serious etching or lippage necessitate professional equipment or expertise. If your floor displays uneven tiles, deep scratches, or outdated topical sealers that need removal, consulting a professional is advisable. Nevertheless, most standard travertine care can be competently executed with the right guidance and tools.

    What Dangers Are Associated with Using Harsh Cleaners or Tools?

    Travertine is particularly sensitive to acidic and abrasive substances. The use of bleach, vinegar, or scrubbing pads can lead to etching, dullness, and surface damage. Even certain “natural” cleaners marketed for tiles may be excessively harsh for calcium-based stones. Always ensure that your cleaning products are explicitly labeled as safe for travertine or natural stone, and conduct a patch test in a discreet area before full application.

    Comprehensive Step-by-Step Guide for Restoring Your Travertine Floor

    Evaluating Surface Wear and Damage

    Before initiating any restoration work, perform a thorough inspection of the floor under adequate lighting. Look for dull patches, fine scratches, and cloudy etch marks resulting from acidic spills or significant foot traffic. Identifying these signs will assist you in determining whether your travertine requires a light clean, thorough polish, or complete resealing. Understanding the type and extent of wear is the first step in formulating a safe and effective DIY strategy.

    Choosing the Right Cleaner for Effective Travertine Restoration

    Always opt for a pH-neutral cleaner for the routine maintenance of travertine floors. These gentle formulations are specifically created for natural stone and will not negatively impact the calcium carbonate found in travertine. However, if your floor exhibits heavier, ingrained dirt or greasy residues, you may need to use a specialized alkaline stone cleaner to effectively break down the buildup.

    Alkaline cleaners are more potent, so it is crucial to strictly adhere to the manufacturer’s instructions. Apply the cleaner uniformly, let it sit for the recommended duration, and then rinse thoroughly with clean water to eliminate all residue. Avoid using acidic or general-purpose household cleaners, as these can etch or damage the stone surface.

    If uncertain, always test new products in a discreet corner first and observe for any changes in texture or color before treating the entire floor.

    Safe Agitation and Rinsing Techniques for Effective Travertine Cleaning

    Evenly distribute the cleaner and allow it to dwell for 5 to 10 minutes. Utilize a soft white pad or microfiber mop to gently agitate the surface. Avoid aggressive scrubbing or abrasive tools. Rinse thoroughly with clean water and remove any excess moisture using a wet vacuum or a dry mop. This ensures that no residue remains before proceeding to seal the floor.

    DIY Repairs: Filling Small Cracks and Holes in Your Travertine Floor

    If your travertine floor has small open holes or surface cracks, you can perform basic repairs yourself using a cement-based grout. This type of filler is straightforward to apply and significantly enhances the appearance while preventing dirt from accumulating in the gaps.

    For additional guidance, refer to this post on Travertine Repair Kit for Filling Holes.

    Best Practices for Achieving Optimal Results

    • Thoroughly clean the area before applying grout. Remove any loose debris or dust.
    • Carefully work the grout into the hole or crack, ensuring it fills completely.
    • Wipe away excess with a damp cloth prior to it drying.
    • Allow the grout to fully cure before cleaning or sealing the floor.

    This type of repair is suitable for cosmetic touch-ups. However, if cracks are deep or spreading, or if a seamless color match is desired, it is advisable to consult a professional who can utilize resin fillers and specialized tools for a more enduring solution.

    Drying the Floor and Preparing for Sealing

    Allow the floor to dry completely—ideally for 12 to 24 hours, depending on ventilation conditions. The porous nature of travertine means that trapped moisture can hinder sealer absorption. Once dry, review the surface for consistency and ensure that no cleaner residue remains. This stage is critical in establishing a solid foundation for effective sealing.

    Applying an Appropriate Stone-Safe Sealer

    If your goal is to maintain the natural look of your travertine floor, opt for a breathable impregnating sealer. This sealer penetrates the stone, offering protection against stains while preserving its appearance. Use a lint-free cloth or applicator pad to apply it, working in small sections. Allow it to absorb, and then wipe away any excess before it dries. Avoid over-application, as this could leave streaks or a tacky finish. Always follow the instructions on the label, including the recommended waiting period before walking on the floor.

    If your floor looks dull and you desire a subtle sheen or gloss, consider using a film-forming topical sealer. This sealer sits on the surface, creating a polished effect, which can be advantageous if you lack the tools or experience needed for professional polishing. Regardless of the type chosen, it is vital to clean the floor with the manufacturer’s recommended cleaner to ensure that the sealer operates effectively and does not harm the finish.

    Conducting a Post-Sealing Inspection and Understanding Cure Time

    After sealing, perform a simple water-drop test to evaluate coverage. If water beads on the surface, the seal is working effectively. Allow the floor to cure undisturbed for the recommended duration, typically 24 to 48 hours, to ensure the sealer adheres properly and protects the stone against future stains and wear.

    Crucial Tools and Products for Effective DIY Travertine Care

    Selecting Suitable Cleaners and Stone-Safe Pads

    For daily cleaning, it is advisable to use a pH-neutral cleaner specifically formulated for natural stone. These gentle formulations efficiently remove daily dirt and spills without reacting negatively with the calcium in travertine, helping to maintain the surface and preserve the sealer. Pair these with a soft white pad or microfiber mop to avoid scratching the stone. Avoid standard household tile cleaners, as many contain acids or harsh chemicals that can gradually damage travertine.

    When a floor requires restoration, it often appears dull, greasy, or covered in built-up grime—especially in kitchens or high-traffic areas—necessitating a more intensive clean. In such instances, a specialized alkaline stone cleaner, such as LTP Grimex, can assist in breaking down stubborn dirt. These products are more potent than standard cleaners, so it is crucial to carefully follow the label instructions. Allow the cleaner to act for the recommended time, then rinse thoroughly with clean water to eliminate all residue.

    Utilizing the appropriate cleaner at the right time significantly influences overall results. Consider pH-neutral products as your standard for regular maintenance, reserving alkaline cleaners for deeper cleaning when your floor requires a refresh. Always test any new product in a small, inconspicuous area to ensure it does not affect the color or finish of your travertine.

    Employing Wet Vacuums and Microfiber Mops for Optimal Results

    After cleaning, utilize a wet vacuum to extract the soiled solution and rinse water. This prevents residue from settling into the stone’s pores. For routine maintenance, a microfiber mop with clean water or a diluted stone-safe cleaner helps maintain freshness without excessive moisture.

    Distinguishing Between Impregnating and Topical Sealers

    Impregnating sealers penetrate the stone and provide internal protection against stains while allowing moisture to escape. Conversely, topical sealers create a surface layer and produce a satin or glossy finish.

    Recommended UK Brands for Travertine Maintenance

    Seek reputable UK brands specializing in stone care, such as Lithofin, Fila, and LTP. These companies provide stone-safe cleaners and sealers specifically formulated for travertine and other calcium-based stones. Always check product labels for compatibility and meticulously follow usage instructions.

    Post-Restoration Care Strategies

    Establishing Consistent Weekly Cleaning Routines for Longevity

    After restoration, safeguard the beauty of your travertine floor with regular gentle cleaning. Utilize a microfiber mop along with a diluted pH-neutral stone cleaner once or twice a week. Avoid over-saturating the surface and always rinse with clean water after using any cleaning product. This routine will help maintain the seal and prevent dirt from accumulating in the pores.

    Identifying Early Signs of Wear in Your Travertine Floor

    Monitor high-traffic areas for dull spots, fine scratches, or inconsistent sheen. These early indicators suggest that the surface may require attention. Spot cleaning with a stone-safe product and conducting occasional resealing in these areas can help avert the need for more extensive restoration work in the future. Travertine responds well to proactive maintenance.

    When Should I Reseal My Travertine Floors?

    Most travertine floors benefit from resealing every 12 to 24 months, depending on usage and exposure levels. Conduct a water-drop test—if water no longer beads on the surface, it is time to reseal. Always ensure thorough cleaning before applying a new sealer coat, and allow adequate curing time to guarantee long-lasting protection.

    Common Missteps to Avoid During Travertine Restoration

    Avoiding Overwetting or Inadequate Rinsing

    As travertine is highly absorbent, excessive water during cleaning can lead to moisture penetrating the stone, diminishing the seal’s effectiveness and promoting staining. Conversely, neglecting to rinse thoroughly after applying a cleaner can leave residue that dulls the surface. Always use minimal water and promptly remove excess moisture with a wet vacuum or dry mop.

    Steering Clear of Acidic or Abrasive Cleaning Products

    A common mistake involves using products not designed for natural stone. Cleaners containing vinegar, lemon, bleach, or abrasive detergents can result in etching and deterioration of the surface. Additionally, abrasive pads or brushes can damage the finish. Stick to pH-neutral, stone-safe products and gentle tools to protect the integrity of the floor.

    Ensuring Proper Surface Preparation Before Sealing

    Applying sealer to a dirty or damp floor can entrap impurities, reducing its effectiveness. Always ensure the surface is clean, dry, and free from residue before sealing. Rushing this step may yield uneven results and could necessitate stripping and resealing sooner than anticipated.

    Frequently Asked Questions Regarding DIY Travertine Restoration

    Is Using Steam Cleaners Safe for Travertine Floors?

    Steam cleaners are not recommended for travertine floors. The high temperatures and moisture can seep into the stone’s pores, compromising the seal. Instead, utilize pH-neutral cleaners and soft pads for safe and effective cleaning without risking damage.

    What Actions Should I Take If My Floor Is Already Damaged?

    If your travertine exhibits deep etching, cracks, or uneven tiles, DIY methods may not be sufficient. Basic cleaning and sealing can help stabilize the surface, but professional restoration might be required to address structural issues or severe wear.

    How Long Can I Anticipate My Restoration to Last?

    With proper care, a restored travertine floor can remain protected for 12 to 24 months before resealing is necessary. Regular maintenance and the use of stone-safe products will prolong the life of your restoration while preserving the natural beauty of your floor.

    Is DIY Travertine Care Environmentally Responsible?

    Indeed, many UK brands offer eco-friendly stone care products that are biodegradable and safe for indoor use. By avoiding harsh chemicals and minimizing waste, DIY travertine care can be both effective and environmentally conscious.

    This article, Can I Restore a Travertine Floor Myself? A DIY Guide, was first published on https://www.abbeyfloorcare.co.uk

    The Article Restoring a Travertine Floor: A DIY Guide to Success appeared first on https://fabritec.org

    The Article DIY Guide to Successfully Restore a Travertine Floor Was Found On https://limitsofstrategy.com

  • DIY Fire Starters: Simple Homemade Solutions You Can Try

    DIY Fire Starters: Simple Homemade Solutions You Can Try

    Unlock the Advantages of Creating Your Own Homemade Fire Starters

    Understanding Homemade Fire Starters and Their Mechanisms

    Homemade Fire Starters: Homemade fire starters on a rustic table: wax-dipped pine cones, cardboard rolls with sawdust, and natural fiber bundles, with camping gear and a cozy fireplace in the background.

    Homemade fire starters are innovative do-it-yourself (DIY) tools that make igniting fires significantly easier. They can be made from materials that are readily available in your home, making them an ideal solution for outdoor enthusiasts, campers, or anyone looking to create a warm atmosphere indoors. The charm of homemade fire starters lies in their versatility; they can range from simple wax-coated cardboard to intricate blends of various natural ingredients. Their increasing popularity is a testament to a growing movement towards self-sufficiency and environmentally friendly practices, highlighting the importance of safe and responsible fire management.

    These fire starters are adaptable to a vast array of situations, whether you’re starting a cozy campfire to share stories beneath a star-lit sky or lighting a wood stove on a chilly evening. Their effectiveness spans diverse climates, from the humid tropics to arid deserts. Each homemade fire starter can be customized to suit your specific needs, enhancing your enjoyment of fire in its many forms.

    The Smart Benefits of Choosing Homemade Fire Starters

    Choosing homemade fire starters offers numerous benefits that extend far beyond mere convenience. For starters, they are remarkably cost-effective. By repurposing commonly found materials, you not only save money but also play an active role in reducing waste. This aligns perfectly with sustainable living practices, as many of the materials can be salvaged from items that would otherwise be discarded. For example, dryer lint, leftover wax, and scrap cardboard can transform into essential components of your fire-starting toolkit.

    Furthermore, homemade fire starters can be tailored to your individual preferences, allowing for adjustments in size and burn duration. This level of customization fosters a deeper connection with the craft of fire-making, cultivating a sense of accomplishment and mastery over a valuable skill. They serve as dependable ignition sources, especially useful in challenging conditions where commercial fire starters may not perform as well. Ultimately, embracing homemade solutions represents a return to fundamental skills and a commitment to self-sufficiency in fire management.

    Best Practices for Storing Homemade Fire Starters for Maximum Efficiency

    Proper storage of homemade fire starters is essential to maintain their effectiveness and safety. To keep these items in optimal condition, adhere to a few key guidelines. First and foremost, store them in a cool, dry location. Moisture can drastically affect the materials, impairing their ability to ignite. Avoid areas that are susceptible to humidity or direct sunlight, as excessive heat can damage the integrity of components, particularly those containing wax.

    A practical solution is to utilize airtight containers for your fire starters. This not only protects them from moisture but also keeps pests at bay. Labeling these containers can add convenience, allowing for quick identification when needed. Additionally, it is prudent to keep homemade fire starters out of children’s reach and away from any heat sources, reinforcing safety as a top priority in your storage practices. By following these recommendations, you can ensure your homemade fire starters are always ready for your next outdoor adventure or a peaceful evening by the fire.

    A Step-by-Step Guide to Crafting Your Own Homemade Fire Starters

    Homemade fire starters on a rustic table: wax-dipped egg cartons, cardboard rolls with dryer lint, old candles, natural elements.

    Creating homemade fire starters is a simple yet rewarding process that can be accomplished with readily available household ingredients. You will need items such as wax (old candles work excellently), cardboard (from boxes or egg cartons), and dryer lint. These materials are often found around the house and can be repurposed, enhancing their appeal as eco-friendly fire-starting solutions.

    To craft your fire starters, follow these straightforward steps:

    • Gather your materials: wax, cardboard, and dryer lint.
    • Cut the cardboard into small sections or utilize egg cartons for convenience.
    • In a double boiler, melt the wax until it becomes liquid.
    • Integrate the dryer lint into the melted wax.
    • Pour the mixture into the cardboard sections or egg carton compartments.
    • Allow the fire starters to cool and solidify completely.
    • Store them in an airtight container for future use.

    By following these steps, you can create effective homemade fire starters that ignite quickly and burn steadily. The crafting process can be a fulfilling experience that allows you to engage creatively with everyday materials while preparing for your next outdoor adventure.

    Understanding the Lifespan of Your Homemade Fire Starters

    The lifespan of homemade fire starters is largely contingent on the materials utilized and the storage conditions. When stored under ideal circumstances—dry and cool—they can last for several months, and even years. The wax functions as a preservative, helping to maintain the integrity and functionality of the other materials. However, exposure to moisture or high temperatures can significantly reduce their effectiveness.

    It is advisable to inspect your homemade fire starters regularly. If they appear damp or if the materials seem compromised, it may be time for replacements. Additionally, understanding the specific components used in your fire starters can provide valuable insights regarding their durability. For instance, starters primarily made of wax typically outlast those with a higher paper content. By practicing good storage habits and remaining aware of the materials, you can ensure that your homemade fire starters remain reliable tools for igniting fires whenever needed.

    Expert Insights on Crafting the Best Homemade Fire Starters

    Identifying the Most Effective Materials for Crafting Fire Starters

    A variety of homemade fire starters on a rustic wooden table, including dryer lint, wax, cardboard, egg cartons, cotton balls, pinecones, used coffee grounds, and paper scraps.

    To enhance the effectiveness of your homemade fire starters, selecting the right materials is crucial. Numerous common household items can serve as effective fire igniters. Here are some of the most suitable materials for your fire starters:

    • Dryer lint: This highly combustible material ignites quickly and efficiently.
    • Wax: Old candles or paraffin wax act as a binding agent and extend burn times.
    • Cardboard: Recycled cardboard offers a sturdy base and initial flame to ignite the fire.
    • Egg cartons: These are excellent for holding wax and lint; they burn well on their own, assisting in the ignition process.
    • Cotton balls: When dipped in wax or used alone, they make exceptional fire starters.
    • Pinecones: Natural options that ignite easily and burn for an extended period.
    • Used coffee grounds: Can be mixed with wax to create an eco-friendly fire starter.
    • Paper scraps: Old newspapers or mail can serve as effective ignition sources.

    These materials are not only readily accessible but also contribute to a reliable fire-starting experience. Experimenting with various combinations can yield unique fire starters customized to your preferences.

    Ensuring Safety When Using Fire Starters

    Safety should always be a priority when utilizing homemade fire starters. To ensure effective and safe usage, adhere to several essential guidelines. First, use fire starters in well-ventilated areas to minimize the risks associated with smoke inhalation and ensure proper airflow, which is crucial for any fire to thrive. Additionally, keep your fire starters away from flammable materials and ignition sources to prevent accidental fires.

    Having a fire extinguisher readily available is a critical safety measure. Familiarize yourself with its location and operational procedures before starting a fire. Never leave a fire unattended, even for a moment; vigilance is vital for fire safety. Lastly, be mindful of the ingredients used in your starters. Some commercial options may contain harmful chemicals, while homemade starters allow you to control the ingredients, reducing health risks and ensuring a cleaner burn. Following these safety practices will help cultivate a safe and enjoyable fire-starting experience.

    Expert Tips to Elevate Your Fire Starter Crafting Experience

    Experts recommend several best practices for effectively crafting and utilizing homemade fire starters. One important tip is to prioritize the moisture content of your materials. Ensure all components, particularly items such as dryer lint or paper, are thoroughly dry before use. Wet materials can hinder ignition and reduce efficiency, complicating your fire-starting efforts.

    Another crucial aspect is to consider the ratios of your materials. A common recommendation is to blend wax and combustible materials, such as dryer lint, in a ratio of approximately 1:2. This balance facilitates quick ignition while providing extended burn times. Introducing natural accelerants, like small amounts of vegetable oil, can further enhance ignition without introducing harmful chemicals—just be careful to use these sparingly.

    Real-world examples highlight the effectiveness of these techniques. Campers in various environments worldwide often depend on the adaptability of homemade fire starters, adjusting their formulas to suit local conditions. Experimentation is part of the journey; discovering what works best for your specific situation can lead to even greater success in igniting fires.

    Effective Storage and Preservation Techniques for Homemade Fire Starters

    To maintain the functionality of your homemade fire starters, proper storage is essential. Always keep them in a cool, dry location to prevent moisture from compromising the materials. Using airtight containers can also protect your fire starters from moisture while keeping them safe from pests or contaminants.

    Regularly inspect your stored fire starters, particularly before embarking on a camping trip or outdoor activity. If you observe any signs of moisture or deterioration, it’s advisable to create new ones rather than risk failure at a critical moment. Labeling containers can aid in organization, making it easier to quickly identify the contents.

    Additionally, consider maintaining an inventory of your fire starters based on their types and effectiveness. This practice ensures you can readily access the best options for your needs, whether faced with damp conditions or windy environments. By implementing these storage and preservation strategies, you can maximize the longevity and reliability of your homemade fire starters.

    Exploring the Advantages of Using Homemade Fire Starters

    Are Homemade Fire Starters Environmentally Friendly?

    Homemade fire starters can certainly be eco-friendly, especially when crafted from recycled or repurposed materials. The environmental footprint of commercial fire starters often includes packaging waste and synthetic chemicals that can harm the ecosystem. In contrast, homemade alternatives promote a sustainable approach to fire management by making use of items that would otherwise contribute to landfill waste.

    For instance, materials such as dryer lint, leftover wax from candles, and scrap cardboard not only find new life as fire starters but also help reduce the overall carbon footprint associated with fire management. Furthermore, as you become more aware of your material choices, you can design your fire starters to exclude any harmful additives, opting instead for natural components. This mindful decision-making fosters a positive relationship with nature, resonating with global initiatives to encourage sustainability and eco-friendly practices.

    Moreover, since homemade fire starters typically do not require extensive industrial processes, they represent a low-impact solution that contributes to a greener planet. From this perspective, crafting your fire starters is not just a convenient act; it transforms into a thoughtful, environmentally responsible choice that reflects a holistic commitment to sustainable living.

    Can Homemade Fire Starters Help You Save Money?

    Utilizing homemade fire starters undeniably represents a cost-effective strategy for managing your fire ignition needs. By repurposing items typically found around the house, you can significantly reduce expenses compared to purchasing commercial fire starters. A small investment in ingredients like wax, cardboard, and natural fibers yields a sustainable and practical solution that produces multiple fire starters at a fraction of the cost of store-bought alternatives.

    This DIY approach not only encourages financial savings but also fosters resourcefulness, prompting you to reevaluate how you perceive everyday materials. Rather than discarding potential fire-starting items, you begin to recognize their value and utility. Over time, these savings can accumulate, leading to a more budget-friendly outdoor experience or cozy evenings by the fireplace.

    Additionally, as you master the art of creating homemade fire starters, you can adjust your methods to meet specific needs, further reducing expenses. This process enhances your skills while reinforcing the notion that practical knowledge can yield long-term financial benefits.

    Customization: Tailoring Your Fire Starters to Fit Your Needs

    One of the most significant advantages of homemade fire starters is their customizable nature. Unlike commercial options, which are often standardized, you have the freedom to design your fire starters to meet your specific requirements, including size, burn time, and materials used. This adaptability proves especially valuable in varying environments, whether you’re camping in a humid region or seeking a quick ignition source for a fireplace.

    For example, if you prefer longer burn times, you can experiment with a higher wax-to-lint ratio or incorporate denser materials like sawdust or wood shavings. Conversely, if you need a quick igniter, you might focus on lighter, more volatile materials. This level of personalization allows you to add scents or other natural elements that enhance the fire experience, making it more enjoyable.

    Additionally, the process of customizing your fire starters encourages creativity and resourcefulness. By experimenting with different combinations, you not only discover what works best for your circumstances but also develop a deeper understanding of fire dynamics. This knowledge inspires ongoing experimentation and adaptation, enriching your overall experience with fire management across diverse settings.

    Research-Based Insights on the Efficacy of Homemade Fire Starters

    What Do Studies Reveal About Fire Starters?

    Research indicates that homemade fire starters can outperform their commercial counterparts, primarily due to the customizable nature of their materials. Studies show that when individuals create their fire starters, they can optimize the composition for improved ignitability and burn duration. For instance, using specific wax-to-combustible material ratios can lead to significant performance enhancements, making homemade options reliable even in challenging conditions.

    Moreover, the flexibility involved in crafting your fire starters allows for necessary adjustments based on environmental factors. Campers in various climates have reported higher success rates with homemade fire starters than with commercial products, particularly in damp or windy conditions where consistency is critical. This adaptability represents a major advantage, reinforcing the idea that understanding materials and their interactions can lead to greater success in fire management.

    These insights underscore the importance of not just the materials themselves but also how they are combined and utilized. As users gain experience with homemade fire starters, they often become more adept at recognizing the variables that influence fire ignition and sustainment. This knowledge translates into a more confident approach to managing fire, ensuring effectiveness across diverse environments and situations.

    Comparing Homemade Fire Starters with Commercial Alternatives

    When comparing homemade fire starters with commercial options, several key differences emerge that highlight the benefits of the DIY approach. Cost is a significant factor; homemade versions typically utilize readily available household materials, resulting in lower overall expenses. Conversely, commercial fire starters usually come with a higher price tag, particularly for those marketed as premium products.

    In terms of customization, homemade fire starters excel. Users can tailor their fire starters to suit personal preferences, experimenting with different materials and ratios to create products that meet specific needs. In contrast, commercial options often provide limited choices, forcing users to settle for one-size-fits-all solutions that may not adequately address their requirements.

    Furthermore, controlling the ingredients in homemade fire starters allows users to avoid potentially harmful chemicals commonly found in some commercial products. By selecting natural elements, you can create fire starters that promote cleaner burning and reduce environmental impact. This conscious choice aligns with a growing global awareness of sustainability and health, making homemade fire starters not just a practical solution but also a responsible one.

    Long-Term Benefits of Using Homemade Fire Starters

    The long-term advantages of utilizing homemade fire starters extend beyond immediate cost savings. With consistent use, they contribute to a heightened sense of self-sufficiency and resourcefulness. Mastering the craft of creating your fire starters equips you with practical skills beneficial in various situations, whether during camping trips, emergencies, or simply enjoying a fire at home.

    Additionally, homemade fire starters can significantly lessen environmental impact. By using recycled materials and avoiding the packaging and chemicals associated with commercial products, you actively participate in promoting sustainability. This ecological mindfulness resonates globally, as more individuals seek ways to minimize their carbon footprints and embrace sustainable practices.

    Another long-term benefit is the growing confidence in fire management skills. As you gain experience creating and utilizing homemade fire starters, you become more adept at understanding fire dynamics, which leads to safer and more effective fire practices. This newfound expertise allows for enjoyable experiences in diverse settings, empowering you to approach fire activities with assurance and skill.

    Enhancing Safety with Homemade Fire Starters

    Homemade fire starters can significantly enhance safety, primarily because you have control over their composition. Unlike many commercial fire starters that may contain harmful chemicals, crafting your own allows you to select natural materials that pose fewer health risks. This focus on safe ingredients results in cleaner burns and a lower likelihood of producing harmful smoke or toxic fumes.

    Moreover, the customizable nature of homemade fire starters means you can modify burn times and ignition characteristics to suit specific environments. For instance, knowing that certain materials ignite quickly can prepare you for use in windy or damp conditions, ensuring effective fire management. This awareness fosters a more responsible approach to fire management, reducing the chances of accidents or uncontrolled flames.

    Additionally, the process of making homemade fire starters provides valuable education on fire safety. As you engage with the materials and learn about their properties, you become more informed about fire behavior and the factors that influence ignition and sustainability. This knowledge can translate into safer practices when starting fires, whether in a controlled environment like a fireplace or during outdoor activities. By prioritizing safety in your fire-starting efforts, you contribute to a culture of awareness and responsibility in fire management.

    Practical Strategies for Crafting Effective Homemade Fire Starters

    Enhancing the Efficiency of Your Fire Starters

    Improving the efficiency of homemade fire starters involves several actionable strategies that can significantly elevate their performance. First, concentrate on the material ratios you use. A common guideline recommends maintaining a balance of approximately 1:2 wax to combustible materials, which ensures optimal burn time while facilitating quick ignition. Experimenting with various combinations can yield impressive results, enabling you to tailor your fire starters to your specific needs.

    Moreover, incorporating natural accelerants can substantially enhance efficiency. For instance, adding a small amount of essential oils or natural oils can improve ignition without compromising safety. However, exercise caution with the quantity, as excessive amounts can lead to uncontrolled flames. Additionally, consider pre-warming wax before mixing it with other materials, as this can enhance adhesion and create a more uniform burn.

    Real-world scenarios often illustrate the significance of these strategies. Campers in diverse conditions, such as those contending with damp environments, have found particular success by honing in on material efficiency and composition ratios. By mastering these techniques, you can create fire starters that ignite quickly and burn steadily, proving invaluable across numerous settings.

    Avoiding Common Pitfalls When Crafting Fire Starters

    Several common mistakes can undermine the effectiveness and safety of homemade fire starters. First and foremost, using wet materials is a significant error. Moisture can drastically reduce ignitability, making it difficult to start fires, particularly in adverse conditions. Always ensure that your materials are thoroughly dry before crafting fire starters.

    Another frequent pitfall is improper storage. Neglecting to store fire starters in airtight containers or exposing them to humidity can lead to degradation over time. Regularly inspecting your stored fire starters and replacing any that show signs of wear is crucial for maintaining their effectiveness.

    Safety precautions are also paramount. Leaving fires unattended, even briefly, can lead to accidents. Always remain vigilant and ensure you have the necessary safety equipment, such as fire extinguishers, readily available. By proactively addressing these issues and being conscious of your practices, you can improve both the safety and effectiveness of your homemade fire starters.

    Utilizing Fire Starters Across Various Scenarios

    Homemade fire starters are incredibly versatile, making them suitable for a wide range of scenarios. For camping excursions, they can be invaluable for igniting campfires, particularly in challenging weather conditions. Their ability to burn steadily allows you to establish a strong, reliable fire for cooking, warmth, or ambiance, whether surrounded by rugged mountains or tranquil lakes.

    In urban settings, homemade fire starters enhance your fireplace experience. They provide a quick and efficient means to ignite logs or other fuels, ensuring a cozy atmosphere on chilly evenings. Additionally, they prove useful during emergencies where quick ignition is essential, such as during power outages or natural disasters.

    The adaptability of homemade fire starters extends even further. You can customize them to fit specific needs, such as creating smaller, portable versions for backpacking or larger, more robust starters for outdoor cooking setups. Regardless of the context, having quality homemade fire starters on hand guarantees you are always prepared to enjoy the warmth and comfort of fire, no matter your surroundings.

    Maintaining and Caring for Your Homemade Fire Starters

    When Should You Replace Your Fire Starters?

    Determining when to replace homemade fire starters is vital for ensuring their ongoing effectiveness. A good rule of thumb is to inspect your fire starters regularly, especially if they have been stored for extended periods. If they exhibit signs of dampness, degradation, or if the materials lose their structural integrity, it’s time to create replacements.

    In humid environments, fire starters may deteriorate more quickly due to moisture exposure, necessitating more frequent replacements. Conversely, those stored in cooler, drier areas might last longer. Nevertheless, always err on the side of caution; if you’re ever uncertain about the condition of your fire starters, it’s best to make new ones rather than risk failure when you need them most.

    By establishing a routine of inspecting and replacing your homemade fire starters, you not only maintain their effectiveness but also ensure a safe fire-starting experience. This proactive approach ultimately enhances your confidence and preparedness in managing fire, regardless of the setting.

    Best Practices for Storing Fire Starters Safely

    Maintaining the effectiveness of homemade fire starters requires adherence to best storage practices. First and foremost, always store them in airtight containers to protect against moisture and pests. Glass jars, plastic bins, or resealable bags are excellent options for keeping your fire starters safe from environmental factors.

    It’s also beneficial to label your containers for easy identification. This can help you quickly locate the desired fire starters when preparing for outdoor activities or cozy nights indoors. Additionally, consider keeping your fire starters in a cool, dry location, away from direct sunlight and heat sources, which can compromise their materials over time.

    Regularly checking the condition of your stored fire starters is another integral practice. This proactive approach helps you catch any signs of moisture or degradation early, allowing for timely replacement if necessary. By incorporating these best practices into your routine, you can ensure your homemade fire starters remain effective and ready for use when needed.

    Can You Reuse Your Homemade Fire Starters?

    Yes, certain homemade fire starters can be reused if they have not been completely consumed. For instance, if you’ve utilized cotton ball fire starters, you may find they still contain residual materials that can be reignited. However, it is essential to assess their condition beforehand. If they are still dry and intact, you can reassemble or repurpose them for future use.

    When reusing fire starters, ensure they are stored properly between uses. Keeping them in airtight containers can help maintain their effectiveness, preventing moisture exposure and degradation over time. Should you decide to reuse a fire starter, monitor its performance and replace it if it shows signs of wear or dampness.

    Ultimately, reusing homemade fire starters not only maximizes their lifespan but also aligns with eco-friendly practices that prioritize sustainability. It reinforces the idea that every element in your fire-starting toolkit can be valuable multiple times, making the most of your resources and contributing to a greener approach to fire management.

    Frequently Asked Questions About Homemade Fire Starters

    What materials are best suited for crafting homemade fire starters?

    The most effective materials for homemade fire starters include dryer lint, wax, cardboard, egg cartons, cotton balls, pinecones, and paper scraps. This variety ensures effective ignition and combustion.

    What are the safe storage practices for homemade fire starters?

    Store homemade fire starters in a cool, dry place within airtight containers to prevent moisture accumulation and protect them from pests.

    Can homemade fire starters be effective in wet conditions?

    Yes, homemade fire starters can perform well in wet conditions, particularly if made with moisture-resistant materials and properly stored prior to use.

    What is the typical lifespan of homemade fire starters?

    When stored correctly, homemade fire starters can last for several months to years. Their longevity depends on the materials used and the storage conditions.

    Are homemade fire starters safe to use?

    Yes, homemade fire starters can be safe if crafted from natural materials and used in well-ventilated areas. Always observe proper safety precautions.

    Can I customize my fire starters to meet specific needs?

    Absolutely! Homemade fire starters can be customized to adjust size, burn time, and materials based on your specific requirements or preferences.

    What common mistakes should I avoid when working with fire starters?

    Common mistakes include using wet materials, improper storage, and neglecting safety practices. These can reduce effectiveness and increase risks.

    How can I improve the efficiency of my fire starters?

    You can enhance fire starter efficiency by optimizing material ratios, adding natural accelerants, and ensuring all components are thoroughly dry.

    How often should I inspect my homemade fire starters?

    Inspect homemade fire starters regularly, especially before use, to check for moisture, degradation, or any signs of wear that may require replacement.

    Is it possible to reuse homemade fire starters?

    Yes, some homemade fire starters can be reused if they remain intact and dry. Monitor their condition before reusing to ensure effectiveness.

    Discover more insights on our platform!

    The post Homemade Fire Starters: Easy DIY Solutions appeared first on Survival Bite.

    The Article Easy DIY Fire Starters for Homemade Solutions Was Found On https://limitsofstrategy.com

  • Survival Tools: A Must-Have DIY Guide for Your Home

    Survival Tools: A Must-Have DIY Guide for Your Home

    Mastering Survival: Expert Techniques for Crafting Essential Tools

    How to Create Functional Knives for Wilderness Survival

    Homemade Survival Tools: A survivalist crafts a sharp knife from an old saw blade in a wilderness setting.

    The ability to craft a functional knife stands as a pivotal skill within the realm of homemade survival tools. A knife transcends its basic function as a cutting implement; it serves multiple purposes, including slicing rope, preparing food, and executing critical tasks essential for survival in the wild. The crafting process allows for the use of materials that are frequently found in outdoor settings. One effective method is to locate a durable piece of metal, such as an old saw blade or a metal file, which can be transformed through creative repurposing. The initial step involves shaping the metal into a blade, achievable through techniques like forging or grinding to attain the desired sharpness and aesthetic.

    After successfully crafting the blade, the subsequent vital step is designing a handle. This can be accomplished using materials such as wood, bone, or even durable plastics that can be molded securely. To ensure a robust bond between the blade and the handle, applying glue or wrapping the junction with cordage can provide a solid grip. Prioritizing ergonomics in the handle design is crucial, as a comfortable grip can greatly influence the knife’s performance in survival situations where it is frequently utilized.

    Diverse cultural approaches to knife-making techniques are observable globally, showcasing the unique materials and traditions of various regions. For example, numerous indigenous cultures have specific designs that resonate with their local environments and accessible resources. By delving into various knife-making methods, you can cultivate a richer appreciation and understanding of this essential skill that has been refined over generations, thereby augmenting your survival toolkit.

    How to Produce Strong Cordage for Vital Survival Applications

    The skill of creating robust cordage from natural fibers is a foundational element of homemade survival tools. Cordage is incredibly versatile, serving a multitude of functions in survival scenarios, from constructing shelters to securing gear and crafting fishing nets. The process begins with identifying suitable plants; for instance, fibers derived from the inner bark of trees like cedar or certain grass leaves can be harvested for this purpose. Recognizing the right plants is essential for effective cordage creation.

    After gathering the appropriate fibers, they must be prepared by stripping them and, in some cases, soaking them to enhance flexibility. A commonly employed technique for cordage production is the twisting method, which entails twisting two or more fibers together to build strength and durability. In regions abundant in palm trees, fronds can be effectively utilized to create strong cordage, making it ideal for a variety of survival tasks.

    As a proficient survivalist, recognizing and utilizing the natural resources surrounding you to create cordage is indispensable. Understanding the various types of fibers available in different ecosystems can significantly improve the functionality and effectiveness of your survival tools, allowing you to adapt to diverse situations and environments with greater ease.

    Crafting Reliable Fire Starters from Common Materials

    The ability to construct reliable fire starters from everyday items is indispensable for warmth, cooking, and signaling in survival scenarios. Among the collection of homemade survival tools, fire starters can range from basic cotton balls soaked in petroleum jelly to more intricate designs utilizing natural tinder sources. A prevalent method involves assembling a fire starter using dry leaves, bark, and other easily ignitable materials, showcasing creativity in resource management.

    An effective approach is to compile a fire starter kit containing various components such as flint, steel, and natural tinder. These elements can typically be found in diverse environments, including riverbeds and forest floors. The key to successfully igniting a fire lies not only in the tools you possess but also in the techniques you employ. Practicing different methods, such as the bow drill technique or the hand drill method, can greatly enhance your skills and confidence in fire-starting.

    Furthermore, grasping the essential components required for a successful fire—specifically, the fire triangle of heat, fuel, and oxygen—can assist you in creating a sustainable warmth source. Mastering the art of building a fire that can endure various weather conditions, including rain or wind, is invaluable for survival, ensuring you can maintain a reliable heat source when it is most critical.

    Essential Tools for Constructing Shelters in Survival Scenarios

    Person in forest building lean-to shelter with branches, leaves, stones, demonstrating survival skills.

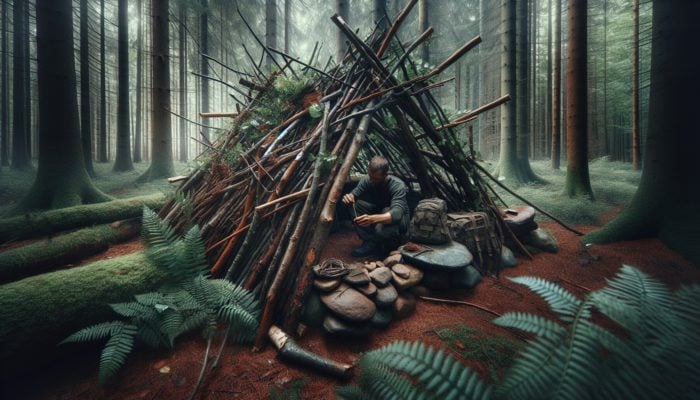
    The capacity to create essential tools for building shelters hinges on effectively utilizing the resources available in your surroundings. Within the domain of homemade survival tools, the ability to construct shelters can be the decisive factor between safety and exposure to harsh environmental elements. The first step involves collecting sturdy materials such as branches, leaves, and large stones, which can be fashioned into various shelter designs. Among the simplest and most effective forms of shelter is the lean-to, which can be constructed with relative ease.

    To build a lean-to, start by identifying two robust trees or a rock wall that can serve as support structures. Next, gather long branches and lean them against the supports at an angle to establish a solid framework. Once the structure is set, fill any gaps with leaves, grass, or other natural insulating materials to effectively retain heat. This technique is particularly advantageous in areas rich in vegetation, providing adequate protection from the elements.

    Another notable shelter design is the debris hut, which offers exceptional insulation against colder climates. Although this design necessitates more materials, the comfort and protection it provides are invaluable. The combination of various shelter-building methods equips survivalists with the flexibility to adapt to their surroundings, utilizing local resources to create safe havens from harsh weather conditions.

    Proven Strategies for Water Collection in Survival Situations

    How to Collect Rainwater for Consistent Hydration

    Establishing simple devices to collect and store rainwater is crucial for maintaining hydration during survival scenarios. Rainwater harvesting can serve as a lifesaver, particularly in regions where freshwater sources are scarce. A fundamental collection system can be implemented using tarps, large containers, or even improvised funnels crafted from leaves or plastic. Strategically positioning these tools to capture rain directly can greatly augment the volume of water gathered, ensuring you have adequate hydration available.

    In addition to creating effective collection systems, it is essential to understand how to filter and safely store water. Techniques that involve layers of sand, charcoal, and gravel can assist in purifying the water before consumption, ensuring it is safe and free from contaminants. Numerous indigenous tribes have mastered the art of rainwater collection, adapting their methods based on local climate patterns and specific requirements.

    Historically, efficient rainwater collection systems have evolved, offering diverse solutions to meet the demands of survival. Learning and adapting these techniques can provide a reliable water source during emergencies, whether in the midst of a planned adventure or an unexpected situation that requires immediate action.

    How to Build Solar Stills for Effective Water Extraction

    A solar still in a desert with a pit, plastic cover, and water collection container under the sun.

    Constructing a solar still is an ingenious method for extracting water from the ground or plant matter, particularly in arid regions. A solar still utilizes solar energy to evaporate moisture, subsequently condensing it back into a liquid form for collection and use. This technique is vital for survivalists who find themselves in dry climates with limited access to fresh water sources, ensuring hydration is maintained.

    To build a basic solar still, you will need a shallow pit, a container for water collection, and a transparent cover, such as plastic sheeting. The pit should be deep enough to expose moisture from the soil. After placing the container at the bottom of the pit, cover it with plastic to create a seal. The sun’s heat will warm the ground, causing moisture to evaporate, which then condenses on the plastic and drips into the container, providing essential hydration.

    Mastering the construction of solar stills not only ensures hydration but also demonstrates resourcefulness and ingenuity in survival situations. This method can be adapted based on available materials and local conditions, making it a versatile tool in any survivalist’s arsenal.

    How to Gather Dew as a Valuable Water Source

    Utilizing natural morning dew as a water source can significantly enhance survival odds, particularly in environments where traditional water sources are limited. The process of collecting dew is straightforward yet effective, requiring minimal tools and effort. One popular technique involves using cloth or sponges to soak up dew from grass or foliage during the early morning hours when dew is most abundant.

    Positioning these absorbent materials in open areas where dew tends to form can optimize your collection efforts. Once saturated, the water can be wrung out into a container for consumption. This technique is particularly beneficial in regions with considerable temperature fluctuations, where dew forms during cooler nights, providing an additional water source when it is most necessary.

    By incorporating dew collection into your survival strategy, you can tap into a frequently overlooked water source. Understanding local climate patterns and recognizing the optimal times and locations for dew collection can greatly enhance your survival toolkit, ensuring access to hydration when it is most critical for your well-being.

    Fundamentals of Building Shelters for Survival

    How to Construct Lean-To Shelters for Immediate Protection

    A lean-to shelter is one of the most straightforward and efficient designs for survival, providing essential protection from the elements. Building a lean-to requires a solid understanding of how to utilize available materials, such as branches, leaves, and foliage. Start by selecting two sturdy trees or a rock face as support structures. The next step involves gathering long branches and leaning them against the supports at an angle to create a triangular shape.

    Ensure the shelter’s design is oriented away from prevailing winds to maintain stability during storms and adverse weather conditions. Once the basic structure is established, fill in gaps with smaller branches and leaves for insulation. To enhance warmth, place a bed of leaves inside the shelter to provide additional insulation and comfort. This basic structure is adaptable and can be modified to suit different environments, improving its effectiveness across various climates and conditions.

    Diverse cultures around the globe adapt lean-to shelters to local materials and environmental conditions. Functional variations can be observed in the traditional practices of indigenous peoples, who have refined the art of shelter building over generations, ensuring their survival in challenging settings while showcasing their deep connection to the landscape.

    How to Construct Debris Huts for Superior Insulation

    Building a debris hut requires more effort but offers exceptional insulation against cold and harsh weather conditions. This shelter is constructed using natural materials like branches, leaves, and grass to create a warm and protective environment. To begin, find a sturdy support, such as a fallen tree or a framework of branches, and create a frame tall enough to lie down inside comfortably, ensuring adequate space for movement.

    The secret to a successful debris hut lies in its insulation; once the frame is erected, cover it with a thick layer of debris, such as leaves, pine needles, or moss. This insulating layer should be at least twelve inches thick to provide adequate warmth and protection. Additionally, you can line the interior with leaves or grass for added comfort, creating a snug sleeping area that shields against the elements.

    Debris huts have been utilized by various cultures throughout history, demonstrating their effectiveness in different climates. As a survivalist, mastering this skill not only improves your ability to create a warm shelter but also deepens your understanding of the environment and the resources it offers, fostering a meaningful connection to the natural world.

    Setting Up Tarp Shelters for Quick Protection

    Establishing a durable tarp shelter can be accomplished quickly and efficiently, offering immediate protection in survival scenarios. Tarps are lightweight, versatile, and can be fashioned into various types of shelters, including A-frame, lean-to, or a basic overhead cover. Selecting an appropriate location is crucial; it should ideally provide some natural windbreak and shelter from the elements.

    Basing your setup on the tarp size, start by securing two ends to trees or strong stakes driven into the ground, creating a sloped roof that allows rainwater runoff. The remaining edges can be staked down for stability, while additional tarps or materials can be layered for extra insulation or coverage if necessary, enhancing the shelter’s effectiveness and comfort.

    The advantages of using tarps are numerous, especially in climates where conditions can change rapidly. Their adaptability allows survivors to create effective shelters with minimal effort, and learning to set them up quickly can be invaluable in emergencies, providing essential protection from the elements and ensuring safety.

    Techniques for Food Procurement in Survival Situations

    How to Design Traps for Capturing Small Animals

    Creating simple traps to capture small animals is a vital skill within the realm of homemade survival tools. Effective trapping can provide a consistent source of protein when food supplies are dwindling, significantly enhancing your survival odds. Various types of traps can be constructed using natural materials, including snares, deadfall traps, and pitfall traps, all of which help sustain your nutritional needs in the wild.

    Snares are particularly effective for catching small mammals and can be crafted using wire or strong cordage. Positioning the snare along animal trails, where signs of activity are visible, increases the chances of success. Deadfall traps utilize weight to crush or ensnare an animal and typically require a sturdy platform and a trigger mechanism. These traps can be made from sticks and stones found nearby, making them practical and accessible in most situations.

    The cultural significance of trapping is evident globally, with diverse communities employing unique designs and methods tailored to local wildlife and ecosystems. Learning these techniques enables survivalists to adapt to various environments, enhancing their ability to procure food in the wild and ensuring survival in challenging circumstances.

    How to Forage for Wild Edibles in the Wilderness

    Identifying and safely gathering wild plants, berries, and nuts is crucial for obtaining nutrition in survival situations. Foraging connects individuals to their environment, enabling them to utilize available resources effectively and sustainably. Start by familiarizing yourself with local flora, including edible plants and berries. Field guides or local experts can provide invaluable insights on safe foraging practices, aiding you in avoiding potentially toxic varieties that could compromise your health.

    When foraging, adhere to the “rule of three”—if you are uncertain about a plant, seek to identify it through three different sources before consuming it. Many edible plants can easily be confused with their toxic counterparts, so caution is essential. Additionally, the nutritional profile of wild edibles often surpasses that of cultivated crops, providing not just sustenance but also vital vitamins and minerals necessary for maintaining health in survival scenarios.

    Foraging practices vary widely across cultures, with indigenous peoples often possessing extensive knowledge of the land and its offerings. By embracing these techniques and gaining a deeper understanding of the local ecosystem, survivalists can enhance their food sources and develop greater confidence in their foraging abilities, ensuring nourishment even in the wild.

    How to Create Fishing Gear for Sustainable Food Sources

    Developing basic fishing tools can significantly enhance a survivalist’s ability to catch fish as a reliable food source. Fishing gear can be crafted from materials found in various environments, with techniques varying based on local fish species and water bodies. For instance, simple fishing lines can be made from strong cordage, while hooks can be fashioned from bent metal, bone, or even wood, showcasing resourcefulness and adaptability in utilizing available resources.

    The construction of fishing nets can also be accomplished using natural fibers, enabling effective trapping of multiple fish at once. Understanding local fishing methods and conditions improves the effectiveness of these tools, as different regions present unique challenges and target species. Knowledge of the local aquatic ecosystem is essential for successful fishing, ensuring you can adapt techniques to suit your environment.

    The cultural practices surrounding fishing are profound, with traditional methods passed down through generations. Learning these techniques not only aids survival but also connects individuals to their local heritage and the abundance of nature, fostering a deeper appreciation for the resources available in the wild.

    Employing Hunting Techniques for Larger Game

    Acquiring knowledge and applying various methods to hunt larger game can significantly enhance food variety and nutritional intake. Within the toolkit of homemade survival tools, hunting can be achieved through strategies ranging from simple stalking to using improvised weapons. Understanding animal behavior and habitat is crucial for success, as well as recognizing the appropriate timing for hunting activities to maximize effectiveness and efficiency.

    One effective method involves utilizing bows and arrows, which can be crafted from local materials such as wood and sinew. Alternatively, traps and snares can be strategically set in areas known for animal movement, providing a passive means of acquiring food. Stealth, patience, and an intimate knowledge of the local wildlife are key components to successful hunting practices, ensuring you are prepared for the challenges ahead.

    Cultural hunting practices vary immensely across different regions, with indigenous peoples often possessing unique techniques tailored to their specific environments. By adopting these methods, survivalists not only increase their chances of success but also gain a deeper appreciation for the land and its resources, fostering a connection to their surroundings that enhances their survival skills.

    Effective Signaling and Communication Techniques in Survival

    How to Create Smoke Signals for Emergency Communication

    Generating visible smoke signals is a traditional method for attracting attention and signaling for help in survival situations. The effectiveness of smoke signals lies in their visibility over long distances, making them a valuable tool for communication during emergencies. To create smoke signals, gather materials that burn well, such as green leaves or wet wood, which produce thick smoke when ignited.

    Building a small fire in an open area with a clear line of sight can maximize the reach of your smoke signals. Timing is essential, as weather conditions can affect visibility; thus, creating distinct patterns, such as puffs of smoke at intervals, can convey messages more effectively. Practicing different signaling techniques can enhance your ability to communicate efficiently during emergencies, ensuring you are prepared for any situation.

    Smoke signaling techniques have been utilized by various cultures throughout history, showcasing their importance in communication and survival. Mastering how to effectively use smoke signals can be a vital skill in emergencies when traditional communication methods are unavailable, providing a means to attract attention and request assistance from potential rescuers.

    Using Reflective Mirrors for Long-Distance Signaling

    Utilizing a polished surface to reflect sunlight creates a signaling beam that can travel long distances, effectively capturing attention. This technique is particularly advantageous in remote areas where other forms of communication may be impractical. A simple mirror can be fashioned from metal or glass, and its effectiveness depends on the angle at which light is reflected.

    To use a mirror, position it so that it faces the sun and aim the beam towards your target. Employ flashing patterns to convey messages, creating a more noticeable signal that can be seen from afar. Practicing this method in different conditions ensures you can signal effectively regardless of the environment or time of day, enhancing your chances of rescue during critical situations.

    Throughout history, mirror signaling has been used in various contexts, from maritime navigation to military communication. By mastering this technique, survivalists can significantly increase their chances of rescue during emergencies, utilizing a simple yet effective tool for communication that can make a profound difference in life-or-death scenarios.

    Crafting Whistles for Efficient Signaling

    Creating a whistle from natural materials is another effective method for long-distance communication. A whistle can be made using bamboo, wood, or even certain types of shells, providing a powerful tool for signaling in survival scenarios. Constructing a simple whistle involves hollowing out a piece of material and shaping it to allow air to produce a clear sound that carries across distances.

    The ability to generate a loud, attention-grabbing signal can prove invaluable, particularly in dense forest environments where visual signals may be obscured. Whistles can also facilitate communication among group members during hunting or gathering activities, enhancing coordination and safety in the wilderness.

    Whistling techniques vary across cultures, with different shapes and materials yielding unique sounds. The process of crafting and utilizing a whistle connects survivalists to traditional communication methods, enriching their skill set while deepening their understanding of their environment and the resources it provides, which can be critical for effective survival.

    Utilizing Drums for Long-Distance Communication

    Using drums to create rhythmic patterns can effectively convey messages over long distances, especially in dense forests or during nighttime. Drumming techniques vary widely across cultures, often rooted in community traditions and practices. A basic drum can be constructed from hollow logs or animal skins stretched over a frame, producing distinct sounds that carry through the air.

    The rhythmic patterns of drumming can be employed to signal specific messages, such as calls for gathering, warnings, or requests for assistance. Understanding the local context and developing a protocol for drumming signals can enhance communication efforts during survival situations, leveraging the power of sound to connect individuals and groups effectively.

    The cultural significance of drum signaling is profound, with drums often serving as a means of storytelling and communal bonding. By mastering this art form, survivalists can tap into a rich tradition while improving their ability to communicate effectively in challenging environments, fostering a sense of community and connection in the wilderness.

    Essential Navigation Aids for Survival

    How to Build a Simple Compass for Direction Guidance

    Constructing a simple compass is a crucial skill for determining direction in unfamiliar terrain. A basic compass can be made using a magnetized needle, a floating device, and a shallow container filled with water. The process begins by magnetizing a needle, which can be accomplished by rubbing it with a magnet in one direction, ensuring it retains its magnetic properties for accurate navigation.

    Once magnetized, place the needle on a floating device, like a piece of cork or a leaf, and set it on the water’s surface. The needle will align itself with the Earth’s magnetic field, pointing towards magnetic north. This technique can guide individuals through dense forests or across open landscapes, significantly enhancing navigation skills and confidence during wilderness excursions.

    Over the years, various cultures have developed their compass systems, adapting them to suit local materials and environmental needs. Learning these techniques not only offers practical navigation solutions but also connects individuals to a long tradition of exploration and discovery, fostering a deeper appreciation for the natural world and its navigational cues.

    Navigating by Stars: Timeless Techniques for Nighttime Orientation

    Navigating using constellations is a time-honored method that enables travelers to find their way at night. The stars have guided explorers and adventurers for centuries, providing a reliable means of navigation and orientation. To master this technique, start by familiarizing yourself with the prominent constellations visible in your region, learning to identify key stars that can assist in navigation.

    Identifying the North Star, situated in the Little Dipper constellation, is an essential component of night navigation. This star remains relatively fixed in the sky, serving as a constant reference point. By understanding the movement of stars throughout the night, survivalists can determine their direction and navigate effectively, even in complete darkness, enhancing their chances of successful navigation.

    Cultural practices surrounding star navigation vary globally, with different societies developing unique stories and techniques tied to their celestial observations. By embracing these traditions, individuals can deepen their connection to the natural world while honing their navigation skills, ensuring they are well-prepared for any journey, regardless of the challenges they may face.

    Utilizing Natural Landmarks for Effective Navigation

    Identifying and utilizing natural landmarks can significantly aid navigation and orientation in survival scenarios. Features such as mountains, rivers, and unique rock formations serve as excellent reference points, helping individuals maintain their bearings in unfamiliar territories. Familiarizing yourself with the local terrain enhances situational awareness and reduces the risk of getting lost during wilderness adventures.

    When navigating through unfamiliar environments, developing a mental map based on visible landmarks is essential. Observing the sun’s position can also provide valuable directional information, as it rises in the east and sets in the west, guiding your journey throughout the day. Combining these observations with knowledge of local flora and fauna can greatly enhance navigation efforts in the wild, ensuring you remain oriented.

    Cultural practices surrounding navigation often incorporate stories and teachings linked to local landmarks, bridging the connection between people and their environment. By embracing these techniques, survivalists can cultivate a deeper understanding of their surroundings, improving their ability to navigate effectively and confidently in the wilderness, which is vital for survival.

    Combining Map Reading with Compass Skills for Effective Navigation

    Integrating map-reading skills with compass usage allows for accurate navigation through unfamiliar terrain and efficient route planning. Understanding the topography and scale of a map is crucial, as it provides essential context for utilizing a compass effectively. To begin, familiarize yourself with the symbols and features depicted on the map, including rivers, mountains, and trails that aid in orientation.

    Once comfortable with the map, the next step is to use the compass to orient it correctly. Align the compass with the map, ensuring that the needle points north while adjusting for declination. This combined approach significantly enhances navigation accuracy, enabling more effective route planning and informed decision-making during wilderness adventures, ensuring you can navigate safely.

    The importance of map and compass skills cannot be overstated in survival situations, especially in areas where technology may fail. Throughout history, cultures have relied on this knowledge for exploration and survival. Mastering these skills fosters confidence and self-reliance when navigating challenging environments, ensuring you are well-prepared for any situation that may arise.

    First Aid Techniques and Health Management in Survival

    How to Create Functional Bandages for Effective Wound Care

    Constructing effective bandages from cloth is essential for treating wounds and preventing infection in survival scenarios. Knowledge of first aid can significantly enhance a person’s chances of survival when medical help is not readily accessible. Bandages can be made from various materials, including clean cloth, clothing, or even natural fibers, depending on the severity of the injury and available resources.

    To create a basic bandage, start by cleaning the wound with clean water or a natural antiseptic, if available. Next, apply the bandage firmly but not overly tight, ensuring it stays in place while allowing for proper blood circulation. It is vital to monitor the wound for signs of infection, such as redness or swelling, which may require additional care and attention to prevent complications and promote healing effectively.

    Understanding the principles of wound care and bandage creation is deeply rooted in many cultural practices, as communities have relied on traditional knowledge for survival throughout history. By mastering these skills, individuals can enhance their ability to maintain health and safety in challenging circumstances, fostering resilience and self-sufficiency in the wilderness.

    Utilizing Natural Remedies for Common Health Ailments

    Harnessing the power of plants and herbs to create remedies for common ailments and injuries is a vital aspect of survival health management. Many plants possess medicinal properties, offering solutions for issues ranging from digestive discomfort to pain relief. Familiarizing yourself with local flora and their uses enhances your ability to address health concerns effectively during survival situations, ensuring you remain in optimal condition.

    Herbal teas, poultices, and tinctures can be made from wild plants, providing natural solutions for various health issues. For instance, chamomile can aid in relaxing the digestive system, while willow bark serves as a natural pain reliever. Understanding the correct dosage and preparation methods is crucial for maximizing the effectiveness of these remedies, ensuring safe and beneficial treatment for ailments in the wilderness.

    Cultural practices surrounding herbal medicine vary widely, with different communities developing unique knowledge bases rooted in local ecosystems. By embracing these natural remedies, individuals can become more self-sufficient in managing their health while fostering a deeper connection to their environment and the resources it provides, ensuring a holistic approach to health and well-being in the wild.

    How to Fabricate Splints for Limb Support and Immobilization

    Constructing splints from available materials is crucial for immobilizing and supporting injured limbs in survival situations. Injuries can occur unexpectedly, and knowing how to create a splint can mean the difference between mobility and long-term complications. A basic splint can be fashioned from sturdy sticks or branches, ensuring that the injured area is immobilized and protected from further damage.

    To create a splint, start by finding two straight branches that can serve as the sides. Pad the area surrounding the injury with leaves or cloth for comfort, then secure the splint to the limb using cordage or strips of cloth. It is essential to check circulation regularly by ensuring that the area beyond the splint remains warm and responsive, preventing additional complications and ensuring proper healing.

    Cultural practices surrounding first aid vary worldwide, with many societies passing down knowledge of splinting techniques through generations. By mastering this skill, survivalists can ensure proper care for injuries, enhancing their overall chances of survival and reinforcing the importance of self-sufficiency in challenging conditions.

    Creating Insulating Clothing for Extreme Survival Conditions

    How to Craft Waterproof Ponchos for Effective Weather Protection

    Making a waterproof poncho is a crucial skill for protecting against rain and maintaining body heat in survival situations. A poncho can be crafted from various materials, including tarps, plastic sheeting, or large leaves found in certain environments. The construction process is straightforward: cut the material into a large rectangle with a hole for the head in the center, ensuring adequate coverage and protection from the elements.

    To enhance insulation and protection, adding a hood and securing the sides can prevent water from entering, ensuring you remain dry. This design allows for freedom of movement while keeping the wearer comfortable in adverse conditions. In colder climates, layering additional materials underneath the poncho can significantly enhance warmth, making it a versatile tool for adapting to various weather conditions and ensuring survival in the wilderness.

    Throughout history, indigenous cultures have developed unique forms of protective clothing, often utilizing local materials that offer both functionality and comfort. By mastering poncho creation, survivalists can ensure they remain insulated and protected, even in challenging weather, thereby increasing their chances of survival in the wild.

    Crafting Insulated Footwear for Harsh Weather Conditions

    Creating insulated footwear is essential for keeping feet warm and dry in harsh conditions. In survival scenarios, protecting your extremities is vital for maintaining overall body temperature and preventing injury. Insulated footwear can be crafted from natural materials, such as animal hides, wool, or repurposed fabrics, showcasing resourcefulness and adaptability in utilizing available resources effectively.

    To create basic insulated footwear, begin by measuring the foot and cutting the materials into corresponding shapes. Layering these materials can significantly enhance warmth and comfort, providing essential protection against the elements. Adding a waterproof outer layer, like plastic or rubber, can further shield against moisture from the ground, ensuring that feet remain dry and warm while navigating through challenging environments.

    Cultural practices surrounding footwear construction vary globally, with different communities developing unique techniques based on available resources. By mastering this skill, survivalists can ensure their feet remain protected, enhancing overall mobility and comfort in the wilderness, which is vital for effective foraging and navigation.

    How to Repair Clothing for Longevity in Survival Scenarios

    Learning to repair and maintain clothing is vital for extending its usability in survival situations. Knowledge of basic sewing techniques enables individuals to mend clothing and stay warm, thereby preventing exposure to the elements that could jeopardize their health. A sewing kit can be created from available materials, including thread made from natural fibers or even fishing lines, showcasing creativity and resourcefulness in crafting necessary tools.

    Basic repairs can involve patching holes, reinforcing seams, or creating new clothing from larger fabric pieces, ensuring that garments remain functional and protective. Understanding the principles of layering can maximize insulation, allowing individuals to adapt their clothing to changing weather conditions effectively, ensuring they maintain warmth and comfort when it matters most.

    Cultural practices surrounding clothing maintenance often reflect values of resourcefulness and sustainability. By embracing clothing repair techniques, survivalists enhance their ability to remain comfortable and protected, ensuring they can thrive in challenging environments and adapt to the demands of the wild.

    Frequently Asked Questions About Homemade Survival Tools

    What are homemade survival tools?

    Homemade survival tools refer to items crafted from available materials that assist in wilderness survival. These tools encompass a variety of essential implements for shelter construction, food procurement, and navigation, enabling individuals to thrive in challenging environments.

    How can I create a knife at home?

    To make a knife, locate a strong piece of metal, shape it into a blade using appropriate techniques, and attach a handle made from wood or durable materials for grip and comfort, ensuring it is secure and functional for various tasks.

    What materials are suitable for making cordage?

    Natural fibers, such as plant bark, grass, or even leaves, can be twisted together to produce strong cords suitable for various survival tasks, thereby enhancing your ability to secure items or construct shelters effectively.

    How do I construct a solar still for water collection?

    To create a solar still, dig a shallow pit, place a container in the center, cover it with plastic, and allow the sun to evaporate moisture for collection, providing a crucial water source in arid conditions.

    What should I do if I sustain a wound in the wilderness?

    Clean the wound using available water, then apply a homemade bandage crafted from cloth or other suitable materials to prevent infection and promote healing, ensuring proper care in survival situations to enhance recovery.

    How can I collect dew for drinking water?

    In the early morning, utilize absorbent materials such as cloth or sponges to soak up dew from grass or leaves, then wring them out into a container for drinking water, enhancing hydration options in the wild.

    What are some common edible plants I can forage?

    Common edible plants include dandelions, clover, and various berries; however, it’s vital to ensure proper identification to avoid consuming toxic varieties, thereby enhancing your nutritional intake during survival situations.

    What methods can I use to signal for help in the wilderness?

    You can signal for help using smoke signals, mirrors, whistles, or even drumbeats, depending on the materials available and your specific situation, to ensure effective communication in emergencies.

    What is the best way to construct traps for small animals?

    Construct simple traps, such as snares or deadfall traps, using local materials. Ensure they are positioned along animal trails for maximum effectiveness and success in procuring food, enhancing your chances of survival.

    Why is clothing repair crucial in survival scenarios?

    Clothing repair is essential as it extends the usability of garments, helping to maintain warmth and protection from the elements, ensuring individuals can survive and thrive in challenging conditions.

    Explore our world on X!

    The post Homemade Survival Tools: Essential DIY Guide appeared first on Survival Bite.

    The Article Survival Tools: Your Essential DIY Guide at Home Was Found On https://limitsofstrategy.com