Category: Recipe Guide

  • Tasting Menu Creation Guide: Craft the Perfect Multi-Course Meal

    Tasting Menu Creation Guide: Craft the Perfect Multi-Course Meal

    Master the Craft of Designing an Exquisite Tasting Menu

    Developing a Captivating and Thematic Menu Concept

    How to Create a Multi-Course Tasting Menu: A tasting menu table with Mediterranean and Asian fusion dishes, vibrant and elegantly presented in a sunlit modern dining room.

    Creating an outstanding multi-course tasting menu necessitates a thoughtful approach to selecting a theme that provides a coherent foundation for the entire dining experience. This theme does more than just set the scene; it informs the culinary narrative and visual appeal of each dish served. Reflect on different cultural influences, seasonal ingredients, or unique cooking techniques that resonate with your culinary ethos. For instance, a Mediterranean theme may be expressed through dishes inspired by the sunlit coasts of Southern Europe, whereas an Asian fusion theme can harmoniously combine flavors from Japan and Thailand. This fusion creates an exciting culinary conversation that is sure to entice and captivate diners.

    When determining a theme, it’s crucial to factor in the tastes and preferences of your target audience. A contemporary twist on classic dishes may intrigue those with adventurous palates, while a focus on traditional recipes can evoke nostalgia for diners seeking comfort and familiarity. Emphasizing seasonal themes can also be particularly effective, as they showcase the freshest ingredients available, ensuring optimal flavor while promoting sustainable sourcing practices. This connection to nature enriches the overall dining experience, fostering a deeper bond between the meal and the environment.

    Determining the Ideal Number of Courses for Your Tasting Menu

    The quantity of courses included in your tasting menu is influenced by several factors, including the dining context, guest preferences, and the overall experience you aim to create. While a classic five-course structure is widely used, expanding to eight or even ten courses can offer a more elaborate exploration of flavors and textures, creating a deeply immersive dining experience. Consider elements such as the anticipated duration of the meal—longer dining experiences allow for more courses—and the appetite of your guests, as well as the nature of the occasion, be it an intimate gathering or a grand celebration.

    Here are some vital considerations to keep in mind when deciding the number of courses:

    • Guest appetite: Are they light eaters, or do they prefer a hearty meal?
    • Meal duration: How much time is available for serving all dishes?
    • Dish complexity: Are the courses elaborate or straightforward?
    • Seasonal availability: How many seasonal ingredients can you effectively utilize?
    • Guest demographics: Are there specific preferences or dietary restrictions to take into account?
    • Type of event: Is this a casual gathering or a formal occasion that requires a more intricate approach?

    Your ultimate aim is to curate a memorable and fulfilling experience that keeps diners engaged and delighted from the first course to the last.

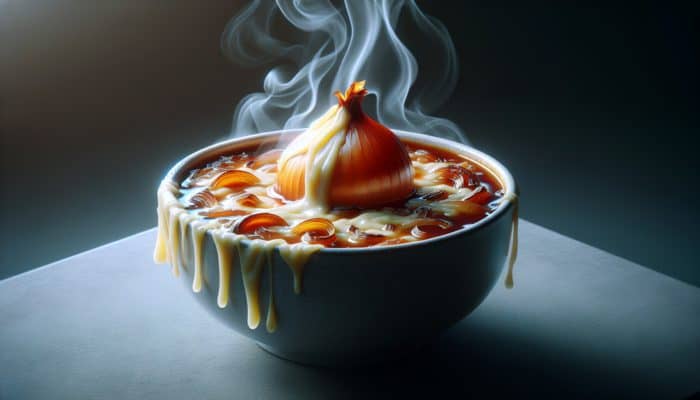
    Creating a Harmonious Balance of Flavors and Textures

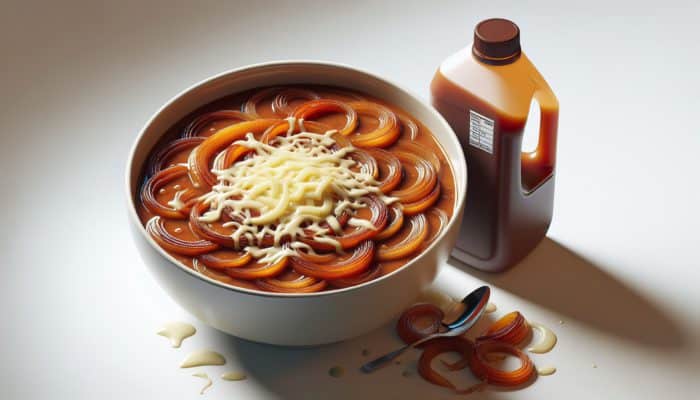
    A successful tasting menu hinges on a meticulous balance of flavors and textures, which together create an engaging and satisfying dining experience. This balance not only enhances the culinary adventure but also maintains the diners’ excitement for the upcoming dishes. Strive to incorporate a diverse array of taste profiles—sweet, savory, bitter, and umami—alongside various textures, such as creamy, crunchy, and chewy. By carefully constructing each course, you can create a harmonious progression that captivates the palate throughout the meal.

    For example, you might begin with a light and refreshing appetizer, such as a crisp salad drizzled with a zesty vinaigrette, seamlessly transitioning into a warm, rich soup that complements the preceding dish. As the menu unfolds, introduce intricate flavor combinations in the main courses, perhaps employing techniques like smoking or fermentation to add depth and intrigue. The dessert should serve as the crowning finale, showcasing contrasting textures, such as a creamy panna cotta paired with a crunchy tuile, culminating in a delightful conclusion to the culinary journey.

    Maintaining a natural flow of flavors is essential. Each course should build upon the last, leading to a crescendo of taste that culminates in a satisfying conclusion. By thoughtfully designing each dish, you not only tantalize the palate but also deepen the appreciation for the artistry inherent in gastronomy.

    Addressing Dietary Restrictions and Allergies Thoughtfully

    A diverse group enjoying allergen-free, vegetarian, vegan, and gluten-free dishes at a dinner table with allergy cards.

    In today’s diverse culinary landscape, it is crucial to consider dietary restrictions and allergies when designing a tasting menu. Offering an inclusive dining experience significantly enhances the enjoyment and satisfaction of your guests. Start by communicating with diners in advance to gather insights about any dietary restrictions or preferences they may have, such as vegetarian, vegan, gluten-free diets, or specific allergies, including nuts or dairy.

    Once you have gathered this information, you can adapt your menu accordingly without compromising creativity or flavor. For instance, if a guest cannot consume dairy, think about using alternatives like coconut milk or cashew cream in sauces. Similarly, for those who require gluten-free options, explore alternative grains or flours that maintain the integrity of the dish while meeting their dietary needs.

    Additionally, strive to preserve the overarching theme of your menu. Crafting alternative dishes that align with your initial vision demonstrates flexibility and ingenuity, ensuring that every guest feels considered and included. Ultimately, the goal is to create an unforgettable experience for all diners, enhancing the sense of community and connection that dining offers.

    Mastering the Timing and Pacing of Your Courses

    The timing and pacing of each course in a multi-course tasting menu are critical for maintaining a smooth flow and enriching the overall dining experience. A well-paced meal allows guests to savor each dish while facilitating conversation and digestion, creating a relaxed atmosphere. Generally, courses should be served with about 10-15 minutes between each dish, depending on the complexity and nature of the meal.

    Consider the overall duration of the dining experience and your guests’ preferences. For a leisurely meal, providing more generous spacing between courses may be appropriate, encouraging relaxed conversation and enjoyment. On the other hand, if the meal is designed to be dynamic and fast-paced, quicker transitions may be more suitable for younger or more energetic diners.

    In addition to timing between courses, pay close attention to the transitions from one dish to the next. Implement palate cleansers, such as a refreshing sorbet or a light sip of a cleansing beverage, to reset the taste buds and enhance the enjoyment of the following dish. This thoughtful pacing ensures that diners remain engaged and comfortable, ultimately leading to a more fulfilling dining experience.

    Essential Techniques for Crafting an Outstanding Multi-Course Tasting Menu

    Identifying Key Components of a Successful Tasting Menu

    A multi-course tasting menu with small, artistic plates, showcasing culinary artistry and thematic consistency.

    The essential elements that contribute to an exceptional multi-course tasting menu include pacing, portion size, and thematic coherence. Renowned restaurants worldwide, such as Noma in Copenhagen and Eleven Madison Park in New York, have perfected the art of creating tasting menus that leave a lasting impression on diners. Pacing is vital; it dictates the rhythm of the meal and allows guests to fully appreciate each dish.

    Portion size is equally critical for guest satisfaction. Each course should be small enough to allow diners to relish multiple dishes without feeling overwhelmed, yet substantial enough to showcase the chef’s expertise and the quality of the ingredients. For instance, using small, artistically designed plates can spark curiosity and stimulate conversation—a hallmark of fine dining.

    Thematic coherence is another fundamental element that unifies the entire dining experience. Every dish should contribute to the overarching theme, whether through flavor profiles, presentation, or cultural references. Consider a tasting menu inspired by a specific region; incorporating local ingredients and traditional cooking methods can create an authentic and immersive experience for diners. This consistency reinforces the meal’s narrative, enhancing its memorability.

    Ensuring Guest Satisfaction Throughout the Dining Experience

    Guaranteeing guest satisfaction during a multi-course tasting menu involves an amalgamation of attentive service, high-quality ingredients, and responsiveness to feedback. One effective approach is to implement feedback mechanisms, such as informal conversations with diners during their meal or follow-up surveys after dining. Observing guests’ reactions and body language as dishes are served can yield valuable insights into their satisfaction levels.

    To enhance the dining experience further, consider the following indicators of satisfaction:

    • Guest engagement: Are diners actively asking questions or expressing enthusiasm about the dishes?
    • Empty plates: Are guests finishing their courses, indicating enjoyment?
    • Repeat visits: Are guests returning for future dining experiences?
    • Positive comments: Are diners offering compliments to the chef or staff?
    • Social media shares: Are guests sharing their experiences online?

    By actively seeking feedback and remaining open to adjustments based on guest preferences, you create an environment where diners feel valued and appreciated. This level of attentiveness not only enhances satisfaction but also fosters loyalty and encourages repeat visits.

    Creatively Accommodating Dietary Restrictions

    Accommodating a variety of dietary needs within a multi-course tasting menu is not merely a requirement; it presents an opportunity for creativity and innovation. By approaching dietary restrictions with an open mind, chefs can devise alternative dishes that preserve the essence of the original menu while ensuring inclusivity for all guests. Start by identifying common dietary restrictions, such as vegan, vegetarian, gluten-free, or nut allergies, and engage with guests ahead of time to understand their specific needs.

    For example, if a guest has a gluten intolerance, consider utilizing alternative grains or flours like quinoa or almond flour in your dishes. For vegetarian diners, enhance the menu with inventive, vegetable-focused creations that prominently feature seasonal produce. This approach not only respects dietary restrictions but also showcases the chef’s versatility and commitment to crafting an inclusive dining experience.

    Moreover, maintaining open communication with guests is paramount. When serving courses, highlight any ingredients that may raise concerns or allergies. This transparency cultivates trust, enabling diners to enjoy their meals with confidence. By thoughtfully integrating dietary restrictions into your tasting menu, you create a more welcoming atmosphere and elevate the culinary experience for everyone at the table.

    Balancing Flavor Profiles Within Your Menu

    Achieving harmony in taste across multiple courses necessitates a deep understanding of flavor profiles. Balancing contrasting and complementary flavors is crucial to crafting a memorable tasting menu. Techniques such as layering flavors, utilizing seasonings, and selecting the appropriate combinations can significantly enhance the overall dining experience. For instance, pairing sweet elements like caramel with a salty component, such as cheese or bacon, can create a delightful contrast that excites the palate.

    One effective strategy for balancing flavors is to initiate with lighter dishes that feature fresh herbs and citrus, gradually transitioning to richer and more robust flavors in the main courses. For example, a starter might consist of a tart citrus salad, leading into a main course of slow-cooked beef braised in red wine accompanied by earthy root vegetables. This progression establishes a satisfying arc that highlights different culinary techniques and flavor dynamics without overwhelming the diner.

    Expert tips for flavor progression may include:

    • Utilizing acidity: Brighten dishes with lemon juice or vinegar to enhance flavors.
    • Incorporating herbs and spices: Use fresh herbs to elevate dishes and introduce contrasting flavors.
    • Experimenting with textures: Combine smooth, creamy elements with crunchy toppings for delightful contrasts.
    • Emphasizing umami: Include ingredients like mushrooms or aged cheeses to deepen flavor complexity.

    By paying meticulous attention to flavor balance, chefs can design a tasting menu that takes diners on an unforgettable gastronomic journey.

    Streamlining Service for Maximum Efficiency

    Optimizing the flow of service during a multi-course tasting menu is essential for creating a seamless dining experience. Proper timing, coordination among staff, and minimizing guest wait times are critical factors in ensuring that the evening unfolds smoothly. Start by establishing a clear service plan that outlines when each course will be served, considering the pacing and timing of dishes.

    Training staff is equally vital; servers should be well-versed in engaging diners confidently about each dish. This knowledge facilitates smoother transitions between courses and enriches the overall dining experience by providing guests with insights into the culinary journey they are experiencing.

    Strategies to streamline service include:

    • Pre-preparation: Prepare as much as possible in advance to minimize time spent in the kitchen during service.
    • Effective communication: Use hand signals or a coordinated system to indicate when courses are ready to serve.
    • Guest anticipation: Train staff to observe guests and anticipate their needs before they have to ask.
    • Efficient cleanup: Plan for quick and unobtrusive clearing of plates between courses to maintain momentum.

    By emphasizing these strategies and fostering effective teamwork, you can create a welcoming atmosphere for diners while delivering a remarkable multi-course tasting menu efficiently.

    Finding Premium Ingredients for Your Culinary Creations

    Where to Discover High-Quality Ingredients for Your Menu?

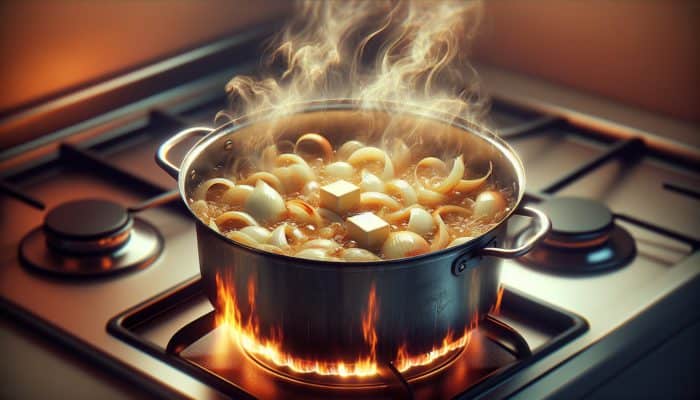
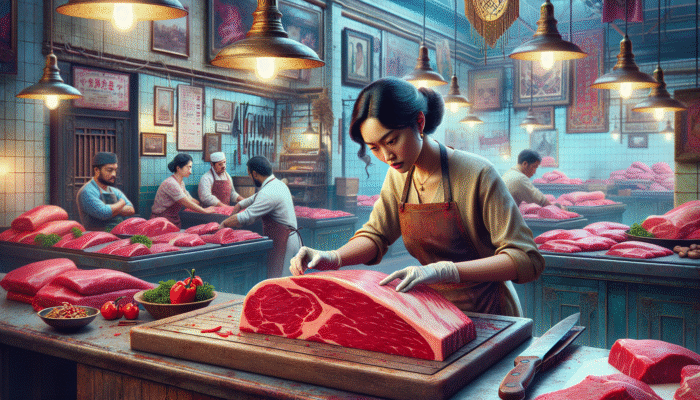
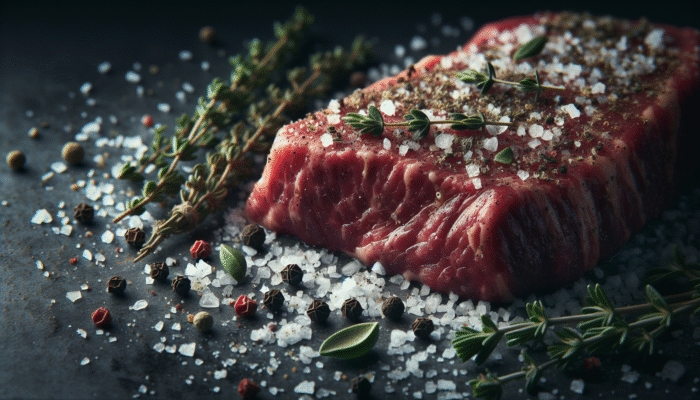
    Procuring high-quality ingredients is essential for crafting a memorable multi-course tasting menu. The quality of the ingredients deeply influences the flavor and presentation of each dish, making it vital to explore various sources to acquire the finest options available. Begin by connecting with local farmers’ markets, which often serve as treasure troves of fresh, seasonal produce. Engaging directly with farmers allows you to learn about their growing practices and select ingredients at their peak freshness.

    In addition to farmers’ markets, consider building relationships with specialty suppliers that focus on unique or hard-to-find ingredients. Many cities boast local purveyors who can supply artisan cheeses, cured meats, and exotic spices, all of which can elevate your culinary creations. Online marketplaces also provide access to high-quality ingredients from around the world, making them ideal when local sources are insufficient.

    When searching for premium ingredients, keep these essential points in mind:

    • Local farms: Support local agriculture and ensure maximum freshness.
    • Artisan producers: Seek specialized suppliers who prioritize quality over quantity.
    • Online suppliers: Explore reputable online markets for rare ingredients.
    • Seasonal availability: Source ingredients that are in season to guarantee peak flavor.

    By prioritizing the quality and provenance of your ingredients, you can ensure that each dish in your tasting menu is a true testament to culinary excellence.

    Maintaining Freshness of Ingredients Throughout Your Menu

    Ensuring ingredient freshness is crucial for maximizing flavor and visual appeal in a multi-course tasting menu. Proper storage techniques play a vital role in preserving the quality of your ingredients from the moment they arrive in your kitchen until they are served. Start by establishing a well-organized storage system, ensuring that each ingredient is stored according to its specific needs.

    For example, leafy greens should be kept in a cool, moisture-controlled environment, while root vegetables can be stored in a dry, dark place. Additionally, herbs can be stored upright in water, similar to a bouquet, to extend their freshness. Regularly inspect the condition of your ingredients to ensure they remain at their best, employing a ‘first in, first out’ approach to minimize waste.

    Here are some effective storage tips to maintain the freshness of your ingredients:

    • Store herbs upright in water to prolong their shelf life.
    • Utilize airtight containers to keep produce fresher for longer.
    • Label and date items to effectively track freshness.
    • Control humidity and temperature in your storage areas to maintain optimal conditions.

    By implementing effective storage practices, you not only enhance the quality of your dishes but also reduce waste, ensuring that every course is a vibrant highlight of your menu.

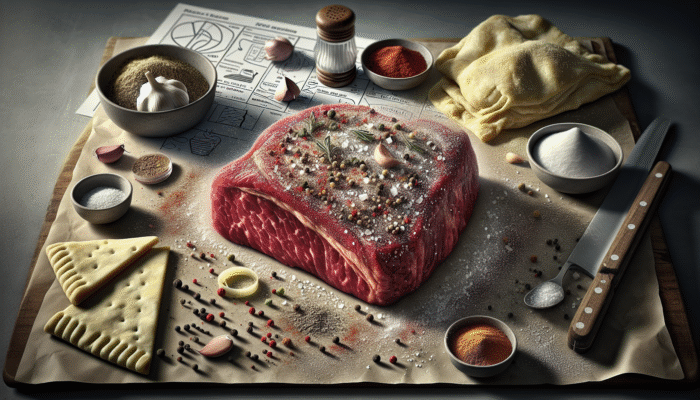
    Budgeting for Ingredients Without Compromising Quality

    Creating a multi-course tasting menu within a specified budget requires careful planning and strategic sourcing. Start by establishing a clear budget for your menu, taking into account both the cost of ingredients and the overall dining experience you wish to deliver. Explore cost-effective alternatives for certain components of your dishes without sacrificing quality. For instance, utilizing seasonal ingredients can significantly reduce expenses while ensuring peak flavor.

    When budgeting, develop a balanced menu that includes both luxury items and more affordable options. This strategy allows you to impress guests with standout dishes while keeping the overall cost manageable. For example, feature a high-quality protein as the centerpiece while complementing it with seasonal vegetables that are more economical.

    Here are some strategies to maintain a budget-friendly approach:

    • Prioritize seasonal ingredients for cost efficiency and enhanced flavor.
    • Explore bulk purchasing options for frequently used items.
    • Minimize waste through meticulous planning and inventory management.
    • Balance luxury items with more affordable ingredients to uphold quality.

    By adopting a thoughtful approach to budgeting, you can create a stunning tasting menu that showcases your culinary skills while remaining financially viable.

    Selecting Seasonal Ingredients for Optimal Flavor and Quality

    Choosing ingredients based on seasonality not only enhances the flavor of your dishes but also supports local agriculture and promotes sustainability. Seasonal ingredients are typically fresher, more flavorful, and often more cost-effective, making them an excellent choice for crafting a multi-course tasting menu. Begin by researching local growing seasons and identifying which ingredients are at their peak during your event’s timing.

    Design your menu around these seasonal offerings, celebrating the finest produce available. For instance, spring may feature vibrant asparagus and peas, while autumn could highlight earthy root vegetables and hearty squashes. Incorporating seasonal themes allows you to create a narrative throughout your menu that resonates with diners, honoring the natural rhythms of the environment.

    Consider the following when selecting seasonal ingredients:

    • Identify local harvest calendars to maximize freshness.
    • Emphasize ingredients that reflect the unique flavors of the season.
    • Incorporate regional specialties to create a sense of place.
    • Experiment with preservation techniques, such as pickling or fermenting, to extend seasonal flavors.

    By embracing seasonality in your ingredient selection, you not only enhance the quality of your dishes but also forge an authentic connection between the meal and its environment.

    Implementing Ethical Sourcing Practices in Menu Development

    Ethical sourcing is increasingly vital in today’s culinary landscape, reflecting a commitment to sustainability and social responsibility. Chefs and restaurateurs are now more conscious of their sourcing practices, ensuring they select suppliers who prioritize fair trade, environmental stewardship, and humane treatment of animals. This conscientious approach not only enhances the quality of your tasting menu but also resonates with diners who care about the impact of their food choices.

    Begin by researching local suppliers that adhere to sustainable practices, such as organic farming, regenerative agriculture, or responsible fishing methods. Engage in open discussions with your suppliers about their sourcing methods and sustainability standards to ensure they align with your ethical values. Additionally, consider participating in initiatives that promote ethically sourced ingredients, like farm-to-table programs or local food networks.

    Strategies for ethical sourcing include:

    • Choose suppliers who prioritize sustainability and ethical practices.
    • Support local farms that engage in environmentally friendly practices.
    • Stay informed about food sourcing controversies and adjust your suppliers accordingly.
    • Engage with your community to promote awareness around ethical sourcing.

    By adopting ethical sourcing practices, you not only enhance the quality and integrity of your multi-course tasting menu but also contribute positively to the broader culinary community and the environment.

    Meticulously Crafting Each Course for Maximum Impact

    Designing Inviting and Flavorful Appetizers

    Appetizers play a pivotal role in establishing the tone for your tasting menu, awakening the palate and inviting guests into the culinary experience. When designing appetizers, focus on creating small, flavor-packed dishes that introduce the theme of your menu while stimulating the senses. Consider employing a variety of techniques and ingredients that will excite diners and encourage conversation.

    For example, a dish featuring marinated heirloom tomatoes with basil oil and a sprinkle of sea salt can serve as a refreshing opener, showcasing the theme of seasonal produce. Alternatively, a delicate scallop ceviche with citrus and avocado can highlight a seafood-focused theme while offering a vibrant explosion of flavors. The key is to create appetizers that are not only visually appealing but also rich in taste.

    When planning your appetizers, keep the following considerations in mind:

    • Use seasonal ingredients to enhance flavor and freshness.
    • Incorporate a variety of textures to create interest and excitement.
    • Present dishes in a manner that encourages sharing and interaction.
    • Consider introducing a palate cleanser between courses to enhance the balance.

    By thoughtfully crafting your appetizers, you set the stage for an unforgettable tasting menu that engages diners from the very first bite.

    Creating Unforgettable Main Courses That Shine

    The main course often represents the highlight of a multi-course tasting menu, showcasing the chef’s culinary skills and creativity. A truly memorable main course strikes a harmonious balance between flavor, presentation, and ingredient quality. Consider how to showcase proteins, vegetables, and sauces in a way that creates a cohesive dish reflecting the overarching theme of your menu.

    For instance, a beautifully seared duck breast paired with a cherry reduction and seasonal vegetables can offer a rich and satisfying experience. The objective is to provide guests with a dish that not only delights the palate but also tells a story through flavor and presentation. Choosing the right accompaniments is crucial; consider what will complement the main protein without overshadowing it.

    Key elements to consider while crafting your main course include:

    • Highlighting high-quality proteins and seasonal vegetables for optimum flavor.
    • Incorporating sauces that enhance and elevate the dish.
    • Balancing flavors to create a cohesive and enjoyable experience.
    • Presenting the dish artistically to enhance visual appeal.

    A memorable main course will leave a lasting impression and serve as the pinnacle of your tasting menu, celebrating the artistry of your culinary vision.

    Crafting an Indulgent Dessert Experience for a Sweet Finale

    Desserts are the sweet culmination of a multi-course tasting menu, offering a final moment of indulgence that leaves a lasting impression on guests. When designing desserts, consider how to incorporate a variety of flavors and textures that resonate with the theme of your menu. The dessert should provide a satisfying contrast to the richness of the preceding courses while showcasing creativity and skill.

    For example, a light and airy lemon mousse served with a crunchy meringue and fresh berries can provide a refreshing end to a heavy meal. Conversely, a decadent chocolate tart drizzled with salted caramel sauce may be the ideal way to cap a meal focused on rich, indulgent flavors. The key is to experiment with different combinations and techniques to create a dessert that surprises and delights.

    Here are some considerations for crafting a satisfying dessert:

    • Balance sweetness with acidity or bitterness to create depth and complexity.
    • Utilize seasonal fruits for freshness and flavor enhancement.
    • Incorporate contrasting textures, such as creamy and crispy elements.
    • Conclude with a visually stunning presentation to enhance allure.

    By creating a dessert that encapsulates the essence of your tasting menu, you provide a memorable finale that lingers in your guests’ minds long after the meal has concluded.

    The Research-Backed Benefits of Crafting a Multi-Course Tasting Menu

    Enhancing the Dining Experience Through a Tasting Menu

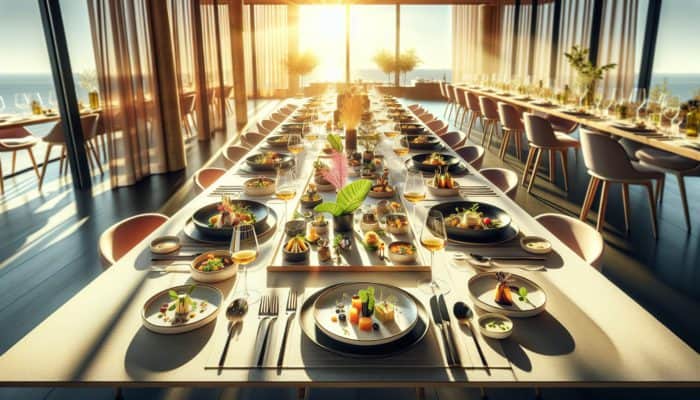
    A well-designed multi-course tasting menu can significantly elevate the dining experience by offering a curated journey through flavors, textures, and culinary techniques. This structured approach engages diners on multiple sensory levels, encouraging them to savor every bite while deepening their appreciation for the artistry involved in the culinary process. For instance, Michelin-starred establishments have demonstrated that a thoughtfully designed tasting menu can transform a meal into an immersive experience, allowing guests to explore the nuances of each dish.

    Psychologically, the anticipation of each course creates a heightened sense of excitement and curiosity, fostering a connection between the diner and the meal. The careful pacing and progressive flavor development keep guests engaged, while the variety of dishes stimulates conversation and camaraderie among diners. This dynamic contributes to an enjoyable atmosphere that enhances overall satisfaction.

    When evaluating the benefits of a multi-course tasting menu, consider:

    • Heightened sensory engagement through varied flavors and textures.
    • Opportunities for creative expression and culinary storytelling.
    • Multiple courses foster enhanced guest interaction and conversation.
    • Increased anticipation and excitement throughout the dining experience.

    By embracing the potential of a multi-course tasting menu, you can create an unforgettable dining experience that resonates with guests long after they leave the table.

    Fostering Guest Loyalty Through Memorable Experiences

    Implementing a multi-course tasting menu can profoundly influence guest loyalty by creating memorable dining experiences that encourage repeat visits. Guests are more likely to return to a restaurant where they have enjoyed a thoughtfully crafted tasting menu, especially if it offers a unique personalized experience. The exclusivity of a well-designed tasting menu can also foster a sense of belonging and connection, prompting diners to share their experiences with friends and family.

    To measure and enhance guest loyalty, consider these actionable steps:

    • Implement loyalty programs to reward returning guests and encourage repeat visits.
    • Solicit feedback to adjust and improve the tasting menu based on guest preferences.
    • Offer exclusive events or tastings for loyal patrons to deepen engagement.
    • Maintain consistent quality in both food and service to build trust and reliability.

    By focusing on creating exceptional experiences through multi-course tasting menus, you can cultivate a loyal customer base that values the artistry and effort that go into each dining experience.

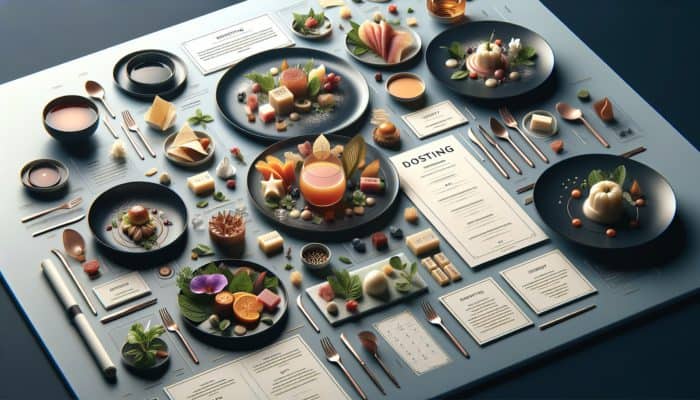
    Promoting Culinary Creativity Through Tasting Menus

    The structure of a multi-course tasting menu inherently encourages culinary creativity, providing chefs with the freedom to experiment and innovate. This format allows chefs to showcase their skills and techniques while exploring unique flavor combinations and presentation styles. As chefs push the boundaries of traditional cuisine, they may create new culinary trends and techniques that elevate the dining experience.

    For instance, concepts such as molecular gastronomy and deconstruction have emerged from the creative exploration intrinsic to tasting menus. Chefs can reinterpret classic dishes, employing techniques like spherification or foaming to surprise diners with novel textures and flavors. This spirit of innovation not only captivates guests but also propels the culinary arts forward.

    Key benefits of promoting creativity through tasting menus include:

    • Encouragement for chefs to push culinary boundaries and explore new techniques.
    • Inspiration for diners to become more adventurous with their food choices.
    • Opportunities for chefs to showcase seasonal and local ingredients in innovative ways.
    • Creation of a dynamic culinary culture that celebrates experimentation and artistry.

    By embracing the potential of multi-course tasting menus to foster culinary creativity, chefs can redefine the dining experience and inspire a new generation of food enthusiasts.

    Optimizing Menu Planning and Resource Management

    A multi-course tasting menu can streamline kitchen operations and resource allocation, leading to enhanced cost efficiencies and improved service delivery. By planning a cohesive menu with complementary dishes, chefs can optimize ingredient use and reduce waste. This approach not only improves the bottom line but also enhances the quality of the dining experience by ensuring that every dish contributes to the overall theme and ambiance.

    In addition to ingredient optimization, a well-structured tasting menu allows for more efficient staff coordination. With a clear plan in place, kitchen and front-of-house teams can collaborate seamlessly, ensuring that service runs smoothly and guests enjoy an exceptional experience. Additionally, the systematic nature of a tasting menu enables one to anticipate guests’ needs better and provide more attentive service.

    Here are some considerations for optimizing menu planning and resource management:

    • Plan complementary dishes to maximize ingredient usage and minimize waste.
    • Establish clear communication between kitchen and service staff.
    • Utilize seasonal ingredients to enhance freshness and reduce costs.
    • Regularly review menu performance to identify areas for improvement.

    By leveraging the advantages of a multi-course tasting menu, chefs can create an efficient and successful dining operation that delights guests while reinforcing a commitment to quality and sustainability.

    Mastering Service and Presentation Techniques

    Best Practices for Delivering Exceptional Service

    Efficient and attentive service is crucial for the success of a multi-course tasting menu, as it enhances the overall dining experience. Staff should be well-trained in timing, communication, and anticipating guest needs to ensure a seamless flow throughout the meal. Start by establishing a clear service protocol that outlines the timing and presentation of each course, ensuring consistency in execution.

    Train your staff to maintain a strong connection with diners by engaging them in conversation about the dishes they are serving. This not only enriches the experience but also provides staff with opportunities to gauge guest satisfaction and adjust service accordingly. Moreover, encourage teamwork among staff members to facilitate smooth transitions and efficient service.

    Here are some best practices for service to consider:

    • Ensure staff are knowledgeable about the menu and can confidently answer guest questions.
    • Maintain eye contact and engage with guests to create a welcoming atmosphere.
    • Time courses appropriately to avoid long waits or rushed service.
    • Anticipate guest needs by observing body language and facial expressions.

    By implementing these best practices, restaurants can create an environment where guests feel valued and appreciated, transforming a meal into a memorable experience.

    Utilizing Plating Techniques for Enhanced Visual Appeal

    The presentation of each course is critical in enhancing the overall dining experience, as it engages the senses before the first bite is taken. Modern plating techniques can highlight the colors and textures of your dishes, transforming them into edible works of art. Consider the principles of balance, contrast, and harmony when designing your plates, ensuring that each element complements the others.

    For instance, using negative space on a plate can draw attention to the main component, while vibrant garnishes can add color and visual interest. Additionally, incorporating height and layering into your plating can create a dynamic presentation that invites curiosity. Experimenting with different plating surfaces, such as slate or wooden boards, can also add a layer of creativity to your presentation.

    Key plating techniques to enhance visual appeal include:

    • Utilizing negative space for a clean and elegant presentation.
    • Incorporating vibrant colors and textures to create visual intrigue.
    • Experimenting with height and layering for dynamic presentations.
    • Using garnishes sparingly to accentuate, rather than overwhelm, the dish.

    By mastering plating techniques, chefs can create visually stunning dishes that enhance the overall dining experience and leave a lasting impression on guests.

    Effectively Coordinating Course Timing

    Timing is a critical aspect of maintaining the flow of a multi-course tasting menu, ensuring that each course is served at the right moment to enhance the dining experience. Effective coordination of course timing allows for digestion and conversation without lengthy waits, creating a relaxed atmosphere that encourages enjoyment. Begin by establishing a clear timeline for each course, taking into account the overall length of the meal and your guests’ preferences.

    Communicate with both kitchen and service staff to ensure everyone is aware of the timing and pacing of dishes. Implementing a system for tracking course progression can help maintain momentum throughout the meal. Additionally, consider incorporating palate cleansers between courses to reset the taste buds and enhance the enjoyment of the subsequent dish.

    Here are some key strategies for coordinating course timing:

    • Establish a clear timeline for each course based on the overall meal duration.
    • Communicate effectively between kitchen and service staff to ensure smooth transitions.
    • Incorporate palate cleansers to enhance the flow of flavors.
    • Be attentive to guest pacing to avoid rushing or delaying service.

    By focusing on effective timing and coordination, restaurants can create an enjoyable dining experience that allows guests to savor each course while fostering meaningful connections and conversations.

    Evaluating and Refining Your Tasting Menu

    Gathering Guest Feedback Effectively

    Collecting feedback from guests is a crucial aspect of continually improving a multi-course tasting menu. Constructive feedback offers valuable insights into what works well and what can be improved, enabling chefs and restaurateurs to refine their offerings and enhance the overall dining experience. Utilize various methods for gathering feedback, such as surveys, direct conversations, or monitoring comments on social media platforms.

    When engaging with diners, encourage them to share their honest opinions on the menu, service, and overall experience. Pay attention to both verbal and non-verbal feedback; body language and facial expressions can provide additional insights into guest satisfaction. Additionally, consider implementing a follow-up system to acknowledge feedback and demonstrate a commitment to improvement.

    Here are some effective strategies for gathering feedback:

    • Use surveys to solicit specific feedback on menu items and service quality.
    • Encourage direct conversations with guests to gain valuable insights during their dining experience.
    • Monitor social media mentions to understand public perception of your menu.
    • Implement a follow-up system to engage with guests after their dining experience, thanking them for their feedback and providing an opportunity for further discussion.

    By actively seeking and responding to feedback, you can create a culture of continuous improvement that enhances the overall dining experience and fosters lasting relationships with guests.

    Adapting Your Menu to Seasonal Changes

    Adapting your tasting menu to seasonal changes is essential for maintaining relevance and freshness in your offerings. As produce availability shifts throughout the year, embracing seasonal ingredients allows chefs to create dynamic menus that celebrate the flavors of each season. Planning is vital; stay informed about seasonal harvest calendars and cultivate relationships with local farmers to gain access to the freshest, most locally sourced ingredients.

    Consider incorporating a flexible component into your menu that allows for seasonal adjustments. For example, you might create a core menu featuring a few signature dishes, then rotate seasonal ingredients to keep the experience exciting for returning guests. This approach not only enhances flavor but also invites diners to experience the culinary journey of each season.

    To effectively adapt to seasonal changes, consider these strategies:

    • Research local harvest calendars to identify seasonal ingredients at their peak.
    • Maintain relationships with local farmers to ensure access to fresh produce.
    • Implement a flexible menu structure that accommodates seasonal variations and changes.
    • Experiment with preservation methods, like pickling or fermenting, to extend seasonal flavors throughout the year.

    By embracing seasonal changes, you create a vibrant and ever-evolving dining experience that keeps guests returning for more.

    Continuous Improvement Strategies for Your Tasting Menu

    Striving for excellence in a multi-course tasting menu requires a commitment to continuous improvement. Regularly reviewing and refining your menu ensures you stay current with culinary trends while incorporating guest feedback and experiences. Consider conducting regular staff meetings to discuss insights and observations on the menu, allowing team members to contribute ideas and suggestions for enhancements.

    Staying updated on culinary trends can also inspire new dishes and techniques, enriching the creativity and variety of your offerings. Attend industry events, participate in workshops, and engage with fellow chefs to stay up-to-date with the latest developments in the culinary world. By fostering a culture of innovation and collaboration within your team, you create an environment that encourages creativity to flourish.

    Here are some strategies for continuous improvement:

    • Regularly review guest feedback to identify areas for enhancement and innovation.
    • Encourage staff contributions and discussions on menu ideas and improvements.
    • Stay informed about culinary trends through continued education and participation in events.
    • Foster a culture of innovation that celebrates experimentation and creativity among your culinary team.

    By committing to continuous improvement, you can ensure that your multi-course tasting menu remains fresh, exciting, and relevant, providing an exceptional dining experience for all guests.

    Frequently Asked Questions About Tasting Menus

    What defines a multi-course tasting menu?

    A multi-course tasting menu is a curated dining experience featuring multiple small dishes served sequentially, allowing guests to explore a variety of flavors and textures within a single meal.

    How many courses are typically included in a tasting menu?

    Tasting menus generally range from five to ten courses, depending on the dining context and the chef’s vision, with each course designed to complement the others.

    What key factors should I keep in mind when planning a tasting menu?

    Consider the theme, dietary restrictions, ingredient seasonality, and pacing of courses to create a cohesive and enjoyable dining experience that caters to your guests.

    How can I ensure my tasting menu accommodates guests with dietary restrictions?

    Communicate with guests in advance to gather information on their dietary needs and adjust your menu accordingly, using creative substitutions to ensure inclusivity without compromising quality.

    What strategies can I implement for balancing flavors and textures in my menu?

    Aim for a variety of tastes, including sweet, sour, bitter, and umami, while incorporating different textures and flavors. This progression keeps guests engaged and enhances their overall experience.

    How important is the presentation of each dish?

    Presentation is critical as it sets the first impression for each dish. Visually appealing plating enhances the overall dining experience and engages guests’ senses before they even take a bite of the food.

    What is the most effective way to gather feedback after a tasting menu?

    Utilize surveys, direct conversations, or social media to collect feedback. Encourage honest opinions to gain insights into guests’ experiences and identify areas for improvement.

    How can I adapt my tasting menu to seasonal changes?

    Plan your menu around seasonal ingredients and maintain relationships with local farmers to ensure access to fresh produce, allowing for dynamic adaptations throughout the year.

    What strategies can I implement to improve guest loyalty through my tasting menu?

    Create memorable dining experiences, implement loyalty programs, and solicit feedback to enhance the tasting menu while fostering strong relationships with returning guests.

    How can I streamline service during a multi-course tasting menu?

    Establish a clear service plan and train staff on the timing and communication protocols to ensure effective service delivery. Anticipate guest needs and maintain effective coordination between the kitchen and service staff to ensure a smooth dining experience.

    Connect with us on Facebook!

    The post How to Create a Multi-Course Tasting Menu: A Universal Guide appeared first on https://cookinggods.com

    The Article Multi-Course Tasting Menu: Your Ultimate Creation Guide Was Found On https://limitsofstrategy.com

  • French Onion Soup: Your Timeless Recipe Guide

    French Onion Soup: Your Timeless Recipe Guide

    Master the Art of Creating Authentic French Onion Soup with These Essential Ingredients

    Discover Key Ingredients That Bring Unmatched Flavor to Your Soup

    How to Make a Classic French Onion Soup: A steaming bowl of French onion soup with caramelized onions, beef broth, and melted Gruyère cheese.

    To craft a truly sumptuous classic French onion soup, it is imperative to select the right ingredients that harmonize beautifully. The hero of this dish is undoubtedly the onions, which should be sweet and perfectly caramelized to create a rich, flavorful base for the soup. A robust beef broth is essential, adding depth and richness that elevates the overall taste and experience. Additionally, the choice of cheese plays a vital role; traditionally, Gruyère or Swiss cheese is utilized, delivering that gooey, comforting layer that transforms the soup into an indulgent treat. The synergy of these ingredients turns a simple broth into a warm, flavorful embrace, making each bowl a delightful adventure for your palate.

    Explore Optional Ingredients That Elevate Your Soup to New Heights

    While the essential ingredients serve as the backbone of your soup, numerous optional additions can elevate your culinary creation to new culinary heights. A sprinkle of fresh thyme can introduce a delightful herbaceous note, while a splash of dry white wine or sherry can add an essential touch of acidity and complexity to the flavor profile. If you desire a hint of sweetness, consider adding a dash of balsamic vinegar to deepen the richness of the caramelized onions, creating an even more robust flavor. Feel free to experiment with these additions to create a personalized version of the soup that reflects your unique culinary style while enhancing the overall dining experience.

    Where to Find High-Quality Ingredients for Your French Onion Soup?

    Sourcing premium ingredients is crucial for achieving an outstanding French onion soup. Here are some practical tips for locating the best components for your culinary masterpiece:

    • Visit local farmers’ markets to discover fresh, seasonal onions that burst with flavor.
    • Choose organic beef broth or consider preparing your own to ensure unparalleled flavor.
    • Opt for reputable cheese brands</b known for their exceptional quality, preferably those sourced from Switzerland or France.
    • Explore specialty grocery stores for unique herbs and high-quality wines to enhance your soup.
    • Look for local artisan producers who may offer bespoke broths or cheeses to elevate your ingredients.
    • Consider joining a co-op for access to farm-fresh, locally sourced produce that supports your community.
    • Always read labels carefully to ensure that your ingredients are free from additives and preservatives, guaranteeing purity in your cooking.

    By dedicating time to find high-quality ingredients, you ensure that your soup will reflect the best available, transforming each bowl into a celebration of flavor and culinary artistry that is sure to impress.

    Guidelines for Accurately Determining Ingredient Quantities

    A steaming bowl of French onion soup with caramelized onions and melted cheese topping.

    Understanding the right quantities of each ingredient is essential for crafting a well-balanced soup that satisfies the palate. A classic recipe for French onion soup typically requires approximately 500g of onions, thinly sliced to ensure even caramelization, allowing the natural sugars to develop fully. Additionally, you will need about 1 litre of beef broth to provide the necessary body and richness, complemented by 200g of cheese for the topping, ensuring that each bowl is generously adorned with that delicious melt. These ratios create a perfect blend of flavors, allowing each spoonful to be as delightful as the last, turning every bite into a pleasurable experience that leaves you craving more.

    Expert Preparation Techniques for Achieving Optimal Results

    Properly preparing your ingredients can significantly influence the final outcome of your soup. Begin by slicing the onions as thinly and uniformly as possible, as this ensures even cooking and caramelization. Utilizing a sharp knife or a mandoline can be beneficial for achieving consistent slices. When it comes to the cheese, grating it fresh rather than using pre-packaged varieties will greatly enhance its melting properties and overall flavor profile. Taking the time to meticulously prepare your ingredients with care will lay a solid foundation for a deeply flavorful and satisfying soup, allowing the rich flavors to shine through in every serving.

    Step-by-Step Guide to Crafting the Perfect French Onion Soup

    Master the Art of Caramelizing Onions for Maximum Flavor Depth

    Large pot on stove with melting butter, thinly sliced onions turning deep golden brown, steam rising.

    Caramelizing onions is a fundamental step in developing the deep, rich flavors that define French onion soup. This process requires patience, as slowly cooking the onions allows their natural sugars to develop and caramelize beautifully. Follow these essential steps to effectively caramelize onions:

    • Begin by heating a large, heavy-bottomed pot over medium heat and adding a generous amount of butter or oil to create a rich base.
    • Introduce the sliced onions to the pot, ensuring they are evenly distributed for uniform cooking.
    • Stir the onions frequently to prevent sticking and allow them to cook evenly without burning.
    • After about 10 minutes, reduce the heat to medium-low to encourage a slower caramelization process, allowing for deeper flavors.
    • Continue cooking for 30 to 40 minutes, stirring occasionally, until the onions achieve a deep golden brown hue, indicating perfect caramelization.
    • To enhance flavor, sprinkle a pinch of salt during cooking to draw out moisture from the onions, intensifying their sweetness.
    • If necessary, add a splash of water or broth to prevent the onions from sticking to the bottom of the pot, ensuring a smooth cooking process.

    This technique transforms your onions into a sweet, richly colored base that will significantly enhance your soup, providing a solid foundation for a truly memorable dish that delights the senses.

    Incorporating Broth and Simmering for Maximum Flavor Development

    Once your onions have reached the desired level of caramelization, it’s time to add the beef broth, which is crucial for bringing the soup together. Pour in 1 litre of high-quality beef broth, ensuring that the onions are fully submerged. Bring the mixture to a gentle simmer to allow the flavors to meld beautifully, creating a rich and satisfying soup. This simmering phase is essential; it infuses the broth with the sweet, caramelized notes of the onions. Maintain a low simmer for at least 30 minutes, stirring occasionally to prevent sticking while allowing the flavors to deepen and develop into a harmonious blend that tantalizes the taste buds.

    Understanding the Importance of Broth in French Onion Soup

    The broth serves as the heart of any French onion soup, providing the foundational depth and richness that truly defines this classic dish. The quality of the broth significantly influences the overall taste and satisfaction. A well-made beef broth, especially if homemade or sourced from a reputable provider, will deliver exceptional flavor and a satisfying mouthfeel that enhances the entire experience. Look for broths that have been simmered for an extended period, allowing the natural flavors of the bones and marrow to be thoroughly extracted. A premium broth complements the sweetness of the onions while balancing the richness of the cheese, resulting in a harmonious soup that delights the senses with every spoonful.

    Selecting the Ideal Cheese to Top Your French Onion Soup

    Choosing the right cheese is critical; it serves as the crowning touch that completes your French onion soup. Gruyère cheese is the traditional choice, celebrated for its excellent melting properties and nutty flavor that pairs beautifully with the soup’s rich base. Alternatively, Swiss cheese can be used for a milder taste that still complements the dish. When selecting cheese, focus on aged varieties, as they typically melt more effectively and contribute greater depth of flavor. Shredding the cheese just before serving ensures it retains its moisture, allowing for a delectable, gooey topping that enhances every spoonful of soup, resulting in a truly indulgent experience that your guests will rave about.

    Expert Insights for Perfecting Your Classic French Onion Soup Recipe

    Real-World Examples of Outstanding French Onion Soup to Inspire Your Cooking

    Exploring examples of expertly crafted French onion soups can greatly enhance your understanding of what makes this dish exceptional. Renowned establishments like La Coupole in Paris and Balthazar in New York City serve exemplary versions of this classic, featuring deeply caramelized onions swimming in a rich broth, topped with a generous layer of bubbling Gruyère. At these venues, the balance of sweetness from the onions and the savoriness from the broth is impeccable, with each bowl finished off with a beautifully toasted cheese crust. By observing and analyzing these dishes, you can draw inspiration to replicate their success in your kitchen, giving you the confidence to create a culinary masterpiece that will impress family and friends alike.

    Actionable Steps for Enhancing the Flavor of Your Soup

    To elevate your French onion soup beyond the classic recipe, consider these expert tips for enhancing its flavor profile:

    • Add a splash of balsamic vinegar during cooking to deepen the sweetness of the onions and add complexity.
    • Incorporate fresh herbs like thyme or bay leaves while simmering to introduce layers of flavor and aroma.
    • Use a blend of beef and chicken broth for a unique and nuanced flavor profile that surprises the palate.
    • Top with a mixture of cheeses, such as Gruyère and mozzarella, for varied texture and taste that enhances the overall experience.

    These enhancements enable you to customize your soup, creating a version that resonates with your unique palate, ensuring a delightful dining experience that impresses every guest and leaves them asking for seconds.

    Professional Techniques Used by Chefs to Achieve Soup Perfection

    Professional chefs often employ specific techniques to ensure their French onion soup reaches the highest quality. One common method is the technique of deglazing the pot after caramelizing the onions; this involves adding a splash of wine or broth to lift the flavor-packed bits from the bottom, thus adding depth to the final product. Chefs also focus on the layering of flavors, beginning with aromatics and carefully building with each ingredient to create a complex and satisfying taste. By mastering these techniques, home cooks can significantly enhance their soup-making skills, achieving results that rival those served in the finest restaurants.

    Essential Cooking Techniques for Crafting Irresistible French Onion Soup

    Sautéing and Deglazing: Key Techniques for Culinary Success

    Sautéing the onions is fundamental for flavor in French onion soup, but deglazing the pot is an often-overlooked step that adds remarkable depth to the dish. Begin by sautéing your onions as previously described, allowing them to caramelize beautifully. Once they’re perfectly golden, introduce a small amount of white wine or broth to the pot, scraping up any browned bits from the bottom. This process captures the collective essence of the previously cooked ingredients, enriching the overall flavor profile of your soup. The acidity from the wine balances the sweetness of the onions, creating a well-rounded taste that is simply irresistible and elevates your soup to new heights.

    Optimal Simmering Time for Enhancing Flavor Development

    The simmering time is crucial for developing the intricate flavors in French onion soup. A typical simmer should last between 30 and 60 minutes, depending on the desired richness and depth of flavor. The longer the simmer, the more pronounced the flavors become as they meld together beautifully. If you prefer a more robust flavor, opting for a longer simmer is advisable. For best results, keep the heat low to prevent boiling, allowing the ingredients to harmonize gradually. During this simmering phase, taste periodically and adjust the seasonings as needed to ensure a well-balanced dish that is both comforting and deeply satisfying with each spoonful.

    Broiling the Cheese Topping for Ultimate Indulgence

    The final step in crafting an impeccable French onion soup is broiling the cheese topping. Once your soup is ladled into oven-safe bowls, generously sprinkle the grated cheese over each portion, ensuring complete coverage. Place the bowls under a preheated broiler for 2-4 minutes, keeping a close watch to prevent burning. The objective is to achieve a bubbly, golden crust that adds delightful textural contrast to the rich soup beneath. For an even more decadent finishing touch, consider sprinkling a little extra cheese before broiling for an additional layer of indulgence that will leave everyone craving more and elevating your dish to restaurant-quality status.

    Serving and Presenting French Onion Soup with Elegance

    Selecting the Right Bowls for Serving French Onion Soup

    Choosing the appropriate bowls is essential for both functionality and presentation when serving French onion soup. Opt for oven-safe, broiler-friendly bowls, ideally crafted from stoneware or cast iron, designed to withstand high temperatures without cracking. Their heat-retaining properties ensure that your soup remains warm and inviting until the last spoonful. Additionally, bowls with a wider surface area allow for a generous amount of that delicious cheese topping, creating a visually appealing and satisfying presentation that invites your guests to dive in and enjoy the comforting goodness of the soup.

    Garnishes That Add an Elegant Touch to Your Soup Presentation

    Enhancing the soup’s appearance and flavor with thoughtfully chosen garnishes can elevate the overall dining experience to new heights. Consider these garnish ideas:

    • Chopped fresh parsley for a touch of color and freshness that brightens the dish.
    • Thinly sliced green onions for a mild onion flavor contrast that adds visual appeal.
    • A sprinkle of freshly cracked black pepper for an added kick that complements the richness.
    • A drizzle of high-quality olive oil for richness and a glossy finish that enhances presentation.

    These garnishes not only add visual appeal but also introduce additional layers of flavor that complement the rich soup, making each serving a feast for both the eyes and the palate, ensuring your guests are thoroughly impressed.

    Serving for Maximum Enjoyment and Satisfaction

    Serving French onion soup at its peak is vital for ensuring maximum enjoyment. Ensure that the soup is piping hot when ladled into bowls, as the warmth enhances the flavors and overall experience. Timing is crucial; serve immediately after broiling the cheese so that guests can savor every moment of that creamy, cheesy indulgence. Pair the soup with a crusty baguette or a fresh salad to create a well-rounded meal, enhancing the overall dining experience and ensuring a delightful culinary journey that leaves everyone satisfied and happy.

    Achieving the Perfect Cheese Melt on Your French Onion Soup

    Achieving the perfect cheese melt on your French onion soup is an art form that elevates the dish. Start by using freshly grated cheese, as pre-shredded varieties often contain anti-caking agents that inhibit melting. Spread the cheese evenly and generously over the soup for complete coverage, ensuring that every bite is rich and satisfying. Position the bowls in the center of the broiler to ensure even heat distribution, and watch closely to prevent burning. When the cheese is bubbly and golden, remove the bowls and allow them to cool slightly before serving. This ensures the perfect gooey texture, making each bite a heavenly experience that your guests will remember.

    Creating an Elegant Table Setting to Enhance the Dining Experience

    Enhancing your dining experience with an elegant table setting can make enjoying your French onion soup even more delightful. Use quality tableware that complements the aesthetics of the soup and adds a touch of sophistication to your meal. Consider incorporating textured napkins and polished cutlery to elevate the overall presentation. Adding a small centerpiece, such as a vase of seasonal flowers or a simple candle arrangement, can create a welcoming atmosphere. These thoughtful touches transform a meal into a special occasion, making every bite feel memorable and enjoyable, ensuring a delightful dining experience for all your guests.

    Creative Variations on the Classic French Onion Soup

    Vegetarian and Vegan Adaptations for Greater Inclusivity

    For those seeking vegetarian or vegan adaptations of French onion soup, it’s entirely possible to maintain the integrity of the dish while accommodating diverse dietary preferences. Start by using a well-flavored vegetable broth instead of beef broth, ensuring it provides depth and richness without compromising flavor. Emphasizing the sweetness of caramelized onions will help balance the flavors beautifully. For a vegan cheese alternative, consider plant-based cheese options made from nuts or soy that melt well and enhance the dish. These substitutions allow for a delicious, inclusive version of this classic dish without sacrificing flavor, making it accessible for everyone to enjoy.

    Creative Twists to Try in Your Soup for Unique Flavor Experiences

    Experimenting with various ingredients can yield delightful twists on classic French onion soup. Try adding sautéed mushrooms for an earthy note, or roasted garlic for an extra layer of robust flavor. Incorporating spices like cayenne pepper or smoked paprika can introduce a hint of heat and smokiness, elevating the traditional recipe to new culinary heights. Another option is to replace the bread with puff pastry for an elegant twist, creating a French onion soup pot pie that captures the essence of the original while offering a new experience that surprises and delights your taste buds.

    Incorporating Various Cheeses for Unique Flavor Profiles

    While Gruyère remains the traditional choice, exploring a variety of cheeses can provide exciting new flavors to your French onion soup. Swiss cheese offers a milder taste, while a sharp cheddar can introduce a tangy kick that enhances the overall experience. Consider blending cheeses for depth; for example, pairing Gruyère with mozzarella can create a creamy texture, while incorporating a sprinkle of blue cheese can add a bold flavor contrast that surprises the palate. This experimentation allows you to discover unique profiles that suit your personal taste, making your soup even more enjoyable and distinctive.

    Proven Strategies for Crafting the Perfect French Onion Soup

    Expert Analysis on Ingredient Ratios for Achieving Culinary Success

    Understanding the correct balance of ingredients is paramount for crafting an outstanding French onion soup. Experts recommend the following ingredient ratios to achieve an ideal flavor and texture:

    • 500g of onions for optimal sweetness and texture, ensuring a rich base.
    • 1 litre of broth for necessary richness that enhances every spoonful.
    • 200g of cheese for a decadent, satisfying topping that completes the dish.
    • 1-2 tablespoons of olive oil or butter for sautéing, creating a flavorful foundation.
    • 1-2 teaspoons of fresh herbs for added flavor complexity that elevates the overall dish.

    These ratios serve as guidelines, and individual preferences can dictate slight adjustments for a personalized experience, allowing you to create a soup that truly reflects your culinary vision and style while ensuring satisfaction for all.

    How to Achieve the Ideal Texture for Your Soup?

    The texture of French onion soup plays a vital role in its enjoyment. To achieve the ideal consistency, ensure that the onions are thoroughly caramelized, as this contributes to a silky mouthfeel that is irresistible. When combining the broth, aim for a smooth blend without any gritty or chunky bits. If the soup feels too thin, simmer it longer to reduce the liquid; alternatively, if it’s too thick, a splash of broth can help restore balance. Striving for the right texture enhances the overall experience, making each spoonful satisfying and memorable, ensuring that your guests are thoroughly impressed.

    Optimal Tips for Storing and Reheating Your French Onion Soup

    Proper storage and reheating are essential for maintaining the quality of your French onion soup. Allow the soup to cool completely before transferring it to an airtight container to prevent condensation from diluting the flavors. When reheating, do so gently on the stove over low heat, stirring occasionally to maintain consistency and avoid burning. If reheating cheese-topped soup, consider briefly broiling it again to refresh the delightful crust that adds texture and flavor. Following these tips ensures that your soup remains delicious and enjoyable, even days later, allowing you to savor every last drop of this comforting classic.

    Perfect Pairings to Enhance Your French Onion Soup Experience

    What Dishes Complement Your French Onion Soup Delight?

    Pairing French onion soup with complementary dishes can create a harmonious meal experience that delights the senses. A simple green salad featuring a light vinaigrette provides a refreshing contrast to the soup’s richness, balancing the flavors beautifully. Crusty bread, whether it be a traditional baguette or a rustic sourdough, enhances the experience, allowing you to scoop up the delightful broth and savor every bite. Classic accompaniments, such as a charcuterie board with cured meats and cheeses, beautifully round out the meal, ensuring a memorable dining experience that keeps guests coming back for more.

    Ideal Beverage Pairings to Elevate Your Meal

    Choosing the right beverages can greatly enhance your enjoyment of French onion soup. A robust red wine, such as Cabernet Sauvignon or Merlot, pairs exquisitely with the deep flavors of the soup, complementing its richness. Alternatively, a crisp lager or amber ale can provide a refreshing balance to the heaviness of the soup. For non-alcoholic options, consider sparkling water with a twist of lemon or a light herbal iced tea to cleanse the palate and enhance your meal, ensuring a delightful experience from start to finish that satisfies all tastes.

    Creating a Complete Meal Around Your French Onion Soup

    Designing a complete meal around French onion soup involves thoughtful considerations for flavor balance and presentation. Start with a light appetizer, such as a seasonal vegetable crudité or a classic French salad, which helps prepare the palate for the richness to come. Follow the soup with a main dish like roasted chicken or a creamy risotto to maintain the comforting theme and create a cohesive dining experience. To finish, a light dessert—like a citrus tart or a scoop of sorbet—can provide a delightful counterpoint to the meal’s richness, creating a well-rounded dining experience that satisfies every craving and leaves lasting memories.

    Frequently Asked Questions About Crafting French Onion Soup

    Can I prepare French onion soup in advance and store it for later use?

    Yes, French onion soup can be prepared in advance. Cook the soup and store it in the refrigerator for up to three days. Reheat gently before serving, and re-broil the cheese topping for best results, ensuring that it retains its delectable texture and flavor that everyone loves.

    Is there a vegetarian version of French onion soup that I can try?

    Absolutely! Substitute high-quality vegetable broth for beef broth and avoid using any animal-derived products to create a delicious vegetarian version of this classic soup. This way, you can enjoy all the rich flavors without compromising on dietary preferences and still have a satisfying dish.

    What should I serve alongside my French onion soup for a complete meal?

    French onion soup pairs well with crusty bread, a light salad, or a charcuterie board. These accompaniments enhance the overall dining experience, making your meal more delightful and satisfying, ensuring that every guest enjoys their time at your table.

    How do I store leftover French onion soup properly?

    Store leftover soup in an airtight container in the refrigerator. It will keep well for up to three days. Reheat gently on the stove before serving to ensure the flavors remain intact and delicious, allowing you to enjoy your favorite soup again.

    Can I freeze French onion soup for later enjoyment?

    Yes, French onion soup can be frozen. Allow it to cool completely, then transfer it to a freezer-safe container. It can be frozen for up to three months, making it a convenient option for meal prep and future enjoyment whenever you crave this classic comfort dish.

    What type of cheese is best for topping my French onion soup?

    Gruyère cheese is a traditional choice, offering a rich, nutty flavor that complements the soup beautifully. However, Swiss cheese or a blend of cheeses can also work well as a topping, providing a deliciously creamy experience that enhances every spoonful.

    How do I achieve the best caramelization on onions for my soup?

    To achieve perfect caramelization, cook onions slowly over medium to low heat, stirring frequently to ensure even cooking. Patience is key, as this process can take 30 to 40 minutes to achieve optimal results, which are essential for the soup’s rich flavor and depth.

    Can I use a slow cooker to make French onion soup?

    Yes, you can use a slow cooker. Start by caramelizing the onions first in a skillet, then transfer them to the slow cooker along with the broth. Cook on low for several hours to allow the flavors to meld beautifully, creating a rich and satisfying soup that you will enjoy.

    What type of wine should I use for deglazing the pot during preparation?

    A dry white wine, such as Sauvignon Blanc or Chardonnay, works perfectly for deglazing. The acidity helps lift the caramelized bits and enhances the overall flavor of the soup, ensuring depth and richness in every spoonful that you serve.

    Is it necessary to top the soup with bread for a traditional experience?

    While traditional, topping the soup with bread is not mandatory. You can enjoy it simply with cheese or opt for an alternative topping based on personal preference. The choice is yours to create the perfect experience that suits your taste!

    Connect with us on Facebook!

    The post How to Make a Classic French Onion Soup: A Timeless Recipe appeared first on https://cookinggods.com

    The Article Classic French Onion Soup: A Timeless Recipe Guide Was Found On https://limitsofstrategy.com

  • Beef Wellington: Perfecting the Classic Recipe Guide

    Beef Wellington: Perfecting the Classic Recipe Guide

    Enhance Your Culinary Expertise: Perfecting Ingredient Preparation for Beef Wellington

    Choosing Premium Quality Beef to Elevate Your Wellington Dish

    Expert butcher selecting high-quality beef fillet for making Beef Wellington in a traditional market.

    Starting your delightful culinary adventure on how to cook a classic beef Wellington hinges on the vital step of selecting the highest quality beef. It is crucial to opt for a tender cut, like fillet or tenderloin, since the quality of the meat significantly impacts the dish’s flavor and texture. Freshness is of utmost importance; seek out bright red meat with a fine grain and minimal marbling. Properly trimmed beef not only enhances the dish’s visual appeal but also guarantees even cooking throughout. Establishing a relationship with your local butcher can lead to discovering superior quality cuts, so do not hesitate to ask for their recommendations or insights on the best available options.

    Once you have obtained your prime cut of beef, consider its source. Grass-fed beef is particularly prized for its rich flavor and leanness, elevating your Wellington to extraordinary levels. If you’re feeling adventurous, explore unique global options like Wagyu or Kobe beef, known for their exquisite marbling and unparalleled tenderness. Choosing these luxurious options can transform beef Wellington into a culinary experience that rivals the finest gourmet establishments worldwide.

    Crafting the Perfect Duxelles to Enhance Your Wellington’s Flavor

    Duxelles, a finely chopped mixture of mushrooms, serves as the backbone of the beef Wellington, playing a crucial role in enhancing the overall flavor profile of this exquisite dish. Start by selecting a variety of mushrooms, as their diversity can significantly influence the taste. Flavorful options include cremini, shiitake, and button mushrooms. Finely chop these mushrooms along with shallots and garlic, then sauté the mixture in a heated pan with a drizzle of olive oil to create a fragrant base that captivates the senses.

    The key to achieving impeccable duxelles lies in diligently cooking out the moisture. As the mushrooms sauté, they release water; continue cooking until this liquid evaporates, thickening the mixture into a rich, concentrated paste. This concentrated flavor not only acts as a moisture barrier, preventing the pastry from becoming soggy, but also infuses the beef with an unforgettable umami punch, enriching every bite. For an added gourmet touch, contemplate incorporating a splash of white wine or a drizzle of truffle oil to elevate the earthy tones of the mushrooms, making the dish even more decadent.

    Creating an Outstanding Pastry Base for Your Beef Wellington

    The pastry transforms your beef Wellington into a breathtaking culinary masterpiece. Puff pastry is the ideal choice, renowned for its flaky, buttery texture that contrasts beautifully with the beef and duxelles. If you are using frozen pastry, make sure it’s thoroughly thawed in the refrigerator before rolling it out to preserve its integrity during preparation.

    Aim for a consistent thickness of approximately 3mm when rolling out your pastry. This uniform thickness is essential for even cooking, resulting in a crisp, golden exterior. Dust your work surface with flour to prevent sticking, and cut the pastry into a rectangle that will comfortably encase your beef. Remember, a well-prepared pastry lays the foundation for the entire dish, so take your time to perfect this critical step in the cooking process.

    Expert Seasoning Techniques to Enhance the Flavor of Your Beef

    Beef seasoned with sea salt, black pepper, thyme, and rosemary, ready for cooking.

    Now that your beef is prepped, it’s time to elevate its inherent flavors through effective seasoning techniques. Generously sprinkle sea salt and freshly cracked black pepper over the entire surface of the meat. This crucial step not only enhances the beef’s natural flavor but also contributes to creating a delicious crust once seared, amplifying its taste and appeal.

    For those looking to add an aromatic touch, consider incorporating finely chopped herbs such as thyme or rosemary into your seasoning mix. These herbs will not only provide a fragrant backdrop but also infuse the beef with a depth of flavor that harmonizes beautifully with the earthy notes of the duxelles. Allow the seasoned meat to rest at room temperature for about 30 minutes before cooking; this resting period helps the flavors penetrate the meat and ensures even cooking throughout.

    Assembling Your Beef Wellington with Precision for Maximum Impact

    Having prepared all components, it’s now time to assemble your beef Wellington. Start with a clean work surface, laying down the rolled-out pastry. Spread an even layer of duxelles over the pastry, ensuring it covers the entire surface. This not only adds a robust flavor but also serves as a crucial moisture barrier to protect the pastry during baking.

    Next, carefully position your seasoned beef fillet in the center of the duxelles-covered pastry. The key to a successful assembly is to securely wrap the beef while avoiding air pockets, which can lead to leaks during the baking process. Gently fold the pastry over the beef, tucking in the ends to create a neat, sealed package. This meticulous process ensures that your Wellington maintains its shape during baking and that every bite is infused with the sumptuous flavors you have meticulously crafted.

    Cooking Techniques to Perfectly Prepare Your Beef Wellington

    Mastering the Seasoning of the Meat for Ultimate Flavor

    Beef fillet seasoned with salt, pepper, paprika, and garlic powder, resting for beef Wellington.

    Seasoning is often overlooked, yet it serves as the foundation of flavor in how to cook a classic beef Wellington. After generously seasoning the beef fillet with salt and pepper, allow it to rest for about 30 minutes. This resting phase not only enhances the flavor but also allows the meat to reach room temperature, ensuring that it cooks evenly throughout the preparation.

    Consider this: a well-seasoned piece of meat will burst with flavor, creating a delightful contrast with the rich duxelles and flaky pastry. You might choose to sprinkle some paprika or garlic powder over the beef for an added touch of flavor. These additional spices will enhance the overall flavor profile and contribute to a deeper, richer taste experience that will delight your palate.

    Achieving the Perfect Sear on the Beef for Maximum Juiciness

    Searing is where the magic truly unfolds. Heat a skillet over high heat, adding a drizzle of oil until it shimmers enticingly. Place your seasoned beef in the pan, allowing it to sear undisturbed for approximately 2-3 minutes on each side. The goal is to create a beautiful, golden crust that locks in the juices while providing a delightful textural contrast once baked.

    Keep a close eye on your beef; you want to achieve a perfect sear on the outside without cooking the inside beyond medium-rare. Remember, the beef will continue to cook during the baking process, so it’s crucial to create that perfect crust without compromising the meat’s integrity. Once seared, transfer the beef to a plate and let it rest for at least 10 minutes. This resting phase is essential, allowing the juices to redistribute and ensuring a succulent slice when you finally cut into your Wellington.

    The Essential Steps for Resting the Beef to Maximize Tenderness

    Resting your beef after searing is a crucial step that should not be overlooked if you want to master how to cook a classic beef Wellington. Allowing the meat to rest for a minimum of 10 minutes ensures that the juices remain locked within the fillet. If you slice into the meat too soon, those precious juices will run out, leaving you with a dry piece of beef that doesn’t do justice to your hard work in the kitchen.

    While resting, loosely cover the beef with foil to keep it warm. This step preserves heat and gives the beef time to relax, making it easier to slice later. Consider this an opportunity to tidy up your workspace and prepare for the final assembly of your Wellington. Good food deserves patience, and this is the moment where your beef transforms from a mere ingredient into the star of your culinary masterpiece.

    Expert Tips for Assembling the Wellington for Stunning Presentation

    Layering Each Component for Maximum Impact and Flavor

    With your beef rested, it’s time to unite all the elements and create an exquisite beef Wellington. Begin by laying your prepared pastry on a clean, flat surface. The first step is to spread the duxelles evenly over the pastry, ensuring every corner is covered. This layer acts as a flavor enhancer and a protective barrier to prevent moisture from affecting the pastry during baking.

    Once the duxelles are laid out, position the beef fillet snugly in the center of the pastry. Keeping the beef in place is essential for retaining its shape and ensuring an even bake. With the beef positioned, gently fold the pastry over the top, tucking it tightly around the meat. Use your fingers to press out any air pockets and ensure the edges are securely sealed. This meticulous assembly process is key to delivering a well-cooked, beautifully presented beef Wellington that will impress all who have the pleasure of dining on it.

    Trim away any excess pastry and use a sharp knife to create a decorative pattern on the top. This artistic touch not only adds visual appeal but also allows steam to escape during baking, preventing any potential sogginess. Remember, presentation is just as important as taste, and a well-assembled Wellington speaks volumes about your culinary skills and attention to detail.

    Expert Techniques for Wrapping the Beef to Ensure Perfect Cooking

    Wrapping your beef securely is a critical part of the assembly process. Once the duxelles is spread and the beef is positioned, carefully fold the edges of the pastry over the meat. The aim is to create a snug fit around the beef, ensuring no part is left exposed to the oven’s heat. This helps prevent moisture from escaping, allowing you to achieve that perfectly tender beef nestled inside a flaky exterior.

    Moisten the edges of the pastry with a bit of water to aid in sealing them together. This step is crucial; if the edges aren’t sealed properly, the juices from the beef and duxelles may leak out, leading to a soggy pastry that detracts from the overall experience. Once the beef is tightly wrapped, flip the entire package seam-side down onto a baking tray lined with parchment paper. This positioning ensures the seam is hidden and allows the pastry to bake evenly from the bottom up.

    Rushing this process risks compromising the final product. Take your time to achieve a well-wrapped beef Wellington that will deliver a delightful texture and flavor experience in every bite.

    The Significance of Applying an Egg Wash for a Beautiful Finish

    An egg wash is your secret weapon for achieving a stunning golden-brown finish on your beef Wellington. Whisk together an egg with a splash of water or milk to create a smooth mixture. Using a pastry brush, apply this wash generously over the entire surface of the wrapped pastry, ensuring every inch is covered for optimal results.

    This egg wash not only gives the Wellington its beautiful sheen but also helps prevent the pastry from separating during baking. The egg wash is crucial in achieving that eye-catching, glossy appearance that transforms your Wellington from a simple meal into a show-stopping centerpiece on the dining table.

    For an extra touch of finesse, consider sprinkling some sea salt or sesame seeds over the top just before baking. This addition will contribute another layer of flavor and texture, elevating your dish from ordinary to extraordinary. Keep in mind that aesthetic appeal is as vital as taste for impressive dishes like a classic beef Wellington.

    Baking Your Wellington to Culinary Perfection

    Key Steps for Properly Preheating Your Oven

    Achieving the right oven temperature is essential for baking the perfect beef Wellington. Preheat your oven to 200°C (390°F) to ensure the pastry puffs up beautifully and the meat cooks evenly throughout. This high temperature guarantees that the outer layer becomes crisp while the interior reaches the ideal doneness.

    Before placing your Wellington in the oven, allow it to rest at room temperature for about 15 minutes. This practice helps prevent thermal shock, which can lead to uneven cooking. A well-prepped oven will result in a beautifully baked pastry that’s both golden and flaky, preserving the integrity of the delicious filling inside.

    If you have one, utilize an oven thermometer, as oven temperatures can vary significantly. Ensuring that your oven is at the correct temperature before baking is fundamental to mastering cooking a classic beef Wellington and achieving the best results.

    Strategies for Accurately Monitoring Internal Temperature

    A meat thermometer is a game-changer for achieving the ideal level of doneness for your beef Wellington. Insert the thermometer into the thickest part of the beef, ensuring it doesn’t touch the pastry. Aim for an internal temperature of around 52°C (125°F) for medium-rare. Once removed from the oven, the residual heat will continue cooking the beef, bringing it to the perfect finish.

    Monitoring the internal temperature is crucial, as overcooking will result in a dry, less enjoyable meal. Keep a close eye on the time; typically, your Wellington will require about 25-30 minutes in the oven, but this can vary depending on your specific oven. Once your beef Wellington reaches the desired internal temperature, remove it from the oven and allow it to rest for 10-15 minutes before slicing. This resting period ensures that all those delicious juices are retained, resulting in tender, juicy slices when you cut into them.

    Achieving the Ideal Bake for Your Wellington with Perfect Timing

    When your beef Wellington emerges from the oven, it should be a sight to behold—a stunning golden-brown crust with beautifully puffed pastry. The perfect bake is all about timing and temperature. Keep a close watch on the pastry during the last few minutes; if it’s browning too quickly, consider covering it loosely with foil to prevent burning while allowing the beef to reach the perfect temperature.

    A successful bake means the pastry will be flaky, crisp, and light, complementing the rich beef and duxelles beautifully. Give it a gentle prod to check for doneness; if it feels firm yet slightly yielding, you’re right on track for culinary success.

    Once baked, remember that patience is key. Allow your beef Wellington to rest before slicing, ensuring that every piece celebrates textures and flavors that will impress any dinner guest when you serve it.

    Techniques for Resting and Slicing Your Wellington for Optimal Enjoyment

    The Importance of Allowing Adequate Rest Time for Juiciness

    Resting your beef Wellington after baking is crucial to ensuring a juicy and flavor-packed dining experience. As tempting as it may be to dive right in, the resting period allows the juices to redistribute throughout the meat, creating incredibly tender and succulent slices that are a delight to enjoy.

    Allow your Wellington to rest for 10-15 minutes before slicing it. This brief wait can significantly impact maintaining moisture levels and preventing dryness in the final product. While resting, keep it covered with a clean kitchen towel or foil to retain warmth. This period is also an ideal time to prepare your side dishes or finish up any garnishes to elevate your presentation.

    The anticipation of slicing into your Wellington is part of the culinary journey. Every moment spent waiting only enhances the reward of a beautifully cooked meal, deserving of every compliment it will receive from your guests.

    Expert Slicing Techniques for Showcasing Flavors and Layers

    When it’s time to slice your beef Wellington, employing the right technique is essential for showcasing its stunning layers. Start with a sharp knife; a serrated knife works particularly well to maintain the integrity of the pastry while smoothly cutting through the beef and duxelles layers.

    Begin by trimming the ends to create a clean edge, then proceed to slice the Wellington into even pieces, approximately 2-3 cm thick. This thickness ensures that each portion includes a generous amount of juicy beef and rich mushroom duxelles, all enveloped in flaky pastry.

    Present your slices on a warm plate, allowing the beautiful layers of your Wellington to shine. This thoughtful presentation will not only impress your guests but also heighten their anticipation for the delightful flavors that await them in each delectable bite.

    Curating Complementary Serving Suggestions for a Complete Meal

    Pairing your beef Wellington with complementary sides can elevate your dish from extraordinary to unforgettable. Classic accompaniments include roasted seasonal vegetables, such as Brussels sprouts or carrots, which add color and freshness to your plate and enhance the overall dining experience.

    Consider serving it alongside creamy mashed potatoes or a luxurious potato gratin, which pairs beautifully with the rich flavors of the beef. A vibrant sauce, such as a red wine reduction or a rich gravy, can also add another layer of flavor, enhancing every bite and delighting your guests.

    Don’t overlook wine pairings; a robust red, such as a Cabernet Sauvignon or a full-bodied Merlot, can take your meal to the next level and provide an excellent balance to the rich flavors of the beef Wellington. Remember, the goal is to create a harmonious dining experience that captivates the senses and leaves a lasting impression on your guests.

    Exploring Creative Variations and Additions for Your Wellington

    Enhancing Flavor with Savory Prosciutto Wraps

    Consider wrapping your beef in prosciutto before adding the duxelles for an extra layer of flavor and moisture retention. This addition not only enhances the dish’s savory profile but also helps keep the beef moist throughout the cooking process. The prosciutto’s natural saltiness beautifully complements the beef, creating a harmonious blend of flavors that elevates the overall dining experience.

    When employing prosciutto, lay the slices in slightly overlapping rows to form a complete layer around the beef. Once the beef is securely wrapped, proceed to add the duxelles and pastry as usual. The outcome is a decadent beef Wellington that tantalizes the taste buds and impresses even the most discerning palates.

    Incorporating Fresh Herbs for a Burst of Aroma

    Elevate your duxelles by incorporating fresh herbs, such as thyme or rosemary, during the cooking process. These aromatic herbs will infuse the mushroom mixture with a fragrant, earthy quality that enhances the overall flavor of your beef Wellington.

    Chop the herbs finely and add them to the mushroom mixture as it cooks. Not only do they add depth of flavor, but they also create a visually appealing touch to the dish. This small yet impactful change can transform a classic recipe into a gourmet masterpiece, showcasing your creativity and culinary flair.

    Personalizing Your Wellington with Unique and Delightful Fillings

    Feel free to personalize your beef Wellington by experimenting with different fillings. For example, adding sautéed spinach or a layer of creamy cheese can create a delightful twist on the traditional recipe. Each of these options not only alters the flavor profile but also adds texture and richness to the dish.

    Consider incorporating roasted red peppers or a layer of pâté for a luxurious touch that enhances the overall experience. These variations allow you to cater to different taste preferences while keeping the essence of the classic dish intact. The beauty of cooking lies in its adaptability, and your Wellington can serve as a canvas for your culinary creativity.

    Exploring Different Meats for Unique Wellington Variations

    While beef is the traditional choice for a Wellington, you can certainly experiment with alternative meats. Veal or pork tenderloin can be excellent substitutes, bringing unique flavors and textures to the table.

    When using different meats, adjust the cooking times accordingly, as they may require different levels of doneness. This experimentation allows you to create a diverse range of beef Wellingtons that cater to various tastes and occasions, proving that the classic dish can be versatile and exciting for any culinary enthusiast.

    Avoiding Common Pitfalls for a Flawless Wellington Experience

    Preventing Overcooked Beef for Optimal Juiciness

    One of the most common mistakes in mastering the cooking of a classic beef Wellington is overcooking the beef. Since the beef fillet will continue to cook while it rests after baking, removing it from the oven at the right temperature is essential for achieving the desired doneness.

    Utilize a meat thermometer to check the internal temperature, aiming for medium-rare doneness at around 52°C (125°F). The golden rule is to pull the beef from the oven while it still has some residual warmth; this ensures a perfectly juicy center when you finally slice into the Wellington, rewarding your efforts with a delightful dining experience.

    Preventing a Soggy Pastry Base for Ideal Texture

    A soggy bottom can ruin the delight of a beef Wellington. To avoid this, ensure that the duxelles are thoroughly cooked and moisture-free before spreading them on the pastry.

    Additionally, allowing the beef to cool slightly before wrapping it in pastry can help minimize moisture. Finally, a well-preheated oven is vital for achieving that crispy, flaky exterior that contrasts delightfully with the tender beef inside, making your Wellington an unforgettable dish that you can be proud of.

    Ensuring Sufficient Seasoning for Maximum Flavor Profiles

    Without proper seasoning, your beef Wellington may fall flat in taste. Generously season the beef with salt and pepper, and don’t skimp on flavorings in the duxelles. Adding fresh herbs can elevate the dish and create a beautifully balanced flavor profile that keeps diners returning for more.

    Always taste the duxelles before assembling; it should be rich and savory, perfectly complementing the beef. Ensuring that every component is well-seasoned will result in a well-rounded dish that is memorable and satisfying for your guests.

    Frequently Asked Questions About Beef Wellington

    Can I prepare beef Wellington components ahead of time?

    Yes, you can prepare the individual components ahead of time. Assemble the Wellington without baking it, then refrigerate it until you’re ready to bake. Just ensure it’s well wrapped to prevent moisture from affecting the pastry.

    What is the best cut of beef for a Wellington?

    The best cut for a classic beef Wellington is beef fillet or tenderloin. These cuts are tender, resulting in a succulent dish that melts in your mouth with every bite.

    Can I use other types of mushrooms in the duxelles?

    Absolutely! Feel free to experiment with mushrooms like shiitake, oyster, or wild. Each type will bring a unique flavor to your duxelles, enhancing the overall experience of the dish.

    How do I know when the beef is cooked to my liking?

    Use a meat thermometer to check the internal temperature. For medium-rare, aim for around 52°C (125°F) before resting; this will yield a perfect piece of meat once sliced.

    What should I serve with beef Wellington for a complete meal?

    Consider serving your beef Wellington with roasted vegetables, creamy mashed potatoes, or a rich red wine sauce to complement the dish beautifully and enhance its overall appeal.

    Can I freeze beef Wellington for later use?

    Yes, you can freeze an unbaked beef Wellington. Wrap it tightly in plastic wrap and foil, then bake from frozen, adding extra time to the cooking process to ensure it is thoroughly cooked.

    What’s the best way to reheat leftover beef Wellington without ruining it?

    To reheat, place it in a preheated oven at a low temperature until warmed through. Avoid microwaving, as this can make the pastry soggy and less enjoyable to eat.

    Is it necessary to use an egg wash for the pastry?

    While not strictly necessary, using an egg wash gives the pastry a beautiful golden sheen and helps seal the edges, making it visually appealing and enhancing its overall texture.

    Can I use a different type of pastry for the Wellington?

    Puff pastry is traditional, but you can experiment with shortcrust pastry for a different texture. Just remember that the baking time may vary, depending on the type of pastry used.

    How can I prevent the pastry from becoming soggy during baking?

    Ensure the duxelles are fully cooked and moisture-free before spreading them on the pastry. Wrapping the beef tightly and baking at the correct temperature also helps create a crispy exterior that is delightful to eat.

    Connect with us on Facebook for more culinary tips!

    The post How to Cook a Classic Beef Wellington: A Timeless Recipe appeared first on https://cookinggods.com

    The Article Beef Wellington: Master the Timeless Classic Recipe Was Found On https://limitsofstrategy.com