Discover the Unmatched Ease of One-Pot Pasta Dinners
Unlock the Secrets of One-Pot Pasta Meals as the Ultimate Time-Saver
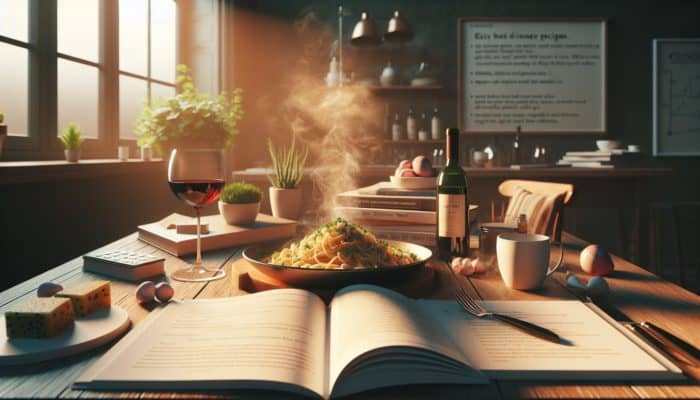
One-pot pasta dishes epitomize convenience in contemporary cooking, making them an ideal solution for busy individuals or families navigating hectic schedules. The straightforward process of preparing a healthy meal in just one pot not only saves precious time but also greatly simplifies the cleanup afterward. This feature makes these recipes an indispensable choice for anyone juggling work, family commitments, and personal time. Here are some extraordinary benefits that come with one-pot pasta meals:
- Minimal cleanup: Enjoy the luxury of washing only a single pot!
- Quick preparation: Most recipes can be ready to serve in under 30 minutes.
- Harmonious flavours: Ingredients meld beautifully as they cook together.
- Versatile ingredients: Utilize whatever ingredients you have at home for a unique meal each time.
- Easy portion control: Prepare just the right amount to suit your needs.
- Healthy options: Effortlessly incorporate a wide range of vegetables and lean proteins.
These benefits highlight one-pot pasta meals as not only visually appealing but also a practical solution for dinner. Furthermore, this cooking style encourages endless creativity, allowing you to experiment with diverse flavours and ingredients from around the globe, ensuring that each meal becomes an exciting culinary journey.
Key Ingredients to Master Your One-Pot Pasta Creations
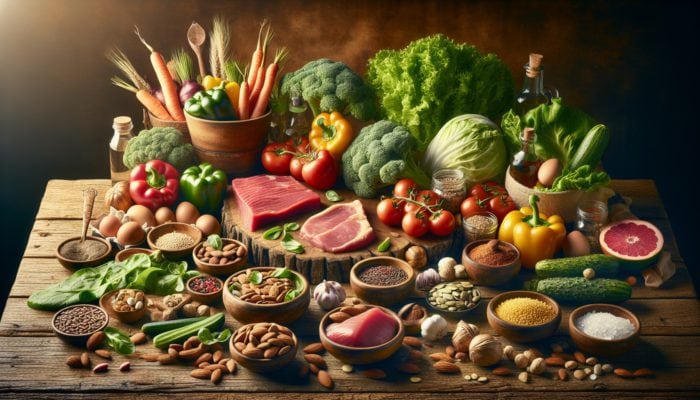
Crafting a delectable one-pot pasta dish hinges on a selection of crucial ingredients that contribute to both flavour and texture. The essential components include:
1. Pasta: Select your preferred type, whether it’s spaghetti, penne, or fusilli. Each pasta shape provides a unique texture and varies in its ability to absorb sauces effectively, enhancing the overall dish.
2. Broth: Choose chicken, vegetable, or seafood broth to elevate the dish with depth. The broth serves as the primary cooking liquid, infusing flavours directly into the pasta as it cooks, resulting in a rich taste.
3. Vegetables: Incorporate fresh, seasonal vegetables like spinach, bell peppers, or zucchini. These not only enhance the dish’s visual allure but also significantly boost its nutritional profile, making each bite more wholesome.
4. Proteins: Opt for chicken, beef, seafood, or plant-based proteins such as beans or lentils. These additions enhance the meal’s heartiness and provide essential nutrients that contribute to a balanced diet.
5. Spices and Herbs: Fresh or dried herbs, along with spices, can amplify the dish’s flavour. Consider adding basil, oregano, garlic, and red pepper flakes to heighten the taste experience.
6. Cheese: A sprinkle of cheese, such as parmesan or mozzarella, can elevate the dish, adding richness and a delightful creaminess that ties all the flavours together.
Equipped with these essential ingredients, you’ll be ready to create enticing one-pot pasta dinners that cater to a wide array of tastes and dietary preferences, ensuring satisfaction for everyone at the table.
Essential Techniques for Perfecting One-Pot Pasta Cooking
To excel in crafting one-pot pasta dishes, it is crucial to grasp the fundamental cooking techniques that guarantee even cooking while allowing the pasta to absorb the delightful flavours of the accompanying ingredients. Here are the key techniques to remember:
1. Simmering: Begin by bringing the broth to a gentle simmer before adding the pasta. This method ensures that the pasta cooks uniformly, soaking up the flavours from the broth and other ingredients effectively.
2. Stirring: Regular stirring is vital, especially during the initial phases, to prevent the pasta from clumping together. It also helps evenly distribute heat throughout the pot, ensuring consistent cooking.
3. Timing: Keep a close watch on cooking times. Different pasta varieties require different cooking durations; softer pasta may cook more quickly than sturdier options. Adding vegetables and proteins at the right times ensures everything is cooked to perfection.
4. Adjusting Liquid: As the pasta cooks, it absorbs liquid, so it’s essential to add more water or broth gradually if the pasta appears to be drying out. Finding the right balance is crucial for achieving a creamy, well-integrated dish that delights the palate.
By mastering these essential techniques, you can ensure that every one-pot pasta meal you create is not only delicious but also showcases the perfect texture and flavour profile that will impress your family and guests alike.
Exciting One-Pot Pasta Recipes to Explore

A wealth of delightful one-pot pasta recipes awaits, catering to a variety of palates and dietary preferences. Here are a few popular options to ignite inspiration for your next dinner:
1. Creamy Mushroom Pasta: Combine earthy mushrooms, aromatic garlic, and a splash of cream to create a rich and satisfying dish. The deep flavour of mushrooms harmonizes beautifully with fresh herbs like thyme and parsley, elevating the entire meal.
2. Spicy Chorizo and Tomato Pasta: Infuse sliced chorizo, diced tomatoes, and red pepper flakes to craft a robust meal. This dish is perfect for those who appreciate a bit of heat in their culinary creations.
3. Vegetable Primavera: Toss a vibrant medley of seasonal vegetables such as asparagus, bell peppers, and cherry tomatoes with pasta and pesto for a fresh, lively dish. This option is particularly appealing to vegetarians seeking a delightful meal.
4. Seafood Linguine: Use succulent shrimp, tender mussels, and a splash of white wine for an exquisite seafood pasta experience. The combination of seafood and garlic yields an aromatic and flavourful dish that is simply irresistible.
5. Mediterranean Pasta: Combine olives, artichokes, and feta cheese with whole grain pasta for a healthy and flavour-packed meal. This dish perfectly embodies Mediterranean flavours and is sure to be a crowd-pleaser.
These easy, one-pot pasta recipes are not only versatile but can be tailored to suit your personal tastes. Whether you’re in the mood for something creamy, spicy, or loaded with vegetables, there’s a one-pot pasta recipe ready to satisfy every appetite.
Effective Strategies for Amplifying One-Pot Pasta Flavours
Enhancing the flavour of your one-pot pasta dishes revolves around incorporating the right elements at just the right moments. Simple additions can transform a basic meal into a flavour-packed experience. Here are some strategies for elevating your one-pot pasta:
1. Fresh Herbs: Adding fresh herbs such as basil, parsley, or cilantro at the end of cooking brightens the flavours and adds freshness. Consider using herb-infused oils for an additional layer of taste that will excite your palate.
2. Cheese: Introduce cheese not only at the end but also during the cooking process. Stirring in cheese early can create a creamy texture, while a sprinkle at serving adds a delightful finishing touch that enhances the overall dish.
3. Citrus Zest: A hint of lemon or lime zest can provide a refreshing contrast to richness. Squeeze a bit of juice before serving for an added zesty punch that invigorates the entire meal.
4. Umami Boosters: Ingredients such as soy sauce, miso paste, or nutritional yeast can introduce depth and umami flavour to your dish. These enhancers are particularly valuable for plant-based recipes, making them even more satisfying.
5. Chilies and Spices: Adjust the heat level by incorporating fresh or dried chilies. Spices like smoked paprika or cumin can introduce a warm, complex flavour profile that excites the palate and elevates your dish to new heights.
By integrating these enhancements, your one-pot pasta will not only be easy to prepare but also incredibly satisfying and bursting with flavour that keeps everyone coming back for seconds.
Expert Insights on Choosing the Best One-Pot Pasta Recipes for Dinner
How to Choose the Ideal Pasta Shape for Your Dish?
Selecting the right pasta shape can significantly influence the texture and flavour absorption of your one-pot dish. Different shapes hold sauces and ingredients differently, creating distinct taste experiences. For instance, short pasta shapes like penne or fusilli excel at capturing chunky sauces that contain bits of meat or vegetables, while long pasta such as spaghetti pairs well with lighter sauces that cling to the noodles.
Consider using the following pasta shapes based on their unique characteristics:
- Fusilli: Its spiral design effectively traps sauce and bits of vegetables, ensuring every bite is flavourful.
- Penne: The tubular shape is perfect for creamy sauces, ensuring that every mouthful is rich and satisfying.
- Spaghetti: Best suited for lighter sauces or those featuring olive oil, garlic, and fresh herbs that coat the strands beautifully.
- Orzo: Rice-shaped orzo works wonderfully in soups or with lighter, broth-based sauces, providing a delightful texture.
- Orecchiette: The ‘little ears’ shape pairs well with thicker sauces and should be complemented with robust flavours for an enjoyable dining experience.
When crafting your one-pot pasta dish, consider the sauce and ingredients you plan to use—this will guide you in selecting the best pasta shape to create a harmonious and flavourful meal that will impress everyone.
Which Proteins Are Best for Inclusion in One-Pot Pasta?
Integrating protein into your one-pot pasta dishes not only enhances flavour but also boosts the nutritional profile of your meal. Each type of protein brings unique characteristics, allowing for a diverse array of culinary creations. Here are some popular protein options to consider:
1. Chicken: Boneless, skinless chicken thighs or breasts are versatile and remain tender during cooking. They can be seasoned in various ways to suit any flavour profile and enhance the overall dish.
2. Beef: Ground beef or beef chunks serve as a hearty base for robust sauces. Browning the meat prior to adding other ingredients intensifies the overall flavour of the dish, creating a satisfying experience.
3. Seafood: Options like shrimp, scallops, or mussels cook quickly and add a briny depth to your pasta. They pair beautifully with garlic and white wine for a delectable experience that transports you to the coast.
4. Plant-Based Proteins: Ingredients like tofu, tempeh, or legumes, such as chickpeas and lentils, are excellent for creating satisfying vegetarian dishes. They absorb flavours well and can be seasoned to your liking for a fulfilling meal.
5. Sausage: Italian sausage or chorizo can lend exceptional flavour to your dish, providing spice and richness. Ensure thorough cooking before adding other ingredients to maximize flavour.
Choosing the right protein is essential for crafting a balanced one-pot pasta dish. Consider the cooking times and how each protein interacts with your selected ingredients for optimal results that please the palate.
How to Infuse More Flavour into One-Pot Pasta?
Enhancing the flavour of one-pot pasta dishes can be accomplished through various methods that emphasize layering ingredients harmoniously. Here are some actionable steps to enrich your cooking:
1. Start with Aromatics: Sauté garlic and onions at the beginning of your cooking process. This creates a flavourful base that permeates the entire dish, infusing every bite with richness.
2. Utilize Quality Ingredients: High-quality pasta, fresh vegetables, and quality broth make a substantial difference. Investing in premium ingredients will reflect positively in the taste of your meal, creating a memorable dining experience.
3. Herbs and Spices: Incorporate a variety of herbs and spices, both during cooking and as finishing touches. Consider thyme, rosemary, and bay leaves for deep flavour, and sprinkle fresh herbs before serving for vibrancy and freshness.
4. Deglazing: If you brown proteins, deglaze the pot with a splash of broth or wine. This lifts the browned bits from the bottom, adding depth and richness to the sauce that enhances the overall dish.
5. Layering Flavours: Introduce ingredients in stages. For example, cook hardier vegetables first, then add softer ones later to maintain their texture. This layering technique ensures that each ingredient shines in the final dish.
By employing these steps in your cooking process, your one-pot pasta will boast impressive depth of flavour that keeps the dish exciting and thoroughly enjoyable for all who partake.
How to Make One-Pot Pasta Healthier?
Boosting the nutritional value of your one-pot pasta isn’t only about selecting healthy ingredients; it’s also about achieving balance within your meal. Here are some tips for creating a more nutritious dish:
1. Whole Grain Pasta: Opt for whole grain or legume-based pasta to enhance fibre content. These alternatives provide more nutrients and can help you feel fuller for longer, making them an excellent choice for health-conscious diners.
2. Incorporate Vegetables: Aim to fill half your pot with a variety of vegetables. Leafy greens, cruciferous veggies, bell peppers, and carrots add vibrant colour and a wealth of vitamins and minerals, enriching your meal.
3. Add Legumes: Beans or lentils serve as excellent sources of protein and fibre, making them ideal add-ins for plant-based meals. They also contribute a satisfying texture to your dish, enhancing both flavour and nutrition.
4. Healthy Fats: Use heart-healthy fats like olive oil or avocado instead of butter or cream-based sauces. These fats not only enhance flavour but also promote better heart health, making your dish more wholesome.
5. Portion Control: Be mindful of serving sizes. Balancing your plate with protein, carbohydrates, and vegetables can help manage caloric intake while ensuring a nourishing meal that satisfies.
By focusing on these elements, you can create one-pot pasta dishes that are not only delicious but also packed with nutritional benefits, making them excellent choices for dinner any night of the week.
Delicious Creamy One-Pot Pasta Variations to Try
How to Achieve the Perfect Creamy Texture in Your Pasta?
Creating a rich and creamy texture in your one-pot pasta dish revolves around selecting the right ingredients and employing effective techniques. Here are some tips to ensure your pasta turns out luxuriously creamy:
1. Choose the Right Base: Start with a combination of broth and cream or a non-dairy alternative like coconut milk. This forms the foundation for your sauce and adds richness to the dish, creating a smooth texture that is irresistible.
2. Stir in Cheese: Grating cheese such as parmesan or mozzarella and stirring it into the pot after cooking can create a wonderfully creamy consistency. Be sure to do this over low heat to avoid separation and ensure a seamless blend.
3. Use Starchy Water: If your recipe requires additional liquid, consider reserving some starchy pasta water. Adding this can help emulsify the sauce and achieve a silky finish that clings beautifully to the pasta.
4. Simmer Gently: Once all ingredients are combined, allow the pot to simmer gently. This helps the flavours meld together while preventing the sauce from breaking, resulting in a cohesive dish that delights the senses.
5. Finish with Herbs: Incorporating fresh herbs at the end not only enhances flavour but also makes the dish visually appealing and vibrant, adding a fresh touch that elevates the entire meal.
By applying these techniques, you can achieve a luxurious, creamy texture that will impress everyone at the dinner table, transforming your one-pot pasta into a standout dish that is both satisfying and delicious.
Popular Cream-Based Sauces for Pasta
Cream-based sauces can elevate your one-pot pasta dishes from simple to gourmet. Here are a few popular options that are sure to please:
1. Alfredo Sauce: A classic choice, this sauce blends cream, butter, and parmesan cheese, resulting in a rich, velvety coating for your pasta. It pairs beautifully with chicken or shrimp, making for a delectable meal.
2. Carbonara: Combining eggs, cream, and cheese creates a silky sauce, enriched with crispy pancetta or bacon. This dish offers a delightful taste experience with a hint of smokiness that excites the palate.
3. Pesto Cream Sauce: Mix traditional basil pesto with cream for a unique twist. This sauce works wonderfully with fresh vegetables and adds a vibrant green hue to your dish, making it visually appealing.
4. Garlic Parmesan White Sauce: A combination of sautéed garlic, cream, and parmesan creates a simple yet delicious sauce that complements nearly any pasta shape. It’s especially good with sautéed veggies and fresh herbs for added flavour.
5. Mushroom Cream Sauce: Sautéed mushrooms blended with cream and herbs yield a rich, earthy sauce. This option is particularly well-suited for vegetarian dishes, providing depth and satisfaction without meat.
These creamy sauces not only enhance the flavour of your one-pot pasta but also provide a comforting and indulgent element, ensuring your meals are both enjoyable and satisfying for everyone.
What Are Some Vegetarian Creamy Pasta Options to Consider?
Vegetarian one-pot pasta dishes can be just as satisfying as their meat-based counterparts, especially when you incorporate creamy elements. Here are some delectable vegetarian options to consider:
1. Spinach and Ricotta Pasta: Combining fresh spinach with creamy ricotta cheese creates a luscious dish. Toss in garlic and olive oil for an added flavour boost that complements the creaminess perfectly.
2. Creamy Tomato Basil Pasta: Use crushed tomatoes and cream to create a rich sauce. The addition of fresh basil elevates the dish, offering a lovely aroma and taste that lingers on the palate.
3. Mushroom and Pea Pasta: Sautéed mushrooms and sweet peas mixed with a creamy sauce yield a comforting meal that’s both hearty and vibrant. This combination is ideal for springtime cooking, celebrating the season’s freshness.
4. Butternut Squash Pasta: Pureeing roasted butternut squash with cream creates a naturally sweet and creamy sauce. This pairs beautifully with sage and a sprinkle of parmesan for an autumn-inspired dish.
5. Creamy Spinach and Artichoke Pasta: Incorporate spinach and artichokes to replicate the popular dip in pasta form. The creaminess combined with the tang from artichokes results in a delightful dish that everyone will love.
These vegetarian creamy pasta options deliver satisfying flavour while appealing to those seeking meatless meals. By incorporating diverse ingredients, you can create delicious one-pot dishes that are both nourishing and enjoyable for all.
How to Incorporate Protein into Creamy Pasta Dishes?
Adding protein to your creamy one-pot pasta dishes not only enhances their nutritional profile but also makes them more filling and satisfying. Here are effective ways to include protein in your meals:
1. Chicken or Turkey: Grilled or sautéed chicken or turkey breast can be added to creamy pasta for a lean protein source. Slice or cube the meat and mix it into the sauce just before serving for optimal results.
2. Fish and Seafood: Light proteins such as shrimp, scallops, or salmon can be cooked directly into the sauce. Their delicate flavours complement the creaminess and add a luxurious touch to your dish that will impress your guests.
3. Tofu or Tempeh: For plant-based options, sautéed tofu or tempeh can be tossed with pasta. Marinate the protein beforehand to infuse extra flavour and complexity, ensuring a satisfying meal.
4. Beans and Lentils: Incorporating beans or lentils not only boosts protein content but also adds heartiness to your dish. Stir them in during the last few minutes of cooking to warm through and integrate well with the other ingredients.
5. Eggs: Stir in beaten eggs into the hot pasta at the end of cooking to create a creamy texture, reminiscent of carbonara. This method provides a delightful richness and additional protein that elevates the dish.
Utilizing these proteins in your creamy pasta dishes ensures that your meals are not only delicious but also hearty and satisfying, catering to a variety of dietary needs and preferences that everyone will appreciate.
One-Pot Pasta with Vegetables
Which Vegetables Are Best for One-Pot Pasta Dishes?
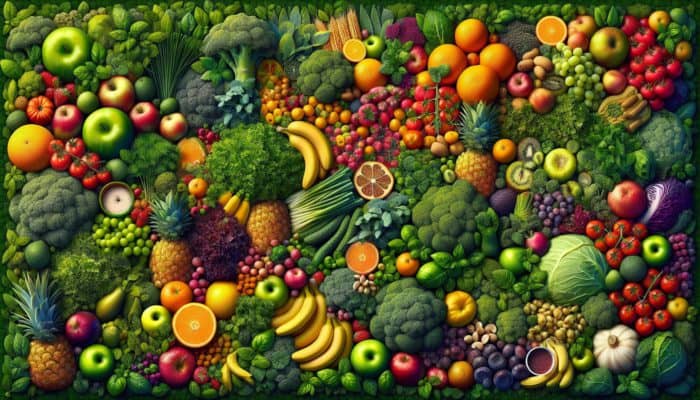
Integrating vegetables into your one-pot pasta not only adds vibrant colour and nutrition but also enhances the overall flavour and texture of the dish. Here are some of the best vegetables to consider for your recipes:
1. Spinach: This leafy green wilts down beautifully, adding nutrients without overwhelming the dish. It pairs well with creamy sauces and is best added towards the end of cooking to retain its vibrant colour.
2. Zucchini: Its mild flavour absorbs surrounding tastes, making it a versatile addition. Slice or dice zucchini and sauté it until tender for optimal texture that complements the pasta.
3. Bell Peppers: Offering sweetness and crunch, bell peppers can be included at the start of cooking. Their vibrant colours enhance the dish’s visual appeal, making it more enticing for everyone at the table.
4. Broccoli: Chopped into small florets, broccoli can be added early, allowing it to cook thoroughly and blend with other flavours. It provides a satisfying crunch and numerous nutritional benefits that support overall health.
5. Cherry Tomatoes: These burst with sweetness when cooked and can be added midway through cooking to retain some of their shape. Their juiciness enhances the overall flavour of the sauce, making every bite delightful.
6. Carrots: Sliced or diced carrots add natural sweetness and texture. Sauté them at the beginning to ensure they soften well and blend seamlessly into the dish for a well-rounded flavour.
7. Asparagus: When in season, asparagus brings a unique earthy flavour and vibrant colour. The tips can be added towards the end to maintain their crispness and freshness, adding a delightful crunch to your meal.
Incorporating these vegetables not only boosts the nutritional value of your one-pot pasta but also creates a more satisfying and flavourful dish. Experimenting with different combinations can lead to exciting flavour profiles tailored to your preferences, ensuring everyone enjoys their meal.
How to Add More Vegetables to Your Pasta Dishes?
Increasing the vegetable content in your one-pot pasta is a fantastic way to enhance nutrition without sacrificing flavour. Here are some strategies to help you incorporate more veggies into your meals:
1. Chop Finely: Smaller pieces cook faster and distribute more evenly throughout the dish. Consider grating or finely chopping vegetables to ensure they blend seamlessly into the pasta.
2. Layering: Add heartier vegetables first, allowing them to cook longer, then follow with softer veggies. This method ensures each vegetable retains its desirable texture while cooking evenly for a delightful bite.
3. Add During Cooking: Introduce vegetables at different stages of the cooking process. For example, add carrots and bell peppers earlier on and spinach or peas towards the end to preserve their colour and nutrients.
4. Use Vegetable Broth: Opt for vegetable broth instead of water or chicken broth to enhance the overall vegetable flavour of your dish. This adds depth and enriches the taste of your pasta, making it more appealing.
5. Sauces and Seasonings: Consider pureeing vegetables like butternut squash or cauliflower into your sauce for a creamy texture. This method not only adds nutrients but also enhances the richness of the dish, elevating the overall experience.
6. Toppings: Serve your pasta with a generous topping of fresh herbs or a sprinkle of vegetable-based pesto. This adds flavour and a burst of freshness to the meal, making it even more enjoyable.
By applying these techniques, you can effortlessly boost the vegetable content in your one-pot pasta dishes, ensuring enjoyable, colourful, and nutritious meals for everyone at the table.
Seasonal Vegetable Pasta Recipes to Savor
Utilizing seasonal vegetables in your one-pot pasta not only guarantees freshness but also maximizes flavour. Here are some seasonal vegetable pasta recipes perfect for showcasing the bounty of each season:
1. Spring Vegetable Pasta: Combine asparagus, peas, and cherry tomatoes with a light lemon cream sauce. The bright flavours capture the essence of spring and celebrate fresh produce in a delightful way.
2. Summer Zucchini Pasta: Use spiralized zucchini alongside roasted bell peppers and corn, tossed in a basil pesto sauce. This dish is refreshing and embodies the flavours of summer, making it perfect for warm evenings.
3. Autumn Butternut Squash Pasta: Roast butternut squash and combine it with sage and parmesan in a creamy sauce. The sweetness of the squash paired with earthy sage makes for a warm and comforting autumn meal.
4. Winter Root Vegetable Pasta: Incorporate hearty root vegetables like carrots, parsnips, and turnips into a rich tomato sauce. This comforting dish is perfect for chilly winter evenings, providing warmth and satisfaction.
5. Mixed Vegetable Pasta: As seasons change, create a medley of whatever vegetables are available. Toss in seasonal herbs and your preferred sauce for a hearty, flavour-packed meal that celebrates the best of what nature offers.
These seasonal recipes not only highlight fresh produce but also encourage sustainable eating practices, allowing you to enjoy the best flavours that each season has to offer while supporting local farmers.
One-Pot Pasta with Seafood
What Types of Seafood Work Best in One-Pot Pasta?
When looking to incorporate seafood into your one-pot pasta dishes, selecting the right types of seafood is crucial for achieving the best flavour and texture. Here are some excellent seafood options to consider:
1. Shrimp: Quick-cooking and flavourful, shrimp can be added whole or sliced. Their natural sweetness pairs beautifully with garlic and lemon, enhancing the overall dish and creating a delightful dining experience.
2. Mussels: These briny shells open up during cooking, releasing their flavour into the dish. Mussels can be added toward the end, allowing them to steam and cook perfectly without becoming tough or rubbery.
3. Scallops: Known for their delicate texture, scallops can be seared before adding to the pasta for an elegant touch. Their sweet, buttery flavour enhances any creamy sauce, creating a luxurious dish.
4. Fish Fillets: Firm white fish like cod or haddock can be diced and cooked alongside the pasta. Their mild flavours absorb sauces well, making them a versatile choice for one-pot meals that everyone will enjoy.
5. Canned Seafood: Options such as tuna or sardines are convenient and packed with flavour. They can be added at the end of cooking for a quick protein boost that enhances your dish without requiring additional cooking time.
These seafood choices not only enhance the dish’s flavour but also provide a range of textures that can elevate your one-pot pasta experience to new heights.
How to Cook Seafood Perfectly in One-Pot Pasta?
Cooking seafood in one-pot pasta requires careful timing to ensure it is perfectly cooked without becoming rubbery. Here are some techniques to master the art of cooking seafood in your pasta:
1. Timing is Key: Add seafood toward the end of the cooking process to prevent overcooking. Most seafood cooks quickly and benefits from brief cooking times for optimal texture and flavour.
2. Sauté First: For shrimp or scallops, consider sautéing them in a bit of oil before adding the pasta. This locks in their flavours and creates a delicious base for your dish that enhances the overall taste.
3. Steam Mussels: If using mussels, add them whole to the pot along with a splash of liquid (like broth or wine) to create steam. Cover the pot to allow them to cook through and open, releasing their delicious briny flavour.
4. Monitor Texture: Keep an eye on the seafood as it cooks. Shrimp should turn pink and opaque, while fish should flake easily when done. This ensures you achieve the perfect texture for your seafood, enhancing the overall experience.
5. Final Toss: Once the pasta and seafood are cooked, give everything a gentle toss in the pot, allowing the flavours to meld beautifully. This final mixing is essential for creating a harmonious dish that excites the taste buds.
By employing these techniques, you can ensure that your seafood is perfectly cooked and integrates seamlessly into your one-pot pasta dish, resulting in a delightful meal that everyone will enjoy.
Seafood and Pasta Flavor Pairings to Experiment With
Creating delicious flavour pairings between seafood and pasta can elevate your one-pot dishes and showcase the natural characteristics of each ingredient. Here are some standout combinations to consider:
1. Shrimp and Garlic: Sautéed shrimp with garlic and olive oil forms a classic base that complements many pasta types, particularly spaghetti or linguine, creating a dish that is both simple and satisfying.
2. Mussels and Tomatoes: Combining mussels with crushed tomatoes, garlic, and herbs creates a rich, briny sauce that pairs exceptionally well with short pasta like penne, enhancing the overall flavour profile.
3. Scallops and Cream: The delicate sweetness of scallops works beautifully with a creamy sauce, creating a luxurious dish when tossed with fettuccine that is sure to impress at any dinner table.
4. Tuna and Capers: Canned tuna mixed with capers and olive oil creates a quick and flavourful dish with farfalle or fusilli, perfect for a busy weeknight when time is of the essence.
5. Fish and Lemon: A light, flaky fish paired with a lemon butter sauce is refreshing and bright. Tossing it with angel hair pasta ensures a delicate balance of flavours that is both satisfying and enjoyable.
By exploring these flavour combinations, you can craft one-pot pasta dishes that highlight the best of seafood and create memorable dining experiences that leave a lasting impression.
Tips for Choosing Fresh Seafood for One-Pot Pasta Dishes
Selecting the freshest seafood is essential for achieving the best flavour and quality in your one-pot pasta dishes. Here are some tips to help you choose the freshest seafood available:
1. Look for Clear Eyes: When purchasing whole fish, ensure the eyes are clear and bulging. This indicates freshness and quality, signalling that you are selecting the best product available.
2. Check the Smell: Fresh seafood should smell slightly briny, reminiscent of the ocean. Avoid any fish with a strong, fishy odour, as this indicates spoilage and can ruin your dish.
3. Firm Texture: Fresh fish should feel firm to the touch, with no signs of mushiness. When pressed down, it should bounce back, indicating good quality and freshness that will enhance your meal.
4. Bright Shells: For shellfish like shrimp and mussels, look for bright, intact shells. Open shells indicate that the seafood may not be alive and should be avoided to ensure the best quality.
5. Sustainable Sources: Whenever possible, opt for sustainably sourced seafood. This not only ensures quality but also supports responsible fishing practices that benefit the environment and promote conservation.
By following these tips, you can ensure quality seafood that will enhance your one-pot pasta dish while contributing to a healthy dining experience that you can feel good about.
One-Pot Pasta with Seafood: Creative Recipe Variations to Explore
Creating variations of one-pot pasta with seafood allows for exciting culinary exploration and can cater to various tastes. Here are some creative recipe ideas:
1. Shrimp Scampi Pasta: Combine shrimp with garlic, butter, and white wine. Toss with linguine and finish with lemon juice and parsley for a classic dish that never disappoints, delivering a burst of flavour in every bite.
2. Creamy Tuscan Salmon Pasta: Cook salmon in a creamy spinach and sun-dried tomato sauce, served over penne for a rich and satisfying meal that’s sure to impress your family and friends.
3. Seafood Paella Pasta: Combine shrimp, mussels, and squid with saffron-infused broth and rice-shaped orzo for a unique twist on traditional paella that offers a burst of flavours that will transport you to Spain.
4. Lemon Garlic Pasta with Clams: Steam clams in a lemon-garlic broth and toss with spaghetti for a fresh, vibrant dish that celebrates the essence of seafood and leaves a lasting impression.
5. Cajun Seafood Pasta: Use a mix of spicy sausage and shrimp with a creamy Cajun sauce, served over fettuccine for a hearty, flavour-packed meal that tantalizes the taste buds and keeps everyone coming back for more.
These recipe variations not only celebrate seafood but also provide opportunities to experiment with different flavours and cooking techniques, ensuring your one-pot pasta dinners are always exciting and satisfying.
One-Pot Pasta with Meat
What Are the Best Cuts of Meat for One-Pot Pasta Dishes?
Choosing the right cuts of meat can dramatically influence the texture and flavour of your one-pot pasta dishes. Here are some of the best cuts to consider:
1. Chicken Thighs: Boneless, skinless chicken thighs are tender and flavourful, making them ideal for one-pot meals. They retain moisture during cooking, enhancing the overall dish and ensuring every bite is juicy.
2. Ground Beef: A versatile choice, ground beef can be browned quickly and mixed with various sauces, making it perfect for creating hearty pasta dishes that satisfy even the largest appetites.
3. Pork Shoulder: This cut becomes tender and flavourful when slow-cooked. Diced or shredded pork shoulder adds depth to pasta dishes, especially when paired with rich tomato-based sauces that meld beautifully.
4. Sausages: Italian sausage, whether spicy or mild, can provide a burst of flavour. Slice and add them to your pasta for an easy and delicious meal that everyone will love for its comforting taste.
5. Beef Chuck: Slow-cooked beef chuck develops rich flavours and tenderness, making it perfect for dishes that require more time to meld flavours together, resulting in a satisfying and hearty meal.
By selecting these cuts of meat, you can ensure your one-pot pasta dishes are not only flavourful but also fulfilling, catering to hearty appetites and diverse palates that appreciate a good meal.
How to Brown Meat for Enhanced Flavor in One-Pot Pasta?
Browning meat is a crucial step in developing rich, deep flavours in your one-pot pasta dishes. Here’s how to do it effectively:
1. Preheat the Pan: Begin by heating your pot or pan over medium-high heat. This ensures a good sear on the meat, enhancing the overall flavour of the dish and creating a delicious base for your pasta.
2. Use the Right Fat: Opt for oils with high smoke points, such as olive oil or vegetable oil. This helps achieve a golden brown crust without burning the meat, allowing for a perfect sear every time.
3. Don’t Overcrowd the Pan: Cooking in batches is key. If you add too much meat at once, it will steam rather than brown, leading to a less flavourful result. Give each piece space to brown properly.
4. Let It Cook: Allow the meat to sear undisturbed for several minutes before flipping. This promotes a nice crust that adds depth to the dish and enhances its overall appeal.
5. Deglaze for Extra Flavor: After browning, consider deglazing the pan with broth or wine. This lifts the browned bits off the bottom, enriching your sauce and overall dish, creating a complex and delicious flavour profile.
By mastering these techniques, you can enhance the flavours of your one-pot pasta dishes, creating meals that are both robust and delicious, ensuring that everyone enjoys their dining experience.
What Are the Best Meat and Pasta Flavor Pairings for Delicious Meals?
Understanding flavour pairings between meats and pasta can elevate your one-pot meals. Here are some delightful combinations to consider:
1. Chicken and Creamy Sauce: Pair chicken with rich, creamy sauces, such as Alfredo or mushroom cream, to create a comforting dish that marries textures beautifully and pleases the palate.
2. Sausage and Tomato Sauce: Italian sausage works wonderfully with tomato-based sauces, offering a robust flavour that enhances the overall dish and makes it satisfying for meat lovers.
3. Beef and Red Wine: Diced beef in a red wine sauce creates a hearty meal. This pairing works exceptionally well with hearty pasta shapes like pappardelle or fettuccine, making for a filling dish that delights.
4. Pork and Sweet Sauces: Pork’s natural sweetness can be complemented with sweet and tangy sauces, like honey mustard or apple cider reduction, for a delightful flavour experience that excites the taste buds.
5. Ground Meat and Spices: Ground meats, when combined with bold spices like cumin or paprika, can create complex flavours that pair nicely with various pasta shapes, ensuring a memorable meal.
Exploring these combinations allows you to create one-pot pasta dishes that reflect both your culinary creativity and the rich flavours of each component, resulting in meals that are satisfying and enjoyable for everyone.
Research-Backed Benefits of One-Pot Pasta Recipes for Dinner
How Does One-Pot Pasta Save Time for Busy Households?
One-pot pasta recipes are renowned for their time-saving benefits, making them ideal for households with busy schedules. The streamlined cooking process offers numerous advantages, including:
1. Reduced Cooking Time: Most dishes can be prepared in under 30 minutes, allowing you to serve a delicious dinner without extensive preparation or time spent in the kitchen.
2. Simplified Cleanup: With only one pot to wash, the cleanup process is quick and efficient, freeing up your time for other activities or relaxation after dinner, enhancing your overall quality of life.
3. Batch Cooking: One-pot pasta is perfect for batch cooking, allowing you to prepare larger quantities for meal prep. This ensures you have ready-to-eat meals throughout the week, saving time during busy days.
4. Minimal Ingredient Prep: Many recipes require little to no chopping. You can simply toss ingredients directly into the pot, saving time on preparation and cooking while still enjoying a home-cooked meal.
By maximizing efficiency through these methods, one-pot pasta dishes enable you to enjoy home-cooked meals without the stress and time commitment often associated with traditional cooking methods.
Nutritional Advantages of One-Pot Pasta Meals
One-pot pasta dishes can offer significant nutritional benefits, aligning with various dietary needs while being satisfying. Here’s what to consider:
1. Balanced Meals: One-pot pasta allows for the inclusion of proteins, carbohydrates, and vegetables all in one dish, providing a balanced meal in a single serving that is both nutritious and delicious.
2. Increased Vegetable Intake: Easily incorporate a variety of vegetables, which enhances the nutritional profile and provides essential vitamins and minerals to support overall health and well-being.
3. Whole Grain Options: Choosing whole grain or legume-based pasta increases fibre content, promoting digestive health and satiety while providing lasting energy for active lifestyles.
4. Customizable Ingredients: The flexibility of one-pot pasta means you can adapt recipes to meet specific dietary requirements, making it suitable for various lifestyles and preferences for a more inclusive meal.
5. Portion Control: Preparing designated serving sizes helps manage caloric intake while ensuring that each meal is nutrient-dense, supporting healthy eating habits and overall wellness.
By embracing these nutritional advantages, one-pot pasta can be a wholesome choice for dinner that satisfies both taste and health needs, making it a go-to option for families looking to dine well.
What Are the Environmental Benefits of One-Pot Cooking?
One-pot cooking offers several environmental benefits, making it a thoughtful choice for eco-conscious individuals. Here’s how it contributes positively to the environment:
1. Reduced Water Usage: Fewer pots and pans mean less water used for washing, leading to lower water consumption overall. This is beneficial for conservation efforts and promotes sustainable cooking practices.
2. Energy-Efficient Cooking: Cooking everything in one pot requires less energy compared to using multiple pots on the stovetop or in the oven, thereby reducing your household’s energy footprint and contributing to a greener planet.
3. Less Food Waste: The flexibility in one-pot recipes encourages creative use of leftovers and odd bits of ingredients, minimizing food waste and promoting sustainability while making the most of what you have on hand.
4. Seasonal Eating: One-pot dishes often highlight seasonal vegetables, supporting local farmers and reducing the carbon footprint associated with transporting out-of-season produce, which is beneficial for both the economy and the environment.
By opting for one-pot cooking, you can contribute to environmental sustainability while enjoying delicious and satisfying meals that are good for both you and the planet, making a positive impact with every dish you prepare.
Tips and Tricks for Perfecting One-Pot Pasta
How to Prevent Pasta from Sticking Together?
Preventing pasta from sticking together in one-pot dishes is essential for achieving a delightful eating experience. Here are some effective tips and tricks:
1. Stir Frequently: Stirring the pasta during the initial cooking phase prevents it from clumping together. This promotes even cooking and distribution of flavours throughout the dish, ensuring that every bite is enjoyable.
2. Use Enough Liquid: Ensure there’s ample broth or water to cover the pasta. Insufficient liquid can lead to sticky pasta, while too much can make the dish soupy, so finding the right balance is key to a successful meal.
3. Add Oil Sparingly: While it may seem counterintuitive, adding a splash of olive oil to the cooking liquid can help reduce stickiness without negatively impacting flavour, ensuring a well-integrated dish.
4. Choose the Right Pasta Shape: Some shapes are naturally less prone to sticking. Opt for pasta varieties like fusilli or orecchiette that offer more surface area for sauce adhesion and provide a delightful eating experience.
5. Finish Cooking Off Heat: If the pasta is cooked to al dente, remove it from heat to prevent overcooking and sticking. Allow it to sit for a few minutes before serving for optimal results that everyone will love.
By applying these strategies, you can ensure that your one-pot pasta dishes remain light and enjoyable, enhancing the overall dining experience for you and your guests.
Adjusting Liquid Ratios for Different Pasta Types
Understanding how to adjust liquid ratios for different pasta types is crucial for successful one-pot cooking. Here’s a breakdown of how to achieve the best results:
1. Long Pasta: For spaghetti or linguine, use a ratio of 1 cup of liquid per 2 ounces of pasta. This allows for proper absorption while maintaining a saucy consistency that enhances the overall dish.
2. Short Pasta: For shapes like penne or fusilli, use a slightly higher liquid ratio, around 1 to 1.5 cups of liquid per 2 ounces of pasta, as these types can absorb more moisture during cooking for optimal texture.
3. Whole Grain or Legume Pasta: These types often require more liquid due to their density. Use 1.5 cups of liquid per 2 ounces to ensure even cooking and the best possible texture for your meal.
4. Orzo or Rice-Shaped Pasta: These smaller shapes cook quickly and can absorb a lot of liquid. Use about 2 cups of liquid per cup of orzo for the best results, ensuring a well-balanced dish.
5. Adjusting During Cooking: Monitor the dish as it cooks, adding more liquid as needed. This is especially important as the pasta absorbs liquid and the dish thickens, ensuring a perfect consistency every time.
By mastering these liquid ratios, you can ensure that your one-pot pasta dishes are well-balanced and delicious without being overly dry or soupy, creating a satisfying meal for everyone.
Creative Add-Ins to Elevate One-Pot Pasta
Elevating your one-pot pasta dishes can be as simple as incorporating creative add-ins that enhance flavour, texture, and nutrition. Here are some exciting options to consider:
1. Nuts and Seeds: Toasted pine nuts, walnuts, or sunflower seeds add crunch and depth. These can be sprinkled on top just before serving for added texture and visual appeal, making your dish more enticing.
2. Dried Fruits: Ingredients like raisins or apricots can introduce a surprising sweetness. They pair well with spiced dishes, adding a unique flavour contrast that enhances the overall dish and delights the palate.
3. Extra Cheese: Beyond the standard cheese, consider adding ricotta or goat cheese for creaminess. These can be stirred in at the end for a rich finish that elevates the dish to new heights.
4. Crème Fraîche or Sour Cream: Adding a dollop of crème fraîche or sour cream can provide tangy richness, enhancing the overall dish with a delightful creaminess that balances well with savoury flavours.
5. Spicy Elements: Incorporate fresh chilies, hot sauce, or crushed red pepper flakes for a kick. These additions can transform a mild dish into something exciting and memorable that everyone will cherish.
By experimenting with these creative add-ins, you can take your one-pot pasta dishes to new heights, ensuring variety and excitement in your meals that keep everyone coming back for more.
FAQs About One-Pot Pasta Dinners
What is the best pasta for one-pot cooking?
The best pasta for one-pot cooking includes shapes that absorb sauce well, such as fusilli, penne, or short pasta. These types hold flavours better and cook evenly in a single pot, making them ideal choices for one-pot meals that deliver satisfaction.
How long does it take to make one-pot pasta?
One-pot pasta dishes typically take around 20 to 30 minutes to prepare, making them ideal for quick weeknight dinners without compromising on flavour or satisfaction, ensuring you enjoy delicious meals in no time.
Can I use frozen vegetables in one-pot pasta?
Yes, frozen vegetables can be used in one-pot pasta dishes. They cook quickly and retain their nutrients, making them a convenient option for enhancing your meal while saving prep time, allowing for easy and nutritious cooking.
Is one-pot pasta healthier than traditional pasta dishes?
One-pot pasta can be healthier as it allows for the easy incorporation of vegetables and lean proteins. Additionally, you can control the amount of sauce used, promoting balanced nutrition and healthier meal options that cater to various dietary needs.
How do I prevent one-pot pasta from being watery?
To prevent watery pasta, ensure you use the right liquid ratios, monitor cooking times carefully, and consider removing the pot from heat when the pasta is al dente. This allows it to thicken naturally and achieve the desired consistency that is enjoyable for everyone.
Can I meal prep one-pot pasta dishes?
Absolutely! One-pot pasta dishes are excellent for meal prep. They can be stored in the fridge for several days and reheated easily, making them perfect for quick lunches or dinners throughout the week, providing convenience and nutritional value.
What proteins can I use in one-pot pasta?
You can use a variety of proteins such as chicken, beef, seafood, or plant-based options like tofu and legumes. Each protein brings its unique flavour, enhancing the overall dish’s appeal and ensuring satisfaction for everyone.
Are one-pot pasta dishes suitable for vegetarians?
Yes! One-pot pasta dishes are highly versatile and can easily be made vegetarian by using vegetable broth, adding beans, legumes, or a variety of vegetables to create delicious meat-free meals that are both satisfying and nutritious.
Can I make one-pot pasta in an Instant Pot?
Yes, you can make one-pot pasta in an Instant Pot. Adjust the cooking time according to the pasta type and use the sauté function to brown meats before pressure cooking for optimal flavour and delicious results.
How can I enhance the flavour of my one-pot pasta?
Enhance the flavour of your one-pot pasta by using quality ingredients, incorporating fresh herbs, and adding umami-rich components like cheese or miso paste for depth and complexity in your dishes, ensuring a delightful dining experience.
Connect with us on Facebook!
The post Best One-Pot Pasta Recipes for Dinner: Simple and Delicious appeared first on https://cookinggods.com
The Article One-Pot Pasta Recipes: Simple and Delicious Dinner Ideas Was Found On https://limitsofstrategy.com