Category: Cooking Tips

  • Tender Pot Roast Secrets for Crafting the Perfect Meal

    Tender Pot Roast Secrets for Crafting the Perfect Meal

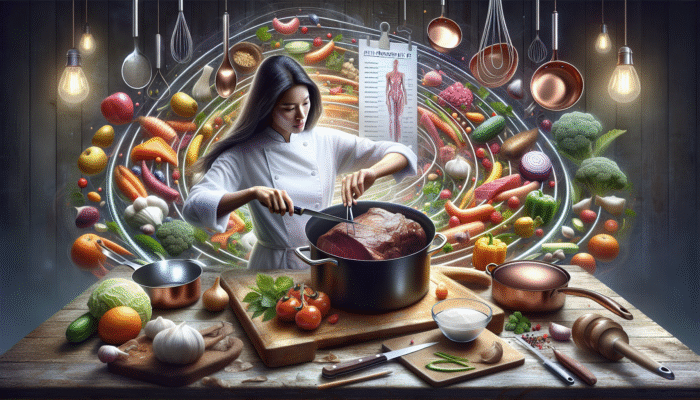
    Master the Art of Selecting the Ideal Meat Cut for an Exquisite Pot Roast

    Choosing the right cut of meat is crucial for crafting the most delectable tender pot roast. Your selection significantly influences the dish’s overall flavour, tenderness, and juiciness. By familiarizing yourself with the various cuts of beef and their distinct characteristics, you can create a pot roast that is not only lusciously tasty but also exceptionally tender, promising a delightful dining experience for everyone around your table. Gaining insight into these essential principles marks the beginning of your journey toward becoming a pot roast preparation expert.

    Why Beef Chuck Stands Out as the Premier Cut for Pot Roast

    Beef chuck roast with marbling, slow-cooked, tender, surrounded by juices and herbs.

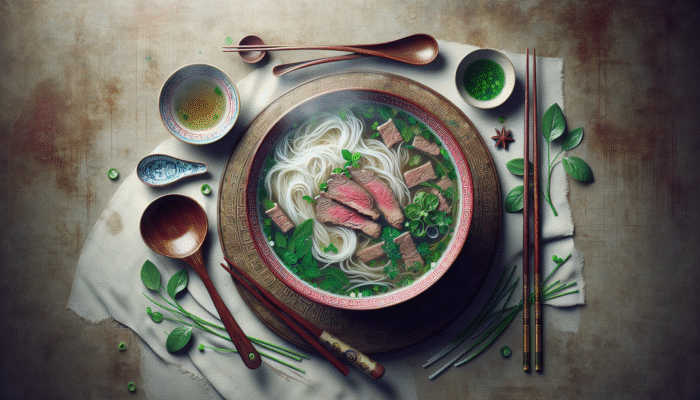
    When it comes to preparing a pot roast, beef chuck is undeniably the best choice. This exceptional cut, derived from the cow’s shoulder, is celebrated for its remarkable marbling, which consists of fine veins of fat interspersed throughout the muscle. This marbling is essential as it melts during the slow cooking process, resulting in meat that is not only tender but also brimming with rich flavours. Additionally, the connective tissues in beef chuck break down beautifully, enhancing the overall juiciness and moistness of your dish.

    Numerous culinary traditions have long embraced the use of chuck for pot roast, ranging from classic American dishes to various European interpretations. The adaptability of beef chuck makes it suitable for an array of cooking techniques, such as braising and slow cooking, earning it a cherished spot among home cooks worldwide. Utilizing chuck not only guarantees an outstanding pot roast but also connects you to a rich tapestry of culinary traditions, inviting you to explore diverse flavours and techniques in your cooking journey.

    Grasping Meat Grades for Ensuring Top-Quality Pot Roast

    Understanding the grading of meat is a crucial yet often overlooked factor that can significantly impact the texture and flavour of your pot roast. In many regions, beef is assigned grades based on several criteria, including marbling, age, and overall quality. In the United States, the Department of Agriculture (USDA) categorizes beef from Select to Prime, with Prime representing the highest quality available.

    To ensure maximum tenderness in your pot roast, focus on sourcing well-marbled cuts that fall into the Choice or Prime categories. These premium-grade cuts break down wonderfully during the slow cooking process, yielding a pot roast that melts in your mouth. While grading systems may vary internationally, the fundamental principle remains unchanged: higher quality meat consistently leads to superior results. Familiarizing yourself with these grading systems will greatly aid you in selecting the perfect cut for your culinary explorations, guaranteeing a deliciously memorable meal.

    Exploring Diverse Cuts for Unique and Flavorful Pot Roasts

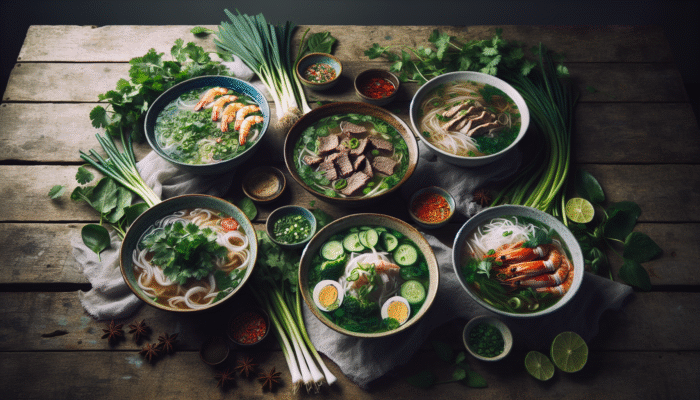
    While beef chuck is the traditional go-to for pot roast, alternative cuts like brisket or round can also produce exceptionally tender results when prepared with care. Brisket, which is sourced from the breast area, is particularly revered in barbecue traditions and can impart a rich, beefy essence when braised for an extended duration. On the other hand, round cuts, although leaner, can achieve delightful tenderness with the right cooking techniques, offering a healthier alternative without sacrificing flavour.

    Across various culinary cultures, these alternative cuts are celebrated for their distinctive flavours. For instance, brisket is a staple in Jewish cuisine, often slow-cooked for festive gatherings, while round cuts frequently feature in traditional Italian ragùs. Exploring these alternatives not only broadens your culinary repertoire but also allows you to uncover exciting flavours and textures from around the world, enhancing your pot roast experience and transforming every meal into a culinary adventure.

    The Significance of Fat Content in Perfecting Your Pot Roast

    A succulent pot roast with balanced fat content, glistening with melted fat, served on a rustic table with French culinary elements.

    The fat content in your selected cut is a critical factor as a flavour carrier, making it vital to choose a cut with the appropriate fat level for a successful pot roast. While lean cuts may appear to be the healthier choice, they often yield a drier dish. A well-prepared pot roast thrives on the natural fats that render during cooking, maintaining the meat’s moisture while significantly enhancing its flavour profile.

    When selecting your cut, strive for balance. A cut with moderate fat content will enrich your dish without overpowering it. Engaging with local butchers for their expert insights and recommendations can provide valuable guidance on which cuts perform best for pot roast across various culinary traditions. For example, in French cuisine, cuts with optimal fat content are celebrated for their ability to transform a simple meal into a remarkable culinary experience, underscoring the crucial role of fat in traditional cooking.

    Recognizing the Importance of Meat Thickness for Even Cooking

    The thickness of the meat significantly influences how evenly your pot roast cooks. Thicker cuts may require longer cooking times, and ensuring an even thickness guarantees that every section of the roast reaches the desired tenderness simultaneously. While preparing the meat, consider using a meat mallet or a knife to create uniform thickness, or select a cut that is already well-portioned for the best results.

    Another essential consideration is the size of your cooking vessel. Whether you choose a slow cooker or a Dutch oven, the shape and dimensions can affect how heat circulates around the meat. Adjusting cooking times based on thickness and ensuring uniformity will greatly enhance the tenderness and flavour of your pot roast. This meticulous attention to detail is a hallmark of successful cooks globally, ensuring a consistently delectable dish every time you prepare it.

    Your Comprehensive Guide to Preparing Meat for Pot Roast

    Preparation is a vital phase in uncovering the secrets to a tender pot roast. Investing a little effort at this stage can dramatically enhance the flavour and texture of your final dish. Properly prepared meat not only boosts taste but also guarantees optimal tenderness, laying the groundwork for a comforting and satisfying meal that everyone will truly enjoy.

    Trimming Excess Fat for Optimal Flavor Balance

    Chef trimming excess fat from pot roast, balancing traditional French and health-conscious methods.

    While some fat is essential for enhancing flavour, excessive fat can lead to a greasy pot roast that detracts from the overall experience. Trimming away the outer layer of fat helps you achieve a perfect balance. Aim to retain a thin layer, as this will render during cooking, imparting essential moisture and flavour without overwhelming the dish.

    Different cultures approach fat trimming in unique ways. For example, traditional French cooking often stresses the importance of retaining enough fat to enhance the dish, while health-conscious diets may lean towards leaner preparations. Understanding these cultural nuances can guide your trimming decisions, enabling you to create a pot roast that aligns with your taste preferences while honoring the culinary traditions of various regions around the globe.

    Mastering Seasoning Techniques to Enhance Flavor

    Utilizing the right seasoning techniques can elevate a pot roast from ordinary to extraordinary. Generously seasoning the meat with salt and pepper prior to cooking allows flavours to penetrate deeply, significantly enhancing the overall taste. Consider employing a dry rub of herbs and spices tailored to your regional preferences; this could include garlic powder, paprika, or even a hint of cumin for a unique twist that reflects your personal culinary style.

    Incorporating regional spices can infuse your pot roast with a distinctive flavour profile that resonates with various culinary traditions. For example, a Moroccan-inspired pot roast might feature spices like cinnamon and coriander, while an Italian rendition could favor rosemary and oregano. Crafting a seasoning strategy that reflects diverse global flavours not only enriches the dish but also transforms it into a conversation starter at the dining table, inviting your guests to explore the culinary journey behind your creation.

    The Essential Technique of Browning Meat for Maximum Flavor

    Browning the meat before slow cooking is a technique that should never be underestimated. This process caramelizes the natural sugars in the meat, resulting in a rich and complex flavour that serves as the foundation of your pot roast. Whether you opt to brown the meat in a skillet or directly in your slow cooker, this step adds depth and richness that simpler cooking methods may lack.

    The Maillard reaction, which occurs during the browning process, is a transformative phenomenon celebrated in various cuisines globally. In North American cooking, browning is a staple technique, while in Asian cuisines, searing meat before braising is similarly common. Embracing this technique can unlock the full potential of your pot roast, ensuring that it delivers that irresistible “wow” factor with each bite and making your meal unforgettable for all who partake.

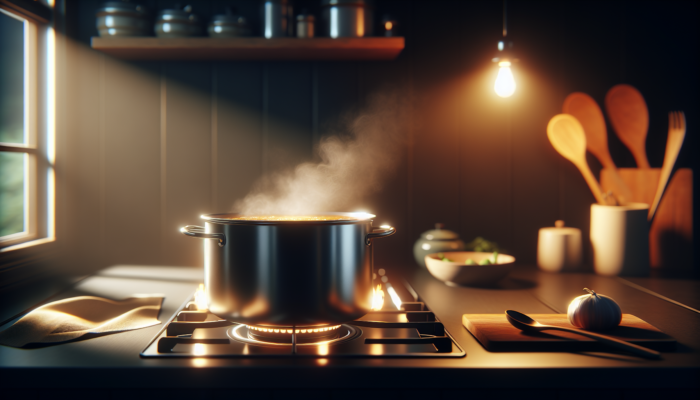
    Selecting the Optimal Cooking Method for Your Pot Roast

    The cooking method you select for your pot roast can significantly influence the final outcome. Each technique offers unique advantages and can be tailored to suit different lifestyles and preferences. Understanding these methods will empower you to choose one that aligns with your culinary goals and time constraints while still uncovering the secrets to a tender pot roast.

    The Incredible Benefits of Cooking with a Slow Cooker

    A slow cooker is an invaluable tool for preparing pot roast, allowing you to achieve tender, flavourful meat with minimal effort. By cooking the roast low and slow, you enable the collagen in the meat to gradually break down, resulting in a melt-in-your-mouth texture that is simply irresistible. This method also fosters the development of deep, rich flavours as the meat interacts with the surrounding ingredients over several hours, enriching the overall culinary experience.

    Many home cooks appreciate the convenience offered by a slow cooker, as it allows for meal prep in the morning, enabling you to return home to a deliciously cooked pot roast by dinner time. The versatility of slow cookers has made them a staple in kitchens worldwide, with recipes tailored to local flavours and seasonal ingredients. This adaptability ensures that no matter where you are, the comfort of a slow-cooked pot roast is always within reach, making it an ideal option for busy families and individuals alike.

    Oven Roasting Techniques for a Deliciously Different Approach

    Oven roasting presents a fantastic alternative to slow cooking, achieving similar tenderness while adding the advantage of browning. By setting your oven to a low temperature, you can replicate the effects of a slow cooker while still achieving that desirable caramelization on the meat’s surface, creating an enticing contrast in both texture and flavour.

    This method offers flexibility in cooking times, which can be particularly advantageous when preparing a meal for guests. Depending on your oven’s capabilities and the size of your roast, oven roasting can create a beautifully balanced crust while maintaining tenderness and juiciness inside. The delightful aroma that wafts through the kitchen while roasting is universally cherished, enhancing the communal experience of meal preparation and sharing, bringing everyone together around the dining table.

    Discover the Time-Saving Advantages of Pressure Cooking

    Pressure cooking is a groundbreaking method for those pressed for time but still yearning for a tender pot roast. This efficient technique dramatically reduces cooking time while preserving the moisture and flavour that traditional pot roasts offer. By elevating the pressure within the cooker, the boiling point of water rises, enabling the meat to cook at higher temperatures and break down rapidly, resulting in a deliciously tender roast.

    Pressure cookers have become immensely popular worldwide, particularly for their ability to create hearty meals in a fraction of the time required by conventional methods. Many cultures have embraced this technique, integrating it into their culinary practices to prepare everything from stews to rice dishes swiftly and efficiently. This time-saving approach does not compromise flavour; instead, it can yield a pot roast that is just as tender and flavourful as those slow-cooked for hours, making it an excellent choice for busy weeknights.

    Elevate Your Cooking with the Precision of Sous Vide Technique

    Sous vide cooking is an exact method that ensures consistent temperature control, resulting in a perfectly cooked pot roast every time. By vacuum-sealing the meat and immersing it in a water bath at a controlled temperature, you can achieve evenly cooked and moist results that are difficult to replicate with other cooking methods. Although this technique requires specialized equipment, it is increasingly popular among culinary enthusiasts who value the scientific principles behind cooking.

    Numerous fine dining establishments worldwide have adopted sous vide techniques to enhance their dishes, demonstrating the meticulous care that goes into each plate. This approach enables chefs to prepare food in advance, ensuring that it is ready to serve at the exact desired doneness. For home cooks striving to impress family and friends, mastering the sous vide technique can unlock a world of culinary possibilities while ensuring that your pot roast remains tender, flavourful, and a true showstopper at any gathering.

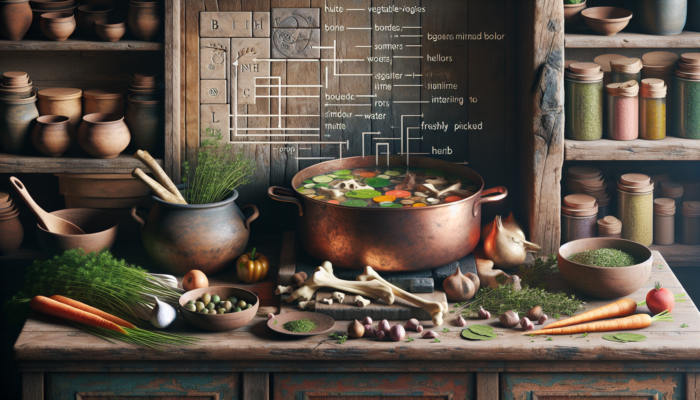
    Enhancing Your Pot Roast with the Perfect Liquids

    The liquids you choose to cook your pot roast can profoundly impact its flavour and overall quality. By selecting the right liquids, you can elevate the richness of the dish while ensuring the meat stays moist and tender throughout the cooking process. Understanding the role of these liquids is vital in revealing the secrets to a tender pot roast, ensuring that each bite is bursting with flavour.

    Using Broth to Infuse Depth and Richness

    Broth, whether beef or vegetable, serves as an excellent foundation for your pot roast. It not only adds essential moisture, preventing the meat from drying out, but also contributes depth and richness to the overall flavour profile. The choice between beef or vegetable broth can depend on personal preference and dietary considerations, but both options work harmoniously in a pot roast, enhancing the overall culinary experience.

    In many culinary traditions, the use of homemade broth is highly esteemed, as it imparts a depth of flavour that store-bought alternatives may lack. Across various cultures, you’ll discover diverse techniques for creating broth, from simmering bones for hours to infusing vegetables with fresh herbs. Integrating high-quality broth into your pot roast preparation can elevate the dish significantly, transforming it into a cherished recipe in your culinary arsenal that friends and family will rave about for years to come.

    Incorporating Wine for an Unforgettable Flavor Profile

    Adding red wine to your pot roast is a classic technique for imparting a complex flavour profile that enhances your dish remarkably. The acidity of the wine aids in tenderizing the meat while contributing rich, nuanced notes that can elevate a simple meal to gourmet status. Whether you opt for a robust Cabernet Sauvignon or a fruity Merlot, your choice of wine can greatly influence the final taste, making it a key ingredient in your pot roast preparation.

    Wine serves not only as a flavour enhancer but also forms a connection to cultural practices surrounding food and drink. For instance, in French cuisine, coq au vin—a dish that exemplifies the use of wine in cooking—has become iconic for its depth and richness. Through such examples, it’s evident that incorporating wine into your pot roast can forge a link to culinary traditions, adding layers of complexity and delight to every bite, ensuring an unforgettable dining experience for you and your guests.

    Harnessing the Power of Tomato Products for Enhanced Flavor

    Tomato paste or sauce can serve as an invaluable asset in your pot roast preparation. Tomatoes not only contribute a robust flavour but also help further tenderize the meat, enhancing the overall dish. The acidity found in tomatoes works wonders when paired with the rich flavours of beef, creating a harmonious balance that elevates your pot roast to new culinary heights.

    In many cuisines, tomatoes are celebrated for their versatility—from Italian ragùs to Middle Eastern tagines, incorporating tomato products can boost the dish’s overall appeal. Experimenting with different tomato varieties, whether you prefer a concentrated paste or a chunky sauce, allows you to customize the flavour to your liking. This adaptability can lead to uniquely delicious pot roasts that reflect a fusion of culinary traditions and your personal tastes, ensuring your dish stands out at any gathering.

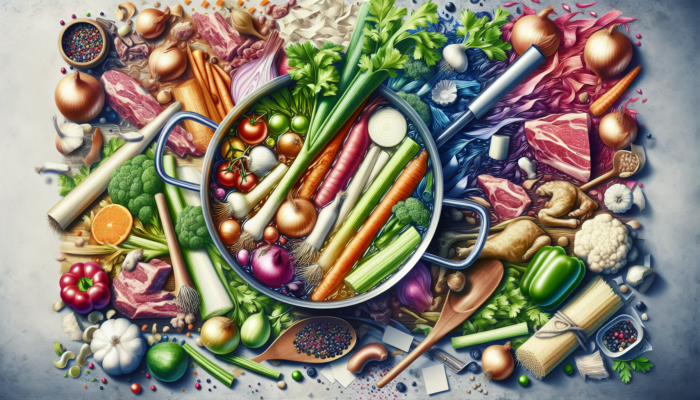
    Maximizing Flavor with Vegetables and Aromatics

    Vegetables and aromatics are essential in developing the flavour of your pot roast while also providing texture and nutrition. The right combination can transform your dish into a well-rounded meal that delights the senses. Understanding how to effectively incorporate these ingredients is key to unlocking the secrets to a tender pot roast that will impress your guests and elevate your culinary skills.

    Choosing the Right Root Vegetables to Enhance Your Pot Roast

    Root vegetables such as carrots and potatoes are classic additions to any pot roast. These vegetables not only absorb the rich juices from the meat but also contribute their own natural sweetness to the dish, creating a delightful balance of flavours. When selecting root vegetables, opt for those that are firm and fresh to ensure they withstand the long cooking process, maintaining their texture and enhancing the overall flavour.

    In various culinary traditions, you might discover unique local root vegetables that can be substituted or added to your pot roast. For example, parsnips provide a sweeter alternative to carrots, while turnips or sweet potatoes can infuse their distinct flavours into the dish. Embracing seasonal produce from your region can create a pot roast that reflects local ingredients, enriching the dish further and showcasing the bounty of your area, making your meal both satisfying and memorable.

    Enhancing Flavor with Onions and Garlic: The Essential Aromatics

    Onions and garlic deliver foundational flavours that significantly elevate the pot roast. Sautéing onions until they caramelize adds a rich sweetness that beautifully complements the beef. Meanwhile, garlic imparts aromatic depth and complexity, making it an indispensable ingredient in many pot roast recipes, thereby enhancing the overall flavour profile.

    Across various cultures, the combination of onions and garlic serves as a staple starting point for countless dishes. From Italian soffritto to Indian masalas, these aromatics create a robust base for flavour development. By incorporating them into your pot roast, you not only adhere to traditional practices but also enrich the overall dining experience, making each forkful a delightful celebration of tastes and textures that will have everyone coming back for more.

    Utilizing Herbs for an Exciting and Dynamic Flavor Profile

    Herbs, whether fresh or dried, are vital for enhancing the overall flavour profile of your pot roast. Classic choices like thyme and rosemary are popular for their ability to complement the rich flavours of beef beautifully. However, experimenting with herbs from various culinary traditions can also lead to exciting discoveries; consider adding bay leaves or even spices like coriander for a unique twist that sets your pot roast apart from the rest.

    Herbs not only add complexity but also introduce a vibrant freshness to the dish. In Mediterranean cuisines, a sprinkle of fresh parsley can brighten up rich stews, while in Asian cooking, herbs like cilantro often provide a refreshing contrast to hearty dishes. Thoughtfully integrating herbs into your pot roast can transform the dish, making it a truly standout meal that captures the essence of global culinary traditions and showcases your creativity as a cook.

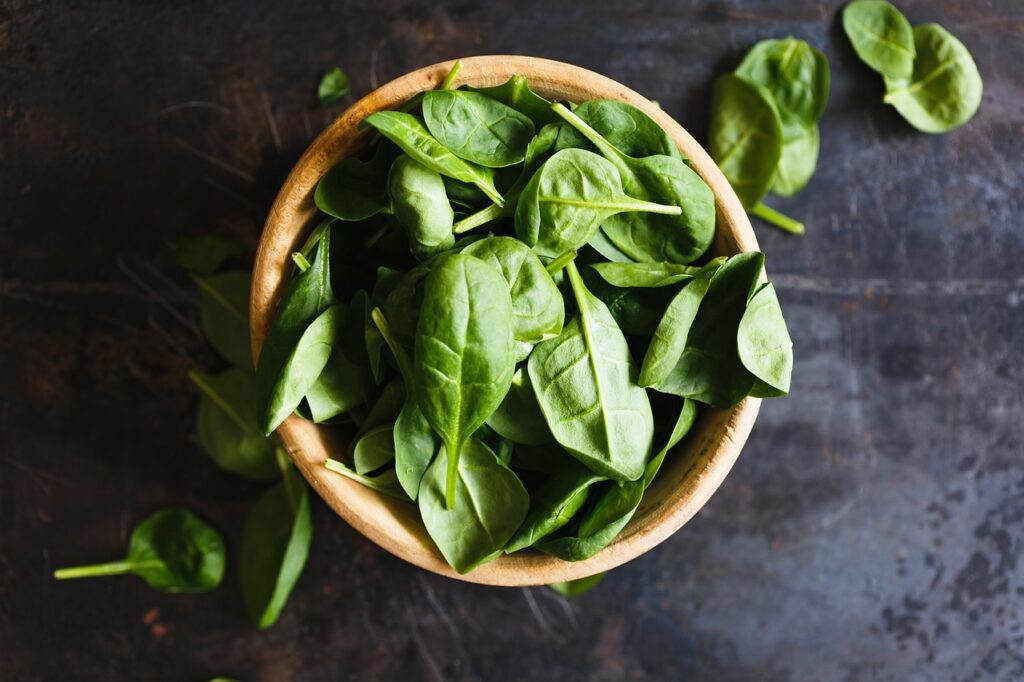
    Boosting Nutrition with Leafy Greens for a Wholesome Touch

    Incorporating leafy greens like spinach or kale toward the end of the cooking process can enhance both the nutritional value and the visual appeal of your pot roast. These greens not only introduce a splash of colour but also add a fresh element that balances the richness of the meat and other ingredients, creating a more wholesome and satisfying dish.

    In numerous culinary traditions, adding greens to slow-cooked dishes is a common practice, often reflecting seasonal availability and health-conscious cooking. Including these leafy greens also allows you to utilize any leftover vegetables in your fridge, boosting the meal’s nutritional profile. Embracing this flexibility can lead to pot roasts that are not only comforting but also nourishing, ensuring a meal that is hearty, satisfying, and guilt-free for everyone at the table.

    Mastering Cooking Times and Temperatures for Pot Roast Perfection

    Understanding cooking times and temperatures is essential for ensuring your pot roast turns out perfectly tender and flavourful. Knowing these variables will help you achieve the best results, leading to a deliciously satisfying dish that encapsulates the secrets to a tender pot roast and leaves everyone at your table wanting seconds.

    Determining the Optimal Cooking Time for Perfect Results

    Cooking time can vary significantly depending on the size of your roast and the method employed. Generally, a pot roast will require anywhere from six to eight hours of cooking time when utilizing a slow cooker, while oven-roasting may take a similar duration at low temperatures. A larger roast may benefit from extended cooking, allowing the collagen to break down fully and tenderizing the meat to perfection, creating an unforgettable dining experience.

    The secret to success is to monitor the roast throughout the cooking process, checking for signs of tenderness. In cultures renowned for their expertise with slow-cooked dishes, such as the French and Italians, cooking time is often viewed as a critical aspect of the recipe. Paying close attention to these details will help you perfect your pot roast over time, ensuring consistent results that you and your loved ones will cherish and enjoy together.

    Setting the Right Temperature for Optimal Pot Roast Results

    The temperature at which you cook your pot roast is vital for achieving that tender, fall-apart texture that everyone loves. For oven roasting, aim for a low temperature of around 275°F (135°C). This low-and-slow approach allows gentle heat to penetrate the meat, breaking down tough fibres without drying them out, thereby ensuring a succulent pot roast every time you prepare it.

    When using a slow cooker, set it to low for the best results. The gentle heat allows for even cooking, and the lid traps moisture, ensuring the roast remains succulent and flavourful throughout the cooking process. Across various culinary traditions, the importance of low temperatures for extended cooking times is a common theme, reflecting a deep understanding of flavour development and meat tenderness that has been refined over generations.

    Checking for Doneness: The Key to Perfect Pot Roast

    The ultimate test for a perfectly cooked pot roast is its tenderness. Utilizing a meat thermometer can help ensure that the internal temperature reaches around 190°F (88°C). At this stage, the collagen has broken down sufficiently, resulting in a fork-tender roast that practically shreds itself with minimal effort, guaranteeing a delightful meal for everyone.

    Learning to check for doneness is a skill that home cooks develop over time. Many cultures have traditional methods for determining when a pot roast is ready, whether it’s the classic ‘fork test’ or visual cues like a deep, rich colour. Incorporating these practices into your cooking not only enhances your skills but also fosters a sense of tradition and connection to the meal you are preparing, making it a truly special occasion for everyone involved.

    Your Questions Answered: Pot Roast FAQs for Home Chefs

    Which Cut of Meat is Best for Pot Roast?

    The best cut for pot roast is typically beef chuck, celebrated for its marbling and connective tissue that breaks down during cooking, resulting in incredibly tender meat that melts in your mouth, providing a truly satisfying dining experience.

    What is the Ideal Cooking Time for a Pot Roast?

    Cooking time varies based on the method and size of the roast, but generally ranges from 6 to 8 hours on low in a slow cooker or oven at 275°F (135°C), ensuring optimal tenderness and flavour in your finished dish.

    Should I Brown the Meat Before Cooking for Enhanced Flavor?

    Yes, browning the meat is highly recommended as it adds rich, caramelized flavour and depth to the pot roast, enhancing the overall taste and making it truly delicious and memorable for all who enjoy it.

    Can I Use a Slow Cooker for Pot Roast?

    Absolutely! A slow cooker is ideal for pot roast, providing even cooking and tender meat with minimal effort, making it perfect for busy home cooks who desire convenience without compromising on taste.

    What Liquids Should I Incorporate in My Pot Roast?

    Incorporating broth, wine, or tomato products can add depth and enhance the flavour profile while keeping the meat moist during cooking, ensuring a delightful and satisfying dish that everyone will love.

    How Do I Know When My Pot Roast is Done Cooking?

    Check the internal temperature; it should reach around 190°F (88°C) for fork-tender results, ensuring that the collagen has broken down and the meat is perfectly tender for your dining enjoyment.

    Can I Add Vegetables to My Pot Roast for Extra Flavor?

    Yes, absolutely! Root vegetables like carrots and potatoes, along with aromatics like onions and garlic, are great additions that enhance flavour, texture, and nutrition in your pot roast, creating a well-rounded meal.

    Which Herbs Work Best in Pot Roast Preparation?

    Herbs like thyme, rosemary, and bay leaves complement the beef’s flavour beautifully. You can also experiment with other herbs based on regional culinary traditions for exciting variations and personal touches that elevate the dish.

    Can I Cook Pot Roast the Day Before Serving for Enhanced Flavours?

    Yes, cooking pot roast a day ahead allows flavours to meld beautifully. Simply reheat gently before serving for the best results, ensuring a delicious meal that’s ready to enjoy with family and friends.

    Is Pot Roast a Healthy Meal Option for Families?

    Pot roast can indeed be a healthy meal option, especially if you choose lean cuts of meat and incorporate plenty of vegetables for a balanced and nutritious meal that satisfies, making it a great family dinner choice.

    Join Our Community on Facebook for More Culinary Tips!

    The post Tender Pot Roast Secrets: Your Ultimate Cooking Guide appeared first on https://cookinggods.com

    The Article Tender Pot Roast Secrets: Mastering the Perfect Recipe Was Found On https://limitsofstrategy.com

  • Vietnamese Pho Recipes for Beginners: A Simple Guide

    Vietnamese Pho Recipes for Beginners: A Simple Guide

    Explore the Deliciously Flavorful Universe of Pho: A Vietnamese Culinary Gem

    Pho is more than just a meal; it embodies a culinary journey that vividly reflects the rich and vibrant culture of Vietnam. This aromatic and comforting soup has attracted a worldwide fan base, becoming a cherished delight among culinary enthusiasts. At its essence, pho is a nourishing soup that artfully blends broth, rice noodles, fragrant herbs, and your choice of meat, making it an ideal entry point into Vietnamese cuisine. For those keen to uncover the intricate flavors and textures of this dynamic culture, pho acts as a friendly introduction. Its appeal lies in its simplicity, yet it offers a profound complexity of flavors when crafted with high-quality ingredients and meticulous techniques.

    The heart of pho is in its critical ingredients, which are the foundation of this beloved dish. The key components include rice noodles (bánh phở), your preferred protein (beef or chicken), and a mix of spices such as star anise and cinnamon, complemented by fresh herbs like basil and cilantro. Each element plays a vital role in creating a balanced and fulfilling bowl of pho. For example, the broth should have a deep, rich flavor, while the noodles must maintain a tender yet firm texture, ensuring that every bite is a delightful experience.

    When it comes to making the broth, beginners can learn the art of creating a clear and flavorful base by following some essential guidelines. Begin by choosing high-quality bones, preferably beef or chicken, and allow them to simmer slowly over low heat for an extended period. This gradual cooking process draws out deep, robust flavors while keeping the broth clear and visually appealing. Introducing spices and herbs at the correct stage can dramatically enhance both the aroma and overall flavor of the broth. As you embark on your pho-making adventure, remember that patience and careful attention to detail will ultimately yield exceptional results.

    Discover the Cultural Essence of Pho: A Culinary Delight

    A steaming bowl of Pho with broth, noodles, herbs, and beef, on a Vietnamese table with chopsticks.

    Pho transcends the definition of a mere meal; it symbolizes the cultural heart of Vietnamese cuisine. Originating from Northern Vietnam, this fragrant soup has traveled across the globe, becoming a beloved dish enjoyed by many. Traditionally, pho features a savory broth, rice noodles known as bánh phở, fresh herbs, and a choice of protein, usually beef or chicken. Each bowl presents a delightful mix of flavors and textures, inviting diners to relish every spoonful.

    The act of enjoying pho is intricately tied to the warmth of Vietnamese hospitality. It’s common to witness street vendors enthusiastically serving pho to eager patrons, creating a vibrant ambiance filled with the tantalizing fragrance of simmering spices. The versatility of this dish makes it appealing to a broad spectrum of tastes, making it an excellent starting point for those new to Vietnamese cuisine.

    For individuals unfamiliar with pho, grasping its significance is essential. It’s not solely about the ingredients; it represents the love and dedication invested in producing the broth and achieving the perfect balance of flavors. Each bowl of pho narrates a story, reflecting the rich cultural heritage and traditions of Vietnam.

    Key Ingredients for Crafting the Ultimate Pho Experience

    Creating the perfect bowl of pho heavily depends on the quality of its ingredients. The fundamental components include rice noodles, broth, and a selection of garnishes. The rice noodles, known as bánh phở, are flat and silky, providing a smooth texture that absorbs the broth’s flavors beautifully. When selecting your noodles, prioritize those made from high-quality rice to ensure the best taste and texture possible.

    Choosing the right meat is equally critical. Beef is the traditional choice, with cuts like brisket or sirloin commonly used, while chicken pho offers a lighter alternative that remains delicious. Each type of meat brings its unique flavor profile to the dish, allowing for personalization based on dietary preferences or restrictions.

    Spices and herbs are essential for enhancing the overall flavor of pho. Key spices such as star anise, cloves, and cinnamon contribute to a fragrant broth that warms the soul. Fresh herbs like basil, cilantro, and mint provide a refreshing contrast to the rich flavors, elevating the entire dining experience. For novices, sourcing the finest ingredients is crucial to achieving an authentic pho experience that delights the senses.

    Expert Tips for Crafting an Outstanding Broth

    The broth is the heart and soul of pho, and mastering its preparation is vital for beginners. To create a clear and flavorful broth, start with high-quality bones. Beef bones are ideal for producing a rich, hearty broth, while chicken bones offer a lighter option. Roasting the bones prior to simmering can significantly enhance the depth of flavor, imparting a caramelized note to the final product.

    Once your bones are prepared, the next step is to infuse the broth with spices. A traditional pho broth features a harmonious blend of spices, typically including star anise, cinnamon, and cloves. It’s essential to add these spices in moderation, as excessive amounts can overwhelm the broth. Striking the right balance between the spices and the natural flavors of the bones is crucial for creating a well-rounded broth that delights the palate.

    Slowly simmering the broth over low heat is essential for extracting maximum flavor from the bones and spices. This process can take several hours, but the outcome is a rich, savory liquid that forms the backbone of your pho. Regularly skimming off impurities during the simmering process ensures a clear broth, which is a hallmark of excellent pho. Once adequately simmered, strain the broth to eliminate solids, leaving behind a clean, flavorful liquid ready to be combined with noodles and garnishes.

    Explore the Diverse and Delicious Styles of Pho

    Assorted pho bowls with beef, chicken, vegetarian, and seafood, steaming on a rustic wooden table.

    The beauty of pho lies in its adaptability, allowing food lovers to explore a variety of styles that cater to different tastes and preferences. Beginners can experiment with a range of pho recipes, from the classic beef pho to lighter chicken options, vegetarian delights, and even seafood varieties. Each style introduces unique flavors and textures, transforming the cooking experience into an exciting culinary adventure.

    Indulge in the Richness of Traditional Beef Pho

    Beef pho stands as the quintessential interpretation of this dish, renowned for its rich and robust flavor profile. The foundation of this recipe is based on broth, typically crafted from beef bones, aromatic spices, and flavorful aromatics. The process begins with roasting the bones to enhance their inherent flavor before simmering them with water and spices such as star anise and cinnamon. The result is a deep, nourishing broth that forms the essence of your pho.

    Once the broth reaches perfection, it’s time to prepare the beef. Thinly sliced cuts of beef, commonly sirloin or brisket, are added directly to the steaming hot broth, allowing them to cook just enough to retain their tenderness. For an authentic experience, serve the pho with traditional garnishes like Bean sprouts, lime wedges, and fresh herbs such as Thai basil and cilantro. Each addition enhances the flavors and textures, making every spoonful a delightful experience.

    To further elevate your beef pho, consider adding extra toppings like sliced jalapeños for a spicy kick or hoisin sauce for a hint of sweetness. This flexibility allows each diner to create a bowl that aligns with their flavor preferences, making beef pho a cherished choice for many.

    Experience the Lightness of Chicken Pho

    For those in search of a lighter alternative, chicken pho offers a delicate yet flavorful option that is sure to please. The broth is prepared similarly to beef pho, but with chicken bones, resulting in a clearer and lighter liquid. Begin by simmering the chicken bones with spices and a touch of ginger for an aromatic enhancement.

    Once the broth is ready, poach the chicken until it reaches tenderness. Shredded or sliced poached chicken is then combined with the noodles and broth. The simplicity of chicken pho makes it an excellent choice for beginners, as the preparation is straightforward yet yields delicious results.

    A unique aspect of chicken pho is the opportunity to customize it with seasonal vegetables and fresh herbs. Adding fresh bean sprouts, herbs, and even mushrooms can enhance flavor and nutrition. This adaptability ensures that chicken pho can be tailored to various tastes and preferences, making it an enjoyable meal for everyone at the table.

    Discover the Vibrant Flavors of Vegetarian Pho

    A steaming bowl of vegetarian pho with mushroom-carrot broth, tofu, noodles, bok choy, sprouts, and herbs.

    Vegetarian pho presents a delightful alternative for those wishing to savor the flavors of this classic dish without meat. Instead of a traditional meat-based broth, a robust vegetable broth is created using mushrooms, carrots, and a medley of spices. The secret lies in slowly simmering the vegetables to allow their flavors to meld into a rich, satisfying broth.

    Mushrooms, particularly shiitake, add depth and umami, forming a gratifying base for the soup. Incorporating tofu adds protein and texture, enhancing the dish’s overall appeal. Once the broth is perfected, serve it with rice noodles and a generous amount of fresh herbs and vegetables, such as bok choy and bean sprouts.

    The beauty of vegetarian pho lies in its ability to cater to various dietary needs while still delivering exceptional flavor. This version can be easily customized with different vegetables or spices, allowing for a personal touch. For those new to cooking, vegetarian pho offers an excellent opportunity to explore the versatility of Vietnamese cuisine without compromising taste.

    Delight in the Freshness of Seafood Pho

    Seafood pho offers a unique twist on the traditional recipe, infusing it with fresh seafood for an exciting variation. The base of seafood pho remains consistent, starting with a flavorful broth, but the addition of fish, prawns, or squid elevates the dish to new culinary heights.

    Begin by preparing the broth with a mixture of seafood shells, such as shrimp or crab, alongside traditional spices. This creates a light yet flavorful liquid that beautifully complements the seafood. Once the broth is ready, gently add your choice of seafood, ensuring it cooks through without becoming rubbery.

    Seafood pho can be garnished with fresh herbs and a squeeze of lime, enhancing the natural flavors of the seafood. This version is perfect for those who appreciate the ocean’s bounty and desire to experience pho in a refreshing and light manner.

    Perfecting the Art of Broth Preparation for Pho

    Crafting the ideal broth is an art form that serves as the foundation of exceptional pho. Mastering broth preparation will elevate your pho-making skills, transforming a simple dish into a remarkable culinary experience.

    Selecting the Right Bones for Optimal Flavor

    The type of bones you choose plays a critical role in the flavor and richness of your broth. For beef pho, opt for a combination of marrow bones, oxtails, and brisket bones. This blend provides an ideal balance of gelatin and flavor, resulting in a rich broth. Conversely, for chicken pho, use a whole chicken or chicken carcass to achieve a lighter yet satisfying broth.

    When sourcing bones, prioritize quality. Look for bones from grass-fed or free-range animals to ensure the best flavor profile. Freshness is paramount, so purchase your bones from a reputable butcher or farmer’s market. This focus on quality sourcing will significantly impact the final result of your broth.

    Consider roasting the bones before simmering. This technique caramelizes the bones, adding a depth of flavor to your broth. A few hours of roasting at a moderate temperature will enhance the final taste, making the broth richer and more complex.

    Enhancing Your Broth with the Perfect Spices

    The spices used in pho broth are essential for achieving that distinctive aromatic profile. A classic blend typically incorporates star anise, cinnamon sticks, cloves, and coriander seeds. Each spice contributes unique flavors that enhance the overall taste of the broth.

    For beginners, the key lies in balancing the spices. Start with small amounts and adjust according to your taste preferences. Using a spice bag can simplify the process, allowing you to easily remove them later and focus on developing the broth’s flavors without the hassle of straining.

    Incorporating aromatics like ginger and onion will further amplify your broth, adding layers of complexity. Charred onion and ginger contribute a smoky, caramelized note that pairs beautifully with the spices.

    Perfecting Your Simmering Technique for Flavorful Broth

    Simmering is where the magic truly unfolds. A long, slow simmer is essential for extracting maximum flavor from the bones and spices. Ideally, aim for a simmering time of at least 6-8 hours for beef broth and 3-4 hours for chicken broth. This extended process allows the flavors to meld and develop, resulting in a rich, flavorful liquid that serves as the base for your pho.

    Keep the heat low to ensure a gentle simmer. High temperatures can lead to a cloudy broth, which is not desirable for pho. Throughout the simmering phase, regularly skim off any impurities that rise to the top. This practice is crucial for achieving a clear broth, which is a hallmark of outstanding pho.

    Once the broth is fully prepared, allow it to cool slightly before straining. Straining removes the solids, leaving behind a pristine, flavorful liquid that serves as the foundation for your pho.

    Skimming and Straining for a Crystal-Clear Broth

    Skimming and straining your broth is vital for creating a clean and flavorful pho. As the broth simmers, impurities and fat will rise to the surface. Regularly skimming these off prevents them from clouding the broth, ensuring a clear, visually appealing soup.

    After simmering, let the broth rest for a few minutes to allow the sediment to settle at the bottom. Then, carefully strain the broth through a fine mesh sieve or cheesecloth to eliminate any remaining solids. This final step will yield a perfectly clear broth that highlights the essence of your ingredients.

    A clean broth not only appears more appetizing but also allows the flavors to shine through without any unpleasant bitterness. This attention to detail is what distinguishes a good pho from a great one, making your culinary efforts truly worthwhile.

    Mastering the Preparation of Noodles for Pho

    The noodles are the essential heart of pho, providing a chewy texture that perfectly complements the rich broth. Preparing them correctly is imperative for creating a well-balanced dish that satisfies the palate.

    Understanding the Different Varieties of Rice Noodles Used in Pho

    Comprehending the different types of rice noodles is crucial for crafting the perfect pho. The most common noodles used in pho are bánh phở, which are flat, wide rice noodles that soak up the broth beautifully. These noodles come in various widths, ranging from thin to wide, allowing for personalization based on individual preference.

    When shopping for rice noodles, seek those made from high-quality rice flour to ensure the best possible texture. Fresh noodles can often be found in Asian grocery stores, while dried noodles are also widely available and can be conveniently stored for future culinary explorations.

    Experimenting with different noodle thicknesses can enhance the texture of your pho. Wider noodles provide a chewier bite, while thinner noodles offer a more delicate experience. As you gain confidence in your pho-making skills, consider trying various noodle types to discover your personal favorite.

    Cooking Noodles to Achieve the Perfect Texture in Pho

    Cooking the noodles to perfection is key for a satisfying bowl of pho. To begin, soak dried rice noodles in warm water for about 30 minutes or until they soften. This step ensures that the noodles hydrate evenly, resulting in a tender texture that pairs wonderfully with the broth.

    Once soaked, it’s crucial to cook the noodles quickly in boiling water. They typically require just a few minutes to achieve an al dente texture. Monitor them closely, as overcooked noodles can become mushy and lose their desirable consistency.

    After cooking, drain the noodles and rinse them briefly under cold water to halt the cooking process. This step helps maintain their texture and prevent them from clumping together. Properly cooked noodles will deliver a satisfying bite that complements the rich flavors of the broth beautifully.

    Serving Noodles for Maximum Enjoyment in Pho

    Serving the noodles correctly is essential for preserving their texture and enhancing the overall dish. When assembling your pho, place a generous portion of cooked noodles at the bottom of each bowl before ladling the hot broth on top. This method ensures that the noodles soak up the broth’s flavor while retaining their firmness.

    To prevent the noodles from clumping together, consider tossing them with a small amount of oil before serving. This practice can also impart a subtle flavor to the dish. When serving, ensure that each bowl has an even distribution of noodles, allowing every diner to enjoy the ideal balance of broth and noodles.

    As a finishing touch, contemplate adding a variety of fresh herbs and garnishes atop the noodles. This not only enhances the dish’s visual appeal but also provides an explosion of flavors that elevate your pho experience to a new level.

    Mastering the Assembly of Your Pho

    Assembling your pho is a delightful process that encourages creativity and personalization. Each component plays a vital role in creating a harmonious and visually appealing dish that tantalizes the senses.

    The Art of Layering Ingredients for the Best Pho Experience

    The technique of layering ingredients in your pho bowl is crucial for achieving the perfect bite. Begin by placing a generous serving of noodles at the base of the bowl. This foundation absorbs the broth’s flavors and serves as a base for the other ingredients.

    Next, incorporate your choice of protein—be it tender slices of beef, poached chicken, or tofu. This layering ensures that each ingredient is adequately distributed, allowing diners to savor a balance of flavors in every spoonful.

    Complete the assembly by ladling the hot broth over the noodles and protein, ensuring that everything is submerged. This step is essential for allowing the flavors to meld together, creating a delightful taste experience.

    Techniques for Beautifully Garnishing Your Pho

    Garnishing your pho is an opportunity to elevate its presentation and add layers of flavor. Traditional garnishes include fresh herbs such as Thai basil, cilantro, and mint, which provide brightness and freshness to the dish. Bean sprouts introduce a crunchy texture, while lime wedges offer a zesty contrast.

    To enhance the garnishing experience, consider providing a selection of toppings on the side. Sliced jalapeños, hoisin sauce, and sriracha can be offered for those who enjoy a touch of heat or sweetness. This approach allows diners to customize their bowls according to their preferences, making each dining experience unique and personal.

    Presentation matters, so take the time to arrange your garnishes aesthetically. A well-garnished bowl of pho not only looks appetizing but also invites diners to indulge in the exciting flavors waiting to be discovered.

    Achieving a Harmonious Flavor Balance in Your Pho

    Striking a balance of flavors is key to crafting a harmonious bowl of pho. The broth should complement the noodles and protein without overpowering them. A well-seasoned broth provides a rich backdrop for the other ingredients, allowing their natural flavors to shine through.

    As you assemble your pho, consider the sweet, salty, and savory elements of the dish. Adding a touch of sugar can enhance the broth’s depth, while fish sauce or soy sauce can introduce umami and saltiness. Taste as you go, adjusting the flavors to ensure a well-rounded and harmonious experience.

    The right balance of spices and garnishes can elevate your pho to new culinary heights. Experiment with different combinations until you discover the perfect blend that excites your palate and tantalizes your taste buds.

    Serving and Presenting Your Pho with Style

    Serving pho is a moment to showcase your culinary efforts. Presentation is vital, as a visually appealing bowl of pho will entice diners and enhance their overall experience. Serve the pho in deep bowls to accommodate the generous portions of broth, noodles, and garnishes.

    Before serving, take a moment to garnish your pho with fresh herbs and lime wedges. The vibrant colors will make the dish pop and set the stage for an appetizing meal that diners will remember. Consider offering chopsticks and a soup spoon alongside the bowls, allowing diners to enjoy their pho in the traditional manner.

    As you serve, encourage diners to mix the garnishes into their soup, allowing the flavors to meld together. This interactive experience creates a connection between the dish and the diner, making the meal even more memorable and enjoyable.

    Personalize Your Pho Experience According to Your Taste

    One of the joys of pho is its adaptability. Each bowl can be customized to suit individual preferences and dietary requirements, making it a versatile option for any meal or occasion.

    Enhancing Your Pho with Spice and Flavor

    For those who enjoy a bit of heat, adding spice to pho can elevate the overall experience. Consider incorporating sliced fresh chilies, sriracha, or hoisin sauce into your bowl. Each of these options empowers diners to control the level of heat according to their liking.

    Chilies can be added directly to the broth or served on the side for personal customization. Sriracha offers a tangy kick, while hoisin sauce introduces a hint of sweetness that can balance the spiciness. Encourage diners to experiment with different combinations to discover their ideal level of heat.

    The ability to customize pho with heat not only enhances the flavors but also adds an element of fun to the dining experience. It invites diners to engage with their food, making each bowl uniquely theirs and enhancing their overall enjoyment.

    Adapting Pho for Vegetarian and Vegan Preferences

    Pho can seamlessly be adapted to accommodate vegetarian and vegan diets. By utilizing a robust vegetable broth, beginners can craft a delicious meat-free version of this beloved dish. Start with a base of mushrooms, carrots, and onions to create a rich broth that mimics the depth found in traditional pho.

    Tofu is an excellent addition, providing protein and texture, while a mix of fresh vegetables like bok choy and bean sprouts can enhance the dish’s overall appeal. Garnishing with fresh herbs like cilantro will add brightness and freshness, making the vegetarian pho a satisfying option for all diners.

    By experimenting with different vegetable combinations and broths, you can easily create a unique, flavorful pho that caters to various dietary preferences without compromising on taste or enjoyment.

    Making Dietary Adjustments in Your Pho

    Customizing pho to meet different dietary needs is straightforward and accessible. For those with gluten sensitivities, opt for gluten-free rice noodles, which are widely available. Always check labels to confirm that the noodles meet dietary requirements, ensuring an enjoyable meal for all.

    To enhance the healthiness of your pho, consider using organic or locally sourced ingredients. This practice not only supports sustainable farming but also ensures that your pho is made with the freshest produce available, contributing to a more wholesome meal.

    For those following a keto diet, substituting traditional noodles with alternatives like zucchini noodles or shirataki noodles can provide a low-carb base while still allowing you to savor the rich flavors of pho without straying from your dietary goals.

    Elevating Flavor Profiles in Your Pho

    To enhance the flavor profile of your pho, experimenting with various herbs and spices can make a significant difference. Fresh basil and mint provide vivid aromas that elevate the overall experience. A splash of lime juice can also brighten the broth, balancing the richness with refreshing acidity.

    Herbs can be added directly to the broth or served as a garnish, allowing diners to personalize their dishes. Consider offering a selection of herbs on the side for an interactive dining experience that encourages creativity and exploration.

    Encourage diners to experiment with different flavor profiles by incorporating unique spices or ingredients that cater to individual tastes. This creativity will transform each bowl of pho into a unique culinary adventure, inviting diners to explore the endless possibilities of this cherished dish.

    Your Most Pressing Questions About Pho Answered

    What are the essential components that define pho?

    Pho primarily consists of rice noodles, broth, fresh herbs, and a protein source, typically beef or chicken. Other essential ingredients include spices like star anise and fresh garnishes such as bean sprouts and lime.

    How much time is required to prepare pho?

    Preparing pho can take several hours, particularly for the broth, which requires a long simmering time to develop rich and complex flavors. However, assembling the dish itself is a quick process that can be accomplished in under 30 minutes once the broth is ready.

    Can pho be adapted to be vegetarian?

    Yes, pho can easily be made vegetarian by using a vegetable broth as the base. Incorporating mushrooms, tofu, and a variety of fresh vegetables can create a delicious meat-free version that is satisfying and flavorful.

    What type of noodles are ideal for pho?

    The best type of noodles for pho are bánh phở, which are flat, wide rice noodles. These noodles soak up the broth’s flavor beautifully and provide a satisfying texture that enhances the overall dish.

    How should I store any leftover pho?

    Leftover pho should be stored in an airtight container in the refrigerator. To maintain the best texture, it’s advisable to store the broth and noodles separately. Reheat carefully before serving to preserve the dish’s quality.

    What spices are considered essential for pho broth?

    Key spices for pho broth include star anise, cinnamon, cloves, and coriander seeds. These spices contribute to the aromatic profile that makes pho so distinctive and enjoyable.

    Can I incorporate different proteins into my pho?

    Absolutely! Pho can be customized with a variety of proteins, including chicken, tofu, seafood, or even a mix of meats. Experimenting with different options allows for personalization and enhances the dining experience.

    Is pho gluten-free?

    Traditional pho made with rice noodles is gluten-free. However, it’s important to always check labels for any additional sauces or ingredients that may contain gluten to ensure a safe dining experience.

    How spicy can I make my pho?

    The level of spiciness in pho can be adjusted by incorporating sliced chilies, sriracha, or hoisin sauce. Diners can easily customize their bowls to suit their individual spice preferences, adding a fun and interactive element to the meal.

    What characteristics define a high-quality pho broth?

    A good pho broth is clear, aromatic, and rich in flavor. It is achieved through a long simmering process with high-quality bones, spices, and aromatics, allowing the flavors to meld beautifully into a comforting and satisfying liquid.

    Join Our Community on Facebook!

    The post Vietnamese Pho Recipes: A Beginner’s Simple Guide appeared first on https://cookinggods.com

    The Article Vietnamese Pho Recipes: A Simple Guide for Beginners Was Found On https://limitsofstrategy.com

  • Homemade Stock: An Easy Guide Using Kitchen Scraps

    Homemade Stock: An Easy Guide Using Kitchen Scraps

    Discover the Art of Creating Rich Homemade Stock Using Kitchen Scraps

    Mastering the skill of producing your very own homemade stock is an essential culinary technique that not only enhances the richness of your dishes but also promotes sustainability in your cooking practices. By learning how to make homemade stock from scraps, you can elevate the flavors in your meals while significantly reducing food waste, benefiting both your kitchen and the environment. Let’s explore the fundamental components that will prepare you for an enjoyable and successful stock-making experience.

    Why Fresh Scraps Matter for Creating Superior Quality Stock

    Fresh vegetable scraps and meat bones simmering in a pot to create rich, flavorful stock.

    The freshness of your ingredients significantly impacts the quality of your stock. Utilizing fresh scraps not only provides a robust and flavorful stock but also serves as an excellent base for a wide range of dishes, including comforting soups and exquisite sauces. Fresh vegetable scraps, such as onion skins, carrot tops, and celery leaves, infuse vibrant flavors and essential nutrients, enhancing the overall taste of your stock. Similarly, fresh meat scraps, including bones and trimmings, contribute a richer, more intricate flavor profile. Always prioritize using scraps from fresh produce and meat, as spoiled or wilted ingredients can adversely affect both the taste and safety of your stock.

    Essential Ingredients Needed for Crafting Exceptional Stock

    When embarking on the rewarding journey of stock-making, simplicity is key. The core ingredients required include water, a variety of vegetables, and meat scraps. Water serves as the primary medium, effectively extracting flavors from your scraps. For vegetables, consider using items that are often discarded, such as onion skins, carrot peels, and garlic cloves. If you’re preparing meat stock, bones and trimmings from chicken, beef, or other meats form the essential backbone of flavor. Incorporating herbs like parsley, thyme, or bay leaves can significantly elevate the aroma and taste of your stock, making it even more delightful and aromatic.

    Perfecting Cooking Time and Temperature for Ideal Stock Extraction

    A critical aspect of successfully creating stock is managing both cooking time and temperature. It is essential to allow the stock to simmer gently for a minimum of 2 hours at a low temperature. This slow cooking process enables flavors to meld beautifully while extracting maximum nutrients from the scraps. Overheating can lead to a bitter taste and an unappealing cloudiness, so maintaining low heat and keeping a gentle simmer throughout the process is crucial. For meat-based stocks, consider extending the cooking time to at least 4 hours or longer, especially when using larger bones, to ensure that every ounce of flavor is captured.

    Your Detailed Guide to Making Homemade Stock from Kitchen Scraps

    A pot simmering with vegetable scraps and bones, surrounded by herbs and a guidebook on making stock.

    Creating stock from scraps is a straightforward process that anyone can master with a bit of guidance. Follow this comprehensive step-by-step guide to ensure your stock is filled with rich flavors and nutritional benefits.

    Effective Collection and Storage of Your Kitchen Scraps

    Begin by collecting vegetable and meat scraps over time. Designate a specific container in your refrigerator or freezer to store these scraps. This container can include onion peels, carrot tops, celery leaves, and any meat trimmings you may have. The beauty of this method lies in the ability to gradually build a collection of scraps, transforming stock-making into a convenient and eco-friendly practice. Aim to gather sufficient scraps to fill a large pot when you’re ready to prepare your stock, ensuring you are well-equipped for the cooking process.

    Preparing Your Cooking Pot for Efficient Stock Creation

    Once you have gathered your scraps, it’s time to prepare your pot. Choose a large pot that can comfortably accommodate all your scraps and water without overflowing. A stockpot is ideal, but any spacious pot will work. Add your vegetable and meat scraps to the pot, ensuring a balanced combination for optimal flavor extraction. Fill the pot with cold water, covering the scraps by about an inch. Starting with cold water is beneficial as it helps extract flavors more effectively during the cooking process, resulting in a richer final product.

    Simmering Your Stock for the Best Flavor Infusion

    A pot simmering golden stock on a stove, steam rising, filling the kitchen with a rich aroma.

    Place your pot on the stove and bring it to a gentle boil. Once boiling, reduce the heat to low to maintain a gentle simmer, which is a crucial stage in stock-making. Allow it to simmer for at least 2 hours, stirring occasionally to prevent sticking at the bottom. For meat stocks, consider simmering for 4 hours or longer. As the stock simmers, you’ll notice it transforming into a beautiful golden hue, while a rich aroma fills your kitchen. This slow simmering process allows the flavors to meld and develop, creating a delicious and nutritious base for your culinary creations.

    Straining Your Stock for Clarity and Enhanced Taste

    Once the simmering process is complete, it’s time to strain the stock. Carefully remove the pot from the heat and let it cool slightly. Using a fine mesh strainer or a cheesecloth, strain the stock into another pot or bowl, discarding the solids. This vital step is essential for achieving clarity and a refined flavor in your stock. If you desire an even clearer stock, consider straining it multiple times. Once strained, allow the stock to cool completely before storing it in the refrigerator or freezer to preserve its freshness and flavor.

    Explore the Numerous Benefits of Using Kitchen Scraps for Homemade Stock

    Making stock from scraps is not just a sustainable practice; it provides a myriad of benefits that make it an excellent choice for any home cook looking to enhance their culinary repertoire.

    Save Money While Reducing Food Waste

    Using scraps significantly minimizes food waste and saves you money. Instead of purchasing pre-made stock or broth, you can create your own using ingredients that would otherwise be discarded. This economical approach is particularly beneficial for those on a budget or anyone looking to be more mindful of their grocery expenses. By repurposing scraps, you ensure that every part of your food contributes to a delicious meal, making your cooking practices more cost-effective and efficient.

    Boost the Nutritional Value of Your Meals with Homemade Stock

    Another significant advantage of crafting stock from scraps is the enhanced nutritional value it offers. Vegetable scraps often contain vitamins and minerals that can elevate the health benefits of your stock. For instance, carrot tops are rich in vitamin C and dietary fiber, while onion skins provide antioxidants. Moreover, meat scraps, particularly bones, are abundant in collagen, which supports joint health. Thus, the stock you create not only intensifies flavor but also serves as a nutritious addition to your meals.

    Contribute Positively to the Environment Through Sustainable Practices

    Utilizing scraps for homemade stock plays a crucial role in reducing landfill waste, making it an environmentally responsible choice. By maximizing your food use, you contribute to a more sustainable kitchen while lowering your overall carbon footprint. This practice fosters a mindset of resourcefulness and sustainability that can extend beyond cooking. Sharing your stock-making journey with others can inspire a collective movement towards reducing food waste in your community, promoting sustainable cooking practices that benefit everyone involved.

    Selecting the Optimal Scraps for Flavorful Stock

    Choosing the right scraps is essential for crafting a delicious and aromatic stock. Here’s a detailed overview of the best types of scraps to use for maximum flavor extraction.

    Boost Flavor with Quality Vegetable Scraps

    Vegetable scraps are the backbone of a flavorful stock. Ingredients such as onion skins, carrot tops, garlic cloves, and celery leaves are among the most effective options to consider. These elements add depth and sweetness to your stock, creating a robust base for soups and sauces. Additionally, you can introduce herbs like parsley stems, thyme, and bay leaves to infuse your stock with aromatic notes. Experimenting with different combinations allows you to discover your preferred flavor profile, ensuring that your stock is both unique and delicious.

    Achieving Richness with Quality Meat Scraps

    For those aiming to produce a rich meat stock, incorporating bones and meat trimmings is vital. Chicken carcasses, beef bones, and pork scraps work beautifully, providing a depth of flavor that vegetable scraps alone cannot deliver. Roasting the bones prior to adding them to your stock can amplify their flavor, imparting a caramelized note to your final product. The collagen released from the bones during the simmering process adds both body and richness to your stock, making it an indispensable element for hearty soups and stews.

    Elevate Flavor with Herb Scraps

    Herb scraps, though often overlooked, can enhance your stock significantly. Stems from fresh herbs like parsley, cilantro, and thyme add a fragrant aroma that improves the overall taste of your stock. You can also experiment with more assertive herbs like rosemary or sage to impart a distinct character to your stock. Remember, balancing flavors is crucial; use herb scraps judiciously to avoid overpowering the other ingredients.

    Smart Techniques for Storing and Freezing Your Homemade Stock

    Once you’ve successfully crafted your stock, appropriate storage is critical for maintaining its freshness and flavor. Here are several effective strategies for storing and freezing your homemade stock.

    Rapid Cooling Methods for Stock Safety

    Before storing your stock, it’s vital to cool it quickly to prevent bacterial growth. Divide the hot stock into smaller portions in shallow containers to facilitate faster cooling. Additionally, consider placing these containers in an ice bath to expedite the cooling process. Once the stock reaches room temperature, transfer it to the fridge if you plan to use it within a few days, or proceed to freeze it for long-term storage.

    Freezing Stock in Convenient, Usable Portions

    Freezing your stock in manageable portions is an excellent way to ensure you have it readily available when needed. Ice cube trays are perfect for this purpose; simply pour the cooled stock into the trays, freeze, and then transfer the cubes to a freezer bag. This method allows you to defrost only the amount you require for your recipes, significantly reducing waste while ensuring that your stock retains its quality over time.

    Labeling and Dating Frozen Stock for Optimal Freshness

    Always label and date your frozen stock to keep track of its freshness. This simple yet effective practice can prevent the disappointment of discovering that your stock has been in the freezer too long. Typically, homemade stock can be stored in the freezer for up to six months. After this period, the flavor may diminish, so keep an eye on your inventory and utilize it within this timeframe for the best results.

    Common Mistakes to Avoid When Making Stock

    While stock-making is relatively straightforward, there are common pitfalls that can lead to less-than-ideal results. Avoiding these mistakes will ensure that your stock is both flavorful and nutritious.

    The Risks of Overcooking Your Stock

    One of the most frequent errors people make is overcooking the stock. While it might seem logical that a longer cooking time would yield a more flavorful stock, overcooking can result in a bitter taste. Aim for a gentle simmer, closely monitoring the cooking duration. For vegetable stock, 2 to 3 hours is sufficient, while meat stocks may require 4 hours or longer. Trust the process and avoid rushing to achieve the best flavor possible.

    Ensuring Freshness: Avoid Using Spoiled Scraps

    Another crucial mistake is using spoiled scraps, which can ruin your stock’s flavor and pose safety risks. Always inspect your vegetable and meat scraps before adding them to the pot. If any scraps show signs of spoilage, it’s advisable to discard them rather than risk compromising your stock’s quality. Freshness is essential, so be diligent in selecting your ingredients to ensure a safe and tasty outcome.

    The Importance of Skimming Impurities During Cooking

    Failing to skim off impurities during the cooking process can lead to a cloudy stock. As the stock simmers, various impurities will rise to the surface. Use a ladle or skimmer to remove these impurities, achieving a clearer, more refined stock. This step not only improves the visual appeal but also enhances the taste, making your stock more palatable and enjoyable.

    Innovative Culinary Applications for Your Homemade Stock

    Once you’ve mastered the art of making stock from scraps, the next step is to apply it creatively in your cooking. Here are some inspiring ideas to elevate your culinary creations.

    Creating Hearty Soups and Stews with Homemade Stock

    Homemade stock serves as an exceptional foundation for hearty soups and stews. Whether you’re crafting a classic chicken soup or a robust beef stew, incorporating your stock adds a depth of flavor that store-bought options simply cannot replicate. Experiment with various ingredients and spices to create dishes that reflect your unique tastes and culinary style.

    Enhancing Sauces and Gravies with Rich Homemade Stock

    Elevate your sauces and gravies by integrating the rich flavor of homemade stock. Whether you’re preparing a simple pan sauce or a complex gravy for a roast, substituting stock for water or store-bought broth will elevate your dish to new culinary heights. The depth of flavor in your stock will shine through, making your sauces more robust and delicious, providing a delightful experience for your diners.

    Infusing Flavor into Risotto and Rice Dishes with Stock

    Using stock as the cooking liquid for risotto or rice dishes imparts incredible depth of flavor. Instead of plain water, opt for your homemade stock to achieve a richer and more satisfying meal. The stock will infuse the grains with its flavor, ensuring that each bite is a delight. This technique works beautifully for any rice dish, from pilafs to paellas, enhancing the overall dining experience.

    Using Stock for Braising Meats to Achieve Optimal Tenderness

    Homemade stock is perfect for braising meats, providing both flavor and moisture for a tender result. Whether you’re braising beef, pork, or chicken, using your stock as the braising liquid ensures that the meat absorbs all the delicious flavors. The result is a succulent dish that showcases the effort you invested in making your stock, impressing everyone at your table.

    Understanding the Environmental Benefits of Using Kitchen Scraps for Stock

    Creating stock from scraps is not only a practical cooking method but also offers substantial environmental benefits. Here’s how your kitchen efforts can positively influence the planet.

    Significantly Reducing Food Waste

    By making stock from scraps, you actively contribute to minimizing food waste. Each year, an astonishing quantity of food is discarded, leading to landfill overflow and greenhouse gas emissions. By repurposing scraps that would otherwise go to waste, you’re making a conscious choice to lessen your environmental impact while maximizing your resources.

    Lowering Your Overall Carbon Footprint

    Every bit of food waste that ends up in a landfill contributes to your carbon footprint. By utilizing scraps for homemade stock, you help reduce your carbon emissions. The more we can do to decrease waste, the smaller our overall environmental impact becomes. This small change in your cooking habits can lead to significant improvements in sustainability, making a meaningful difference.

    Encouraging Sustainable Cooking Practices Within Your Community

    Sharing your knowledge about making stock from scraps can inspire others to adopt sustainable cooking practices. By demonstrating how simple and beneficial it is to repurpose kitchen scraps, you foster a culture of mindfulness surrounding food consumption. This ripple effect can lead to broader community initiatives focused on reducing food waste and promoting sustainability, creating a more responsible approach to cooking.

    Building Community Connections Through Sustainable Cooking Efforts

    Lastly, discussing your stock-making tips and experiences within your community can cultivate a sense of shared responsibility towards sustainability. Encouraging neighbors and friends to adopt similar practices can form a supportive network aimed at reducing waste and embracing sustainable cooking. This collective effort can result in a more environmentally conscious community, benefiting everyone involved and fostering a culture of sustainability.

    Frequently Asked Questions (FAQs)

    Which vegetable scraps are best for making stock?

    You can use a variety of vegetable scraps, but focus on flavorful options like onion skins, carrot tops, and celery leaves. Avoid using bitter vegetables or those that spoil quickly, as they can negatively affect your stock’s taste.

    How long can homemade stock be safely stored in the fridge?

    Homemade stock can typically be stored in the fridge for up to 3-4 days. If you don’t plan to use it within that timeframe, freezing is recommended for longer-term preservation.

    Is it safe to use meat scraps for stock-making?

    Absolutely! Using fresh meat scraps, bones, and trimmings is safe and adds richness to your stock. Ensure they are fresh and properly handled to avoid any food safety issues.

    Can I create stock without using meat?

    Definitely! Vegetable stock can be just as flavorful and nutritious as meat stock. Focus on utilizing a variety of vegetables and herbs to create a depth of flavor that will satisfy your palate.

    What’s the best method to thaw frozen stock?

    The best way to thaw frozen stock is to transfer it to the fridge the night before you intend to use it. You can also thaw it in a microwave or by placing the container in warm water, ensuring it’s ready for your cooking requirements.

    Can I reuse scraps for making stock?

    While some vegetable scraps can be reused, they may lose flavor after the first batch. It’s best to use fresh scraps for optimal results in subsequent batches to maintain the quality and taste of your stock.

    How can I tell if my stock has gone bad?

    If your stock develops an off smell, unusual color, or any signs of mold, it’s best to discard it. Always trust your senses to ensure food safety and quality.

    Is it okay to add spices during the stock cooking process?

    Yes! Adding spices like peppercorns, bay leaves, and herbs while cooking can enhance the flavor profile of your stock. Just remember to strain them out before storing to maintain a clear stock.

    Is homemade stock more nutritious than store-bought options?

    Homemade stock often contains higher nutrients and flavor compared to store-bought varieties, as you control the ingredients and can include nutrient-rich scraps that enhance the final product.

    Can stock be made in a slow cooker?

    Yes, making stock in a slow cooker is an excellent option. Simply add your scraps and water, set it on low, and let it simmer for several hours for a rich and flavorful stock.

    Connect with us on Facebook!

    The post Homemade Stock: Easy Guide Using Kitchen Scraps appeared first on https://cookinggods.com

    The Article Easy Guide to Homemade Stock from Kitchen Scraps Was Found On https://limitsofstrategy.com

  • Poaching Eggs Perfectly: The Ultimate Guide for Aussies

    Poaching Eggs Perfectly: The Ultimate Guide for Aussies

    Enhance Your Cooking Expertise: Master the Art of Poaching Eggs to Perfection Every Time

    Becoming adept at the skill of poaching eggs is a rewarding culinary achievement that can elevate ordinary breakfast dishes into extraordinary gastronomic experiences. Grasping the delicate balance of heat and timing is crucial for achieving flawless results. This detailed guide will explore the essential elements that lead to perfectly poached eggs, equipping you with the necessary knowledge and techniques to consistently create impressive dishes. Whether you’re just starting your culinary journey or you’re an experienced chef, this comprehensive resource will empower you to prepare exquisite poached eggs that are sure to impress anyone at your breakfast table.

    Selecting the Best Quality Eggs: The Foundation for Perfect Poaching

    A hand selecting fresh eggs with tight whites and high yolks at a farmers' market, surrounded by rustic crates and vibrant produce.

    Your journey to creating an exceptional poached egg begins with the careful selection of eggs from your local grocery store or farmers’ market. It’s vital to recognize that not all eggs are created equal; their freshness and overall quality are crucial to the outcome of your dish. Freshly laid eggs showcase tighter whites that maintain their form during cooking, resulting in a more visually appealing product. When you crack open a fresh egg, the yolk sits high, surrounded by firm, less runny whites, which is exactly the texture required for a delectable poached egg that captivates the eye and the palate.

    When choosing eggs, ensure they have clean, uncracked shells and select those with a ‘best before’ date that is significantly in the future. Whenever feasible, buy from local farms or esteemed suppliers recognized for their high egg quality. Generally, organic and free-range eggs are fresher since hens raised in superior conditions produce eggs with richer yolks and enhanced flavors, making them ideal for poaching.

    In summary, the first step in mastering how to poach an egg perfectly every time is to select the highest quality eggs available. This fundamental decision greatly influences your success, ensuring that your poached eggs are not only visually stunning but also bursting with rich, delightful flavor.

    Grasping the Ideal Water Temperature: A Crucial Element for Poaching Success

    The water temperature plays a pivotal role in the poaching process and can drastically influence your results. The perfect poaching temperature lies between 80 and 90 degrees Celsius (176 to 194 degrees Fahrenheit). Within this specific temperature range, the water is sufficiently hot to gently cook the egg without reaching a tumultuous boil, which can create a chaotic cooking environment. Boiling water causes the egg whites to move too aggressively, leading to an unappealing appearance and uneven cooking.

    To achieve the ideal water temperature, start by heating a pot of water just below boiling. Aim for a gentle simmer, where small bubbles are observable at the pot’s bottom but do not break the surface violently. A thermometer can help monitor this temperature accurately, but with experience, you’ll learn to recognize the right heat level through visual clues and sound.

    Once you have reached the correct temperature, it’s essential to maintain it throughout the cooking process. If the water cools down, the egg will take longer to cook and may not develop that coveted silky texture. Conversely, if the water begins to boil, promptly reduce the heat. Mastery of water temperature control is fundamental in your journey to understand how to poach an egg perfectly every time.

    Utilizing Vinegar: A Secret Ingredient for Ideal Egg Whites

    Vinegar is often underestimated in the poaching process, yet it plays an indispensable role in achieving the desired consistency for your eggs. The acidity in vinegar speeds up the coagulation of proteins in the egg whites, helping to keep the egg intact while enhancing the overall texture. This is particularly crucial when working with older eggs, as their whites may lack the firmness of fresh ones.

    When incorporating vinegar into your poaching water, aim for approximately one tablespoon per liter. White vinegar is the most commonly used, but apple cider vinegar can offer a milder flavor if that suits your taste better. It’s important to ensure that the vinegar is evenly mixed in the water before adding your egg, as this prevents uneven clumping and promotes a uniform cooking process.

    While vinegar does impart a subtle flavor, when poached correctly, its taste should remain delicate and not overpower the egg’s inherent richness. Understanding the significance of vinegar is crucial as you refine your technique for poaching an egg perfectly every time. This minor yet impactful addition can vastly improve the quality of your poached eggs.

    A Comprehensive Step-by-Step Blueprint: Your Detailed Guide to Poaching Eggs

    A serene kitchen scene with tools and perfectly poached eggs in simmering water.

    Employing a systematic approach is vital for excelling at poaching eggs. With the appropriate tools, techniques, and timing, you can consistently achieve that perfect poached egg. Let’s outline a detailed step-by-step guide for this culinary exploration.

    Preparing Your Workspace: Essential Tools and Ingredients for Poaching Success

    Before embarking on the poaching journey, it’s crucial to organize your workspace effectively. Gather all necessary ingredients and tools to ensure everything is conveniently accessible. To successfully poach eggs, you will require a pot, a slotted spoon, a timer, a bowl for cracking the eggs, and a thermometer for precise temperature control.

    Begin by filling your pot with enough water to completely submerge the eggs and place it on the stove. As previously mentioned, bring the water to the desired temperature. While waiting for the water to heat, prepare your eggs by cracking them into separate bowls. This method simplifies the process of adding eggs to the pot and allows you to inspect for any shell fragments or spoiled eggs before cooking.

    Organizing your workspace not only streamlines your cooking process but also minimizes the opportunity for mistakes. Once you feel confident that everything is arranged properly, you are ready to transition to the next stage of the poaching process.

    Implementing the Swirling Water Technique: Instructions for Perfectly Shaped Eggs

    The swirling water technique is one of the most effective methods for poaching eggs. This approach creates a gentle vortex that helps maintain the egg’s integrity during cooking. Here’s how to execute this technique:

    First, once your water reaches the ideal temperature, gently stir it with a spoon to create a whirlpool effect. This motion aids in guiding the egg whites around the yolk, promoting cohesion and ensuring a more uniform shape. Next, take your bowl with the cracked egg and gently slide it into the center of the vortex.

    It’s essential to be cautious and avoid dropping the egg from a height, as this can cause the whites to break apart. Instead, let the egg glide smoothly into the water. As the egg cooks, you’ll observe the whites wrapping around the yolk, forming that signature poached egg shape.

    Maintain the gentle swirl for several seconds to assist the egg in setting. The key is to move the water delicately without escalating to a vigorous boil. Perfecting this technique is crucial for anyone aiming to master how to poach an egg perfectly every time, as it significantly enhances the presentation of the final dish.

    Perfect Timing: How Long to Poach for Optimal Results

    A perfectly poached egg with a runny yolk, timer at 3:45, being lifted from water with a slotted spoon.

    Timing is a critical component of creating the perfect poached egg. The cooking time may vary slightly based on the size of the egg and your preference for yolk consistency. Typically, you should poach an egg for about 3 to 4 minutes for a runny yolk, while a firmer yolk may require up to 6 minutes.

    To ensure consistency, start your timer as soon as the egg enters the water. For those new to poaching, utilizing a timer is beneficial to prevent overcooking. When the timer signals, gently lift the egg from the water using your slotted spoon and check for doneness. The whites should be set, while the yolk should still feel soft and slightly bouncy upon touch.

    If you occasionally overcook an egg, don’t let it discourage you. Use this experience to adjust your timing for future attempts. With practice, you’ll develop an intuitive understanding of how long to poach for your desired level of doneness—an essential skill in how to poach an egg perfectly every time.

    Removing and Draining: Techniques for Preserving the Shape of Your Poached Eggs

    After achieving your desired cooking results, the next step involves removing the eggs from the water without compromising their shape. This is where a slotted spoon becomes indispensable. Gently slide the spoon beneath the egg, ensuring you provide adequate support as you lift it from the water.

    Once the egg is lifted, draining excess water is critical. To absorb moisture, place the egg on a plate lined with kitchen paper or a clean towel. This step is particularly important if you plan to serve the eggs on toast or in a dish where excess moisture could lead to a soggy texture.

    For a visually appealing presentation, consider trimming any uneven edges of the egg whites using kitchen scissors. This simple adjustment can significantly enhance the visual appeal of your dish. By carefully removing and draining the eggs, you are well on your way to mastering how to poach an egg perfectly every time.

    Avoiding Common Pitfalls: Tips for Flawless Poached Eggs

    Even seasoned cooks can encounter common pitfalls when poaching eggs. Recognizing these mistakes allows you to continuously refine your technique and achieve outstanding results. Let’s explore frequent errors and how to avoid them.

    Preventing Overcooking: Identifying Signs and Implementing Solutions

    Overcooking is one of the most prevalent mistakes made when poaching eggs. If you’ve ever encountered a rubbery texture or a yolk that resembles a hard-boiled egg, you understand the disappointment it brings. The key to avoiding overcooking lies in closely monitoring both your timing and the water temperature.

    To prevent overcooking, utilize a timer and check your eggs one minute earlier than you expect them to be done. You can also gently poke the egg with a spoon; it should feel firm yet have a slight give if it’s perfectly poached. If you frequently find your eggs overcooked, consider adjusting your heat settings or investing in a reliable kitchen timer.

    Moreover, due to residual heat, eggs continue to cook slightly even after being removed from the water. This is another reason to be cautious with your cooking times.

    Preventing Egg Disintegration: Strategies to Maintain Cohesion

    Another common issue is egg disintegration, where the whites disperse in the water instead of remaining cohesive. This frustration often arises from using older eggs or excessively hot water.

    To prevent disintegration, always opt for the freshest eggs available. The tighter whites of fresh eggs will hold their shape more effectively. If you must use older eggs, adding vinegar to the water can help tighten the whites and improve their cohesion.

    Additionally, make sure your water is at the right temperature before introducing the egg. If the water is too hot, it can cause the egg to break apart. Using the swirling method to create a vortex also helps keep the egg together during cooking. By being mindful of these factors, you can minimize the risk of egg disintegration and enhance your skills in poaching an egg perfectly every time.

    Ensuring Even Cooking: Strategies for Consistent Results

    Uneven cooking occurs when heat isn’t distributed evenly or if there is insufficient water movement. If you notice that certain parts of the egg are overcooked while others remain runny, it’s time to reassess your technique.

    To combat uneven cooking, ensure your pot is large enough to facilitate proper water circulation. A smaller pot can lead to overcrowding, which may result in inconsistent cooking. Additionally, maintain a gentle simmer and ensure that the water swells when adding the egg. This movement guarantees that heat is evenly distributed around the egg, leading to more consistent results.

    By mastering these common mistakes, you can enhance your confidence in the kitchen and refine your ability to produce perfect poached eggs, reinforcing your understanding of how to poach an egg perfectly every time.

    Refining Your Poaching Skills: Innovative Tools and Gadgets to Consider

    The right tools can significantly impact your results in the quest for culinary excellence. While traditional methods can be effective, innovative gadgets can offer convenience and precision. Let’s explore some of these tools and evaluate their usefulness for your poaching endeavors.

    Examining Egg Poachers: Are They Worth the Investment?

    Egg poachers are popular kitchen gadgets designed specifically for cooking eggs gently. They typically consist of a pan with inserts that hold the eggs above simmering water, creating a controlled cooking environment. This method can be particularly beneficial for those new to poaching, as it simplifies the process and minimizes the risk of errors.

    However, while egg poachers may offer convenience, they might not provide the same level of control as traditional methods. The water temperature can fluctuate, and the eggs may not achieve that classic poached texture. An egg poacher can serve as an excellent tool for beginners to build confidence, but for those aiming to master how to poach an egg perfectly every time, it is advisable to learn the classic technique first.

    Ultimately, whether to invest in an egg poacher depends on your cooking style and how often you intend to prepare poached eggs. If you enjoy experimenting in the kitchen, it could be a valuable addition to your collection.

    Silicone Cups: A Practical Solution for Aspiring Poachers

    Silicone cups have recently gained popularity as a practical solution for poaching eggs. These flexible cups can be placed directly into simmering water, allowing for even cooking without the need for swirling. This method can be particularly advantageous for beginners who may find the swirling technique challenging.

    To use silicone cups, lightly grease them to prevent sticking, crack an egg into each cup, and then place them in a pot of simmering water. Cover the pot with a lid to trap heat and steam, resulting in perfectly poached eggs. The silicone material ensures easy removal and minimal cleanup, making them an excellent choice for busy mornings.

    While silicone cups may not replicate the traditional poaching experience, they are a fantastic tool for those learning how to poach an egg perfectly every time. They provide a forgiving method that yields satisfying results without the stress of managing water temperature and swirling techniques.

    Exploring Sous Vide: The Pinnacle of Precision Poaching

    For those who desire the utmost cooking precision, the sous vide method offers an innovative approach to poaching eggs. Sous vide involves vacuum-sealing food in a bag and cooking it in a water bath at a precisely controlled temperature. This technique enables you to poach eggs to your preferred level of doneness with minimal effort.

    To sous vide poach eggs, set your immersion circulator to your desired temperature—typically around 63 degrees Celsius (145 degrees Fahrenheit) for a runny yolk. Place the eggs in their shells directly into the water bath and cook them for about 45 minutes. The result is an egg cooked evenly throughout, boasting a silky texture that is challenging to achieve through traditional methods.

    While sous vide machines can represent a significant investment, they are an impressive option for those passionate about cooking and eager to experiment with precision. If you are serious about perfecting how to poach an egg perfectly every time, this method can elevate your culinary skills to new heights.

    Showcasing Your Poaching Expertise: Delicious Recipes and Serving Ideas for Poached Eggs

    Having mastered the fundamentals of poaching eggs, it’s time to showcase your culinary skills with some delightful recipes. Poached eggs are incredibly versatile and have the power to elevate a wide variety of dishes. Let’s explore some classic and modern serving suggestions that highlight the elegance of a perfectly poached egg.

    Classic Eggs Benedict: A Timeless Brunch Favorite

    Eggs Benedict is perhaps the quintessential poached egg dish, combining rich flavors with an elegant presentation. To prepare this classic, start by toasting English muffins and adding crispy bacon or smoked salmon. Place a perfectly poached egg on top, allowing the golden yolk to cascade over the other ingredients.

    For the finishing touch, whip together a homemade hollandaise sauce by whisking egg yolks, lemon juice, and melted butter until smooth and creamy. Drizzle the hollandaise over the poached egg and garnish with fresh herbs or a sprinkle of paprika to add color and flavor. This dish not only showcases your poaching skills but also makes a stunning impression at brunch gatherings.

    Eggs Benedict is a timeless dish that celebrates the delicate flavors of poached eggs while providing a satisfying meal perfect for any occasion. By mastering this recipe, you’ll move one step closer to mastering how to poach an egg perfectly every time.

    Avocado Toast with Poached Eggs: A Modern Brunch Essential

    Avocado toast has quickly become a modern brunch staple, and adding a poached egg elevates it to new culinary heights. To create this dish, start with a slice of artisanal bread, toasted to perfection. Mash ripe avocado with lemon juice, salt, and pepper, then spread it generously over the toast.

    Top the avocado with a perfectly poached egg, allowing the yolk to break and mingle with the creamy avocado. Enhance the dish with toppings like feta cheese, cherry tomatoes, or a sprinkle of dukkah for an extra burst of flavor. This combination provides a delightful balance of textures and tastes while offering a nutritious meal.

    Avocado toast with poached eggs is not only visually appealing but also a fantastic way to incorporate healthy fats and protein into your diet. This dish exemplifies the versatility of poached eggs and their ability to enhance even the simplest of meals.

    Poached Eggs in Soup: A Comforting and Luxurious Twist

    Consider adding poached eggs to your favorite soup for a comforting and hearty option. The richness of the yolk can elevate the overall flavor of the dish while providing a satisfying element. Classic choices include ramen or minestrone, where the poached egg adds a touch of luxury.

    To prepare, poach your eggs separately and carefully place them atop the soup before serving. The residual heat will warm the egg, allowing the yolk to remain runny while enhancing the soup’s depth of flavor. This approach is an excellent way to showcase your poaching skills while creating a nourishing and comforting meal.

    Incorporating poached eggs into soups not only adds dimension but also transforms a simple dish into an elegant offering. By experimenting with various recipes, you’ll continue to refine your understanding of how to poach an egg perfectly every time.

    Expert Insights: Frequently Asked Questions and Pro Tips for Poaching Eggs

    Can You Poach Eggs in Advance? Storage and Reheating Guidelines

    Yes, you can poach eggs ahead of time! To store them, place the eggs in a bowl of cold water and refrigerate for up to two days. When you’re ready to enjoy, reheat them in simmering water for about 1-2 minutes until warm.

    How to Ensure a Consistently Runny Yolk

    To guarantee a runny yolk every time, poach the eggs for 3-4 minutes at the proper temperature (80-90°C). Using fresh eggs will also help, as they maintain their shape better during cooking.

    Poaching Multiple Eggs: Techniques for Maintaining Quality

    When poaching several eggs, it’s best to do so in batches. Use a larger pot to provide ample space for each egg. Keep a consistent water temperature and utilize the swirling method to prevent them from sticking together.

    Can I Add Salt to the Water When Poaching Eggs?

    While some chefs prefer to add salt to the water, it’s advisable to avoid it, as it can cause the egg whites to break apart. Instead, season the finished eggs to taste after poaching.

    How Do I Determine When My Poached Egg Is Done?

    Check for doneness by gently pressing the egg; it should feel firm yet still have a slight give. Alternatively, you can cut into the egg to assess if the yolk is runny, depending on your preference.

    What is the Best Pan for Poaching Eggs?

    A wide, shallow pan is ideal for poaching eggs, as it allows for even water distribution. A non-stick pan can also be beneficial, helping to prevent the eggs from sticking and making removal easier.

    Can I Freeze Poached Eggs?

    Freezing poached eggs is not recommended, as the texture may alter upon thawing. It’s best to poach eggs fresh, although they can be stored in the fridge temporarily.

    What Should I Do If My Egg Whites Spread Out in the Water?

    If your egg whites spread, it may be due to using older eggs. Adding vinegar to the water can help coagulate the whites faster and keep them contained, thus preventing spreading.

    Are Poached Eggs Healthy?

    Yes, poaching eggs is a healthy cooking method, as they are prepared without added fats or oils. They are an excellent source of protein and essential nutrients, fitting well into various dietary plans.

    Can I Poach Eggs in Flavored Broth?

    Absolutely! Poaching eggs in flavored broth can add depth and enhance the overall taste of your dish. When adding the eggs, ensure the broth is at the right temperature and not boiling for optimal results.


    Connect with us on Facebook for the latest updates!

    The post Poaching Eggs Perfectly: The Ultimate Aussie Guide appeared first on https://cookinggods.com

    The Article Perfect Poaching Eggs: Your Ultimate Aussie Guide Was Found On https://limitsofstrategy.com

  • Pasta Sauces: Key Tips for Culinary Success

    Pasta Sauces: Key Tips for Culinary Success

    Master the Art of Flavorful Pasta Sauces: Proven Techniques for Culinary Success

    To truly shine in the culinary world, it is essential for any dedicated home chef to master the intricate craft of creating exceptional pasta sauces. By employing these proven techniques for pasta sauce mastery, you will not only elevate your cooking abilities but also leave a lasting impression on your guests with dishes that are rich in flavors and boast delightful textures that excite the palate.

    Enhancing Flavor Harmony by Selecting the Ideal Pasta Shape for Your Sauce

    Pappardelle with meat sauce, rigatoni with Bolognese, spaghetti with olive oil, fusilli with marinara.

    The connection between pasta and sauce is a cornerstone of authentic Italian gastronomy. Picking the appropriate pasta shape can greatly enhance the overall dining experience, ensuring that the sauce adheres perfectly and creates a lovely equilibrium of flavors. For example, a robust meat sauce pairs excellently with broader pasta varieties like pappardelle or rigatoni, which effectively capture the sauce within their folds. In contrast, lighter sauces—such as those featuring olive oil—are ideally matched with thinner pasta types like spaghetti or linguine, allowing each strand to be delicately coated without overwhelming the taste buds.

    Furthermore, the sauce’s texture is crucial when determining the ideal pasta match. Chunky sauces, like a hearty Bolognese, pair beautifully with shapes such as fusilli or farfalle, which can support their weight. Conversely, smoother sauces, like classic marinara, are best complemented by more delicate pasta shapes. Understanding how the sauce interacts with the pasta is vital for crafting a cohesive dish where every element shines.

    Additionally, regional variations significantly influence the best pasta shapes to pair with specific sauces. For instance, in Southern Italy, thicker pasta often accompanies rich, tomato-based sauces, while Northern regions favor lighter, more delicate pasta that harmonizes with creamy or buttery sauces. Don’t hesitate to explore and experiment; discovering the perfect pairing can transform an ordinary meal into a culinary masterpiece.

    Fresh Pasta versus Dried Pasta: Optimal Pairing Techniques for Your Sauces

    The debate between fresh and dried pasta is a favorite topic among culinary enthusiasts. Each type contributes unique characteristics and is suited for specific uses, and knowing when to use each can significantly enhance the final dish. Fresh pasta, typically crafted from eggs and flour, provides a tender texture and requires a shorter cooking time, making it perfect for lighter sauces like a delicate sage brown butter or a simple garlic and olive oil dressing. Its inherent softness allows it to absorb flavors quickly, seamlessly blending the sauce into the dish.

    On the other hand, dried pasta, made from durum wheat, offers a firmer bite and is ideally paired with heartier sauces. The rough surface of dried pasta allows sauces to adhere more effectively, especially with chunky or meat-based varieties. Dried pasta is often the preferred choice for rich sauces like a robust ragù or a creamy Alfredo.

    When deciding between fresh and dried, it’s crucial to consider the sauce’s weight and the type of meal you aim to create. Pairing a heavy sauce with fresh pasta may lead to an unbalanced dish, while a light sauce over dried pasta might feel unnecessarily substantial. Therefore, understanding the properties of each pasta type is essential for achieving an ideal balance of flavor and texture.

    Unlocking the Secrets of Perfect Al Dente Cooking: Enhancing Sauce Integration

    Perfecting the cooking process to achieve the ideal al dente texture is essential for any pasta aficionado. Al dente, which translates to “to the tooth,” indicates pasta that is firm yet tender, improving the overall dining experience and influencing how well the sauce adheres to the pasta.

    To achieve this perfect texture, it’s important to adhere to the cooking instructions on the pasta package while tasting periodically throughout the cooking process. Start by bringing a large pot of salted water to a rolling boil to ensure even cooking. Once the pasta is in the pot, stir occasionally to prevent it from sticking. Begin tasting the pasta a few minutes before the suggested cooking time; the aim is to maintain a slight firmness that delivers a satisfying bite.

    Additionally, remember to save a portion of the pasta cooking water before draining. This starchy liquid can be invaluable when finishing your pasta dish, allowing you to adjust the sauce’s texture and ensuring it adheres beautifully to the pasta.

    Moreover, incorporating the pasta directly into the sauce instead of the other way around can create a significant enhancement in flavor. Tossing the al dente pasta directly into the sauce allows it to absorb flavors, guaranteeing that every bite is perfectly coated and creating a delightful dining experience.

    Exploring Pasta Sauce Recipes: From Timeless Classics to Creative Innovations

    A chef's kitchen with simmering pots of traditional and innovative pasta sauces, surrounded by fresh herbs and ingredients.

    Creating pasta sauces is a culinary skill that encompasses both traditional recipes and modern twists. A solid understanding of the fundamentals will empower you to craft a diverse range of delectable sauces that can be tailored to different meals.

    Your Comprehensive Guide to Crafting Authentic Tomato Sauce

    Traditional tomato sauce is the backbone of Italian cooking, renowned for its versatility. Start by selecting high-quality canned San Marzano tomatoes or fresh, ripe tomatoes when they are in season. Next, sauté finely diced onions and garlic in premium extra virgin olive oil until they become translucent, forming a robust flavor foundation.

    Once the aromatics are fragrant, add the tomatoes, breaking them apart with a wooden spoon. Season generously with salt, introduce a pinch of sugar to balance acidity, and add a handful of fresh basil. Allow the sauce to simmer gently for at least 30 minutes, stirring occasionally, so the flavors meld into a rich, vibrant sauce.

    For added depth, consider incorporating a splash of red wine or balsamic vinegar to elevate your sauce and impart a sophisticated touch. Just before serving, finish with a drizzle of high-quality olive oil to enhance the sauce’s richness and overall flavor.

    Keep in mind, traditional tomato sauce serves as a versatile base for countless variations. For a puttanesca twist, introduce sautéed vegetables, olives, or capers, or add ground meat for a Bolognese-style sauce. The endless possibilities make this classic a must-master recipe for any aspiring chef.

    Indulging in Creamy Alfredo Sauce: A Step-by-Step Journey to Luxurious Flavor

    Alfredo sauce is a rich addition that imparts a creamy texture to any pasta dish. The true beauty of crafting this sauce lies in its simplicity. Start by melting unsalted butter in a saucepan over medium heat. Once melted, add minced garlic and sauté briefly, ensuring it releases its fragrance without browning.

    Next, pour in heavy cream, stirring to combine, and allow the mixture to simmer gently. This step thickens the sauce while enhancing its flavors. Gradually whisk in finely grated Parmesan cheese until it melts smoothly into the sauce—season with salt, freshly cracked black pepper, and a hint of nutmeg for an aromatic touch.

    For an extra twist, consider adding sautéed mushrooms, fresh spinach, or even grilled chicken into your Alfredo sauce. These ingredients not only enhance the dish’s heartiness but also retain its indulgent quality. Serve immediately over your favorite pasta, garnished with fresh parsley and additional cheese, for a dining experience that rivals any fine restaurant.

    Unleashing Your Culinary Creativity with Variations of Pesto Sauce: Experiment with Flavorful Herb and Nut Combinations

    Colorful bowls of basil, sun-dried tomato, and kale pesto with nuts and herbs on a rustic table.

    Pesto is a vibrant, flavor-rich sauce that can be customized to meet your taste preferences. Traditionally made with fresh basil, pine nuts, garlic, Parmesan cheese, and olive oil, the variations are endless. Begin by blending fresh basil leaves with toasted pine nuts and garlic until finely chopped. Gradually incorporate olive oil while blending until you achieve a smooth consistency.

    Feel free to experiment with alternative greens such as spinach, arugula, or even kale to create unique takes on this classic sauce. Nuts such as walnuts, almonds, or cashews can provide distinct flavor profiles, while cheeses like pecorino or nutritional yeast cater to various dietary preferences.

    Consider adding sun-dried tomatoes or roasted red peppers for an extra burst of flavor. These ingredients not only enhance the taste but also infuse beautiful colors into your sauce. Pesto is incredibly versatile and can be tossed with pasta, used as a spread, or drizzled over grilled vegetables for an added kick.

    For any leftover pesto, ensure it is stored in an airtight container topped with olive oil to prevent browning. This will allow you to enjoy this delightful sauce for days to come.

    Key Ingredients to Transform Your Pasta Sauces: Elevate Every Dish

    The choice of ingredients can dramatically elevate an ordinary pasta sauce into an extraordinary culinary experience. Knowing how to select and effectively utilize these components is vital for mastering the art of pasta sauce preparation.

    The Impact of Olive Oil: Selecting the Right Type for Maximum Flavor and Texture

    Olive oil is a staple ingredient in many pasta sauces, imparting rich flavor and a luxurious texture. The type of olive oil you choose can significantly influence the final outcome of your sauce. Extra virgin olive oil, renowned for its robust flavor and health benefits, is ideal for drizzling over finished dishes or incorporating into dressings.

    High-quality virgin olive oil is perfect for cooking, as it has a higher smoke point, making it suitable for sautéing aromatics without compromising flavor. Additionally, consider the oil’s origin; oils from different regions offer unique flavor profiles. Italian oils are typically fruity and peppery, while Spanish oils may provide a more robust, herbaceous flavor.

    Using olive oil in your sauces serves various purposes, from enhancing flavor to emulsifying the mixture. A drizzle of high-quality oil at the end of cooking can elevate your dish further, adding richness and complexity. Don’t hesitate to experiment with infused oils, such as garlic or chili oil, to introduce an extra kick to your sauces.

    Choosing Cheese Varieties That Enhance Your Sauce’s Flavor and Texture

    Cheese plays a vital role in enriching pasta sauces, contributing depth, creaminess, and a savory umami punch. When selecting cheese, consider the type of sauce and the desired flavor profile. Parmigiano-Reggiano and Pecorino Romano are excellent choices for creamy sauces, providing a sharp, salty bite that complements rich sauces beautifully.

    Incorporating a touch of mozzarella or ricotta in tomato-based sauces can create a delightful creaminess. Stirring these cheeses into the sauce near the end of cooking enhances texture and allows them to melt beautifully.

    For a unique twist, explore non-traditional cheese options. Feta can add tanginess to Mediterranean-style sauces, while blue cheese introduces a bold flavor to creamy sauces. Always taste as you go; gradually adding cheese will help achieve a well-balanced flavor.

    Utilizing Fresh Herbs and Spices: Balancing Flavors with Fresh and Dried Options

    Herbs and spices are essential in creating layers of flavor within pasta sauces. Fresh herbs, such as basil, parsley, and oregano, impart lively notes and delightful aromas, while dried herbs provide concentrated flavors that enhance sauces cooked over time.

    When using fresh herbs, add them towards the end of the cooking process to preserve their intensity. Dried herbs can be introduced earlier, allowing their flavors to meld into the sauce. A basic marinara can be elevated with dried oregano or crushed red pepper flakes, while fresh basil sprinkled at the end brightens the dish.

    Spices also play a vital role in flavor balancing. A hint of nutmeg can enhance creamy sauces, while a dash of black pepper or chili flakes adds warmth and complexity. Experimenting with different spices can unveil new dimensions in your sauces; the right balance can transform a simple dish into something extraordinary.

    Essential Cooking Techniques for Creating Perfect Pasta Sauces: Unlock Culinary Secrets

    The cooking techniques you employ can dramatically influence the outcome of your pasta sauce. Understanding these methods will ensure you consistently create rich, balanced sauces bursting with flavor.

    Simmering Versus Boiling: Achieving the Ideal Sauce Consistency

    The cooking method you select for your sauce can significantly affect its texture and flavor intensity. Simmering is preferred for most pasta sauces, as it allows flavors to develop gradually and thoroughly. This gentle heat encourages ingredients to meld without breaking down too quickly.

    In contrast, boiling sauces can yield a watery consistency, diluting flavors. If your sauce becomes too thin, try simmering it uncovered to reduce and thicken. This technique enriches the sauce’s depth and concentrates the flavors, resulting in a more satisfying dish.

    Moreover, consider the time available; certain sauces, like a classic marinara, benefit from prolonged simmering, while others, such as a quick garlic and oil sauce, can be prepared in mere minutes. Tailoring your approach based on the sauce type will lead to consistently enjoyable results.

    Building Flavor Depth: Techniques for Creating Richness in Your Pasta Sauce

    Developing depth in your pasta sauce is an art that demands attention to detail and an understanding of flavor profiles. Begin by sautéing aromatics like onions and garlic, allowing them to caramelize slightly, which adds a sweet and savory foundation to your sauce.

    Next, consider incorporating vegetables such as bell peppers, carrots, or celery to enhance the flavor. These vegetables can be sautéed alongside the onions to create a mirepoix, enriching the sauce’s complexity.

    Another helpful tip is to use high-quality stock or broth instead of water as a base for your sauce. This adds an extra layer of flavor that enriches the overall dish. For a touch of acidity, incorporating wine or vinegar can brighten the sauce and balance more decadent flavors.

    Finally, don’t overlook the importance of tasting frequently throughout the cooking process. Adjusting seasonings as you go ensures the sauce maintains a harmonious balance of flavors, resulting in a truly satisfying dish.

    Thickening and Reducing: Ensuring Your Sauce Coats Pasta Evenly

    Achieving the perfect consistency in your pasta sauce is crucial for ensuring it adheres beautifully to the pasta. Reducing your sauce is an effective method for enhancing its thickness and flavor. Begin by simmering your sauce uncovered, allowing excess liquid to evaporate. This process intensifies flavors and results in a more luxurious texture.

    If your sauce is too thin, you can add starch to thicken it. A slurry of cornstarch and water can be gradually whisked into the sauce to thicken it without altering its flavor. Alternatively, a small amount of grated cheese can also serve as a thickening agent, adding texture and richness.

    Incorporating heavy cream or a roux (a mixture of flour and fat) can help creamy sauces achieve a velvety finish. Always stir continuously when thickening to prevent lumps and ensure a smooth consistency.

    Finally, once you’ve reached your desired thickness, toss the pasta directly into the sauce, adding a splash of reserved pasta cooking water if necessary. This final step ensures the sauce adheres to the pasta, creating a beautifully coated dish that’s ready to impress.

    Enhancing Pasta Sauces with Proteins and Vegetables: Elevate Your Meals

    Enhancing your pasta sauces with the right proteins and vegetables can transform a simple dish into a hearty meal. Understanding how to effectively pair these ingredients will enhance flavors and create a satisfying dining experience.

    Selecting the Ideal Meat: Beef, Pork, or Chicken – Preparation Strategies

    When it comes to pairing meats with pasta sauces, the options are extensive. Beef, pork, and chicken each bring unique flavors and textures that can elevate your sauce. Ground beef is a popular choice for creating a rich, hearty sauce; it can be browned and added to tomato-based sauces for a classic Bolognese or meat ragù.

    Pork, particularly in sausage form, adds delightful richness and a hint of spice to sauces. Sautéing crumbled sausage before incorporating it into your sauce infuses the dish with flavor while providing a satisfying texture.

    Whether grilled, shredded, or sautéed, chicken offers a lighter option that pairs beautifully with creamy sauces like Alfredo or a simple olive oil and garlic dressing. To enhance depth, marinating your chicken beforehand can infuse it with flavor, ensuring it complements the sauce perfectly.

    When adding meat to your sauces, consider the cooking times. Ground meats cook quickly, while larger cuts may require longer simmering to become tender and flavorful. Always taste as you go to ensure a harmonious blend of flavors.

    Incorporating Seafood into Your Pasta Sauces: Best Practices for Flavorful Dishes

    Introducing seafood adds a delightful taste to pasta sauces, imparting a fresh, briny element that pairs beautifully with numerous flavors. When using shrimp, sauté them quickly in olive oil and garlic, then add them to your sauce just before serving to prevent overcooking. Their natural sweetness enhances the dish, especially in light, tomato-based or garlic sauces.

    Clams and mussels can be incorporated into sauces that benefit from a seafood broth. Begin by steaming the shellfish until they open, then add them to the sauce along with their cooking liquid, introducing depth and complexity. A splash of white wine can further enhance the flavors while providing a touch of acidity.

    For a unique twist, consider integrating anchovies or sardines into your sauces. These small fish offer a rich umami flavor that significantly elevates tomato sauces. Sauté them gently until they dissolve into the sauce, creating a robust base that beautifully complements the pasta.

    Always prioritize sourcing high-quality seafood for the best results, and feel free to experiment with different combinations to discover new flavor profiles that excite your palate.

    Delicious Vegetarian and Vegan Alternatives: Flavorful Plant-Based Options

    For those seeking vegetarian or vegan options, pasta sauces can be equally satisfying and flavorful. Incorporate hearty vegetables such as mushrooms, zucchini, or eggplant into your sauces. These ingredients can provide a meaty texture and depth of flavor that mimics traditional meat sauces.

    For a rich, creamy vegan sauce, blend cashews with nutritional yeast, garlic, and lemon juice to create a velvety texture that works beautifully as a substitute for dairy-based sauces. Alternatively, consider a sauce made from tahini or almond butter to introduce unique flavors and creaminess.

    Legumes, such as lentils or chickpeas, can add protein to your sauce. When simmered in a tomato-based sauce, they absorb flavors while providing a hearty element to the dish.

    Lastly, don’t underestimate the potential of fresh herbs and spices to elevate your vegetarian or vegan sauces. They provide bursts of flavor that keep the dish vibrant and exciting. With a bit of creativity, vegetarian and vegan pasta sauces can be just as indulgent and satisfying as their meat-based counterparts.

    Addressing Common Pasta Sauce Challenges: Expert Solutions for Culinary Consistency

    Even the most experienced cooks can encounter difficulties when preparing pasta sauces. Recognizing common issues and knowing how to resolve them ensures consistently delicious outcomes.

    Troubleshooting Watery or Thick Sauces: Achieving Consistency Perfection

    Achieving the right consistency in your pasta sauce is crucial for maintaining balance. If your sauce turns out too watery, the remedy is straightforward: simmer it uncovered to reduce the liquid. This process concentrates the flavors and thickens the sauce, resulting in a more cohesive dish.

    Conversely, if your sauce is too thick, you can easily adjust it by gradually adding a splash of reserved pasta cooking water or broth, stirring until you reach the desired consistency. The starch from the water will help bind the sauce and pasta together, ensuring a smooth texture.

    Always remember that the sauce should coat the pasta, not drown it. Aim for a consistency that allows for even coverage without being overly soupy or dry.

    Balancing Bland or Overpowering Flavors: Achieving the Perfect Taste

    Finding the right flavor balance can be challenging, but a few adjustments can significantly enhance your sauce. If your sauce tastes bland, boost the seasoning with additional salt, pepper, or herbs. Fresh basil or parsley can brighten the flavors, while a splash of vinegar or citrus juice introduces much-needed acidity.

    Conversely, if the flavors are too intense, you can dilute the sauce by adding more tomatoes, cream, or even vegetables to tone down overpowering tastes without compromising the integrity of the dish.

    It’s crucial to taste throughout the cooking process. Adjustments should be made gradually to prevent over-seasoning or overpowering the base flavors you’ve worked hard to develop.

    Preventing Sauce Separation: Techniques for a Cohesive Consistency

    Sauce separation can occur for various reasons, often due to temperature fluctuations or ingredient choices. To prevent this issue, ensure that your sauce simmers gently and consistently. Avoid boiling, which can cause the sauce to break apart.

    If separation does occur, a simple remedy is to whisk in a small amount of cold water or additional cream to help emulsify the sauce and bring it back together. Stirring vigorously can also assist in reintroducing the separated components.

    Incorporating emulsifiers, such as egg yolks or cheese, at the right time can also prevent separation during cooking. Always aim for a smooth, cohesive sauce to ensure a delightful dining experience.

    Pro Tips for Storing and Reheating Pasta Sauces: Maintain Quality Like a Professional

    Properly storing and reheating pasta sauces is essential for preserving their quality and flavor, allowing you to enjoy them multiple times. Understanding best practices ensures that your culinary efforts don’t go to waste.

    Freezing Pasta Sauces: Effective Techniques to Preserve Flavor and Texture

    Freezing pasta sauces is an excellent strategy for preserving leftovers or preparing meals in advance. To freeze effectively, allow the sauce to cool completely before transferring it to airtight containers or freezer bags. Be sure to leave space for expansion, as liquids can expand when frozen.

    Label your containers with the date and type of sauce for easy identification later. Most sauces can be frozen for up to three months without significantly losing quality. When ready to use, thaw in the refrigerator overnight or utilize the defrost function on your microwave.

    Gently reheating on the stovetop over low heat is ideal for preserving flavor and texture. Adding a splash of reserved pasta cooking water can help re-emulsify the sauce.

    Reheating Techniques to Preserve Quality: Tips for Delicious Results

    Reheating pasta sauces requires care to maintain the original flavors and textures. Avoid high heat, which can lead to separation or overcooking. Instead, opt for gentle reheating on the stovetop, stirring frequently.

    If your sauce appears too thick after thawing, adding a splash of water, broth, or cream can help restore its ideal consistency. Always taste and adjust seasoning as needed, as flavors can sometimes mellow during storage.

    Microwaving is an option for quick reheating, but use a microwave-safe container and stir the sauce halfway through to ensure even heating. Covering the container can help retain moisture and prevent the sauce from drying out.

    Preparing in Advance: Crafting Sauces for Quick Weeknight Meals

    Preparing pasta sauces in advance is a time-saving strategy that allows for quick weeknight meals without sacrificing flavor. Many sauces, such as Bolognese, marinara, or pesto, can be made ahead of time and stored in the refrigerator for up to a week or frozen for extended storage.

    To maximize flavor, consider making a larger batch of sauce and portioning it into smaller containers. This approach allows for easy defrosting and reheating without starting from scratch each time.

    When planning meals, pair your pre-made sauces with fresh pasta or cooked grains for a quick and satisfying dinner. Adding seasonal vegetables or proteins can create a complete meal that feels homemade.

    Discovering Regional Variations of Pasta Sauces: Embark on a Culinary Exploration

    Italy’s rich culinary heritage is reflected in its diverse pasta sauces, with each region showcasing unique flavors and techniques. Exploring these regional variations can broaden your culinary horizons and introduce new favorites to your repertoire.

    Savory Northern Italian Sauces: Creamy and Rich Flavors from the North

    Northern Italy is renowned for its creamy, rich sauces that often highlight dairy and nuts. Classic examples include Alfredo and Pesto alla Genovese, both showcasing the region’s love for fresh ingredients. Mascarpone, Gorgonzola, and butter provide a luxurious mouthfeel that pairs beautifully with various pasta.

    Mushroom-based sauces, such as a creamy porcini sauce, showcase the region’s abundant forests. These sauces frequently utilize local ingredients, resulting in a distinctive flavor profile that represents the area’s culinary traditions.

    Additionally, risotto is a staple in Northern Italian cuisine, often served with rich sauces. Combining rice and sauce can inspire innovative pasta dishes that blend techniques from both culinary worlds.

    Hearty Southern Italian Sauces: Tomato-Based Flavors from the South

    Conversely, Southern Italy is celebrated for its robust tomato-based sauces, showcasing the region’s abundant produce. Dishes like Arrabbiata and puttanesca are packed with flavor, featuring garlic, olives, capers, and fresh herbs.

    These sauces tend to be rustic, with chunky textures that provide a satisfying bite. The emphasis on fresh, local tomatoes during peak season contributes to the vibrant flavor of Southern Italian sauces.

    Moreover, Southern Italian cuisine embraces seafood, with dishes such as spaghetti alle vongole reflecting the coastal influences of the region. Fresh fish and shellfish in pasta sauces highlight the area’s culinary heritage, offering a delightful contrast to the more decadent sauces of the north.

    Global Influences on Pasta Sauce Recipes: A Fusion of Flavors and Techniques

    International influences have enriched the world of pasta sauces, leading to exciting fusion dishes that meld diverse flavors. For instance, incorporating Asian ingredients like soy sauce, ginger, or sesame oil can create a unique twist on traditional sauces, offering a fresh perspective.

    Mexican-inspired pasta sauces might feature elements like jalapeños, cilantro, and lime, infusing a zesty kick into classic dishes. Similarly, Indian spices can introduce warmth and complexity, transforming a simple tomato sauce into a vibrant, flavorful dish.

    These global influences encourage creativity in the kitchen, prompting cooks to experiment with flavors and techniques from various cuisines. The result is a collection of pasta sauces that reflect a blend of cultures, showcasing the versatility and adaptability of this beloved dish.

    Serving and Presenting Pasta Dishes: Tips for a Memorable Dining Experience

    Presentation plays a vital role when serving pasta dishes. A beautifully plated dish enhances the dining experience, making the meal feel special and inviting.

    Expert Plating Techniques: Enhancing Your Pasta Dish’s Visual Appeal

    The way you plate your pasta can greatly impact the overall dining experience. Begin by selecting an appropriate plate; shallow bowls or wide plates are ideal for showcasing the pasta.

    When serving, twirl the pasta using a fork or a serving tool to create a neat nest in the center of the plate. This technique enhances visual appeal and allows the sauce to pool around the pasta, elevating the dish’s overall presentation.

    Consider layering your components. For example, spreading a sauce base on the plate before adding the pasta creates a beautiful contrast. Finish with a sprinkle of cheese, herbs, or a drizzle of olive oil for added flair.

    Garnishing for Flavor and Appeal: Fresh Herbs and Toppings to Enrich Your Dish

    Garnishing your pasta dish can enhance both its appearance and flavor. Fresh herbs like basil or parsley add color and freshness, while grated cheese provides a rich, savory finish.

    For added texture, consider sprinkling toasted nuts or breadcrumbs over the dish. These elements not only enhance visual appeal but also provide a satisfying crunch that contrasts beautifully with the softness of the pasta.

    Additionally, a dash of freshly cracked black pepper or a drizzle of high-quality olive oil can accentuate the dish’s flavors, providing a final touch that makes the dish truly shine.

    Perfect Wine Pairing with Pasta: Selecting the Right Wine to Elevate Your Sauce

    Wine pairing can elevate the dining experience, enhancing the flavors of the pasta dish and the accompanying wine. When selecting a wine, consider the sauce’s base; for tomato-based sauces, a medium-bodied red wine, such as Chianti or Sangiovese, complements the acidity of the tomatoes beautifully.

    For cream-based sauces, opt for a white wine like Chardonnay or a light-bodied red such as Pinot Noir, which can balance the richness. If your pasta features seafood, a crisp white like Sauvignon Blanc or a sparkling wine can elevate the dish’s freshness.

    Always remember to serve the wine you use in your sauce alongside the dish. This creates a harmonious experience, melding the flavors beautifully on the palate.

    Frequently Asked Questions About Pasta Sauces

    What is the best method for cooking pasta?

    To cook pasta perfectly, bring a large pot of salted water to a rolling boil, add the pasta, and cook according to package instructions until al dente. Stir occasionally to prevent sticking.

    How can I tell when my pasta sauce is finished cooking?

    Pasta sauce is ready when it reaches the desired thickness and flavor intensity. Frequent tasting is essential; look for a rich, cohesive texture without excessive liquid.

    Can I prepare pasta sauce ahead of time?

    Yes, many pasta sauces can be made in advance. They can be stored in the refrigerator for up to a week or frozen for longer storage.

    What are some common mistakes to avoid when making pasta sauce?

    Common mistakes include overcooking pasta, using low-quality ingredients, and neglecting to taste and adjust seasonings throughout the cooking process.

    How do I prevent my pasta sauce from becoming too thick?

    If your sauce becomes too thick, gradually add reserved pasta cooking water or broth while stirring until you achieve the desired consistency.

    Can I use fresh herbs in my pasta sauce?

    Absolutely! Fresh herbs can enhance the flavor of pasta sauces. To preserve their intensity, add them towards the end of cooking.

    What type of olive oil should I use for my pasta sauce?

    Extra virgin olive oil is ideal for drizzling over finished dishes, while virgin olive oil, due to its higher smoke point, works well for cooking.

    What can I use as a substitute for cheese in vegan pasta sauces?

    Nutritional yeast, blended cashews, or tahini can be excellent substitutes for cheese in vegan pasta sauces, providing creaminess and flavor.

    How do I fix a bland pasta sauce?

    Add salt, freshly cracked black pepper, or a splash of vinegar or lemon juice to enhance a bland pasta sauce.

    What is the best way to store leftover pasta sauce?

    Leftover pasta sauce can be stored in an airtight container in the refrigerator for up to a week or frozen for up to three months.

    Follow our exciting updates on Facebook!

    The post Cooking Pasta Sauces: Essential Tips for Success appeared first on https://cookinggods.com

    The Article Pasta Sauces: Essential Tips for Cooking Success Was Found On https://limitsofstrategy.com

  • Blackout Cooking Essentials: Your Survival Guide

    Blackout Cooking Essentials: Your Survival Guide

    Enhance Your Kitchen Readiness for Effective City Blackout Cooking

    When unforeseen events occur and the electricity goes out, your kitchen becomes a crucial center for survival. The secret to thriving during city blackout cooking is thorough preparation. By arming your kitchen with the necessary tools and resources, you can tackle any power outage with both creativity and confidence. This comprehensive guide will lead you through essential steps to embark on this vital journey, ensuring that your family remains nourished and comforted, even in the most challenging circumstances.

    Strategically Stocking Non-Perishable Foods for Emergency Cooking

    Diverse pantry with canned goods, beans, and rice on rustic wooden shelves for emergency preparedness.

    In the world of city blackout cooking, having a stockpile of non-perishable foods is vital. These indispensable foods can remain safe to consume for long periods without refrigeration, making them perfect for emergency situations. Begin by evaluating your pantry and ensuring it’s stocked with essential staples such as canned goods, dried fruits, and grains. Items like canned vegetables, beans, and soups not only provide necessary nutrition but also offer incredible versatility for various meal preparations.

    Furthermore, think about adding pasta, which can be swiftly cooked using just boiling water, and nut butters that pair excellently with crackers or bread for instant, satisfying snacks. Don’t overlook the importance of spices and condiments; these elevate even the simplest meals, enhancing flavor and enjoyment. A well-stocked pantry guarantees you can prepare meals effortlessly while also helping to sustain morale during tough times.

    Establishing Reliable Water Storage Systems for Cooking and Hydration

    Water is undoubtedly the most crucial resource in any survival situation, particularly during a blackout. Ensuring you have a reliable supply of water for both cooking and drinking is essential for the well-being of your household. Start by storing clean water in food-grade containers, which can be easily labeled and stored in a cool, dark environment. A common guideline is to keep at least one gallon of water per person per day for a minimum of three days, ensuring that your family is well-prepared.

    Additionally, understanding water purification methods is critical for survival. If your tap water becomes unavailable or questionable, consider investing in a water filtration system or purification tablets for ensuring safe drinking water. Boiling water is another effective purification method; ensure you have a means to generate heat. Moreover, collecting rainwater can be an eco-friendly solution, provided you establish the proper mechanisms to ensure cleanliness and safety for consumption.

    Key Cooking Utensils to Prepare Your Kitchen for Blackout Scenarios

    Equipping your kitchen with the right cooking utensils can significantly enhance your experience during a blackout. Essential tools to include are a manual can opener to easily access your canned goods and portable stoves that operate on propane or butane. A simple camping stove can greatly improve your cooking capabilities, allowing you to prepare meals efficiently, even when the power is out.

    It’s vital to not underestimate the importance of basic kitchen tools: having a reliable knife, a sturdy cutting board, and various cooking pots are fundamental for effective meal preparation. Moreover, consider investing in a portable grill or even a solar cooker for outdoor cooking options when necessary. A dependable flashlight or headlamp will also be invaluable for illuminating your workspace. By having these essential tools at your disposal, you not only simplify the cooking process but also promote safety and efficiency during an outage.

    Creative Cooking Methods to Thrive During City Blackouts

    Solar cooking setup on city rooftop, blackout; diverse no-cook meals on display, vibrant.

    When the power goes out, your ingenuity becomes the cornerstone of city blackout cooking. Embrace innovative techniques that allow you to prepare meals that not only nourish but also inspire. From harnessing solar cooking to crafting no-cook meals, here are some creative methods to explore during power outages.

    Utilizing Solar Cooking for Eco-Friendly Meal Preparation

    Harnessing the sun’s energy for cooking is an ingenious solution when faced with a blackout. Solar cookers come in various designs, leveraging reflective materials to focus sunlight and generate adequate heat for cooking. These cookers can effectively bake, boil, and steam a wide variety of foods, making them an environmentally friendly option for urban dwellers who want to maintain sustainable practices.

    To start using solar cooking, position your solar cooker in an area that receives ample sunlight and adjust its angle throughout the day to optimize exposure. Foods like rice, beans, and various vegetables can be easily cooked with solar ovens, often requiring minimal supervision. This method not only promotes sustainability but also allows you to relish the outdoors while preparing delicious meals, adding a delightful twist to your blackout cooking experience.

    Safe Campfire Cooking Techniques for City Environments

    Cooking over an open flame may seem intimidating in an urban setting, but with the right precautions, it can be done safely and effectively. Setting up a small campfire in a controlled outdoor space, such as a backyard or balcony with adequate ventilation, can be a wonderful way to prepare meals while enjoying the fresh air.

    Ensure you have a fire pit or grill to contain the flames and prevent accidents. Use dry wood or charcoal to create a stable heat source for cooking. Essential tools for campfire cooking include skewers, cast iron pans, and grill grates. Simple recipes like roasted vegetables, skewered meats, or foil-wrapped dinners can transform your blackout experience into an enjoyable culinary adventure, creating lasting memories with family and friends.

    Quick and Tasty No-Cook Meal Options for Effortless Solutions

    Assorted no-cook meal platter with salads, wraps, and snacks on a rustic table.

    Not every meal during a blackout needs to involve cooking. In fact, there’s a wide array of delicious and nutritious no-cook meals that can be prepared swiftly and effortlessly. Think of salads made from canned beans, assorted vegetables, and a drizzle of olive oil or vinegar for added flavor. Wraps made with tortillas stuffed with deli meats, cheeses, and fresh veggies can also be highly satisfying, providing variety without the need for cooking.

    Snack plates offer a fun way to enjoy a variety of foods without cooking—consider an assortment of nuts, cheese, crackers, and fruits. These meals not only save time but also conserve energy resources, making them the perfect choice for periods when the power is out. By focusing on no-cook options, you can keep your family well-fed and content without the added stress of traditional cooking methods, fostering a positive atmosphere during challenging times.

    Emphasizing Safety in City Blackout Cooking Practices

    Safety should always be a primary concern when partaking in city blackout cooking. Recognizing potential hazards and understanding how to mitigate them is essential for ensuring a safe cooking experience during power outages. Here are key considerations to keep in mind.

    Ensuring Food Safety During Power Interruptions

    Maintaining food safety during a blackout can be quite challenging, but it is crucial to prevent foodborne illnesses. Without refrigeration, perishable items can spoil quickly. The USDA recommends keeping your refrigerator and freezer doors closed as much as possible. A fully stocked freezer can keep food safe for about 48 hours, while a half-full freezer may only last around 24 hours.

    If you suspect that food has spoiled, it’s best to trust your instincts—when in doubt, throw it out. Look for signs of spoilage, such as off odors, unusual colors, or textures. It’s wise to have a thermometer on hand to monitor food temperatures during outages, ensuring that any potentially hazardous food items are discarded before they can pose a health risk to your family.

    Avoiding Carbon Monoxide Poisoning During Indoor Cooking

    Using certain cooking fuels indoors can lead to the dangerous buildup of carbon monoxide, a colorless and odorless gas that can be lethal, especially in poorly ventilated areas. If you choose to use propane or kerosene stoves, always ensure you are cooking in an outdoor location or have proper ventilation to avoid health risks.

    Investing in a battery-operated carbon monoxide detector can provide peace of mind while cooking. Additionally, familiarize yourself with the symptoms of carbon monoxide poisoning, which may include dizziness, confusion, or headaches. If you suspect exposure, seek fresh air immediately and contact emergency services for assistance.

    Implementing Fire Safety Protocols During Cooking

    Cooking without electricity can increase the risk of fire hazards. To minimize these risks, keep flammable materials away from heat sources, and always have a fire extinguisher readily accessible. If you are using an outdoor grill or campfire setup, ensure that the area is clear of debris and any flammable items to prevent accidents.

    Practice safe cooking techniques by avoiding loose clothing and keeping long hair tied back to prevent accidental ignition. Additionally, never leave cooking food unattended, especially when using open flames. In case of an emergency, be aware of your escape routes and keep a charged phone nearby for quick access to emergency services if needed.

    Engaging Families in City Blackout Cooking: Keeping Morale High and Stomachs Full

    Involving your entire family in city blackout cooking can transform a potentially stressful situation into a cherished bonding experience. By preparing meals together and ensuring everyone feels included, you can maintain a positive atmosphere during power outages, making the experience memorable for all.

    Crafting Kid-Friendly Meals for Blackout Cooking

    When the lights go out, it’s essential to have meals that cater to children’s tastes. Think of simple, fun options that can engage kids in the cooking process. For instance, sandwiches made with their favorite spreads and toppings can be a big hit among children. Adding cut fruits and vegetables provides a nutritious touch that parents will appreciate.

    Another engaging idea is to set up a “build-your-own” pizza station using pre-made dough or tortillas, allowing children to customize their toppings and create their unique pizzas. Ice cream or yogurt parfaits can serve as delightful desserts, even without refrigeration for a short duration. By keeping meals appealing and interactive, you ensure that even during a blackout, everyone remains well-fed and happy.

    Encouraging Kids to Participate in Blackout Cooking Activities

    Involving children in the cooking process can transform a blackout into a memorable family activity. Assign them age-appropriate tasks, such as washing vegetables, assembling sandwiches, or stirring ingredients. This not only imparts valuable cooking skills but also cultivates a sense of responsibility and teamwork within the family.

    Consider developing a cooking game where kids can suggest ingredients or meal ideas based on what’s available in your pantry. This encourages creativity and helps them grasp the importance of resourcefulness during emergencies. By making cooking a fun and collaborative effort, you create lasting memories while ensuring everyone is invested in the meal preparation process.

    Addressing Food Allergies During Blackouts for Safe Meal Preparation

    Food allergies can pose challenges during a blackout, but with thoughtful planning, it is possible to accommodate dietary restrictions effectively. Begin by identifying safe options from your emergency stockpile. For instance, gluten-free pasta or nut-free snacks can be essential for families with specific dietary needs, ensuring they remain safe and healthy.

    Consider preparing allergy-friendly recipes ahead of time and storing them in your pantry. This can include easy-to-assemble meals that are free from allergens. Clear communication with your family about food choices and ensuring everyone knows what’s safe to consume can alleviate stress and help keep everyone healthy during an outage.

    Learning from Real-Life Experiences in City Blackout Cooking

    Gaining insights from the experiences of others can be incredibly beneficial in enhancing your understanding of city blackout cooking. By examining case studies and personal narratives, you can better prepare for potential challenges and devise effective solutions for your own cooking strategies.

    Analyzing Case Studies of Urban Blackouts and Community Resilience

    Cities worldwide have faced extended power outages due to natural disasters or infrastructure failures. For example, during Hurricane Sandy, residents of New York City adapted by utilizing rooftop grills and communal cooking methods in shared spaces. These case studies underscore the importance of community and ingenuity in overcoming challenges, showcasing how neighbors can unite to share resources.

    By analyzing these real-life scenarios, you can draw inspiration for your preparedness plans. Consider how communal resources can be utilized and which cooking methods proved most effective in these situations. This knowledge empowers you to navigate future blackouts with greater confidence and resilience.

    Insights from Interviews with Blackout Survivors

    Listening to firsthand accounts from individuals who have endured blackouts can provide a wealth of practical knowledge. Many survivors emphasize the significance of adaptability and creativity in the kitchen during power outages. One survivor, for instance, shared how they used a car battery to power small appliances, allowing them to cook meals and maintain morale during difficult times.

    These interviews often highlight the value of community support, as neighbors come together to share resources, ideas, and even meals. By understanding these experiences, you can gather practical tips and inspiration for your blackout cooking strategies, enhancing your preparedness for future events.

    Connecting with Community Resources for Assistance During Outages

    Local organizations often provide vital support during extended blackouts by offering resources for food distribution and community cooking events. Establishing connections with these entities can ensure that you have access to essential supplies and information during emergencies, reinforcing community bonds in the face of adversity.

    Consider reaching out to local community centers or nonprofits that focus on disaster preparedness. They may offer workshops on emergency cooking, food storage techniques, and even community potlucks to foster connections among residents. Building a network with other families can facilitate sharing resources and ideas, ultimately enhancing your collective resilience during a blackout.

    Future-Proofing Your City Blackout Cooking Strategies

    Preparation is critical when it comes to city blackout cooking. By investing in the right resources and creating a comprehensive plan, you can ensure that you’re ready for any future outages while maintaining your family’s health and morale.

    Investing in Backup Power Solutions for Cooking Needs

    Implementing backup power solutions can significantly enhance your cooking capabilities during a blackout. Consider investing in a generator that can power essential appliances or a battery-powered cooking device that operates independently of the electric grid, ensuring you can prepare meals even when the power is out.

    Additionally, solar-powered chargers can keep your devices functional, enabling you to stay informed about the status of outages and recovery efforts. Researching options that align with your lifestyle and budget will empower you to make informed decisions, guaranteeing that your kitchen remains operational even in challenging circumstances.

    Creating a Comprehensive Blackout Cooking Kit for Emergency Preparedness

    Assembling a thorough blackout cooking kit is vital for ensuring you are prepared for any emergency. This kit should encompass non-perishable foods, water storage solutions, and essential cooking utensils. Consider including items such as a first-aid kit, flashlights, and a portable stove to ensure you’re ready for any situation that may arise.

    Be diligent about regularly checking and replenishing your kit, replacing expired items and rotating stock as necessary. Involving your family in this process can help everyone understand the significance of preparedness and encourage them to contribute ideas for what should be included in your blackout cooking kit.

    Staying Informed During Outages: The Importance of Real-Time Updates

    Having access to real-time information during a blackout is crucial for safety and preparedness. Consider investing in a battery-powered radio or a hand-crank emergency radio to stay updated on local news and recovery efforts, including updates on power restoration timelines.

    Utilize mobile applications that provide alerts and updates regarding power outages in your area. Staying informed enables you to make timely decisions about food management and cooking methods, ensuring that you are always a step ahead during an emergency situation.

    Frequently Asked Questions

    What are the best non-perishable foods for blackout cooking?

    Excellent choices include canned goods, dried fruits, grains, and pasta due to their long shelf lives and versatility in various recipes, providing essential nutrition during outages.

    How should I store water for cooking during a blackout?

    Store water in food-grade containers and keep it in a cool, dark place. Aim for at least one gallon per person per day for several days of preparedness, ensuring enough supplies for cooking and hydration.

    What cooking utensils are essential for a blackout scenario?

    A manual can opener, portable stove, reliable knives, cutting boards, and various pots are critical tools for efficient cooking without electricity, allowing for versatility and safety.

    Is it feasible to cook with a solar cooker during a blackout?

    Absolutely! Solar cookers utilize sunlight to prepare meals and serve as an effective method for sustainable cooking during power outages, enabling you to harness natural energy.

    What are some kid-friendly meals for cooking during a blackout?

    Sandwiches, wraps, and no-cook snack plates featuring fruits, nuts, and cheese are fantastic options that keep kids engaged and satisfied, making cooking enjoyable for the whole family.

    How can I maintain food safety during a power outage?

    Keep refrigerator and freezer doors closed as much as possible, and discard any perishable items that have been above 40°F for more than two hours to prevent foodborne illnesses.

    What safety precautions should I take when cooking indoors during a blackout?

    Always ensure proper ventilation, avoid using fuels that produce carbon monoxide indoors, and keep flammable materials away from heat sources to minimize risks during cooking.

    What should I include in my blackout cooking kit?

    Your kit should encompass non-perishable foods, water storage solutions, essential cooking utensils, a first-aid kit, and emergency lighting supplies to ensure you are well-prepared.

    How can I involve my kids in blackout cooking activities?

    Assign them age-appropriate tasks, encourage their meal ideas, and make the cooking process fun and interactive to foster creativity and engagement during power outages.

    Where can I find community support during a blackout?

    Local organizations and community centers often provide resources and workshops on disaster preparedness and can assist with food distribution, fostering a supportive environment during outages.

    The post Blackout Cooking: Your Essential Survival Guide appeared first on Survival Bite.

    The Article Survival Guide for Blackout Cooking Essentials Was Found On https://limitsofstrategy.com

  • Healthy Herbs You Should Be Cooking With

    Healthy Herbs You Should Be Cooking With

    Herbs are healthy and should be used in cooking.

    Everyone knows that a balanced diet rich in fruits and vegetables is essential to maintaining a robust immune system. On the other hand, herbs are an excellent method to increase our food’s nutrient density while enhancing its flavor. Herbs provide several health advantages that you may not be aware of, in addition to their delightful flavor. One benefit that comes to mind is using herbs to flavor meals instead of salt. Keeping our blood pressure and heart rates in check is made possible by this simple change, as salt primarily contributes to high blood pressure and cardiac stress.

    Basil

    Basil

    This brightly colored, aromatic plant has several health advantages and comes in over sixty different types. Because to the carotenoids lutein and zeaxanthin, basil is excellent for maintaining eyesight and improving eye health. The anti-oxidants included in basil can aid the body in warding off the effects of free radicals, which can damage cells, cause illness, and speed up aging. If you have a family history of cancer, diabetes, or arthritis, including basil in your diet may help lower your risk.

    Due to its ability to control blood sugar, basil aids in preventing diabetes. It also reduces inflammation, which makes it helpful in treating inflammatory pain diseases like arthritis (2). It has been discovered to have anti-cancer qualities and can aid in treating several malignancies, including those of the liver, lungs, mouth, and skin. Lastly, basil has been shown to enhance mood and reduce depressive symptoms.

    Cilantro (aka coriander)

    In Asian cooking, cilantro is a common ingredient. It is also known as coriander, and people have different ideas about how much they like it. People generally have strong opinions on it, either for or against it. The leaves and seeds of cilantro have a citrusy flavor, yet other people claim they taste like soap. Linalool, an essential oil from coriander seeds, has long been used to treat stomach upset, especially that brought on by bacterial illnesses and food poisoning. This is due to the presence of antibiotic and antibacterial substances.

    Coriander seeds have been shown to lower blood cholesterol levels and prevent atherosclerosis, the buildup of plaque in blood arteries that can cause strokes and heart disease. The health advantages of coriander are maximized when combined with other spices like ginger, turmeric, and garlic.

    Dill

    The dill plant’s feathery leaves, seeds, and essential oil have all been shown to offer health benefits. These advantages are brought on by the chemicals in this herb’s anti-oxidant action. Plant chemicals including proanthocyanins, flavonoids, and phenols can help lower “bad” cholesterol while raising “good” cholesterol in the blood. Triglycerides are another type of blood fat. Also, they can aid in maintaining a healthy blood sugar level, which is important in the battle against diabetes. Finally, this aromatic plant can help in the fight against cancer and bacterial infections. Consuming dill might assist with stomach disorders.

    Dill is a delicate plant with an anise-like flavor. It goes well with salmon, but it also goes well with eggs, salads, soups, and herb butter.

    Mint

    Mint is a pleasant plant that grows quickly. Because of this, it’s better to keep it in a pot unless you want it to take over your garden. Traditionally served with lamb, mint is also a wonderful addition to various other foods, including dips, sauces, salads, and even tea. You may have noticed that toothpaste has a minty flavor. This is because mint eliminates the bacteria that cause bad breath, making it a wonderful breath freshener. Sniffing mint essential oil has been demonstrated to boost memory and attentiveness.

    Mint is excellent for relieving stomach and digestive ailments including bloating and gas. Irritable bowel syndrome and gastroesophageal reflux illness are two conditions that can benefit from its use. When you have a cold, the menthol in mint might help open up your nose and throat. Colds and flu are attacked from two fronts by the anti-bacterial characteristics.

    Oregano

    Another herb utilized in Italian and other Mediterranean cooking is oregano. It tastes and is closely linked to marjoram. The flavor can be slightly bitter, and the scent is reminiscent of camphor.

    Carvacrol and thymol, two phenolic compounds found in oregano, are helpful at reducing “bad” cholesterol and raising “good” cholesterol levels in the blood. If administered for around six weeks, oregano essential oil has been demonstrated to eradicate parasite infestations. It is effective against fungi like Candida. Hopefully, you won’t have any parasitic or fungal illnesses. But, if you have them and would rather not take medicine, oregano can help you get rid of them.

    Parsley

    The majority of people are familiar with the herb parsley. It is frequently used as a garnish and might have flat or curled leaves. Parsley, like mint, may be used to mask the taste of garlic and other strong flavors in the mouth and prevent bad breath. Parsley has also been demonstrated to kill germs in the lab, however, this hasn’t been shown in humans just yet. Flavones, of which apigenin is the most beneficial, are found in parsley. While it may also be found in oregano and chamomile, parsley has most of it. The beneficial component is significantly more concentrated when parsley is dried. Apigenin has been shown in several trials to be effective in the battle against cancer. This is because it inhibits the growth of cancer cells, lowers inflammation, protects DNA, and keeps new blood vessels from developing around tumors, thus starving the diseased cells. Due to its high vitamin K content, parsley is excellent for maintaining strong bones and avoiding fractures and osteoporosis. If you are hurt and start bleeding, vitamin K helps your blood clot so you can stop the bleeding and get better faster. As a diuretic, parsley can help your kidneys and lower your blood pressure. In addition to vitamin K, parsley is rich in vitamin A, lutein, and zeaxanthin, all of which contribute to the protection of eyesight and the maintenance of healthy eyes.

    As you can see, parsley is a very adaptable herb that is well worth including in your recipes. It may be used in salads uncooked or as a garnish on a variety of foods. It may also be used to season sauces, soups, and a wide variety of other meals. Or just chew it to keep your breath minty.

    These are just a handful of the many herbs you may use in your cuisine to stay healthy. Almost every herb and spice you can imagine has at least one health advantage. They may be included in a wide variety of preparations. Why aren’t you utilizing them at this point, then?

    References

    The post Healthy Herbs You Should Be Cooking With appeared first on https://gqcentral.co.uk

    The Article Healthy Herbs You Should Be Cooking With First Appeared ON
    : https://ad4sc.com

  • Make More Terpenes With This Recipe.

    Make More Terpenes With This Recipe.

    Make More Terpenes With This Recipe.

    Make More Terpenes With This Recipe: The term “terpene” can be found everywhere in the cannabis world. Terpenes are more popular than ever thanks to the world’s passion for cannabis science and research. It has even been proposed that its use will be one of the following significant booms in cosmetic marketing. So, let us discuss terpene production and why it is significant.

    Why are terpenes important?

    Terpenes play an essential role in how cannabis, mainly THC, affects the person who consumes it. Terpenes are primarily responsible for the effects of each strain. They significantly enhance the effects of THC and CBD by modulating their actions.

    Terpenes are supposed to be responsible for the “entourage effect,” which is described as an orchestra of cannabinoids and terpenes working harmoniously. Even while they all contain comparable terpenes, the different percentages of a terpene blend can lead one strain to treat neuropathic pain another to help with insomnia. Yet, another to help with chronic fatigue. Regrettably, conventional medicine is not built to cope with numerous components in a single drug, and cannabis extracts include hundreds of them.

    sativa-

    A higher terpene level indicates higher quality products, more significant therapeutic potential, and a more pleasurable experience. Terpene content increases the excitement, tastiness, and potency of cannabis extracts. Their interest grew after Dr Ethan Russo’s work for GW Pharmaceuticals in 2011. While the cannabis community has thoroughly embedded this knowledge in the culture, it may not have reached its pinnacle in the broader pharmaceutical, medicinal cannabis formulations.

    One of the most intriguing aspects of cannabis terpene production is that the plant synthesizes terpenes early in its life then re-synthesized them into more complex terpenes. This understanding demonstrates why it is beneficial to keep plants in good health throughout their lifetimes.

    How to make essential oils in a perfect environment

    While the plant has the genetic code to make terpenes, they cannot be produced unless the requisite elements are present in the soil or other growing media. Growing media does include the appropriate N-P-K ratio, but it won’t get you very far.

    Beneficial bacteria, fungi, and microorganisms should be present in healthy soil. These biological components make the soil fruitful and carry out processes that convert raw waste elements into bioavailable plant nourishment. As a result, many farmers nowadays refer to “feeding the soil” rather than “feeding the plants.” Our guide on making your organic soil will help you learn what it takes to make a strong foundation of homemade soil.

    So, how can you ensure that your soil is thriving with the beneficial additives required to take cannabis’ fragrant characteristics to the next level?

    Lactobacillus Serum is a straightforward approach to manufacturing soil additives. It’s not easy, but inexpensive goes a long way and is entirely practical. A year’s supply can be made for less than £10.

    Plants are not the only ones who benefit from probiotics.

    If you take probiotic pills for your gut health, you’ve probably heard of this brand. Bacteria that live in your gastrointestinal system help keep you healthy in general. A little-known feature about Lactobacillus is that eating it increases the number of cannabinoid receptors in your gut.

    Those who often use canna-capsules or take drugs should ensure that they consume a sufficient amount of these helpful microorganisms. This could increase the potency of the cannabinoids you ingest. Wouldn’t it be great if your harvest could go further or be more effective? Fermented foods like sauerkraut, pickles, sourdough, and other healthy delights contain approximately 90% of the germs found in honey. Let’s look at how to create them for a fraction of the cost of what you’d get in a health food store.

    Lactobacilli, an anaerobic bacterium, are seen in Lactobacillus Acid Serum (LABS) (anaerobic). Numerous Lactobacillus strains can compost and decompose a wide range of materials. Because of this, they are a good way to replenish the soil’s nutritional levels.

    I’ll describe a method I was shown a few years ago.

    Ingredients

    Rice

    Water with minerals

    Milk

    Molasses

    marijuana-

    Equipment

    Bucket

    Pitcher

    String/elastic tape

    Syringe/pipette

    Towel for the kitchen

    jar/bottle made of glass

    1st step:

    Prepare a rice wash. This is relatively straightforward. Take a handful of rice and a glass of water. In the water, wash the rice. Drain the rice but save the water – that’s what you’re looking for. Because microbes thrive on carbs, we must set a trap. Cook the leftover rice for dinner later.

    Step two:

    In a glass trap, collect the bacteria. Fill a glass jar halfway with rice pudding wash. Use a clean cloth or a kitchen towel to cover it. It’s important that the jar’s sides are completely sealed. A rubber band or string is proper. This keeps the dirt out while allowing the bacteria in the air to enter the jar and start eating the starch. Spot the jar in a dry place with plenty of fresh air. Three layers will appear after a few days. A layer of foam on top (which you do not want). Microbes in liquid form at the centre (this is desirable). Sediment on the seafloor (this is also undesirable).

    Third step:

    Gather the liquid microorganisms. Take off the cloth. Aspirate the middle layer of liquid from the glass trap with a syringe. This will have a bit sour smell, which is acceptable. It signifies that it was successful. Make sure that you don’t disrupt the bottom sediment. Because you’ll have plenty to work with, it’s fine to leave some liquid in the jar.

    4th step:

    Mix in the liquid bacteria with the milk. Lactose in milk acts as a glucose source for lactobacilli. Close the bucket with a lid and set it aside for 5-7 days at a consistent temperature. This will give the serum adequate time to develop. The whey separates from the lactose during this procedure, leaving two layers. On top is a curd, and underneath is a liquid serum.

    5th step:

    Remove the bucket’s lid and carefully remove the curd layer from the top. It will most likely dissolve, so don’t be too concerned. After removing it, strain the residual serum with a cloth or an old t-shirt (make sure it is clean). Because this is the beginning of the cheese-making process, it will smell like cheese. You’re ready to go once your liquid has split and is clear of lumps. Hopefully, you are on your team’s compost at home and have composted the curds. It still has a high concentration of helpful microorganisms. If you have a dog, feed some of it to him. They adore it – they go crazy for it – and it’s beneficial to their intestinal health! God bless grass-fed animals.

    Sixth step:

    Use it as is or store it in a bottle for long-term use. At this point, you can store it in the refrigerator in a glass bottle or jar for up to a year without noticing any apparent degeneration. It will preserve for several years at room temperature if mixed in a 1:1 ratio with molasses. I would create this mixture at least once a year rather than rest for two years – it’s always better to keep these microorganisms fresh and protect the quality.

    How to Use LABS to Produce Terpenes

    This is strong stuff! You only need 1-3ml per 10l of water to inoculate the soil with Lactobacillus enough to boost soil biology.

    As little as 0.1ml per litre of water can be used as a foliar spray. If you use too much, your room will smell like a farm or a cheese factory for the following 24 to 48 hours.

    It’s fantastic to observe how more alive your plants appear after adding this old yet prolific bacteria. It’s difficult to put into words, yet they feel more alive.. Within a week to ten days, you should detect indicators that it’s working because the stems will become a little stickier, and if you sniff them with your fingers, you should sense an improvement in the aromatic intensity.

    It is not necessary to add it at each feeding. Inoculating the soil every two weeks is sufficient to avoid the colonisation of dangerous microorganisms.

    The post Make More Terpenes With This Recipe. appeared first on https://gqcentral.co.uk