Category: Cooking Tips

  • Measure Ingredients Without Tools: Simple Methods for Accuracy

    Measure Ingredients Without Tools: Simple Methods for Accuracy

    Elevate Your Culinary Expertise with Innovative Hand Measurement Techniques

    Become Proficient in Using Your Hands for Measuring Dry Ingredients

    Hands scooping flour and sugar in a rustic kitchen, measuring intuitively without cups.

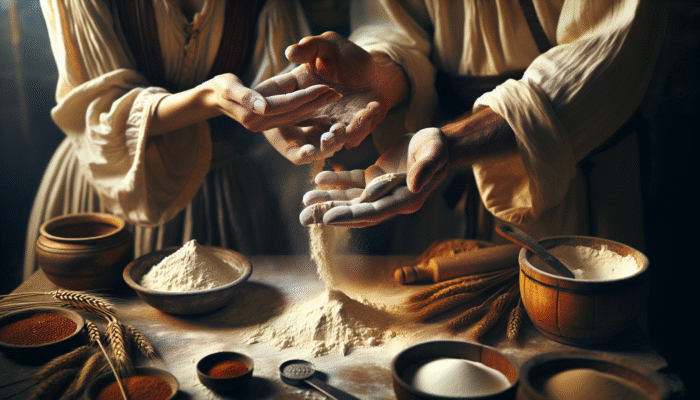
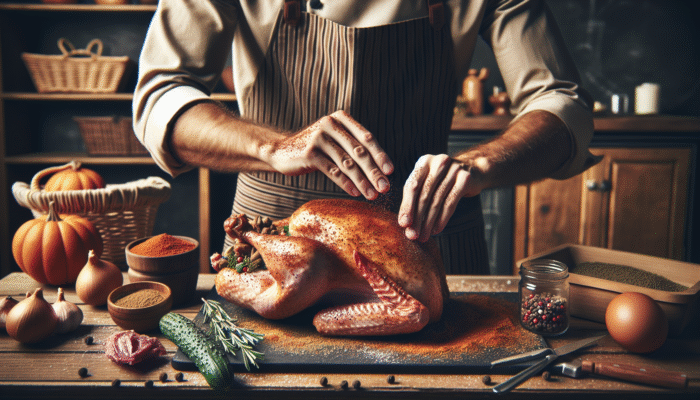
    Employing your hands as a tool for measuring dry ingredients is a time-honored practice that not only personalizes your cooking but also equips you with a straightforward and effective method for portioning. For instance, a handful of flour can be approximated to a cup, allowing for a more instinctive way to measure without relying on exact instruments. This technique becomes especially handy when you’re cooking in unfamiliar kitchens or traveling, where conventional measuring tools may not be accessible. By adopting this tactile method, you’ll find that cooking feels more approachable and enjoyable, empowering you to refine your culinary skills with both assurance and creativity.

    Picture yourself exploring a vibrant market in Marrakech, where merchants offer aromatic spices sold by the handful. Grabbing a handful of cumin or coriander not only enhances the flavors in your dishes, but also immerses you in the local cultural experience, transforming the cooking process into an exhilarating sensory journey. By mastering this uncomplicated measurement technique, you’ll develop a more sophisticated understanding of the diverse textures and weights of various ingredients, enriching your culinary knowledge in both cooking and baking.

    One of the most significant advantages of using your hands for measurement is the inherent versatility it allows, enabling you to modify quantities based on personal flavor preferences. Some individuals may prefer a generous handful for a bold dish, while others might opt for a more level scoop for a milder flavor profile. This flexibility encourages innovation in the kitchen, inviting you to experiment with an array of flavors and textures, which ultimately leads to culinary masterpieces that are more gratifying and tailored to your unique palate.

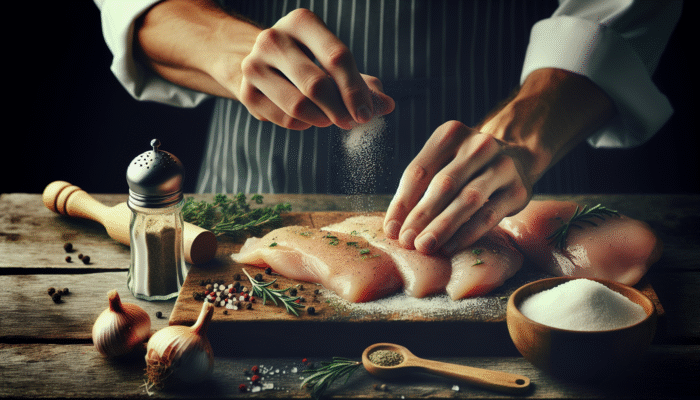
    Utilize Pinches for Precise Measurement of Small Ingredients

    The straightforward yet effective technique of pinching can be surprisingly precise for measuring small amounts of ingredients. When you pinch between your fingers, you typically create a measurement equivalent to about 1/16 of a teaspoon. This level of accuracy is invaluable for adding essential seasonings like salt, pepper, or herbs into your dishes, allowing you to achieve the perfect flavor balance in your culinary creations.

    Envision yourself in a cozy Italian kitchen, where just a pinch of oregano is all you need to elevate your pasta sauce to new heights. This traditional method empowers cooks to gauge their ingredients instinctively, rather than relying solely on unfamiliar measuring devices. It nurtures a deeper connection to flavors, encouraging you to let your taste buds lead you instead of strictly adhering to the recipe.

    Embracing the art of pinching also cultivates mindfulness during the cooking process. Each pinch represents a conscious choice, symbolizing a small yet significant moment of connection with the food you prepare. This intuitive method invites you to engage more deeply in the cooking experience, transforming everyday tasks into an expressive art form that reflects your unique culinary journey.

    Estimate Liquid Measurements Using Your Palm for Practicality

    Your palms can serve as an unexpectedly useful tool for estimating liquid measurements. When you pour liquids into your palm, you can approximate about half a cup, which is particularly handy when cooking without precise measuring instruments. This technique not only simplifies the measuring process but also fosters a direct and tactile relationship with the food you are preparing, enriching your culinary experience.

    Imagine delving into the vibrant culinary landscape of Thailand, where fresh coconut milk is often measured by hand. Pouring it into your palm allows you to experience its creamy texture while intuitively gauging the amount required. Engaging with your ingredients in this hands-on manner fosters a deeper appreciation for the dishes you create, reinforcing your connection to the rich culinary traditions across various cultures.

    Utilizing your palm for liquid measurements paves the way for adaptability in the kitchen. You can easily modify your measurements based on the specific dish you are crafting. If a recipe calls for a cup of broth, you might prefer it slightly richer or thinner. The capacity of your palm allows for these personal adjustments, making the cooking process feel more intimate and creatively fulfilling.

    Quickly Measure Lengths with Your Finger Segments for Precision

    A person using finger segments to measure and chop basil into uniform strips in a kitchen.

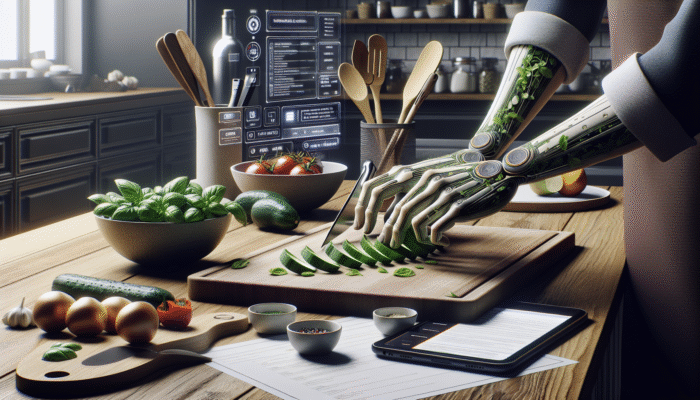
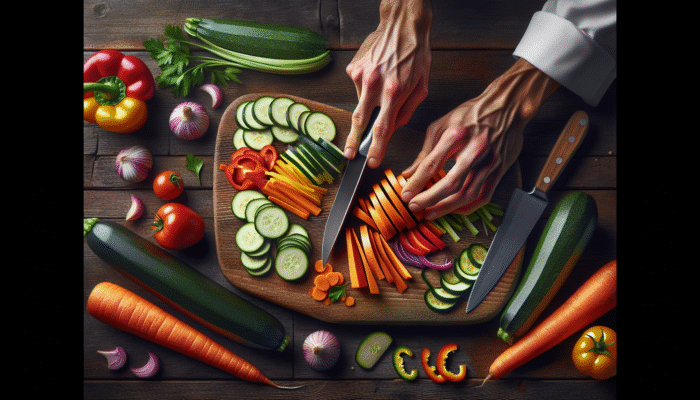
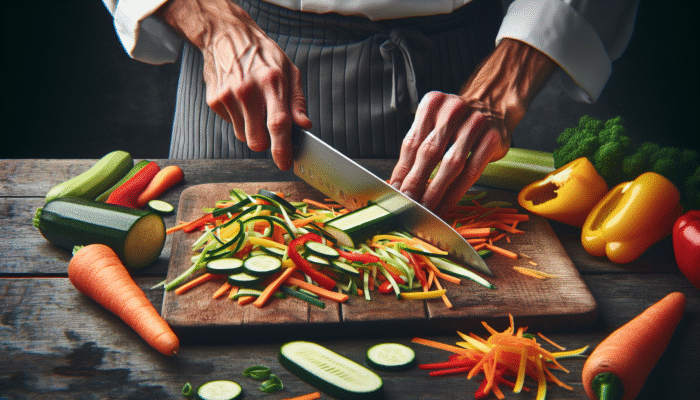
    When it comes to estimating lengths, the segments of your fingers can serve as a practical guide. Each finger segment measures roughly an inch long, making this method particularly beneficial for quick measurements in the kitchen. This technique is especially useful when determining ingredient sizes, such as how thick to slice vegetables or the length to cut herbs.

    Imagine you are preparing a dish that features fresh herbs, and you need to chop basil into precise strips. By measuring with your finger segments, you can ensure consistent sizes that enhance both the visual appeal and flavor profile of your dish. This technique not only simplifies your process but also integrates a tactile element that enriches your overall cooking experience.

    Measuring lengths using your fingers can broaden your culinary horizons. Whether you find yourself in a lively street market in Mexico or preparing a traditional dish in India, this method allows you to adjust your measurements to fit local ingredients and cooking styles. By moving away from standardized tools, you become more adaptable and attuned to the culinary world around you.

    Sharpen Your Visual Estimation Skills in the Kitchen

    Quickly Eyeball Ingredient Volumes for Efficient Measurements

    Visual estimation is an invaluable skill that transcends cultures and kitchens. By mastering the ability to eyeball the volume of various ingredients, you can evolve into a more instinctive cook. Everyday objects, such as a tennis ball or a shot glass, can serve as effective reference points for measuring ingredients like flour or sugar. This technique empowers you to quickly and efficiently gauge amounts without relying on traditional measuring cups.

    Reflect on the rich culinary traditions of India, where spices are frequently measured by eye. A seasoned cook might fill a small bowl with cumin seeds, using a shot glass as a mental reference. This method fosters creativity and adaptability in cooking, allowing you to make adjustments based on personal taste or the available ingredients.

    Mastering the art of visual estimation builds confidence in your culinary skills. Instead of feeling constrained by precise measurements, you can approach recipes with a newfound sense of freedom. This shift enhances the joy of cooking, transforming it from a mundane task into an engaging adventure in culinary creativity that resonates with your individual style.

    Assess Ingredient Quantities by Texture for Enhanced Cooking

    French pastry chef assessing dough texture in a bustling bakery, surrounded by flour and sugar.

    Texture is a vital yet often overlooked aspect of measuring ingredients that can significantly elevate your cooking. By learning to recognize various textures, you can gauge quantities with greater accuracy. For instance, a ‘heap’ of flour might indicate about a cup, just as a ‘scoop’ of sugar may approximate the amount you need for your recipe.

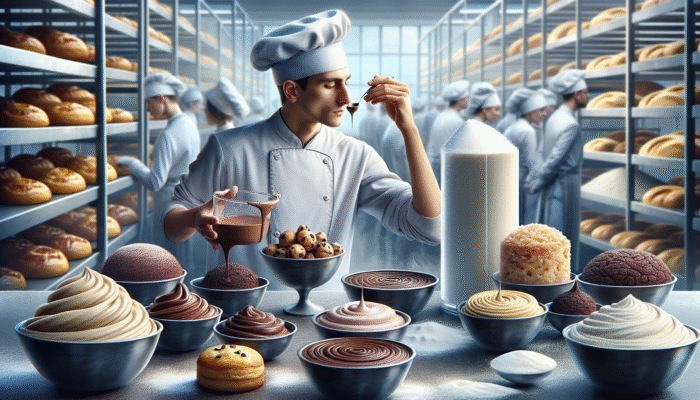
    This method fosters a profound connection with your ingredients. When you can distinguish between a dense chocolate batter and a light sponge mixture by touch, you begin to understand the subtleties of baking and cooking. Consider a French pastry chef assessing dough by feel; this skill takes time to develop but pays off in the quality of the final product, giving you the confidence to experiment with different textures and combinations in your dishes.

    Being able to judge by texture also enables you to make spontaneous adjustments. If a batter feels too thick, you can add a splash of milk without worrying about exact measurements. This adaptability can be the key difference between an average dish and a culinary masterpiece, allowing you the freedom to improvise and create delectable meals that reflect your unique preferences.

    Achieving Consistent Color in Your Culinary Creations

    Achieving color consistency is an essential skill in the kitchen, especially when blending ingredients. By matching the color of your mixed ingredients to a known reference, you can ensure a balanced and visually appealing final dish. For example, when making a pasta sauce, the vibrant red of tomatoes should be complemented by the green of herbs, resulting in a dish that is as visually striking as it is delicious.

    This technique encourages you to engage with your ingredients on a deeper level. Imagine preparing a vibrant salad, where the colors of the vegetables not only enhance visual appeal but also signify the nutritional value of the dish. By paying attention to color, you unlock a richer understanding of your ingredients and how they harmonize, enhancing your overall cooking experience.

    Moreover, color consistency can serve as a signal for flavor adjustments. If your stew appears too pale, it might require additional spices or herbs. This visual cue helps you develop your culinary intuition, making you more adept at modifying recipes based on what you see and taste, leading to more successful and satisfying dishes.

    Leverage Your Hand Size for Quick Ingredient Comparisons

    In the kitchen, your hands can be a reliable reference point for estimating ingredient amounts. By comparing ingredients to the size of your hand, you can quickly gauge portion sizes. For example, a handful of nuts typically equals about a quarter cup, while a fistful of leafy greens can equate to around two cups.

    This method is especially useful when preparing dishes that require a medley of ingredients. Imagine crafting a colorful stir-fry, where you need to gauge the right amount of vegetables without the hassle of measuring cups. By utilizing your hands as guides, you can create a dish that is visually appealing and balanced in flavor, all while enjoying the cooking process.

    Relying on hand sizes fosters a deeper understanding of portion control. As you become more attuned to the dimensions of your hands, you can make informed decisions about how much of each ingredient to incorporate. This awareness can lead to healthier eating habits and a more enjoyable culinary experience, allowing you to cook with confidence and creativity.

    Resourceful Household Items as Makeshift Measuring Tools

    Employ Spoons and Cups for Ingredient Measurement Efficiency

    Every kitchen is filled with a variety of items that can function as makeshift measuring tools. Standard spoons and cups can be particularly useful; for example, a tablespoon typically measures approximately 15ml. This method creates a sense of familiarity in your cooking, even when traditional measuring instruments are not readily available.

    In many cultures, cooking with non-standard measurements is a common practice. For instance, in a traditional South American kitchen, a spoon may serve as the primary measuring tool for spices and herbs. As you embrace this method, you’ll find that cooking becomes more intuitive and personal, fostering a deeper connection between you and the ingredients you utilize.

    Using household items for measuring also ignites creativity. You might find a distinctive cup that holds a specific amount or a cherished spoon that feels just right in your hand. This adaptability helps you connect with your cooking environment, allowing you to experiment and innovate in ways that strict recipes might not support, enhancing your overall culinary experience.

    Measure Liquids with Bottles and Jars for Greater Convenience

    Utilizing bottles and jars for measuring liquids can be an effective and practical approach. A standard water bottle generally contains about 500ml, making it an excellent reference for gauging larger quantities of liquid. This method streamlines the measuring process, especially when preparing beverages or sauces that require precise measurements.

    Imagine standing in a rustic kitchen in the French countryside, where a glass bottle of homemade olive oil serves as your measuring guide. By pouring it into your recipe, you not only measure accurately but also embrace the essence of local flavors and culinary traditions. This tactile experience adds a personal touch to your cooking, connecting you to the rich culinary heritage of diverse cultures.

    Furthermore, using bottles and jars can simplify the process of measuring ingredients for recipes that call for multiple liquids. Instead of juggling various measuring cups, you can utilize a single bottle to measure everything from water to broth. This efficiency enhances your kitchen workflow, allowing you to focus more on the creative aspects of cooking, making the process more enjoyable.

    Measuring Small Quantities with Coins and Small Objects for Versatility

    Coins can surprisingly serve as handy tools for measuring small amounts of ingredients. For instance, a nickel is approximately the size of a teaspoon, making it a convenient reference for gauging spices, baking powder, or even small amounts of liquid. This method proves particularly useful in situations where traditional measuring tools are unavailable, allowing you to maintain your cooking momentum.

    Consider the process of creating a delicate cake, where precision is essential, but you discover you don’t have a measuring spoon on hand. By using a coin, you can still achieve the right balance without sacrificing quality. This resourcefulness fosters adaptability in the kitchen, a valuable trait that can enhance your cooking skills and encourage innovative solutions.

    Incorporating small objects into your measuring repertoire encourages an inventive mindset. You can explore various coins or even small items like buttons or beads for unique measuring experiences. By embracing this approach, cooking becomes an adventure in creativity and flexibility, reinforcing the notion that limitations can lead to unexpected discoveries and delightful culinary surprises.

    Utilizing Rulers and Tape Measures for Precision in Your Cooking

    For accuracy, common household rulers or tape measures can serve as excellent tools. A standard ruler typically measures 30cm in length, allowing you to measure sizes accurately, whether slicing dough or assessing the dimensions of a cake. This technique is particularly beneficial when working with recipes that require specific presentations, ensuring your culinary creations are visually appealing.

    Consider the artful precision involved in crafting a layered cake, where each layer must be measured to fit seamlessly. By using a ruler, you can ensure that your layers are evenly sized, enhancing the overall aesthetic appeal of your creation. This attention to detail not only elevates your dishes but also builds your confidence as a cook, encouraging you to experiment with different shapes and designs.

    Relying on rulers and tape measures also opens the door to a new realm of culinary possibilities. You can experiment with different shapes and sizes, pushing the boundaries of traditional cooking. By integrating this method into your routine, you cultivate an appreciation for the art of cooking that transcends the mere act of preparing food, allowing for a more enriching and fulfilling culinary journey.

    Estimating Ingredient Weights with Everyday Objects

    Utilize Familiar Objects for Weight Estimation of Ingredients

    When estimating weight, comparing ingredients to common objects can provide valuable reference points. For instance, a stick of butter weighs about 113g, serving as a handy benchmark for measuring other ingredients. This method is particularly advantageous for those who prefer weight measurements in their cooking, simplifying the process and enhancing accuracy.

    Imagine preparing a rich, buttery pastry where precision is crucial. By using a stick of butter as your measuring guide, you can ensure the perfect balance between flavor and texture. This approach not only simplifies the measuring process but also instills confidence in your ability to create delectable dishes that impress your family and friends.

    Estimating weight using familiar objects is an engaging practice that nurtures creativity in the kitchen. It empowers you to develop a more intuitive understanding of ingredient weights, facilitating improvisation and adjustments in your recipes. This skill is especially valuable when experimenting with new flavors, encouraging you to adapt and explore with confidence.

    Feel the Weight of Ingredients for Intuitive Cooking Practices

    Another effective technique involves lifting ingredients to feel their weight. For instance, a pound feels similar to a can of soup, offering a practical way to gauge amounts without relying on precise measurements. This tactile approach to cooking enhances your connection with the ingredients as well as the overall cooking experience, making it more engaging and enjoyable.

    Picture yourself in a vibrant market, selecting fresh produce. By lifting a bag of flour or a container of nuts, you’re not merely measuring; you’re also engaging with the sensory aspects of cooking. This method cultivates a deeper understanding of the ingredients, encouraging you to appreciate their unique qualities and how they contribute to your dishes.

    Feeling the weight of ingredients also facilitates on-the-fly adjustments. If something seems too heavy or light, you can intuitively modify your recipe, leading to more personalized and satisfying dishes. This adaptability fosters confidence and encourages a playful spirit in the kitchen, enriching your overall cooking journey.

    Balancing Ingredients to Achieve Accurate Weight Estimates

    Balancing ingredients against one another is a practical method for estimating weight, particularly when dealing with multiple components. For example, a cup of flour typically weighs around 125g, allowing you to compare it to other ingredients in your recipe. This technique encourages active and adaptive engagement with measurements, fostering a more intuitive cooking experience.

    Envision preparing a hearty stew where you need to balance the richness of meats against the freshness of vegetables. By estimating the weight of each ingredient and adjusting accordingly, you can create a harmonious dish that delights the senses. This method fosters creativity and flexibility, enabling you to explore the nuances of cooking while developing your culinary skills.

    Balancing techniques also provide an opportunity to cultivate a deeper understanding of how ingredients interact. As you work with various weights and measurements, you’ll become increasingly attuned to the effects of each component on the overall dish. This awareness enhances your cooking skills and cultivates a connection to the culinary arts, allowing you to take your cooking to the next level.

    Achieve Precision in Measurements with a Kitchen Scale

    While tools may be scarce, a kitchen scale can provide precise measurements for those seeking accuracy. A digital scale, for instance, can measure to the nearest gram, making it an invaluable asset for bakers and cooks alike. This method is particularly useful for recipes that require exact ingredient ratios, ensuring that your dishes turn out perfectly every time.

    Imagine crafting a delicate soufflé, where precision is paramount. By using a scale to measure your flour, eggs, and other ingredients, you can ensure the perfect balance for achieving a light and airy texture. This level of accuracy can elevate your cooking, enabling you to create dishes that impress even the most discerning palates and showcase your culinary talents.

    Incorporating a scale into your cooking routine fosters discipline and consistency. As you weigh ingredients, you develop a deeper understanding of their proportions and interactions. This knowledge empowers you to experiment confidently, leading to a more fulfilling culinary experience that encourages innovation and creativity in the kitchen.

    Creative Techniques for Measuring Ingredients by Counting

    Count Small Items for Effortless Ingredient Measurements

    Counting small items can be an effective approach for measuring ingredients, particularly when dealing with items like nuts or berries. A handful might equate to approximately 10-15 pieces, providing a straightforward way to gauge amounts without the need for precise measurements. This method not only simplifies the cooking process but also enhances your engagement with the ingredients.

    Imagine preparing a refreshing fruit salad, where the addition of fresh berries enhances both flavor and presentation. By counting the berries as you add them, you can ensure a balanced mix without complicating the process. This technique fosters simplicity and ease in cooking, making the experience particularly enjoyable and stress-free.

    Counting small items also encourages mindfulness in the kitchen. Each piece becomes a deliberate choice, allowing you to forge a deeper connection with your cooking. This practice can be especially beneficial when working with children, as it transforms measuring into a fun and interactive experience that nurtures a love for cooking and creativity in the kitchen.

    Estimate Larger Items by Size for Quick Reference

    Estimating the number of larger items can also be an effective strategy. For instance, three medium apples typically weigh about a pound, offering a quick reference for gauging amounts without needing a scale. This method simplifies the measuring process and encourages you to engage more closely with your ingredients, enhancing your overall cooking experience.

    Consider preparing a hearty apple pie, where the balance of flavors is essential. By estimating the number of apples needed based on their size, you can create a dish that is both delicious and visually appealing. This approach encourages creativity, allowing you to adapt your recipes based on what’s available in your local market, leading to unique and satisfying culinary results.

    Estimating by size also fosters a deeper understanding of ingredient weights and measurements. The more you work with different fruits and vegetables, the more attuned you become to their characteristics and how they contribute to your dishes. This intuition can significantly enhance your cooking and lead to more satisfying results that showcase your culinary skills.

    Utilize Standard Units for Reliable Ingredient Measurements

    Employing standard units, like a ‘dozen’ for eggs, can provide a dependable method for measuring ingredients. A dozen eggs, for instance, typically weighs around 450g, giving you a clear reference for recipes that require precise measurements. This technique simplifies the measuring process and ensures consistency in your cooking, allowing you to focus on the creative aspects of your dishes.

    Envision preparing a classic quiche, where the number of eggs is crucial for achieving the desired texture. By using the standard unit of a dozen, you can easily determine how many eggs to incorporate, ensuring a balanced and flavorful dish. This method fosters a sense of familiarity and confidence in the kitchen, making your cooking experience more enjoyable and fulfilling.

    Incorporating standard units into your measuring toolkit also promotes organization and efficiency. By relying on familiar measurements, you can streamline your cooking process, allowing you to focus on the creative aspects of your dishes. This adaptability can lead to more enjoyable and fulfilling culinary experiences, enhancing your passion for cooking.

    Specialized Techniques for Baking Success

    Estimate Flour and Sugar for Perfect Baking Outcomes

    When it comes to baking, estimating flour and sugar using visual cues can be an invaluable skill. A cup of flour, for instance, is roughly the size of a fist, while a cup of sugar might appear as a heaping mound. This method allows you to gauge amounts without relying on precise measurements, cultivating a sense of intuition in your baking endeavors.

    Imagine standing in a warm kitchen, preparing a batch of cookies. As you scoop flour into your mixing bowl, you can trust the size of your fist as a reliable reference point, ensuring the appropriate balance of dry ingredients. This tactile approach not only simplifies the process but also nurtures a deeper connection to the ingredients you are using, making baking more enjoyable and rewarding.

    Estimating flour and sugar also encourages creativity in your baking. If you prefer a sweeter cookie, you can adjust the sugar quantity according to your taste. This flexibility allows you to experiment with flavors and textures, leading to delightful variations on classic recipes that reflect your unique culinary style and preferences.

    Accurate Measurement of Butter and Fats for Optimal Baking Results

    Butter is a crucial ingredient in numerous baked goods, and measuring it accurately is vital for achieving the desired texture. Common objects can serve as helpful references for measuring butter; a stick of butter, for example, is approximately half a cup. This method streamlines the measuring process, allowing you to concentrate on the creative aspects of baking.

    Visualize yourself crafting a rich, buttery cake where every ingredient plays a vital role. By using a stick of butter as your measuring guide, you can ensure the right balance of fat, resulting in an unforgettable texture and flavor. This approach fosters confidence in your baking skills, empowering you to explore new recipes and techniques with ease and enthusiasm.

    Utilizing common objects for measuring butter also encourages resourcefulness. If you find yourself without measuring cups, you can rely on the familiar shapes of butter sticks to gauge your amounts. This adaptability can transform your baking experience, making it more enjoyable and engaging, ultimately leading to greater culinary satisfaction and creativity in the kitchen.

    Estimating Leavening Agents for Perfect Rise in Baked Goods

    When measuring leavening agents like baking powder and baking soda, estimation can be equally effective. A teaspoon, for instance, is roughly the size of a bottle cap, providing a straightforward reference for gauging quantities. This technique simplifies the measuring process, allowing you to focus on the overall baking experience and the joy of creating delicious treats.

    Consider the importance of baking powder in producing light and fluffy baked goods. By using a familiar object as a reference, you can ensure the right balance of leavening agents, which is crucial for successful results. This flexibility nurtures creativity, enabling you to adapt recipes based on your preferences and desired outcomes, enriching your baking journey.

    Estimating leavening agents also promotes a deeper understanding of their roles in baking. As you experiment with various recipes, you’ll become more attuned to how these agents interact with other ingredients, ultimately enhancing your baking skills and boosting your confidence in the kitchen, allowing you to create exceptional baked goods.

    Cooking Liquids and Sauces with Precision and Creativity

    Estimate Broths and Stocks with Common Containers

    When measuring broths and stocks, common containers can serve as effective measuring tools. A standard mug typically holds around 250ml, making it a reliable reference for gauging liquid amounts. This method simplifies the measuring process, particularly when preparing soups or sauces that require precision and balance in flavors.

    Imagine preparing a hearty chicken soup, where the balance of flavors plays a crucial role. By using a mug as your measuring guide, you can ensure the right amount of broth, resulting in a dish that is both nourishing and satisfying. This technique fosters creativity, allowing you to adjust the flavors according to your personal preferences, enhancing your overall culinary experience.

    Utilizing common containers for measuring broths also encourages resourcefulness in your culinary adventures. If you find yourself without measuring cups, you can rely on familiar objects to gauge your ingredients. This adaptability not only simplifies the process but also enhances your overall cooking experience, making it more enjoyable and fulfilling.

    Common Questions About Measuring Ingredients Effectively

    What are the Most Effective Methods for Measuring Ingredients Without Tools?

    Utilizing your hands, visual estimation, and everyday household items can effectively measure ingredients without traditional tools. Techniques like grabbing a handful or employing spoons and cups can greatly simplify the process, enhancing your cooking experience.

    Can I Accurately Measure Spices Without Specific Tools?

    Yes, you can accurately measure spices by pinching them between your fingers or by utilizing common items like coins for reference. This method fosters creativity and flexibility in your cooking, allowing for personalized flavor profiles.

    How Can I Estimate Liquid Measurements Using My Hands?

    You can estimate liquid measurements by pouring into your palm, which typically holds about half a cup. This tactile method simplifies cooking without precise tools, making the process more intuitive and enjoyable.

    Is It Feasible to Bake Without Precise Measurements?

    Absolutely! Estimating ingredients by hand sizes, visual cues, or familiar objects can lead to successful baking outcomes. This approach nurtures creativity and personalisation in your recipes, enhancing your culinary experience.

    How Can I Measure Ingredients Effectively While Traveling?

    When traveling, utilize your hands, visual references, and everyday household items to measure ingredients. This practical approach allows for adaptability in varied cooking environments, making it easier to create delicious meals on the go.

    What is the Significance of Estimating by Size in Cooking?

    Estimating by size helps in gauging ingredient proportions quickly and intuitively. It adds flexibility to cooking and encourages creativity, allowing for personalized dishes that reflect your unique style and preferences.

    How Can I Ensure Consistency When Measuring Ingredients by Eye?

    To ensure consistency, establish reference points or vehicles (like a cup or ball) for common measurements. This technique builds confidence and accuracy in your cooking, making it easier to replicate successful dishes.

    Are There Any Drawbacks to Measuring Without Tools?

    While measuring without tools encourages flexibility and creativity, it may lead to inconsistent results for precise recipes. Understanding your ingredients and their characteristics can help mitigate this risk and improve your outcomes.

    Can I Teach My Children to Measure Ingredients Effectively Without Tools?

    Yes, teaching children to measure ingredients without tools can be a fun and educational experience. Use hands, visuals, and counting methods to engage their creativity and interest in the kitchen, fostering a love for cooking.

    What Are Some Unique Cultural Practices for Measuring Without Tools?

    Various cultures employ distinctive methods for measuring ingredients, such as using palmfuls, handfuls, or traditional vessels. Embracing these practices can enrich your culinary experience and broaden your cooking skills, enhancing your appreciation for global cuisines.

    Join Our Community on Facebook!

    The post How to Measure Ingredients Without Tools: Simple Techniques appeared first on Cooking Gods.

    The Article Measure Ingredients Without Tools: Easy Techniques You Can Use Was Found On https://limitsofstrategy.com

  • Argentine Chimichurri Sauce: Your Essential Recipe Guide

    Argentine Chimichurri Sauce: Your Essential Recipe Guide

    Essential Fresh Herbs for Crafting Authentic Argentine Chimichurri Sauce

    Unlocking Unmatched Flavors with Vibrant Fresh Herbs

    How to Make an Argentine Chimichurri Sauce: Argentine chimichurri sauce with fresh, organic herbs: parsley, oregano, cilantro from a lush garden.

    Creating an authentic Argentine chimichurri sauce hinges on the inclusion of fresh herbs, which serve as the vibrant foundation of this time-honored condiment. The perfect blend of parsley, oregano, and cilantro is key to achieving the sauce’s signature flavor profile. Parsley delivers a fresh, grassy note, while the aromatic oregano introduces a rich, slightly peppery complexity. Meanwhile, cilantro adds a refreshing citrus undertone that enhances the overall tasting experience. Choosing organic herbs notably elevates the sauce’s flavor, particularly if sourced from your own garden or local farmers’ markets, ensuring superior quality while supporting sustainable agricultural practices that benefit both communities and the environment.

    To guarantee that your chimichurri sauce is bursting with aromatic goodness, selecting freshly harvested herbs is paramount. When you unwrap your freshly picked herbs, their aroma should be potent and invigorating. While dried alternatives can be used in a pinch, they often lack the robust flavor profile of their fresh counterparts. For a creative twist, consider blending both dried and fresh herbs in your preparation; this method can yield a unique flavor profile while honoring the essence of traditional chimichurri.

    Enhancing Flavor with Garlic and Vinegar for a Perfect Blend

    The bold flavors of minced garlic combined with the zesty brightness of red wine vinegar create a dynamic and flavorful base that is essential for crafting authentic Argentine chimichurri sauce. Garlic not only enhances the sauce’s taste but also functions as a health powerhouse, rich in antioxidants and renowned for its anti-inflammatory properties. To unlock its full potential, chop or mince the garlic just before adding it to the sauce; this technique releases its potent oils, ensuring that its robust aroma thoroughly infuses the chimichurri.

    Among vinegars, red wine vinegar is particularly noteworthy due to its sharp yet subtly sweet acidity, which beautifully balances the oil and herbs. Its tanginess cuts through the richness of the olive oil, creating a harmonious blend that tantalizes the palate. Feel free to experiment with different varieties of vinegar, such as apple cider vinegar or white wine vinegar, to create distinctive variations of your chimichurri. Each type will alter the flavor profile, providing endless opportunities to customize the sauce to your liking.

    Choosing Premium Olive Oil and Spices for Flavor Enhancement

    The selection of olive oil is crucial when crafting authentic Argentine chimichurri sauce. Opting for high-quality extra virgin olive oil not only adds a silky texture but also enriches the sauce with its fruity notes and peppery finish. Begin by gently drizzling the olive oil into your mixture while stirring, which helps emulsify the sauce, creating a creamy consistency that adheres beautifully to grilled meats and vegetables.

    Salt plays a vital role in elevating all the existing flavors in the mixture. Choose sea salt or kosher salt for a more nuanced taste experience. Additionally, red pepper flakes offer an exciting kick, transforming your chimichurri into a versatile condiment that can enhance virtually any dish. Adjust the amount of red pepper flakes according to your preferred spice level; some may prefer a gentle warmth, while others might favor a more intense heat. The beauty of chimichurri lies in its adaptability, allowing you to fine-tune the spices to achieve your ideal flavor profile.

    Infusing Citrus Juice for a Bright Flavor Enhancement

    Incorporating freshly squeezed lemon or lime juice acts as a secret weapon in crafting authentic Argentine chimichurri sauce. This citrus infusion not only enhances the freshness of the herbs but also perfectly balances the richness of the olive oil. The natural acidity from the citrus cuts through the marinade, making it an excellent accompaniment to grilled meats or roasted vegetables. For optimal flavor, always opt for freshly squeezed juice, as bottled varieties often lack that vibrant zing.

    Moreover, the addition of citrus not only brightens the sauce but also provides additional health benefits. Rich in vitamin C, it can bolster your immune system and acts as a powerful antioxidant. If you’re feeling adventurous, consider experimenting with other citrus fruits, such as oranges or grapefruits, to add a new dimension to your chimichurri. Each variation can provide a unique taste experience, showcasing the versatility of this classic sauce.

    Mastering Techniques for Preparing Fresh Herbs in Chimichurri

    Thoroughly Washing and Drying Fresh Herbs for Optimal Flavor

    Properly preparing your herbs is essential when crafting authentic Argentine chimichurri sauce. Begin by thoroughly washing your herbs under cold running water to eliminate dirt, pesticides, and any potential insects. Pay particular attention to the crevices of the leaves, where tiny particles might hide. After washing, gently shake off any excess water and use a clean kitchen towel or paper towels to pat the herbs dry. This step is crucial, as wet herbs can dilute your sauce, resulting in a watery and less flavorful outcome.

    To achieve optimal freshness, consider using a salad spinner to effectively remove moisture. This handy tool speeds up the drying process while preserving your herbs’ integrity and freshness. Drier herbs will absorb oils and vinegar more effectively, helping to maintain the final consistency of your chimichurri sauce. Investing time in this initial preparation step will significantly enhance the flavor and quality of your final product.

    Perfecting Herb Chopping Techniques to Maximize Flavor

    When it comes to chopping herbs for crafting authentic Argentine chimichurri sauce, your technique is critical. Finely chopping herbs releases essential oils, which enhances their flavors and aromas. Start by stacking the leaves neatly, rolling them tightly, and slicing them into thin ribbons; this technique is known as chiffonade. After this, rotate the pile and chop in the opposite direction to create finely minced herbs.

    Utilizing a sharp knife is essential for achieving clean cuts, which prevents bruising and maintains the herbs’ vibrant appearance. If you prefer a more rustic texture, don’t hesitate to leave the herbs coarser. The key is to ensure that the herbs are evenly distributed throughout the sauce, allowing their flavor to permeate every bite. If preparing a large batch, feel free to use a food processor, but be cautious not to over-process to avoid a mushy consistency.

    Precision in Measuring Ingredients for Optimal Flavor Balance

    Achieving the perfect balance in crafting authentic Argentine chimichurri sauce depends on accurate measurements. The right ratio of herbs, garlic, oil, and vinegar can elevate your sauce from ordinary to extraordinary. For greater precision, consider using a kitchen scale or measuring cups when measuring your ingredients. This practice is particularly important if you’re experimenting with unique variations.

    Keep in mind that personal taste plays a significant role in the outcome. Some may prefer a herb-forward chimichurri, while others might favor a sharper, vinegar-heavy version. Start with the basic recipe and adjust according to your preferences. Documenting your ratios for future reference will allow you to consistently recreate your ideal chimichurri sauce.

    Sorting and Selecting the Freshest Herbs for Best Results

    The selection of the freshest herbs is paramount when crafting authentic Argentine chimichurri sauce. Whether you are harvesting from your garden or purchasing from a store, look for vibrant colors and avoid any herbs displaying signs of wilting or brown edges. Fresh herbs should feel crisp and firm when touched, rather than limp or soft. If you’re at a farmer’s market, don’t hesitate to ask the vendor about their harvesting methods and the freshness of their herbs, as they are often eager to share this information.

    While sorting through your herbs, be attentive to removing any discolored leaves. Even a few wilted or damaged herbs can negatively impact the flavor of your sauce. Only utilize the tender leaves and stems for your chimichurri, as the tougher, woodier stems can impart a bitter taste. Aim for a clean, fresh base that will shine in your final dish.

    Storing Herbs for Maximum Freshness and Flavor

    To maintain the freshness of your herbs for crafting authentic Argentine chimichurri sauce, employing proper storage techniques is essential. Wrap the herbs in a damp paper towel and place them in an airtight container to significantly extend their shelf life. This method mimics the conditions found in a garden, maintaining balanced moisture levels and preventing wilting.

    If you aren’t ready to prepare your chimichurri immediately, think about submerging the herb stems in a jar of water and loosely covering them with a plastic bag. This technique helps keep the herbs fresh for an extended duration, allowing you to prepare your sauce whenever it suits you. Should you notice any signs of spoilage, promptly remove those herbs to prevent them from affecting the others.

    Mixing the Base for Your Flavorful Chimichurri Sauce

    Combining Garlic and Vinegar for a Flavorful Foundation

    The first step in mixing your chimichurri base involves combining minced garlic with red wine vinegar to form a fragrant and flavorful foundation for crafting authentic Argentine chimichurri sauce. Start by mincing several cloves of garlic; the fresher the garlic, the more intense the flavor. As you mince, the cellular structure of the garlic breaks down, allowing its pungent oils to escape and infuse the vinegar.

    After mincing, measure out your red wine vinegar—the acidity of this ingredient is vital. It not only adds tanginess but also helps balance the richness of the olive oil that will be added later. Mix the garlic and vinegar in a bowl, allowing the vinegar to slightly mellow the sharpness of the garlic. Let this mixture sit for a few minutes to enable the flavors to meld before adding the remaining ingredients. This crucial step can enhance the depth of your chimichurri, ensuring that each bite is packed with flavor.

    Incorporating Fresh Herbs into the Flavor Base Mixture

    Once you’ve blended the garlic and vinegar, it’s time to fold in the fresh herbs that are essential for crafting authentic Argentine chimichurri sauce. Stir in your finely chopped parsley, oregano, and cilantro, ensuring that the herbs are evenly distributed throughout the mixture. The act of mixing is just as important as the ingredients themselves; vigorous stirring helps release essential oils from the herbs, intensifying the overall flavor profile.

    As you mix, take a moment to enjoy the vibrant colors and aromatic scents emanating from the bowl. This is where the magic truly begins. The herbs will start to absorb the tangy garlic-vinegar mixture, creating a fragrant base that lays the groundwork for the final ingredients. If you encounter any large clumps of herbs, break them apart to maintain a consistent texture throughout the sauce.

    Allowing the Mixture to Rest for Enhanced Flavor Development

    Allowing the mixture to rest is a vital step in crafting authentic Argentine chimichurri sauce. This waiting period enables the flavors to meld, resulting in a more harmonious sauce. Cover the bowl with plastic wrap or a lid and let it sit at room temperature for around 30 minutes. If you have the luxury of time, consider refrigerating the mixture for an hour or even overnight; this extended resting period will deepen the flavors further.

    During this resting phase, the vinegar continues to infuse into the herbs and garlic, softening harsh edges and allowing for a well-balanced flavor profile. You may even notice the color of the chimichurri intensifying as the natural oils and essences combine. This crucial step should not be overlooked, as it significantly elevates the overall taste and complexity of your chimichurri sauce.

    Final Steps to Perfect Your Chimichurri Sauce

    Incorporating Olive Oil for a Cohesive and Luscious Mixture

    The final touch in crafting authentic Argentine chimichurri sauce is the addition of olive oil, which unites all the ingredients into a luscious, cohesive blend. Begin by slowly drizzling high-quality extra-virgin olive oil into the mixture while continuously stirring. This process facilitates the emulsification of the sauce, creating a smooth texture that allows the flavors to cling beautifully to your grilled meats and vegetables.

    Choosing the right olive oil is crucial; opt for one that is robust and carries fruity notes. The oil should complement the other ingredients without overpowering them. As you pour in the olive oil, pay close attention to the consistency and richness of the sauce. If it appears too thick, add a splash more vinegar or a touch of water to achieve your desired consistency.

    Take your time with this step; ensuring that the sauce is well combined is essential. The desired result should be a glossy, vibrant sauce that balances richness with acidity, making it an ideal companion for a variety of dishes.

    Seasoning for the Perfect Taste Balance in Your Chimichurri

    Now that the base is ready, it’s time to fine-tune your chimichurri sauce through careful seasoning. Start by adding salt to enhance the overall flavor profile in crafting authentic Argentine chimichurri sauce. Use sea salt or kosher salt for a more nuanced taste, gradually adjusting the amount until you reach your desired saltiness. Remember, you can always add more, but it can be challenging to remove it!

    Next, introduce red pepper flakes to incorporate heat into the sauce. Adjust the quantity based on your spice preference—some may appreciate a subtle warmth, while others might crave a fiery kick. Mix thoroughly and taste as you go, ensuring that the flavors meld together seamlessly. This step is critical, as proper seasoning can elevate your chimichurri from a basic condiment to an extraordinary sauce that enhances any dish.

    Final Stir and Taste Test for Ultimate Perfection

    The last step in crafting authentic Argentine chimichurri sauce is to give the mixture a final stir and conduct a taste test. This is your chance to make any last-minute adjustments. Use a clean spoon to taste the sauce, paying close attention to the balance of flavors. Does it need more acidity? More heat? Perhaps a touch more salt?

    If everything tastes harmonious, congratulations! You’ve successfully created a delicious chimichurri sauce. If you’re not quite satisfied, don’t hesitate to tweak the ingredients slightly. Remember, the beauty of chimichurri lies in its adaptability, allowing you to create a sauce that perfectly suits your unique tastes and preferences. Once you’re delighted with the flavor, it’s time to serve or store your delightful creation.

    Exploring Creative Variations of Chimichurri Sauce

    Elevating Chimichurri with Citrus Infusions for New Flavors

    Elevating your chimichurri sauce with citrus is an exciting way to enhance the original recipe. Adding a squeeze of fresh lemon or lime juice not only brightens the flavors but also infuses a refreshing twist. Citrus can cut through the richness of the olive oil and amplify the herbaceous notes, creating a more complex and vibrant chimichurri.

    You can also incorporate citrus zest for an extra layer of flavor. The oils in the zest can enhance the aroma and essence of your chimichurri, providing a fragrant backdrop. When adding citrus, start with a small amount and gradually increase it to achieve the desired brightness without overwhelming the sauce. This flexibility allows you to cater to various palates, leading to unique and exciting flavor combinations.

    Incorporating Alternative Herbs for Unique Flavor Experiences

    While parsley, oregano, and cilantro are traditional staples in crafting authentic Argentine chimichurri sauce, don’t hesitate to unleash your creativity by including other herbs. Basil, mint, or thyme can introduce entirely new flavor profiles that enhance the overall experience. Basil contributes a sweet, peppery flavor, while mint offers a refreshing, cool note that can make your chimichurri even more invigorating.

    When adding additional herbs, consider the balance of flavors and how they interact with the original ingredients. It may be wise to start with small amounts of the new herbs and adjust according to your taste preferences. This experimentation will allow you to craft a chimichurri sauce that reflects your unique palate while maintaining its traditional roots.

    Adjusting Heat Levels to Suit Your Personal Spice Preferences

    The beauty of crafting authentic Argentine chimichurri sauce lies in its adaptability to personal preferences, particularly regarding heat levels. While red pepper flakes are the classic choice for adding heat, you can also experiment with fresh chili peppers or hot sauces to achieve your desired spice level.

    If you prefer a milder chimichurri, start with fewer red pepper flakes and taste as you go. You can always increase the amount if you’re seeking a bolder kick. Conversely, for those who love heat, feel free to crank it up! Just remember to balance the heat with the other flavors; the goal is to create a sauce that is full-bodied and harmonious, rather than overwhelmingly spicy.

    Storage Techniques to Preserve Your Chimichurri Sauce

    Essential Refrigeration Tips for Extended Freshness of Your Sauce

    Properly storing chimichurri is crucial for maintaining its flavor and freshness. To preserve your delicious creation, store the sauce in an airtight container in the refrigerator. This will help prevent oxidation and keep the ingredients vibrant for a longer duration. It’s essential to ensure that the container is sealed tightly, as exposure to air can lead to spoilage.

    Chimichurri can typically be stored in the refrigerator for up to one week. However, if you notice any signs of spoilage, such as changes in color, smell, or texture, discard the sauce immediately. When it comes to food safety, it’s always better to err on the side of caution.

    Freezing Chimichurri for Extended Shelf Life and Future Use

    For longer storage options, consider freezing your chimichurri sauce. This is an excellent choice if you’ve prepared a large batch or want to get a head start on your culinary creations. The best method is to use ice cube trays, pouring the chimichurri into each compartment before freezing. Once solid, transfer the cubes to a resealable freezer bag, labeling it with the date.

    By freezing in this manner, you can easily thaw individual portions as needed, allowing you to enjoy fresh chimichurri at any time. Keep in mind that while freezing may slightly alter the sauce’s texture, the flavor should remain intact. Use frozen chimichurri within three months for the best quality.

    Understanding the Shelf Life of Your Chimichurri Sauce for Optimal Usage

    Understanding the shelf life of your chimichurri sauce is vital for maximizing its freshness when crafting authentic Argentine chimichurri sauce. When stored properly in the fridge, it can last between five and seven days, depending on the freshness of the ingredients used. Keeping your chimichurri in an airtight container is essential; this will help maintain the vibrant colors and flavors of the herbs and spices.

    If you notice any changes in the sauce’s aroma, color, or texture, it’s critical to err on the side of caution and discard it. For frozen chimichurri, use it within three months for optimal freshness. After this period, although it may still be safe to consume, the quality will start to decline, affecting the overall flavor and texture of your cherished sauce.

    Creative Serving Suggestions to Enhance Your Chimichurri Sauce Experience

    Utilizing Chimichurri as a Flavorful Marinade for Meats

    Using chimichurri as a marinade is one of the most popular and effective ways to enjoy this vibrant sauce. The harmonious blend of herbs, garlic, and vinegar penetrates meats beautifully, infusing them with rich flavors. When marinating, aim for a minimum of two hours, but overnight is optimal for maximum absorption. This method works exceptionally well with beef, chicken, and even fish, making it a versatile marinade suitable for a wide range of proteins.

    To enhance the depth of flavor, consider adding a splash of soy sauce or Worcestershire sauce to your chimichurri marinade. This addition can round out the flavor profile and elevate the umami notes, resulting in an unforgettable taste experience. Be sure to reserve some chimichurri for serving alongside the grilled meats, as it adds a fresh element when the dishes are plated.

    Chimichurri as a Versatile Condiment for Various Dishes

    Chimichurri shines when used as a condiment, bringing life to grilled dishes and roasted vegetables. Drizzle it over steak, grilled chicken, or even roasted vegetables to enhance the dining experience. Its fresh, herbaceous notes contrast beautifully with the smokiness of grilled foods, enriching the overall flavor profile.

    Beyond meats, you can also use chimichurri on sandwiches or wraps for a zesty kick. Add a generous spoonful to your next barbecue or picnic spread, allowing guests to customize their dishes. It pairs beautifully with a variety of cuisines, making it a must-have condiment that can be utilized in countless culinary applications.

    Transforming Simple Salads with Chimichurri Dressing

    Chimichurri also makes an excellent salad dressing, providing a zesty and flavorful alternative to traditional vinaigrettes. Drizzle it over your favorite greens, creating an explosion of flavor that transforms a basic salad into a culinary delight. Consider pairing it with fresh tomatoes, cucumbers, or grilled vegetables to craft a refreshing side dish that complements any meal.

    If you prefer a creamier dressing, think about mixing chimichurri with Greek yogurt or sour cream for a rich and tangy alternative. This combination maintains the vibrant flavors of the chimichurri while adding a creamy texture, perfect for drizzling over hearty salads or as a dip for fresh vegetables.

    Exploring the Health Benefits of Chimichurri Sauce

    Boosting Immunity with Nutrient-Rich Ingredients

    One of the standout health benefits of crafting authentic Argentine chimichurri sauce lies in its immune-boosting properties. Fresh herbs like parsley and cilantro are loaded with vitamins and antioxidants, which help combat illnesses and bolster the body’s natural defenses. Garlic, another key ingredient, is well-known for its immune-enhancing properties, making this sauce a powerhouse for health.

    Incorporating chimichurri into your meals can effortlessly elevate your diet, providing not just flavor but also nutritional benefits. Regular consumption of herbs and garlic has been associated with improved health outcomes, including lower blood pressure and enhanced cardiovascular health.

    Promoting Digestive Health with Natural Ingredients

    Another significant advantage of chimichurri is its potential to promote digestive health. The combination of fresh herbs, garlic, and olive oil can aid digestion and improve gut health. Olive oil is a healthy fat that supports nutrient absorption, while the fresh herbs offer dietary fiber, which is essential for a well-functioning digestive system.

    The vinegar in chimichurri can also stimulate the production of digestive enzymes, aiding in nutrient absorption and enhancing overall digestive function. Adding chimichurri to your meals is a simple way to incorporate digestive health benefits into your diet, promoting long-term wellness.

    Supporting Heart Health Through Healthy Ingredients

    Chimichurri sauce offers a range of benefits that support heart health. The olive oil used in this recipe is a key ingredient, being rich in monounsaturated fats that can help lower bad cholesterol levels and reduce the risk of heart disease. Additionally, the antioxidants found in herbs like parsley and oregano contribute to cardiovascular health by reducing inflammation and supporting healthy blood circulation.

    Garlic, another essential ingredient, is known for its numerous heart health benefits, including lowering blood pressure and improving cholesterol levels. By incorporating chimichurri into your meals, you’re not only enhancing flavor but also taking proactive steps toward better heart health.

    Frequently Asked Questions About Chimichurri Sauce

    What exactly is chimichurri sauce?

    Chimichurri sauce is a vibrant, herby condiment that hails from Argentina. It is primarily made with parsley, garlic, vinegar, and olive oil, and is commonly used as a marinade or topping for grilled meats.

    How long can chimichurri last when stored in the fridge?

    When stored properly in an airtight container, chimichurri can last up to one week in the refrigerator. Always check for signs of spoilage before use.

    Can I substitute dried herbs for fresh ones in chimichurri?

    Yes, while fresh herbs are ideal for flavor and aroma, dried herbs can be used as substitutes. Just remember that dried herbs are more concentrated, so use them sparingly.

    Is it possible to make chimichurri ahead of time?

    Absolutely! Chimichurri can be prepared ahead of time and stored in the fridge. Allowing it to sit for a few hours or overnight can enhance the flavors as they meld together.

    Which dishes pair well with chimichurri sauce?

    Chimichurri pairs beautifully with grilled meats, roasted vegetables, sandwiches, and salads. Its versatility makes it a fantastic condiment for a wide array of cuisines.

    Is chimichurri sauce considered spicy?

    The spiciness of chimichurri depends on the amount of red pepper flakes or chili peppers used. Adjust the heat level to suit your taste preferences.

    Can I freeze chimichurri sauce for later use?

    Yes, chimichurri can be frozen in ice cube trays for easy portioning. Just be sure to use it within three months for optimal flavor and quality.

    What can I substitute for red wine vinegar in chimichurri?

    If you don’t have red wine vinegar on hand, you can use apple cider vinegar or white wine vinegar as a substitute. Each will impart a different flavor, so choose based on your preference.

    How can I serve chimichurri sauce in my meals?

    Chimichurri can be served as a marinade, a condiment for grilled dishes, or even as a salad dressing. Its fresh, zesty flavor enhances many dishes.

    Are there health benefits associated with chimichurri sauce?

    Yes! Chimichurri is packed with antioxidants, vitamins, and healthy fats, which can support immune function, digestive health, and heart health when incorporated into a balanced diet.

    Connect with us on Facebook for More Culinary Insights!

    The post How to Make an Argentine Chimichurri Sauce: A Universal Recipe appeared first on https://cookinggods.com

    The Article Argentine Chimichurri Sauce: The Ultimate Recipe Guide Was Found On https://limitsofstrategy.com

  • Chicken Alfredo Cooking Guide: Creamy and Delicious Recipes

    Chicken Alfredo Cooking Guide: Creamy and Delicious Recipes

    Gathering Premium Ingredients for an Exceptional Creamy Chicken Alfredo Experience

    Key Ingredients to Create Your Alfredo Culinary Masterpiece

    Fresh ingredients for creamy chicken alfredo on a rustic kitchen table: chicken, pasta, cream, and Parmesan cheese.

    Embarking on your culinary journey to create the most delicious creamy chicken alfredo begins with selecting high-quality, fresh ingredients. Gather juicy chicken, perfectly cooked pasta, rich cream, and flavorful cheese, as these are the foundational components of your how to cook a creamy chicken alfredo masterpiece. Opt for moist, tender chicken, pasta cooked al dente for the perfect bite, a creamy sauce that envelops the dish, and a cheese that melts beautifully, such as Parmesan or Pecorino Romano. Each ingredient contributes significantly to achieving that luxurious, creamy texture and delectable flavor that makes this dish a beloved classic.

    When selecting your chicken, boneless, skinless breasts are ideal due to their versatility and quick cooking times. For your pasta, fettuccine remains the traditional favorite as it captures sauce exceptionally well, though you can also explore other pasta varieties like penne or farfalle for a unique twist. It’s essential to choose heavy or double cream to achieve the ultimate richness and creaminess in your sauce. Never underestimate the impact of high-quality cheese on the dish; it significantly elevates the overall taste and mouthfeel, making it a truly indulgent experience.

    Enhance Your Alfredo with Flavorful Optional Additions

    Elevate your creamy chicken alfredo dish by incorporating optional ingredients that will enhance both flavor and visual appeal. Fresh herbs like basil, thyme, or parsley can add a fresh aroma, significantly enriching the dining experience. Garlic is another timeless addition; when sautéed in butter, it introduces a deep, savory flavor that complements the dish beautifully. Consider incorporating sautéed mushrooms, spinach, or sun-dried tomatoes to infuse vibrant colors and essential nutrients into your plate. These added elements not only enhance the taste but also contribute to the overall presentation, transforming your meal into a feast for the eyes.

    A splash of white wine can also introduce remarkable depth and complexity to the flavor, providing a subtle acidity that beautifully contrasts with the creaminess of the sauce. However, it’s important to ensure these embellishments complement the main star of the dish—the luscious creamy sauce—without overshadowing it. Strive for balance by choosing a few ingredients that resonate with your unique taste preferences, creating a harmonious blend that will delight your palate.

    Exploring Substitutions for Various Dietary Needs

    For those with specific dietary requirements, it’s essential to explore substitution options for your creamy chicken alfredo recipe. Consider using dairy-free alternatives such as almond milk or coconut cream instead of traditional cream; additionally, nutritional yeast can provide a cheesy flavor without any dairy. When it comes to pasta, gluten-free options made from rice, quinoa, or legumes are excellent choices that retain both flavor and texture without compromising the integrity of the dish.

    It is vital to ensure that the flavors from your alternative ingredients align with the original recipe to maintain the dish’s essence. Experiment with various combinations until you find a blend that satisfies your cravings while accommodating your dietary needs. This thoughtful approach ensures that everyone can enjoy a delightful plate of creamy chicken Alfredo, regardless of their dietary restrictions.

    Understanding Portion Sizes for Ideal Servings

    Chicken Alfredo dish with 250g pasta, 150g chicken, creamy sauce, and fresh herbs.

    Grasping the appropriate quantities of each ingredient is crucial for creating a perfectly creamy chicken Alfredo that satisfies all diners. A general guideline is approximately 200-250 grams of pasta per person, ensuring a generous serving when combined with the sauce and chicken. Aim for around 100-150 grams of chicken per serving; this ensures that everyone enjoys a hearty portion without feeling overwhelmed.

    For the sauce, strive for about 1 cup of cream and 1 cup of grated cheese for every 200 grams of pasta. Feel free to adjust these measurements based on your personal preferences regarding creaminess and richness. Keeping a record of which ingredient combinations work best for you will enhance your overall cooking experience, allowing you to personalize your dish to perfection.

    Streamlining Your Cooking Process for Effortless Preparation

    Effective preparation is key to simplifying your cooking process and achieving outstanding results. Begin by gathering all your ingredients, which not only saves time but also ensures that you have everything you need within reach. Chop any vegetables, crush garlic, and measure out your cream and cheese ahead of time. This mise en place technique allows you to concentrate fully on cooking without the distraction of searching for items mid-recipe.

    Another valuable tip is to let your chicken come to room temperature for about 20 minutes before cooking. This practice promotes even cooking and guarantees that the chicken remains tender and juicy. Additionally, using a sharp knife for cutting will enhance safety and efficiency in your preparation work.

    If you want to elevate your culinary skills even further, consider pre-cooking your pasta and storing it in the fridge. You can then easily reheat it in the sauce when it’s time to serve, saving both time and flavor. Implementing these preparation tips will set you up for success as you create an unforgettable creamy chicken Alfredo that will surely impress your family and friends.

    Perfecting the Cooking Method for Chicken in Your Alfredo

    Seasoning Your Chicken to Amplify Its Flavor

    Chef seasoning raw chicken with salt, pepper, and Italian herbs on a wooden board for Alfredo.

    Properly seasoning your chicken is the foundation of a delicious creamy chicken alfredo dish. Start by generously seasoning the chicken with salt and pepper; this crucial step elevates the meat’s natural flavors. Feel free to experiment with additional herbs and spices that excite your palate. Consider incorporating Italian seasoning, paprika, or garlic powder to create a flavor profile that complements your Alfredo sauce beautifully.

    Allow the seasoned chicken to rest for a few moments before cooking. This resting period not only helps the seasoning penetrate the meat but also ensures even surface temperature, promoting a uniform cooking process that results in juicy, tender chicken.

    Think beyond basic seasoning! If time allows, marinate the chicken in a mixture of olive oil, lemon juice, and your favorite herbs for at least one hour—this will infuse the meat with even more flavor and tenderness appreciated by your diners.

    Selecting Optimal Cooking Methods for Your Chicken

    Choosing the right cooking method can significantly impact the texture and flavor of your chicken. Sautéing in a pan is a fast and effective approach, allowing the chicken to develop a beautiful golden crust while retaining its juiciness inside. This technique works exceptionally well for thinly sliced chicken breasts, ensuring they cook quickly and evenly.

    If you prefer a smokier flavor, grilling is an excellent option. The char marks enhance the visual appeal of the dish while adding depth to the taste. Baking is another suitable method; placing your seasoned chicken in the oven ensures even cooking without requiring constant monitoring.

    Each cooking method presents unique characteristics, so consider your available time, equipment, and desired flavor when making your choice. Utilizing a meat thermometer to confirm the chicken reaches an internal temperature of 75°C guarantees it’s cooked safely while retaining moisture.

    Mastering Cutting Techniques for Seamless Integration into Your Dish

    Once your chicken is cooked to perfection, mastering cutting techniques is crucial for seamless integration into your creamy chicken alfredo. Allow the chicken to rest for at least five minutes before slicing; this resting period helps redistribute the juices, ensuring the meat remains moist and flavorful.

    Thin slices are ideal for Alfredo, as they marry beautifully with the pasta and sauce. If you’re using larger cuts, consider dicing the chicken into bite-sized pieces. This not only makes serving easier but also allows more sauce to coat each piece, ensuring a consistent burst of flavor with every bite.

    Presentation is equally important. Arrange the chicken artfully on top of the pasta or mix it through the sauce for a more rustic feel. The manner in which you cut and present your chicken can significantly enhance the overall dining experience, making it visually appealing next to the creamy sauce.

    Elevating Flavor Through Marination of Chicken

    Marinating your chicken introduces an additional layer of flavor, significantly enhancing your creamy chicken alfredo dish. A simple marinade can be made using olive oil, vinegar, and a variety of spices. This not only boosts the chicken’s taste but also aids in tenderizing the meat, ensuring a juicy result every time.

    Allow at least one hour for marinating; however, if time permits, marinating overnight will yield an even deeper flavor profile. Consider incorporating ingredients like soy sauce for a touch of umami or citrus juice for acidity, which brightens the dish and adds complexity.

    Remember, while marinating enhances flavor, it’s crucial not to overdo it. A well-balanced marinade should complement, rather than overpower, the dish. The right combination will infuse your chicken with rich, vibrant flavors, enhancing the creamy Alfredo sauce to create an unforgettable meal.

    Understanding the Significance of Resting Your Chicken

    Resting your chicken after cooking is a critical step often overlooked, yet it can significantly affect the juiciness of your meat. Allowing it to sit for a few minutes before slicing enables the internal juices to redistribute, ensuring every bite remains succulent. This simple technique can elevate your how to cook a creamy chicken alfredo from merely good to truly exceptional.

    If you’ve grilled or baked your chicken, loosely covering it with foil while it rests helps retain warmth. The ideal resting time typically falls within the range of 5-10 minutes, depending on the size of the chicken pieces.

    Proper resting also prevents excessive juice loss when you cut into the chicken, preserving that tender texture that pairs beautifully with your creamy sauce. Mastering this technique guarantees you’ll consistently serve chicken that is both juicy and flavorful.

    Creating a Decadent Alfredo Sauce

    Starting with Melting Butter for a Flavorful Base

    The base of a delectable Alfredo sauce begins with melting butter to create a rich, flavorful foundation. Select high-quality unsalted butter—this choice allows you to manage the saltiness of your sauce effectively. Heat a pan over medium heat and add the butter, keeping a close eye as it melts and begins to bubble.

    Avoid allowing the butter to brown, as you want a clean, creamy taste for your sauce. Once fully melted, add minced garlic to infuse a delightful aroma, cooking it only until fragrant. This initial step sets the tone for your how to cook a creamy chicken alfredo experience, ensuring your sauce is rich and bursting with flavor.

    Be mindful of the temperature; cooking on excessively high heat can lead to uneven sauce or burnt ingredients. Stirring frequently during this process helps achieve a smooth consistency while developing a luscious flavor profile that will excite your taste buds.

    Incorporating Cream and Cheese for Indulgent Creaminess

    After your butter has melted to perfection, it’s time to blend in cream and cheese to achieve that signature creamy Alfredo sauce. Gradually pour in heavy cream while stirring continuously to combine, ensuring a smooth, homogenous mixture without any lumps.

    Opt for high-quality melting cheese such as Parmesan or Pecorino Romano; freshly grated options are preferable as pre-packaged cheeses often contain anti-caking agents that can hinder proper melting. Add the cheese slowly, allowing it to melt completely into the cream. This blending process is essential for developing the thick, creamy texture that is synonymous with Alfredo sauce.

    As the sauce thickens, be sure to taste and adjust the seasoning as necessary. A sprinkle of salt and freshly cracked pepper will enhance the overall flavor, while a pinch of nutmeg can add unexpected depth. This combination creates a rich, indulgent sauce that perfectly complements your pasta and chicken, bringing your dish to life.

    Thickening Your Sauce for the Perfect Consistency

    Achieving the ideal thickness for your Alfredo sauce is essential for it to cling beautifully to your pasta. To thicken your sauce, allow it to simmer over low heat for several minutes. This gentle cooking process evaporates excess liquid, concentrates the flavors, and achieves the desired consistency.

    Stay attentive during this step; stirring often prevents the sauce from sticking to the bottom of the pan and burning. If your sauce becomes too thick, don’t hesitate to add a splash of reserved pasta water to loosen it. The starchy water not only thins the sauce but also helps it adhere better to the pasta, creating a cohesive dish.

    Remember to taste as you go; adjusting the thickness may also require tweaks to your seasoning. A well-thickened sauce should coat the back of a spoon, creating a luxurious experience with every bite, ensuring your creamy chicken alfredo is nothing short of perfection.

    Cooking Pasta to Achieve Perfection

    Choosing the Best Pasta for Your Alfredo Dish

    The choice of pasta in your creamy chicken alfredo dish is paramount. While fettuccine is the traditional option, feel free to explore various pasta shapes that can effectively hold sauce, such as tagliatelle, pappardelle, or even gnocchi. The goal is to select a pasta that offers a balance between texture and sauce adherence for the ultimate dining experience.

    Consider the cooking time of your chosen pasta. Fresh pasta cooks quickly and may be more suited for quick meals, while dried pasta provides convenience and excellent texture. Always check the package instructions for cooking times, as achieving the perfect al dente texture will ensure that the pasta holds up beautifully against the rich Alfredo sauce.

    Furthermore, consider the visual appeal of your dish. A broader pasta, like fettuccine, creates a satisfying mouthfeel, while smaller shapes may provide a fun, bite-sized experience. The right pasta choice elevates your creamy chicken Alfredo from a simple meal to an extraordinary culinary delight, impressing all who partake.

    Boiling the Pasta to Achieve Perfect Al Dente Texture

    When boiling pasta, the water-to-salt ratio is critical for enhancing flavor. Use 1-2 tablespoons of salt per 4 liters of water; this practice elevates the taste of the pasta itself. Bring the water to a rolling boil before adding your pasta—this ensures even cooking and prevents it from becoming mushy.

    Cook the pasta until it reaches al dente, typically about 1-2 minutes less than the package instructions suggest. Al dente pasta should have a slight bite, which holds up beautifully against the rich Alfredo sauce. Remember to taste as it cooks; this is the most reliable way to determine when it’s done to your liking and perfect for your dish.

    Once cooked, drain the pasta but reserve about a cup of pasta water. This starchy water is a secret weapon for adjusting the sauce’s consistency and ensuring it clings perfectly to the pasta. This crucial step lays the groundwork for a delightful, cohesive dish that everyone will enjoy.

    Properly Draining and Reserving Pasta Water for Optimal Results

    Properly draining pasta is essential for maintaining the desired texture in your creamy chicken alfredo. Once your pasta reaches al dente perfection, use a colander to drain it, but don’t forget to reserve some of that precious starchy pasta water. This often-overlooked step can significantly impact your sauce’s overall consistency and texture.

    After draining, avoid rinsing the pasta. Rinsing removes the starch that helps the sauce adhere, which is crucial for achieving the right coating. Instead, keep your pasta warm while you finish preparing the sauce; if it cools too much, it can stick together, creating clumps rather than the perfect creamy pasta you desire.

    Storing any leftover pasta water for adjusting sauce consistency is a game-changer. You might find that just a few tablespoons can transform your dish from too thick to beautifully creamy. This simple technique can elevate your cooking and ensure your dish is restaurant-quality.

    Effortlessly Mixing Pasta with Alfredo Sauce for Ideal Integration

    Combining your drained pasta with the Alfredo sauce is where the true magic unfolds in your creamy chicken alfredo dish. In a large mixing bowl or directly in the pan, pour the sauce over the pasta, ensuring even coverage throughout. Use tongs or a spatula to gently toss, thoroughly coating the pasta in that rich, creamy sauce.

    If you find the sauce to be too thick, add a bit of the reserved pasta water; this helps achieve the desired consistency without compromising flavor. The goal is to have every strand of pasta luxuriously enveloped in sauce, resulting in a delightful, harmonious dish that pleases all palates.

    Exercise caution not to overmix, as this can break apart the pasta and diminish its texture. A gentle toss ensures that the creamy sauce clings lovingly to each piece, resulting in a restaurant-quality meal that you can proudly serve to your guests.

    Bringing Your Alfredo Dish Together for a Perfect Finish

    Expertly Mixing Pasta and Sauce for Optimal Coating

    The final stage in your creamy chicken alfredo journey involves the delicate balance of mixing pasta and sauce to achieve that perfect creamy texture. After tossing the pasta and sauce together, take a moment to assess the coating; it should be rich and evenly distributed.

    If the pasta appears dry, don’t hesitate to add more reserved pasta water. This step is essential; the starchy water adds moisture and helps the sauce cling effectively to the pasta. Striking the perfect sauce-to-pasta ratio results in a dish that is richly coated yet not swimming in sauce, creating a memorable dining experience.

    This is also the ideal time to taste and adjust any seasoning. A sprinkle of additional cheese or a dash of pepper can elevate the dish, ensuring a well-rounded flavor profile. As you mix, remember that the goal is a creamy, luxurious finish that is as visually appealing as it is deliciously irresistible.

    Integrating Chicken into Your Pasta and Sauce Mixture for Maximum Flavor

    Now it’s time to seamlessly incorporate your perfectly cooked chicken into the pasta and sauce mixture. Whether you’ve sliced or diced the chicken, gently fold it in, allowing the flavors to meld beautifully. This step enhances the overall experience, ensuring that every bite of pasta includes tender pieces of chicken, creating a satisfying and wholesome meal.

    Ensure that the chicken is warm before combining; adding cold chicken can cool down your dish and detract from the overall experience. If needed, you can place the combined mixture back on low heat briefly, allowing everything to warm through evenly and ensuring that the dish is served at the ideal temperature.

    As you mix, be careful not to break the chicken apart. You want those juicy pieces to shine through in your Alfredo, providing an excellent contrast to the creamy sauce. This final addition brings everything together, creating a harmonious blend of flavors and textures that define your creamy chicken Alfredo.

    Adjusting Consistency for the Ultimate Creamy Finish

    Adjusting the consistency of your dish is critical for achieving that ultimate creamy finish in your creamy chicken alfredo. After combining the pasta and chicken, assess the texture. If it feels too thick, slowly add reserved pasta water, starting with just a tablespoon at a time, mixing well until you reach the desired creaminess.

    The goal is to create a sauce that clings to the pasta without being overly soupy. Pay attention to how the sauce coats the pasta; it should form a luxurious, velvety layer that enhances each bite, providing an unforgettable experience for everyone at the table.

    If you accidentally add too much water, there’s no need to panic! You can always thicken the sauce back up by letting it simmer gently for a few minutes. Continuous tasting and adjusting are part of the process, ensuring your final dish is nothing short of perfection and truly satisfying.

    Serving and Enjoying Your Culinary Creation

    Artfully Plating Your Dish for Maximum Visual Appeal

    Presentation is paramount when serving your creamy chicken alfredo. Warm your plates before serving; this simple step helps maintain the dish’s temperature and enhances the overall dining experience for your guests.

    When plating, consider the composition of your dish. Twirling the pasta with a fork for a neat, stacked appearance can create an eye-catching presentation. Gently place the chicken on top or mix it through for a more rustic, homestyle feel that invites everyone to dig in.

    A sprinkle of freshly cracked black pepper or a light dusting of grated cheese immediately enhances the look and aroma of your dish. Remember, first impressions count, so take your time to create a visually appealing plate that tantalizes the senses and encourages everyone to savor every bite.

    Garnishing Your Dish to Elevate Its Appeal

    Garnishing your creamy chicken Alfredo can transform it from simple to spectacular. Fresh herbs like parsley or basil not only add a splash of color but also introduce a hint of freshness that beautifully balances the richness of the dish.

    Consider using a fine grater to add a sprinkle of extra cheese, such as Parmesan or Pecorino Romano, on top just before serving. This not only enhances the visual appeal but also adds that final touch of flavor enhancement that will delight your guests.

    You might also think about adding a drizzle of high-quality olive oil or a sprinkle of red pepper flakes for an added kick, reflecting your personal style and creativity. Garnishing is your opportunity to make your dish truly unique and memorable.

    Pairing Suggestions to Enhance Your Meal Experience

    To create a well-rounded meal with your creamy chicken alfredo, consider pairing it with side dishes that complement its richness. A light side salad with a zesty vinaigrette can cut through the creaminess, striking a beautiful balance of flavors.

    Dishes like garlic bread or focaccia offer comforting, hearty accompaniments, perfect for soaking up any leftover sauce. If you’re feeling adventurous, roasted or sautéed vegetables can add color and nutrients, enriching the overall dining experience and making it more satisfying.

    Don’t overlook beverage pairings! A crisp white wine, such as Chardonnay or Pinot Grigio, pairs beautifully with Alfredo, while a light beer can also refresh the palate. Selecting sides and drinks that enhance your meal transforms it into a truly memorable occasion for everyone involved.

    Creating a Cozy Dining Atmosphere for Ultimate Enjoyment

    Cultivating a cozy and inviting atmosphere elevates your dining experience, transforming a simple meal into a memorable occasion. Dim lighting and soft music can help set the mood, allowing everyone to relax and fully enjoy the meal.

    Consider laying the table with care—using elegant plates, cutlery, and perhaps a decorative centerpiece can add a charming touch. If you’re hosting, engaging conversation alongside great food enhances the experience and fosters connections among dining companions.

    As you serve your creamy chicken Alfredo, encourage everyone to savor each bite, appreciating the flavors and textures that come together in this delightful dish. The dining atmosphere should reflect the warmth and care that went into preparing this culinary masterpiece, making it an occasion that everyone will remember fondly.

    Addressing Common Questions About Creamy Chicken Alfredo

    Which pasta is best for Alfredo dishes?

    Fettuccine is the traditional choice for Alfredo, but you can also use other pasta shapes like penne or tagliatelle. The key is to select a pasta that holds the sauce well and complements the overall dish.

    Can I make Alfredo sauce without cream?

    Absolutely! You can substitute cream with alternatives like milk and flour or use cauliflower puree for a lighter version. Each option will yield a different texture and taste suitable for various dietary preferences.

    What’s the best way to store leftover Alfredo sauce?

    Store leftover Alfredo in an airtight container in the fridge for up to three days. When reheating, do so gently on the stove, adding a splash of water or milk to restore creaminess to the sauce.

    Can I incorporate vegetables into my Alfredo dish?

    Certainly! Vegetables like spinach, broccoli, or mushrooms can enhance the flavor and nutrition of your dish. Sauté them beforehand and then mix them with the pasta and sauce for the best results.

    What type of cheese is best for crafting Alfredo sauce?

    Parmesan and Pecorino Romano are the best choices for Alfredo. Freshly grated cheese melts better and provides a richer flavor compared to pre-packaged options that may contain additives.

    Is Alfredo sauce gluten-free?

    Alfredo sauce is naturally gluten-free if made without flour. Be sure to use gluten-free pasta if you need to accommodate gluten sensitivity in your dish.

    Can I make Alfredo sauce ahead of time?

    Yes, you can prepare the sauce in advance. Store it in the fridge and reheat gently, adding a splash of pasta water to restore the desired consistency before serving.

    How can I make my chicken Alfredo healthier?

    Utilize lean chicken breasts, opt for whole grain pasta or vegetable-based pasta, and incorporate more vegetables into the dish to boost nutritional value without sacrificing flavor.

    Is it possible to freeze Alfredo sauce?

    Yes, you can freeze Alfredo sauce. Allow it to cool completely, then store it in airtight containers. Thaw in the fridge before reheating, but be aware that it may separate upon thawing.

    What wine pairs well with chicken Alfredo?

    A crisp white wine like Chardonnay or Sauvignon Blanc pairs beautifully with chicken Alfredo, complementing its richness and enhancing the overall dining experience for an unforgettable meal.

    Join us on Facebook for more delicious recipes!

    The post How to Cook a Creamy Chicken Alfredo: A Delicious Guide appeared first on https://cookinggods.com

    The Article Creamy Chicken Alfredo: A Delicious Cooking Guide Was Found On https://limitsofstrategy.com

  • Masterclass Guide to Julienne Vegetables Like a Chef

    Masterclass Guide to Julienne Vegetables Like a Chef

    Mastering the Art of Julienne Cutting: Key Tools and Techniques

    Choosing the Perfect Knife for Expert Julienne Cutting

    Chef's hands julienning vegetables on a wooden board in a professional kitchen.

    To julienne vegetables like a seasoned professional, possessing a sharp chef’s knife is absolutely crucial. This indispensable kitchen tool provides the precision and control needed to create perfectly uniform strips, enhancing both the visual appeal of your dishes and ensuring that cooking is even throughout. When selecting your knife, focus on comfort and grip, opting for one with a thin, sharp blade. Using a dull knife requires excessive force, leading to uneven cuts and a higher risk of injury. By investing in a high-quality chef’s knife, you set yourself up for culinary success as you dive into the intricate art of julienne cutting.

    Alongside a chef’s knife, adding a paring knife to your toolkit can be advantageous for more intricate cutting tasks. This smaller knife is designed for precision, making it perfect for navigating curves and reaching tight spots with ease. With a paring knife, you can ensure that each piece is cut to the desired thickness, significantly enhancing your culinary creations. Regularly honing your knives is crucial to maintaining their effectiveness; this practice allows you to julienne vegetables with both confidence and ease.

    If you’re just starting your journey into the art of julienning, the weight and balance of your knife play pivotal roles in your cutting experience. A heavier knife can offer more control for some home cooks, while others might prefer the agility and quickness of a lighter blade. By experimenting with various knives, you can discover the ideal fit for your unique cutting style, ultimately enhancing both your efficiency and enjoyment in the kitchen.

    Safely Using a Mandoline for Consistent Julienne Cuts

    A mandoline slicer can significantly improve your ability to achieve consistent julienne cuts with remarkable speed and accuracy. This essential kitchen tool allows you to slice vegetables quickly and uniformly, making it a staple among chefs worldwide. However, safety must always come first; mandolines have exceptionally sharp blades that can cause serious injuries if not utilized properly.

    Before using a mandoline, take the time to familiarize yourself with its various features. Most models come equipped with adjustable blades that cater to different thicknesses. Begin by attaching the julienne blade, which will produce thin, consistent strips. Always make use of the accompanying hand guard, which secures your grip on the vegetable while simultaneously protecting your fingers from the sharp blades.

    Employing the correct technique is crucial for safe and effective use of a mandoline slicer. Start by positioning the mandoline on a stable cutting board, ensuring it has a non-slip base to prevent accidents. Apply firm, consistent pressure while sliding the vegetable along the blade, allowing the tool to do the work. Begin practicing with firmer vegetables, such as carrots or zucchini, to build confidence and proficiency in utilizing this invaluable kitchen tool.

    Optimizing Your Cutting Board Setup for Safe Julienne Cutting

    A stable cutting board is fundamental for safe and effective julienne cutting. It’s essential to select a board with a non-slip surface to prevent unwanted movement during slicing. Wooden or bamboo boards are favored for their durability and natural aesthetics, while plastic boards offer practical advantages for easy cleaning. Each material has its unique benefits, so choose one that aligns with your cooking style and personal preferences.

    To further enhance stability, consider placing a damp cloth or paper towel beneath your cutting board. This simple yet effective trick can significantly reduce slipping, providing you with the confidence needed for precise cuts. Additionally, maintaining a clean workspace is essential; it allows you to concentrate fully on your task, minimizing the chances of accidents occurring in the kitchen.

    Moreover, contemplate the size of your cutting board before initiating the julienne process. A larger board provides ample space for handling vegetables, promoting greater efficiency and reducing clutter. An organized workspace is vital for maintaining focus while executing the perfect julienne cut. Remember, a well-kept kitchen is integral to successful cooking.

    Proven Strategies for Perfecting Your Julienne Cuts

    Chef's hands julienning vibrant vegetables on a wooden board with colorful slices around.

    Mastering Hand Positioning for Julienne Cutting Success

    Achieving consistent julienne cuts begins with mastering the correct hand positioning technique. Your dominant hand should grip the knife handle firmly, while your non-dominant hand guides the vegetable. This technique not only provides control over the knife but also safeguards your fingers from potential injuries.

    When guiding the vegetable, utilize a claw grip by curling your fingers under slightly. This position keeps your fingertips safely away from the blade’s path while allowing you to exert effective pressure on the vegetable. Your thumb should rest against the vegetable, providing stability as you slice through it.

    Practicing this technique on various vegetables will build your confidence and skill level. Start with larger, stable vegetables like carrots or bell peppers. Once you feel comfortable, progress to smaller or more delicate items. Always maintain the knife at the appropriate angle, keeping a rhythm that feels natural. With consistent practice, your hand positioning will become second nature, resulting in perfectly julienned vegetables every time.

    Achieving Consistency in Your Julienne Slices for Flawless Results

    Uniformity is crucial when julienning vegetables, as it guarantees even cooking and enhances the visual appeal of your dish. Before cutting, take the time to slice vegetables into even pieces. For example, when working with a carrot, begin by trimming both ends to create a flat surface, facilitating more uniform slices.

    It’s advantageous to cut the vegetables into manageable lengths, typically around 2 to 3 inches. This allows for better control and precision while slicing. Strive for an even thickness in each slice; a consistent thickness ensures that when you julienne the pieces, they will cook uniformly, contributing to a cohesive dish.

    As you grow more adept at julienning, consider using a ruler to measure your slices initially. This practice can help train your eye for accuracy. Once you feel confident, rely on your judgment. Practicing with various vegetables will enhance your skills and empower you to julienne like a professional chef.

    Developing Speed and Precision Techniques for Efficient Julienne Cutting

    Chef's hands julienning vibrant vegetables on a wooden board with a sharp knife.

    Speed and precision are essential when learning to julienne vegetables like a chef. With practice, you’ll discover your rhythm, but certain techniques can significantly enhance both aspects of your performance. One effective method is to focus on making a series of gentle, controlled cuts rather than rushing through the process.

    Consistent practice will build muscle memory, allowing your hands to move smoothly and swiftly. Setting a timer for short, focused practice sessions can help sharpen your skills while keeping the process enjoyable and engaging. Start with easier vegetables and gradually challenge yourself with tougher textures as you improve your technique.

    Maintaining proper posture and positioning while cutting is also crucial. Stand comfortably with your feet shoulder-width apart and ensure you’re at the right height relative to your cutting board. This alignment can significantly impact your efficiency and reduce strain on your body, allowing you to julienne vegetables with both speed and accuracy. Remember, the objective is not just to cut quickly but to do so while preserving the quality of your cuts.

    Understanding the Importance of Choosing the Right Knife for Julienne Cutting Mastery

    Selecting the right knife is essential for achieving clean and efficient julienne cuts. A sharp, thin-bladed knife is ideal for this task, as it allows for enhanced precision. The design of the blade should facilitate effortless slicing through the vegetable, minimizing the force required and reducing the likelihood of mistakes.

    Different knives offer varying advantages; for instance, a Santoku knife features a wider blade that helps channel food away, making it easier to manage slices. On the other hand, a Japanese gyuto knife provides a fine edge for delicate cuts, making it perfect for intricate julienne tasks.

    Ultimately, the best knife for you is one that feels comfortable and secure in your hand. Test various options, paying attention to the weight, grip, and balance. A knife that feels natural will boost your confidence, enabling you to julienne vegetables like a chef in no time.

    Identifying the Best Vegetables for Perfect Julienne Cutting Techniques

    Discovering the Ideal Vegetables for Flawless Julienne Cuts

    Not all vegetables lend themselves well to julienning; however, certain varieties excel due to their texture and shape. Carrots, bell peppers, zucchini, cucumbers, and radishes stand out as excellent candidates for julienne cuts. Their firm structure allows for clean, uniform slices that maintain their integrity in a variety of dishes.

    When selecting vegetables, consider their freshness and quality. Fresh produce typically has a firmer texture, making it easier to achieve clean cuts. Avoid overripe or soft vegetables, as these may yield uneven slices and lack the desired crunch in your final dish.

    Experimenting with different vegetables not only enhances your skills but also broadens your culinary repertoire. For instance, try julienning beets for a vibrant addition to your salads or using sweet potatoes for a unique twist. The versatility of julienned vegetables makes them an excellent choice for elevating dishes across diverse global cuisines.

    Key Preparation Techniques for Perfectly Julienned Vegetables

    Preparation is crucial for successful julienne cuts. Start by thoroughly washing your vegetables to eliminate any dirt or pesticides. Once clean, trim the ends and peel if necessary. For certain vegetables, like carrots or zucchinis, peeling can enhance the visual appeal of your dish, while others, like cucumbers, can be left unpeeled for a rustic presentation.

    Uniformity in size is vital before the julienne process begins. Cut the vegetables into sections that are equal in length, typically around 2 to 3 inches. This ensures that each piece will be manageable and easy to handle during slicing.

    Using a sharp knife during the prep stage will streamline the process. A clean cut allows for more precise julienne strips and reduces the chance of the vegetable breaking or becoming mushy. Properly preparing your vegetables sets the foundation for beautifully julienned results that will impress your guests.

    Best Practices for Storing Julienned Vegetables to Preserve Freshness

    Proper storage of julienned vegetables is essential for maintaining their freshness and crispness. After julienning, store the vegetables in an airtight container or a resealable bag to limit exposure to air, which can lead to wilting and textural degradation.

    For optimal results, keep the cut vegetables in the refrigerator. The cool temperature helps preserve their color and crunch, ensuring they remain vibrant and appealing. If you plan to use them later, consider storing them between damp paper towels to prevent them from drying out. This added moisture can help maintain the ideal texture for your culinary creations.

    For extended storage, blanching vegetables before julienning can significantly prolong their shelf life. Blanching involves briefly boiling the vegetables and then rapidly cooling them in ice water. This process helps lock in color and nutrients while preparing them for freezing without compromising quality.

    Essential Tools for Streamlining the Julienne Cutting Process

    Utilizing the right tools for julienne cutting can greatly enhance your culinary experience. Besides a chef’s knife and mandoline, consider investing in a julienne peeler. This handy tool simplifies the process of creating julienne strips, especially for softer vegetables like zucchinis and cucumbers.

    Food processors equipped with julienne blades are another fantastic option. These machines can save time, particularly when preparing large quantities. However, be mindful of the texture achieved; sometimes, the precision of a knife or mandoline is unmatched when it comes to producing ideal julienne cuts.

    For safety, always use a cutting board that is stable and has a non-slip surface. This can significantly boost your confidence while cutting. Additionally, maintain an organized workspace. A clutter-free environment allows you to focus on crafting beautiful, uniform julienne cuts without distractions.

    Avoiding Common Mistakes in Julienne Cutting for Optimal Results

    Strategies to Prevent Uneven Cuts While Julienne Cutting

    Uneven cuts can detract from the overall presentation of your dish, making it essential to focus on consistency when julienning vegetables. One common mistake is rushing through the process or applying inconsistent pressure while slicing. Take your time to ensure even pressure on the knife and maintain a steady rhythm throughout the cutting process.

    Practicing with a ruler or guideline can help train your eye to recognize the desired thickness of your cuts. Additionally, be mindful of the angle at which you’re slicing; maintaining a consistent angle can significantly enhance the uniformity of your julienne strips.

    Another common pitfall is neglecting to prepare the vegetables adequately before cutting. Ensure that each piece is trimmed to a manageable length and that the vegetable is stable on the cutting board. By addressing these factors, you can substantially reduce the occurrence of uneven cuts, resulting in a more polished final dish.

    Techniques to Prevent Injury When Cutting Vegetables

    Knife safety is paramount when julienning vegetables, as improper techniques can lead to serious injuries. One of the most critical aspects is maintaining a proper grip on the knife while employing the claw technique with your non-dominant hand. This positioning safeguards your fingers and allows for better control over the vegetable.

    Always remain aware of your surroundings and avoid distractions while cutting. Setting up a well-lit and organized workspace can help you maintain focus. Additionally, ensure your cutting board is stable to prevent slips as you apply pressure.

    Regular knife maintenance is essential; a dull blade can lead to accidents, as it requires more force to cut through vegetables. Keeping your knives sharp not only enhances your safety but also improves the quality of your cuts, enabling you to julienne vegetables with confidence.

    Maintaining Optimal Knife Sharpness for Effective Julienne Cutting

    A sharp knife is vital for safe and efficient julienne cutting. Dull knives necessitate more pressure, which increases the risk of slips and injuries. Make it a habit to hone your knives regularly using a honing rod or professional sharpening services to maintain their edge.

    Investing in a high-quality sharpening tool can also help maintain the sharpness of your blades at home. There are various options available, from whetstones to electric sharpeners, allowing you to choose one that suits your skill level and preferences.

    In addition to sharpening, remember to wash and dry your knives properly to prevent rust and damage. Caring for your tools not only extends their lifespan but also enhances your cutting experience, enabling you to julienne vegetables with confidence, just like a chef.

    Ensuring Consistency in Sizes While Julienne Cutting for Culinary Excellence

    Achieving uniform sizes when julienning is crucial for both aesthetic appeal and cooking consistency. Start by cutting your vegetables into equal lengths before julienning. This practice creates a more organized cutting process and ensures that each piece will cook evenly.

    Additionally, practice makes perfect; the more you julienne, the better your eye will become at recognizing consistent sizes. Consider using a mandoline slicer for even more precision. This tool is particularly beneficial for creating uniform cuts quickly, especially when preparing large quantities of vegetables.

    If you find it challenging to maintain consistent sizes, try experimenting with different vegetables. Some may be easier to handle than others, allowing you to build confidence in your skills. With time and practice, you’ll develop the ability to julienne vegetables to perfection, ultimately enhancing the quality of your dishes.

    The Importance of Proper Hand Positioning in Julienne Cutting Techniques

    Proper hand positioning is essential for both safety and precision while julienning vegetables. Begin by gripping the knife handle firmly with your dominant hand, ensuring control throughout the cutting process.

    Your non-dominant hand should guide the vegetable using the claw grip technique. Curl your fingers under to keep them safe from the knife’s edge while allowing your thumb to press against the vegetable. This hand positioning not only protects your fingers but also provides stability as you slice through the vegetable.

    Practicing various hand positions while cutting will enhance your comfort level, allowing you to julienne vegetables like a professional. Remember, control is key; maintaining a steady grip will yield cleaner cuts and improve the overall quality of your culinary creations.

    Innovative Culinary Applications for Julienned Vegetables

    Transforming Salads with Vibrant Julienned Vegetables

    Julienned vegetables can elevate a simple salad into a visually stunning masterpiece. Their uniform strips not only contribute texture but also enhance the visual appeal, making each bite a delightful culinary experience. Incorporate julienned carrots, cucumbers, and bell peppers into your salads for vibrant colors and fresh flavors that invigorate each dish.

    Experiment with different dressings to complement the julienned vegetables. For instance, a zesty citrus vinaigrette pairs beautifully with the crunch of julienned veggies, enhancing the overall taste profile of your salad. Additionally, consider layering your salad with julienned vegetables for an impressive presentation that is sure to delight your guests.

    Don’t limit yourself to traditional salads; explore global variations, such as Vietnamese gỏi, which often features julienned vegetables, imparting a refreshing crunch. The versatility of julienned vegetables allows for endless creativity in your culinary endeavors, making your salads both nutritious and visually appealing.

    Enhancing Dishes Through Creative Garnishing Techniques with Julienned Vegetables

    Utilizing julienned vegetables as garnishes can significantly elevate the presentation of your dishes. Whether serving a gourmet main course or a casual meal, incorporating julienned veggies introduces a burst of color and freshness that captivates the eye.

    For Asian-inspired dishes, consider using julienned scallions or carrots as garnishes. Their vibrant hues provide an attractive contrast against the main dish, enhancing the overall presentation and making your meals more inviting.

    When garnishing, remember to keep flavor profiles in mind; the garnish should complement the main dish. Julienned herbs, such as basil or mint, can add a fresh touch to soups or salads, while julienned bell peppers can brighten a plate of stir-fried vegetables, providing both flavor and visual appeal.

    Incorporating Julienned Vegetables into Flavorful Stir-Fries

    Julienned vegetables are a staple in stir-fries, enhancing both flavor and texture in your culinary creations. The quick cooking time of julienned veggies ensures they retain their crunch, enriching the overall experience of the meal.

    Consider incorporating a variety of vegetables in your stir-fry, such as julienned carrots, snow peas, and bell peppers. Their vibrant colors and distinct textures meld beautifully, creating a visually appealing and nutritious dish that is both satisfying and wholesome.

    For added flavor, experiment with different sauces and seasonings. A soy sauce-based marinade can enhance the taste of your julienned vegetables while complementing the other ingredients in the stir-fry. The adaptability of julienned vegetables allows for endless variations, making each stir-fry a unique culinary adventure that you can enjoy.

    Creating Healthy Vegetable Noodles with Julienned Veggies

    Julienned vegetables can serve as a healthy, low-carb alternative to traditional pasta. Zucchini noodles, often referred to as zoodles, have gained popularity as a nutritious option for those seeking to reduce their carbohydrate intake. Julienning zucchini creates thin strips that mimic the texture of traditional noodles, making them ideal for tossing in your favorite sauce.

    Experiment with different vegetable noodles by combining julienned carrots, sweet potatoes, or even beets. These colorful options can add a delightful twist to your dishes, making them visually appealing and nutritious while catering to various dietary preferences.

    When preparing vegetable noodles, consider lightly sautéing them with olive oil and garlic for added flavor. Alternatively, serve them raw, drizzled with a zesty dressing or sauce. The culinary possibilities are endless, allowing you to enjoy a healthy twist on classic pasta dishes without sacrificing taste or satisfaction.

    Elevating Sandwiches and Wraps with Fresh Julienned Vegetables

    Julienned vegetables can introduce a fresh crunch and vibrant color to sandwiches and wraps. Their incorporation can elevate even the simplest creations, transforming a plain sandwich into a culinary delight.

    Consider adding julienned cucumbers, carrots, and bell peppers to your favorite wrap for a symphony of textures and flavors. Pairing these vegetables with protein, such as grilled chicken or tofu, creates a balanced, satisfying meal that is both nutritious and delicious.

    Creative combinations can also enhance your sandwiches. For example, try pairing julienned radishes with creamy avocado and a spicy mayo for a delectable bite that excites the palate. The vibrant colors and textures from julienned vegetables not only improve presentation but also contribute to a more flavorful and enjoyable meal experience.

    Advanced Techniques for Expert-Level Julienne Cutting

    Creating Fine Julienne Cuts for Delicate Culinary Preparations

    Mastering the technique of creating fine julienne cuts can significantly enhance your culinary repertoire. Fine julienne is particularly useful for garnishing dishes or crafting delicate salads. To achieve this, start with a sharp knife and maintain a consistent angle as you slice.

    Begin by cutting the vegetable into manageable lengths and making thin, even slices. The key is to apply gentle pressure while allowing the knife to glide through the vegetable. This technique often requires more patience and practice to perfect, but the results are well worth the effort.

    Utilizing a mandoline slicer can also aid in achieving fine julienne cuts with precision. Experiment with different settings to find the perfect thickness that suits your dish. Fine julienne cuts can enhance the overall presentation and offer a refined touch to your culinary creations, making them more visually appealing to your guests.

    Utilizing Julienne Cuts for Decorative Presentation in Culinary Dishes

    Using julienne cuts as decorative elements in your culinary presentations can significantly elevate your dishes. Whether plating gourmet meals or creating visually stunning appetizers, julienned vegetables can add flair and creativity that impress diners.

    Consider julienning a mix of colorful vegetables, such as bell peppers, carrots, and radishes, and arranging them artistically on the plate. This technique not only enhances visual appeal but also adds a variety of textures and flavors to your dish, creating an inviting dining experience.

    Incorporating different colors and shapes can create captivating presentations. For example, pairing julienned beets with creamy goat cheese and microgreens can result in an impressive starter. The visual impact of well-executed julienne cuts can transform your dish into a work of art, delighting both the eyes and the palate.

    Combining Julienne Cuts with Other Knife Techniques for Culinary Excellence

    Combining julienne cuts with other knife techniques can yield complex and beautifully layered dishes. For instance, pairing julienned vegetables with diced or sliced elements can create a harmonious balance of textures that enhances the dining experience.

    Consider using julienned carrots alongside diced celery and cubed bell peppers in a stir-fry. This combination introduces a variety of textures while maintaining visual appeal. The julienne cuts will offer a delightful crunch, while the other cuts provide different mouthfeel experiences that add depth to the dish.

    Experimenting with various cutting techniques can also enhance your flavor profiles. For example, pairing julienned ginger with minced garlic can create a fragrant base for many Asian-inspired dishes. The fusion of different cutting techniques not only adds depth and interest to your culinary repertoire but also showcases your skills as a chef.

    Frequently Asked Questions About Julienne Cutting Techniques

    What does it mean to julienne vegetables?

    Julienning vegetables involves cutting them into thin, matchstick-sized strips, enhancing their presentation while ensuring even cooking in various dishes.

    Which types of vegetables are best suited for julienning?

    Carrots, bell peppers, zucchini, cucumbers, and radishes are excellent choices for julienning due to their firm texture and vibrant colors that hold up well in culinary creations.

    How can I ensure my knife is sharp for julienning?

    Regularly honing and sharpening your knife is crucial for maintaining its edge. Invest in a high-quality sharpening tool or consider professional sharpening services to keep your knives in optimal condition.

    Can I use a mandoline for julienning vegetables?

    Yes, a mandoline slicer is an excellent tool for achieving uniform julienne cuts quickly and efficiently, but be sure to use it safely with the hand guard to protect your fingers.

    What is the best way to store julienned vegetables?

    Store julienned vegetables in an airtight container in the refrigerator. Including a damp paper towel can help maintain freshness and prevent wilting, ensuring they stay crisp for longer.

    Are there specific techniques for creating fine julienne cuts?

    To create fine julienne cuts, focus on applying gentle pressure with a sharp knife and maintain a consistent angle while slicing. Practicing with various vegetables will help improve your skills and precision.

    How can I effectively incorporate julienned vegetables into salads?

    Julienned vegetables can be added to salads for texture and visual appeal. Consider mixing colorful vegetables and pairing them with complementary dressings for a delightful dish.

    What are some creative ways to use julienned vegetables?

    Julienned vegetables can be used in salads, as garnishes, in stir-fries, as vegetable noodles, or added to sandwiches and wraps for added crunch and vibrant color.

    How can I prevent injury while julienning vegetables?

    Maintain a proper grip on the knife, use a claw grip with your non-dominant hand when guiding the vegetable, and ensure your cutting surface is stable to minimize the risk of slips and accidents.

    What tools do I need for effective julienning of vegetables?

    Essential tools include a sharp chef’s knife, a mandoline, and a stable cutting board. A julienne peeler can also simplify the process for certain vegetables, making it easier to create uniform strips.

    Join our community on Facebook!

    The post How to Julienne Vegetables Like a Chef: Mastering the Art appeared first on https://cookinggods.com

    The Article Julienne Vegetables Like a Chef: A Masterclass Guide Was Found On https://limitsofstrategy.com

  • Gluten-Free Cooking Tips for Memorable Group Gatherings

    Gluten-Free Cooking Tips for Memorable Group Gatherings

    Unlocking the Essential Components of a Gluten-Free Diet for Healthier Living

    Diving Deep into Gluten: Its Role and Importance in Our Food Choices

    Freshly baked bread with a golden crust and chewy interior, surrounded by wheat, barley, and rye grains.

    Gluten is a fundamental type of protein that significantly contributes to the texture and structure of various baked goods, making it a key player in culinary experiences. This protein is predominantly found in grains such as wheat, barley, and rye, which are responsible for the delightful chewy characteristics that many individuals cherish in bread and pastries. For those adhering to a gluten-free lifestyle, it is essential to completely avoid gluten, as even minimal exposure can result in severe health complications. Thus, identifying the multitude of gluten sources is crucial for anyone who must follow this dietary path, whether prompted by medical conditions or personal lifestyle choices.

    It may come as a surprise to many that gluten hides in an extensive range of everyday foods, often unbeknownst to consumers. While gluten is typically linked with obvious sources like bread and pasta, it can also lurk in sauces, dressings, and certain processed meats. Therefore, acquiring a thorough understanding of gluten is the crucial first step towards successfully embracing a gluten-free lifestyle. In an increasingly health-conscious society, awareness surrounding gluten has surged; however, misconceptions remain prevalent. For instance, many believe that gluten-free products are inherently healthier than their gluten-containing counterparts, which is not always the case. Prioritizing whole foods that are naturally gluten-free is paramount rather than relying solely on processed gluten-free goods, which may lack essential nutritional benefits.

    The impact of gluten can vary significantly from one individual to another; some may suffer severe adverse reactions due to conditions like celiac disease, while others might only experience mild discomfort from gluten sensitivity. Therefore, when determining how to prepare meals for a gluten-free audience, it is crucial to acknowledge these differences and provide a diverse array of options that cater to various dietary requirements and preferences.

    Exploring the Motivations Behind Choosing a Gluten-Free Lifestyle

    Individuals opt for a gluten-free diet for a myriad of reasons. For many, medical conditions such as celiac disease—a serious autoimmune disorder—render this dietary choice imperative. For those affected, consuming gluten can cause significant harm to the small intestine, leading to a host of health complications. This condition affects approximately 1% of the global population, underscoring the urgent need for awareness and understanding of gluten-related health issues.

    Others may experience non-celiac gluten sensitivity, which, although less clearly defined, can still produce uncomfortable symptoms like bloating, fatigue, and joint pain. Furthermore, some individuals adopt a gluten-free approach as part of a broader health strategy, viewing it as a cleaner and more nutritious way of eating. The wellness community increasingly promotes gluten-free diets based on purported health advantages, though scientific opinions on these claims remain mixed and varied.

    When creating meals for a gluten-free group, it is essential to consider the diverse motivations that shape each person’s dietary restrictions. Some may strictly avoid gluten due to medical issues, while others may adopt a more flexible attitude, viewing gluten-free options as part of a holistic lifestyle. Recognizing these distinctions allows for the creation of meals that are not only delicious but also inclusive, catering to a broad spectrum of dietary philosophies and practices.

    Recognizing Essential Ingredients in Gluten-Free Cooking

    Embarking on gluten-free cooking opens the door to an exciting array of ingredients, offering ample opportunities for creativity in meal preparation. Staples such as rice, corn, quinoa, and gluten-free oats serve as excellent foundational components for any gluten-free menu. These ingredients provide essential nutrients while acting as versatile bases for flavors and culinary techniques from various cultures around the world.

    Consider rice; its versatility lends itself to a wide range of dishes—from comforting risottos to vibrant stir-fries. Quinoa, a pseudo-grain celebrated for its high protein content, can shine in hearty salads or grain bowls, offering a nutritious base that is both satisfying and gluten-free. Meanwhile, corn, especially in the form of polenta or corn tortillas, adds delightful texture and flavor to meals, making it a beloved ingredient across numerous cuisines. Additionally, gluten-free oats make for an excellent breakfast choice or baking ingredient, easily transforming into oatmeal or delicious cookies.

    Beyond these staples, the gluten-free market has significantly expanded, introducing innovative alternatives to traditional grains, such as almond flour, coconut flour, and chickpea flour. These substitutes not only adhere to gluten-free standards but also introduce unique flavors and health benefits—such as increased protein content and healthy fats—into your culinary creations. By recognizing and incorporating these common gluten-free ingredients, you can craft scrumptious meals that everyone can savor, regardless of their dietary restrictions.

    Mastering the Craft of Gluten-Free Meal Planning for Delicious Outcomes

    A person arranging colorful gluten-free dishes on a rustic table with fresh ingredients and recipe books.

    Designing a Nutritionally Balanced Gluten-Free Menu

    Creating a well-rounded gluten-free menu is essential for ensuring nutritional adequacy and variety in your meals. A balanced meal should consistently incorporate a reliable source of protein, a diverse assortment of vegetables, and gluten-free grains or starches. This balance not only promotes overall health but also enhances the dining experience, transforming each meal into an indulgent and satisfying occasion.

    When planning your menu, aim to include proteins from both animal and plant sources. Options like lean meats, fish, legumes, and dairy products offer vital nutrients that support muscle health and overall energy levels. Pairing these proteins with a colorful variety of vegetables introduces a wealth of vitamins, minerals, and antioxidants, further enhancing the nutritional profile of each dish. Picture vibrant salads featuring seasonal produce, topped with seeds or nuts for added crunch and nutrition.

    Gluten-free grains like quinoa, brown rice, and buckwheat not only complement proteins and vegetables but also deliver essential carbohydrates necessary for sustained energy levels. These grains can take center stage in recipes such as stuffed peppers or hearty grain bowls, where they can absorb flavors from various spices and sauces, creating a delightful culinary experience that is both nourishing and satisfying.

    Remember, variety is crucial. Including ingredients from diverse cuisines—such as Mexican, Asian, or Mediterranean—can keep your menu dynamic and enticing. By weaving a wide range of flavors and textures into your offerings, you ensure that meals can cater to even the most discerning palates. This approach is especially important when mastering how to cook for a gluten-free group, as it allows for a menu that feels inclusive and celebratory.

    Implementing Effective Strategies to Prevent Cross-Contamination

    Cross-contamination poses a significant risk when preparing meals for individuals with gluten sensitivities or celiac disease. Even the slightest traces of gluten can trigger severe health reactions, making it critical to adopt proactive measures in the kitchen.

    To prevent cross-contamination, designate specific utensils, cookware, and surfaces exclusively for gluten-free meal preparation. This includes using separate cutting boards, knives, and pots for gluten-free items to ensure that no gluten-containing crumbs or residues remain. When cooking gluten-free grains, always utilize clean water and distinct colanders to prevent any gluten from contaminating your food.

    Labeling is another effective strategy, aiding in identifying gluten-free items while clearly marking equipment intended solely for gluten-free cooking. If gluten-free meals are being prepared in a shared kitchen, it is advisable to communicate with all parties involved to ensure that everyone understands the importance of these precautions to maintain a safe cooking environment.

    Moreover, educate yourself about gluten-free cooking techniques and products. While many brands offer gluten-free sauces and condiments, not all may be adequately labeled, making it essential to read labels carefully. By prioritizing safety and mindfulness in the kitchen, you create a welcoming atmosphere for those with dietary restrictions, allowing everyone to enjoy the meal without concern or anxiety.

    Strategic Budgeting for Gluten-Free Ingredients Without Compromising Quality

    Diverse gluten-free foods in bulk at a vibrant farmers' market, shoppers selecting affordable produce.

    One of the challenges associated with gluten-free cooking is the often elevated cost associated with gluten-free ingredients and products. Being aware of this can assist you in planning your grocery budget more effectively, ensuring a variety of gluten-free options are available without straining your finances.

    Start by exploring bulk-buying options for staples such as rice, quinoa, and gluten-free flours. Many health food stores provide these items at more affordable prices when purchased in larger quantities, allowing for significant savings. Additionally, consider shopping at local farmers’ markets for fresh produce, which can often be both less expensive and more flavorful than what you find in conventional stores. Purchasing seasonal fruits and vegetables not only supports local agriculture but also tends to be more budget-friendly.

    When it comes to gluten-free products, exercise caution with pre-packaged items, as these can carry a hefty price tag. Instead, focus on sourcing whole foods that naturally contain no gluten. For instance, legumes, nuts, and seeds are typically affordable and can be integrated into numerous recipes to provide protein and texture while remaining gluten-free.

    Plan your meals in advance by creating a shopping list that prioritizes essential gluten-free ingredients. This strategy will help you avoid impulse purchases and enable you to stick to your budget more effectively. Embrace creative cooking by utilizing what you have on hand to minimize waste and save money while still providing delicious gluten-free meals. By being mindful of your spending habits, you can ensure that everyone at your meal feels valued and included without putting a strain on your finances.

    Shopping Smart for Gluten-Free Ingredients to Elevate Your Cooking

    Mastering the Art of Reading Labels for Gluten-Free Products

    Reading labels is a crucial skill when it comes to shopping for gluten-free ingredients. Gluten can disguise itself in various forms, making it essential to meticulously examine the ingredients list of every product you purchase. Even seemingly benign items—like salad dressings, marinades, and processed meats—may contain glutenous additives or thickeners that could jeopardize your dietary needs.

    When purchasing packaged goods, actively seek out certified gluten-free labels, which indicate that a product adheres to strict gluten-free standards. This certification provides peace of mind, confirming that cross-contamination did not occur during production. Additionally, familiarize yourself with common terminology that can indicate the presence of gluten. Terms like “wheat flour,” “barley malt,” and “rye” are clear markers that a product is not gluten-free and should be avoided.

    Consider utilizing resources or apps that provide updated lists of gluten-free products. Many stores feature extensive gluten-free sections, making it easier to discover safe options. However, it’s wise to remain vigilant, as product formulations can change without notice, possibly rendering formerly safe options unsuitable.

    Do not hesitate to reach out to manufacturers if you have questions about their products. Many companies are more than willing to provide information regarding gluten-free status, ingredients, and cross-contamination protocols. By taking these precautions and staying informed, you can confidently fill your shopping cart with gluten-free ingredients, setting the stage for delicious meals that everyone can enjoy.

    Discovering Effective Gluten-Free Substitutes for Everyday Cooking

    Finding effective gluten-free substitutes can significantly enhance your cooking experience, allowing you to recreate beloved recipes without gluten. Numerous gluten-free flours, such as almond flour, coconut flour, and rice flour, can often replace wheat flour in various cooking and baking scenarios. Each flour possesses unique characteristics, so understanding their properties will help you achieve optimal results in your culinary endeavors.

    For example, almond flour is excellent for baked goods, adding moisture, while coconut flour is high in fiber and requires additional liquid in recipes due to its absorbent nature. Blending different gluten-free flours can yield fantastic results; for instance, a combination of almond and coconut flour can create a delightful pancake mix that everyone will adore, showcasing the versatility of gluten-free ingredients.

    When it comes to pasta, gluten-free options like brown rice pasta or lentil-based pasta are widely available, providing similar textures and tastes to their gluten-containing counterparts. Experimenting with different brands can help you discover your favorites, as flavors and cooking times can vary significantly between options.

    Moreover, gluten-free grains such as quinoa, millet, and buckwheat can serve as excellent substitutes in traditional dishes, offering unique flavors while remaining gluten-free. Whether you’re crafting a risotto or preparing a comforting casserole, these ingredients can shine, delivering hearty and fulfilling meals that everyone can appreciate.

    With the right substitutes, you need not shy away from your favorite recipes when cooking gluten-free. Instead, embrace the challenge and creativity that gluten-free cooking brings, ensuring that each dish is both safe and delicious, ultimately showcasing the potential of gluten-free cuisine.

    Building a Comprehensive Gluten-Free Pantry for Culinary Success

    Establishing a well-stocked gluten-free pantry can dramatically enhance your ability to prepare gluten-free meals with ease and confidence. Essential gluten-free staples should encompass a variety of grains, flours, and ingredients that facilitate versatility in cooking and baking.

    Grains such as brown rice, quinoa, and buckwheat should occupy a prominent position in your pantry. These ingredients not only provide a solid foundation for meals but also offer diverse nutrient profiles that contribute to overall health. Additionally, keep gluten-free flours like almond flour, coconut flour, and gluten-free all-purpose flour readily available to adapt recipes as needed, ensuring you have options for various culinary creations.

    Furthermore, consider stocking up on gluten-free condiments, sauces, and snacks. Items like gluten-free soy sauce, tamari, and an assortment of spices can elevate your dishes while ensuring they remain safe for your guests. Having a selection of canned goods, such as beans and tomatoes, can simplify meal preparation and add depth to your gluten-free menus, making the cooking process more enjoyable and efficient.

    To maximize your pantry’s potential, periodically check your inventory and replenish items that are running low. This practice can save you time and money while reducing food waste, allowing you to whip up delicious meals at a moment’s notice. By maintaining a well-stocked gluten-free pantry, you’ll empower yourself to create satisfying meals that ensure everyone at your table feels included and satisfied.

    Exploring Specialty Stores for Unique Gluten-Free Ingredients

    Shopping at specialty stores can vastly enrich your gluten-free cooking experience. Many health food shops and gluten-free bakeries offer a treasure trove of unique ingredients, making it easier to find high-quality products that may not be readily available in standard supermarkets.

    Visiting these stores can be an adventure in itself, as you may uncover locally produced gluten-free items, such as artisanal bread, pasta, or baked goods, crafted specifically for those avoiding gluten. These products often originate from smaller producers who prioritize quality and flavor, offering a delightful alternative to mass-produced gluten-free options that may lack character.

    Take the time to engage with knowledgeable staff who can guide you to the best gluten-free selections and potentially introduce you to new products that align with your dietary needs. Exploring these stores enables you to expand your culinary repertoire, trying ingredients you may not have previously considered or even known about.

    Moreover, specialty stores frequently host gluten-free workshops or tasting events, providing valuable opportunities to learn new recipes and cooking techniques. Engaging with the gluten-free community can boost your confidence as a cook, offering support and inspiration as you navigate the world of gluten-free dining and cooking.

    By exploring these unique resources, you not only enhance your gluten-free cooking skills but also contribute to a supportive community that celebrates inclusive dining experiences, making your culinary journey all the more enjoyable.

    Perfecting the Techniques for Preparing Gluten-Free Dishes

    Effective Strategies for Adapting Traditional Recipes to Be Gluten-Free

    Adapting classic recipes for a gluten-free audience is entirely achievable and can lead to delightful, innovative dishes that everyone can enjoy. The key lies in understanding gluten’s role in recipes and identifying suitable replacements that maintain the dish’s integrity and flavor.

    The first step in modifying a recipe is to pinpoint the gluten-containing ingredients. Typically, this will include wheat flour, bread, pasta, and certain thickeners. Once these ingredients are identified, you can explore gluten-free substitutes. For example, when baking, consider utilizing a gluten-free all-purpose flour blend that typically combines rice flour, potato starch, and tapioca flour. These blends are specifically formulated to replicate the properties of traditional flours, yielding similar textures and flavors in your baked goods.

    In savory dishes, gluten-containing components can often be swapped for gluten-free alternatives without sacrificing flavor. For instance, instead of using soy sauce, opt for tamari, which is gluten-free and adds depth to stir-fries and marinades. Similarly, using quinoa or brown rice in place of couscous or traditional pasta can provide a nutritious alternative while maintaining the dish’s gluten-free status.

    Experimenting with spices, herbs, and flavorings can further enhance gluten-free recipes, allowing you to impart unique tastes that elevate the dish. By remaining open to experimentation and embracing new ingredients, you can create satisfying meals that are both gluten-free and bursting with flavor, showcasing the endless possibilities of gluten-free cooking.

    Developing Expertise in Gluten-Free Baking Techniques

    Baking gluten-free can be a rewarding challenge, requiring a few adjustments to achieve the desired texture and flavor. One of the most critical ingredients in gluten-free baking is xanthan gum or guar gum, which can mimic the binding properties of gluten, helping to maintain the structure of baked goods and enhance their texture.

    When working with gluten-free flours, remember that they behave differently compared to standard wheat flour. For instance, almond flour is denser and may necessitate additional eggs or liquid to reach the right consistency. Conversely, coconut flour is highly absorbent, often requiring more wet ingredients in recipes to achieve the desired outcome.

    Start by following gluten-free recipes specifically crafted for these alternative flours, as this will provide a solid foundation before you venture into making your adaptations. Once you feel confident, begin substituting gluten-free flours in your favorite baked goods, keeping in mind the necessary ratios and adjustments for each type of flour to ensure successful outcomes.

    Don’t be discouraged if your initial attempts don’t turn out perfectly—baking gluten-free often requires practice and fine-tuning. Celebrate your successes and learn from any setbacks, and soon you’ll be creating gluten-free cookies, cakes, and breads that everyone will adore, showcasing the potential of gluten-free baking.

    Refining Cooking Techniques for Gluten-Free Meals for Enhanced Flavor

    Adapting your cooking techniques for gluten-free meals can significantly enhance both flavor and texture, ensuring that your dishes are enjoyable and satisfying for all. Gluten-free ingredients often necessitate different cooking methods or times, so being attentive is key to achieving optimal results.

    When cooking gluten-free grains, it’s essential to adhere to specific instructions, as cooking times can vary considerably between types. For example, quinoa generally cooks faster than brown rice, so keep a close watch on both to prevent overcooking or mushiness. Experimenting with techniques like toasting grains before cooking can also deepen their flavors, adding an extra layer of complexity to your dishes, making them more enjoyable and appealing.

    In baking, adjusting oven temperatures can yield better results with gluten-free products. Often, gluten-free baked goods benefit from being baked at slightly lower temperatures or for shorter durations to prevent them from drying out, ensuring that they remain moist and delicious.

    If you’re using gluten-free pasta, be mindful of the cooking times, as they can differ from traditional pasta. After cooking, rinsing your gluten-free pasta can help remove excess starch, preventing it from becoming gummy or clumping together.

    By refining these techniques and remaining adaptable in your approach, you can create gluten-free dishes that are not only safe for your guests but also bursting with flavor and texture, ensuring an enjoyable dining experience for everyone.

    Ensuring Safety and Comfort in Gluten-Free Dining Experiences

    Establishing Open Lines of Communication with Guests for Enhanced Dining Experiences

    The foundation of a successful gluten-free dining experience is clear and open communication with your guests. Before finalizing your menu, it is wise to inquire about any dietary restrictions, allergies, or preferences to foster a safe and enjoyable atmosphere for all attendees.

    Encourage your guests to share their concerns regarding gluten and any other allergens they may have. This openness cultivates a sense of trust and allows you to tailor your menu effectively, catering to the specific needs of each individual. Additionally, discussing dietary requirements well in advance helps to eliminate last-minute stresses during meal preparation and ensures a smooth dining experience.

    Make it a priority to educate yourself about the specific needs of individuals with celiac disease or gluten sensitivities. Understanding the severity of their reactions can assist you in crafting a menu that considers their requirements and prioritizes their safety, ensuring that everyone at the table feels comfortable and secure.

    Offering extra options or variations can also be advantageous. For example, if you’re preparing a dish that can easily be made gluten-free, consider creating a separate version to ensure every guest feels welcomed at the table. Ultimately, clear communication will not only enhance the meal experience but also cultivate an inviting and supportive dining environment.

    Creating an Inclusive and Welcoming Dining Atmosphere for All Guests

    An inclusive environment is vital when hosting a gluten-free gathering. Your guests should feel comfortable and valued, regardless of their dietary restrictions. Begin by setting the stage for inclusivity through thoughtful meal planning and presentation that highlights the variety and creativity of gluten-free cooking.

    Consider decorating the table with an array of gluten-free dishes, showcasing the creativity and diversity that gluten-free cooking offers. Encouraging guests to serve themselves allows them to navigate the buffet and select their favorites while ensuring they have control over their dietary choices. This self-service approach fosters a sense of independence and empowerment for those with dietary restrictions.

    Be attentive and approachable throughout the meal. Offer to answer questions about the dishes you’ve prepared and share insights into the ingredients used. This not only alleviates any concerns your guests may have but also encourages engaging conversations about gluten-free cooking and living, helping to foster connections among diners.

    Additionally, cultivating a relaxed atmosphere goes a long way in ensuring everyone feels at ease. Avoid drawing attention to dietary restrictions; instead, focus on the joy of sharing a meal together. When diners feel comfortable and included, they’re more likely to appreciate the experience and recognize the effort you put into accommodating their needs, leading to a memorable gathering.

    Being Prepared for Dietary Emergencies to Ensure Guest Safety

    Despite the best precautions, dietary emergencies can arise, making it essential to be prepared. Accidental gluten exposure can lead to severe reactions, particularly for those with celiac disease or gluten sensitivities. Having a plan in place can help mitigate these situations effectively and ensure the safety of your guests.

    Begin by familiarizing yourself with the symptoms of gluten exposure, which may include digestive distress, fatigue, and headaches. If you suspect a guest has been affected, approach the situation calmly and ask how you can assist them. Depending on their needs, this may involve ensuring they have access to safe foods, hydration, or even medical assistance if required.

    Maintaining an emergency kit for dining events, including gluten-free snacks and hydration options, can offer immediate relief and comfort to a guest who may feel unwell after accidental gluten exposure. This preparedness demonstrates your commitment to their well-being and creates a supportive environment.

    Educating yourself about first aid procedures for allergic reactions can also be beneficial. Be prepared to offer assistance and reassure your guests that you are dedicated to their safety. Handling these emergencies with care and compassion will enhance your reputation as a considerate and conscientious host, ensuring a positive dining experience for all.

    Implementing Clear Food Labeling for Safety and Clarity

    Clear food labeling is an essential aspect of hosting a gluten-free meal. By ensuring all dishes are labeled with their ingredients, you empower your guests to make informed choices and avoid potential allergens, contributing to a safer dining experience.

    Use simple, visible labels to identify gluten-free items, specifying any other potential allergens as well. This not only demonstrates your commitment to their dietary needs but also allows guests to navigate the meal confidently, enhancing their overall dining experience. Providing clear labeling fosters an atmosphere of respect and consideration for guests’ dietary restrictions.

    In addition to labels, consider providing a brief description of each dish, highlighting any unique ingredients or flavors. This transparency can spark conversations and encourage guests to try new foods, expanding their culinary horizons and enriching the dining experience.

    If you’re serving dishes that can be modified, such as a taco bar with various fillings, clearly separate the gluten-free options from those containing gluten. This practice further reduces the risk of cross-contamination and reassures guests that their dietary needs are being respected and prioritized.

    By prioritizing clear food labeling, you foster a safe and welcoming environment, allowing everyone to enjoy the meal without concern or stress related to dietary restrictions.

    Understanding the Etiquette of Gluten-Free Dining for a Respectful Experience

    Respecting the Dietary Needs of All Guests for an Inclusive Gathering

    Respecting dietary needs is paramount when hosting meals that include gluten-free options. Acknowledging the significance of gluten-free diets for your guests helps create an inclusive atmosphere where everyone feels valued and appreciated.

    Take the time to learn about the various dietary restrictions that may be present at your gathering. Understanding the distinctions between celiac disease and gluten sensitivity, for instance, can guide you in providing appropriate options tailored to each individual’s needs. This knowledge will empower you to create a menu that is both delicious and accommodating.

    Avoid trivializing or dismissing dietary restrictions, as this can lead to discomfort for those affected. Instead, celebrate the opportunity to create diverse and delicious gluten-free dishes that highlight the richness and variety of gluten-free cooking. This positive attitude encourages guests to feel comfortable and valued, fostering a sense of community.

    Encouraging open dialogue about dietary needs fosters an environment of respect and understanding. Guests will appreciate your efforts to accommodate their requirements, and this experience can strengthen bonds through shared meals that embrace all dietary preferences and restrictions, ultimately enhancing the overall experience of your gathering.

    Offering Thoughtful Alternatives for Inclusivity and Satisfaction

    When preparing meals for a diverse group, providing alternatives ensures that everyone feels included and satisfied. Offering gluten-free options alongside traditional dishes allows guests to select what works best for them, creating a sense of belonging.

    For example, if you’re serving sandwiches, include gluten-free bread or wraps for those who avoid gluten. This consideration demonstrates your thoughtfulness towards their dietary needs and ensures that no one feels left out during the meal. Such gestures promote a welcoming atmosphere where everyone can enjoy the culinary offerings.

    When preparing side dishes, consider offering both gluten-containing and gluten-free versions whenever possible. For instance, serving a gluten-free pasta salad alongside a traditional one enables guests to enjoy the flavors without worry, fostering a sense of inclusion.

    Moreover, educating other guests about the gluten-free options can help promote understanding and inclusivity. Sharing information about gluten-free ingredients can spark conversations and foster a sense of community at the table, enhancing the overall dining experience.

    By prioritizing alternatives and showcasing the variety of gluten-free cooking, you create a welcoming environment that celebrates the beauty of diverse dining experiences, making every guest feel valued and included.

    Facilitating Education on Gluten-Free Living to Foster Awareness

    Educating others about gluten-free diets not only raises awareness but also promotes understanding and inclusivity at shared meals. Your role as a host provides an opportunity to share knowledge and insights into gluten-free cooking, debunking myths and misconceptions that may exist within the community.

    Begin by sharing your own journey with gluten-free cooking. Whether it’s a recipe that turned out unexpectedly well or a challenge you overcame, personal stories can make the topic relatable and enjoyable for your guests. This engagement fosters a supportive atmosphere where guests feel comfortable asking questions and sharing their experiences.

    Encourage guests to ask questions, providing clear and informative answers. Be prepared to discuss common gluten-containing ingredients, the importance of cross-contamination prevention, and the benefits of gluten-free eating. This knowledge can help build a supportive community around gluten-free dining, creating a sense of camaraderie among those present.

    Additionally, consider creating resources such as recipe cards or pamphlets for guests to take home. These can include helpful tips, gluten-free substitutes, and information about gluten sensitivity. By equipping others with knowledge, you empower them to make informed choices in their own lives, fostering a culture of understanding and support.

    Cultivating an educational atmosphere enriches the dining experience, transforming a simple meal into an opportunity for learning and connection that extends beyond the dining table.

    Maintaining Clear Communication Throughout the Meal for a Positive Experience

    Clear communication is essential when hosting a gluten-free gathering. Inform guests about gluten-free options and any potential cross-contamination risks associated with the meal. By being transparent, you foster trust and ensure that everyone feels secure while dining, enhancing their overall experience.

    Consider providing a menu ahead of time, outlining the dishes being served along with their ingredients. This enables guests to review options and communicate any concerns in advance, ensuring a seamless dining experience.

    During the meal, encourage your guests to engage in conversations about the dishes prepared. Prompt them to ask questions regarding ingredients and preparation methods, offering insights into your gluten-free cooking techniques. This interaction fosters a sense of community and engagement among diners, making the meal more enjoyable.

    If you’re serving a buffet-style meal, ensure that gluten-free items are clearly marked, assisting guests in confidently navigating their options. Additionally, highlight any items that may contain gluten to further assist those with dietary restrictions, promoting a safe and enjoyable dining experience for all.

    By prioritizing clear communication, you foster an atmosphere of respect and consideration, allowing everyone to relish the meal without anxiety surrounding their dietary needs, ultimately creating a memorable gathering.

    Exciting Gluten-Free Recipe Ideas for Every Occasion to Delight Your Guests

    Scrumptious Starters and Appetizers to Kick Off Your Meal

    When it comes to starters and snacks, gluten-free options can be both delicious and satisfying. Consider preparing gluten-free crackers, served alongside a variety of dips and spreads. Hummus, guacamole, or a zesty salsa can offer a burst of flavor, perfect for socializing and mingling before the main event.

    Vegetable-based starters present another fantastic way to kick off a gluten-free meal. Roasted seasonal vegetables drizzled with olive oil and sprinkled with herbs create a colorful and appealing display that tempts the taste buds. Alternatively, stuffed mushrooms filled with gluten-free breadcrumbs, cheese, and fresh herbs provide a delightful bite-sized treat that guests will love.

    For a unique twist, consider assembling gluten-free skewers with grilled chicken, colorful vegetables, and sweet pineapple. Marinated and grilled to perfection, these skewers are sure to be a hit at any gathering, offering a fun and interactive dining experience.

    If you’re feeling adventurous, whip up gluten-free energy bites made with oats, nut butter, honey, and your choice of add-ins such as chocolate chips or dried fruits. These tasty treats can serve as a delightful snack for guests to enjoy throughout the evening, keeping energy levels high and spirits lifted.

    By offering a variety of gluten-free starters, you set the tone for an inclusive meal that caters to all dietary preferences while showcasing the flavors and creativity that gluten-free cooking can achieve.

    Flavorful Main Course Options to Satisfy Every Palate

    Main courses are the essence of any meal, and gluten-free options can be both comforting and flavor-packed. Grilled chicken served with a vibrant quinoa salad exemplifies a balanced dish that is not only gluten-free but also loaded with nutrients. Tossed with fresh herbs, crisp vegetables, and a light dressing, this dish is bound to satisfy both health-conscious diners and those looking for something delicious.

    Gluten-free pasta offers another fantastic option, with numerous ways to prepare it. Consider crafting a rich and savory sauce to accompany your pasta, such as a homemade marinara or a creamy pesto. Add seasonal vegetables and protein, like succulent grilled shrimp or sautéed chicken, to create a hearty meal that everyone will enjoy, showcasing the versatility of gluten-free ingredients.

    Another delicious gluten-free main course is a hearty vegetable curry served alongside brown rice. This vibrant dish, brimming with spices and flavors, showcases the versatility and creativity of gluten-free cooking. Using coconut milk adds richness while keeping the dish dairy-free, making it accessible to a broader audience that appreciates diverse culinary experiences.

    Don’t overlook the potential of stuffed peppers, filled with a delightful mixture of rice, beans, and spices. Baked until tender, these peppers can be both visually stunning and incredibly satisfying, making them a standout option for your gluten-free menu.

    By focusing on bold flavors and wholesome ingredients, you can create gluten-free main courses that are not only safe for your guests but also highlight the joys of gluten-free cooking, ensuring a memorable dining experience.

    Indulgent Gluten-Free Desserts to End on a Sweet Note

    No meal is complete without a sweet finish, and gluten-free desserts can be just as indulgent as their gluten-containing counterparts. Consider crafting a fruit crumble, where gluten-free oats and almond flour create a delicious topping over a medley of fresh fruits. This warm dessert, served with a scoop of vanilla ice cream, is sure to impress and satisfy sweet cravings.

    Chocolate mousse is another delightful gluten-free option. Made with high-quality chocolate, eggs, and cream, this rich and airy dessert satisfies any sweet tooth, providing a luxurious experience. Serve in individual cups for an elegant touch that elevates your dessert presentation.

    For a lighter choice, consider gluten-free pavlova topped with whipped cream and seasonal fruits. This meringue-based dessert is naturally gluten-free and presents beautifully, making it an ideal selection for special occasions where you want to impress your guests.

    If you’re feeling adventurous, gluten-free brownies can be a crowd-pleaser. Made with almond flour or a gluten-free flour blend, these can be dense and fudgy, perfect for a decadent treat that satisfies chocolate cravings and leaves a lasting impression.

    By incorporating gluten-free desserts into your meal, you ensure that everyone can indulge in a sweet finish, leaving a delightful and lasting impression on your guests, making your gathering truly memorable.

    Essential Resources for Mastering Gluten-Free Cooking for Enhanced Skills

    Valuable Cookbooks and Reliable Websites to Inspire Your Culinary Journey

    In the realm of gluten-free cooking, numerous resources are available to inspire and guide your culinary journey. Look for cookbooks specifically dedicated to gluten-free recipes, which often provide invaluable insights and tips tailored to this dietary preference. Popular titles typically feature a broad array of recipes, from quick weeknight meals to elaborate desserts, ensuring that you have ample options at your fingertips to suit various tastes and occasions.

    Many online platforms offer invaluable resources, including blogs and websites devoted to gluten-free living. These sites often include user-generated recipes, allowing for a community-driven approach to cooking that fosters collaboration and creativity. You can also find forums and discussions where gluten-free cooks share their experiences and advice, creating a supportive network for those navigating this dietary lifestyle.

    Social media also serves as a fantastic avenue for discovering new gluten-free recipes and ideas. Platforms like Instagram and Pinterest are rich with visuals that can stimulate your culinary creativity. Look for hashtags like #glutenfreerecipes or #glutenfreebaking to uncover engaging content, innovative techniques, and connect with fellow gluten-free enthusiasts to share ideas and inspiration.

    By utilizing these resources, you can enrich your gluten-free cooking repertoire, gaining confidence in your ability to create meals that delight and satisfy every palate, ensuring a successful and enjoyable culinary experience.

    Connecting with Supportive Gluten-Free Communities for Shared Experiences

    Engaging with gluten-free communities can provide invaluable support and camaraderie as you navigate your gluten-free cooking journey. Online forums, social media groups, and local meet-up events allow individuals to share experiences, recipes, and advice, creating a nurturing environment for gluten-free cooking that fosters connection and learning.

    Many communities also host events such as gluten-free food fairs or cooking classes, providing opportunities to learn new skills and connect with like-minded individuals who share your dietary interests. Participating in these events can expand your knowledge, deepen your understanding of gluten-free cooking techniques, and introduce you to new products and ingredients that can enhance your culinary repertoire.

    Additionally, local support groups focused on gluten-free living often share resources for dining out, shopping, and recipe exchanges, helping you feel empowered and informed in your journey towards gluten-free living. Engaging with gluten-free communities fosters a sense of belonging and connection, making the transition to gluten-free living a more enjoyable and fulfilling experience.

    Frequently Asked Questions (FAQs) About Gluten-Free Living to Enhance Your Knowledge

    What are some common gluten-free grains to include in my diet?

    Common gluten-free grains include rice, quinoa, millet, buckwheat, and gluten-free oats. These grains can serve as the foundation for various dishes and provide essential nutrients that contribute to a balanced diet.

    How can I effectively avoid cross-contamination in the kitchen?

    To prevent cross-contamination, utilize separate utensils, cutting boards, and cooking surfaces exclusively for gluten-free food. Thoroughly clean all equipment before use to ensure safety and prevent accidental exposure to gluten.

    Are gluten-free products always healthier than their gluten-containing counterparts?

    Not necessarily. Some gluten-free products can be heavily processed and may contain added sugars or unhealthy fats. Focus on whole foods for a healthier diet, prioritizing nutrient-dense options that support your overall well-being.

    Can I use regular flour in gluten-free recipes, and what should I substitute?

    Regular flour contains gluten, so it cannot be directly substituted in gluten-free recipes. Always opt for gluten-free flours that are specifically designed for baking and cooking to achieve the best results.

    How can I make gluten-free bread rise properly?

    Utilizing xanthan gum or guar gum can help enhance the texture and rising ability of gluten-free bread, mimicking the properties of gluten and yielding a light, airy loaf.

    Is gluten-free pasta available in different varieties, and how do they differ?

    Yes, gluten-free pasta comes in various types, including those made from rice, quinoa, lentils, and chickpeas, each offering unique textures and flavors that can complement a range of sauces and dishes.

    What are some gluten-free snack options I can easily prepare?

    Gluten-free snacks include fresh fruits and vegetables, gluten-free crackers, popcorn, and energy bites made from nuts, seeds, and dried fruits, providing delicious and healthy options for any occasion.

    How do I effectively communicate dietary needs to my guests ahead of time?

    Inquire about guests’ dietary restrictions ahead of time and encourage open dialogue about their needs to ensure a safe and enjoyable dining experience for everyone.

    What are some simple gluten-free dessert ideas I can try?

    Simple gluten-free desserts include fruit crumbles, chocolate mousse, pavlova, and gluten-free brownies, allowing for indulgence without gluten and catering to a variety of tastes.

    Where can I find reliable gluten-free recipes and cooking inspiration?

    Gluten-free recipes can be found in dedicated cookbooks, websites, food blogs, and social media platforms, offering a plethora of options for various tastes and dietary needs, ensuring you never run out of ideas.

    Connect with us on Facebook for the latest updates and support!

    The post How to Cook for a Gluten-Free Group: Essential Tips appeared first on https://cookinggods.com

    The Article Gluten-Free Cooking Tips for Your Group Gatherings Was Found On https://limitsofstrategy.com

  • Meat Tenderizer Boosts Flavor and Texture for Delicious Meals

    Meat Tenderizer Boosts Flavor and Texture for Delicious Meals

    Unlock Culinary Excellence: Master the Art of Meat Tenderization with a Quality Tenderizer

    The remarkable advantages of a meat tenderizer are derived from its unique capacity to mechanically break down muscle fibers. This pivotal process not only enhances the tenderness of various cuts of meat but also significantly amplifies their overall flavor. By delving into the intricate interplay between texture, flavor, and diverse cooking techniques, both amateur cooks and seasoned chefs can utilize this knowledge to create exceptional dishes that captivate the palate and elevate the entire dining experience.

    Dive Deep into the Mechanics of Meat Tenderization for Culinary Mastery

    A meat tenderizer disrupting tough muscle fibers in brisket, enhancing tenderness.

    When meat is subjected to the mechanical action of a tenderizer, it leads to a significant disruption of the tough muscle fibers. This disruption is particularly crucial for improving the tenderness of naturally resilient cuts such as brisket or chuck. These cuts, sourced from well-exercised muscles, are inherently fibrous and chewy. By effectively breaking down these fibers, a tenderizer modifies the structural integrity of the meat, rendering it far more enjoyable and palatable, which ultimately transforms the entire dining experience into something extraordinary.

    As meat becomes more tender, the overall eating experience is transformed dramatically. Chewing requires significantly less effort, enabling diners to focus on the rich flavors rather than struggling with tough fibers. This transformation is vital across various culinary contexts, from traditional Australian barbecues to hearty slow-cooked stews in Europe, where achieving a balance between texture and flavor is essential for the enjoyment of any dish.

    Optimize Your Cooking: Maximize Surface Area for Enhanced Marinade Absorption

    The mechanical action of disrupting muscle fibers not only tenderizes but also significantly increases the surface area of the meat. This expanded surface area allows marinades and spices to penetrate more deeply, enriching the flavor profile of the dish. As the meat becomes more porous and tender, seasoning can effectively permeate every layer, ensuring that the flavors infuse each bite rather than simply coating the surface.

    Imagine the delightful experience of biting into a perfectly marinated steak or chicken breast that bursts with flavor. This phenomenon is especially prominent in global cuisines that prioritize marinades, such as the citrus-infused marinades celebrated in Caribbean cuisine or the complex spice blends characteristic of Middle Eastern dishes. The tenderizer’s ability to enhance flavor through improved marinade absorption is indeed a transformative advantage for both home cooks and culinary professionals alike.

    Achieve Unforgettable Juiciness: Enhance Your Meat’s Flavor and Moisture

    Juiciness is a hallmark of high-quality meat that many diners crave, and the mechanical action of a meat tenderizer is crucial in retaining moisture within the meat. By creating a more tender structure, the meat is better equipped to hold onto its natural juices throughout the cooking process, significantly boosting its flavor. This aspect is essential for achieving that succulent experience that diners seek.

    When cooked properly, a tender piece of meat retains its juices rather than losing them to the cooking environment, resulting in a mouth-watering experience that is unforgettable. This quality becomes especially vital in high-heat cooking methods such as grilling or roasting, where moisture loss can lead to a dry final product. The juicy, flavorful meat resulting from the tenderization process is what culinary traditions strive for, whether it’s a classic barbecue or a sophisticated gourmet creation.

    Harnessing Enzymatic Action: Elevate Meat Tenderization and Flavor

    Enzymes in meat tenderizer breaking down protein fibers in a steak, enhancing flavor and texture.

    Beyond the mechanical aspects, the enzymatic properties of a meat tenderizer play a pivotal role in enhancing flavor. These natural compounds work at the molecular level to break down proteins, leading to an overall improvement in the meat’s texture and taste. Understanding the function of these enzymes provides valuable insights into achieving optimal results in meat preparation and flavor enhancement.

    Grasping Protein Degradation: Achieve Optimal Tenderness and Flavor

    Enzymes such as papain (derived from papaya) and bromelain (from pineapple) are frequently employed in meat tenderizers to facilitate the breakdown of proteins. These enzymes specifically target the long chains of amino acids that comprise the proteins within meat, breaking them down into shorter, more digestible segments. This degradation process not only softens the meat but also has significant implications for the development of flavor.

    As the proteins decompose, they release smaller peptides and amino acids, many of which contribute to umami, often regarded as the fifth flavor. The presence of umami is particularly significant in meats, as it adds depth to flavors that are both rich and satisfying. By utilizing enzyme-based tenderizers, cooks can elevate the overall taste of their dishes, making them far more appealing to discerning diners.

    Unlock Maximum Flavor Enhancement Through Enzymatic Action

    The enzymatic action involved in tenderization does more than merely soften the meat; it also significantly amplifies its flavor profile. As enzymes break down proteins, they can liberate existing flavor compounds, thus intensifying the overall taste experience. This effect is particularly pronounced in tougher cuts of meat, which, when prepared correctly, yield deep, complex flavors often lacking in more tender cuts.

    These enhanced flavors can be savored across various cuisines. For example, in South American barbecue cultures, where meats are marinated with tropical fruits rich in natural enzymes, the resulting dish is vibrant and full of flavor, celebrating the art of grilling. This exemplifies the potential of enzymatic tenderizers to transform ordinary dishes into extraordinary culinary experiences that leave a lasting impression.

    Achieving a Memorable Dining Experience Through Improved Texture

    Close-up of tenderized meat in shabu-shabu, showcasing smooth, juicy texture enhancing dining experience.

    Achieving the right texture is a fundamental aspect of cooking meat. The enzymatic process not only tenderizes but also creates a smoother, more enjoyable texture. Meat that has undergone enzymatic tenderization is not only softer but also provides a delightful mouthfeel, which significantly enhances the overall dining experience.

    When cooked, tenderized meat maintains a desirable texture that keeps diners engaged with each bite. This quality becomes especially important in cuisines emphasizing intricate flavors and textures, such as in Japanese cooking, where the quality of the meat is critical in dishes like shabu-shabu. The interplay between tenderness and texture greatly enhances the enjoyment of meat-based meals, transforming them into memorable culinary experiences.

    Boosting Nutritional Value Through Enzymatic Processes

    Another significant benefit of enzymatic tenderization is the potential increase in the bioavailability of essential amino acids. When proteins are broken down, the body can absorb these nutrients more effectively. For individuals focused on maximizing their protein intake, particularly athletes and health-conscious consumers, tenderizing meat can play a positive role in achieving their dietary goals.

    Moreover, the tenderization process can lead to a more enjoyable eating experience, encouraging individuals to increase their consumption of lean proteins as part of a balanced diet. This consideration is particularly relevant in various global contexts where protein intake is a key dietary focus, from the protein-rich diets of the Mediterranean to the high-protein staples found throughout the Americas.

    Enhancing Cooking Efficiency: Reduce Cooking Times with Tenderized Meat

    The use of enzymes can significantly shorten cooking times, making meal preparation more efficient. As the proteins break down, the meat becomes less dense, allowing heat to penetrate more rapidly during the cooking process. This time-saving aspect is invaluable for both busy home cooks and professional chefs seeking to optimize their kitchen workflow.

    Shorter cooking times not only save valuable time but also reduce energy consumption, which benefits both the environment and your finances. In regions where energy costs are elevated, such as parts of Europe or Australia, utilizing meat tenderizers can lead to significant savings in both cooking time and energy expenditure, all while preserving flavor and quality.

    Maximize Flavor with Effective Marinade Absorption Using a Meat Tenderizer

    The connection between marinade and meat is a fundamental aspect of flavor enhancement that demands careful consideration. When meat is tenderized, its ability to absorb marinades improves dramatically, directly influencing the overall flavor profile. Understanding this relationship is crucial for maximizing the taste potential of any dish.

    Facilitate Enhanced Marinade Penetration for Richer Flavors

    The structural changes in meat caused by tenderization significantly improve its capacity to absorb marinades. A tenderizer creates pathways within the meat that allow marinades to seep in more effectively. This results in flavors enveloping the meat instead of merely coating the surface, leading to a more harmonious taste experience.

    When marinades rich in herbs, spices, and acids are applied to tenderized meat, their effectiveness is amplified. Techniques such as marinating overnight enable the meat to absorb the full spectrum of flavors, whether it’s the zesty brightness of citrus in a Thai marinade or the deep, smoky notes characteristic of a barbecue rub.

    Deep Flavor Infusion for Complex Culinary Experiences

    The deeper flavor infusion achieved through tenderizing is pivotal in crafting complex, layered tastes that resonate throughout the entire dish. When marinades penetrate deeply into the meat, they interact with the proteins and fats, creating flavor compounds that enrich every bite with depth and satisfaction.

    This is especially significant in dishes that celebrate bold flavors, such as Mexican carne asada or Indian tikka, where the marinade’s spices and herbs meld beautifully with the meat. The infusion process transforms the meat from a simple protein source into a culinary canvas, showcasing the depth and richness of global flavors that excite the palate and create unforgettable meals.

    Ensure Moisture Retention for Juicy, Flavorful Meat

    One of the most critical benefits of marinating tenderized meat is moisture retention. When meat is marinated, it absorbs not only flavors but also moisture. This dual absorption guarantees that the meat remains juicy during cooking, leading to a more satisfying eating experience.

    Dishes like Moroccan tagines, which rely on juicy, tender meat, exemplify the importance of moisture retention. Here, the processes of tenderization and marination work in harmony to create meat that melts in the mouth, bursting with flavor and moisture. The result is a dish that feels luxurious and indulgent without being overly rich or heavy.

    Texture Enhancement Through the Synergy of Tenderizing and Marinating

    The combination of tenderizing and marinating can dramatically improve the texture of the meat. A tenderizer breaks down the fibers, allowing the marinade to work its magic, resulting in a meat product that is both tender and enjoyable to consume.

    From the perfect steak to juicy chicken thighs, the enhanced texture achieved through this process makes meals more pleasurable. The contrast between tender meat and the crunchy exterior often found in grilled or roasted dishes creates a delightful eating experience celebrated in cuisines worldwide.

    Boosting Cooking Efficiency with the Strategic Use of a Meat Tenderizer

    Cooking efficiency is a vital consideration for anyone involved in meal preparation, whether at home or in a professional kitchen. The application of a meat tenderizer can significantly enhance this aspect, resulting in a streamlined cooking process that maintains both quality and flavor in every dish.

    Achieve Shorter Cooking Times for Greater Convenience

    One of the most immediate benefits of using a meat tenderizer is the reduction in cooking time. Tenderized meat cooks more quickly due to its altered structure, allowing heat to penetrate more effectively, resulting in faster cooking times. This efficiency is particularly advantageous for busy individuals or those preparing large meals for gatherings.

    Imagine the difference it makes when hosting a family barbecue or a dinner party; tenderized meats facilitate faster preparation, allowing you to spend more time enjoying the company of your guests instead of laboring away in the kitchen. This benefit is universally appreciated, whether in bustling urban environments or relaxed rural settings across the globe.

    Ensure Even Cooking for Consistent, Delicious Results

    Another significant advantage of tenderized meat is the assurance of even cooking. When the fibers are broken down, the meat cooks more uniformly, minimizing the risk of overcooked exteriors and undercooked interiors. This feature is essential for achieving the perfect medium-rare steak or ensuring chicken is thoroughly cooked without drying out.

    The implications for both food safety and quality are substantial. With evenly cooked meat, diners can enjoy a consistent texture and flavor, which is particularly crucial across various culinary traditions, from Asian stir-fries to Western roasts.

    Realize Energy Savings for Sustainable Cooking Practices

    Efficiency in cooking not only saves time; it also translates into significant energy savings. With reduced cooking times, overall energy consumption decreases, making meal preparation more sustainable. This is an important consideration in our increasingly eco-conscious world, where reducing energy usage is essential for environmental health.

    Cooks in both homes and restaurants are increasingly recognizing the benefits of energy-efficient cooking methods, and tenderizing meat can significantly contribute to this goal. By embracing techniques that optimize cooking efficiency, chefs and home cooks can create delicious meals while remaining mindful of their environmental footprint and energy consumption.

    Maximize Versatility in Cooking Methods with a Quality Meat Tenderizer

    The versatility that a meat tenderizer provides is a game-changer for anyone who enjoys cooking. Tenderized meat can be prepared using various cooking methods, each contributing uniquely to the overall flavor and experience of the dish.

    Grilling for Flavorful, Juicy Results

    Grilling is synonymous with flavor, and tenderized meat shines in this cooking method. The high heat of the grill can be unforgiving, but tenderized meat retains its juiciness and flavor, even when subjected to intense temperatures.

    When grilling, the caramelization of sugars and the Maillard reaction enhance the meat’s natural flavors, resulting in a delicious crust. Tenderized cuts, whether it’s a steak or chicken breast, are perfect for this technique, ensuring that the final product is not only tender but also bursting with flavor, making it a popular choice at barbecues around the world.

    Roasting to Achieve Perfect Flavor and Texture

    Roasting is another method where the benefits of using a meat tenderizer become apparent. Tenderized meat results in even cooking, which is crucial for roasting larger cuts. The combination of dry heat and the breakdown of fibers leads to a succulent, flavorful dish that is sure to impress.

    Consider classic dishes like herb-crusted roast lamb. The tenderness achieved through tenderization allows for the full expression of spices and herbs, creating a dish that resonates with flavor. The ability to infuse and retain moisture ensures that the final product is enjoyable and memorable, providing a culinary experience that diners will cherish and remember.

    Braising for Rich, Flavorful Outcomes

    In braising, where meat is slowly cooked in liquid, tenderized pieces excel due to their enhanced tenderness. The slow cooking process allows the flavors of the braising liquid to permeate the meat, resulting in a rich and complex dish.

    This technique is widely utilized in cuisines that thrive on hearty meals, such as French coq au vin or Italian osso buco. The tenderization process ensures that the meat can withstand long cooking times without becoming tough, resulting in a delicious outcome that embodies comfort and flavor, capturing the essence of home cooking.

    Crafting Enhanced Flavor Profiles with Effective Use of a Meat Tenderizer

    The enhancement of flavor profiles is perhaps one of the most exciting aspects of utilizing a meat tenderizer. By improving the meat’s interaction with spices, herbs, and sauces, cooks can achieve a depth of flavor that elevates any dish to new culinary heights.

    Integrate Spices for Maximum Flavor Impact

    Tenderized meat allows spices to integrate more thoroughly, enriching the overall flavor profile. The increased surface area and improved texture facilitate deeper penetration of spices, ensuring an even distribution of flavors throughout the meat.

    In cuisines where spices are paramount, such as Indian or Middle Eastern cooking, the ability to fully integrate these flavors is essential. Dishes like biryani or shawarma rely on the complete immersion of spices into the meat, which cannot be achieved with tougher cuts. The tenderizing process ensures that every bite is a burst of flavor, reflecting the rich culinary traditions of these cultures.

    Infusing Herbs for Elevated Culinary Taste

    Herbs, often used to brighten and elevate dishes, benefit significantly from the tenderizing process. When herbs are applied to tenderized meat, they can penetrate deeply, imparting complex and aromatic flavors that linger on the palate long after the meal.

    Consider classic dishes like Italian osso buco, where fresh herbs harmonize beautifully with tenderized meat to create a symphony of flavors. The infusion of herbs not only enhances the taste but also contributes to the visual appeal of the dish, crafting a feast for the senses that embodies the essence of culinary artistry.

    Enhancing Sauce Compatibility for Memorable Culinary Creations

    The compatibility of tenderized meat with various sauces cannot be overstated. The enhanced texture and flavor absorption capabilities ensure that sauces adhere well and amplify the overall dish. Whether it’s a rich barbecue sauce or a delicate chimichurri, tenderized meat provides the ideal canvas for culinary creativity.

    In global cuisines, sauces often define the character of a dish—think of zesty salsa in Mexican cuisine or robust gravy in classic British meals. The ability of tenderized meat to pair seamlessly with a variety of sauces enhances the overall taste experience, making each meal memorable and satisfying, leaving diners eager for more.

    Creating a Superior Eating Experience Through the Art of Meat Tenderization

    Ultimately, the primary aim of cooking is to create an enjoyable eating experience. The use of a meat tenderizer significantly enhances this experience by improving tenderness, flavor intensity, and texture variety. Understanding these elements can fundamentally transform how meals are appreciated and enjoyed.

    Elevate Tenderness for Effortless and Enjoyable Consumption

    Tenderized meat fundamentally alters how diners engage with their food. Enhanced tenderness makes the meat easier to chew and savor, allowing the full range of flavors to shine through without demanding excessive effort. This transformation is especially critical in settings where the focus is on shared meals or communal dining experiences.

    In cultures that celebrate food as a communal experience—think of a traditional Italian family meal or a South African braai—the ease of eating tender meat fosters a convivial atmosphere. Diners can concentrate on conversation and enjoyment rather than grappling with tough fibers, greatly enhancing the overall dining experience.

    Maximize Flavor Intensity for Lasting Culinary Impressions

    The enhanced flavor intensity that arises from using a meat tenderizer is transformative. Each bite becomes a revelation, as tenderized meat bursts with flavor thanks to the processes of tenderization, marination, and cooking. This transformation resonates with diners, creating a memorable meal that lingers long after the last bite.

    For chefs and home cooks alike, this intensity serves as a point of pride, enabling them to showcase their culinary skills and creativity. Dishes rich in flavor resonate deeply with diners, often leading to repeat requests and cherished memories of shared meals, solidifying the tenderizer’s role in creating unforgettable dining experiences.

    Enhancing Texture Variety for a Delightful and Engaging Dining Experience

    Texture variety is a critical aspect of the eating experience, and tenderization allows for a range of textures that enhance enjoyment. The contrast between tender meat and accompanying elements like crisp vegetables or creamy sauces creates a multi-layered experience that engages the palate in exciting ways.

    In various culinary traditions, the appreciation for texture is paramount. Consider the balance of textures in Japanese kaiseki dining or the interplay of tender meat with crunchy pickles in Korean barbecue. The ability to create and appreciate this variety is significantly enhanced when meat is tenderized, leading to a satisfying and delightful meal that leaves diners craving more.

    Common Questions About Meat Tenderizers: Your Guide to Understanding

    What is a meat tenderizer, and what does it do?

    A meat tenderizer is a tool or substance designed to break down tough muscle fibers in meat, making it softer and easier to chew, ultimately enhancing the overall eating experience.

    How does a meat tenderizer enhance flavor?

    A meat tenderizer boosts flavor by breaking down muscle fibers, allowing marinades and spices to penetrate deeper, resulting in more intense and evenly distributed flavors throughout the meat.

    Can I use natural tenderizers in my cooking?

    Yes, natural tenderizers like pineapple, papaya, or vinegar can be effective. They contain enzymes that help break down proteins, making the meat tender and flavorful.

    Are meat tenderizers safe to use?

    Yes, meat tenderizers are generally considered safe when used as directed. However, it is essential to follow recommended usage instructions to avoid overly softening the meat, which can impact its texture and quality.

    How long should I tenderize meat for best results?

    The time required to tenderize meat varies depending on the type and thickness of the cut. Typically, 30 minutes to a few hours is sufficient, but over-tenderizing can result in excessively mushy meat, which is not desirable.

    Which cuts of meat benefit the most from tenderization?

    Tougher cuts of meat, such as flank steak, brisket, and chuck roast, benefit the most from tenderization due to their higher connective tissue content, which can be effectively broken down.

    Can tenderized meat be cooked in any method?

    Yes, tenderized meat can be grilled, roasted, braised, or sautéed, and it often cooks more evenly and quickly compared to un-tenderized cuts, making it versatile for various cooking methods.

    Does tenderizing meat affect its nutritional value?

    Tenderizing meat can enhance the bioavailability of essential amino acids, allowing the body to absorb these nutrients more effectively, thus contributing positively to your dietary goals.

    How can I tell if meat has been properly tenderized?

    Properly tenderized meat should feel soft to the touch and exhibit a more uniform texture. It should be easy to cut and chew when cooked, indicating successful tenderization.

    Can I tenderize meat at home?

    Absolutely, you can easily tenderize meat at home using tools like mallets, forks, or natural tenderizers like fruit juices, making it accessible for everyday cooking.

    Connect with us on Facebook for more culinary tips!

    The post Why a Meat Tenderizer Improves Flavor: Enhancing Taste and Texture appeared first on https://cookinggods.com

    The Article Meat Tenderizer Enhances Flavor and Texture for Better Meals Was Found On https://limitsofstrategy.com

  • Budget Cooking Tips for Every Home Chef

    Budget Cooking Tips for Every Home Chef

    Craft Your Meal Plans Strategically to Achieve Budget Success

    Develop a Comprehensive and Diverse Weekly Menu

    Best Tips for Cooking on a Budget: A colorful weekly meal planner with Mexican tacos, Italian pasta, and an open pantry and fridge.

    Implementing effective meal planning is essential for discovering the most effective strategies for cooking on a budget. By creating a comprehensive weekly menu, you can streamline your grocery shopping efforts and greatly reduce food waste. Dedicating time each week to plan your meals allows you to make the most of what you already have at home, preventing unnecessary purchases that may go unused. This method not only saves you money but also conserves precious resources, contributing to a more sustainable lifestyle.

    Begin by performing a meticulous inventory of the items in your pantry and fridge. This assessment provides a foundation for your menu, ensuring that you utilize available ingredients, thus minimizing waste. Various platforms like Pinterest and countless food blogs offer an abundance of culinary inspiration, showcasing diverse dishes from global cuisines. To keep your meals exciting, consider incorporating international flavors, such as enjoying Mexican tacos one night followed by a delightful Italian pasta dish the next. This approach not only adds variety but also allows you to explore and celebrate different cultures through their culinary traditions.

    Once your weekly menu is set, prioritize achieving nutritional balance and variety. Strive to incorporate a diverse range of proteins, grains, and a colorful assortment of seasonal vegetables. This strategy not only guarantees a well-rounded diet but also takes advantage of lower prices on seasonal produce, offering delicious and healthy options for every meal throughout the week.

    Finally, ensure you incorporate quick and easy meals for those particularly hectic days. A well-organized meal plan will empower you to resist the lure of takeout, a habit that can quickly disrupt your budget and dietary goals.

    Shop Intentionally with a Clearly Defined Grocery List

    Creating a thorough shopping list is more than just a smart tactic; it’s a critical component in reaching your financial goals. Entering the grocery store with a clear purpose significantly minimizes the temptation of impulse purchases. Start by translating your weekly menu into a detailed shopping list, organizing items by categories such as produce, dairy, and grains.

    This systematic approach not only streamlines your shopping experience but also sharpens your focus, helping you avoid purchasing items that are not on your list. Whether you’re navigating a busy market in Bangkok or a local supermarket in Sydney, adhering to your list ensures that your purchases align with your meal plan and budget.

    Consider utilizing digital tools that track prices and promotions across various retailers. These resources can offer valuable insights into where to find the best deals on your grocery items, enhancing your ability to stay within your budget.

    Shopping with a list also fosters mindful purchasing. By doing so, you reduce the likelihood of being swayed by marketing tactics designed to tempt you into buying unnecessary products. The outcome is a more efficient shopping experience that maximizes your grocery budget while keeping your meals aligned with your nutritional objectives.

    Maximize Value by Utilizing Seasonal Ingredients

    Incorporating seasonal produce into your meals is a smart choice for both your wallet and the environment. Seasonal fruits and vegetables are typically fresher, tastier, and more abundant, leading to lower prices. By familiarizing yourself with what’s in season in your area—whether it’s vibrant summer berries, hearty autumn squash, or crisp spring greens—you can make informed choices that enhance your meals while saving money.

    For instance, avocados peak in Australia during the summer months, making them a fantastic and economical addition to your meals. Similarly, root vegetables like carrots and potatoes are plentiful and inexpensive during the colder months in Europe. Not only do these ingredients offer delicious meal options, but they also support local farmers and contribute to lowering your carbon footprint by minimizing transport emissions.

    Visit local farmers’ markets or co-ops to find seasonal produce at great prices. Building connections with local growers can lead to discovering unique and new ingredients to experiment with in your cooking. By consistently incorporating seasonal produce, you can elevate your meals while adhering to the best tips for cooking on a budget.

    Enhance Cost Efficiency by Optimizing Ingredient Utilization

    Chefs in a modern kitchen efficiently using all ingredients, minimizing waste, with scales and cost charts.

    Reinvent Leftovers into Fresh and Exciting Dishes

    Reimagining leftovers into new and exciting culinary creations is a vital strategy among the best tips for cooking on a budget. No one enjoys wasting food, and by creatively thinking about what remains in your fridge, you save money while significantly reducing food waste.

    A classic illustration is taking roasted vegetables and transforming them into a delightful omelette or blending them into a hearty soup with stock and herbs. Similarly, leftover grilled chicken can be reinvented into a colorful salad or a robust chicken curry. The key is to envision new culinary adventures that can emerge from what you already have.

    Another effective method involves batch cooking foundational staples that can be easily combined with different ingredients throughout the week. For instance, preparing a large pot of rice or quinoa serves as a versatile base for various meals. Pair it with different proteins or sauces for distinct flavors and cuisines, ensuring your meals remain exciting and budget-friendly.

    Don’t overlook the benefits of incorporating leftover grains or proteins into your breakfast. A nutritious breakfast bowl featuring leftover quinoa, sautéed greens, and a poached egg can kickstart your day healthily and economically. This practice maximizes the use of every ingredient, optimizing both their potential and your budget.

    Unlock Savings through Bulk Buying Practices

    Bulk buying can be transformative for anyone looking to maximize their food budget. Purchasing staple items like rice, pasta, and canned goods in larger quantities often results in significant savings over time. Many grocery stores and bulk food outlets frequently offer discounts for bulk purchases, making this a savvy strategy for budget-conscious shoppers.

    Before making bulk purchases, assess your storage capacity. Ensure you have enough room to store larger quantities, whether that means investing in airtight grain containers or a dedicated freezer for meats and vegetables. Proper storage not only extends the shelf life of your ingredients but also facilitates easy access when cooking.

    It may also be beneficial to collaborate with friends or family to pool resources for bulk purchases. By doing so, you can share costs and the food, reducing the chances of items going stale before use. For example, a group of friends can collectively buy a large bag of flour or a case of canned tomatoes, dividing it among themselves to ensure nothing goes to waste.

    Bulk buying isn’t limited to dry goods; consider fresh produce as well. Purchasing fruits or vegetables in larger amounts when they are in season allows you to enjoy fresh flavors while saving money simultaneously.

    Use Freezing as a Powerful Preservation Method

    A variety of foods in labeled, airtight containers and freezer bags in a frost-covered freezer.

    Freezing food is one of the most effective strategies for extending the life of your ingredients. This technique allows you to take advantage of seasonal prices while preventing spoilage. Knowing how to freeze various items correctly is essential for maximizing this strategy, which aligns with your best tips for cooking on a budget.

    Begin by properly packaging your food to prevent freezer burn. Use airtight containers or heavy-duty freezer bags to eliminate as much air as possible before sealing. Label each item with the date and contents to help you keep track of what you have available.

    Certain foods freeze exceptionally well, including spinach, broccoli, and peas. Consider blanching them briefly before freezing to maintain their vibrant color and texture. Proteins can also be frozen in bulk—whether chicken, beef, or fish—providing you with convenient ready-to-cook options that save both time and money during meal prep.

    Soups, stews, and casseroles can also be prepared in larger quantities and frozen in individual portions. This not only saves you effort on busy weeknights but also offers a healthy, homemade option that’s far more economical than takeout.

    Effectively utilizing your freezer means you can buy in bulk during sales and stock up on items while they are at their best. The result is a well-stocked pantry, fewer trips to the store, and significant savings over time.

    Effortlessly Create Budget-Friendly Dishes

    Embrace the Simplicity of One-Pot Meals for Efficiency

    One-pot meals present an outstanding method to streamline the cooking process while adhering to the best tips for cooking on a budget. These dishes are efficient and help cut costs by minimizing the need for multiple ingredients. When everything cooks together, flavors meld harmoniously, enhancing the overall taste of the meal.

    Consider classic recipes such as casseroles, stir-fries, or hearty stews. These meals often allow you to incorporate whatever you have on hand, whether it’s leftover vegetables, grains, or proteins. This versatility empowers you to be resourceful, using up what might otherwise go to waste.

    Additionally, one-pot meals simplify cleanup. With only one pot to wash, you save time and effort, which is invaluable after a long day. For instance, a straightforward vegetable and lentil soup cooked in a single pot is both budget-friendly and nutritious.

    Explore global cuisines for inspiration. Moroccan tagines, Spanish paellas, and Indian curries can all be prepared in one pot and typically utilize affordable spices and ingredients. This not only broadens your culinary skills but also keeps your weekly menu diverse and exciting.

    Incorporating one-pot dishes into your meal rotation encourages experimentation with various flavor profiles and cuisines while keeping your budget intact.

    Incorporate Pulses and Grains for Enhanced Nutritional Value

    Pulses and grains are the unsung heroes of budget cooking. By integrating these affordable, nutrient-rich foods into your diet, you can maintain a balanced, healthy lifestyle without straining your finances. High in protein and fiber, these ingredients make meals satisfying and filling.

    Beans, lentils, and chickpeas are versatile staples that can be included in soups, salads, and main dishes. They are not only economical but also provide essential nutrients that contribute to a wholesome diet. For example, a lentil curry can be made with just a few ingredients and pairs perfectly with rice or flatbread, creating a complete and nutritious meal.

    Grains like rice, quinoa, and barley are equally valuable. They serve as excellent bases for various dishes and absorb flavors beautifully. Including grains in salads or as sides can elevate the nutritional profile of your meal while keeping costs down.

    Consider exploring international recipes that highlight these ingredients. Middle Eastern falafel, Indian dal, and Mexican black bean tacos are just a few examples of how pulses and grains can shine in your cooking. These meals not only provide budget-friendly options but also introduce you to the rich tapestry of global cuisine.

    Embracing these ingredients can make your meals cost-effective and incredibly satisfying, offering a wealth of choices that keep your culinary creativity vibrant.

    Select Cost-Effective Protein Sources for Well-Balanced Meals

    Opting for affordable protein sources is essential for anyone aiming to follow the best tips for cooking on a budget. While meat can be expensive, there are numerous budget-friendly options that provide excellent nutrition without straining your wallet.

    Eggs, for example, are a highly versatile and economical protein source. They can be utilized in countless ways, from breakfast scrambles to dinner frittatas, or even baked into treats. Their affordability and ease of preparation make them a staple in households worldwide.

    Tofu and tempeh are excellent alternatives for those seeking plant-based options. These soy products are both budget-friendly and adaptable, easily absorbing various flavors and cooking methods. Incorporating these affordable proteins into stir-fries, salads, or curries can provide satisfaction and nutritional benefits.

    Beans and legumes are another fantastic source of protein. They are not only budget-friendly but also offer fiber and other essential nutrients. By including beans in your meals, you can stretch your budget while enhancing the nutritional profile of your dishes.

    Seek out sales, discounts, or bulk options when shopping for protein. You might find opportunities to purchase larger quantities of meat and freeze what you don’t use immediately. By making strategic protein choices, you can maintain a balanced and satisfying diet while staying within your financial limits.

    Maximize the Benefits of Seasonal Produce for Flavor and Cost Savings

    Incorporating seasonal produce into your meals is not only wise for your wallet but also beneficial for the environment. Seasonal fruits and vegetables are often fresher, tastier, and more abundant, leading to lower prices. By understanding what’s in season in your region—be it vibrant summer berries, hearty autumn squash, or spring greens—you can make informed decisions that enrich your meals and save you money.

    For instance, in Australia, avocados peak during the summer months, making them a fantastic and cost-effective addition to your meals. Similarly, root vegetables like carrots and potatoes are plentiful and inexpensive during the colder months in Europe. Not only do these ingredients provide delicious meal options, but they also support local farmers and reduce your carbon footprint by minimizing transport emissions.

    Explore farmers’ markets or local co-ops to find seasonal produce at excellent prices. Building relationships with local growers can also lead to discovering new ingredients to experiment with in your cooking. By consistently utilizing seasonal produce, you can elevate your meals while adhering to the best tips for cooking on a budget.

    Implement Strategic Meal Planning and Batch Cooking for Maximum Efficiency

    Strategic planning and batch cooking are effective techniques that can dramatically enhance your ability to cook on a budget. By dedicating time to planning your meals for the week and preparing them in larger quantities, you save money and reduce the amount of time spent in the kitchen each day.

    Start by mapping out your weekly meals, ensuring you utilize ingredients that can be combined across various dishes. For instance, preparing a large pot of chili can serve as a standalone meal, be used in burritos, or served on baked potatoes later in the week.

    Once your meals are planned, allocate a specific time for cooking. Batch cooking allows you to prepare larger quantities, maximizing your time and energy. This approach also helps save on utility costs and reduces the temptation to order takeout on busy nights.

    Invest in quality storage containers that make it easy to store and reheat your meals. Labeling your portions with dates helps you track freshness, ensuring you utilize your meals effectively throughout the week.

    This method not only saves money but also fosters a sense of organization in your kitchen, making it easier to enjoy healthy and delicious meals without the hassle of daily cooking.

    Adopt Smart Shopping Strategies for Maximum Financial Savings

    Effectively Analyze and Compare Prices for Better Deals

    Shopping strategically can significantly impact your budget, and one of the most effective methods is to compare prices across different stores. Whether navigating a bustling market in Mexico City or a grocery chain in London, investing time in research can lead to substantial savings.

    Before heading out, consider using apps or websites that allow you to check prices at nearby stores. Some supermarkets even offer loyalty programs that provide special discounts to members. By being aware of your local pricing landscape, you can make informed decisions about where to shop based on the best available deals.

    In addition to comparing prices at various stores, don’t overlook sales, promotions, and seasonal discounts. Many retailers frequently run regular sales on popular items, and being aware of these can help you stock up on necessities at reduced prices.

    Consider timing your shopping trips around these sales. Many supermarkets mark down items nearing their expiration dates, providing an excellent opportunity to snag great deals on perishables. With a little effort and awareness, you can stretch your food budget significantly by intelligently analyzing prices.

    Choose Store Brand Products to Maximize Your Savings

    When it comes to smart shopping strategies, selecting store brands over name-brand products can yield significant savings without compromising quality. Many consumers overlook private label products, assuming they are inferior, but often they are produced by the same companies that manufacture name-brand items.

    Store brands frequently offer comparable quality at a fraction of the price. For instance, a store-brand pasta or cereal may cost significantly less than its branded counterpart while delivering similar taste and nutritional value. This is particularly advantageous for staple items that you purchase regularly.

    When browsing the aisles, take the time to compare labels. Look for similar ingredients and nutritional information; you may discover that the differences are minimal, yet the price disparity can be substantial. This small change in purchasing habits can accumulate significant savings over time, allowing you to allocate more of your budget to fresh produce or other quality ingredients.

    Furthermore, many supermarkets run promotions on their store brands, making them an even more attractive option. By embracing store-brand products, you can enjoy delicious meals while adhering to the best tips for cooking on a budget.

    Maximize Savings with Coupons and Discounts

    Coupons and discounts can drastically lower your grocery expenses. Whether shopping online or at a physical store, being savvy with coupons allows you to maximize your savings while still enjoying high-quality products.

    Start by signing up for store loyalty programs or apps, which often provide personalized coupons tailored to your shopping habits. Many grocery stores send out weekly flyers detailing special promotions, allowing you to plan your shopping list around the best available deals.

    In addition to store-specific coupons, consider checking websites and mobile apps that aggregate discounts from various retailers. These platforms often provide access to digital and printable coupons, making it easy to save on items you regularly purchase. Dedicating some time each week to hunt for those additional savings is well worth the effort.

    Also, don’t forget seasonal sales events like Boxing Day or back-to-school promotions. Timing your shopping trips around these events can lead to significant discounts on staple and specialty items.

    Utilizing coupons and discounts is a proactive approach to grocery shopping. It enables you to adhere to your budget while still enjoying a variety of quality foods.

    Time Your Shopping Around Sales for Optimal Savings

    Timing your grocery shopping around sales can be one of the most effective ways to follow the best tips for cooking on a budget. Many supermarkets have regular sales cycles, often occurring on specific days of the week or during special promotional periods. By taking advantage of these sales, you can significantly reduce your grocery costs.

    Begin by familiarizing yourself with your local stores’ sales patterns. Many supermarkets rotate their sales weekly, offering discounts on particular product categories. For instance, one week might focus on grains and pastas, while another may highlight fresh produce or dairy products. You can maximize your savings by planning your meals around these weekly sales.

    Consider bulk purchasing items that are on sale. If a particular brand of canned tomatoes is significantly discounted, buying several cans can pay off in the long run, especially if you frequently use them in your recipes. Similarly, keep an eye on sales for fresh produce, which can often be lower-priced when in season, ensuring you’re getting the best quality at a fraction of the cost.

    It’s also beneficial to subscribe to or follow store newsletters on social media, as many retailers announce flash sales or exclusive discounts to their followers. Shopping during these sales can lead to savings that allow you to allocate money elsewhere in your budget, making your overall grocery experience much more manageable.

    Minimize Food Waste for Financial and Environmental Benefits

    Implement Effective Food Storage Techniques to Reduce Waste

    Proper food storage is vital for minimizing waste and maximizing the use of your ingredients. It is a fundamental aspect of the best tips for cooking on a budget. Understanding how to store various foods can extend their shelf life and ensure you make the most of every purchase.

    Start by familiarizing yourself with the ideal storage conditions for different items. For example, potatoes and onions thrive in a cool, dark place, while leafy greens do best in the crisper drawer of your refrigerator. Investing in reusable, airtight containers helps keep your food fresh and reduces reliance on single-use plastic.

    Additionally, utilize your freezer for items that you won’t use immediately. Many fruits and vegetables can be frozen for later use, while cooked dishes like casseroles can be stored for convenient meals. This practice helps prevent spoilage and allows you to take advantage of seasonal sales.

    Proper storage is equally crucial for leftovers. If you have remnants from a meal, ensure they cool quickly and are stored in airtight containers. Label them with the date so you can keep track of their freshness, making it easier to incorporate them into your meal plans.

    By mastering effective food storage techniques, you not only save money but also contribute to reducing waste, fostering a more efficient and sustainable kitchen environment.

    Understand Expiry Dates for Better Food Management

    Gaining clarity on expiration dates is essential for minimizing food waste and optimizing your grocery budget. Terms like “best before” and “use by” can often confuse consumers, leading to premature disposal of perfectly good food.

    “Best before” dates indicate when food is expected to maintain its quality. While it’s advisable to use items by this date for optimal taste, many foods can still be safely consumed beyond this point. For instance, canned goods or dried pasta may remain perfectly edible for months after their “best before” dates.

    Conversely, “use by” dates are critical, particularly for perishable items such as dairy, meat, and seafood. Consuming these products beyond the suggested date can pose health risks. It’s essential to pay close attention to these labels and prioritize using or freezing these items to prevent spoilage.

    Additionally, consider learning to assess food quality visually and by smell, rather than relying solely on dates. Familiarize yourself with signs of spoilage, such as off-putting odors or changes in texture, to help you make informed decisions about food safety.

    By understanding expiration dates and effectively assessing food quality, you can reduce waste and maximize your grocery purchases, closely aligning with the best tips for cooking on a budget.

    Compost Food Scraps for Sustainable Solutions

    Turning food scraps into compost is an excellent way to reduce waste while contributing to a more sustainable lifestyle. Composting not only provides a solution for food scraps but also enriches your garden soil, creating a cycle of nourishment that benefits the environment.

    Collect vegetable peels, fruit cores, eggshells, and other organic materials in a compost bin or heap. Balance green materials (like grass clippings and kitchen scraps) with brown materials (like dried leaves and cardboard) to create healthy compost.

    Composting at home can significantly reduce the volume of waste you produce, diverting food scraps from landfills where they would emit methane, a potent greenhouse gas. You can even involve family members, teaching children about sustainability and reducing waste.

    If composting seems daunting, consider starting small—many cities now offer community composting programs, allowing you to drop off scraps at designated locations. This way, you can contribute to reducing waste while learning the ropes of composting at home.

    By composting your scraps, you’re not only reducing food waste but also supporting healthy soil and gardening practices, closely aligning with eco-friendly cooking and the best tips for cooking on a budget.

    Plan Meals Effectively to Minimize Waste

    Effectively planning your meals and shopping lists is crucial for ensuring you only purchase what you genuinely need, thereby minimizing waste. A well-thought-out plan aligns your purchases with your dietary goals and lifestyle, reducing the chances of food going to waste.

    Begin by assessing your week ahead. Consider any outings, social events, or busy days when you may not have time to cook. By planning meals around your schedule, you can avoid the common pitfall of buying food you won’t have time to prepare.

    Creating a shopping list based on your meal plan can help you concentrate on your needs, steering you away from impulse purchases. Consider categorizing your list according to food types, making your shopping experience more efficient and targeted.

    Finally, regularly review your pantry and fridge to incorporate ingredients nearing expiry into your meals. This ensures you’re using what you have on hand and helps to prevent waste. By doing so, you can create delicious meals while sticking to your budget and following the best tips for cooking on a budget.

    Cook at Home More Often for Financial Benefits

    Master Essential Recipes for Versatile Cooking

    Mastering a few foundational recipes can revolutionize your cooking routine. This knowledge allows for flexibility and creativity in your meals while adhering to the best tips for cooking on a budget. With a repertoire of basic dishes, you can easily adapt them to suit various ingredients, reducing the need for constant grocery shopping.

    Start with versatile recipes such as stir-fries, pasta dishes, or grain bowls. These meals can incorporate a variety of vegetables, proteins, and sauces, making them adaptable to whatever you have on hand. For example, a simple pasta dish can transform dramatically by adding seasonal vegetables or a protein source like beans or chicken.

    Learning basic cooking techniques such as sautéing, roasting, or grilling opens up a world of culinary possibilities. With foundational skills, you can experiment with different flavors and cuisines, keeping your meals exciting and budget-friendly.

    Consider taking a cooking class or watching tutorial videos online. These resources can provide valuable insights and techniques for creating cost-effective and delectable meals. By mastering these basic recipes, you will equip yourself with the knowledge and skills needed to cook confidently at home.

    Cooking at home more frequently saves money and encourages healthier eating habits, making it a win-win for both your wallet and overall well-being.

    Encourage Family Participation in Meal Preparation

    Cooking can become a delightful and engaging activity when family members are involved. They share both the workload and the joy of creating meals together, which lightens your burden as a cook and fosters a sense of togetherness and shared responsibility.

    Start by assigning each family member a role in the cooking process. Younger kids can help wash vegetables or set the table, while older children can assist with chopping or measuring ingredients. This involvement teaches valuable cooking skills while promoting teamwork and cooperation.

    Consider designating a “family night” where everyone participates in preparing meals. This can become a cherished tradition, allowing everyone to share their favorite dishes and learn from each other’s culinary experiences. By cooking together, you’ll likely discover new recipes and flavors that everyone enjoys.

    Engaging family members in cooking can also lead to more balanced meals. When children take part in preparing their food, they may be more willing to try new ingredients and flavors, encouraging a healthier diet while also aligning with the best tips for cooking on a budget.

    Cooking together can transform mealtimes into a rewarding family experience, fostering collaboration and a deeper appreciation for the food you prepare and enjoy.

    Implement Batch Cooking for Enhanced Efficiency

    Batch cooking is a highly effective method for maximizing your time and resources when preparing meals at home. By dedicating a few hours each week to cook larger quantities of food, you can enjoy the benefits of healthy, home-cooked meals while alleviating the stress of daily cooking.

    Begin by selecting a couple of recipes that can be easily scaled up. Soups, stews, curries, and casseroles are ideal for batch cooking, as they can be prepared in larger quantities and stored for later use. Prepare these dishes and portion them into individual servings, making it easy to grab a meal when needed.

    Having a stockpile of ready-to-go meals saves time and helps you resist the temptation of ordering takeout. When you have delicious homemade options waiting in your fridge or freezer, you’re less likely to turn to convenience foods that can derail your budget.

    Additionally, batch cooking allows you to experiment with new flavors and cuisines. You can play with various spices and ingredients by preparing larger quantities, leading to a diverse menu throughout the week. This culinary exploration keeps your meals exciting while maintaining your budget.

    Investing in quality storage containers is essential for batch cooking. Ensure they are microwave-safe and airtight to preserve the freshness of your meals while making reheating a breeze. By embracing batch cooking, you can streamline your meal prep and take significant steps toward achieving your culinary aspirations.

    Organize Weekly Meal Plans for Streamlined Cooking

    Organizing your meals for the week ahead is a powerful strategy to control your grocery budget while ensuring you have all the necessary ingredients. A well-structured meal plan allows you to make informed decisions about what to buy, minimizing the chances of purchasing items you won’t use.

    Start by considering your schedule for the week. Identify days when you might have more time to cook and when you need quick and easy meals. This foresight tailors your meal prep to fit your lifestyle, making it easier to stick to your budget without sacrificing convenience.

    Create a central meal-planning calendar or use an app dedicated to tracking your weekly meals. This visual reminder of your planned meals will help you measure your ingredient needs more accurately, preventing you from overbuying.

    Don’t forget to incorporate leftovers from previous dinners when planning your meals. You can create new meals from what you already have, maximizing your ingredients and ensuring nothing goes to waste.

    Effective meal planning promotes organization in the kitchen, making the cooking process more enjoyable and less stressful. By planning your meals wisely, you can take significant steps toward adhering to the best tips for cooking on a budget while enjoying delicious, home-cooked meals.

    Discover Diverse Cuisines for Culinary Inspiration

    Exploring different cuisines can be an exciting way to expand your culinary skills while keeping your home cooking fresh and engaging. You can introduce new flavors and ingredients into your meals by experimenting with international dishes without straining your budget.

    Start by researching recipes from various cultures. Look for dishes that highlight affordable ingredients, such as beans, grains, and seasonal vegetables. Cuisines like India, Thailand, or Mexico often feature vibrant flavors using cost-effective staples, making them ideal for budget-conscious cooking.

    Consider hosting a themed dinner night where you prepare a meal based on a specific region’s cuisine. This adds a fun element to cooking and allows you and your family to learn about different cultures through their culinary traditions.

    Explore local markets for unique ingredients that correlate with the cuisines you want to try. This can also be an opportunity to experiment with spices and herbs that may be new to you, adding an exciting twist to your cooking.

    By being open to exploring new cuisines, you can enhance your cooking skills and create a diverse and exciting meal rotation that keeps your family engaged. This approach aligns perfectly with the best tips for cooking on a budget, allowing you to enjoy varied, delicious meals while staying within your financial means.

    Common Questions and Answers about Budget Cooking

    What are some budget-friendly meal ideas I can try?

    Consider dishes like lentil soup, vegetable stir-fry, or homemade pasta dishes. These meals often utilize affordable ingredients and can be stretched to feed larger groups.

    How can I save money on groceries effectively?

    Plan your meals, create a shopping list, and stick to it. Use seasonal produce, buy in bulk, and take advantage of sales and coupons.

    What are some easy one-pot meals I can make?

    One-pot meals include curries, casseroles, and stir-fries. They are simple to prepare and clean up, making them ideal for busy weeknights.

    How can I reduce food waste at home efficiently?

    Store food properly, understand expiry dates, compost scraps, and plan meals wisely to ensure you use all ingredients before they spoil.

    What are some healthy, cheap protein sources I can include in my meals?

    Affordable protein sources include eggs, beans, lentils, tofu, and canned fish. These options are nutritious and versatile for various recipes.

    Can I cook at home while working full-time?

    Yes! Batch cooking on weekends and planning quick meals for busy weekdays can make cooking at home manageable, even with a tight schedule.

    How do I start batch cooking effectively?

    Select a few recipes, then cook larger quantities to store in portioned containers. This approach saves time and effort throughout the week.

    Why is meal planning important for budget cooking?

    Meal planning helps you stay organized, reduces food waste, saves money, and ensures you have all the necessary ingredients for your meals.

    What are some tips for using leftovers effectively in my cooking?

    Repurpose leftovers into new meals, such as soups or salads, or simply reheat and serve. Planning meals around leftovers can help minimize waste.

    How can I encourage my family to cook together more often?

    Assign roles in meal preparation, designate family cooking nights, and choose recipes that everyone can participate in. Make it a fun and collaborative experience.

    Follow us for exciting updates on Facebook!

    The post Best Tips for Cooking on a Budget: A Universal Guide appeared first on https://cookinggods.com

    The Article Cooking on a Budget: Essential Tips for Every Home Chef Was Found On https://limitsofstrategy.com

  • Trussing a Turkey: Step-by-Step Guide for Perfect Roasting

    Trussing a Turkey: Step-by-Step Guide for Perfect Roasting

    Essential Steps for Perfectly Preparing Your Turkey for Roasting

    Gathering the Right Tools for Effective Turkey Trussing

    Kitchen twine, scissors, and roasting pan on counter, ready for turkey trussing.

    To successfully truss a turkey for roasting, it’s imperative to start by collecting all the essential tools. Key items to have on hand include kitchen twine, scissors, and a roasting pan. Each of these tools plays a vital role in achieving a beautifully roasted turkey. High-quality kitchen twine needs to be both durable and flexible, providing the necessary support to keep the turkey in shape throughout the roasting process. Opting for food-safe twine is crucial to avoid any unwanted flavors seeping into the meat. Scissors are essential for cutting the twine into appropriate lengths, ensuring a tailored fit for your turkey. A sturdy roasting pan not only secures the bird but also captures all the delectable drippings, perfect for crafting a rich, flavorful gravy.

    When choosing your roasting pan, it’s crucial to consider your turkey’s size; a pan that’s too small can lead to messy spillage or uneven cooking, negatively affecting the final presentation and taste. Many chefs recommend using a rack within the pan to elevate the turkey, allowing hot air to circulate around it for even cooking. With all these essential tools prepared, you are well-equipped to embark on a rewarding and enjoyable turkey roasting journey that will surely impress family and friends alike.

    Creating an Organized Workspace for Efficient Turkey Trussing

    Establishing a well-organized and efficient workspace is fundamental when mastering how to truss a turkey for roasting. Begin by clearing a spacious area on your countertop that allows for easy movement, providing you with the freedom to maneuver around the turkey without obstacles. A clean and well-arranged workspace enables you to concentrate fully on the trussing process, significantly minimizing the likelihood of errors that could affect the outcome.

    It’s beneficial to arrange all necessary items within arm’s reach, including the turkey itself, twine, and scissors. This setup will reduce unnecessary movements, helping you maintain your workflow. Additionally, having paper towels on hand can be invaluable for cleaning up any spills or for safely handling raw turkey, which demands strict hygiene practices. An organized workspace not only enhances your efficiency but also cultivates a stress-free cooking environment, allowing you to relish your time in the kitchen without feeling rushed or overwhelmed.

    Conducting a Thorough Inspection of Your Turkey

    Before diving into the trussing process, it’s essential to perform a detailed inspection of your turkey. Many turkeys come with giblets and the neck stored inside the cavity; checking for these parts ensures you are fully prepared for both trussing and utilizing every aspect of the bird. The giblets can be transformed into a rich broth, adding depth and flavor to your gravy or stuffing, while the neck can be roasted or simmered to create a delicious stock that enhances your meal.

    During your inspection, also look for any lingering feathers or impurities on the skin. A clean turkey is vital for achieving an appetizing presentation once roasted. Furthermore, if your turkey has been frozen, ensure that it has fully thawed before cooking. A meticulously inspected turkey not only leads to a more enjoyable roasting experience but also boosts both flavor and final presentation, guaranteeing that your hard work in the kitchen results in a beautifully cooked dish.

    Ensuring Your Oven is at the Optimal Temperature for Perfect Roasting

    Person using oven thermometer to check 180°C temperature, with golden-brown turkey ready for roasting.

    Before placing your turkey in the oven, it’s crucial to confirm that your oven is preheated to the ideal temperature, which typically hovers around 180°C. Achieving the correct temperature is fundamental to the overall success of your dish; it promotes even cooking and helps prevent the turkey from drying out during the roasting process, which is vital for ensuring flavorful meat.

    While waiting for the oven to heat, consider using an oven thermometer to verify the accuracy of the temperature, as some ovens may have inconsistencies in their readings. Once the oven has reached the desired preheated state, you can confidently place your turkey inside, assured that it will cook thoroughly. This crucial step not only simplifies your cooking process but also significantly contributes to achieving that coveted golden-brown finish that is so often sought after in a perfectly roasted turkey.

    Proven Techniques for Trussing Your Turkey Effectively

    Neatly Tucking the Wings for a Professional Appearance

    The first step in mastering how to truss a turkey for roasting is effectively tucking the wings. This technique not only secures the wings in place but also protects them from burning during the roasting process. To start, gently lift each wing and tuck it underneath the body of the turkey. This positioning helps maintain a compact shape, which is essential for even cooking and achieving an appealing presentation on your dining table.

    Tucking the wings also enhances the turkey’s overall visual appeal. A beautifully shaped turkey is always more enticing when served, elevating the dining experience for your guests. Additionally, this method allows heat to circulate evenly around the bird, ensuring that every bite remains succulent and perfectly cooked. Remember, a well-tucked turkey not only appears professional but also cooks to perfection, making this step critical in your roasting journey.

    Tying the Legs Together for Improved Stability

    A chef trusses a turkey, tying its legs at the ankles with kitchen twine for even cooking.

    Next, focus on tying the legs together, an essential aspect of the trussing process. Using your kitchen twine, bring the legs together at the ankles, forming a tight yet comfortable knot. This technique not only creates a compact shape, which is vital for even cooking, but also prevents the legs from spreading apart during the roasting process, ensuring a consistent cook throughout the entire bird.

    Consider employing a double knot for enhanced security, ensuring that your turkey retains its shape while cooking. A well-tied turkey not only looks visually appealing but also allows heat to penetrate evenly, ensuring that both white and dark meat are perfectly cooked. When executed correctly, this technique ensures that your turkey retains its moisture and flavor, delivering a delicious meal that your guests will rave about for years to come.

    Securing the Body for Optimal Roasting Results

    Once you have tucked the wings and tied the legs, it’s time to secure the body of the turkey. Using the kitchen twine, wrap it around the turkey several times to create a firm hold. This step is vital for maintaining the bird’s shape during the roasting process, preventing it from sprawling out and cooking unevenly, which can result in dry, overcooked meat.

    As you wrap the twine, consider crisscrossing it for added support, enhancing not only the structure but also the presentation of your turkey. This technique allows the skin to brown beautifully while ensuring that the meat remains juicy and flavorful throughout the cooking process. A well-secured turkey looks fantastic on the serving platter and promises a delicious meal that your family and friends will thoroughly enjoy, making this step critical in your trussing technique.

    Correctly Positioning the Neck Flap for Seamless Roasting

    Properly positioning the neck flap is another essential aspect of how to truss a turkey for roasting. You can either tuck the neck flap under the body of the turkey or secure it with a skewer. This step is vital for maintaining the overall shape and integrity of the bird during cooking, ensuring that it roasts evenly.

    Tucking the neck beneath helps to maintain moisture, directly contributing to a juicy final product that will impress your guests. If you opt to use a skewer, ensure it is securely fastened to prevent any movement during roasting. Properly positioning the neck not only enhances the turkey’s appearance but also promotes even cooking, ensuring that every part of the bird reaches the ideal internal temperature without drying out.

    Utilizing a Trussing Needle for Advanced Techniques

    For those who want to elevate their technique, using a trussing needle can greatly enhance your trussing process. Threading kitchen twine through a trussing needle allows you to sew the cavity of the turkey shut, ensuring that any stuffing remains securely inside while cooking. This technique is particularly beneficial if you’re preparing a stuffed turkey, as it prevents any stuffing from leaking out during roasting.

    When using the needle, start at the back of the cavity and pull the thread through, providing a tight yet gentle grip. This method not only secures the stuffing but also fosters an even cooking environment, allowing heat to circulate effectively within the turkey. A tightly trussed turkey ensures that every bite is flavorful and succulent, delivering a wonderful dining experience for all your guests.

    Advanced Techniques for Expert-Level Turkey Trussing

    Mastering the Cross-Stitch Trussing Technique for Enhanced Security

    Elevating your trussing skills with how to truss a turkey for roasting can involve advanced techniques like cross-stitch trussing. This method not only offers added security but also results in an aesthetically pleasing finish that will certainly impress your guests. To execute a cross-stitch design, begin by tying the legs together, similar to basic trussing techniques.

    Once the legs are secured, take the twine and create a cross pattern over the turkey’s body, weaving it in and out of the skin. This technique not only holds the turkey in place but also encourages uniform cooking, as the twine supports the skin and meat throughout the roasting process. The visual impact of a cross-stitched turkey can elevate your presentation, leaving a lasting impression at any gathering or celebration.

    Notably, mastering this technique requires some practice, but the results are well worth the effort. A beautifully trussed turkey showcases your culinary skills and enhances the overall dining experience, making it a valuable skill for any home cook looking to impress their guests.

    Quick and Efficient Butterfly Trussing Method for Reduced Cooking Time

    Butterfly trussing is an excellent technique for those seeking a quicker cooking method. This approach involves removing the backbone of the turkey, allowing it to flatten, which significantly reduces cooking time. Start by laying the turkey breast-side down on your cutting board, and carefully cut along both sides of the backbone using kitchen scissors or a sharp knife.

    Once the backbone is removed, flip the turkey over and firmly press down on the breast to create a flat surface. With the turkey now in a butterflied position, you can easily truss it by tying the legs together and securing the wings beneath the body. This technique not only expedites cooking but also enhances the caramelization of the skin, resulting in a deliciously crispy exterior that is sure to please everyone at your table.

    Butterfly trussing also significantly alters the presentation of your turkey. The flat shape allows for more even browning and creates a stunning visual display when served. Perfect for gatherings, this method ensures that every bite of your turkey is juicy and flavorful, making it a popular choice among seasoned cooks looking to impress their guests.

    Creating Visual Appeal with Lattice Trussing Techniques

    For those looking to combine functionality with visual appeal, lattice trussing is an excellent choice when mastering how to truss a turkey for roasting. This technique involves weaving twine in a lattice pattern across the turkey’s body, creating a beautiful and intricate design that is sure to capture attention.

    To begin, secure the legs and wings as you would with basic trussing. Next, take a length of kitchen twine and start weaving it over and under the body of the turkey to form the lattice. This not only secures the turkey effectively but also allows for better heat circulation, promoting even cooking and ensuring a beautifully browned skin that will wow your guests.

    The finished result is visually striking, making your turkey the centerpiece of the dining table. A well-lattice-trussed turkey not only looks impressive but also ensures that the meat retains its moisture and flavor throughout the cooking process. This technique is perfect for special occasions, showcasing your culinary creativity and attention to detail, making every meal memorable.

    Enhancing Security with Spiral Trussing Technique

    If you’re eager to enhance both the security and presentation of your turkey, spiral trussing is a fantastic method to explore. This technique involves wrapping the twine around the turkey in a spiral pattern, creating an elegant and unique appearance. To begin, tie the legs together and tuck the wings underneath as you normally would.

    Starting at the base of one leg, wrap the twine around the turkey in a spiral motion, gradually working your way up to the breast. As you wrap, ensure that the twine is snug but not overly tight, as this will help maintain the turkey’s shape while allowing for even cooking. The spiral design not only secures the bird effectively but also adds a touch of sophistication to your presentation, making your turkey look professionally prepared.

    Spiral trussing can be especially beneficial for larger turkeys, as it guarantees that all parts of the bird receive equal exposure to heat. The outcome is a beautifully roasted turkey, complete with golden-brown skin and juicy meat that your guests will love. This technique not only elevates your culinary skills but also impresses guests with its stunning presentation, making it a worthwhile addition to your cooking repertoire.

    Achieving a Compact Shape with Tuck and Fold Trussing

    Another effective method in your trussing toolkit is tuck and fold trussing, which is perfect for ensuring a compact shape during cooking. To begin this technique, tuck the wings underneath the turkey’s body, then fold the legs back towards the body. Once positioned, use kitchen twine to securely tie the legs together, ensuring they remain in place while cooking.

    This method is particularly useful for achieving an even cook, as the compact shape allows for better heat circulation within the bird. Additionally, tucking the wings helps prevent them from drying out or burning, ensuring that every part of your turkey remains succulent and juicy throughout the roasting process.

    Not only does this technique support even cooking, but it also contributes to a polished and professional appearance on your serving platter. A neatly trussed turkey is bound to impress guests, setting the stage for a memorable dining experience. With tuck and fold trussing, you can produce a beautifully roasted turkey that will be the highlight of any gathering, ensuring that your efforts in the kitchen are recognized and appreciated.

    Avoiding Common Mistakes in Turkey Trussing

    Preventing Over-Tightening of Twine for Even Cooking

    One of the most common pitfalls when learning how to truss a turkey for roasting is over-tightening the twine. While it may seem reasonable to pull the twine taut for added security, doing so can result in uneven cooking. An excessively tight truss can constrict the turkey’s body, hindering proper heat circulation and potentially leading to dry meat, which can spoil your carefully prepared meal.

    Instead, aim for a snug hold that keeps the skin and meat in place without cutting into the flesh. This approach allows the turkey to cook evenly, ensuring that both the breast and thigh meat reach the perfect level of doneness. A well-trussed turkey should maintain its shape while allowing for the natural expansion that occurs during cooking, resulting in a deliciously moist final product that your guests will relish.

    To sidestep this mistake, practice your technique using a smaller chicken or similar-sized bird before tackling a larger turkey. Understanding the right tension for your trussing twine will enhance your skills and guarantee a perfectly cooked turkey every time, ensuring your culinary efforts result in a meal everyone will remember.

    Avoiding Improper Wing Positioning for Optimal Cooking

    Another frequent error is neglecting to position the wings correctly. If the wings are not tucked properly, they can easily become burnt or overly dried out during roasting, which detracts from the overall quality of your dish. Proper wing positioning is essential for both the cooking process and the overall presentation of your turkey.

    When tucking the wings, ensure they are securely placed under the turkey’s body. This positioning helps prevent them from flopping about, which can lead to uneven cooking and an unappealing appearance. A well-tucked wing not only ensures that it cooks evenly alongside the rest of the bird but also contributes to a polished look when served, enhancing the overall dining experience.

    To perfect this technique, take the time to practice tucking the wings before attempting your turkey. Gaining experience goes a long way in helping you avoid this common mistake, paving the way for a beautifully roasted turkey that will impress everyone at your gathering.

    Addressing the Neglect of the Tail for a Complete Presentation

    A lesser-known trussing mistake involves overlooking the importance of securing the tail. Neglecting to do so can compromise the shape and presentation of your turkey, resulting in a less-than-desirable appearance on the serving platter. The tail area can be particularly prone to burning, which can detract from the overall look of your beautifully roasted bird.

    To prevent this, ensure that the tail is securely tucked or tied in place as you truss the rest of the turkey. Using kitchen twine, create a simple knot to hold the tail down or tuck it under the body like the wings. This technique not only preserves the integrity of the turkey’s shape but also supports even cooking throughout the bird, allowing for a consistently delicious outcome.

    When considering the overall presentation, remember that attention to detail matters. A well-trussed turkey, complete with a securely positioned tail, will undoubtedly impress your guests and elevate your dining experience, showcasing your culinary expertise and care for your meal.

    Ensuring the Neck Skin is Tucked for Moisture Retention

    One critical aspect often overlooked in the trussing process is tucking the neck skin under the body. Neglecting this step can result in moisture loss, leading to a dry turkey by the time it’s ready to serve. Tucking the neck skin helps trap steam and flavor, contributing to a juicier final product that everyone will appreciate.

    To incorporate this technique, simply fold the neck skin under the turkey before completing your trussing. This small yet significant step can make a substantial difference in the overall taste and presentation of your bird. A well-cooked turkey should not only be visually appealing but also bursting with flavor and moisture, providing a delightful meal for your guests.

    To further enhance the experience, consider utilizing the neck and giblets to create a rich gravy or stock. By using every part of the turkey, you not only minimize waste but also elevate your meal, ensuring a delightful dining experience for everyone around the table.

    Exploring Trussing Tools and Alternatives

    Reliable Kitchen Twine for Effective Trussing

    When it comes to trussing, kitchen twine remains the traditional and most reliable choice. Its combination of strength and flexibility makes it perfect for holding the turkey’s shape during roasting. High-quality kitchen twine will withstand the heat of the oven, ensuring that the turkey remains securely tied throughout the cooking process without any risk of breaking or melting.

    When selecting twine, look for food-safe options that won’t impart any unwanted flavors to your bird. Avoid synthetic materials, as they can melt or release harmful chemicals when exposed to high temperatures. Natural cotton twine is the best choice, providing both safety and durability for your cooking needs while allowing for easy handling during the trussing process.

    While kitchen twine is versatile and effective, it does require some skill to master the various trussing techniques. With practice, you’ll find that using twine becomes a seamless part of your cooking routine, contributing to beautifully roasted turkeys time and time again, ensuring your meals are consistently impressive.

    Convenient Silicone Bands for Trussing

    For those seeking a reusable alternative to traditional twine, silicone bands have gained popularity in recent years. These bands offer an easy-to-use solution for trussing, effortlessly stretching around the turkey to hold its shape securely. They are also dishwasher safe, making cleanup a breeze after your cooking session, which is particularly beneficial for busy cooks.

    However, while silicone bands are convenient, they may not provide the same level of support as kitchen twine. When using these bands, always ensure they are securely fastened to prevent any slipping or loosening during the roasting process. Additionally, some may prefer the traditional aesthetic of twine when serving, as it adds a classic touch to your presentation that can enhance the overall dining experience.

    Incorporating silicone bands into your trussing toolkit can offer added flexibility, especially for those who may lack confidence in mastering twine techniques. They also represent an eco-friendly choice for environmentally conscious cooks looking to reduce waste while still achieving excellent results in the kitchen.

    Using Metal Skewers for Additional Security

    Metal skewers can serve as a useful tool for securing the shape of the turkey during roasting, although they offer less flexibility than twine. These sturdy implements can be used alongside kitchen twine or silicone bands for added security, particularly when it comes to holding the wings and tail in place during the cooking process, ensuring everything stays in position for even cooking.

    When using metal skewers, be sure to insert them at an angle, allowing for a snug fit without risking damage to the turkey’s skin. This technique will help maintain the overall shape and prevent any parts from burning during cooking, ensuring a beautifully roasted turkey that you can proudly present.

    While metal skewers may not be the traditional choice for trussing, they can serve as an effective backup plan for those who wish to enhance the stability of their turkey. Combined with other methods, they contribute to a beautifully roasted bird that is sure to impress your guests at the table, making your meal memorable.

    Understanding the Benefits of Trussing Your Turkey

    Achieving Even Cooking for Perfect Results

    One of the primary advantages of learning how to truss a turkey for roasting is that it ensures even cooking throughout the bird. Trussing helps maintain the turkey’s shape, allowing for uniform heat distribution, which is especially crucial for larger turkeys, where different parts can cook at varying rates without proper trussing in place.

    When the turkey is compactly secured, heat can circulate effectively, ensuring that both white and dark meat reaches the perfect level of doneness. A well-cooked turkey results in tender, juicy meat, free from the dreaded dry or rubbery texture that can occur when cooking is uneven. Proper trussing makes a significant difference in ensuring a successful roast that everyone will enjoy.

    Moreover, even cooking enhances the overall flavor of the turkey, as it allows the natural juices to remain intact. This means every bite is full of delicious flavor, making your meal a delightful experience for everyone gathered around the table, ensuring that your efforts in the kitchen are rewarded with enthusiastic praise.

    Enhancing Presentation for Special Occasions

    A trussed turkey not only cooks better but also looks significantly more appealing when served. A neatly tied turkey with properly positioned wings and legs is bound to impress guests and elevate the overall dining experience during festivities and gatherings, making your meal feel even more special.

    When it comes to celebrations, presentation plays a crucial role in setting the mood. A beautifully roasted turkey can serve as the centerpiece of your table, showcasing your culinary skills and attention to detail. The visual appeal of a well-trussed bird can create an atmosphere of celebration, making your meal all the more memorable for your guests and enhancing their enjoyment of the occasion.

    Additionally, a well-presented turkey signals the care and effort put into the meal, showing your guests that you value their dining experience. A polished appearance speaks volumes, making the trussing process a worthwhile investment in any festive gathering, ensuring that everyone appreciates the special effort you’ve put forth.

    Retaining Moisture for Flavorful Results

    When learning how to truss a turkey for roasting, one of the most significant benefits is the retention of moisture during cooking. Trussing helps keep the turkey compact, allowing the natural juices to circulate within the bird. This leads to a succulent, juicy final product that bursts with flavor, satisfying every palate at your table.

    By holding the turkey together, trussing prevents overexposure of the meat’s surface to the dry oven air. As a result, the turkey remains moist, ensuring that every bite is tender and flavorful. A well-trussed bird can transform your meal, creating a memorable experience for your family and friends that they will cherish for years to come.

    In addition to moisture retention, trussing can also enhance the flavor profile of your turkey. With the juices kept contained, the meat absorbs the spices and seasonings you apply, resulting in a deliciously seasoned roast that is sure to impress everyone at the table and elevate your culinary reputation.

    Frequently Asked Questions About Turkey Trussing

    What does it mean to truss a turkey?

    Trussing a turkey involves tying the bird’s legs and wings to maintain its shape during roasting, ensuring even cooking and enhancing the overall presentation of the dish for a delightful dining experience.

    Why is it important to truss my turkey?

    Trussing helps retain moisture, promotes even cooking, and improves presentation, creating a more succulent and visually appealing dish for your guests to enjoy during special occasions and gatherings.

    Can I use alternatives to kitchen twine for trussing?

    Yes, silicone bands and metal skewers can serve as effective alternatives for trussing, providing different levels of security and ease of use during the roasting process, allowing for flexibility in your cooking approach.

    How can I tell if my turkey is fully cooked?

    The internal temperature of the turkey should reach 75°C when measured at the thickest part of the thigh without touching the bone to ensure it is safely cooked and ready to serve to your guests.

    Is it necessary to remove the giblets before roasting my turkey?

    Yes, removing the giblets is essential for proper trussing, and they can also be used to create a flavorful broth or gravy to accompany your meal, minimizing waste and enhancing the overall dining experience.

    How long should I let the turkey rest after cooking?

    Allow the turkey to rest for at least 20-30 minutes after cooking. This resting period helps the juices redistribute, ensuring moist and tender meat that will delight your guests when it’s time to serve.

    Can I truss a turkey without using a needle?

    Absolutely! You can truss a turkey using just twine by tying the legs and wings securely, or you can use skewers for additional support if needed, allowing for versatility in your trussing methods.

    What happens if I forget to truss my turkey?

    If you forget to truss your turkey, it may still cook well, but it might not retain its shape, leading to uneven cooking and a less visually appealing presentation on the table, which could detract from your meal.

    How can I simplify my trussing process?

    Practicing with smaller birds like chickens can help you gain confidence in your trussing technique, making it easier when preparing a larger turkey for roasting and ensuring that your skills improve over time.

    Is it possible to truss a frozen turkey?

    No, it’s important to thaw the turkey completely before trussing. A frozen turkey cannot be effectively trussed, which can lead to uneven cooking results that will affect the quality of your meal.

    Connect with us on Facebook!

    The post How to Truss a Turkey for Roasting: A Step-by-Step Guide appeared first on https://cookinggods.com

    The Article Trussing a Turkey for Roasting: Step-by-Step Instructions Was Found On https://limitsofstrategy.com

  • Avoid Burning Your First Roast with These Essential Tips

    Avoid Burning Your First Roast with These Essential Tips

    Elevate Your Roasting Skills: Expert Tips for Perfectly Roasted Meats Every Time

    Your oven serves as the central hub of your kitchen, making it crucial to comprehend its intricacies to master the art of roasting. To consistently prevent burnt roasts, a thorough understanding of your oven’s functionalities can transform your cooking from potential failures into delightful successes, resulting in juicy, tender, and flavorful dishes with every meal you create.

    Explore Different Oven Types for Enhanced Roasting Techniques

    Different oven types - conventional, convection, gas - with roasting meats, showing heat distribution and efficiency.

    Understanding that ovens vary significantly in their operation is critical for successful roasting. Whether you use a conventional, convection, or gas oven, each type possesses distinct characteristics that can greatly influence heat distribution and overall cooking performance. Conventional ovens may exhibit hot and cold spots, resulting in uneven cooking outcomes. On the other hand, convection ovens feature a fan that circulates hot air, promoting consistent cooking throughout your roast. To effectively navigate how to prevent burnt roasts, it’s important to familiarize yourself with the specific capabilities and limitations of your oven model.

    Set aside time to experiment with your oven’s various settings to grasp how they impact cooking times and temperature accuracy. For example, you may find that a convection oven operates efficiently at a lower temperature compared to its conventional counterpart to achieve similar results. Observe how your oven behaves—does it tend to run hotter or cooler than the set temperature? Track how long it takes to reach your desired temperature and make necessary adjustments to enhance its performance.

    Furthermore, the positioning of your roast inside the oven is paramount for achieving even cooking. Ideally, place your roast in the center of the oven to allow for optimal heat circulation. If you are utilizing multiple racks, keep in mind that the top rack generally cooks faster than the bottom; rotate your roast as necessary to avoid burning and ensure a consistently delectable outcome.

    Ensure Temperature Precision for Impeccable Roasting Results

    An oven thermometer is a vital instrument for anyone looking to refine their roasting skills. Many ovens can be off by as much as 25 degrees Fahrenheit (approximately 14 degrees Celsius), which can result in overcooking or even burning your prized roast. By placing an oven thermometer inside, you can confirm that the temperature you set aligns with the actual cooking temperature, providing a solid foundation for your culinary endeavors.

    Consider this scenario: if you follow a recipe that specifies a particular temperature, but your oven operates at a higher temperature, you are setting yourself up for failure. Regularly calibrating your thermometer will help maintain its accuracy, paving the way for your successful mastery of how to prevent burnt roasts.

    The Essential Preheating Process for Cooking Success

    Never underestimate the significance of preheating your oven. Allowing sufficient time for your oven to reach the desired temperature before placing your roast inside is crucial for achieving evenly cooked results. A general guideline is to preheat your oven for at least 20 to 30 minutes.

    Preheating not only gives your roast a head start for even cooking but also helps develop a beautiful crust that enhances flavor. If you are using a covered roasting pan, preheating it as well can create a steaming effect that helps retain moisture within your roast, leading to a more enjoyable dining experience.

    By ensuring your oven is fully preheated, you significantly minimize the chance of burning your roast. Remember, patience is a virtue in the culinary realm, and it pays off with delicious results.

    Choosing the Perfect Cut of Meat: Your Ultimate Guide to Successful Roasting

    A chef examines meat cuts on a rustic table, selecting a piece for roasting in a warm kitchen.

    When embarking on your roasting journey, the selection of the meat cut is of utmost importance. Choosing the right cut not only enhances flavor but also plays a significant role in preventing burnt roasts and ensuring a delightful dining experience.

    Selecting High-Quality Meat for Successful Roasting

    Choosing a meat cut that is ideal for roasting is critical for ensuring a successful outcome. Cuts such as rib roast, tenderloin, and pork loin are excellent choices due to their tenderness and favorable fat content. It is wise to avoid lean cuts that tend to dry out during cooking, as this can lead to burnt edges and an undesirable texture.

    Additionally, the source of your meat carries substantial significance. Grass-fed or organic options often provide superior flavor and moisture content. Whenever feasible, purchase your meat from local butchers who can offer valuable insights into the best cuts for roasting, empowering you to make informed choices.

    Don’t hesitate to opt for cuts with good marbling; the fat within these cuts enhances flavor and moisture, creating a more forgiving cooking process. The right choice of meat lays the foundation for a roast that will surely impress your guests and loved ones alike.

    The Impact of Fat Content on Cooking Success

    The fat content in your selected cut of meat is crucial in determining cooking time and temperature. Fat acts as a natural insulator, effectively retaining moisture and preventing the meat from drying out during the roasting process. However, excessive fat can lead to flare-ups and burnt exteriors, which are best avoided.

    As you prepare your roast, pay close attention to the distribution of fat. A well-marbled cut will cook evenly, while a leaner cut may require more careful monitoring to avert burning. If necessary, consider trimming excess fat strategically—just be cautious not to remove too much, as some fat is essential for flavor and moisture retention.

    As the meat cooks, remember that fat renders, adding both flavor and moisture. Understanding how fat behaves during roasting can help you control the outcome and guide you toward roasting success.

    Recognizing the Importance of Size and Shape in Roasting

    Beef roasts of varying sizes and shapes on a counter with a scale and cooking chart.

    The size and shape of your roast are essential factors in determining cooking time and temperature. Larger roasts require longer cooking times, while smaller cuts may take less time. To achieve even cooking, opt for cuts that are approximately uniform in shape and size.

    As a general guideline, always weigh your roast and consult cooking charts that provide time estimates based on weight. Keep in mind that larger cuts often benefit from lower temperatures and extended cooking times, while smaller cuts can handle higher heat for quicker results.

    By being mindful of the size and shape of your roast, you can avoid the common pitfalls of overcooked exteriors and undercooked interiors—two scenarios that can easily lead to a burnt roast and disappointment.

    Preparing Your Roast: Setting the Stage for Culinary Excellence

    Preparation is a critical component of roasting. Getting your roast ready not only enhances its flavor but also safeguards against burning, ensuring you are well on your way to culinary excellence.

    Trimming Excess Fat for Uniform Cooking

    Start by trimming any unnecessary excess fat from your roast. While some fat is essential for flavor and moisture retention, excess can lead to flare-ups and charred surfaces during cooking. Use a sharp knife to carefully remove thick layers, leaving a thin layer intact to enhance flavor.

    Trimming excess fat creates a more even cooking surface, allowing heat to penetrate the meat more effectively. It also minimizes the risk of producing excessive smoke, which can compromise the overall taste of your roast.

    When preparing your roast, remember that sometimes less is more. A meticulously trimmed roast can lead to a more delicious and visually appealing dish, laying the groundwork for a successful first roasting experience.

    Effective Seasoning Techniques for Amplifying Flavor

    Even seasoning of your roast is crucial for enhancing flavor without risking a burnt exterior. A well-seasoned roast not only delights the palate but also aids in forming a beautiful crust. Utilize a blend of salt, pepper, and your favorite herbs—garlic, rosemary, and thyme are particularly effective.

    Be generous with your seasoning, but avoid concentrating it solely on the surface; rub the seasoning into the meat to ensure even distribution of flavors. Consider letting your roast rest with the seasoning for at least 30 minutes before cooking, allowing the flavors to penetrate deeply.

    For an added depth of flavor, consider marinating your roast prior to cooking. A marinade can create a protective layer that enhances moisture and flavor while assisting in preventing the outer surface from burning during the roasting process.

    Allowing Your Roast to Reach Room Temperature

    Bringing your roast to room temperature before cooking is a transformative step. When meat is cold, it takes longer to cook through, often resulting in a burnt exterior and an undercooked interior.

    Remove your roast from the refrigerator about 30 to 60 minutes before cooking, depending on its size. This step promotes a more even cooking process and helps achieve that ideal juicy finish. The end result? A tender roast cooked to perfection, showcasing your newly acquired skills in preventing burnt roasts.

    Cooking Techniques: Elevating Your Roasting Expertise

    Once your roast is properly prepared, it’s time to delve into the cooking techniques that will enhance your roasting skills. Mastering these methods will not only help you avoid burning your roast but also empower you to create mouth-watering dishes sure to impress everyone at your dinner table.

    Selecting the Right Roasting Method for Desired Results

    Choosing the appropriate roasting method is vital, as it directly influences the results you achieve. For instance, slow roasting is ideal for tougher cuts that require low and slow cooking to break down muscle fibers and render fat. This method ensures a more uniformly cooked roast that melts in your mouth while significantly reducing the risk of burning.

    Conversely, high-heat searing can create a fantastic crust on the exterior while locking in juices. However, mastering this technique is essential. Start with a preheated oven at a high temperature, then lower it after a brief period to ensure thorough cooking without burning the surface.

    Regardless of the method you select, keep in mind that your oven’s unique characteristics will influence the final outcome. Adjust cooking times and temperatures based on your experiences, and soon you’ll expertly navigate the art of roasting.

    The Importance of Basting for Moisture Retention

    Regularly basting your roast during the cooking process is an excellent way to maintain moisture and prevent the surface from burning. As the roast cooks, the natural juices will baste the exterior, enhancing flavor and reducing dryness.

    Utilize a basting brush or spoon to apply the drippings from the bottom of the pan onto the roast every 30 minutes. This simple action not only infuses moisture but also helps develop a rich, golden crust that adds visual appeal.

    If you’re concerned about burning, consider adding a splash of broth or wine to the roasting pan. This liquid helps create steam, maintaining moisture on the surface while allowing for even cooking throughout.

    Utilizing a Meat Thermometer for Precise Cooking

    A reliable meat thermometer is an essential companion in your roasting journey. This invaluable tool allows you to monitor the internal temperature of your roast, ensuring it is cooked perfectly without the risk of overcooking.

    Insert the thermometer into the thickest part of the roast, avoiding bones and fat for the most accurate reading. Familiarize yourself with the recommended internal temperatures for different types of meat—typically, beef should reach around 135°F (57°C) for medium-rare, while pork needs to hit 145°F (63°C).

    With a meat thermometer at your disposal, you’ll gain confidence in your ability to achieve the perfect roast while eliminating the fear of burning your meal.

    Allowing the Meat to Rest for Maximum Juiciness

    After your roast reaches the desired internal temperature, it’s crucial to let it rest before carving. This vital step allows the juices to redistribute throughout the meat, resulting in a tender and juicy finish.

    Loosely cover the roast with foil and let it rest for at least 15 to 30 minutes, depending on its size. Skipping this essential step can lead to a dry roast, as the juices will run out when you carve it, leaving you with a less than satisfactory meal.

    Resting isn’t just about improving flavor; it’s also a critical step for achieving a visually appealing presentation. As the juices settle, slicing becomes easier, resulting in neat and beautiful cuts that showcase your culinary efforts.

    Mastering Carving Techniques for Stunning Presentation

    Finally, the way you carve your roast can significantly influence the dining experience. Use a sharp, serrated knife for optimal results, and slice against the grain to maximize tenderness.

    To create an impressive presentation, consider slicing the roast into even portions and arranging them attractively on a serving platter. Garnish with fresh herbs to elevate the visual appeal and leave a lasting impression on your guests.

    The right carving technique completes your roasting journey, enabling you to showcase your skills and the juicy, perfectly cooked roast that you have diligently prepared while mastering how to prevent burnt roasts.

    Mastering Timing and Temperature: Key Elements for Culinary Mastery

    Timing and temperature are critical components in the world of roasting. Mastering these elements allows you to create a roast that is not only delicious but also perfectly cooked, all while avoiding the risk of burning.

    Guidelines for Accurate Cooking Times

    Getting the cooking time right is essential to prevent both undercooked and burnt roasts. As a general rule, adhere to cooking time guidelines based on the weight of your roast. A good estimate for roasting beef is approximately 20 minutes per pound at 350°F (175°C), while pork may require around 25 minutes per pound.

    Always factor in resting time, as this will influence the final cooking temperature. Using a kitchen scale to weigh your roast ensures precise cooking times and helps you avoid the common pitfalls associated with overcooking.

    Investing in a reliable kitchen timer can greatly assist in keeping you on track. Set it for the estimated cooking time and check for doneness diligently, making necessary adjustments to achieve that flawless roast.

    Making Necessary Temperature Adjustments During Cooking

    Adjusting the oven temperature throughout the roasting process is often critical for preventing burning while ensuring the roast is cooked through. If you notice that your roast is browning too quickly, lower the temperature slightly to allow for more evenly cooked meat.

    Flexibility in your approach is essential; making temperature adjustments is a normal part of cooking. Do not hesitate to reduce heat if you sense that the exterior is cooking faster than the interior.

    As you experiment with various cuts and sizes, you’ll develop an intuitive sense for when to make these adjustments. Soon, you’ll be adept at navigating the complexities of roasting without burning your culinary masterpiece.

    Understanding the Significance of the Resting Period

    The resting period is a crucial step in ensuring your roast turns out perfectly. Allowing your meat to rest for at least 15 minutes post-cooking not only aids in redistributing juices but also ensures that your roast doesn’t continue to cook while it sits, which can lead to dryness or burning.

    Loosely cover your roast with foil to retain heat while preventing moisture from becoming trapped. This simple practice can elevate your roast from ordinary to extraordinary, allowing you to create a dish that is both succulent and visually appealing.

    Understanding and appreciating the importance of this resting period will be one of your most significant lessons on your journey to mastering how to prevent burnt roasts.

    Vigilantly Monitoring Your Roast: A Key to Culinary Success

    Maintaining a watchful eye on your roast throughout the cooking process is crucial to ensuring it emerges perfectly. Monitoring its progress allows you to avoid burning and enhances your overall roasting experience.

    Conducting Visual Checks for Consistent Cooking

    Regularly inspect the color and surface of your roast to ensure it is not burning. A perfectly roasted piece of meat should have a rich, golden-brown exterior. If you notice any darkening or charring, it may be time to adjust the temperature or cover it with foil to prevent further damage.

    Visual checks also enable you to determine whether the meat is browning evenly. If one side cooks faster than the other, consider rotating the roast or repositioning it within the oven for optimal results.

    Being attentive to visual cues is essential for mastering how to prevent burnt roasts. Your eyes will become one of your most valuable tools throughout this culinary journey.

    Remaining Attentive to Smell and Smoke

    Stay attuned to any aromas or smoke that may indicate your roast is overcooking. While a pleasant fragrance should fill your kitchen, any acrid smells could signal trouble, prompting you to take corrective action.

    If you detect smoke, immediately reduce the oven temperature and continue to monitor your roast until it is cooked through. This level of vigilance will help you hone your skills and avoid burnt outcomes.

    Developing a keen sense of smell while roasting will serve you well in your culinary adventures. Trust your instincts; they will guide you toward success in the kitchen.

    Utilizing a Timer for Consistent Monitoring

    Setting a timer is a straightforward yet effective strategy to remind yourself to check on your roast regularly. This practice helps prevent you from losing track of time, which can ultimately lead to unwanted burning.

    Consider using multiple timers if you’re managing different roasts or side dishes, ensuring that nothing falls through the cracks during the cooking process.

    Being proactive with a timer will keep you engaged and in control, making your journey to perfect roasting much smoother and more enjoyable.

    Checking Internal Temperature for Cooking Precision

    Utilizing a meat thermometer to monitor the internal temperature of your roast is crucial. Aim for the recommended temperatures for various meats: 135°F (57°C) for medium-rare beef, 145°F (63°C) for pork, and 165°F (74°C) for poultry.

    Regular temperature checks will not only ensure that your roast is thoroughly cooked but will also help you avoid the dreaded overcooked, dry outcome that can lead to disappointment.

    As you gain experience, you’ll develop an instinctive understanding of timing and temperature, making the practice of checking internal temperatures feel like second nature.

    Resolving Common Roasting Issues: Navigating Culinary Challenges

    Even the most seasoned cooks encounter challenges while roasting. Knowing how to troubleshoot common issues empowers you to maintain control and avoid burning your roast.

    Addressing Uneven Cooking for Consistent Results

    If you encounter uneven cooking, rotating your roast and adjusting the oven rack position can make a significant difference. Ensure your roast is centered in the oven for optimal heat circulation.

    Don’t hesitate to open the oven door to check the roast’s status; just be sure to do so quickly to retain heat. If one side is cooking faster than the other, rotate the roast halfway through cooking to ensure uniform results.

    By taking these proactive measures, you’ll gain mastery in how to prevent burnt roasts and build confidence in your culinary skills.

    Identifying Hot Spots in Your Oven

    Recognizing and avoiding hot spots in your oven is essential for achieving even cooking results. If you have a conventional oven, you may find that certain areas cook faster than others.

    To identify these hot spots, conduct a simple test by placing slices of bread on different oven racks. The bread that toasts the quickest will reveal your oven’s hot spots. Once identified, position your roast accordingly to avoid these areas, minimizing the risk of burnt edges.

    Being aware of your oven’s unique characteristics empowers you to take control of your cooking environment, ensuring perfect roasts each time.

    Correcting Overcooked Exteriors During the Cooking Process

    If the exterior of your roast overcooks while the interior remains undercooked, it’s time to adjust your strategy. Lower the temperature or tent the roast with foil to protect the exterior while allowing the interior to catch up in cooking.

    This technique is especially effective for larger cuts that may require additional time to cook through. As you become more familiar with roasting, you’ll learn to adjust your methods based on the feedback your roast provides.

    By mastering these troubleshooting techniques, you’ll gain confidence and skill, ultimately making your journey toward perfect roasts a successful and satisfying one.

    Prioritizing Safety and Hygiene: Ensuring a Secure Cooking Environment

    In the culinary realm, safety and hygiene are paramount. As you embark on your roasting adventure, maintaining a safe kitchen environment is vital as part of the cooking process.

    Practicing Proper Hygiene When Handling Raw Meat

    Always ensure proper hygiene when handling raw meat. This includes washing your hands before and after handling, using separate cutting boards, and sanitizing surfaces to prevent cross-contamination.

    Raw meat should be stored in the fridge until you are ready to prepare it. Avoid leaving it out for extended periods, as this can lead to bacterial growth and compromise food safety.

    By adhering to robust hygiene practices, you will not only ensure a safe cooking environment but also enhance your overall experience of how to prevent burnt roasts.

    Frequently Asked Questions About Roasting

    What is the optimal oven temperature for roasting?

    The ideal oven temperature for roasting typically hovers around 350°F (175°C) for even cooking results. Adjustments may be necessary based on the specific cut and desired doneness.

    How do I determine when my roast is cooked?

    Utilize a meat thermometer to check the internal temperature. Beef is generally considered medium-rare at 135°F (57°C), while pork should reach 145°F (63°C) for safe consumption.

    Can I roast meat straight from the freezer?

    Roasting frozen meat is not advisable, as it can lead to uneven cooking and increase the risk of bacterial growth. Always ensure your meat is thoroughly thawed before roasting.

    How frequently should I baste my roast?

    Baste your roast every 30 minutes to keep it moist and enhance flavor. This practice also contributes to the development of a delicious crust.

    Is resting my roast after cooking necessary?

    Yes, allowing your roast to rest for 15 to 30 minutes facilitates juice redistribution, resulting in a more tender and flavorful meal.

    What should I do if my roast starts to burn?

    If your roast begins to burn, immediately lower the oven temperature and tent it with foil to protect the surface while it continues to cook through.

    Can I use a marinade on my roast?

    Absolutely! A marinade enhances flavor and moisture retention. Just ensure to pat the surface dry before roasting to avoid excess moisture.

    What are the best cuts of meat suitable for roasting?

    Cuts like rib roast, tenderloin, and pork loin are excellent choices for roasting, as they are known for their tenderness and desirable fat content.

    How should I slice my roast for serving?

    Use a sharp serrated knife and slice against the grain for maximum tenderness. Arrange the slices neatly on a serving platter for an appealing presentation.

    What should I do if my roast cooks unevenly?

    Rotate your roast or adjust its position in the oven to ensure even cooking. If necessary, cover it with foil to prevent burning while allowing it to cook through.

    Connect with us on Facebook!

    The post How to Avoid Burning Your First Roast: Essential Tips appeared first on https://cookinggods.com

    The Article Essential Tips to Avoid Burning Your First Roast Was Found On https://limitsofstrategy.com

  • Thanksgiving Turkey Tips for Perfect Cooking Results

    Thanksgiving Turkey Tips for Perfect Cooking Results

    Enhancing Your Turkey Preparation for an Unforgettable Thanksgiving Celebration

    Selecting the Perfect Turkey for Your Holiday Feast

    A golden-brown heritage turkey centerpiece on a festive Thanksgiving table with autumn decor and gathered loved ones.

    Choosing the ideal turkey for Thanksgiving is a pivotal step in creating a memorable dining experience. Begin by assessing the size of your gathering: are you hosting an expansive family celebration or a cozy dinner with close friends? For larger festivities, opt for a turkey weighing between 10-20 pounds, while an 8-12 pound bird is better suited for smaller gatherings. While many chefs advocate for fresh turkeys due to their superior flavor, a properly prepared frozen turkey can also deliver exceptional results. As you shop, explore various turkey breeds; heritage varieties are celebrated for their robust flavor, while self-basting turkeys provide the convenience of pre-injected seasonings that enhance taste.

    Additionally, consider the sourcing of your turkey carefully. Many local markets offer organic and free-range options that not only taste fresher but also promote sustainable farming practices. If you reside in an area where turkey options are limited, investigate international markets that may provide diverse turkey selections. Moreover, online retailers can facilitate convenient delivery, ensuring that you can acquire a high-quality turkey regardless of your location. This meticulous selection process will significantly enhance your turkey preparation experience, leading to a delicious centerpiece that will impress your guests at the Thanksgiving table.

    Finally, take into account the dietary preferences and restrictions of your guests. While some may prefer white meat, others might have specific allergies or dietary restrictions. By offering various turkey options or preparing complementary side dishes that cater to these needs, you create an inclusive dining atmosphere that everyone can enjoy. This thoughtful consideration will ensure that your Thanksgiving celebration is memorable for all the right reasons, leaving your guests satisfied and delighted with the meal.

    Effective Thawing Techniques for Your Turkey

    Employing safe thawing methods is crucial when preparing your turkey, as it significantly influences both flavor and food safety. The refrigerator method is the most reliable technique, allowing the turkey to thaw uniformly while maintaining a safe temperature. As a general rule, allocate 24 hours of thawing time for every 2.5 kg (approximately 5 pounds) of turkey. For instance, if you have a 4 kg turkey, plan for at least 2 days in the refrigerator, making it essential to organize your cooking schedule well in advance.

    Avoid thawing your turkey at room temperature, as this practice can encourage bacterial growth. If time is limited, consider the cold water thawing method, which involves submerging the turkey, still in its packaging, in cold water. Change the water every 30 minutes to maintain safety. This method typically requires around 30 minutes of thawing time for each pound of turkey, offering a quicker yet safe alternative for those on a tight schedule.

    Once your turkey has fully thawed, it is crucial to prepare it promptly to preserve its quality. Ensure that the turkey remains at a safe temperature and avoid leaving it unrefrigerated for extended periods. This diligence is vital not only for achieving that perfectly cooked Thanksgiving turkey but also for ensuring the health and safety of your guests.

    Enhancing Flavor and Moisture with Brining Techniques

    Brining can transform your turkey into a flavorful, succulent delight that will wow your guests. This technique involves soaking the bird in a saltwater solution, which enhances both flavor and moisture retention. A simple brine can be made by dissolving 1 cup of salt and optionally, ½ cup of sugar in 4 liters (approximately 1 gallon) of water. Feel free to customize your brine by adding ingredients such as garlic, rosemary, thyme, or even citrus zest, tailoring it to your taste preferences.

    To start the brining process, ensure the turkey is completely submerged in the brine solution and refrigerate for a minimum of 12 hours, but no more than 24 hours for optimal results. The science behind brining relies on osmosis: as the turkey absorbs the brine, the muscle fibers relax, allowing moisture to be retained during cooking. The end result? A juicy, flavor-packed turkey that is sure to impress your guests. Don’t hesitate to experiment with various brine recipes to uncover your signature flavor that will elevate your Thanksgiving meal.

    Maximizing Flavor: Expert Seasoning and Stuffing Techniques

    Chef seasoning and stuffing a roast with colorful spices and herbs in a vibrant kitchen.

    Creating a Flavorful Turkey Rub for an Exquisite Roast

    Crafting a delectable rub for your turkey presents a fantastic opportunity to personalize its flavor profile. A well-designed turkey rub can elevate your dish from ordinary to extraordinary, providing a simple yet effective way to integrate your favorite spices. Begin with a base of salt and pepper, then introduce traditional herbs such as thyme, rosemary, and sage to capture that quintessential Thanksgiving essence.

    Feel free to add garlic powder, onion powder, or a dash of cayenne for an extra burst of flavor. Incorporating oils, such as olive or canola oil, can aid the rub in adhering to the turkey while promoting a beautifully browned exterior during cooking. Use your hands to thoroughly massage the rub over the turkey, ensuring it penetrates beneath the skin where it can infuse the meat with rich flavors more effectively.

    For those adventurous in the kitchen, consider experimenting with international flavors. A Jamaican jerk seasoning, a za’atar blend from the Middle East, or a tandoori mix from India can introduce an exciting twist to traditional recipes. This diversity not only expands your culinary repertoire but also enriches your journey in mastering how to cook a Thanksgiving turkey perfectly.

    Stuffing Techniques to Elevate the Flavor of Your Turkey

    The tradition of stuffing a turkey is beloved, but it requires careful attention to detail, especially regarding food safety. Whether you choose a classic bread stuffing or explore alternatives like quinoa or rice, ensure that your stuffing achieves a safe internal temperature of 74°C (165°F) to avoid any risk of foodborne illness.

    For a delightful traditional stuffing, utilize stale bread cubes, sautéed vegetables such as onions and celery, and a mix of herbs for a comforting flavor. Moisten the mixture with broth and season thoroughly before packing it into the turkey’s cavity. Alternatively, consider contemporary variations, such as incorporating dried fruits like cranberries or apricots for a hint of sweetness, or nuts for added texture and flavor.

    While stuffing contributes moisture and depth of flavor, you might prefer to cook the stuffing separately if you are concerned about achieving precise cooking times or temperatures. This method allows for a crispy texture while ensuring the turkey remains moist and tender. Regardless of your chosen approach, ensuring even heat distribution in the stuffing is critical for mastering how to cook a Thanksgiving turkey perfectly.

    Strategically Applying Seasoning for Maximum Flavor

    Chef seasoning a dry Thanksgiving turkey under and over the skin for flavor and crispiness.

    The art of applying seasoning is a crucial step in how to cook a Thanksgiving turkey perfectly. For the best results, begin with a dry turkey by patting it down with paper towels to remove any excess moisture. This technique allows the seasoning to adhere more effectively while promoting a crispy skin that will be the envy of your guests.

    Generously distribute the seasoning both beneath the skin and on the surface, ensuring every nook and cranny is infused with flavor. This method not only enhances the overall taste but ensures that the seasonings penetrate the meat, resulting in a turkey bursting with flavor in every bite.

    To achieve an even distribution of seasoning, consider a combination of sprinkling and a gentle massage technique. This approach guarantees that the flavors meld beautifully during cooking. Don’t hesitate to explore various seasoning techniques, such as incorporating citrus zest or an herb-infused oil rub, to find the perfect balance that complements your palate.

    Cooking Techniques for Achieving the Perfect Turkey

    Roasting Your Turkey for Flawlessly Golden-Brown Results

    Roasting is undeniably the most traditional method for preparing a turkey, providing a straightforward approach to achieving that coveted golden-brown exterior and juicy meat. Start by preheating your oven to a temperature ranging from 170°C to 180°C (340°F to 350°F). This temperature range allows for even cooking without drying out the turkey, resulting in a beautifully moist bird that will satisfy every palate at your table.

    Frequent basting throughout the roasting process is vital for moisture retention. Use the pan juices to baste the turkey, which not only adds flavor but also helps develop that stunning crispy skin you desire. For an added layer of flavor, consider incorporating butter or a flavored fat into the basting mixture, enhancing the overall richness of your dish.

    Cooking times will vary based on the turkey’s weight, with a general guideline of approximately 13-15 minutes per pound. However, the most reliable method remains using a meat thermometer; aim for an internal temperature of 74°C (165°F) in the thickest part of the thigh. This ensures that your turkey is safe to eat and perfectly cooked, contributing to a successful meal that elevates your culinary reputation among friends and family.

    Utilizing a Turkey Roaster for Enhanced Cooking Convenience

    If you’re seeking to simplify your cooking process, a turkey roaster can be a transformative tool in your kitchen. These appliances offer even cooking, allowing you to free up valuable oven space for side dishes and desserts, making your Thanksgiving prep more efficient. Be sure to follow the manufacturer’s guidelines for temperature settings, as some models may require specific adjustments for optimal performance.

    Using a turkey roaster can also simplify cleanup due to built-in drip trays. This efficient method is particularly advantageous for large gatherings, where managing space and timing is critical for a successful dinner.

    To maximize flavor, consider adding aromatic vegetables and herbs to the roaster; this will infuse the turkey with delightful aromas as it cooks. This technique not only yields a delicious bird but also creates a fragrant base for gravies and sauces, ensuring that your Thanksgiving meal is unforgettable and truly special.

    Deep Frying for a Unique, Crispy Texture

    Deep frying may appear unconventional, but it presents a unique and delightful method for cooking your turkey. This approach involves immersing the entire bird in hot oil, resulting in a crispy skin and juicy meat that many find irresistible. However, safety should always be your top priority; ensure you use a turkey fryer outdoors to minimize any potential hazards.

    The ideal oil temperature for deep frying is around 175°C (350°F), and a general rule of thumb is to fry the turkey for approximately 3-4 minutes per pound. Ensure that the turkey is fully thawed and dry before immersing it to prevent dangerous oil splatters that could lead to burns or accidents.

    When executed correctly, deep frying can yield a beautifully crispy texture that many guests will find irresistible. Pair this cooking method with a homemade marinade or rub to deepen the flavor profile. This technique can serve as a fabulous conversation starter and a highlight of your holiday celebrations, showcasing your culinary prowess and creativity in the kitchen.

    Smoking Your Turkey for Rich, Complex Flavors

    Smoking is an exceptional method for infusing rich, complex flavors into your turkey. This low-and-slow approach requires patience but rewards you with a unique taste profile that is difficult to surpass. Maintaining a consistent temperature of around 107°C to 135°C (225°F to 275°F) throughout the smoking process is crucial for achieving the best results.

    Choose your wood chips wisely; hickory, apple, and cherry woods are popular choices that impart distinct flavors to the meat. Soaking the chips in water prior to use can enhance smoke production, creating an aromatic experience that will tantalize your guests’ senses and elevate your holiday meal.

    Timing is essential in smoking, with a general guideline of approximately 30 minutes of smoking per pound of turkey. Utilizing a meat thermometer is vital to ensure that the internal temperature reaches a safe 74°C (165°F). The outcome is a tender, flavorful turkey that is sure to impress even the most discerning palate at your Thanksgiving gathering.

    Spatchcocking for Efficient and Even Cooking

    Spatchcocking, also referred to as butterflying, is a technique that enables even cooking and reduces cooking time by flattening the turkey. This method involves removing the backbone, allowing the bird to lie flat, which promotes even heat distribution throughout the cooking process and ensures that every bite is perfectly cooked.

    This technique can significantly shorten cooking time while ensuring the turkey remains juicy. Generously season the turkey before roasting, allowing flavors to penetrate more deeply into the meat. This practical tip is invaluable for those eager to learn how to cook a Thanksgiving turkey perfectly, as it opens new avenues for experimentation with seasoning and flavor profiles.

    Additionally, spatchcocking contributes to a stunning presentation, as the flattened bird creates an impressive canvas for garnishing and serving. Combine this technique with your preferred cooking method for a memorable dining experience that is sure to leave a lasting impression on your guests.

    Mastering Temperature and Timing for Culinary Success

    Utilizing a Meat Thermometer for Accurate Cooking

    A meat thermometer is an essential tool for ensuring that your turkey is cooked to perfection. The ideal internal temperature for a turkey is 74°C (165°F) in the thickest part of the thigh. This precise measurement guarantees that the meat is safe to consume while retaining the moisture and tenderness that everyone craves during a festive meal.

    Insert the thermometer before the turkey is fully cooked to avoid overcooking. If you find that the thighs reach the desired temperature first, consider tenting the breast with foil to prevent it from drying out. This careful attention to temperature is critical for your success in how to cook a Thanksgiving turkey perfectly, ensuring a meal that delights.

    For those seeking added precision, consider using a digital thermometer equipped with an alarm feature, which can notify you when the turkey reaches the designated temperature. This is particularly useful during holiday gatherings, allowing you to focus on other preparations without the constant need to monitor the oven closely.

    Estimating Cooking Time for Effective Meal Planning

    Calculating cooking time is vital in planning your Thanksgiving meal effectively. The general guideline is to allow approximately 13-15 minutes per pound for an unstuffed turkey and 15-18 minutes for a stuffed one. These guidelines will assist you in organizing your cooking schedule, ensuring that everything is prepared and ready when your guests arrive, thereby minimizing any last-minute stress.

    However, it is essential to note that cooking times may vary based on several factors, including oven calibration and the turkey’s size and shape. Using a meat thermometer remains your most reliable method for accuracy. Additionally, always allow for some extra time in your calculations to accommodate any unexpected delays or adjustments during the cooking process.

    Keep in mind that resting time is also a crucial factor; your turkey requires at least 20-30 minutes to rest before carving. This vital step enables the juices to redistribute, ensuring a moist and flavorful turkey that will delight your guests and leave them wanting more.

    Understanding the Importance of Resting Your Turkey

    Resting your turkey is a critical step that is often overlooked but essential for achieving the best possible outcome. After cooking, allow the turkey to rest for a minimum of 20-30 minutes. This resting period enables the juices to redistribute throughout the meat, ensuring that every slice is juicy and tender, creating a truly exceptional dining experience that your guests will remember.

    Cover the turkey loosely with foil during the resting period to keep it warm. While it rests, take the opportunity to prepare your side dishes or finish any sauces or gravies, as this timing coordination is key to executing a seamless Thanksgiving dinner that impresses everyone.

    The resting time also serves as an excellent moment for everyone to gather around the table and appreciate the feast ahead. The anticipation builds as the enticing aroma fills the air, making it a memorable prelude to your meal that sets the tone for a delightful gathering.

    Carving and Serving: The Grand Finale of Your Thanksgiving Celebration

    Mastering the Art of Carving Your Turkey with Precision

    Carving a turkey can be an art form, and with the right technique, you can achieve beautifully sliced pieces that will impress your guests. Start with a sharp carving knife to ensure clean, precise cuts. Begin by removing the legs and thighs, slicing through the joint where they connect to the body for a seamless separation.

    Next, carve the breast meat by slicing it off the bone in long, even strokes. This method produces attractive slices while keeping the turkey looking pristine on the serving platter, enhancing its visual appeal. A carving fork can provide stability, making the carving process smoother and safer for you.

    Consider presenting the turkey on a large platter, arranging the slices neatly and garnishing with fresh herbs or citrus slices to elevate the visual impact. This thoughtful presentation can enhance the overall dining experience and leave a lasting impression on your guests, showcasing the effort you put into preparing the meal and making it feel special.

    Creating an Attractive Platter Arrangement for Your Turkey

    Presentation is paramount in your Thanksgiving feast, so take the time to arrange your carved turkey attractively on a platter. Start by placing the larger pieces, such as the legs and wings, before layering the breast slices neatly over them for a visually organized look.

    Add colorful garnishes such as fresh herbs, cranberries, or slices of citrus, which will enhance visual interest while complementing the rich flavors of the turkey. Consider incorporating seasonal elements like ornamental pumpkins or autumn leaves for a festive touch, ensuring that the presentation is as memorable as the meal itself, captivating your guests from the moment they sit down.

    Investing time in the final presentation of your turkey signifies the effort put into the entire cooking process. Your guests will appreciate the attention to detail, enhancing their overall dining experience and creating cherished memories that will last long after the meal is over.

    Thoughtful Serving Suggestions for an Unforgettable Thanksgiving Meal

    Traditional Thanksgiving sides, such as creamy mashed potatoes, savory stuffing, and tangy cranberry sauce, often pair beautifully with turkey, creating a harmonious meal. However, don’t hesitate to experiment with new and exciting accompaniments that reflect your culinary creativity. Consider roasted root vegetables seasoned with Moroccan spices or a fresh salad featuring seasonal fruits and nuts for a delightful twist that surprises your guests.

    Including a selection of sauces, such as rich gravy or zesty chimichurri, can elevate the entire meal and enable your guests to customize their plates to suit their tastes. Be mindful of diverse dietary preferences; offering vegetarian or gluten-free options ensures that everyone can partake in the feast without restrictions or concerns.

    Ultimately, the goal is to create a balanced and vibrant spread that showcases the turkey as the star of the show while complementing it with a variety of delicious sides that will delight your guests, ensuring a memorable Thanksgiving celebration filled with joy and laughter.

    Smart Strategies for Storing Leftover Turkey Safely

    Properly storing leftover turkey is crucial for enjoying this delicious dish in the days following your feast. Aim to refrigerate leftover turkey within two hours of serving to prevent any risk of bacterial growth. Store the turkey in airtight containers, and be mindful to separate dark and white meats if they will be used differently in future meals.

    Leftover turkey can last for up to four days in the fridge, allowing you to savor the flavors of Thanksgiving long after the holiday has passed. For longer storage, consider freezing the meat in portioned containers or vacuum-sealed bags. This approach allows you to enjoy your delicious turkey well beyond the Thanksgiving holiday, providing a taste of your festive celebration for weeks to come.

    Get creative with your leftovers; they can inspire exciting new culinary adventures, from scrumptious sandwiches to hearty casseroles. Don’t let any of those delicious remnants go to waste; find inventive ways to repurpose your turkey into delightful new dishes that everyone will love, ensuring that your Thanksgiving spirit continues even after the last bite.

    Maximizing Your Turkey Experience: Leftovers and Storage Techniques

    Effectively Storing Leftover Turkey for Future Enjoyment

    Storing leftover turkey correctly is essential for maintaining the quality and safety of your meal. Begin by refrigerating any turkey leftovers within two hours of cooking to mitigate any risk of foodborne illness. Utilize airtight containers to keep out moisture and odors while ensuring the turkey remains fresh for future enjoyment, extending the life of your delicious dish.

    Organizing the turkey by separating dark and white meat is advisable, as these can be utilized in different recipes later. Cooked turkey can last for up to four days in the refrigerator; however, if you plan to keep it longer, consider freezing it to preserve its taste and texture for future meals.

    When freezing, slice the turkey into portions for easier defrosting later on. Vacuum sealing is an excellent technique for maintaining freshness and preventing freezer burn, allowing you to savor your turkey weeks after the holiday. By employing proper storage techniques, you can significantly enhance your culinary experience and make the most of your Thanksgiving meal.

    Reheating Leftovers Safely and Deliciously

    Reheating leftovers must be done with care to preserve quality and ensure safety. The best method for reheating turkey is in the oven, which helps retain moisture and ensures even heating. Preheat your oven to 175°C (350°F) and place the turkey in a baking dish, covering it with foil to lock in moisture for a tender result.

    For smaller portions, the microwave can be a convenient option; however, be cautious of uneven heating. Always stir or rearrange the meat to avoid cold spots that may harbor bacteria, ensuring every bite is safe and enjoyable. Aim for an internal temperature of 74°C (165°F) before serving to ensure your turkey is safe to eat and delicious, offering the same satisfaction as the initial feast.

    Additionally, consider reheating any sides alongside the turkey for a complete meal remake. This strategy makes for a quick and easy dinner while ensuring that the flavors remain consistent with your original Thanksgiving feast, creating a satisfying experience for everyone and minimizing waste.

    Creative Ways to Repurpose Leftover Turkey into New Dishes

    Making the most of your leftover turkey opens the door to culinary creativity and innovation. Transform the remaining meat into savory turkey sandwiches, loaded with cranberry sauce and stuffing for a delightful post-Thanksgiving treat that captures the essence of the holiday. Alternatively, consider crafting a hearty turkey soup or a comforting casserole that utilizes every last bit of meat, providing nourishment and satisfaction.

    Experimenting with different flavors can lead to exciting new dishes. For example, try mixing turkey with Asian-inspired ingredients like hoisin sauce and ginger for a unique stir-fry, or incorporate it into tacos with fresh toppings for a fun twist on your leftovers that will surprise and delight.

    The possibilities are endless when it comes to repurposing turkey, allowing you to savor the flavors of Thanksgiving long after the holiday is over. With a bit of imagination and creativity, your leftovers can become just as exciting and enjoyable as the main event, ensuring the spirit of Thanksgiving lingers well into the future.

    Common Questions About Turkey Preparation for Thanksgiving

    How long does it take to cook a turkey for Thanksgiving?

    Cooking time for a turkey typically ranges from 13 to 15 minutes per pound for an unstuffed bird and 15 to 18 minutes per pound for a stuffed one. Always utilize a meat thermometer to check for doneness, ensuring safety and quality for your holiday meal.

    What is the best way to thaw a frozen turkey safely?

    The safest method to thaw a frozen turkey is in the refrigerator, allowing 24 hours for every 2.5 kg (5 pounds) of turkey. For a quicker option, you can submerge it in cold water, changing the water every 30 minutes to maintain safety and prevent bacterial growth.

    Can I stuff the turkey the night before cooking?

    It’s not recommended to stuff the turkey ahead of time due to potential food safety risks. Instead, prepare the stuffing just before you are ready to cook to ensure optimal safety and quality, allowing for a delicious result.

    What should I do if my turkey is not cooking evenly?

    If your turkey isn’t cooking evenly, you can tent areas with foil that are browning too quickly to prevent burning. Always use a meat thermometer to ensure all parts reach the safe cooking temperature of 74°C (165°F) for optimal safety and quality.

    How do I keep the turkey moist while cooking?

    Basting the turkey every 30-45 minutes with pan juices or melted butter can help keep it moist throughout the cooking process. Additionally, consider brining the turkey beforehand to enhance moisture retention and flavor, ensuring a succulent and delicious result.

    Can I cook a turkey from frozen safely?

    Yes, you can cook a frozen turkey; however, it will take approximately 50% longer than a thawed bird. Always check the internal temperature with a meat thermometer to ensure it reaches the safe cooking temperature of 74°C (165°F) before serving.

    What are some creative leftover turkey recipes I can try?

    Leftover turkey can be transformed into delicious sandwiches, soups, casseroles, or even tacos. Feel free to get creative and experiment with different flavors to enjoy your leftovers in exciting new ways that keep mealtime interesting.

    How should I store leftover turkey properly?

    Store leftover turkey in airtight containers within two hours of serving. It can last up to four days in the refrigerator or be frozen for longer storage, allowing you to enjoy your turkey beyond the holiday and reduce waste.

    What temperature should the turkey be when it is done cooking?

    The turkey should reach an internal temperature of 74°C (165°F) in the thickest part of the thigh to ensure it is safe to eat and cooked to perfection, providing peace of mind for your Thanksgiving celebration.

    Can I use the turkey carcass for soup after the meal?

    Absolutely! The turkey carcass can be simmered to create a rich and flavorful broth, perfect for soups or stews. Simply add vegetables and seasonings to enhance the flavor and nutritional value of your dish, making the most of every part of the turkey.

    Connect with us on Facebook for more culinary tips!

    The post How to Cook a Thanksgiving Turkey Perfectly: A Universal Guide appeared first on Cooking Gods.

    The Article Thanksgiving Turkey Cooking Tips for Perfect Results Was Found On https://limitsofstrategy.com