Category: Cooking Tips

  • Smoke Bone Marrow: A Guide to Flavorful Richness

    Smoke Bone Marrow: A Guide to Flavorful Richness

    Master the Art of Choosing Premium Bone Marrow for Exceptional Smoking

    Discover How to Select Top-Quality Bones for Flavorful Smoking

    How to Smoke Bone Marrow for Richness: High-quality beef and veal marrow bones, marbled and meaty, on a rustic table, labeled grass-fed.

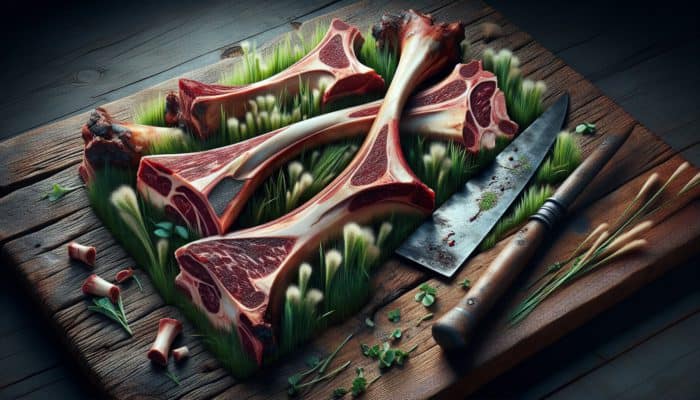
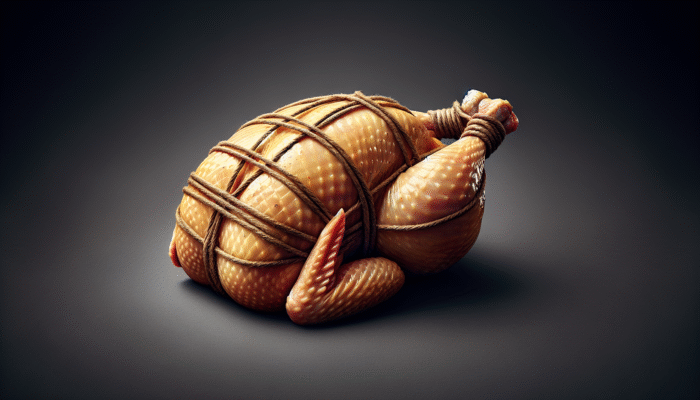
    Embarking on the culinary journey of smoking bone marrow for rich flavor begins with the critical step of selecting the highest quality bones available. Prioritize beef or veal bones sourced from trusted butchers, as these typically offer a superior flavor profile and a luxurious richness that enhances your dish significantly. Seek marrow bones that are not only meaty but also display excellent marbling; these characteristics indicate a more flavorful and indulgent end product. For an unparalleled culinary experience, consider grass-fed beef bones, which often provide a deeper and more robust taste compared to their grain-fed counterparts. Engaging with local butcher shops can unveil premium-quality options, so don’t hesitate to inquire about the finest bones available for smoking.

    Recently, the trend of nose-to-tail eating has surged, emphasizing the importance of utilizing every part of the animal in a sustainable manner. This environmentally responsible approach not only enriches your culinary skills but also invites you to appreciate the full spectrum of flavors available. By selecting high-quality bones, you are making an investment in the final product—a sumptuous, creamy marrow that is regarded as a culinary treasure.

    Step-by-Step Process for Preparing Your Bones for Optimal Smoking

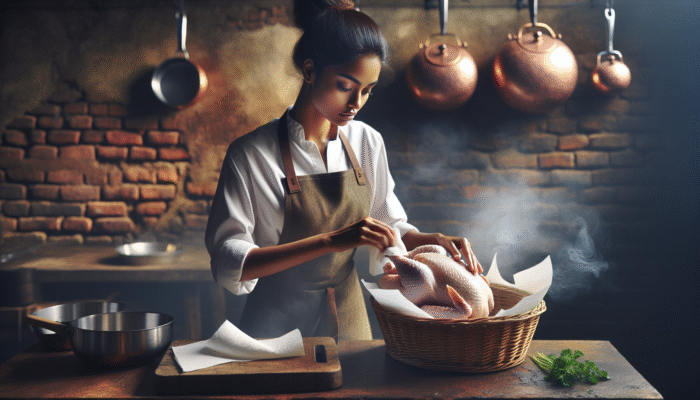
    The preparation stage is crucial in the smoking process, especially when mastering how to smoke bone marrow for rich flavor. Start by carefully slicing the bones in half lengthwise, which exposes the marrow, allowing it to absorb the smoky flavors more effectively and facilitating easier extraction once the smoking is completed. It’s essential to use a sharp, reliable knife for this task—prioritize safety and take your time to make precise, clean cuts for the best results.

    Once you’ve sliced the bones, it’s advisable to soak them in a solution of salted water for several hours or even overnight. This soaking technique helps to draw out impurities and residual blood, resulting in a purer flavor profile. Afterward, a thorough rinse of the bones is vital to ensure they are fully prepared for the smoker, eliminating any lingering saltiness that could detract from the natural richness of the marrow.

    Listen to Our Expert Insights on Smoking!


    How to Find Local Sources for Premium Quality Bones

    Acquiring the freshest and highest-quality bones is a crucial step in achieving the best flavor while mastering how to smoke bone marrow for rich flavor. Local farmers’ markets and specialty meat shops serve as excellent starting points for your search. These venues often carry grass-fed and sustainably raised options, allowing you a direct connection to the producers. Don’t hesitate to ask about the animal’s upbringing; the responses can significantly influence the flavor and quality of the marrow you will be working with.

    Building relationships with local farmers can also provide valuable insights into seasonal offerings and unique cuts that may not be available at larger grocery chains. Moreover, exploring local shops enables you to support your community while enjoying the freshest ingredients available. The experience of personally selecting your bones from local sources can greatly enhance the cooking process, transforming it into a more intimate and rewarding endeavor.

    Optimize Your Smoker for Perfect Smoking Results Every Time

    Diagram of a smoker with labeled parts, meats at various smoking stages, and a chef adjusting settings.

    Selecting the Best Wood for Smoking Bone Marrow

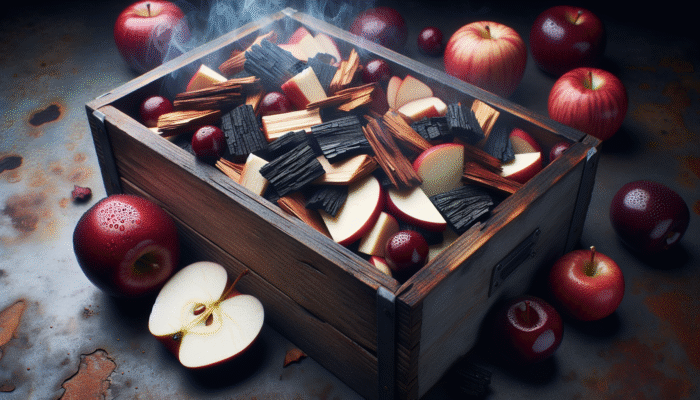
    The type of wood you select can dramatically influence the flavor of your smoked marrow. For a rich and robust flavor profile that beautifully enhances the fatty richness of the marrow, hickory and oak are preferred choices. Hickory, known for its strong, smoky essence, enhances the marrow’s natural flavors without overpowering them. On the other hand, oak provides a more subtle smoke that allows the inherent flavors of the marrow to shine through while still adding depth to elevate the overall dish.

    Feel free to explore other wood varieties, such as cherry or mesquite, to create unique flavor combinations. Cherry wood introduces a hint of sweetness, while mesquite imparts a more intense smokiness. Each type of wood has its distinct character, enabling you to customize the flavor profile of your smoked marrow to suit your personal preferences and enhance your culinary skills.

    Ensuring Proper Temperature Control for Optimal Smoking

    Maintaining the correct temperature throughout the smoking process is crucial for achieving the desired outcomes. Aim for a low and steady temperature of around 225°F. This gradual cooking method allows the marrow to render gently, transforming from a dense, gelatinous state into a luxuriously creamy texture that delights the palate.

    Utilizing a digital thermometer can provide precise temperature readings, ensuring that your smoker maintains this ideal environment throughout the cooking duration. Slow smoking not only enhances the flavor of the marrow but also significantly improves its tenderness, making it easier to scoop out once fully cooked and ready to serve.

    Preheating Your Smoker for Consistent and Delicious Results

    Smoker preheating with heat waves, glowing charcoal, and wood chips in rustic outdoor kitchen.

    Before introducing your prepared bones to the smoker, it is essential to preheat the smoker to the desired temperature. This often-overlooked step is critical for achieving consistent results. By allowing the smoker to reach its operating temperature before adding the bones, you ensure that the smoking process begins immediately, which is vital for achieving that perfect smoky flavor.

    If you are using a charcoal smoker, it requires more attention, as you must closely monitor the coals and wood chips. In contrast, electric smokers simplify this task by maintaining a steady temperature with minimal effort. Regardless of your choice, starting with a properly heated smoker is fundamental in setting the stage for a successful smoking experience that yields delicious results.

    Strategically Arranging Marrow Bones in Your Smoker for Optimal Flavor

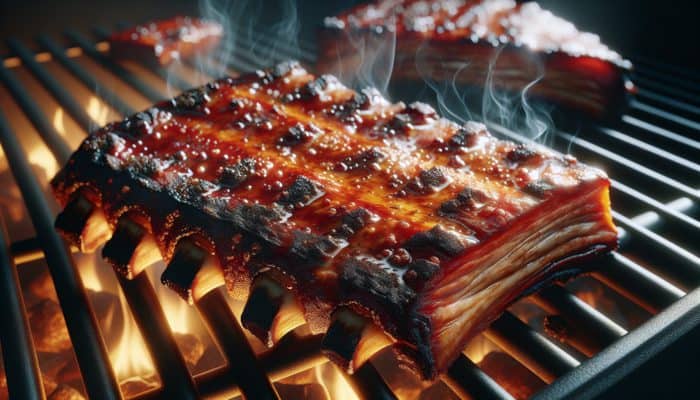
    The arrangement of the bones within the smoker can greatly influence the overall flavor and cooking process. Position the bones cut-side up on the smoker rack, ensuring they are spaced evenly apart. This spacing is critical for allowing smoke to circulate freely around each piece, ensuring uniform flavor penetration throughout the marrow.

    Avoid overcrowding the smoker, as this can lead to uneven cooking and compromise the smoking experience. If you are working in batches, ensure that each batch has sufficient space to allow for optimal airflow. Proper arrangement not only enhances flavor but also contributes to a more visually appealing final presentation, creating a dish that is inviting to serve and enjoy.

    Regularly Monitoring the Smoking Process for Optimal Outcomes

    During the smoking process, it is vital to conduct regular checks on your smoker’s temperature and monitor the color of the marrow to achieve the best results. Use a reliable thermometer to ensure the internal temperature remains steady at approximately 225°F for optimal outcomes.

    As the bones smoke, they will undergo a visual transformation, becoming slightly browned and bubbly. This visual cue indicates that the marrow is approaching doneness. To check for tenderness, gently press the marrow with a fork; it should yield effortlessly when cooked to perfection. Be prepared to adjust the temperature as necessary to prevent over-smoking, which can impart a bitter taste to your delicious creation.

    Perfecting the Flavor of Your Smoked Bone Marrow for a Luxurious Experience

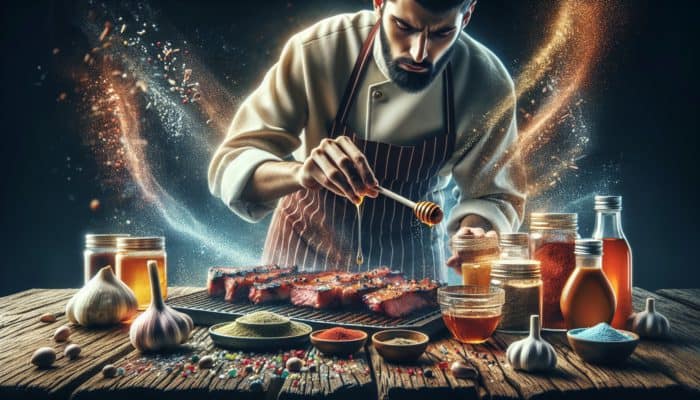
    Enhancing Flavor with Simple Seasoning: Salt and Pepper

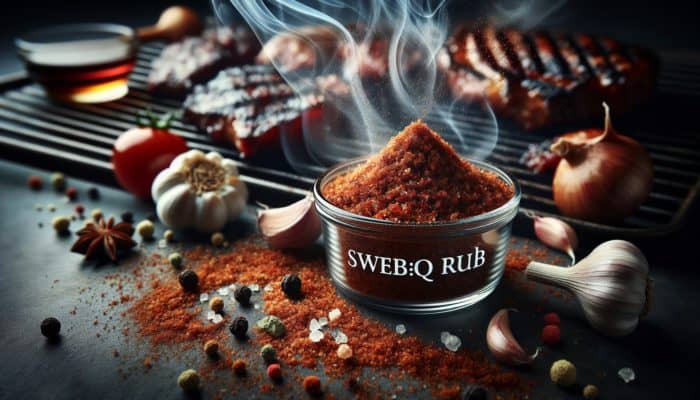
    The seasoning of your marrow plays a pivotal role in elevating its natural flavors, making a straightforward yet effective approach ideal for culinary enthusiasts. A simple sprinkle of salt and pepper can work wonders, allowing the inherent richness of the marrow to take center stage in your dish. Using coarse sea salt creates a delightful textural contrast when served, while freshly cracked black pepper adds a subtle kick that beautifully complements the fatty goodness of the marrow.

    This minimalist approach is particularly effective when you’re learning how to smoke bone marrow for rich flavor, as it allows the quality of the marrow and the smoking process to shine through without overwhelming the palate. Remember, the key is to season sparingly before smoking; you can always add more flavor after tasting the finished product to ensure a delightful balance that pleases the senses.

    Incorporating Fresh Herbs and Spices for a Flavorful Experience

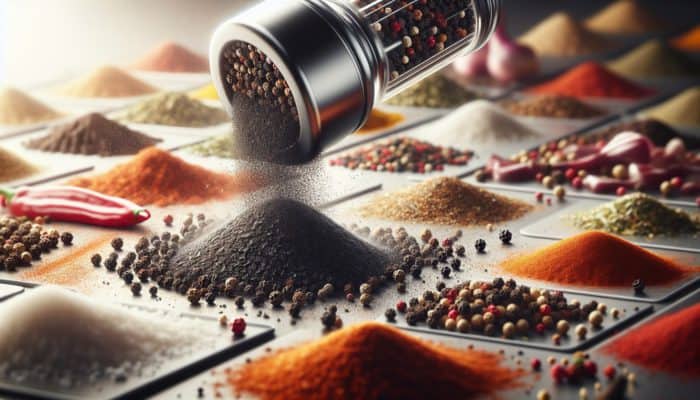
    If you’re eager to elevate your culinary experience, consider incorporating a variety of herbs and spices to introduce a more complex flavor profile. Fresh herbs like rosemary, thyme, and garlic powder are exceptional choices that pair beautifully with the rich, buttery essence of bone marrow. These aromatic herbs can balance the inherent richness while enhancing the overall sensory experience of the dish, making it truly memorable.

    Feel free to experiment with different combinations; for instance, pairing rosemary with garlic creates a classic flavor duo, while thyme adds an earthy undertone that complements the marrow perfectly. When seasoning, apply a light dusting of your chosen herbs to the marrow before smoking, ensuring that they enhance rather than overshadow the natural flavors of the bone, creating a delightful harmony on the palate.

    Exploring Marinating Techniques to Elevate Your Flavor Game

    Marinating the bones is an excellent technique to enhance flavor and explore the richness of smoked bone marrow. An overnight marinade can infuse the marrow with robust flavors, resulting in a more complex and satisfying dish. A simple mixture of olive oil, herbs, and spices can work wonders at this stage, allowing the flavors to penetrate deeply.

    Combining olive oil with finely chopped herbs like parsley or basil, along with garlic, salt, and pepper, creates a flavorful marinade that will enhance your marrow. Generously coat the bones with this mixture and let them marinate in the refrigerator overnight. This not only amplifies flavor but can also help tenderize the marrow, making it even more delectable after smoking, ensuring each bite is a delight.

    Executing the Smoking Process with Precision and Care for Maximum Flavor

    Strategic Bone Arrangement for Optimal Smoke Absorption

    As you prepare to begin smoking, the arrangement of the bones remains crucial for optimal flavor absorption. Position the bones with the cut side facing up on the smoker rack. This orientation maximizes exposure to smoke, enhancing flavor while ensuring even cooking throughout the marrow.

    Careful spacing is essential; avoid crowding the bones to promote optimal airflow. If you have multiple racks or a larger smoker, consider smoking in smaller batches to ensure even heat distribution. The more evenly the smoke circulates through each bone, the richer and more satisfying the flavor will be, yielding the indulgent experience you are striving for with your smoked marrow.

    Vigilantly Monitoring the Smoking Process for Ideal Results

    Maintain a close watch on the smoking process as you master how to smoke bone marrow for rich flavor. Periodically check the color of the marrow; it should gradually develop a rich, golden-brown hue as it cooks. This visual transformation serves as a reliable indicator of the smoking process—if it appears too dark, it may suggest over-smoking, which can negatively affect flavor.

    Utilizing a probe thermometer to monitor the internal temperature of the marrow can help prevent it from becoming tough. Aim for an internal temperature of approximately 160°F to ensure that the marrow is perfectly cooked, achieving the desirable melt-in-your-mouth consistency. This careful monitoring ensures that you obtain a tender, creamy texture without sacrificing the delightful smoky flavor you have been working tirelessly to create.

    Mastering the Art of Achieving an Ideal Smoking Experience

    To truly master the art of smoking bone marrow for rich flavor, the ultimate objective is to achieve a well-balanced smoky flavor that beautifully complements the inherent richness of the marrow. You want the smoke to harmonize with, rather than overpower, the natural flavors of the bone, creating a cohesive culinary experience that delights the senses.

    Consider the smoking duration as well—typically, bone marrow should smoke for around 45 minutes to an hour. This timeframe allows the marrow to absorb sufficient smoke without becoming overly charred. As you refine your skills, you may discover that adjusting the smoking duration based on the specific type of wood or the size of the bones can further improve your results, leading to a delightful and memorable dish that impresses everyone at the table.

    Final Touches and Resting for Maximum Flavor Development

    Identifying When Smoked Marrow is Perfectly Cooked

    Identifying when your marrow has been fully smoked is essential for achieving the desired texture. The marrow should be soft and slightly bubbly when it is ready to be removed from the smoker. A gentle poke with a fork should yield easily, indicating that the marrow has reached that perfect, melt-in-your-mouth consistency you aim for, providing a satisfying experience.

    It’s important to remember that the smoking process will continue for a few moments even after the bones are removed from the smoker due to residual heat. Therefore, exercise caution to avoid overcooking; overdone marrow can become tough and lose its rich, creamy texture. Striking that perfect balance is key to ensuring a successful smoking experience that leaves everyone satisfied and eager for more.

    Allowing the Marrow to Rest for Enhanced Flavor Integration

    Once your bones have been perfectly smoked, the next step involves allowing them to rest for a few minutes. This resting period is crucial as it enables the flavors to meld and settle, enhancing the overall taste of the marrow when served. Place the smoked bones on a cutting board or platter, allowing them to cool slightly before serving, ensuring the best experience for your guests.

    This brief resting period also helps prevent accidental burns when serving, ensuring that your guests can enjoy the dish without discomfort. After resting, the marrow will maintain its creamy texture, making it a delightful addition to your meal that everyone will appreciate and savor.

    Prioritizing Food Safety Throughout the Smoking Process

    Safety should always be a priority, particularly when working with meats and smoked products. Throughout the smoking process, it is vital to maintain the appropriate temperatures to ensure that the marrow is safe for consumption. Please monitor the internal temperature, ensuring it remains within safe limits (160°F) to minimize the risk of foodborne illness that can arise from improper cooking.

    Using a clean thermometer and fresh utensils can help prevent cross-contamination. Additionally, ensure that any remaining bones are stored correctly after cooking. If not serving immediately, allow them to cool completely before refrigerating, ensuring a safe and delicious meal for later enjoyment, allowing you to cherish the flavors of your hard work.

    Innovative Serving Suggestions for Your Smoked Bone Marrow

    Pairing Smoked Bone Marrow with Fresh Bread for an Exquisite Experience

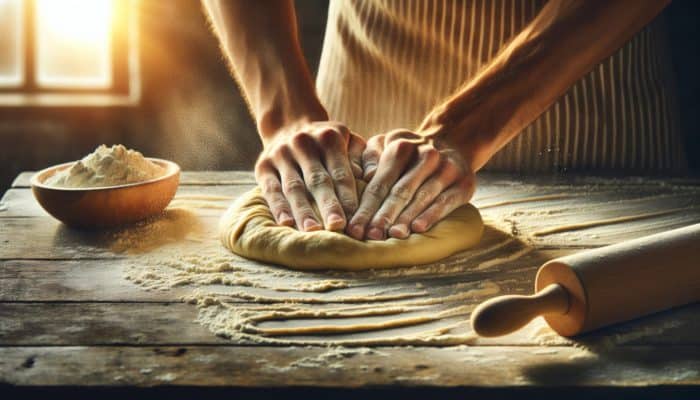
    Serving your smoked bone marrow can be a remarkable experience, and pairing it with the right accompaniments elevates the dish to new heights. Toasted baguette slices or rustic bread are classic choices that harmonize beautifully with the marrow. The crunchy texture of the bread provides a delightful contrast to the smooth, rich marrow, creating a well-rounded and satisfying culinary experience that captivates the senses.

    Consider brushing the bread with a touch of olive oil before toasting to enhance its flavor profile. A light sprinkle of salt on the bread will also amplify the overall taste, further bringing out the richness of the marrow and creating a delightful balance of flavors that guests will love.

    Complementary Dishes to Balance the Richness of Smoked Marrow

    To create a harmonious balance with the richness of the smoked marrow, consider serving it alongside fresh, grilled vegetables or a light salad. Grilled asparagus, zucchini, or bell peppers can add a delightful crunch and freshness that beautifully contrasts with the rich flavors of the marrow. A simple vinaigrette can introduce acidity to the dish, cutting through the fat and enhancing the overall dining experience, ensuring a delightful meal for everyone.

    Additionally, incorporating a light side of pickled vegetables can provide a tangy counterbalance, creating a beautifully curated meal that is sure to please the palate and leave guests wanting more, making your culinary efforts truly memorable.

    Expert Presentation Tips for a Memorable Dining Experience

    Presentation is key, particularly when serving such a decadent dish. Arrange the smoked bones on a platter, garnished with fresh herbs like parsley or thyme to add a pop of color and freshness. Including lemon wedges can also introduce a bright, zesty element that can be squeezed over the marrow just before serving, enhancing the overall flavor and visual appeal.

    Creating an inviting and visually appealing presentation not only enhances the dining experience but also excites your guests about the flavors they are about to enjoy. The art of presentation can elevate a simple dish into a gourmet experience, ensuring your gathering remains memorable and delightful, encouraging everyone to savor each bite.

    Elevating Flavor Profiles for an Unforgettable Culinary Adventure

    Enhancing Flavor with a Finishing Salt for Depth

    For that final touch of flavor, consider adding a sprinkle of flaky sea salt just before serving. This finishing salt enhances the taste of the smoked marrow, accentuating its creaminess and coaxing out the rich flavors developed during the smoking process. The contrast between the warm marrow and the cool, crunchy salt creates a delightful sensory experience, making each bite an adventure for the palate.

    Choose high-quality finishing salts, such as Maldon or fleur de sel, which offer unique textures and flavors that can elevate your dish. This small yet impactful addition can make a significant difference, serving as a simple way to enhance your dish to the next level and ensure a memorable dining experience for all.

    Incorporating a Variety of Sauces for Customization and Enhanced Flavor

    Offering a selection of sauces allows guests to personalize their smoked marrow experience, enhancing the flavors to suit their preferences. Consider presenting traditional sauces, such as chimichurri, which introduces a vibrant, herbaceous note, or a simple balsamic reduction that adds a hint of sweetness and tang, beautifully complementing the richness of the marrow.

    A garlic aioli can provide a creamy, rich dimension that beautifully complements the marrow, while a spicy sriracha or harissa can add an unexpected kick. The beauty of smoked marrow lies in its versatility, so feel free to explore different flavor combinations that will surely impress your guests and enhance the overall dining experience.

    Using Fresh Herbs to Enhance Flavor and Aesthetic Appeal

    Garnishing your smoked marrow dish with fresh herbs not only enhances visual appeal but also adds a burst of flavor that elevates the entire dish. Chopped parsley, chives, or thyme can introduce freshness to the rich, smoky marrow, creating a well-balanced dish that excites the senses and invites everyone to indulge.

    Fresh herbs add an aromatic quality that enhances the overall dining experience. When presenting your dish, ensure that these herbs are generously sprinkled on top, making your dish not only tantalizing for the taste buds but also a feast for the eyes, inviting everyone to dig in and enjoy the flavors.

    Frequently Asked Questions About the Art of Smoking Bone Marrow

    Which Types of Bones Are Best for Smoking?

    For the best results, beef or veal bones are recommended for smoking due to their rich flavor and high marrow content. Always seek quality bones sourced from local butchers to ensure optimal outcomes, enhancing your culinary experience.

    What Is the Recommended Smoking Time for Bone Marrow?

    Typically, bone marrow should be smoked for 45 minutes to an hour at a low temperature of approximately 225°F to achieve the best flavor and tenderness that will impress your guests.

    Can I Experiment with Different Wood Types for Smoking?

    Absolutely! While hickory and oak are popular choices, you can experiment with other wood types such as cherry or mesquite to create unique and delightful flavor profiles that excite the palate.

    Is It Necessary to Soak the Bones Before Smoking?

    Yes, soaking the bones in salted water helps draw out impurities and enhances flavor, making it a recommended practice for the best smoking experience that yields delicious results.

    What Dishes Pair Well with Smoked Bone Marrow?

    To create a balanced meal, consider serving smoked marrow with toasted bread, grilled vegetables, or a fresh salad that complements its richness beautifully, ensuring a delightful dining experience.

    How Can I Further Enhance the Flavor of Smoked Marrow?

    Flavor enhancement can be achieved by adding a sprinkle of finishing salt, offering a variety of sauces like chimichurri, and garnishing with fresh herbs for added complexity and interest, making each bite memorable.

    Is Smoked Bone Marrow Safe to Eat?

    Yes, as long as it reaches the proper internal temperature of 160°F during cooking, smoked bone marrow is indeed safe for consumption, allowing you to enjoy its rich flavors without concern.

    Can I Marinate the Bones Before Smoking Them?

    Certainly! Marinating the bones overnight can infuse them with deeper flavors, making your smoked marrow even more delicious and satisfying for your guests.

    How Can I Tell When the Marrow Is Done Smoking?

    The marrow is ready when it is soft, slightly bubbly, and yields easily to a fork. A golden-brown color is also a reliable indicator of doneness, ensuring a delightful culinary experience.

    Can I Store Leftover Smoked Marrow?

    Yes, any leftover smoked marrow can be stored in an airtight container in the refrigerator for up to three days. Gently reheat before serving to enjoy it again, preserving the rich flavors you’ve created.

    Join the Conversation with Us on Facebook!

    The Article How to Smoke Bone Marrow for Richness: A Flavorful Guide appeared first on https://pitmastersarsenal.com

    The Article Smoke Bone Marrow: A Flavorful Guide to Richness Was Found On https://limitsofstrategy.com

  • BBQ Rub: Mastering the Art of Flavorful Recipes

    BBQ Rub: Mastering the Art of Flavorful Recipes

    Selecting the Ideal Base Ingredients for Your Ultimate Sweet BBQ Rub

    Creating an exceptional sweet BBQ rub begins with the careful selection of the right base ingredients. These fundamental components are crucial as they contribute distinct flavors that define your BBQ experience while enhancing the overall taste and visual appeal of your grilled creations. A thoughtfully crafted sweet rub is essential for injecting that signature BBQ flavor into your meats. By understanding the role and potential of every base ingredient, you can tailor your rub to embody your unique taste preferences, ensuring a barbecue experience that is both personalized and deliciously unforgettable.

    Unlocking the Rich Sweetness and Flavor Complexity of Brown Sugar in Your BBQ Rub

    Close-up of BBQ ribs with caramelized brown sugar crust, under golden grill lights with savory smoke.

    At the core of any delightful sweet BBQ rub is brown sugar, which delivers a rich sweetness and an unmatched depth of flavor to the mixture. Its inherent molasses content imparts a unique character that allows it to caramelize beautifully during cooking. This caramelization not only enhances the visual allure of your grilled meats but also introduces a complex layer of taste that can elevate your BBQ creations significantly. Whether you’re grilling succulent ribs, tender pork, or juicy chicken, brown sugar is indispensable for achieving that coveted caramelized crust that BBQ aficionados yearn for.

    Don’t hesitate to experiment with various types of brown sugar, such as light or dark, to attain different levels of sweetness and flavor complexity. Light brown sugar offers a milder sweetness, while dark brown sugar boasts a richer flavor profile, making it ideal for heartier meats. The objective is to strike the perfect balance with other ingredients to prevent overpowering the dish with excessive sweetness, ensuring a harmonious blend that enhances your culinary masterpieces.

    Enhancing Your Rub with the Vibrant Color and Flavor of Paprika

    Paprika is a vital spice that not only infuses a vibrant pop of color but also adds a mild, sweet flavor profile to your rub. This versatile spice comes in various forms, including sweet, smoked, and hot, each capable of dramatically altering the flavor dynamics of your sweet BBQ rub. Sweet paprika is particularly favored, as it imparts the necessary sweetness while improving the visual presentation of your dish, making it more appealing and inviting to your guests.

    Beyond its aesthetic appeal, paprika introduces a subtle smokiness, especially when using the smoked variety. This smoky essence can beautifully complement your grilling techniques, whether you’re using a gas grill or traditional charcoal, adding an authentic touch to your BBQ experience that tantalizes the senses and enriches the overall enjoyment of your meals.

    The Crucial Role of Salt in Elevating Flavor Profiles

    Salt serves an essential, albeit often overlooked, role in formulating a well-balanced sweet BBQ rub. Although it may seem counterintuitive to incorporate salt into a sweet blend, it is vital for enhancing and balancing flavors. Salt amplifies the sweetness of brown sugar while counteracting the richness of the meat, ensuring that your rub doesn’t become overly cloying or heavy. This equilibrium is crucial for crafting a memorable barbecue experience that leaves a lasting impression on your guests.

    When choosing salt, consider options like kosher or sea salt, as these varieties have a coarser texture that improves the application of the rub on various meats. Salt not only seasons the meat but also aids in moisture retention, resulting in juicier, more flavorful outcomes once cooked. This meticulous attention to detail guarantees that every bite is succulent and bursting with flavor, taking your BBQ dishes to new heights of deliciousness.

    Elevating Flavor with the Savory Essence of Garlic Powder

    A close-up of sweet BBQ rub with garlic powder, enhancing flavor, beside grilled meats.

    Garlic powder introduces an irresistible savory layer to your sweet BBQ rub, enriching the aromatic complexity of the overall flavor profile. Its concentrated flavor harmonizes beautifully with the sweetness, creating a balanced blend that delights the palate. Unlike fresh garlic, garlic powder provides a more potent taste that integrates seamlessly into your rub, ensuring that every bite bursts with rich flavor.

    When adding garlic powder, it’s crucial to find the right balance with the other ingredients in your rub. Too much garlic powder can overpower the sweetness and disrupt the flavor harmony. However, when used judiciously, garlic powder can significantly elevate the depth and richness of your BBQ offerings, making them irresistibly delicious and appealing to diners.

    Adding a Spicy Element with Freshly Ground Black Pepper

    Black pepper is an indispensable ingredient that introduces a sharp, spicy kick to your sweet BBQ rub, rounding out the flavor profile beautifully. The heat from black pepper complements the sweetness, creating an enjoyable interplay between sweet and spicy that enhances the natural flavors of the meat. Achieving this balance is key to developing a well-rounded rub that captivates the taste buds and leaves a lasting impression.

    Opting for freshly ground black pepper is highly recommended, as it delivers a more intense flavor than pre-ground varieties. The quality of your pepper can significantly affect the overall taste of your rub, so choose high-quality peppercorns for the best results. Additionally, you can adjust the quantity to suit your heat tolerance, providing a personalized experience that perfectly aligns with your preferences.

    Deepening Flavor Complexity with an Array of Spices

    While your base ingredients lay the groundwork for flavor, incorporating additional spices can greatly enhance the complexity and depth of your sweet BBQ rub. These spices not only amplify the flavor profile but also highlight the unique characteristics of the meats you’re cooking, resulting in a truly memorable dining experience.

    Exploring the Multifaceted Nature of Black Pepper

    Freshly ground black pepper enhancing BBQ rub, showing varying heat levels, with grilling spices.

    As discussed earlier, black pepper contributes a sharp flavor, but its multifaceted nature deserves further exploration. This spice acts as more than just a background note; it has the capacity to elevate your rub to new heights. When freshly ground, black pepper releases aromatic oils that enhance its fragrance, adding a sophisticated touch to your BBQ rub that captivates the senses.

    Adjusting the quantity of black pepper in your rub allows you to customize the spice level to your liking. A heavier hand can result in a more pronounced heat, which is especially enjoyable for those who appreciate a spicy kick in their barbecue. On the other hand, for a more subtle approach, consider blending it with other spices to maintain a balanced flavor experience that caters to a broader range of palates.

    Discovering the Umami Qualities of Garlic Powder

    Returning to garlic powder, this ingredient offers a layer of umami that is often overlooked in rubs. The savory notes of garlic powder elevate the overall complexity of your sweet BBQ rub, leading to a well-rounded flavor profile that encourages diners to savor each bite. This aromatic quality not only makes your meats more appealing but also significantly contributes to the overall dining experience.

    In addition to enhancing flavor, garlic powder can improve the texture of the rub. When combined with other dry ingredients, it forms a cohesive mixture that adheres well to the meat, ensuring that the flavors penetrate effectively during the cooking process. This meticulous attention to detail can greatly impact the final taste and presentation of your BBQ dishes.

    Enhancing Sweetness and Depth with Onion Powder

    Onion powder is another impactful ingredient that dramatically enhances the sweetness and depth of your BBQ rub. It introduces a mild sweetness that pairs beautifully with brown sugar, while also adding a subtle, savory note. Onion powder operates similarly to garlic powder, providing a rich, aromatic quality that elevates your dishes and captivates the senses.

    When integrated into your sweet BBQ rub, onion powder helps create a more balanced flavor profile that enhances the overall enjoyment of your meal. By combining onion powder with garlic and pepper, you establish a harmonious foundation that works well with a variety of meats, from chicken to pork, ensuring a delightful flavor journey for your guests.

    Incorporating Heat for a Memorable Flavor Experience

    While sweetness is a hallmark of your BBQ rub, the thoughtful addition of heat can elevate the flavor experience to new levels. Heat elements should be balanced carefully to maintain the sweet profile while introducing another layer of complexity that tantalizes the taste buds.

    Igniting Flavor with the Spicy Kick of Cayenne Pepper

    Cayenne pepper serves as a powerful ingredient that adds a fiery kick to your sweet BBQ rub. The heat level can be adjusted according to your personal taste, making it a versatile option for those who enjoy a hint of spice in their dishes. When working with cayenne, start with a small amount and gradually increase until you reach your desired level of heat, ensuring a customized flavor experience that perfectly aligns with your palate.

    This ingredient not only contributes heat but also enhances the overall flavor profile, providing a contrasting element that beautifully balances the sweetness of the brown sugar. When cooked, cayenne can create an extraordinary taste experience, especially when paired with rich, fatty meats like pork shoulder or brisket, leading to a delightful culinary adventure.

    Adding Warmth with the Richness of Chili Powder

    Chili powder introduces a warm and smoky flavor that perfectly complements the sweetness in your BBQ rub, resulting in a well-rounded and satisfying taste. Its unique blend of spices often includes cumin and garlic, enhancing the complexity of your rub while adding a layer of smokiness that pairs wonderfully with grilled meats.

    The heat level in chili powder can vary, so it’s crucial to select a variety that aligns with your taste preferences. Whether you prefer a milder option suitable for family-friendly BBQs or a spicier blend for adventurous gatherings, chili powder can adapt accordingly, making it an excellent addition to your sweet BBQ rub that enriches the overall flavor experience.

    Incorporating Tanginess with Mustard Powder

    Mustard powder is a distinctive ingredient that brings a tangy, slightly spicy note to your sweet BBQ rub. This component is vital for balancing sweetness, resulting in a more complex flavor that works exceptionally well with richer meats. Its tanginess enhances the overall flavor profile, positioning it as a valuable addition to your BBQ toolkit.

    When using mustard powder, consider its role in enhancing the other spices in your rub. Its bright flavor can cut through the richness of fatty cuts of meat, ensuring a well-balanced taste that satisfies the palate. Experimenting with different quantities can help you discover the perfect balance for your specific BBQ dishes, adding a personalized touch that enriches the overall experience.

    Achieving Flavor Harmony Through Thoughtful Ingredient Balance

    Crafting a sweet BBQ rub goes beyond merely adding sweet components; it’s about achieving a harmonious balance of flavors that delights the palate. Integrating complementary spices and herbs can help round out the taste, ensuring that no single element dominates and that every bite is a delightful experience.

    Introducing Earthy Undertones with Cumin

    Cumin contributes an earthy, slightly bitter flavor that effectively balances the sweetness in your rub. Its warm, nutty notes enrich the barbecue experience, making it a favored choice in various BBQ styles, including Tex-Mex and Southwest, where its robust flavor truly shines.

    Beyond its flavor contributions, cumin promotes a savory quality that interacts beautifully with the sweet elements of your rub. Opting for high-quality, fresh cumin seeds can intensify the aromatic experience, ensuring that every bite is loaded with flavor and richness that captivates your guests and elevates your BBQ gatherings.

    Enhancing Flavor with the Freshness of Thyme

    Thyme is an aromatic herb that adds a subtle, herby note to your sweet BBQ rub. Its delicate flavor enhances the overall taste without overshadowing the sweetness, making it an excellent choice for creating a well-rounded blend that appeals to a variety of palates.

    When incorporating thyme, consider whether to use fresh or dried varieties. Both forms impart unique flavors, with fresh thyme delivering a brighter taste compared to dried. The key lies in experimenting with quantities to identify the right balance that complements your specific BBQ style and enhances the overall dining experience.

    Balancing Sweetness with the Robust Flavor of Oregano

    Oregano adds a bold, slightly bitter flavor that effectively balances the sweetness in your rub. This herb is widely utilized in various cuisines, making it a versatile addition to your BBQ repertoire. Its distinctive flavor pairs beautifully with grilled meats, especially lamb and chicken, enhancing the overall taste of your dishes.

    When incorporating oregano, you can choose between dried or fresh varieties, each offering unique flavor profiles. Dried oregano is more concentrated, so be cautious with the amount you use to avoid overwhelming the sweetness in your BBQ rub, ensuring a harmonious balance that delights the senses.

    Mixing and Storing Your Sweet BBQ Rub for Lasting Freshness

    Properly mixing and storing your sweet BBQ rub is essential for preserving its flavor and potency over time. Adopting the right techniques will ensure that your rub remains fresh and flavorful, ready to enhance your next grilling adventure and impress your guests.

    Understanding Ingredient Ratios for Optimal Flavor Balance

    Creating a balanced flavor profile in your sweet BBQ rub begins with a solid understanding of the appropriate ratios for each ingredient. Overusing any single component can lead to an overpowering flavor that detracts from the overall experience. Strive for a harmonious blend where sweetness, heat, and savory elements complement one another, crafting a delightful taste journey with every bite.

    A general guideline for ratios includes a higher proportion of sweet ingredients like brown sugar, balanced by equal parts of savory elements such as garlic and onion powder, with just a pinch of heat from cayenne or chili powder. Always adjust to match your taste preferences and don’t hesitate to keep notes for future reference, allowing you to refine your recipe over time for even better results.

    Thorough Mixing for Consistent Flavor Distribution

    Achieving a uniform flavor throughout your sweet BBQ rub requires a meticulous mixing of all ingredients. Utilizing a whisk or mixer is highly advisable to ensure that every element is evenly distributed. This step is critical, as it prevents clumping and guarantees consistent flavor application across your meats, resulting in a delightful BBQ experience that keeps guests coming back for more.

    Additionally, consider sifting your dry ingredients before mixing to eliminate lumps, creating a fine, even texture in your rub. The objective is to develop a blend that adheres well to your meat, allowing the flavors to penetrate effectively during cooking, resulting in a deliciously flavorful final product that impresses and satisfies.

    Storing Your Rub in Airtight Containers for Maximum Freshness

    To maintain the freshness and flavor of your sweet BBQ rub, it’s crucial to store it in an airtight container. Exposure to air can lead to oxidation, diminishing the potency of your spices over time. Opt for a glass jar with a tight-sealing lid or a high-quality plastic container that can withstand varying temperatures, ensuring your rub remains flavorful and aromatic for future use.

    Labeling your container with the date and ingredients can help you monitor its freshness. Ideally, your rub should be used within six months for optimal flavor, but proper storage can significantly extend its shelf life, allowing you to enjoy delicious BBQ rubs for many grilling seasons to come.

    Maximizing Flavor Through Strategic Application of Your Rub

    Applying your sweet BBQ rub correctly is essential for maximizing flavor absorption in your meats. Understanding the proper techniques and timelines can elevate your BBQ dishes to new heights, ensuring that every bite is rich in flavor and satisfaction.

    Preparing the Meat for Superior Flavor Absorption

    Properly preparing the meat is the first step to achieving the best flavor absorption from your sweet BBQ rub. Begin by patting the meat dry with paper towels to remove any excess moisture, which can hinder the adhesion of the rub. This step is crucial, as a dry surface allows the spices to penetrate more effectively, guaranteeing that every bite is infused with delightful flavor.

    Once the meat is dry and ready, you can apply the rub evenly, ensuring that all sides are well coated. The application should be generous but not excessive; your aim is to create a flavorful crust that enhances the dish without overshadowing the natural taste of the meat itself, allowing the flavors to harmonize beautifully.

    Resting Time: The Key to Flavor Infusion

    Allowing the rub to rest on the meat for optimal flavor penetration is a game-changer in the BBQ process. After applying the rub, cover the meat and let it rest for at least 30 minutes to an hour, or even overnight in the refrigerator if time permits. This resting period allows the flavors to meld and infuse into the meat, resulting in a more robust and satisfying taste that your guests will love.

    If you’re pressed for time, even a brief resting period can enhance flavor absorption. The key is to ensure that the rub has adequate time to work its magic before cooking begins, allowing for a deeply flavorful and enjoyable BBQ experience that impresses everyone at the table.

    Cooking Techniques to Maximize Flavor Development

    Various cooking techniques can bring out the best in your sweet BBQ rub. Whether you’re grilling, smoking, or oven-baking, each method has unique advantages that can enhance the flavors of your meats. For instance, slow-smoking meats allows the flavors to deepen and develop over several hours, while grilling creates quick caramelization that emphasizes the sweetness of the rub.

    Regardless of your chosen method, ensure that your cooking temperature is appropriate for the type of meat you’re preparing. Low and slow works well for tougher cuts, while higher heat is best for quicker-cooking options like chicken breasts or ribs. Understanding the nuances of each cooking technique can significantly impact the final flavor and texture of your BBQ dishes, yielding exceptional results that delight the palate.

    Customizing Your Rub Application for Different Types of Meat

    When applying the sweet BBQ rub, it’s essential to consider the specific type of meat you’re using. Different meats feature distinct flavor profiles and require tailored approaches for optimal results. For example, pork ribs can handle a sweeter rub, while beef brisket may benefit from a bolder, spicier mix that complements its rich flavor.

    Investing time to choose a rub that complements the meat’s natural flavor can significantly enhance the overall dining experience. Ingredients like salt, sugar, and spices play crucial roles in crafting the desired taste profile for each specific dish, ensuring that your BBQ creations are both delicious and memorable for every guest.

    Applying Rubs Effectively to Various Cuts of Meat

    Each type of meat requires a slightly different rub application technique to achieve optimal results. For instance, with ribs, you may want to apply the rub generously, ensuring every crevice is coated to maximize flavor. Conversely, when working with chicken, a lighter application may be preferred to avoid overshadowing the naturally mild taste of the meat.

    Understanding the characteristics of the meat can guide you in adjusting your rub application technique. This attention to detail can lead to mouthwatering results, transforming ordinary BBQ into extraordinary dishes that will impress everyone at your gathering.

    Frequently Asked Questions About Crafting Sweet BBQ Rubs

    What distinguishes a sweet BBQ rub?

    A sweet BBQ rub is a meticulously crafted blend of spices that emphasizes sweetness, often incorporating ingredients such as brown sugar, paprika, and complementary herbs and spices to enhance the flavor profile of grilled meats. This unique combination creates a delightful taste experience that elevates your BBQ dishes and leaves a lasting impression.

    What is the best method for storing my sweet BBQ rub?

    To preserve the freshness and flavor of your sweet BBQ rub, store it in an airtight container in a cool, dark place. This will help maintain its potency over time. Additionally, label the container with the date and ingredients for easy reference, ensuring you always know when it was made and can use it effectively.

    Can I adjust the heat level of my rub?

    Absolutely! You can easily modify the heat level of your sweet BBQ rub by varying the amounts of cayenne pepper, chili powder, or mustard powder to align with your personal taste preferences. This flexibility allows you to create a customized flavor profile that suits any occasion and palate.

    How long should I let the rub sit on the meat for optimal flavor?

    For the best flavor penetration, allow the rub to sit on the meat for at least 30 minutes to an hour. If possible, letting it rest overnight in the refrigerator will significantly enhance the flavor, creating a more robust and satisfying taste that your guests will thoroughly enjoy.

    Do I need to use all the base ingredients in my rub?

    While each base ingredient contributes to the overall flavor of your sweet BBQ rub, you can customize your blend by adjusting or omitting certain ingredients based on your personal preferences. This adaptability empowers you to craft a unique rub that aligns with your taste and grilling style.

    Can fresh herbs be added to my sweet BBQ rub?

    Yes, fresh herbs can be incorporated into your sweet BBQ rub; however, they may necessitate adjustments in ratio compared to dried herbs. Keep in mind that fresh herbs have a shorter shelf life, so it’s best to use them promptly to ensure maximum flavor and freshness in your rub.

    Which meats are best suited for a sweet BBQ rub?

    Sweet BBQ rubs are versatile and complement a variety of meats, including pork ribs, chicken, and brisket. These rubs enhance the natural flavors of the meat, creating a delicious caramelized crust that elevates your BBQ experience and delights your guests.

    Can I use my sweet BBQ rub for grilling vegetables?

    Absolutely! A sweet BBQ rub can add exceptional flavor and depth to grilled vegetables, making them a delightful addition to your barbecue spread. This versatility allows you to create a well-rounded meal that satisfies both meat lovers and vegetarians alike, enhancing the overall dining experience.

    How long will a homemade sweet BBQ rub last?

    A homemade sweet BBQ rub typically lasts around six months when stored properly in an airtight container. However, its potency may diminish over time, so it’s best to use it within this timeframe for optimal flavor and freshness in your grilling adventures.

    Is it feasible to make a bulk batch of sweet BBQ rub?

    Yes, preparing a bulk batch of sweet BBQ rub is a smart idea for frequent use. Just ensure you store it correctly to maintain its freshness and flavor, allowing you to enjoy delicious BBQ rubs whenever the grilling mood strikes and impressing your friends and family with mouthwatering dishes.

    Join the Flavorful Conversation on Facebook!

    The Article How to Make a Sweet BBQ Rub: A Flavorful Guide appeared first on https://pitmastersarsenal.com

    The Article Sweet BBQ Rub: A Flavorful Guide to Perfecting Your Recipe Was Found On https://limitsofstrategy.com

  • Smoker Temperature Tips for Mastery and Success

    Smoker Temperature Tips for Mastery and Success

    Unlock the Secrets of Temperature Control for Exceptional Smoked Dishes

    Mastering the intricacies of smoker temperature control is essential for anyone aspiring to elevate their smoking skills. This fundamental knowledge transforms the cooking experience from a simple pastime into a precise science, ensuring that each dish transcends mere satisfaction to become a true culinary masterpiece. By refining this vital skill, you can ensure your meals are cooked to absolute perfection, enhancing flavors while adhering to crucial safety standards. Grasping the nuances of temperature management can turn an ordinary meal into an unforgettable culinary journey, celebrating the rich and diverse food culture found throughout the United States.

    Proven Techniques to Sustain Steady Heat in Your Smoker

    Understanding Smoker Temperature Basics: A smoker with a steady smoke stream, cooking a large brisket, surrounded by consistent temperature gauges on a rustic table under warm light.

    Ensuring consistent heat is paramount for effectively smoking meats and achieving the best outcomes. A stable temperature guarantees even cooking, forming a mouthwatering crust on the exterior while preserving the juiciness within. Temperature fluctuations can lead to overcooked edges and undercooked centers, undermining your culinary efforts. This principle is particularly crucial when dealing with larger cuts of meat, such as briskets or pork shoulders, which necessitate prolonged cooking times for optimal results.

    Additionally, maintaining a steady cooking temperature is vital for preventing the common problem of meat drying out. When temperatures drop too low, cooking times extend, which can lead to significant moisture loss. Conversely, if temperatures rise too high, you risk charring your meat and compromising its flavor profile. Experienced pitmasters recognize that striking the right temperature balance is essential for developing a beautiful smoke ring and rich flavor—hallmarks of expertly smoked meats.

    Moreover, consistent heat greatly enhances the texture of your food. Subjecting meat to varying temperatures can yield a tough or rubbery texture, negating your hard work. Cooking at a controlled temperature allows collagen in the meat to break down gradually, resulting in a tender and succulent final product. This meticulous approach to temperature can elevate a simple barbecue into a spectacular feast, whether you’re hosting an intimate backyard barbecue or a lively neighborhood block party.

    The Crucial Role of Temperature Control in Food Quality and Flavor Enhancement

    Effective management of temperature not only dictates cooking duration but also profoundly impacts the final flavor and texture of smoked foods. For instance, smoking beef at an ideal range of 225-250°F enables the meat to absorb the deep, rich flavors from the smoke, resulting in a complex and robust taste profile. This slow-cooking method fosters the development of intricate flavors, a cornerstone of barbecue traditions across the United States.

    Furthermore, the texture of the meat is equally important. Cooking at the proper temperature achieves that coveted melt-in-your-mouth quality. For example, a brisket smoked low and slow effectively breaks down connective tissues, resulting in a fork-tender and flavorful dish. Any deviation from the ideal temperature during the smoking process can result in a tough, chewy end product—something no true barbecue enthusiast desires.

    While factors like seasoning, wood selection, and cooking techniques are crucial, without precise temperature control, these elements may not achieve their full potential. Attaining the right temperature ensures that flavors meld beautifully, creating a delightful combination that excites the palate. Whether you’re smoking pork ribs in Kansas City or brisket in Texas, mastering the nuances of temperature control is vital for taking your barbecue experience to unmatched heights.

    Interested in Learning More? Listen Now!


    Key Safety Guidelines for Effective Temperature Management

    Temperature control is not only about enhancing flavor; it’s also a critical safety concern. Undercooking meats can lead to foodborne illnesses, posing serious health risks and potentially ruining social gatherings. The USDA has established specific internal temperature guidelines for various meats to ensure they are safe for consumption. For example, poultry must reach a minimum of 165°F to eliminate harmful pathogens like Salmonella from your meal.

    Understanding the significance of temperature empowers you to make informed decisions regarding cooking times and methods. Utilizing a reliable smoker that effectively regulates temperature reduces the risk of foodborne illnesses, ensuring your meats are not only delicious but also safe for eating. This knowledge is particularly valuable for those hosting outdoor events where food safety is of utmost importance.

    Moreover, mastering temperature control can help prevent potential mishaps during the smoking process. When temperatures drop too low, the risk of bacterial growth increases, leading to serious health concerns. Conversely, maintaining optimal temperatures guarantees food safety while enhancing your overall smoking experience, transforming it into a culinary triumph.

    Enhancing Energy Efficiency through Smart Temperature Management

    Electric smoker with digital thermostat on patio, surrounded by holiday decorations and meat, showcasing energy efficiency.

    Another significant benefit of effective temperature control is the energy efficiency it affords. Smokers that can maintain stable temperatures generally require less fuel, whether it be wood, charcoal, or electricity. For instance, electric smokers equipped with digital thermostats are designed to automatically regulate temperature, which can lead to reduced energy costs over time. This advantage is particularly appealing for frequent smokers, especially during holidays or family gatherings when large quantities of meat are prepared.

    Charcoal and pellet smokers also reap the rewards of proper temperature management. A well-controlled fire burns more efficiently, requiring less fuel while producing minimal smoke. This not only conserves money but also mitigates environmental impact, making your smoking practices more sustainable over time.

    Moreover, using less fuel means you can enjoy more quality time with friends and family while barbecuing, rather than constantly tending to the fire. This aspect of efficiency allows dedicated pitmasters to focus on flavor development and presentation without the ongoing concern of energy consumption logistics.

    Exploring Various Smoker Types and Their Temperature Regulation Techniques

    Gaining a thorough understanding of the different types of smokers on the market is essential for mastering temperature control. Each smoker type presents its own unique features and challenges. From electric to charcoal to pellet smokers, knowing how to manage temperature for each can significantly enhance your smoking experience.

    Discover the Advantages of Electric Smokers

    Electric smokers have surged in popularity among both novice and experienced pitmasters due to their user-friendly design and precise temperature control capabilities. Equipped with digital thermostats, these smokers maintain consistent temperatures with minimal effort. Users simply set their desired temperature, and the smoker takes care of the rest, making it an ideal choice for beginners or those with busy lifestyles.

    Many electric smokers come with built-in features such as meat probes and timers, making it easy to monitor the cooking process without constant checks. This technology is invaluable for achieving consistent results, especially when smoking larger cuts like brisket or pork shoulders. The controlled environment within these smokers helps prevent temperature fluctuations, resulting in meats that are not only juicy but also packed with flavor.

    Furthermore, electric smokers are recognized for their energy efficiency. They typically consume less fuel than traditional smokers, leading to lower operational costs. This feature is particularly beneficial for avid smokers, especially during tailgating season or festive gatherings. However, while electric smokers offer convenience, traditionalists may argue that they lack the authentic smoke flavor derived from burning wood or charcoal.

    Perfecting Temperature Control in Charcoal Smokers

    A pitmaster adjusts vents on a charcoal smoker, managing heat zones for various meats in a smoky ambiance.

    Charcoal smokers are celebrated for the rich flavors they impart to meats, although they require more hands-on temperature management. Achieving the perfect temperature in a charcoal smoker demands diligent monitoring and timely adjustments. Pitmasters often utilize vents and dampers to control airflow, which directly influences how charcoal burns.

    A distinctive feature of charcoal smokers is the ability to create various heat zones. By strategically placing the charcoal, you can manage hot and cooler sections within the smoker, allowing for versatile cooking techniques. This approach is particularly beneficial when preparing multiple types of meat that require different temperatures.

    However, managing temperature in a charcoal smoker can be challenging, especially for beginners. It necessitates a solid understanding of how airflow and charcoal quantity affect heat levels. With experience, many find that the rich flavors achieved through charcoal smoking are well worth the effort. Whether you’re cooking ribs in North Carolina or a classic brisket in Texas, the unique smoky taste from a charcoal smoker is unparalleled.

    Exploring the Versatility of Pellet Smokers

    Pellet smokers have gained popularity for their convenience and versatility. These smokers utilize wood pellets that are automatically fed into a burn pot, igniting to produce smoke. Temperature regulation is managed through an electronic control panel, providing a level of precision that rivals electric smokers while still delivering authentic wood flavor.

    Pellet smokers are particularly user-friendly. The ability to set a desired temperature and allow the smoker to manage the rest removes much of the guesswork associated with traditional methods. This feature is especially advantageous for prolonged smoking sessions, such as cooking a whole turkey for Thanksgiving or a large brisket for summer barbecues.

    However, while pellet smokers are easy to operate, they do require regular maintenance, including keeping the hopper stocked with pellets and ensuring the auger functions correctly. Nevertheless, when properly maintained, pellet smokers can produce some of the most delightful flavor profiles, making them an excellent choice for both novice and experienced smokers alike.

    Identifying Optimal Smoking Temperatures for a Variety of Meats

    To achieve the best results, it is crucial to comprehend the ideal smoking temperatures for different types of meat. Each meat type responds uniquely to heat, and knowing the appropriate range can significantly influence both flavor and texture.

    Mastering the Art of Smoking Beef

    When smoking beef, particularly cuts like brisket and ribs, the mantra “low and slow” cannot be overstated. The ideal temperature range of 225-250°F is essential for breaking down tough connective tissues in the meat, resulting in a tender, flavor-rich finish.

    Smoking beef at these temperatures allows the meat to absorb the smoky flavors while cooking to perfection over time. For brisket, maintaining this temperature for several hours ensures it achieves a melt-in-your-mouth quality. The extended cooking duration also contributes to the development of that beautiful bark—a caramelized crust resulting from the Maillard reaction, enhancing both flavor and visual appeal.

    Additionally, it’s crucial not only to reach the correct cooking temperature but also to closely monitor the internal temperature. Aim for an internal temperature of around 195°F to 205°F for brisket. This elevated temperature is vital for collagen to render and transform into gelatin, enriching the meat’s flavor and moisture. This technique is particularly esteemed among Texas barbecue aficionados who swear by the results.

    Smoking Pork for Maximum Flavor and Texture

    Pork is another meat that flourishes when smoked at the 225-250°F range. This temperature is ideal for cuts like pulled pork and smoked ham, allowing the meat to cook evenly while absorbing bold smoke flavors.

    When smoking pulled pork, maintaining this consistent temperature aids in breaking down the connective tissues in the shoulder, resulting in that fork-tender texture that defines exceptional barbecue. A pork shoulder cooked within this range may take anywhere from 10 to 14 hours, depending on the size of the cut, but the results are undeniably worth the wait.

    For smoked ham, the same temperature range applies. Slow cooking allows the smoke to penetrate the meat, producing a rich, smoky flavor that complements the pork’s natural sweetness. It’s essential to monitor the internal temperature, aiming for around 190-205°F, to ensure the ham is thoroughly cooked and infused with flavor. This technique is especially popular during holiday gatherings across the United States, where smoked ham often takes center stage.

    Best Practices for Smoking Poultry

    Smoking poultry, including chicken and turkey, requires a slightly higher temperature range of 250°F to 275°F. This range ensures that the meat cooks thoroughly while remaining juicy, thus preventing dryness that can occur at lower temperatures.

    For chicken, this temperature range allows the skin to crisp beautifully while keeping the meat moist and tender. Many backyard cooks prefer to smoke chicken at around 250°F, cooking it until the internal temperature reaches 165°F. This is crucial for food safety, as poultry must achieve this temperature to eliminate harmful bacteria.

    When smoking turkey, the same principles apply. Cooking at 250-275°F helps retain moisture, resulting in tender, juicy meat. Additionally, employing a brining method before smoking can enhance both flavor and moisture retention. The combination of well-controlled temperature and effective cooking techniques ensures a turkey that will be the highlight of any Thanksgiving or festive gathering.

    Unlocking the Flavor Potential of Smoked Lamb

    Lamb is a flavorful meat that benefits from smoking at 225-250°F, particularly for cuts such as leg and shoulder. These cuts are often tougher, making low-and-slow cooking essential for breaking down connective tissue and enhancing flavor.

    When smoking lamb, it’s vital to closely monitor the internal temperature. Aim for a temperature of around 130-145°F for medium-rare doneness, which is optimal for enjoying the rich, gamey flavor that lamb offers. This smoking technique not only produces a tender texture but also allows the unique smoky flavors to meld beautifully with the lamb’s natural essence.

    Smoking lamb is notably popular in various regions of the United States, from Mediterranean-inspired dishes in California to Southern BBQ styles. Regardless of preparation style, understanding the ideal temperature for smoking lamb is key to achieving a delicious and memorable dish.

    Utilizing Thermometers for Precision in Smoking

    In the realm of smoking, precision is critical. Effectively utilizing thermometers can mean the difference between a perfectly cooked meal and one that falls short. Understanding the various types of thermometers available and how to use them is essential for every serious pitmaster.

    Examining Different Thermometer Types for Smokers

    When it comes to smoking meats, several types of thermometers can cater to your needs. Probe thermometers are ideal for long smoking sessions, allowing you to monitor the internal temperature of the meat without needing to open the smoker. Instant-read thermometers are excellent for quick checks, providing accurate readings in mere seconds. Finally, leave-in thermometers are designed to remain in the meat while it cooks, offering real-time updates without lifting the smoker’s lid.

    Each thermometer type has its advantages, suitable for specific situations. For instance, probe thermometers are invaluable when smoking larger cuts like brisket or pork shoulder, where knowing the internal temperature is critical for ensuring doneness and safety. Instant-read thermometers, on the other hand, are perfect for checking smaller cuts or even side dishes that may be cooking simultaneously.

    Investing in a reliable thermometer can significantly enhance your smoking experience, allowing you to consistently replicate successful results. Whether you are a novice or an experienced professional, having the right tools at hand can elevate your barbecue skills to new heights.

    Optimizing Thermometer Placement for Accurate Temperature Readings

    Proper placement of thermometers can greatly influence the accuracy of your readings. For probe thermometers, insert the probe into the thickest part of the meat, taking care to avoid bones and fat. The goal is to achieve a reading that accurately reflects the meat’s internal temperature.

    When using a leave-in thermometer, ensure the probe is positioned correctly from the start. This setup allows you to monitor the meat’s progress without needing to open the smoker, which can cause temperature fluctuations that might impact cooking results.

    Additionally, consider the thermometer’s placement relative to your heat source. In larger smokers, considerable temperature variations may occur depending on the meat’s location, so understanding your specific smoker’s characteristics is crucial for optimal results. With the right thermometer type and placement, you can ensure that your meats reach safe and delectable internal temperatures every time.

    The Significance of Temperature Monitoring and Adjustments

    Consistently monitoring temperatures is vital when smoking meats. It’s insufficient to set your smoker and walk away; periodically checking the internal temperature allows you to make necessary adjustments throughout the cooking process.

    If you notice that the temperature is rising too high, you can adjust the vents or fuel source to bring it back down to a suitable level. Conversely, if the temperature drops too low, adding more fuel or adjusting airflow can help stabilize it and maintain the desired cooking environment.

    Investing in a high-quality thermometer can facilitate this process significantly. Many modern thermometers are equipped with alarms that alert you when the meat reaches a predetermined temperature, allowing you to concentrate on other aspects of your barbecue. This level of monitoring ensures your smoked meats turn out perfectly every time, boosting your confidence in your smoking skills.

    Addressing Common Temperature-Related Challenges

    Even the most seasoned smokers can encounter temperature-related challenges. Recognizing these common issues and knowing how to tackle them can greatly enhance your smoking experience and the quality of your food.

    Controlling Temperature Fluctuations for Consistency

    Temperature fluctuations can pose a significant challenge during smoking. These variations may arise from poor insulation, drafty conditions, or inadequate fuel management. For instance, if your smoker lacks proper insulation, external temperature changes can greatly affect internal temperatures, complicating your cooking process.

    To combat these issues, consider investing in a high-quality smoker with excellent insulation properties. Additionally, if you’re smoking in cooler temperatures, wrapping your smoker in a weather-resistant blanket can help maintain heat stability.

    Another factor to consider is the type of fuel you use. For charcoal smokers, managing the amount and arrangement of charcoal can help sustain steady temperatures. Using quality charcoal and controlling airflow through vents can dramatically improve how effectively your smoker retains heat, addressing temperature fluctuations effectively.

    Mitigating Hot Spots for Uniform Cooking

    Hot spots within a smoker can lead to uneven cooking, causing certain areas to cook faster than others. This can be particularly frustrating, especially when striving for perfectly smoked meats.

    To combat hot spots, consider using heat deflectors or placing water pans in your smoker. These elements can help distribute heat more evenly, reducing the impact of hot spots. Additionally, rotating your meats during the smoking process can ensure even cooking throughout, resulting in a more consistent flavor and texture.

    Understanding your smoker’s design and how heat circulates can also help minimize hot spots. For instance, in offset smokers, positioning the meat further away from the firebox can often yield more uniform results, creating a more consistent cooking environment.

    Avoiding Over-Smoking Issues

    Over-smoking is a common issue that can lead to bitter flavors in your meats. This often occurs when smoking at low temperatures for extended periods, resulting in excess smoke buildup on the meat’s surface.

    To prevent over-smoking, pay close attention to the type and amount of wood you’re using. Opt for milder wood varieties, such as fruitwood, which impart subtle flavors without overwhelming the meat. Additionally, monitor the smoke color emanating from your smoker. Thin, blue smoke is ideal, while thick, white smoke often indicates that you may be using too much wood, leading to that undesirable bitterness.

    Understanding the balance between smoke and temperature is vital for a successful barbecue. With practice and experimentation, you can discover the right combination that yields a beautifully smoked product without the harsh flavors associated with over-smoking.

    Tackling Cold Spots for Safe Cooking

    Cold spots can lead to undercooked areas within your meat, negatively impacting both flavor and texture while posing potential food safety risks. Inconsistent temperatures often stem from poor airflow or inefficient heat distribution within the smoker.

    To address cold spots, consider using a thermometer to monitor temperatures in different areas of your smoker. This practice allows you to identify colder zones and make necessary adjustments, such as rotating the meat or repositioning the heat source.

    Enhancing airflow within the smoker can also help mitigate cold spots. Experimenting with vent and damper adjustments can create better heat circulation. In larger smokers, using multiple heat sources or adding a water pan can foster a more uniform cooking environment.

    Adapting to Environmental Conditions for Optimal Smoking

    Weather conditions can significantly influence your smoking experience. Recognizing and adapting to various environmental factors is crucial for maintaining ideal temperatures throughout your cooking process.

    Strategies for Smoking in Cold Weather

    Smoking in colder weather presents unique challenges, including longer pre-heating times and the need for increased fuel. When outside temperatures drop, it can severely impact your smoker’s internal temperature, leading to fluctuations that complicate your cooking.

    To combat this, consider insulating your smoker with blankets or thermal jackets specifically designed for smokers. These tools can help maintain a stable cooking temperature even in frigid conditions. It’s also wise to allocate extra time for the smoker to reach your desired cooking temperature, as colder ambient air can slow the process.

    When smoking during winter months, selecting the right fuel source is equally vital. Charcoal may struggle to maintain heat in extremely cold conditions, so opting for high-quality briquettes or lump charcoal can ensure a steadier burn. By taking these precautions, you can enjoy delicious smoked meats even in the depths of winter.

    Adjusting for Hot Weather Challenges

    Conversely, smoking in hot weather can lead to rapid temperature increases, requiring more frequent monitoring and adjustments. As the ambient temperature rises, your smoker may reach higher temperatures faster than desired, which can lead to overcooked meats.

    To adapt to hot weather, be vigilant about monitoring your smoker’s temperature. Utilizing a dual-probe thermometer can help you track both the internal meat temperature and the smoker temperature. Additionally, consider using more wood or charcoal to balance the increased heat, ensuring your meats are cooked perfectly without drying out.

    Another effective strategy is to smoke during the cooler parts of the day, such as early morning or late evening, to avoid the harsh midday sun. This simple adjustment can significantly enhance your smoking experience and yield better results.

    Mitigating Windy Conditions for Consistent Cooking

    Wind can greatly affect your smoker’s temperature, making it challenging to maintain a stable cooking environment. Strong gusts can cool down the smoker or disrupt airflow, resulting in temperature fluctuations that can impact your cooking process.

    To mitigate these issues, consider strategically positioning your smoker in a sheltered area, away from direct wind. If possible, use windbreaks or barriers to shield the smoker while still allowing for adequate ventilation.

    Monitoring the smoker’s temperature more frequently during windy conditions is essential. Adjusting vents to control airflow can help maintain steadiness, ensuring your meats cook evenly while preserving their rich flavors. With the right adjustments, you can successfully navigate windy conditions and achieve outstanding results.

    Implementing Techniques for Effective Temperature Management

    Mastering temperature management techniques is essential for achieving perfection in smoking. Several strategies can help stabilize your smoker’s environment, making the smoking process more seamless and enjoyable.

    Utilizing Water Pans for Temperature and Humidity Control

    Incorporating water pans is a time-honored method for managing both temperature and humidity in your smoker. Placing a pan of water inside the cooking chamber serves multiple purposes. Firstly, it adds moisture to the air, preventing meats from drying out during the extended cooking process. This is especially beneficial for lean cuts that are prone to drying, such as poultry or pork loin.

    Secondly, water pans help stabilize the smoker’s temperature. The water absorbs heat, creating a more even cooking environment and reducing temperature fluctuations. This method is particularly effective for long smoking sessions, as it aids in maintaining a consistent temperature throughout the cooking process.

    Furthermore, the steam produced from the water can enhance the flavor and tenderness of the meat, resulting in a juicy and delicious final product. This technique is favored by both experienced pitmasters and casual cooks alike, as it can significantly elevate the quality of your smoked meats.

    Mastering Vent Control for Optimal Smoking Results

    Effective vent control is another critical technique for maintaining proper temperature within your smoker. Vents regulate airflow, which directly affects fuel combustion and, subsequently, the heat levels inside the cooking chamber.

    Most smokers come equipped with adjustable vents, enabling you to fine-tune airflow. Opening the vents increases oxygen flow, which can elevate temperatures, whereas closing them can lower temperatures. Therefore, understanding how your specific smoker responds to vent adjustments is vital for effective temperature management.

    Additionally, monitoring the smoke color can provide insights into whether your vents are correctly adjusted. Thin, blue smoke indicates good airflow and combustion, while thick, white smoke often suggests that your vents may need adjustment.

    Utilizing Insulation for Enhanced Temperature Stability

    Employing insulation is a practical approach to managing temperature fluctuations, particularly in extreme weather conditions. Insulating your smoker with blankets specifically designed for this purpose can help maintain stable heat levels, ensuring consistent cooking results regardless of external temperatures.

    For example, during colder months, wrapping your smoker in insulation can minimize heat loss, guaranteeing that your cooking environment remains optimal. This technique is especially beneficial for charcoal and offset smokers, which may struggle to retain heat in chilly conditions.

    Moreover, if you use a smoker with a thin metal construction, adding insulation can significantly improve heat retention and reduce fuel consumption. Whether it’s winter or summer, having the appropriate level of insulation ensures your smoking experience is both enjoyable and efficient.

    Advanced Temperature Management Techniques for Enthusiasts

    For those eager to elevate their smoking skills, advanced temperature management techniques can make a substantial difference. Implementing strategies like reverse searing and sous vide can dramatically enhance the quality of your smoked meats.

    Reverse Searing for Perfectly Cooked Meat

    Reverse searing is an advanced technique that combines low-temperature smoking with high-heat finishing. This method entails smoking your meat at a low temperature until it nears the desired doneness, followed by a high-heat sear to create an impressive crust.

    The advantage of reverse searing lies in its ability to preserve juiciness while developing a beautiful outer layer. For instance, smoking a steak at 225°F until it reaches an internal temperature of 120°F allows for uniform cooking throughout. Following this, a quick sear on a hot grill or cast-iron skillet enhances both texture and flavor, resulting in a steak that is both tender and flavorful.

    This technique is particularly favored among barbecue enthusiasts eager to impress at social gatherings and events. The combination of smoky flavor from the low-and-slow process and caramelization from searing produces a dish that is nothing short of extraordinary.

    The Importance of Allowing Meat to Rest

    Resting your smoked meats is a crucial step that is frequently overlooked. During cooking, the juices are forced toward the center of the meat. Resting allows these juices to redistribute throughout, resulting in a more flavorful and moist final product.

    The ideal resting period varies based on the cut size. For larger cuts like brisket or pork shoulder, resting for at least 30 minutes is recommended. Smaller cuts, such as ribs or chicken, typically require only about 10-15 minutes. Covering the meat with foil during the resting period can help retain warmth while allowing juices to settle.

    This simple technique significantly enhances the quality of your smoked meats, yielding a more succulent and enjoyable eating experience—perfect for impressing guests at your next barbecue.

    Integrating Sous Vide with Smoking Techniques for Perfect Results

    Combining sous vide cooking with smoking is an innovative method that allows for precise temperature control while enhancing flavor. Sous vide involves vacuum-sealing food and cooking it in a water bath at a carefully regulated temperature, ensuring perfect doneness each time.

    By smoking the meat after sous vide cooking, you can infuse it with rich, smoky flavors without the risk of overcooking. For example, cooking a brisket sous vide at 155°F for 48 hours guarantees a tender result. Afterward, a quick smoke for a couple of hours delivers that desirable smoky flavor, creating a dish that is both perfectly cooked and bursting with flavor.

    This method is increasingly popular among chefs and home cooks alike, blending the best of both worlds: precision cooking and traditional smoking techniques. Whether you’re a professional chef or a backyard enthusiast, experimenting with sous vide and smoking can elevate your culinary creations to new heights.

    Frequently Asked Questions about Smoker Temperature Control

    What is the optimal temperature range for smoking meats?

    The ideal smoking temperature generally falls within the range of 225°F to 250°F for most meats, ensuring even cooking and optimal flavor absorption.

    How can I maintain a consistent temperature in my smoker?

    To keep consistent smoker temperatures, regularly monitor readings with thermometers, control airflow through vents, and utilize water pans to boost humidity.

    Which types of thermometers are best for smoking?

    Probe thermometers are excellent for long cooking sessions, while instant-read thermometers are perfect for quick checks. Leave-in thermometers provide continuous monitoring without lifting the lid.

    What steps can I take to prevent over-smoking my meat?

    To avoid over-smoking, use milder wood types, pay attention to smoke color, and refrain from using excessive amounts of wood during the cooking process.

    How can I address cold spots in my smoker?

    To remedy cold spots, rotate your meat during cooking, adjust vent settings for improved airflow, and consider adding heat sources to those areas.

    Can I smoke meat in cold weather?

    Yes, you can smoke meat in cold weather by insulating your smoker, allowing for longer pre-heating times, and using quality fuel to maintain the desired temperature.

    What is the reverse searing technique?

    Reverse searing is a method that involves smoking meat at low temperatures first, followed by searing at high heat to create a crispy crust while retaining the meat’s juiciness.

    How long should I let smoked meat rest after it has been cooked?

    Larger cuts, such as brisket, should rest for at least 30 minutes, while smaller cuts can rest for 10-15 minutes to allow juices to redistribute.

    How does sous vide enhance the smoking process?

    Sous vide cooking enables precise temperature control, resulting in perfectly cooked meat that can then be smoked for added flavor without the risk of overcooking.

    What is the best way to use water pans in a smoker?

    Place a water pan inside the smoker to add moisture and stabilize temperatures, which helps keep the meat juicy and enhances its overall flavor during the cooking process.

    Connect with us on Facebook for more tips and tricks!

    The Article Understanding Smoker Temperature Basics: Essential Tips appeared first on https://pitmastersarsenal.com

    The Article Smoker Temperature Basics: Key Tips for Mastery Was Found On https://limitsofstrategy.com

  • BBQ Cooking Times: A Beginner’s Essential Guide

    BBQ Cooking Times: A Beginner’s Essential Guide

    Explore an Extensive Selection of BBQ Meats to Enhance Your Grilling Journey

    Unforgettable Beef Cuts That Will Transform Your BBQ Experience

    A succulent BBQ feast with marbled brisket and glazed ribs on a rustic grill.

    When you picture an ideal BBQ, the selection of beef cuts plays a pivotal role, as these choices can elevate your grilling experience to extraordinary heights. Cuts such as brisket and ribs are particularly renowned for their unique flavor profiles and demand specialized cooking techniques to fully realize their potential. The allure of brisket lies in its remarkable marbling, which requires a low-and-slow cooking method to unlock its full flavor. Cooking at a consistent temperature of 225-250°F for approximately 1 to 1.5 hours per pound allows the connective tissues to break down, resulting in incredibly tender, juicy beef that practically melts in your mouth. In contrast, ribs can be enhanced with the perfect combination of spice rubs and sauces, with baby back ribs requiring 5-6 hours at 225°F, while spare ribs may take up to 7 hours. Mastery of these cooking techniques is essential for any BBQ enthusiast determined to impress friends and family with their grilling skills.

    The significance of a meticulously crafted seasoning rub cannot be overstated. A well-seasoned brisket can dramatically elevate your BBQ experience, making the wait truly worthwhile. By employing the “Texas Crutch” technique—wrapping the brisket in foil after a few hours of cooking—you can retain moisture and accelerate cooking time while maintaining that essential melt-in-your-mouth tenderness. This technique is vital for achieving the best possible flavor and texture in your BBQ meats, ensuring each bite is a delight.

    Indulge in the Rich, Succulent Flavors of BBQ Pork Cuts

    Pork occupies a cherished position in the BBQ world, showcasing favorites such as pulled pork and pork chops that consistently delight enthusiasts and guests alike. Pulled pork, typically sourced from the shoulder or butt, requires a lengthy cooking period to effectively break down the tough connective tissues, resulting in the tender, succulent texture that BBQ lovers crave. Cooking at a low temperature of around 225°F can take anywhere from 8 to 12 hours, depending on the size of the cut. The result is a mouthwatering, easily shredded meat that serves as an excellent filling for sandwiches or sliders, making it a staple at family gatherings and celebrations.

    Conversely, pork chops offer a quicker grilling option that can be grilled directly over high heat. They usually take about 4-6 minutes per side, depending on their thickness, making them a fantastic choice for those seeking a speedy yet satisfying BBQ meal. Grasping the varying cooking times for different pork cuts is crucial to circumvent the common pitfalls of overcooking or undercooking, both of which can lead to disappointing meal experiences.

    Seasoning plays a vital role in amplifying the flavor of pork dishes. A perfectly balanced sweet and tangy sauce can enhance the natural flavors without overpowering them. For BBQ newcomers, mastering the timing for cooking pork cuts can significantly enhance your grilling skills and leave your guests thoroughly impressed with the delectable results.

    Achieve Chicken Mastery to Become a Grilling Pro

    Chicken is an incredibly versatile protein that accommodates numerous grilling methods, ranging from whole birds to wings, with each cut requiring unique cooking times to guarantee both safety and flavor. A whole chicken typically takes about 1.5 to 2 hours at 350°F, ensuring that the internal temperature reaches the critical safety benchmark of 165°F. Achieving this temperature is vital for food safety and guarantees a deliciously cooked bird that’s sure to please everyone at the gathering.

    For individual chicken cuts, such as thighs or breasts, the cooking time is significantly shorter—approximately 20-30 minutes, depending on size. Chicken wings shine when cooked over high heat for around 20-30 minutes, resulting in a perfectly crispy exterior that tantalizes the taste buds. The secret to flavorful chicken lies in consistently monitoring the internal temperature with a meat thermometer, ensuring that your dish is not only safe to consume but also retains its juiciness and flavor throughout the cooking process.

    Brining chicken prior to grilling can yield exceptional results, as it enhances moisture and flavor in the meat. When BBQing chicken, understanding the necessary cooking times for different cuts is crucial to achieving a perfectly cooked meal without drying out the meat, ensuring a delightful experience for everyone at the table.

    Relish the Flavorful Lamb Cuts for BBQ Aficionados

    Succulent lamb shoulder slow-cooked and grilled lamb chops sizzling on a BBQ grill.

    Lamb is an exquisite and richly flavored option that necessitates careful attention to cooking times to achieve optimal tenderness and flavor. Cuts such as shoulder and chops have unique time requirements that must be observed. A lamb shoulder is ideally prepared using a slow cooking technique at 250°F for about 4-6 hours, allowing the meat to become beautifully tender, which has made it a favorite among BBQ aficionados who appreciate its depth of flavor.

    In contrast, lamb chops are akin to preparing steaks and can be grilled quickly over high heat for about 4-5 minutes per side, depending on their thickness. Understanding the correct cooking durations for lamb is essential to avoid drying out the meat while capturing the distinctive flavor that makes lamb a standout choice for BBQ enthusiasts.

    Utilizing marinades rich in herbs and spices can beautifully complement lamb. Classic pairings, such as fresh rosemary and garlic, can elevate the dish to an entirely new level of deliciousness. Mastering the cooking times and techniques for lamb will undoubtedly enhance your BBQ skill set, impressing your guests and adding variety to your grilling repertoire.

    Crucial BBQ Techniques to Hone Your Grilling Skills

    Utilizing Direct Heat for Quick Grilling Success

    Direct heat grilling is an excellent method for swiftly cooking popular items such as burgers, hot dogs, and chicken breasts. This technique involves placing food directly over the flame, yielding a beautifully seared exterior and an irresistible smoky flavor that enhances the overall experience. Timing is critical with this method, as most items only require a few minutes on each side. For instance, burgers typically need around 4-5 minutes per side for a medium-rare result, while chicken breasts can take approximately 6-8 minutes to reach perfection.

    One common pitfall when grilling over direct heat is the failure to manage the heat effectively, which can lead to uneven cooking and disappointing outcomes. Always preheating your grill is essential to ensure you achieve the perfect sear and prevent food from sticking, both of which are crucial for a successful BBQ experience.

    For those striving to achieve various levels of doneness, it is vital to comprehend the specific cooking times associated with each type of meat. Utilizing a meat thermometer will help you attain your desired doneness without risking overcooking, ensuring that every bite is cooked to perfection and bursting with flavor.

    Mastering Indirect Heat Grilling for Larger Cuts of Meat

    A whole chicken and brisket grilling indirectly on a barbecue, surrounded by smoke, cooking in their own juices.

    Indirect heat grilling is the preferred method for larger cuts of meat that necessitate longer cooking times. This technique involves positioning the food away from the direct flame, allowing it to cook slowly and evenly. For example, a whole chicken or a brisket is optimally cooked using this method, typically at temperatures ranging from 225°F to 275°F, which allows a richer flavor profile to develop and enhances the overall taste of the meat.

    Cooking times will vary based on the size of the meat; however, a general guideline is approximately 30-40 minutes per pound. This approach not only ensures that the meat cooks evenly but also helps it retain its juices, resulting in an exceptionally tender and flavorful final product that will impress your guests.

    To further enhance flavor during indirect grilling, consider adding wood chips to your fire for that perfect smoky finish. This additional layer of flavor, combined with extended cooking time, will create a BBQ experience that is both memorable and delicious, leaving your guests craving more and eager for your next grilling endeavor.

    Embrace the Rich Flavors of Smoking Meat for BBQ Excellence

    Smoking is a cherished BBQ technique that involves cooking meat at low temperatures over an extended period, often incorporating wood chips to infuse distinct flavors into the meat. This process can take several hours—ranging anywhere from 5 to 12 hours, depending on the type of meat and the desired intensity of smoke flavor. The low and slow method allows the meat to absorb the smoke while becoming tender and flavorful, resulting in an unforgettable BBQ experience.

    Brisket and pork shoulders are prime candidates for smoking, typically cooked at a temperature of around 225°F for an extended duration. This slow cooking method permits the smoke to permeate the meat, creating a rich and complex flavor profile that is simply unmatched in the BBQ world. Although smoking may seem daunting, the delicious results are well worth the effort, rewarding your patience with an incredible BBQ experience that will have everyone talking.

    The choice of wood used for smoking can significantly influence the flavor profile, with options like hickory, mesquite, and applewood being particularly popular among BBQ enthusiasts. Understanding the balance of cooking time, temperature, and smoke flavor will result in a BBQ experience that impresses any crowd and elevates your grilling game to new heights.

    Mastering Temperature Control for BBQ Perfection

    Understanding Grill Temperature for Optimal Cooking Success

    Maintaining the correct grill temperature is crucial for a successful BBQ. Different types of meat have specific optimal temperature ranges for cooking, ensuring both safety and flavor. For instance, beef is best cooked at around 130-160°F for medium-rare to medium doneness, while chicken must reach a minimum internal temperature of 165°F to be safe for consumption, making temperature control essential for achieving delicious results in your BBQ meals.

    Utilizing a reliable grill thermometer is vital for monitoring temperature, enabling you to make necessary adjustments as needed. Additionally, understanding the type of grill you are using—whether it is gas, charcoal, or electric—can enhance your mastery of temperature control and improve your grilling outcomes significantly.

    Hot and cold spots on the grill can lead to uneven cooking, which can be frustrating for any BBQ enthusiast. Rotating your meat and being mindful of where you place it on the grill can help mitigate these issues, ensuring everything cooks uniformly and to perfection, ultimately elevating your BBQ skills to the next level.

    Ensuring Meat Temperature for Safety and Quality

    Utilizing a meat thermometer to check internal temperatures is crucial for ensuring food safety while achieving the desired doneness. Each type of meat has specific temperature thresholds that must be met. For example, ground meats should reach 160°F, beef steaks can vary from 130°F for rare to 160°F for well-done, while pork should reach 145°F to ensure safety and flavor retention.

    When measuring temperature, it is essential to insert the thermometer into the thickest part of the meat, avoiding contact with bones, which can provide inaccurate readings. Understanding these specific temperatures not only ensures safety but also helps achieve the desired texture and juiciness of your meats, significantly enhancing the quality of your BBQ meals and leaving your guests thoroughly satisfied.

    For those new to BBQ, investing in a high-quality meat thermometer can be a game-changer, allowing you to cook with confidence. Achieving the right internal temperature is one of the most critical aspects of BBQ success, making it an essential tool in your grilling arsenal that will serve you well for many future grilling sessions.

    Adapting to Environmental Conditions for Consistent Cooking Results

    Ambient conditions, including weather and altitude, can significantly influence cooking times and outcomes. For example, windy days can cause temperature fluctuations, necessitating adjustments to cooking times to ensure that your BBQ turns out perfectly every time. Cooking at higher elevations can lead to longer cooking durations due to lower air pressure, meaning that meats may require additional time to reach their ideal cooking temperature, impacting the overall quality of your BBQ.

    If you’re grilling outdoors during colder months, consider wrapping meats in foil to help retain heat and moisture, ensuring they cook evenly and thoroughly. Conversely, on hot summer days, it may be beneficial to adjust your cooking strategy to avoid overcooking or drying out your dishes, ensuring that every BBQ session is successful and enjoyable for everyone involved.

    Being aware of these environmental factors can enable you to plan your BBQ more effectively, leading to consistent results regardless of the conditions. This knowledge will enhance your confidence and skill as a BBQ enthusiast, allowing you to create memorable meals that everyone will cherish.

    Utilizing Temperature Probes for Accurate Cooking

    Employing accurate temperature probes can assist in monitoring cooking temperatures precisely, ensuring that your meat is cooked evenly across different zones of the grill. Temperature probes can be either wired or wireless, allowing you to keep an eye on the temperature from a distance without having to hover over the grill, providing you with greater flexibility during the cooking process.

    Many advanced models come equipped with alerts that notify you when your meat has reached the desired temperature, enabling you to focus on other tasks while cooking. This technology can be particularly advantageous when smoking meats, as maintaining consistent temperatures is critical during long cooking sessions, ensuring that everything is cooked to perfection and elevating your BBQ game to new heights.

    Investing in high-quality temperature probes can significantly enhance your BBQ experience, providing you with more control over the cooking process and increasing the likelihood of a successful cook every time you fire up the grill, impressing your guests with your culinary skills.

    Techniques for Adjusting Temperature During Grilling

    Mastering techniques such as vent control and heat deflection is essential for fine-tuning grill temperatures for optimal cooking results. In charcoal grills, adjusting the vents can increase or decrease airflow, subsequently altering the temperature levels to suit your cooking needs.

    Adding or removing coals can also help regulate heat effectively. For gas grills, utilizing multiple burners can create zones of varying temperatures, allowing for both direct and indirect cooking methods to be executed simultaneously. This flexibility can greatly enhance your BBQ capabilities and overall cooking experience.

    Becoming familiar with these techniques will empower you to achieve the right cooking temperatures consistently, whether you are grilling burgers or smoking a succulent brisket. This mastery can elevate your BBQ skills and impress your guests, making every gathering a delicious success that they will remember fondly.

    Avoid Common BBQ Mistakes for an Unforgettable Experience

    Steer Clear of the Common Pitfall of Overcooking Your Meats

    Overcooking is a frequent mistake that can ruin even the finest cuts of meat. Understanding and meticulously monitoring cooking times is crucial for preventing dryness and ensuring that your BBQ experience remains enjoyable. For instance, brisket can easily become tough if cooked for too long, while chicken can dry out quickly if left unattended, leading to disappointing meals that fall short of expectations.

    To avoid the overcooking trap, it is essential to invest in a reliable meat thermometer. Regularly checking the internal temperature will assist you in determining when the meat is just right, ensuring a tender and flavorful outcome. Additionally, techniques such as wrapping meat in foil during the final stages of cooking can help retain moisture, creating a juicy and delicious result that impresses your guests.

    Learning to recognize visual and textural cues can also help prevent overcooking. For instance, meat should feel firm yet springy when done, and juices should run clear. Mastering these indicators will enhance your BBQ success and boost your cooking confidence, ensuring that every meal is a hit and a source of pride.

    Prevent Undercooking for Health and Safety

    Undercooking poses serious health risks, particularly with poultry and pork. Ensuring that meats reach safe internal temperatures is essential to prevent foodborne illnesses from impacting your BBQ gathering. For chicken, this means cooking it to at least 165°F, while pork should reach 145°F to ensure safety, flavor retention, and the right texture.

    To guarantee thorough cooking, using a meat thermometer is essential. Understanding the specific safe cooking temperatures for each type of meat allows you to prepare food safely while also retaining its flavor and appealing texture, making your BBQ gatherings enjoyable and safe for everyone at the table.

    Visual cues can also assist in determining doneness. For example, chicken should no longer appear pink in the center, and juices should run clear when pierced. Avoiding undercooked meats is crucial for a safe and enjoyable BBQ experience, and it reflects your dedication to quality cooking and ensuring the health of your guests.

    Managing Inconsistent Heat for Even Cooking Results

    Managing hotspots and cold spots on the grill can significantly impact cooking results, leading to uneven doneness and frustrating outcomes. Understanding your grill’s mechanics and conducting test runs can help identify these areas, allowing you to adjust your cooking strategy accordingly for optimal results.

    Rotating your food during cooking can help mitigate these issues, ensuring more even heat distribution and consistent results. Furthermore, keeping the lid closed while cooking aids in maintaining steady temperatures, enhancing your results and cooking efficiency significantly, leading to a successful BBQ every time.

    Adjusting your placements based on identified hotspots can lead to a more successful grilling experience, ultimately honing your BBQ skills over time and increasing your confidence as a grill master.

    The Importance of Using the Right BBQ Tools

    Choosing the right utensils and equipment is vital for enhancing BBQ results and preventing damage to both food and grill. For instance, using metal tongs instead of forks helps prevent the juices from escaping, keeping your meat moist and flavorful. This simple switch can make a significant difference in the quality of your BBQ and the satisfaction of your guests.

    Investing in a quality set of grilling tools can greatly improve your overall experience. Consider tools like grilling baskets for smaller items, which can prevent food from falling through the grates, and sharp knives for easy slicing and serving, enhancing both convenience and efficiency during your BBQ sessions.

    Avoid using non-BBQ-specific tools, as they can lead to accidents and damage during your grilling sessions. Ensuring you have the right tools on hand will make your BBQ process smoother and more enjoyable, allowing you to focus on creating delicious meals for your friends and family that they will remember fondly.

    Essential Tools and Accessories for an Exceptional BBQ Experience

    Reliable Thermometers for Accurate Cooking

    Thermometers are indispensable for obtaining accurate temperature readings, guiding cooking times, and ensuring food safety throughout your BBQ. Digital instant-read thermometers provide quick and precise readings, allowing you to monitor your meat without losing valuable heat, which is crucial for maintaining quality.

    Investing in a quality thermometer can greatly enhance your BBQ experience, offering peace of mind that your food is cooked to perfection. Some advanced models even feature Bluetooth capabilities, enabling you to monitor temperatures remotely, which is incredibly convenient during longer cooking sessions where constant attention may not be possible.

    Understanding how to properly use and calibrate your thermometer is also essential. Regularly checking its accuracy can ensure that you are always cooking with confidence and precision, minimizing the risk of undercooked or overcooked meats, ultimately enhancing the quality of your BBQ meals.

    Timers to Keep Your Cooking on Schedule

    Setting timers is crucial for managing long cooks, ensuring that you check on your food at appropriate intervals. An easy-to-use kitchen timer can help you keep track of cooking times, especially for lengthy smokes or roasts, preventing overcooking or burning that could ruin your hard work.

    Utilizing timers can also prevent common pitfalls in BBQ, allowing you to focus on other tasks while still ensuring that your food is receiving the attention it deserves. Having reminders in place is invaluable for a smooth cooking process that leads to success.

    Consider using timers that offer multiple settings, enabling you to manage several items simultaneously. This feature can be particularly helpful during busy BBQ gatherings, ensuring that everything is cooked to perfection and ready to serve at the right time, delighting your guests with every dish.

    Grilling Baskets for Versatile Cooking Options

    Grilling baskets are a versatile tool for handling smaller items like vegetables and seafood that require frequent turning to achieve even cooking. These baskets allow for better airflow around the food, ensuring that your items are grilled to perfection without falling through the grates, which can enhance your BBQ experience significantly.

    Moreover, these baskets can enhance flavor by allowing food to be coated in marinades during grilling. Investing in a high-quality grilling basket can substantially improve your BBQ experience, ensuring that no delicious morsel is left behind and making the cooking process more efficient.

    Additionally, they simplify cleanup, minimizing mess and ensuring smooth transitions between dishes, making your grilling session more enjoyable overall. This added convenience allows you to focus on enjoying your time with friends and family rather than worrying about the cooking process, creating a relaxing and pleasurable atmosphere.

    Versatile Tongs for Safe and Efficient Grilling

    Tongs are an essential tool for safely handling hot food on the grill. They offer a firm grip, allowing for easy flipping and turning, which is crucial for preventing food from sticking and ensuring even cooking across all items, resulting in a delightful BBQ experience.

    Using tongs instead of forks helps retain juices, resulting in a more succulent final product that showcases your grilling skills. Choosing high-quality, heat-resistant tongs can significantly enhance your grilling experience, providing better maneuverability and control during cooking, making it easier to achieve perfect results.

    Tongs come in various designs, so selecting a pair that feels comfortable in your hand can also contribute to a more enjoyable BBQ experience, allowing you to grill with confidence and efficiency while impressing your guests with your culinary prowess.

    Durable Spatulas for Efficient Food Handling

    Spatulas are ideal for lifting and turning larger food items on the grill, ensuring even cooking while preventing sticking that could ruin your meal. A good grilling spatula should be sturdy yet flexible, allowing for easy maneuverability when handling various foods, from meats to delicate items.

    Using a spatula can also help with delicate items like fish, which require a gentle touch to flip without breaking apart. Finding a spatula that suits your grilling style can greatly enhance your overall results, making the cooking process smoother and more enjoyable for all involved.

    Ensure that your spatula is made of heat-resistant materials to withstand high temperatures, making it a reliable tool for all your BBQ needs. A high-quality spatula will serve you well for many grilling sessions to come, proving to be an invaluable asset in your BBQ arsenal.

    Comprehensive BBQ Cooking Time Charts for Every Meat Type

    Understanding Cooking Times for Beef and Pork for Perfect Results

    Familiarity with the average cooking times for various cuts of beef and pork is essential for any BBQ enthusiast. For beef brisket, you should expect approximately 1 to 1.5 hours per pound when cooked at 225°F, ensuring that it becomes tender and flavorful, embodying the essence of BBQ perfection. Ribs typically require around 5-7 hours at the same temperature for the best results, giving you that iconic BBQ flavor that everyone craves.

    On the pork side, a pork shoulder intended for pulled pork can take 8-12 hours at 225°F, allowing the connective tissue to break down into melt-in-your-mouth goodness. In contrast, pork chops are much quicker to prepare, needing only about 4-6 minutes per side over direct heat. These cooking times can vary based on grill temperature, meat thickness, and desired doneness, making it essential to monitor your BBQ carefully to ensure perfect results every time.

    Utilizing resources like cooking time charts can provide a quick reference guide, simplifying your BBQ planning and ensuring you serve perfectly cooked meats to delight your guests with each delectable bite.

    Perfect Cooking Times for Poultry to Ensure Safety and Flavor

    Different chicken parts require varying cooking times for optimal results. A whole chicken should be cooked for about 1.5-2 hours at 350°F, while chicken thighs and breasts typically take about 20-30 minutes. Wings require similar timing, around 20-30 minutes, depending on the cooking method used, making proper timing crucial for a successful BBQ that your guests will rave about.

    Utilizing a poultry cooking time chart can help ensure that you achieve juicy, flavorful chicken without any risk of undercooking. This knowledge is especially beneficial for those hosting BBQ gatherings, guaranteeing that the chicken will be a crowd-pleaser and a highlight of the meal that everyone will enjoy.

    Understanding cooking times for poultry is not only essential for safety but also for flavor, allowing you to serve a delicious meal that everyone will enjoy without any worry about undercooked poultry.

    Guidelines for Grilling Seafood and Vegetables to Achieve Delicious Results

    Grilling seafood and vegetables requires specific guidelines to achieve the desired doneness and flavor. Fish fillets typically take around 8-10 minutes per inch of thickness at medium heat, while shrimp can cook in as little as 2-3 minutes per side, making them a quick and tasty option for your BBQ that will impress your guests.

    Vegetables vary widely in their cooking times, with denser options like potatoes needing around 20-30 minutes, while softer vegetables like zucchini can take only 5-10 minutes to reach that perfect tenderness. Following these cooking times is crucial for ensuring quality and flavor, making it essential to adhere to guidelines for optimal results during your grilling sessions to ensure a memorable BBQ experience.

    Using a cooking time chart for seafood and vegetables can streamline your BBQ experience, ensuring that everything cooks harmoniously and allows flavors to shine through, creating an enjoyable meal that everyone will love.

    Frequently Asked Questions About BBQ Techniques

    What is the ideal temperature for grilling beef brisket?

    The ideal temperature for grilling beef brisket is around 225-250°F, enabling a low and slow cook that results in tender, mouthwatering meat sure to impress anyone who tastes it.

    How long should I cook pork chops on the grill for best results?

    Pork chops typically take about 4-6 minutes per side on direct heat, depending on their thickness, to achieve optimal doneness and flavor that satisfies every palate and craving.

    What internal temperature must chicken reach to ensure safety?

    Chicken should reach an internal temperature of 165°F to ensure that it is safe to eat and thoroughly cooked, minimizing health risks while guaranteeing a delicious meal for everyone.

    How can I tell when my ribs are fully cooked?

    Ribs are fully cooked when they reach an internal temperature of approximately 190-203°F, and the meat is tender, easily pulling away from the bone, showcasing your grilling prowess and skill.

    Is it possible to grill vegetables directly on the grill?

    Yes, you can grill vegetables directly on the grill, but using a grilling basket is advisable to prevent them from falling through the grates, ensuring even cooking and delicious results that everyone will enjoy.

    What’s the best method to avoid overcooking meat?

    Using a reliable meat thermometer to monitor internal temperatures is the best way to avoid overcooking meat, ensuring it reaches the desired doneness without drying out, resulting in juicy and flavorful dishes that your guests will love.

    How long does it typically take to smoke a pork shoulder?

    Smoking a pork shoulder usually takes 8-12 hours at 225°F, depending on its size and desired tenderness, making it a time-consuming but rewarding process for BBQ lovers seeking perfection.

    What steps should I take if my grill has hot spots?

    To manage hot spots on your grill, rotate your food during cooking and adjust your meat placement to ensure even cooking across all items, leading to a more successful BBQ experience everyone will appreciate.

    How can I keep my BBQ tools in top condition?

    Regularly cleaning your BBQ tools after each use and storing them in a dry, safe place will help maintain their longevity and performance, ensuring they’re ready for your next grilling session with ease and efficiency.

    What advantages does brining chicken offer?

    Brining chicken helps to enhance its flavor and moisture, resulting in juicier meat that is less likely to dry out during cooking, making it a popular technique among BBQ enthusiasts seeking perfection in their dishes.

    Join Us on Facebook for More BBQ Tips and Tricks!

    The Article Understanding BBQ Cooking Times for Beginners: A Comprehensive Guide appeared first on https://pitmastersarsenal.com

    The Article BBQ Cooking Times for Beginners: Essential Guide Was Found On https://limitsofstrategy.com

  • Pizza Stone at Home: A Simple Guide for Perfect Pies

    Pizza Stone at Home: A Simple Guide for Perfect Pies

    Essential Strategies for Maximizing Your Pizza Stone Experience

    Thoroughly Cleaning Your Pizza Stone for Optimal Cooking Performance

    How to Use a Pizza Stone at Home: A person cleaning a pizza stone with a dry brush to remove burnt remnants for a perfect crust.

    To fully harness the incredible potential of your pizza stone, begin with a meticulous cleaning process. An immaculate stone is crucial for achieving that perfect crispy crust and deliciously flavorful base. Initiate this essential cleaning by gently using a dry brush to remove any remnants from previous baking sessions. This straightforward yet effective method efficiently eliminates burnt residues while preserving the stone’s integrity, ensuring its surface is primed and ready for your upcoming culinary creations.

    It’s imperative to avoid using soap or water, as the porous nature of the stone can absorb these substances, potentially altering the delightful flavor profile of your pizza. Instead, utilize the stone’s natural properties for maintenance. Consistently employing a dry cloth or a soft brush will keep your pizza stone in top-notch condition, always prepared for the culinary masterpiece you envision.

    If you encounter stubborn stains, gently utilize a spatula or scraper to remove them without risking damage to the stone’s surface. This practice not only preserves the stone’s integrity but also prepares it for your next baking adventure. Establishing a regular cleaning routine not only boosts the flavor of your pizza but also extends the lifespan of your stone, making it an invaluable asset in your kitchen arsenal.

    Preheating Your Oven for Consistently Perfect Pizza Cooking

    Preheating your oven is a fundamental step in mastering the effective use of a pizza stone at home. For optimal results, position your pizza stone in a cold oven and set the temperature between 230 °C and 260 °C. This method guarantees that the stone heats evenly from the center outwards, preventing any risk of thermal shock that may occur when introducing a cold stone into a hot oven. The gradual increase in temperature allows the stone to absorb and maintain heat, which is essential for achieving the restaurant-quality crust you desire.

    The significance of reaching the precise temperature cannot be overstated. A properly preheated pizza stone delivers an immediate burst of heat that contributes to a beautifully crisp bottom, locking in moisture and flavors within the toppings. Allow the stone to remain in the oven for about 30 to 45 minutes before placing your pizza, ensuring that the high temperature required for perfect cooking is consistently maintained.

    Employing an oven thermometer can further enhance this process, guaranteeing that your oven reaches the desired temperature accurately. This meticulous attention to detail distinguishes a good pizza from an extraordinary one, amplifying the enjoyment and satisfaction of your homemade culinary creations.

    Strategically Positioning Your Pizza Stone in the Oven for Even Cooking

    The positioning of your pizza stone within the oven is crucial for achieving optimal cooking results. For the best outcomes when learning to use a pizza stone at home, place the stone on the middle rack of your oven. This strategic positioning facilitates optimal heat distribution, ensuring that both the top and bottom of the pizza are cooked evenly.

    If the stone is situated too close to the heat source, such as the bottom of the oven, there’s a risk of burning the base while leaving the toppings undercooked. Conversely, placing the stone too high may lead to a soggy base as the heat is primarily directed from above. By positioning the stone centrally, you create a balanced environment that allows your pizza to thrive.

    Furthermore, it’s vital to avoid overcrowding the oven. If you are cooking multiple pizzas, ensure there is ample space between them to facilitate proper airflow. This promotes even cooking and prevents any undesirable steaming effect. By mastering the art of positioning, you set the stage for a delightful pizza experience that transports your taste buds to Italy.

    Crafting the Perfect Pizza Dough for Exceptional Pizzas

    Chef's hands kneading pizza dough on a rustic table, flour in the air, sunlit kitchen.

    Selecting the Best Flour for Your Pizza Dough

    The foundation of any outstanding pizza lies in its dough, making the choice of flour a pivotal factor in this equation. When exploring how to use a pizza stone at home, selecting high-protein flour, such as bread flour or ‘00’ flour, can significantly enhance your pizza-making skills. High-protein flours yield robust gluten structures, resulting in a chewy and crisp crust that can support a variety of toppings.

    The unique qualities of ‘00’ flour, commonly used in traditional Italian pizzerias, provide an incredibly smooth texture that lends itself to an authentic Neapolitan-style base. This fine type of flour adeptly absorbs moisture, enhancing the extensibility of the dough while delivering that desired airy texture. If you’re experimenting with various styles, consider blending different flours to achieve a crust that caters to your personal taste preferences.

    Incorporating other flour types, such as whole wheat or rye, can add depth of flavor and nutritional benefits to your pizza dough. However, it’s essential to balance these with higher-gluten flours to maintain structural integrity. The choice of flour may also vary based on regional preferences, with some cultures favoring specific grains or mixtures that reflect their culinary heritage. Understanding these nuances can enrich your pizza-making experience, making it all the more enjoyable.

    Mixing and Kneading Your Dough for Optimal Results

    Creating the ideal pizza dough commences with the perfect blend of ingredients and technique. Begin by mixing your chosen flour with yeast, water, and salt, ensuring that the water is lukewarm to activate the yeast effectively. The ratio of ingredients is crucial; typically, a 3:1 ratio of flour to water yields a manageable dough that is neither too wet nor too dry.

    Once combined, the kneading process begins, which is vital for developing gluten, responsible for the dough’s elasticity and structure. Knead the dough for approximately 8 to 10 minutes on a lightly floured surface until it attains a smooth and elastic consistency. If the dough feels excessively sticky, sprinkle in small amounts of flour as needed, but exercise caution not to overdo it, as too much flour can lead to a dense crust.

    During the kneading phase, consider infusing additional flavors, such as herbs or spices, to give the dough a unique character. Once the dough reaches the desired consistency, place it in a greased bowl, cover it with a damp cloth, and allow it to rise until it has doubled in size. This fermentation stage is essential; it develops flavors and enhances the texture of the dough, resulting in a delightful base for your pizza.

    Shaping Your Dough for a Flawless Pizza Base

    Person stretching pizza dough by hand, achieving even thickness with thicker edges for crust.

    After your dough has successfully risen, the next step is to shape it into the perfect pizza base. This process is where your creativity can truly shine. Gently punch down the dough to release air bubbles, then divide it into portions based on the size of the pizzas you wish to create.

    When shaping, you can either roll out the dough with a rolling pin or stretch it by hand. If you choose the latter, begin from the center and work your way to the edges, allowing gravity to assist in the process. The goal is to achieve an even thickness, typically around 1/4-inch, while ensuring the edges remain slightly thicker for a delightful crust.

    Be mindful of the dimensions of your pizza stone when shaping the dough, as the size should match the stone to ensure even cooking. A well-shaped dough not only enhances the aesthetic appeal of your pizza but also significantly impacts its cooking process. Uneven thickness can lead to undercooked or overcooked areas, detracting from the overall experience.

    As you shape the dough, consider adding toppings directly onto the unbaked base to visualize how your pizza will look. This practice can inspire creativity in topping combinations, ensuring a balanced distribution of flavors across your pizza.

    Proofing Your Dough for the Best Texture

    Proofing, or allowing the dough to rise a second time, is a crucial step in achieving a light, airy texture while developing rich flavors. After shaping, let the dough proof for a final rise, typically lasting between 1 and 2 hours at room temperature. This stage enhances the dough’s flavor profile and contributes to that quintessential pizzeria texture.

    Alternatively, for those who prefer a more robust flavor, consider placing the shaped dough in the fridge overnight. Cold fermentation allows complex flavors to develop, resulting in a more nuanced dough that reflects traditional practices found in pizzerias worldwide. This method, often favored by professional bakers, enhances the crust while also improving the dough’s handling characteristics.

    As the dough proofs, monitor its expansion; it should grow noticeably. Ensure it’s covered with a damp cloth or plastic wrap to prevent it from drying out. This technique not only retains moisture but also promotes a healthier rise.

    Once the dough has doubled in size, it’s ready to be prepared for the stone. This final proofing stage is where the magic happens and should never be rushed. The patience you invest here will reward you with a delicious, airy crust that is nothing short of spectacular.

    Preparing Your Dough for the Pizza Stone

    Before placing your pizza on the hot stone, it’s essential to prepare the surface to prevent sticking. Dust your pizza stone lightly with cornmeal or semolina, creating a non-stick barrier while allowing for a slight crunch on the bottom of your pizza. This technique is widely employed by professional pizza makers and is crucial for mastering the use of a pizza stone at home effectively.

    Once the stone is ready, carefully transfer your shaped dough onto a pizza peel or an inverted baking sheet dusted with flour or cornmeal. This method ensures a smooth slide onto the stone without risking the dough’s integrity. If you don’t have a peel, improvisation is possible, but take care to maintain the dough’s shape during the transfer.

    Ensure that your toppings are prepared and strategically placed on the pizza to avoid overcrowding, which can lead to a soggy outcome. The key to a successful pizza is achieving balance; toppings should complement rather than overwhelm the base. By properly preparing the dough and utilizing a hot pizza stone, you set the stage for a delicious culinary experience that brings the authentic flavors of Italy to your home.

    Mastering the Art of Topping and Cooking Your Pizza to Perfection

    Evenly Spreading Sauce and Arranging Toppings for Maximum Flavor

    One of the most exciting aspects of mastering pizza stone use at home is the art of topping your pizza. Begin by evenly spreading your chosen sauce across the dough, ensuring to leave a border for the crust. The sauce should enhance your ingredients without overpowering them; consider using homemade tomato sauce, pesto, or even a white sauce for a unique twist on tradition.

    When it comes to toppings, remember that less is often more. Overloading your pizza can lead to a soggy mess, preventing that perfect crust from forming. Instead, adopt a balanced approach by utilizing fewer high-quality ingredients. For example, a classic Margherita pizza usually features fresh mozzarella, basil, and a drizzle of olive oil, while a gourmet option might include toppings such as prosciutto, arugula, and truffle oil for an elevated experience.

    The order of your toppings also plays a significant role; start with cheese to create a protective layer that prevents the base from absorbing too much moisture. Then, add your meats and vegetables. Vegetables with high water content, such as tomatoes and mushrooms, should be pre-cooked or applied sparingly to avoid excess moisture during baking.

    Feel free to experiment with flavors from various cuisines to elevate your pizza-making game. Consider globally-inspired toppings, such as tandoori chicken or Greek feta, to create a unique culinary fusion on your stone. The possibilities are endless, allowing you to tailor each pizza to your taste and culinary adventures, ensuring every bite is a delight.

    Carefully Transferring Your Pizza to the Stone for Even Cooking

    Transferring your assembled pizza to the preheated stone requires steady hands and a bit of finesse. Using your pizza peel or an inverted baking sheet, gently slide the pizza onto the stone, ensuring there are no hiccups that could compromise your culinary masterpiece. A quick, confident motion is essential; hesitation may lead to sticking or misalignment.

    If you encounter any sticking, remain calm. A spatula can help nudge the pizza free without damaging the base. After positioning the pizza, promptly close the oven door to maintain the high temperature needed for proper cooking.

    As the pizza bakes, keep a close watch through the oven window. The intense heat from the pizza stone will begin to work its magic, crisping the base while melting and browning the cheese. This is the moment where anticipation builds as you envision that perfect slice ready to be enjoyed.

    Be mindful of your cooking time, which typically ranges from 10 to 15 minutes, depending on your oven and the thickness of the dough. Key indicators of a perfectly cooked pizza include a golden-brown crust and bubbling cheese. If you notice the crust browning too quickly, consider rotating the pizza halfway through for even cooking, resulting in a delightful, uniformly baked treat.

    Understanding Cooking Time and Temperature for Impeccable Results

    Achieving the ideal pizza requires a keen understanding of cooking time and temperature. When exploring how to use a pizza stone at home, setting your oven between 230 °C and 260 °C ensures that your pizza cooks quickly, resulting in a crispy crust while keeping the toppings vibrant and flavorful.

    Generally, a cooking time of 10 to 15 minutes will suffice, but this can vary based on the thickness of your crust and the toppings used. Thicker crusts may require a few additional minutes, while thin crusts may finish more quickly. It’s vital to monitor the pizza closely during the final minutes of cooking, as the line between perfect and burnt can be precariously thin.

    An oven thermometer can be invaluable in this situation. Subjectivity can play a role when relying on standard oven settings, and an accurate reading will help you refine your technique for consistent results.

    As your pizza approaches completion, pay attention to the bubbling cheese and the delightful aroma filling your kitchen; these sensory cues will guide you to the right moment for removal. Once you’ve achieved that golden crust and melted perfection, carefully extract the pizza from the oven using your peel or a spatula, allowing it to cool briefly before slicing into this delicious creation.

    Essential Maintenance Practices for Your Pizza Stone

    Cleaning Your Stone After Each Use to Ensure Longevity

    Proper maintenance of your pizza stone is crucial for ensuring its longevity and optimal performance, especially when learning how to use a pizza stone at home. After cooking, allow the stone to cool completely before attempting to clean it; attempting to clean a hot stone can result in thermal shock and potential cracking.

    Once cooled, use a spatula to gently scrape off any stuck-on food. This step is vital for preserving the stone’s surface and ensuring that it’s ready for your next use. For stubborn residue, a soft brush can help dislodge any remnants without damaging the stone.

    A damp cloth can be used to wipe down the surface, but avoid using soap or soaking the stone in water. The porous nature of the stone means it can absorb these substances, leading to unwanted flavors in your future pizzas. Regular cleaning after each use will keep your pizza stone in prime condition, enhancing your overall pizza-making experience.

    Consider how often you use your stone; the more frequently you bake, the more crucial it is to maintain consistent cleaning. By integrating these practices into your routine, you’ll ensure that your pizza stone remains a reliable tool in your kitchen arsenal, ready to deliver perfect pizzas time and time again.

    Preventing Damage to Your Pizza Stone for Optimal Use

    When learning how to use a pizza stone at home, understanding how to avoid damage is of utmost importance. The stone is designed to withstand high temperatures, but improper handling or maintenance can lead to cracks and deterioration.

    Always handle the stone with care, as dropping it or exposing it to drastic temperature fluctuations can cause it to crack. When storing your pizza stone, choose a dry place to prevent moisture buildup, which can compromise its structural integrity. If your stone does become damp, allow it to air dry completely before using it again.

    Additionally, avoid using metal utensils on the stone’s surface, as they can scratch and damage the material. Opt for wooden or silicone tools when working with your pizza stone to preserve its quality and longevity. By adopting these simple yet effective practices, you can ensure your pizza stone remains in pristine condition, ready to produce artisanal pizzas for years to come.

    Optimal Storage Techniques for Your Pizza Stone

    Proper storage plays a significant role in the longevity of your pizza stone. After cleaning, ensure the stone is thoroughly dry before putting it away. Moisture can lead to mold growth or cracking during subsequent uses, undermining your efforts to master using a pizza stone at home.

    Store your pizza stone flat, rather than on its side, to avoid undue pressure that could lead to fractures. If space permits, keep it in a designated area in your kitchen where it won’t be jostled by other kitchenware. Some enthusiasts even opt to keep their stones in the oven, providing the dual benefit of easy access and additional thermal mass, which can enhance oven performance.

    Maintaining your stone in optimal conditions will ensure it remains a reliable companion on your pizza-making journey. With proper care, your pizza stone will continue to produce perfectly cooked pizzas, offering an authentic taste experience that rivals your favorite pizzeria.

    Troubleshooting Common Issues with Your Pizza Stone

    Addressing Cracks in Your Pizza Stone for Continued Use

    Cracks in your pizza stone can be disheartening, especially after investing time in mastering the art of using a pizza stone at home. However, it’s essential to understand that minor cracks are often normal and will not significantly affect the stone’s performance. These small fissures are typically cosmetic and can occur due to rapid temperature fluctuations or prolonged use.

    If you encounter larger cracks, it may be time to consider replacing the stone. While small cracks won’t impede functionality, larger ones can disrupt heat distribution and lead to uneven cooking. Regularly inspecting your stone can help you identify potential issues early, allowing for timely intervention and prevention.

    To mitigate future cracking, ensure that you’re allowing the stone to cool gradually before cleaning, as sudden temperature shocks are a primary cause of damage. Additionally, maintaining consistent care practices will prolong the life of your stone, enabling it to continue delivering delicious pizzas.

    Preventing Pizza from Sticking to the Stone for Effortless Removal

    Sticking can be a frustrating issue when exploring how to use a pizza stone at home. When your pizza adheres to the stone, it can lead to an unsightly mess and an unfortunate cooking experience. To prevent sticking, always remember to dust the stone with a generous amount of cornmeal or semolina before placing your dough onto it. This creates a barrier that allows for easy sliding during the transfer and promotes a delightful crunch on the crust.

    Additionally, ensure that your dough is well-floured when you shape it. If the dough is too sticky, it can cause adhesion to the stone, complicating removal. Use flour liberally during the shaping process, but be cautious not to overwork the dough, as this can affect its final texture.

    If you do encounter a sticking issue, a gentle nudge with a spatula can help release it without damaging the pizza. By implementing these strategies, you can enjoy a hassle-free pizza experience, allowing you to focus on the delightful toppings and flavors that make each pizza unique.

    Perfecting Your Pizza Crust for Restaurant-Quality Results

    Achieving a flawless crust is the holy grail of pizza-making, and understanding the key elements can help you master how to use a pizza stone at home. The first and most crucial factor is ensuring your oven is fully preheated, alongside the pizza stone. This step is vital, as a hot stone provides the instant heat necessary to create that coveted crispy bottom while retaining moisture in the toppings.

    Another critical aspect is the dough itself. A well-made dough should have the right balance of ingredients, allowing for elasticity and structure. This balance ensures your crust rises adequately during cooking, resulting in the perfect airy texture you desire.

    Consider experimenting with different cooking times and temperatures based on your preferences. Some may prefer a slightly softer crust, while others enjoy a robust crunch. A good practice is to monitor the pizza closely, observing the crust’s color and texture as it cooks.

    By honing these techniques and paying attention to detail, you can achieve a crust that rivals those found in traditional pizzerias, bringing the authentic taste of Italy directly to your home kitchen.

    Managing Uneven Heating in Your Oven for Consistent Cooking Results

    Uneven heating can lead to disappointments when creating pizzas, particularly when navigating how to use a pizza stone at home. If you find that certain areas of your pizza are cooking faster than others, it’s crucial to rotate your pizza halfway through the cooking time. This practice ensures even heat distribution, allowing every part of your pizza to receive equal treatment.

    It’s also important to ensure that your oven is functioning correctly. An oven thermometer can help diagnose temperature inconsistencies, enabling you to adjust your cooking times accordingly. If your oven has hot spots, consider using a pizza stone with a thicker base, as it can help regulate temperature more effectively.

    Regular maintenance of your oven can also contribute to even heating. Periodically clean the oven to remove food residue and grease, maintaining efficient airflow and heat distribution, ensuring every pizza comes out perfectly cooked. By incorporating these strategies, you’ll be well on your way to achieving pizza perfection in your kitchen.

    Keeping Your Pizza Stone Clean and Well-Maintained for Longevity

    Maintaining the cleanliness of your pizza stone is essential for preserving its quality and ensuring each pizza is as delicious as the last. After every use, allow the stone to cool completely before cleaning. This critical step prevents thermal shock and potential cracking.

    Once cooled, use a spatula or scraper to gently remove any stuck-on food. A stiff brush can help dislodge stubborn bits, but avoid using soap or soaking the stone in water. The porous nature of the stone can absorb these substances, affecting future flavors in your pizzas.

    For persistent stains, consider gently scrubbing the area with a damp cloth, but ensure the stone is thoroughly dry before storing it. Regular cleaning will help maintain the stone’s performance and enhance your overall pizza-making experience, ensuring that you can consistently create perfect pizzas.

    Discovering Innovative Pizza Recipes and Flavor Combinations

    Exploring Unique Flavor Profiles for Your Pizza Creations

    One of the most thrilling aspects of mastering how to use a pizza stone at home is the opportunity to experiment with various recipes and flavor combinations. Beyond traditional pizzas, consider venturing into gourmet toppings or alternative bases. For instance, a dessert pizza featuring Nutella, fresh fruits, and a sprinkle of icing sugar can provide a delightful end to a meal, showcasing the versatility of your pizza stone.

    Incorporating globally inspired toppings can also elevate your pizza-making game. Imagine a Thai-inspired pizza with peanut sauce, shredded chicken, and fresh cilantro, or a Middle Eastern twist featuring lamb, tzatziki, and roasted vegetables. The possibilities are endless, and each recipe can reflect the diverse culinary influences from around the world.

    Moreover, don’t shy away from using alternative flours, such as chickpea or cauliflower, to create gluten-free bases that appeal to a broader range of dietary preferences. This experimentation allows you to tailor your creations to accommodate various tastes and dietary needs, making your pizza nights even more inclusive and enjoyable for all.

    Innovating by Combining Unique Ingredients for Extraordinary Pizzas

    Embracing creativity is essential when exploring how to use a pizza stone at home. Combining unexpected ingredients can lead to delightful surprises. For example, consider blending gourmet cheeses like gorgonzola with traditional mozzarella for a rich flavor profile, or incorporate seasonal vegetables to enhance freshness and taste.

    Experimenting with different sauces can also add depth to your pizza. Instead of the classic tomato sauce, try using pesto, barbecue sauce, or even a drizzle of balsamic glaze to elevate your dish and surprise your guests.

    Engaging with local markets can inspire your pizza toppings. Seasonal produce not only enhances flavor but also supports local agriculture, making your pizza experience both delicious and community-focused. By sourcing fresh ingredients, you can create pizzas that are not only satisfying but also celebrate the diversity of global cuisines.

    Creating Memorable Experiences with Interactive Pizza Nights

    Consider hosting a pizza night as a fun and interactive way to explore how to use a pizza stone at home. Invite friends and family to join in on the culinary adventure, providing a variety of doughs, sauces, and toppings for everyone to create their unique masterpieces.

    This communal experience encourages creativity and collaboration, with guests sharing their flavor combinations and techniques. You could even set up a mini-competition for the best pizza, motivating everyone to step out of their comfort zones and try new ideas.

    Hosting a pizza night not only creates memorable experiences but also fosters a sense of community around cooking and sharing food. By embracing this tradition, you’ll find that making pizzas becomes not just a process but a celebration of culture and collaboration, enhancing your culinary journey.

    Frequently Asked Questions About Using a Pizza Stone

    Can I use any oven with a pizza stone?

    Yes, you can utilize a conventional oven or even a grill. However, ensure that the oven can reach high temperatures for optimal cooking results.

    How do I know when my pizza is fully cooked?

    Your pizza is done when the crust is golden brown, the cheese is bubbling, and the toppings appear cooked but not burnt, indicating perfect readiness.

    Is it safe to wash my pizza stone with soap and water?

    No, avoid using soap, as the stone is porous and can absorb it. Instead, clean with a dry brush or scraper to maintain quality.

    What distinguishes a baking stone from a pizza stone?

    While both serve similar purposes, pizza stones are generally thicker and specifically designed to withstand high temperatures and absorb moisture more effectively.

    What can I do if my pizza dough keeps sticking to the stone?

    Ensure your dough and the pizza stone are well-floured. Consider dusting with cornmeal or semolina to create a non-stick surface, preventing sticking.

    What is the expected lifespan of my pizza stone?

    With proper care, a pizza stone can last many years. Regular cleaning and avoiding thermal shock will significantly contribute to its longevity.

    Can I place frozen pizza directly on a pizza stone?

    Yes, you can place frozen pizza directly on the preheated stone. Adjust cooking times accordingly based on the pizza’s size and thickness for optimal results.

    Can I use my pizza stone for baking bread?

    Absolutely! A pizza stone is excellent for baking bread as it helps create a crispy crust due to even heat distribution, enhancing the baking process.

    How do I re-season my pizza stone?

    You don’t need to season your pizza stone. Please keep it clean and dry after each use to maintain its surface and performance.

    What should I avoid placing on my pizza stone?

    Avoid using metal utensils, immersing them in water, or applying soap, as these actions can damage the stone and affect its functionality.

    Connect with us on Facebook!

    The post How to Use a Pizza Stone at Home: A Simple Guide appeared first on https://cookinggods.com

    The Article Using a Pizza Stone at Home: Your Simple Guide Was Found On https://limitsofstrategy.com

  • BBQ Competition Menu Strategies for Winning Success

    BBQ Competition Menu Strategies for Winning Success

    Proven Techniques for Selecting Top-Quality Meats for Your BBQ Competition Menu

    Designing an outstanding BBQ competition menu requires more than just personal taste; it demands a deep understanding of the specific qualities that judges look for in every dish. The essence of BBQ competitions lies in the careful selection of meats, including beef, pork, and chicken, each showcasing their own distinct characteristics and judging criteria. To truly captivate judges, it’s crucial to combine popular flavors with premium selections that will undoubtedly stand out among the competition.

    Evaluating Your Meat Options: Choosing Between Beef, Pork, or Chicken for BBQ Success

    Judges evaluating beef brisket, pork ribs, and marinated chicken at a BBQ competition.

    The exciting realm of BBQ competitions across the United States showcases beef, pork, and chicken, each with its own unique flavor profiles and textures that set them apart from competitors. Judges critically examine key factors such as tenderness, flavor, and overall presentation of the meat, making it essential to choose the right cuts that excel in these areas. For instance, beef brisket is a favorite among competitors due to its rich flavor and ability to absorb smoky flavors beautifully. In contrast, pork ribs are judged on their adherence to the bone and the sweetness of the sauce used. Meanwhile, chicken, especially thighs and wings, opens up avenues for creative marinades or rubs that can significantly enhance the dish.

    Each type of meat demands a specific approach, both in terms of preparation and presentation. For example, slow-cooking brisket is essential to adequately render the fat, resulting in a tender bite that judges will crave. Conversely, chicken requires careful attention to moisture retention, particularly with high-heat cooking methods that can quickly dry it out.

    Discovering High-Quality Cuts for BBQ Competition Success

    The caliber of your meat is critical in crafting a BBQ competition menu that stands out amidst fierce competition. Obtaining cuts from reputable suppliers ensures that you receive meat that is fresh, flavorful, and well-marbled. Marbling, the intramuscular fat that enhances flavor and tenderness, is an important factor to consider. Cultivating strong relationships with local butchers or farmers can grant you access to the finest cuts available, a crucial element for competing at the highest level in BBQ.

    Furthermore, being knowledgeable about different meat grades, such as USDA Choice and Prime, can significantly impact the outcome of your dishes. Prime cuts, while often more expensive, typically yield superior results in terms of texture and flavor. Exploring local farmers’ markets or specialty meat shops can also unveil exciting opportunities to discover unique, high-quality cuts tailored for BBQ enthusiasts.

    Access Exclusive Audio Insights for Deeper Understanding!


    Enhancing Cooking Techniques for Outstanding BBQ Results

    Every cooking method—whether smoking, grilling, or slow cooking—presents unique challenges and opportunities for flavor enhancement. Mastering the specific techniques associated with each style is crucial to achieving optimal results in your BBQ dishes. For example, smoking is often regarded as the pinnacle of BBQ, requiring meticulous timing and temperature control to achieve perfection. Preparing meats with rubs or marinades beforehand allows flavors to penetrate deeply, significantly enriching the final dish.

    On the other hand, grilling typically involves quick, high-heat methods that demand precise timing to prevent overcooking. Each meat cut may require different approaches; tougher cuts can benefit from an overnight marinade, while more delicate meats like chicken can be ready for the grill after a brief soak in a flavorful marinade.

    Ultimately, mastering the preparation of various meats for different cooking styles empowers you to maximize flavor and tenderness—two essential elements in ensuring your entries shine in a competitive arena.

    Boosting Flavor with Expertly Crafted Rubs and Marinades for BBQ Excellence

    BBQ meats on the grill, coated in flavorful rubs and marinades, surrounded by swirling smoke.

    Designing a remarkable BBQ competition menu requires more than simply selecting quality meat; the use of rubs and marinades plays an instrumental role in enhancing flavors and achieving succulent results. Mastering these components can elevate your dishes beyond the competition, leaving a memorable impact on even the most discerning judges.

    Creating Your Distinctive Signature Rubs for BBQ Mastery

    Your unique signature rub can be the game-changing factor that transforms a standard BBQ dish into an extraordinary culinary experience. Crafting exclusive blends of spices and herbs is both an art and a science, and understanding how each flavor interacts with the meat is vital. A well-designed rub should enhance the natural flavors of the meat without overwhelming them, allowing the inherent qualities to shine through.

    Strive for a balance between sweet and savory elements when developing your rubs. For instance, a combination of brown sugar, paprika, and garlic powder can create a base that caramelizes beautifully during cooking. A hint of cayenne or black pepper can introduce the perfect level of heat. Experimentation is key; do not hesitate to explore different spice combinations to discover that ideal blend that reflects your unique style.

    Additionally, it’s crucial to apply the rub generously and allow it to rest for several hours or even overnight. This resting period promotes flavor integration into the meat, resulting in a harmonious taste that can truly captivate judges.

    Perfecting Your Marinade Recipes for Maximum Flavor Infusion

    Marinades serve not only to impart flavor but also to tenderize the meat and retain moisture throughout the cooking process. Crafting the ideal marinade requires a careful balance of acidity, oil, and spices. For example, a marinade based on vinegar or citrus can effectively break down tough fibers, yielding a more tender bite.

    It’s crucial to consider marination time based on the specific cut of meat. While chicken can thrive with a brief soak of about 30 minutes to an hour, tougher cuts like brisket may benefit from an overnight marinade for optimal flavor absorption and tenderness. This is where the dynamics of BBQ truly shine, as one marinade can yield vastly different outcomes depending on the meat used.

    When crafting your marinade recipes, focus on the overarching flavor profile you wish to achieve. For instance, a sweet and tangy marinade could beautifully complement pork, while a savory, herbaceous marinade might be perfect for chicken. By understanding the characteristics of each meat type, you can design marinades that enrich rather than overshadow the unique flavors of your BBQ dishes.

    Striking the Perfect Balance of Sweet and Savory in BBQ Creations

    BBQ chef balancing sweet and savory flavors while grilling meats with vibrant rubs and marinades.

    The secret to enchanting judges lies in achieving a harmonious balance between sweet and savory flavors in your rubs and marinades. It’s a delicate interplay between sugar and spice, where an excess of one can easily overpower the other. A well-rounded flavor profile resonates with a diverse group of judges and significantly elevates the overall dining experience.

    When formulating your rubs and marinades, carefully consider how various ingredients interact. For example, pairing sweet elements like honey or maple syrup with savory components such as soy sauce or garlic powder can create a complex flavor that tantalizes the palate. This balance is particularly important in BBQ, where sweetness is often expected and appreciated.

    Engaging in experimentation is essential; don’t hesitate to try unconventional combinations. You may find that a splash of citrus juice or a dash of Worcestershire sauce can elevate your BBQ dish to new culinary heights. Achieving this perfect balance will not only appeal to judges but also leave a lasting impression on their taste buds.

    Elevating Flavor through Expert Smoking Techniques

    Smoking is a traditional method that adds a depth of flavor to meats that is challenging to replicate with other cooking techniques. Mastering the intricate nuances of smoking can vastly enhance your BBQ competition menu and impress judges with your expertise in this time-honored culinary art.

    Selecting the Ideal Wood for Smoking Your Meats

    Choosing the appropriate wood for smoking can greatly influence the quality of your BBQ dish. Different wood types impart unique flavors, making it essential to understand which varieties complement your chosen meat. For instance, hickory imparts a strong, smoky flavor that pairs excellently with beef, while applewood offers a milder, sweeter essence that beautifully complements both pork and chicken.

    It’s important to experiment with various wood types to discover combinations that create distinctive and appealing flavor profiles. Combining different woods, such as mesquite with cherry wood, can yield a more nuanced flavor that judges may find particularly appealing.

    Additionally, consider the size and form of the wood you are using; chunks, chips, and logs each produce different smoking outcomes. They burn at varying rates, so understanding how to utilize them effectively can help maintain consistent smoke and heat levels throughout the cooking process.

    Mastering Temperature and Smoke Control for Optimal BBQ

    Mastering the art of smoking goes beyond selecting the right wood; managing temperature and smoke levels is equally crucial for success. The ideal smoking temperature generally ranges between 225°F and 250°F, ensuring that the meat cooks evenly while absorbing the desired smoky flavors.

    Using a reliable thermometer is essential for monitoring temperatures. Many competitors invest in digital smokers with precise controls, but traditional methods can yield excellent results with sufficient practice. Smoke levels are also critical; too much smoke can lead to bitterness, while too little can leave the meat lacking that signature BBQ flavor.

    Timing plays a vital role as well. Understanding how long to smoke various cuts of meat is essential to avoid overcooking and ensure that each piece is tender and bursting with flavor. With experience, you can master the delicate balance of heat, smoke, and time to create BBQ that could take home championships.

    Understanding the Right Timing for Smoking Different Meats

    Grasping the ideal smoking durations for various meats is crucial for achieving perfect tenderness and flavor. Each cut demands different lengths of time to yield the ideal bite. For instance, ribs typically require 4-6 hours, while brisket can take anywhere from 10 to 14 hours, depending on its size and thickness.

    Monitoring the internal temperature of the meat is vital to avoid undercooking or overcooking. The USDA recommends a minimum internal temperature of 165°F for poultry, while beef and pork can be safely enjoyed at 145°F. However, BBQ enthusiasts know that the real magic happens at higher temperatures, especially for tougher cuts, where longer cooking times break down fat and collagen, resulting in that melt-in-your-mouth tenderness.

    Creating a smoking timeline can help ensure everything is ready in time for competition. Counting backward from your target serving time allows you to schedule when to start smoking each meat, facilitating a smooth and organized cooking process.

    Experimenting with Unique Wood Combinations for Distinctive Flavors

    Combining different woods can be a transformative strategy for achieving exceptional smoking results. Through experimentation with various wood combinations, you can develop unique flavor profiles that leave a lasting impression on judges. For instance, blending oak and cherry wood can create a robust smoke flavor softened by subtle sweetness, making it ideal for brisket.

    Consider the foundational flavors you aim to impart. Stronger woods like mesquite can overpower more delicate meats if not balanced with milder options. Think creatively about how different woods can complement each other and the meats you are smoking to achieve your desired flavor profile.

    Maintain a log of your experiments; this will assist in identifying which wood combinations yield the best results for your specific BBQ dishes. With time and practice, you’ll refine your technique, resulting in a signature flavor that truly distinguishes your BBQ offerings.

    Enhancing Smoked Meats with Expertly Crafted Marinades and Rubs

    Enhancing the flavor of your smoked meats through the application of marinades and rubs is essential for creating a standout BBQ competition menu. These flavor-enhancing elements can accentuate the natural smokiness of the meat while providing a multi-layered flavor profile that judges will recognize and appreciate.

    Applying rubs prior to the smoking process can create a delightful crust that locks in moisture and flavor. Meanwhile, marinades work by infusing flavor into the meat while breaking down tough fibers, resulting in a moist and tender final product.

    When using these techniques together, consider how they interact during cooking. The rub may caramelize and form a delicious outer layer, while the marinade remains absorbed within, providing a dynamic eating experience filled with layers of flavor that entice judges to come back for more.

    Grilling Techniques That Propel BBQ Competition Success

    Grilling is an essential skill for anyone aspiring to craft an impressive BBQ competition menu. Understanding various grilling techniques and mastering the art of temperature control can greatly impact the success of your entries in competitions.

    Direct vs. Indirect Grilling: Choosing the Best Method for Your Meats

    Identifying when to utilize direct versus indirect grilling can substantially influence the final results of your BBQ dishes. Direct grilling involves cooking food directly over the heat source, making it ideal for quick-cooking items like burgers, steaks, and assorted vegetables. This method allows for a beautiful sear and promotes the coveted Maillard reaction, leading to rich flavors and appealing textures.

    Conversely, indirect grilling is better suited for larger cuts of meat that require longer cooking times, such as ribs or whole chickens. By positioning the meat away from the heat source, the grill creates an oven-like environment, allowing for even cooking without charring. This method effectively preserves moisture while achieving that quintessential smoky flavor.

    A solid understanding of your grill’s setup—whether gas, charcoal, or pellet—is critical for mastering these techniques. Each type possesses unique characteristics that can influence cooking times and results, so invest time in familiarizing yourself with how your equipment performs in various scenarios.

    Mastering Temperature Management on the Grill

    Temperature control is vital for preventing burnt or undercooked meat, particularly in a competitive context. Learning to effectively manage grill temperatures will enable you to achieve consistent cooking results across all your dishes.

    Using a reliable instant-read thermometer can assist in monitoring internal temperatures, ensuring everything cooks to perfection. It’s also essential to keep an eye on the grill’s surface temperature, especially when grilling over direct heat. Targeting a temperature range suitable for the specific meats you are preparing will optimize your grilling outcomes.

    Moreover, preheating your grill is essential for achieving that perfect sear on your meats. A hot grill not only prevents sticking but also locks in juices, resulting in a flavorful crust that judges will love.

    Achieving the Perfect Sear for Restaurant-Quality BBQ

    Searing is a technique that enhances not only the visual appeal of your BBQ dishes but also locks in moisture and flavor. Mastering the art of achieving that perfect sear can elevate your competition entries, impressing judges with both taste and presentation.

    Start by ensuring your grill is adequately preheated before placing your meats on it. A hot grill creates an attractive crust while keeping the interior juicy and tender. Avoid overcrowding the grill; leaving space between items allows for proper airflow and even cooking.

    Timing plays a critical role in this process. Avoid flipping meats too frequently; instead, allow them to sear for the appropriate length of time. A good rule of thumb is to sear steaks for approximately 3-4 minutes per side, depending on their thickness. Once you achieve that gorgeous crust, move the meat to a cooler area of the grill for indirect cooking to finish.

    With practice, you’ll become adept at the nuances of searing, enabling you to create visually stunning and deliciously flavorful BBQ dishes that stand out in competitions.

    Curating Side Dishes That Elevate Your BBQ Experience

    While the main meats take center stage in any BBQ competition menu, the significance of side dishes cannot be overlooked. Thoughtfully selected sides can enhance your offerings and showcase your creativity, ensuring a memorable dining experience for judges.

    Classic BBQ Side Dishes That Stand the Test of Time

    Timeless sides such as coleslaw, baked beans, and potato salad are staples at BBQ competitions throughout the United States. These dishes complement the richness of BBQ meats while providing a refreshing contrast in flavor and texture.

    For instance, coleslaw adds a crunchy, creamy element that balances the savory, smoky flavors of the meat. A tangy vinegar-based slaw can elevate the overall meal experience, cleansing the palate between bites. Similarly, baked beans introduce a hint of sweetness and heartiness, serving as a perfect counterpoint to the richness of smoked meats.

    When creating your classic sides, consider adding your unique twist to make them memorable. Perhaps a spicy jalapeño cornbread or a creative version of traditional potato salad could leave a lasting impression on judges while still honoring classic BBQ side dishes.

    Innovative Side Dish Ideas That Differentiate Your BBQ

    To set your BBQ menu apart from the competition, consider experimenting with inventive side dish ideas that are unexpected yet complementary. Grilled vegetables, for instance, can add a colorful and nutritious aspect to your presentation while enhancing the overall flavor profile of your meal.

    Think about incorporating seasonal produce in innovative ways. A grilled zucchini and corn salad with a zesty lime dressing can provide a vibrant and refreshing addition to rich BBQ meats. Alternatively, a unique take on traditional sides, such as a quinoa salad with roasted sweet potatoes and cranberries, can attract attention while appealing to health-conscious judges.

    Being bold with your side dishes can create memorable pairings that make your competition entries truly unforgettable. Think outside the box; unexpected sides might just become conversation starters among judges.

    Creating Flavor and Texture Harmony in Your BBQ Menu

    Crafting a successful BBQ menu necessitates a harmonious balance of flavors and textures across all dishes. The sides should complement the main meats, enhancing the overall experience for judges without overshadowing the star attraction.

    Aim to incorporate a mix of creamy, crunchy, and savory elements. For example, pairing rich brisket with a light salad or a tangy slaw creates a pleasing contrast. Additionally, featuring a variety of textures—from the creamy richness of potato salad to the crisp freshness of grilled asparagus—can keep each bite exciting and enjoyable.

    Consider how each side dish contributes to the overall meal. Strive for a cohesive theme that connects your dishes, whether through flavor profiles or ingredient choices. This holistic approach will ensure that your BBQ competition menu impresses judges from start to finish.

    Health-Conscious Side Dish Options to Broaden Your Appeal

    With the growing trend toward health-conscious eating, offering lighter and more nutritious side dish options can cater to a broader range of judges and diners at your BBQ competition. Grilled fruits, such as peaches or pineapples, can impart a sweet, smoky flavor that pairs beautifully with rich meats.

    Quinoa salads filled with vibrant vegetables and a light vinaigrette can provide a refreshing counterpoint to heavier BBQ dishes, showcasing your ability to craft a well-rounded menu. Vegetable skewers not only deliver flavor but also offer visual appeal, allowing you to incorporate seasonal produce while providing a healthy alternative to traditional sides.

    As you develop these healthier options, consider which flavors and textures will best complement your main meats. This thoughtful approach can expand your appeal and create an unforgettable dining experience for all.

    Presentation Techniques That Captivate Judges

    Presentation is often just as important as flavor in BBQ competitions. Judges frequently taste with their eyes first, making it crucial to design visually appealing dishes that stand out from the crowd.

    Strategic Plate Arrangement for Maximum Visual Appeal

    The arrangement of meats and sides on the plate can significantly influence judges’ first impressions. Strive for an organized and visually captivating presentation that showcases each component of your dish.

    Consider utilizing a variety of colors and heights to create visual intrigue. Stacking ribs or arranging sliced brisket on a bed of vibrant coleslaw can lead to an eye-catching presentation. Pay close attention to portion sizes; ensure each plate is consistently sized and properly portioned according to competition standards.

    Choosing high-quality plates and utensils can also enhance your presentation. Rustic wooden boards can impart a traditional BBQ feel, while elegant white plates can lend a more sophisticated touch. Your choice of dishware should complement the overall theme of your menu.

    Enhancing Your Dishes with Thoughtful Garnishes

    Garnishes can provide the final touch that elevates your presentation to new heights. Fresh herbs, edible flowers, or a sprinkle of colorful spices can enhance the visual allure of your dishes.

    When selecting garnishes, opt for those that complement the flavors of your dish without overshadowing them. A sprig of cilantro can enhance a spicy pork dish, while a dash of paprika can add a vibrant pop of color to chicken.

    Always ensure that garnishes are both edible and relevant to the dish. Judges will appreciate thoughtful touches that enhance both the appearance and flavor of your BBQ entries.

    Ensuring Consistency Across All Competition Entries

    Consistency is paramount in BBQ competitions, particularly concerning presentation. Every plate presented should maintain similar portion sizes and arrangements, creating a cohesive experience for judges.

    To achieve this consistency, practice your plating techniques in advance. Develop a template or method for assembling each dish, ensuring that every entry reflects the same level of care and attention to detail.

    Furthermore, consider how you will keep your dishes warm and presentable until serving time. Having a clear plan for transporting and presenting your BBQ entries will help maintain the overall quality and visual appeal of your dishes.

    Comprehending Judging Criteria in BBQ Competitions

    Successful BBQ competition entries encompass more than just flavor; understanding the judging criteria is essential for distinguishing your dishes from the competition. Familiarizing yourself with what judges prioritize can help tailor your menu for optimal success.

    Evaluating Taste and Flavor Profiles for Maximum Impact

    The primary criterion for judges is undoubtedly the taste and flavor profile. This encompasses not only the primary flavors of the meat but also how well your rubs, marinades, and sides enhance the overall experience. Judges seek a well-rounded flavor that highlights the quality of the meat while integrating your unique culinary touch.

    Balancing flavors is critical; ensure your dishes are not overly salty, sweet, or spicy. A harmonious blend of flavors will resonate more with judges, creating a memorable tasting experience.

    Additionally, consider the complexity of flavors. Depth and nuance can elevate a dish, making it more intriguing and enjoyable to consume. Judges appreciate when competitors take risks and craft unique combinations that surprise and delight the palate.

    Assessing Texture and Tenderness of Meats for Optimal Scoring

    Texture and tenderness are essential aspects that judges evaluate when scoring BBQ dishes. The meat should be tender and juicy, providing a satisfying mouthfeel. Overcooked or dried-out meat can lead to disappointment and lower scores, making it vital to master cooking times and techniques.

    Regarding sides, consider how textures can complement the main dishes. A crispy slaw can create an appealing contrast to tender meats, while a creamy potato salad adds richness and depth. Strive for variety in textures to enhance the overall dining experience for judges.

    Being mindful of these elements will help you design a BBQ competition menu that not only satisfies taste buds but also impresses judges with its overall quality.

    Presentation and Creativity: Key Factors in Judging Success

    Judges also evaluate the presentation and creativity of your dishes. A visually captivating plate can leave a strong first impression, while innovative flavor combinations and ingredients can help set your entries apart.

    Do not hesitate to take creative risks; thinking outside the box can yield unique flavor pairings and eye-catching presentations. This approach not only captures judges’ attention but also showcases your culinary skills and passion for BBQ.

    By understanding and adhering to these judging criteria, you can create a BBQ competition menu that dazzles judges and increases your chances of winning awards.

    Frequently Asked Questions About BBQ Competitions

    What types of meat are optimal for BBQ competitions?

    Beef brisket, pork ribs, and chicken thighs are popular choices. Each type possesses specific qualities that can impress judges, making it essential to select high-quality cuts.

    How should I prepare my meats for competition?

    Meats should be brined, marinated, or rubbed ahead of time to enhance their flavor and tenderness. Proper preparation techniques vary by cooking method, so plan accordingly.

    What are the best types of wood for smoking?

    Common choices include hickory, apple, and cherry. Each type of wood has its distinct flavor, so choose based on the meat you’re smoking and your flavor preferences.

    How can I create a signature rub for my BBQ?

    Experiment with various spice blends to balance sweet and savory elements. Incorporate unique ingredients, such as brown sugar or citrus zest, to develop a distinctive flavor profile.

    What side dishes should I include in my BBQ competition menu?

    Classic sides like coleslaw and baked beans are expected, but innovative options like grilled vegetables or quinoa salads can showcase creativity and complement your main meats.

    How can I enhance the presentation of my BBQ dishes?

    Focus on clean, organized plating and utilize garnishes to enhance visual appeal. Consider color contrasts and varying heights to create an inviting presentation.

    What do judges prioritize in BBQ competitions?

    Judges assess taste, tenderness, texture, presentation, and creativity. A well-rounded entry that excels in these areas can impress judges and increase your chances of winning.

    How critical is timing when smoking meats?

    Timing is essential for achieving the right tenderness and flavor. Overcooked or undercooked meat can result in lower scores, so monitor cooking times closely to ensure optimal results.

    Can I mix different woods when smoking?

    Experimenting with wood combinations can produce unique flavor profiles. Mixing woods helps complement the meat and achieve your desired flavor intensity.

    What is the best way to manage grill temperatures?

    Utilize a reliable thermometer to monitor both grill and meat temperatures. Preheating your grill and adjusting vents for charcoal grills are essential for maintaining the desired heat.

    Connect with us on Facebook for More BBQ Tips!

    The Article How to Create a BBQ Competition Menu: Winning Strategies appeared first on Pitmasters Arsenal.

    The Article BBQ Competition Menu: Strategies for Success Was Found On https://limitsofstrategy.com

  • BBQ Marinade Injector: A Complete Guide to Making Your Own

    BBQ Marinade Injector: A Complete Guide to Making Your Own

    Discover the Best Marinade Injector for Exceptional BBQ Flavor

    Exploring Marinade Injector Options for Optimal Flavor Enhancement

    Detailed view of BBQ marinade injectors, showcasing syringe and multi-needle types alongside rich marinades and large cuts of meat.

    Embarking on your BBQ journey necessitates the careful selection of a marinade injector, as it plays a critical role in achieving juicy and flavorsome results. In the diverse U.S. market, you will primarily encounter two categories of BBQ marinade injectors: syringe injectors and needle injectors. Syringe injectors are especially popular among novices due to their user-friendly design, making the marinating process streamlined and efficient. The process is straightforward: pull back the plunger, fill it with your preferred marinade, and inject it directly into the meat. In contrast, needle injectors are equipped with multiple openings along their sides, enabling superior flavor distribution. This design is particularly advantageous for larger cuts of meat such as pork shoulders or briskets, ensuring that the marinade penetrates deeply into the meat fibers and amplifies the overall flavor.

    Understanding the distinctions between these injector types is vital for maximizing flavor infusion and ensuring a remarkable BBQ experience. Many needle injectors come with a selection of needle gauges, which can greatly influence the size of the marinade particles you can inject. If your marinade contains chunky components, opting for a wider gauge needle is paramount. Conversely, for smoother marinades, a standard needle should suffice. This knowledge empowers you to make informed decisions that will elevate your BBQ skills and impress your guests.

    Moreover, making a well-informed choice also involves assessing the design and functionality of the injector. Some advanced models feature integrated pressure gauges that facilitate better control during the injection process. Investing in a high-quality injector can significantly enhance your BBQ experience, especially when preparing for large gatherings or competitive events. The right tool will enable you to create tender, flavorful meats that not only impress your guests but also leave them yearning for more.

    Key Material Factors for Selecting a Safe and Durable Marinade Injector

    When choosing your BBQ marinade injector, prioritizing safety and durability is essential. Always opt for injectors crafted from food-grade materials to guarantee the health and safety of your guests. Stainless steel is a premier choice due to its resilience against the rigors of outdoor cooking while remaining resistant to rust and corrosion. While plastic injectors may appear lighter and more affordable, they often lack the durability required to withstand high heat and frequent use, which can compromise their effectiveness over time.

    In addition to the material, it’s crucial to check whether the injector is dishwasher safe. This feature can drastically simplify your cleanup process, particularly after a long day of BBQing. Furthermore, an injector designed for easy disassembly and thorough cleaning will help prevent flavor contamination from previous marinades, ensuring that every BBQ session is unique and memorable.

    Additionally, consider the safety features of your injector. An injector with a sturdy grip can enhance safety and efficiency, reducing the risk of slipping and potential injuries while injecting into larger meat cuts. Always prioritize quality over cost; a reliable injector can provide years of service, making it a worthwhile investment for any serious BBQ aficionado.

    Ready to Explore More?


    Evaluating Size and Capacity to Meet Your Marinade Injector Requirements

    The size and capacity of your BBQ marinade injector should align with the types of meat you commonly prepare. For smaller cuts like chicken breasts or pork chops, a compact injector is typically sufficient. However, if your grilling often involves larger cuts, such as briskets or whole turkeys, it is prudent to invest in a larger-capacity injector that can accommodate more marinade, facilitating comprehensive flavor penetration.

    A standard injector generally holds around 2 to 3 ounces of marinade. For larger pieces of meat, consider selecting injectors with a capacity of 4 ounces or more. This will allow you to effectively inject the marinade, minimizing the need for multiple refills and streamlining your overall cooking process.

    Additionally, the length of the needle can significantly influence your injector choice. Longer needles are ideal for thicker cuts, while shorter needles are more manageable for smaller pieces. Keep in mind that using an injector that is too small for your needs can lead to frustration, while one that is excessively large may become cumbersome and difficult to maneuver.

    Boosting Convenience: Prioritizing User-Friendliness and Cleaning Ease

    Ergonomic BBQ injector featuring detachable, dishwasher-safe parts, showcased against a vibrant grilling backdrop.

    In the realm of BBQ, convenience is key to a successful and enjoyable cooking experience. An injector that is straightforward to operate will streamline your preparations and enhance your overall grilling endeavors. Seek injectors that feature ergonomic designs that provide a comfortable grip, making them easy to handle, especially during extended grilling sessions.

    Cleaning your injector should never be an afterthought. An effectively designed injector with detachable parts allows for thorough cleaning of each component with ease. Many high-quality injectors available today are dishwasher safe, significantly alleviating the post-BBQ cleanup burden. Ensure that the injector you select is easy to disassemble, as this will be beneficial for your cleaning routine and will help maintain optimal hygiene.

    To preserve the longevity of your injector and ensure maximum cleanliness, it is crucial to clean it immediately after each use. Leftover marinades can dry and clog the injector, complicating its usability in future BBQ sessions. A simple blend of warm water and mild soap will effectively clean the injector, ensuring it’s primed for your next culinary adventure.

    Creating Your Perfect Marinade for BBQ Triumph

    Choosing Ingredients Wisely to Elevate Flavor Profiles

    Crafting an exceptional BBQ marinade begins with selecting the right mix of ingredients that enhance the flavor profile of your meat. In American BBQ culture, common components include a variety of herbs, spices, and liquids. For instance, Worcestershire sauce, soy sauce, and vinegar create a zesty base that complements various meats beautifully. Additionally, incorporating elements like brown sugar or honey for sweetness can foster a caramelized crust during grilling, enhancing both flavor and texture.

    Herbs and spices are vital for amplifying the marinade’s profile. Fresh herbs such as rosemary, thyme, and cilantro can impart vibrant flavors to your meat. If fresh options are unavailable, dried herbs can serve as a suitable substitute. Moreover, spices like paprika, cumin, or chili powder can introduce distinctive regional flavors, connecting your BBQ to specific American styles such as Tex-Mex or Kansas City BBQ.

    When crafting your marinade, consider regional influences. For example, Southern BBQ often favors a sweeter flavor profile, while Western styles tend to emphasize more savory combinations. Tailor your ingredient selection based on the specific type of meat you are marinating; for instance, a rich beef brisket may thrive with a bold marinade filled with robust flavors, whereas chicken could shine with citrus and herb-infused options for a refreshing twist.

    Mixing Your Marinade for Uniform Flavor Distribution

    A hand whisking a vibrant marinade in a glass bowl on a rustic wooden table.

    Once you’ve gathered your ingredients, the next crucial step is blending the marinade to achieve a harmonious mixture. Start by combining your liquid components, such as oils, vinegars, or sauces, in a mixing bowl to create a cohesive base. After the liquids are well-mixed, gradually incorporate your dry ingredients like spices and herbs. Whisking or stirring until fully combined ensures that the flavors are evenly distributed throughout the marinade.

    If you’re feeling adventurous in the kitchen, consider using a blender to create smoother marinades, particularly if you’re including fruits like pineapples or citrus. This technique will help achieve a consistent texture, allowing the flavors to meld beautifully for a truly delicious outcome.

    During the mixing process, it’s essential to monitor the consistency of your marinade. A mixture that is too thick may struggle to penetrate the meat effectively, while one that is too thin might not adhere properly. Aim for a balanced texture that allows for easy injection while still clinging to the meat’s surface. Always taste your marinade before injecting it into the meat; this will allow you to adjust flavors and ensure a delectable result.

    Ensuring Safe and Proper Storage for Your Marinades

    Adhering to U.S. food safety guidelines is crucial when preparing marinades to prevent spoilage and foodborne illnesses. Always wash your hands and any surfaces that come into contact with raw meat and marinade. This practice significantly reduces the risk of cross-contamination, which is a common issue that can lead to foodborne pathogens and health risks.

    When storing your marinade, it’s best to place it in a sealed container and refrigerate it, especially if you plan to let it sit for an extended period before use. Most marinades can be safely stored for up to 48 hours, but always check for any signs of spoilage, such as off odors or discoloration, if you’re unsure about their safety.

    If you’ve prepared a batch of marinade that you won’t use immediately, consider freezing it in ice cube trays for later application. This way, you can thaw only what you need for future BBQ sessions. Remember to label your containers with the date to keep track of freshness and avoid using expired marinades.

    Mastering Injection Techniques for BBQ Excellence

    Finding Optimal Injection Points for Maximum Flavor Saturation

    To achieve maximum flavor penetration, understanding the ideal injection points when injecting marinades into meat is crucial. Different cuts of meat possess varying structures, meaning that the best injection points may differ. For instance, when working with a pork loin, target the thickest part of the cut, as this area presents the best opportunity for flavor absorption, ensuring that each bite is bursting with deliciousness.

    Another effective approach involves injecting at several points around the meat. For larger cuts, such as brisket or turkey, employing a grid pattern when injecting guarantees that the marinade disperses evenly throughout the entire cut. This technique enhances overall flavor and tenderness, making each bite a savory delight that will impress your guests.

    It’s also vital to space your injection points appropriately. Over-saturating one area can leave surrounding sections bland and uninspired. Strive for a balanced approach that enables the marinade to distribute evenly throughout the meat, crafting a consistent flavor experience with every bite.

    Understanding the Right Injection Depth for Flavor Infusion

    Grasping the appropriate depth for injecting the marinade is just as important as knowing where to inject. The goal is to reach the center of the meat without saturating the outer layer excessively. Typically, you should insert the needle roughly halfway into the thickness of the meat to ensure that the marinade penetrates deeply enough to enhance flavor and tenderness without causing the outer layer to become overly soggy and unappetizing.

    When injecting, be cautious not to pull the needle out too quickly. If you withdraw the needle too rapidly, the marinade can escape, leading to insufficient flavor infusion. Instead, withdraw the needle gradually while simultaneously injecting to ensure a smooth infusion of flavors. This technique can significantly influence the overall quality of your BBQ meats, resulting in delectable outcomes.

    For larger cuts, like a whole turkey, you may need to adjust your technique by injecting at various depths throughout the bird, concentrating on both the breast and thigh areas to ensure a uniform flavor profile that tantalizes the taste buds.

    Determining the Ideal Injection Frequency for Optimal Flavor Saturation

    Establishing the right frequency for injections is crucial, especially when working with different types of meat. For smaller cuts, such as chicken breasts or pork chops, a single injection is often adequate. However, for larger cuts like briskets or pork shoulders, consider injecting the meat multiple times to thoroughly saturate it with flavor, ensuring that each bite is rich and savory.

    As a general guideline, aim to inject approximately every two inches across the meat. This method promotes even marinade distribution while maximizing flavor absorption. Keep in mind that over-injecting can lead to a mushy texture, so it’s important to find a balance and avoid excess.

    Additionally, take into account the type of marinade you are using. Thicker marinades may require fewer injection points, while thinner marinades can be injected more liberally. Experimentation will help you discover the perfect balance for your BBQ needs and preferences.

    Selecting the Right Injection Solutions for Varied Meats

    Choosing the appropriate marinades or solutions for different meats is a game-changer in BBQ preparation. For beef, selecting marinades high in acidity can help break down tough fibers, resulting in a tender, flavor-rich dish. Ingredients like citric acid from lime juice or vinegar can effectively facilitate this process, ensuring a delectable outcome.

    When marinating poultry, milder marinades that incorporate citrus and herbs can enhance the meat’s natural flavors without overwhelming them. For pork, a blend of sweet and tangy flavors often yields excellent results, as the sugar caramelizes beautifully during grilling, creating an enticing crust.

    Moreover, consider the cooking method when selecting your marinade. If grilling, a marinade that emphasizes bold flavors may be suitable, while slow-roasting might benefit from a subtler blend. Tailoring your injection solutions to specific meat types and cooking methods ensures a mouthwatering BBQ experience that keeps everyone coming back for more.

    Delicious Marinade Recipes to Enhance Your BBQ Skills

    Crafting a Classic American BBQ Marinade

    A classic American BBQ marinade is a blend of rich flavors that elevate meats to new culinary heights. Begin with a base of Worcestershire sauce, which imparts a savory depth. Combine this with brown sugar, not only for sweetness but also to create a beautiful caramelized crust on the grill that enhances the visual appeal of your dish.

    To prepare this marinade, mix 1 cup of Worcestershire sauce, 1/2 cup of brown sugar, and 1/4 cup of apple cider vinegar in a mixing bowl. Stir until the sugar dissolves completely, resulting in a smooth mixture. Incorporate minced garlic, a tablespoon of smoked paprika, and a teaspoon of black pepper for added complexity and depth. This marinade works exceptionally well with ribs and chicken, ensuring that every bite bursts with flavor and leaves a lasting impression on your palate.

    For optimal results, allow your meat to marinate for several hours or even overnight before grilling. This extended marinating time enables the flavors to penetrate deeply, resulting in tender, juicy outcomes that are perfect for any BBQ gathering.

    Creating a Zesty Spicy Marinade for Added Flavor

    For those who seek a bit of heat, a spicy marinade can elevate your BBQ experience to exhilarating new heights. In Southern U.S. cuisine, marinades often incorporate hot sauce and cayenne pepper to create an exciting flavor profile. To whip up a spicy marinade, combine 1 cup of olive oil, 1/2 cup of hot sauce, two tablespoons of honey, and a tablespoon of cayenne pepper.

    Whisk these ingredients together and taste to adjust the heat level according to your preference. This marinade works wonders with chicken wings and pork tenderloin, adding depth and excitement to your grilling endeavors that will leave your guests wanting more.

    Allow your meat to marinate for at least two hours, but for the best flavor infusion, letting it sit overnight is recommended. The heat will penetrate deeply into the meat, making every bite a thrilling experience that tantalizes the palate.

    Refreshing Herb-Infused Marinade Recipe for Bright Flavors

    Herb-infused marinades are perfect for those who appreciate the freshness of natural ingredients. Utilizing fresh herbs like rosemary and thyme, this marinade enhances the flavor of meats, particularly chicken and lamb. Start by combining 1/2 cup of olive oil, 1/4 cup of lemon juice, two tablespoons of chopped fresh rosemary, and two tablespoons of chopped fresh thyme.

    Thoroughly mix the ingredients and adjust the quantities to suit your taste preferences. This marinade is most effective when allowed to sit for a minimum of four hours, ensuring that the herbs infuse their aromatic essence into the meat, resulting in delightful flavor.

    When grilling, the herbs will caramelize slightly, producing a captivating aroma and taste that will leave your guests eager to know your secret recipe. The refreshing qualities of the herbs combined with the zest of lemon create an unforgettable BBQ experience.

    Creating an Asian-Inspired Marinade for a Unique Twist

    Asian flavors offer a distinctive twist to traditional BBQ, making an Asian-inspired marinade a fantastic option for those looking to experiment. Featuring soy sauce, garlic, and ginger, this marinade is both savory and aromatic. To create it, mix 1/2 cup of soy sauce, 1/4 cup of rice vinegar, two tablespoons of sesame oil, two minced garlic cloves, and one tablespoon of grated ginger.

    This marinade pairs beautifully with chicken and beef, creating an unforgettable fusion of flavors that will impress your guests. Allow your meat to marinate for a minimum of two hours, though letting it sit overnight will yield even better results, allowing the flavors to meld perfectly.

    When grilling, the sugars in the marinade will caramelize, producing a savory glaze that enhances the overall experience. This recipe is perfect for pairing with various side dishes, transforming your BBQ into an exciting culinary adventure that delights the senses.

    Understanding Marinating Times for Ideal Results

    Quick Marinating Strategies for Busy Schedules

    Short marinating can be a lifesaver for those with hectic lifestyles, enabling you to create flavorful meals in minimal time. A quick marinade lasting 30 minutes to 2 hours can enhance the flavors of chicken, pork chops, or even vegetables without overwhelming them. Focus on using acidic ingredients like vinegar or citrus juice, which penetrate the meat quickly without altering its texture.

    For instance, a straightforward marinade of lemon juice, olive oil, and herbs can work wonders on chicken breasts in just 30 minutes. While short marinating can impart flavor, it’s important to note that it won’t yield the same depth as longer marinating times. Use this method when you’re pressed for time but still wish to enjoy delicious BBQ.

    As a helpful tip, consider preparing your marinade in advance and storing it in the refrigerator for convenient use. This allows you to quickly toss your meat into the marinade as you fire up the grill, saving time while still delivering impressive flavors that will wow your guests.

    Long Marinating for Deep Flavor Infusion

    Long marinating is essential when working with tougher cuts of meat, such as brisket and pork shoulder, which benefit from extended flavor infusion. Allowing your meat to marinate for 8 hours or overnight can help break down connective tissue, resulting in tender, juicy bites that are sure to impress.

    When crafting your marinade for long marinating, consider incorporating ingredients that can withstand the extended duration, such as yogurt or buttermilk. These ingredients not only contribute flavor but also effectively tenderize the meat for an unbeatable dining experience.

    For those concerned about overpowering flavors, balance stronger ingredients with milder ones to create a harmonious blend that enhances the overall taste without overwhelming the palate. Remember, longer marinating times are ideal for cuts that require extra time to absorb flavors and become tender and delectable.

    Temperature Factors for Effective Marinating

    Temperature plays a crucial role in marinating times and overall effectiveness. In warmer climates, marinating times may need to be shortened to prevent spoilage, while in cooler temperatures, marinating can take longer since the cold environment slows the infusion process.

    If you’re preparing food in a hot climate, it’s advisable to marinate your meat in the refrigerator to ensure safety. As a general guideline, when marinating in warm environments, limit your time to 2 hours for delicate proteins like fish and chicken. For sturdier meats like beef and pork, you can extend marinating times to 4 or even 8 hours, depending on the marinade and desired flavor intensity.

    Understanding the influence of temperature on marinating will help you make informed decisions, ensuring your BBQ is not only delicious but also safe for consumption, ultimately allowing you to enjoy your culinary adventures to the fullest.

    Essential Safety Tips for an Enjoyable BBQ Experience

    Avoiding Cross-Contamination During BBQ Preparation

    Ensuring food safety is paramount when injecting marinades into raw meat. Start by thoroughly washing your hands both before and after handling raw meat. Always use separate cutting boards and utensils designated for raw meat to avoid cross-contamination with other foods, thus safeguarding everyone’s health.

    When injecting, take care to insert the needle only into the meat and avoid contact with surfaces that could harbor bacteria. If you are using a syringe-style injector, ensure it is clean before each use to maintain hygiene and prevent the spread of foodborne illnesses. After injecting, promptly discard any remaining marinade that has come into contact with raw meat to mitigate the risk of foodborne illness.

    Additionally, be mindful of your workspace. Clean and sanitize surfaces that have come into contact with raw meat or marinade before preparing other food items. Following these guidelines will help ensure that your BBQ experience is not only delicious but also safe for everyone involved, allowing you to fully enjoy your grilling endeavors with peace of mind.

    Effective Cleaning Methods for Your Marinade Injector

    Cleaning your BBQ marinade injector is essential for maintaining hygiene standards and ensuring longevity. After each use, disassemble the injector to clean every component thoroughly. Start by rinsing the injector with warm water to remove any leftover marinade, followed by washing it with a mild soap solution to ensure a thorough clean.

    For stainless steel injectors, you can often place them in the dishwasher for a more comprehensive clean. However, always check the manufacturer’s instructions to avoid damaging the injector. For plastic components, hand washing is generally recommended to ensure their longevity and functionality.

    Make it a habit to clean your injector immediately after each use. This practice prevents residue from hardening, making future cleaning considerably easier. A well-maintained injector not only lasts longer but also guarantees that every BBQ is a fresh and flavorful experience, allowing you to impress your guests every time.

    Proper Storage Techniques for Your Marinade Injector

    Correctly storing your BBQ marinade injector is crucial for maintaining hygiene and functionality. After cleaning, ensure the injector is thoroughly dried before storing it in a cool, dry location. Avoid placing it in damp areas, as moisture can encourage bacterial growth and compromise the effectiveness of the injector.

    For marinades, always store them in airtight containers in the refrigerator if they are not being used immediately. Most homemade marinades can be safely kept for 2-3 days; however, always check for signs of spoilage before using them. If you have excess marinade, consider freezing it in ice cube trays for future use. Be sure to label the containers with the date to keep track of freshness.

    By adhering to these safety tips for both your injector and marinades, you can ensure a safe and enjoyable BBQ experience while minimizing the risk of foodborne illnesses, allowing you to focus on creating delicious meals that everyone will love.

    Enhancing Flavor in Your BBQ Creations

    Incorporating Complementary Seasonings to Enrich Flavor Profiles

    Enhancing the flavor of your BBQ isn’t solely about the marinade; complementary seasonings play a vital role in crafting a remarkable dish. Consider using rubs and sauces that harmonize with your marinade to create a cohesive flavor profile. For example, pairing a spicy marinade with a sweet rub can create a delightful contrast that tantalizes the taste buds, enriching the overall BBQ experience.

    Rubs add depth to the outer layer of the meat, while your injected marinade ensures that flavor penetrates deeply. Experiment with various combinations to discover what works best for your palate and preferences. For those who enjoy culinary experimentation, consider keeping a flavor journal to track which seasonings pair well with different meats and marinades for future reference.

    Don’t shy away from layering flavors. Utilizing a marinade, followed by a dry rub, and finishing with a sauce can create a multi-dimensional taste experience that keeps guests coming back for more. This approach allows for a rich and satisfying BBQ that showcases your culinary creativity.

    Exploring Diverse Marinating Techniques for Flavor Enhancement

    Various marinating techniques can significantly enhance the depth of flavors in your dishes, making each BBQ memorable. One popular method is the “brine and inject” technique, where the meat is first brined to infuse it with moisture and flavor, and then the marinade is injected. This ensures that the meat remains juicy during cooking, regardless of the heat source you choose.

    Another effective technique involves using the “tenderizing method,” where you score the surface of the meat before injecting. This scoring allows the marinade to penetrate more effectively, ensuring that the flavors meld beautifully into the meat fibers for a truly delectable outcome.

    Experimenting with different methods can help you unlock new flavors and textures in your BBQ creations, contributing to your growth as a BBQ enthusiast. Each technique presents unique opportunities for flavor enhancement, so don’t hesitate to explore and try them out.

    Selecting Cooking Methods to Elevate Flavor Profiles

    The cooking method you select can significantly impact the flavor profiles of your BBQ dishes. Techniques such as grilling, smoking, roasting, and braising offer unique advantages and can beautifully complement the flavors of your injected marinades.

    Grilling is the most popular method for BBQ, allowing for direct heat and charred flavors that enhance marinated meats. Smoking infuses a rich, smoky essence that is particularly suitable for tougher cuts, such as brisket or pork shoulder, creating an unforgettable flavor experience.

    Roasting can enhance the natural sweetness of marinades, while braising adds depth through slow cooking in flavorful liquids. Each cooking method has its strengths, so consider experimenting with various techniques to discover which ones yield the best flavor for your favorite marinades and meats.

    Your Questions Answered: Frequently Asked Questions About Marinade Injectors

    What is a BBQ marinade injector?

    A BBQ marinade injector is a specialized tool designed to inject marinades directly into meat, allowing for deeper flavor penetration and enhanced moisture retention during cooking, resulting in a more flavorful end product.

    How do I clean my marinade injector effectively?

    To clean your marinade injector, disassemble it and rinse all parts with warm water. Use a mild soap solution to clean each component, ensuring that no marinade residue remains. Some injectors may be dishwasher safe, but always refer to the manufacturer’s instructions for guidance.

    Can I use marinades with chunks in my injector?

    It is advisable to use smooth marinades, as chunky marinades can clog the injector. If you wish to include chunks, make sure they are small enough to pass through the needle without obstruction.

    How long should I marinate meat for optimal results?

    Marinating times vary based on the type of meat; small cuts can typically be marinated for 30 minutes to 2 hours, while larger cuts benefit from marinating overnight for maximum flavor infusion and tenderness.

    What types of meat benefit most from marinade injections?

    Larger cuts of meat, such as brisket, pork shoulder, turkey, and chicken, can greatly benefit from injection, as this technique enhances flavor and moisture retention, resulting in juicy and savory dishes.

    Is it safe to freeze leftover marinade?

    Yes, you can freeze leftover marinade in airtight containers or ice cube trays for later use. Just ensure that it has not come into contact with raw meat to maintain food safety.

    Is marinating necessary for all types of meats?

    Not all meats require marinating; however, it is beneficial for tougher cuts of meat. Tender cuts may require less or no marination, instead focusing on seasoning to achieve optimal flavor enhancement.

    What ingredients should I avoid using in marinades?

    Avoid using overly salty or acidic ingredients, as they can break down the meat excessively, resulting in a mushy texture. Striking a balance in your marinade is vital for effective flavor infusion.

    How can I determine if my marinade is effective?

    Effective marinades enhance the flavor and tenderness of the meat, leading to juicy, flavorful dishes. Taste the marinade before using it and adjust the flavors as needed to ensure a well-balanced outcome.

    Can I use an injector for non-meat items?

    Absolutely! BBQ injectors can also be used to infuse flavor and moisture into various items, including vegetables, fruits, and even tofu, offering exciting culinary possibilities.

    Connect with us on Facebook for more BBQ tips and recipes!

    The Article How to Create a BBQ Marinade Injector: A Step-by-Step Guide appeared first on https://pitmastersarsenal.com

    The Article BBQ Marinade Injector: Step-by-Step Creation Guide Was Found On https://limitsofstrategy.com

  • Stress-Free Rice Cooking: Your Simple Success Guide

    Stress-Free Rice Cooking: Your Simple Success Guide

    Master the Art of Selecting the Perfect Rice for Every Dish

    Choosing the ideal rice is a vital culinary skill that can significantly enhance your cooking and ensure you prepare rice effortlessly. With a plethora of rice varieties available, understanding the distinctive qualities of each type can elevate your meals into culinary delights that are both satisfying and enjoyable. Each rice variety offers its unique nutritional benefits and specific cooking techniques, thus expanding your culinary horizons. By picking the right rice for your dish, you are making a crucial move toward achieving culinary excellence and tantalizing your taste buds.

    Explore the Diverse World of Rice Varieties and Their Uses in Cooking

    A pot of steaming rice on a stove in a serene kitchen, with cooking instructions on a chalkboard.

    Many individuals perceive rice as a singular ingredient, but it actually encompasses a broad spectrum of varieties, each boasting its own unique characteristics and culinary applications. Long-grain rice varieties such as Basmati and Jasmine are cherished for their fluffy texture, making them perfect for pilafs, salads, or as a standalone side. In contrast, medium-grain rice tends to be slightly stickier, making it suitable for sushi or creamy risottos. Short-grain rice, often found in Asian cuisine, tends to clump together, making it ideal for sushi rolls or rice balls requiring a cohesive texture.

    Aromatic rice varieties like Basmati and Jasmine are celebrated not only for their inviting fragrances but also for their exceptional ability to absorb flavors, transforming any dish they accompany into a fragrant culinary masterpiece. By familiarizing yourself with these distinctions, you can make informed decisions about which rice to select for your specific cooking needs, thereby enriching your overall gastronomic experience.

    Understand the Importance of Grain Length and Its Impact on Cooking Techniques

    The length of rice grains significantly affects cooking time and the necessary water-to-rice ratio. For long-grain rice, a typical water-to-rice ratio is two cups of water for every cup of rice, cooking it until it becomes tender yet fluffy. On the other hand, medium-grain rice may require slightly less water, while short-grain rice often necessitates more due to its higher starch content, leading to a stickier texture that many recipes demand.

    Grasping these nuances allows you to consistently achieve perfectly cooked rice. For instance, when preparing a comforting risotto, using Arborio rice—a short-grain variant—will yield the creamy texture that this dish is renowned for. In contrast, light and fluffy Basmati rice pairs beautifully with pilafs or serves as an elegant side dish, significantly enhancing both the presentation and flavor of your meal.

    Enhance Your Culinary Creations with Gourmet and Specialty Rice Varieties

    By stepping beyond conventional rice options, gourmet and specialty varieties can greatly amplify your culinary creations and introduce exciting flavors to your meals. Consider incorporating black rice or red rice into your cooking repertoire; these varieties not only add vibrant colors to your plate but are also rich in antioxidants. Often referred to as “forbidden rice” and “nutty rice,” respectively, they can serve as visually striking bases for salads or side dishes, enhancing both nutritional value and aesthetic appeal.

    Don’t overlook aromatic rice varieties either. Fragrant options like Jasmine and Basmati can elevate your dining experience with their delicate aromas, enhancing the enjoyment of any meal they accompany. By experimenting with these specialty rice options, you can unlock a new realm of flavors and textures, making your culinary journey both more enjoyable and less stressful.

    Implement Proven Techniques for Preparing Rice Perfectly Every Time

    A serene kitchen with a glass pot of steaming, perfectly cooked rice on a modern stove.

    Preparation plays a critical role in the successful cooking of rice, whether you’re an experienced chef or a kitchen novice. Mastering essential rice preparation techniques ensures you can achieve perfect results every time. From rinsing to precise measuring, each step is crucial to attaining the fluffy and flavorful rice you desire.

    The Essential Step of Rinsing Rice for Optimal Cooking Outcomes

    Rinsing rice is an important step that many home cooks often overlook. This simple yet effective technique eliminates excess starch, which can lead to clumping and a gummy texture in the finished rice. To start, place your rice in a fine-mesh strainer and rinse it under cold water until the water runs clear. Although this process may take a few minutes, the results are well worth the effort.

    In addition to improving texture, rinsing enhances the rice’s flavor by washing away surface impurities. This step is particularly significant for varieties like Basmati or Jasmine, where achieving a light and airy texture is the goal. When preparing rice in larger quantities, rinsing becomes even more critical to ensure consistent results across all servings, leading to a more enjoyable dining experience.

    Unlock the Advantages of Soaking Rice Prior to Cooking

    Soaking rice before cooking is a time-honored practice celebrated in various cultures, and for good reason. This technique can dramatically improve the texture of your rice while also reducing cooking time. Soaking allows the grains to absorb water, leading to a more even cooking process. For varieties like Basmati, soaking for at least 30 minutes can yield exceptionally fluffy results.

    Furthermore, the soaking process helps unlock the rice’s natural flavors, making it more aromatic and enjoyable to eat. In cultures where rice is a dietary staple, such as in Indian or Thai cuisines, soaking is a common method that elevates the dish. Consider incorporating soaking into your cooking routine to enhance your meals and alleviate the stress associated with rice preparation.

    Perfect the Technique of Accurate Measurement for Rice and Water

    A clear pot of perfectly cooked rice on a stove in a serene kitchen, with a guidebook open to rice cooking instructions.

    Achieving the ideal rice-to-water ratio is a crucial skill in how to cook rice without stress. While the common guideline suggests using two cups of water for every one cup of rice, this can vary based on the specific rice type you are using. For instance, sticky rice may require slightly more water, while certain long-grain varieties might need a little less.

    Investing in a reliable measuring cup can significantly enhance your cooking experience, as precision is key for successful results. Many experienced chefs advocate for the finger method: once you’ve added the water, place your finger on top of the rice; the water level should reach your first knuckle. This technique helps avoid common pitfalls and ensures perfectly cooked rice without guesswork, making the cooking process more enjoyable.

    Selecting the Ideal Rice for Specific Dishes

    Understanding the various types of rice and their ideal applications can greatly simplify your cooking process. For example, if you’re preparing a stir-fry, opting for long-grain rice ensures that the grains remain separate and fluffy. For rich dishes like risotto, Arborio rice is preferred due to its high starch content, which contributes to a creamy, luscious texture.

    When selecting rice for particular recipes, consider the overall flavor profile and texture you aim to achieve. For instance, pairing aromatic Jasmine rice with a spicy curry creates a delightful contrast that enhances your dining experience. The right choice of rice can elevate your meals from ordinary to extraordinary, making your cooking journey not just more enjoyable but also less stressful.

    Diverse Cooking Techniques to Prepare Rice with Perfection

    The method you choose for cooking rice can greatly influence the final result. With an array of techniques available, understanding which method to employ for different situations can save you time and alleviate the anxiety often associated with rice cooking.

    Classic Stovetop Cooking Techniques for Flawless Rice

    Cooking rice on the stovetop is a traditional method that many rely on due to its simplicity and minimal equipment requirements—a pot with a lid and a heat source are all you need. Begin by rinsing and soaking your rice if desired. Then, add the correct amount of water, bringing it to a boil before covering the pot and reducing the heat to maintain a gentle simmer.

    Monitoring the cooking time is vital; for long-grain rice, this typically takes around 15-20 minutes. Avoid lifting the lid too frequently, as this can release steam and adversely affect the cooking process. Once the water is absorbed, allow the rice to sit for a few minutes off the heat before fluffing it with a fork. This classic method allows for hands-on monitoring, reducing the stress associated with cooking rice.

    Achieve Perfect Results with a Rice Cooker

    Rice cookers have transformed the way many people prepare rice, offering a hands-off approach that suits busy lifestyles perfectly. With just a push of a button, you can achieve flawlessly cooked rice every time. The secret lies in using the correct rice-to-water ratio, which is often indicated on the rice cooker itself.

    Many rice cookers also feature functions that allow for steaming vegetables or cooking other grains simultaneously, simplifying meal preparation even further. The automatic shut-off feature alleviates the worry of overcooking, allowing you to focus on other aspects of your meal and significantly reducing kitchen-related stress.

    Effortless Rice Cooking in the Microwave

    If you’re short on time, cooking rice in the microwave can be a quick and effective method. Begin by rinsing the rice and placing it in a microwave-safe bowl. Add the right amount of water, ensuring you follow the recommended ratios, and cover the bowl with a microwave-safe lid or plate. Microwave on high for approximately 10-12 minutes, checking for doneness and adjusting as needed.

    This technique is particularly advantageous for single servings or when you need rice quickly. Microwaving rice can save time and alleviate the stress of cooking, especially when managing multiple tasks in the kitchen.

    Essential Tips and Tricks for Perfect Rice Every Time

    Cooking rice might appear straightforward, yet there are numerous tips and tricks that can enhance your results and make the process more enjoyable. From flavoring techniques to achieving the perfect texture, these insights can turn your rice cooking experience into a culinary triumph.

    Preventing Rice from Sticking Together

    One of the most common challenges encountered while cooking rice is its tendency to stick together. To prevent this, thoroughly rinsing the rice before cooking is essential. Additionally, adding a small amount of oil or butter to the cooking water creates a barrier that helps keep the grains separate.

    Stirring the rice during the initial cooking phase can also help avoid clumping. If you’re using a rice cooker, be cautious not to overfill the pot, as this can lead to sticky rice. By employing these techniques, you can ensure a fluffy, perfectly cooked result every time, boosting your cooking confidence.

    Achieving the Desired Texture for Your Rice

    The texture of rice plays a critical role in determining the overall success of your dish. To achieve rice that is neither too soft nor too firm, it’s essential to follow the recommended cooking times and water ratios specific to the variety you are using.

    Allowing the rice to rest after cooking is equally important. This resting period allows steam to settle, resulting in a more uniform texture. Fluffing the rice with a fork before serving will separate the grains, enhancing the overall presentation. Mastering these techniques will make your rice cooking experience both less stressful and incredibly rewarding.

    Enhancing the Flavor Profile of Your Rice

    Rice serves as a blank canvas, ready to absorb an array of flavors. Simple additions such as fresh herbs, spices, or vegetable broth can elevate plain rice into a culinary masterpiece. For example, cooking rice in coconut milk creates a creamy base that pairs beautifully with tropical dishes.

    Experimenting with seasonings—such as garlic, onion, or bay leaves added to the cooking water—can infuse your rice with enticing aromas. This versatility allows you to tailor the flavor of rice to complement any meal, making it a delightful addition to your culinary repertoire and enhancing the overall dining experience.

    Avoiding Common Mistakes in Rice Cooking

    Steering clear of common mistakes is essential for achieving stress-free rice cooking. Many home cooks face similar challenges that can lead to unsatisfactory results, but with a few simple tips, you can effectively navigate these common issues.

    Preventing Overcooked Rice

    Overcooking rice often results in an undesirable mushy texture. To avoid this, closely monitor cooking times and water ratios. Utilize a kitchen timer to track how long the rice has been cooking, and taste a few grains for doneness a few minutes before the suggested time.

    If you find that the water has been absorbed but the rice remains firm, add a splash of water, cover it, and allow it to steam for a few additional minutes. This technique can help salvage overcooked rice in many instances, ensuring you achieve the ideal texture every time.

    Preventing Undercooked Rice

    Undercooked rice can be frustrating, especially when you’re eager to enjoy your meal. To avoid this issue, it’s vital to adhere to the recommended cooking times and water ratios specific to the type of rice you’re using.

    When in doubt, taste a few grains to check their doneness. If you discover that your rice is still crunchy, simply add a bit more water, cover, and continue cooking for a few more minutes. This precaution will help ensure that your rice is perfectly tender and enjoyable.

    Avoiding Incorrect Water Ratios for Perfect Rice

    Using incorrect water ratios can lead to a range of issues, from soggy rice to a dry, uncooked mess. Each type of rice has unique properties and required water ratios, making it crucial to follow specific guidelines for the selected rice variety.

    Investing in a reliable measuring cup and adhering to the recommended ratios for long, medium, and short-grain rice is essential. This attention to detail will set you up for success, allowing you to cook rice without the stress of uncertainty while delivering delicious results each time.

    Troubleshooting Common Rice Cooking Problems

    Even with the best preparation and cooking methods, problems can still arise when cooking rice. Knowing how to troubleshoot these issues can save your dish and enhance your cooking experience, making it more enjoyable overall.

    Salvaging Burnt Rice with Ease

    If you find yourself with burnt rice, don’t despair. The first step is to salvage what you can—gently transfer any unburned rice to a new pot, leaving the burnt layer behind. To prevent this mishap in the future, always use a pot with a heavy bottom to distribute heat evenly.

    You might also consider adding a splash of water to the burnt rice and covering it for a few minutes, which may help to steam and loosen the burnt bits. This approach is a practical way to salvage your meal and minimize waste while allowing you to enjoy your rice without compromising quality.

    Fixing Soggy Rice Issues

    Soggy rice can be disappointing, but all is not lost. If your rice has absorbed too much water, consider spreading it out on a baking tray and allowing it to dry out for a few minutes in a low oven. This method allows moisture to escape, restoring some texture to your rice.

    Alternatively, you can transform soggy rice into fried rice by stir-frying it in a pan with fresh vegetables and soy sauce. This creative solution can turn your soggy mishap into a delightful dish, showcasing your resourcefulness in the kitchen while minimizing waste.

    Reviving Cold Rice for a Delicious Meal

    Leftover rice can lose its appeal, but reviving it is easier than you might think. One effective method is to sprinkle a few drops of water over the cold rice, then microwave it for a minute or two. The steam generated will help rehydrate the rice, restoring its desired texture.

    Alternatively, creating a stir-fry with fresh vegetables, proteins, and a splash of soy sauce can breathe new life into your cold rice. This delicious transformation can elevate what might have been a mundane leftover meal into something exciting and enjoyable.

    Addressing Undercooked Rice Challenges with Ease

    If you discover that your rice is still hard or crunchy after the cooking time, don’t fret. Simply add a small amount of water, cover the pot, and continue cooking for a few more minutes. This technique allows the rice to absorb the extra moisture it needs to cook evenly and thoroughly.

    If you’re using a rice cooker, the automatic settings may not account for variations in rice type. Checking for doneness occasionally can help you avoid undercooked rice in the future, ensuring a consistently enjoyable meal experience.

    Effectively Managing Overcooked Rice Challenges

    Overcooked rice can be a challenge, but there are ways to salvage it. If your rice has become mushy, consider repurposing it in soups or as a base for creamy dishes where the texture won’t be as noticeable.

    Another clever solution is to make rice pudding—this allows you to transform overcooked rice into a delightful sweet treat. By embracing these creative solutions, you can navigate the challenges of rice cooking with confidence and flair.

    Best Practices for Storing and Reheating Rice

    Understanding the proper storage and reheating techniques is essential to maintaining the quality of your cooked rice. Whether you’re meal prepping or saving leftovers, knowing the best practices will ensure that your rice remains delicious and safe to eat.

    Safe Storage Techniques for Cooked Rice

    Correctly storing cooked rice is vital to prevent foodborne illnesses. After cooking, allow the rice to cool to room temperature before transferring it to an airtight container. Store the rice in the refrigerator for up to four days, ensuring it remains fresh and safe for consumption.

    If you plan to store rice for an extended period, consider freezing it. Spread the cooled rice onto a baking sheet and freeze until solid. Once frozen, transfer the rice to a sealable plastic bag, removing as much air as possible. This method prevents freezer burn and allows you to enjoy cooked rice at your convenience.

    Effective Techniques for Reheating Rice

    Reheating rice properly is crucial to preserving its original texture and flavor. The microwave is a popular option, but be sure to add a splash of water and cover the bowl to create steam. This technique ensures that your rice remains moist and fluffy during the reheating process.

    Alternatively, reheating on the stovetop with a bit of water can also yield excellent results. Simply place the rice in a saucepan, add water as needed, and heat gently while stirring until warmed through. This method offers a more controlled reheating process, helping maintain the rice’s texture and flavor.

    Smart Methods for Freezing Cooked Rice

    Freezing cooked rice can save time and provide a convenient meal option later on. To freeze effectively, ensure the rice has cooled completely before transferring it to a freezer-safe container. Portioning the rice into individual servings can also simplify thawing only what you need at any given time.

    When you’re ready to use the rice, simply remove it from the freezer and reheat directly from frozen, adding a little water to prevent it from drying out. This technique allows for quick meals on busy days without sacrificing quality or taste, making your cooking experience more enjoyable.

    Creative Ways to Incorporate Rice into Your Culinary Creations

    Rice is an incredibly versatile ingredient that can shine both as a side dish and as a main component in various meals. Exploring different methods to incorporate rice into your cooking can enhance your culinary repertoire and delight your palate.

    Rice as a Flavorful Complement to Side Dishes

    Rice often serves as an ideal accompaniment to a wide array of dishes, enhancing flavors and providing balance to the overall meal. Whether it’s fragrant Jasmine rice served alongside spicy curries or herbed Basmati rice paired with grilled meats, the possibilities are truly limitless.

    Consider enhancing plain rice by adding sautéed vegetables, fresh herbs, or a squeeze of citrus to elevate its flavor profile. These simple additions can transform your side dish into a vibrant and flavorful element of your meal. Experimenting with different flavor combinations allows you to customize your rice to suit any occasion, making it an exciting part of your culinary adventures.

    Making Rice the Star of Main Courses

    From hearty casseroles to delectable stir-fries, rice frequently takes center stage in many beloved dishes worldwide. For example, a traditional Spanish paella showcases rice as the star ingredient, soaking up the rich flavors of saffron and seafood, resulting in an unforgettable dining experience.

    In Asian cuisines, fried rice is a popular method to utilize leftover rice, combining it with fresh vegetables and proteins for a satisfying and flavorful meal. The adaptability of rice enables it to complement various ingredients and cooking styles, making it an indispensable component in countless recipes, enhancing the overall enjoyment of your meals.

    Addressing Common Questions About Cooking Rice

    What type of rice is best for making sushi?

    Short-grain rice, particularly varieties like Japonica, is ideal for sushi because its high starch content makes it sticky and easier to shape into rolls.

    Can rice be cooked in a slow cooker?

    Yes, rice can be cooked in a slow cooker. Simply add the appropriate water ratio, cover, and allow it to cook on low for about 2-3 hours until tender.

    Is soaking rice before cooking necessary?

    Soaking rice is not always necessary, but it can enhance texture and reduce cooking time, especially for long-grain varieties that benefit from this method.

    How can I prevent rice from boiling over during cooking?

    To prevent boiling over, ensure you use a pot that is large enough for the amount of rice and water, and maintain the heat at medium to avoid rapid boiling.

    Is it safe to reheat leftover rice?

    Yes, leftover rice can be safely reheated. Make sure it is heated thoroughly to kill any bacteria, adding moisture as needed to prevent it from drying out.

    What’s the best way to store leftover rice?

    Leftover rice should be stored in an airtight container in the refrigerator for up to four days or frozen for longer storage, allowing for convenient future meals.

    How much water is needed for cooking brown rice?

    Typically, brown rice requires a water-to-rice ratio of about 2.5:1, and it generally takes longer to cook compared to white rice varieties.

    Can I add spices to the cooking water for extra flavor?

    Absolutely! Adding spices or herbs to the cooking water can infuse the rice with additional flavor, greatly enhancing the overall dish.

    What should I do if my rice is undercooked?

    If your rice is undercooked, add a bit more water, cover the pot, and continue cooking until the grains are tender and fully cooked.

    Why does my rice turn out sticky after cooking?

    Rice can become sticky if it’s overcooked or if the wrong type of rice is used. Rinsing the rice before cooking can also help reduce stickiness, ensuring a better texture.

    Stay connected with our latest news and tips on Facebook!

    The post How to Cook Rice Without Stress: A Simple Guide appeared first on https://cookinggods.com

    The Article Cook Rice Stress-Free: Your Simple Guide to Success Was Found On https://limitsofstrategy.com

  • Crispy Skin on Smoked Chicken: The Complete Guide

    Crispy Skin on Smoked Chicken: The Complete Guide

    Unlock the Secrets to Achieving Perfectly Crispy Skin on Smoked Chicken

    Choosing the Ideal Chicken for Flavorful Smoking Success

    A chef selecting and preparing a fresh, organic chicken for smoking to achieve crispy skin.

    The first step in achieving irresistibly crispy skin on smoked chicken is selecting the perfect chicken. Opt for a fresh, high-quality bird, ideally free-range or organic, as these selections often yield superior flavor and texture—crucial elements for successful smoking. Once you’ve purchased your chicken, it’s important to pat the skin dry with paper towels. This simple yet vital step helps eliminate excess moisture, which is essential for achieving that elusive crispy skin during the smoking process.

    Excess moisture can lead to steaming instead of crisping, resulting in a less than satisfying outcome. Additionally, consider the weight of your chicken; smaller birds, typically weighing between 3 to 5 pounds, tend to cook evenly. This weight range strikes the perfect balance between juicy meat and delectable crispy skin, enhancing the overall enjoyment of your dish.

    When selecting your chicken, inspect the skin for any blemishes or discoloration. A healthy chicken should exhibit a clean, plump appearance, indicating its freshness. Furthermore, pay close attention to the layer of fat beneath the skin; a substantial fat layer is crucial for rendering moisture, which significantly contributes to achieving that delightful crunch you’re striving for in your smoked chicken.

    Enhancing Flavor and Moisture with Effective Brining Techniques

    Brining is a fundamental technique that serves two essential purposes: enhancing flavor and ensuring moisture retention during the smoking process. To prepare your brine, combine water with salt and sugar, and infuse it with a selection of herbs and spices to elevate the flavor profile. This brine solution allows the chicken to absorb moisture, resulting in a juicier end product that bursts with flavor, captivating the palate.

    Soak your chicken in the brine for at least 4-6 hours, or ideally overnight for the best results. This extended soaking period allows the salt to thoroughly penetrate the meat, ensuring that every bite is infused with rich, savory flavors. It’s crucial to keep the chicken refrigerated during the brining process to prevent any bacterial growth that could jeopardize the safety and quality of your dish.

    After brining, rinse the chicken under cold water to remove any excess salt, then pat it dry with paper towels. This step is crucial; if the skin retains moisture, it will not achieve that desired crispiness during smoking. Brining also creates an opportunity to develop a delicious flavor profile by incorporating various spices or herbs, giving your smoked chicken a unique depth of flavor that sets it apart from the ordinary.

    Transform Your Chicken with a Flavorful Dry Rub

    The secret to an exceptional smoked chicken lies in the seasonings, and a meticulously crafted dry rub is an essential component of this culinary equation. A balanced dry rub can significantly enhance the flavors of your chicken while aiding in the formation of that coveted crispy skin. Begin with a base of kosher salt and freshly ground black pepper, then incorporate your choice of spices, such as paprika, garlic powder, and onion powder for an added kick.

    Applying the dry rub is an art in itself. Generously coat the entire chicken, ensuring that every nook and cranny is thoroughly covered. This not only imparts flavor but also helps draw moisture out of the skin, creating a protective barrier that encourages crispiness during the cooking process.

    Once the dry rub is applied, allow the chicken to rest for at least 30 minutes. This waiting period enables the flavors to meld and the salt to penetrate the meat fully. For those looking to experiment, consider adding brown sugar for a hint of sweetness or cayenne pepper for an extra kick. The versatility of dry rubs allows you to customize your chicken to suit your taste preferences, making it an ideal choice for family gatherings and barbecues.

    Ensure Even Cooking Through Proper Trussing Techniques

    A trussed chicken ready for even cooking, showcasing a compact shape and promising crispy, golden skin.

    Trussing may appear to be an unnecessary step, but it is essential for ensuring your chicken cooks evenly and maintains its shape. By securing the legs and wings with kitchen twine, you create a compact bird that cooks uniformly, facilitating crispy skin all around.

    To truss your chicken, start by positioning it breast-side up. Tuck the wing tips under the body to prevent them from burning. Then, take a length of kitchen twine, loop it around the chicken’s legs, and tie them together. This not only enhances visual appeal but also prevents the legs from splaying out during the smoking process, promoting a beautifully uniform appearance.

    Trussing promotes consistent cooking, reducing the risk of overcooking certain areas while undercooking others. It also assists in moisture retention, which is crucial for achieving juicy meat beneath that perfectly crispy exterior. When the chicken is fully smoked, its shape will remain intact, yielding an impressive presentation that will surely impress your guests.

    Maximizing Your Smoker Setup for Unmatched Results

    Choosing the Right Smoker for Perfectly Smoked Chicken

    The type of smoker you select can significantly impact your success in mastering how to achieve crispy skin on smoked chicken. For beginners, electric or pellet smokers are excellent choices, offering consistent temperature control and ease of use. These smokers streamline the process, allowing you to focus on flavor development rather than constantly monitoring the temperature.

    Electric smokers are particularly user-friendly, equipped with digital controls that enable you to set your desired temperature with precision. Pellet smokers utilize wood pellets to generate smoke and heat, imparting a rich flavor that beautifully complements chicken.

    If you’re feeling adventurous and wish to explore more traditional methods, charcoal smokers provide a classic experience with the potential for richer flavor complexity. However, they require more attention to maintain optimal temperature and smoke levels. Regardless of your choice, ensure that your smoker is properly ventilated and has sufficient space for air and smoke circulation, which are crucial for achieving that deliciously crispy skin.

    Preparing Wood Chips for Maximum Flavor Enhancement

    Soaked apple and cherry wood chips in a rustic smoker box, ready for smoking chicken.

    Choosing the right wood chips is essential for imparting the desired flavor while smoking your chicken. Fruit woods, such as apple or cherry, are particularly well-suited for poultry, providing a mild, slightly sweet smoke that enhances the chicken’s flavor without overwhelming it.

    Before utilizing wood chips in your smoker, soak them in water for at least 30 minutes. Soaking prevents the chips from igniting too quickly and allows them to smolder, producing a steady stream of flavorful smoke. Once prepared, drain the chips and mix them in with the smoker’s heating elements or place them in a smoke box, depending on your smoker type.

    Feel free to experiment with different wood varieties to discover your preferred flavor profile. Hickory imparts a robust flavor that can be delightful when balanced appropriately, while mesquite, although more intense, can add a unique twist when used sparingly. Each type of wood brings its own characteristics, allowing you to customize your smoked chicken experience to your liking.

    Maintaining the Ideal Temperature for Cooking Success

    Controlling temperature is crucial for mastering the art of smoking chicken. Aim to maintain a steady temperature between 225°F and 250°F. This temperature range allows for slow cooking, ensuring that the meat remains juicy while providing the skin the opportunity to crisp up perfectly.

    To achieve this, use a reliable smoker thermometer to accurately monitor internal conditions. If your smoker has vents, adjust them to regulate airflow, which directly impacts temperature. Opening the vents increases heat, while closing them can decrease it, so finding the right balance is essential for optimal cooking.

    Additionally, avoid placing your chicken directly over the heat source. Instead, position it in a cooler section of the smoker, allowing for indirect cooking. This method helps prevent the skin from burning while promoting even cooking throughout the entire bird.

    Proven Techniques for Achieving Perfectly Crispy Skin on Smoked Chicken

    Initiating Cooking with High Heat for Optimal Crispiness

    To kick off your smoking experience, begin with high heat for the first 30 minutes. This initial burst of heat is critical for mastering how to achieve crispy skin on smoked chicken. High temperatures help to quickly render the fat beneath the skin, promoting that sought-after crispiness that everyone craves.

    During this initial phase, it’s important to monitor the chicken closely to ensure that the skin begins to crisp up without burning. After the first half hour, you can lower the temperature to the ideal smoking range of 225°F to 250°F. This technique allows the chicken to cook thoroughly while maintaining the skin’s texture and integrity.

    Having a high-quality meat thermometer on hand is also beneficial. This tool enables you to check internal temperatures without repeatedly opening the smoker, which can lead to heat loss. Remember, the objective is to strike a balance where the outer skin crisps beautifully while the inner meat retains its juiciness and tenderness.

    Utilizing a Water Pan for Enhanced Moisture Retention

    Incorporating a water pan into your smoking setup can significantly enhance the results. Placing a pan of water inside your smoker helps maintain humidity levels, which is crucial for preventing the chicken skin from drying out too quickly. This added moisture creates a more controlled environment, ensuring that the skin crisps while the meat remains delectably moist.

    The steam generated from the water pan contributes to the cooking process, allowing the chicken to cook evenly without losing its natural juices. This technique also aids in creating a beautiful, glossy finish on the skin, making your smoked chicken visually appealing and enticing.

    To elevate the flavor even further, consider adding herbs, citrus slices, or even beer to the water pan. As the water evaporates, these elements will infuse your chicken with subtle flavors that beautifully complement the smokiness, adding layers of complexity to your dish that will impress your guests.

    Finishing Smoked Chicken with a Broil for Maximum Crispiness

    For the ultimate finishing touch on your smoked chicken, broiling it for a few minutes after smoking can create an irresistible crispy skin. Once the chicken reaches the desired internal temperature of 165°F, transfer it to a preheated broiler. This method exposes the skin to direct heat, enhancing the crispiness even further and giving it that golden-brown finish that makes your smoked chicken truly stand out.

    Keep a close watch on your chicken during this step, as broiling can quickly transition from perfectly crisp to charred. Just a few minutes under the broiler is all you need to achieve that eye-catching finish that will leave your guests eagerly anticipating their first bite.

    This finishing technique not only enhances the texture but also adds visual appeal, making the dish more enticing. The combination of smoky flavor and crispy skin will undoubtedly impress your guests and elevate your dining experience.

    Reapplying a Dry Rub Before Broiling for Enhanced Flavor

    Revisiting the significance of the dry rub, a second application just before broiling can intensify flavors and further enhance crispiness. Ensure that you lightly reapply your dry rub, focusing particularly on areas where the skin appears less seasoned or dull.

    This technique acts as a barrier that aids in further moisture removal during the broiling process. The added salt from the rub will continue to draw moisture from the skin, allowing for maximum crisping potential and flavor enhancement.

    Feel free to experiment with flavors in your rub, adjusting spices according to your preferences. Consider adding a touch of brown sugar or trying different aromatics to create a unique flavor profile that distinguishes your smoked chicken from the rest.

    Scoring the Skin for Enhanced Crispiness

    Scoring the skin of your chicken is a simple yet effective technique that can significantly enhance crispiness. Lightly cutting the skin in a crisscross pattern allows fat to escape, rendering out moisture and making it easier for the skin to crisp up during the cooking process.

    Be cautious not to cut too deep; the goal is to pierce the skin rather than the meat underneath. This technique works particularly well with chickens that have a good layer of fat, as it facilitates the rendering process and contributes to the overall texture.

    In addition to improving texture, scoring the skin can also allow for better absorption of your dry rub. The cuts create channels for the seasoning to penetrate deeply, resulting in a more flavorful and succulent bird. With this technique, you have another tool at your disposal to ensure your chicken comes out perfectly crispy and delicious every time.

    Monitoring Cooking Time for Outstanding Results

    Utilizing a Meat Thermometer for Precise Measurements

    A reliable meat thermometer is indispensable for achieving perfect results in your quest for how to achieve crispy skin on smoked chicken. Insert the thermometer into the thickest part of the chicken, avoiding contact with the bone, which can yield inaccurate readings.

    Aim for an internal temperature of 165°F, which is essential for ensuring your chicken is safe to eat while remaining juicy and tender. Monitoring the temperature throughout the smoking process helps prevent overcooking, which can lead to dry meat and compromised texture.

    Incorporating a digital meat thermometer with an alarm feature can add convenience, allowing you to focus on other aspects of your cook. This way, you can ensure your chicken reaches perfect doneness without the need to constantly check it manually, streamlining your cooking process.

    Accurately Estimating Cooking Time

    Estimating cooking time is a crucial skill for any pitmaster. As a general rule, plan for approximately 3-4 hours of smoking, depending on the size of the chicken and the temperature maintained in the smoker.

    A chicken weighing between 4-5 pounds will typically fit this time frame. However, several factors can influence cooking time, including the specific type of smoker, outdoor temperature, and even humidity levels, all of which can play a role in the overall cooking process.

    Regularly checking the internal temperature is the best way to ensure doneness. Keep in mind that larger birds may require additional time, while smaller birds may cook more quickly. Adjust your plans accordingly, and always prioritize internal temperature over cooking time for the best results.

    Allowing Your Chicken to Rest for Maximum Juiciness

    After your chicken has finished smoking, allowing it to rest is a critical step that should not be overlooked. Resting for 10-15 minutes enables the juices to redistribute throughout the meat, ensuring a flavorful and moist final product that is a delight to taste.

    During this time, the skin will also firm up, which can enhance its crispiness, making every bite even more satisfying. Cover the chicken loosely with aluminum foil to keep it warm while resting, but avoid wrapping it tightly as this can trap steam and soften the skin, negating your hard work.

    This step not only improves texture but also enhances the overall eating experience, as every bite will be succulent and flavorful. Patience is key; a few minutes of waiting will reward you with a chicken that is both delicious and beautifully presented, impressing all who gather around the table.

    Checking for Doneness with Visual Indicators

    The visual appeal of your smoked chicken is just as important as its flavor and texture. A perfectly cooked chicken should exhibit a golden-brown color, a clear skin surface, and juices that run clear when pierced, indicating doneness.

    In addition to relying on your meat thermometer, use visual cues as well. The skin should appear crispy and taut, while the meat should feel firm yet tender to the touch. If you’re still uncertain, consider cutting into the thickest part of the thigh to check for doneness and the absence of any pink meat, ensuring a safe and satisfying meal.

    Serving a perfectly cooked chicken not only ensures a safe meal but also provides an aesthetically pleasing dish that will impress your friends and family, showcasing your skills as a master of barbecue and elevating your reputation in the culinary community.

    Flavor Enhancements for Your Smoked Chicken

    Integrating Fresh Herbs and Spices for Enhanced Flavor

    Elevating the flavor of your smoked chicken is easily achievable by incorporating fresh herbs and spices into your dry rub or brine. Popular choices like rosemary, thyme, and sage add aromatic qualities that can enrich the overall taste experience, tantalizing the senses.

    Consider mixing these herbs into your dry rub for an additional burst of flavor that lingers on the palate. The essential oils in fresh herbs will infuse the chicken as it smokes, creating a delightful complexity that pairs wonderfully with the natural smoky flavor of the meat, resulting in an unforgettable dish.

    You can also place fresh herbs inside the cavity of the chicken before smoking. This technique allows the herbs to release their aromatic oils as the chicken cooks, further enriching the flavor profile and ensuring each bite is bursting with freshness. Experimenting with different combinations can help you discover unique tastes that will keep your friends and family coming back for more.

    Using Marinades for Improved Flavor and Tenderness

    Marinating your chicken overnight can significantly enhance its flavor and tenderize the meat, resulting in a succulent outcome that will impress. A marinade comprising oil, vinegar, and your choice of spices can penetrate the chicken, creating a harmonious taste that complements the smoking process beautifully.

    Consider using citrus juices, such as lemon or lime, for added acidity, which brightens the flavor while helping to break down the meat fibers, making the chicken more tender. Combine these with herbs, spices, and a touch of sweetness from honey or brown sugar for a well-rounded marinade that enhances the chicken’s overall taste and mouthfeel.

    After marinating, be sure to thoroughly pat the chicken dry before applying any dry rub. This step ensures the skin can crisp during the smoking process while still allowing all the delicious flavors from the marinade to remain locked within the meat, resulting in a truly flavorful chicken.

    Experimenting with Various Wood Types for Unique Flavor Profiles

    The choice of wood used in smoking can dramatically alter the flavor profile of your chicken. While apple and cherry woods are popular for their mild flavors, don’t hesitate to explore stronger options like hickory or mesquite for a bolder taste.

    Hickory provides a robust, smoky flavor that can stand up to richer marinades or rubs, creating a delightful contrast. Mesquite, while potent, can add a unique twist when used sparingly, making it an excellent choice for those looking to experiment and elevate their smoked chicken experience. The key lies in finding a balance that complements the chicken without overpowering it.

    Consider blending different types of wood for a more complex flavor profile. For instance, mixing fruit wood with hickory can yield the best of both worlds: a sweet, fruity aroma combined with a hearty, smoky depth that elevates your chicken to an entirely new level of deliciousness.

    Avoiding Common Mistakes When Smoking Chicken

    Preventing Overcrowding in Your Smoker

    One of the most common mistakes when smoking chicken is overcrowding the smoker. Ensuring ample space between each bird is essential for optimal air and smoke circulation, which promotes even cooking and prevents any sogginess. When chickens are packed too closely together, they can create steam pockets that hinder the crisping process, leading to disappointing texture and flavor.

    To achieve the best results, consider smoking one chicken at a time, or if you’re preparing multiple, ensure there’s sufficient room for air to flow around each bird. This setup not only aids in attaining crispy skin but also allows the smoke to reach every part of the bird evenly, enhancing its overall flavor and aroma.

    If your smoker has multiple racks, position the chickens so that they are not directly above or below each other, allowing smoke to circulate freely. With careful planning and spacing, you can create a harmonious cooking environment that yields delicious, perfectly smoked chicken every time, impressing all who partake.

    Minimizing the Frequency of Opening the Smoker

    When it comes to smoking chicken, patience is crucial. Opening the smoker too frequently can lead to temperature fluctuations that negatively impact the cooking process. Each time the lid is lifted, valuable heat escapes, extending cooking time and potentially compromising the chicken’s texture and juiciness.

    Limit the number of times you open the smoker to check on your chicken. Instead, rely on your thermometer and your sense of smell to gauge progress. If you’re concerned about cooking times, consider keeping notes based on previous cooks to refine your process over time and enhance your skills.

    Consider setting up a timer or alarm that alerts you when it’s time to check the internal temperature rather than doing so impulsively. This small change can make a significant difference in your smoking efforts, contributing to the overall quality of your final product and ensuring consistent results.

    Ensuring Proper Drying of the Chicken Skin

    Moisture on the chicken’s skin is the enemy of crispiness. To ensure success in achieving how to achieve a crispy skin on smoked chicken, it’s critical to dry the skin thoroughly before applying the rub and smoking. After rinsing the chicken post-brine, use paper towels to absorb any lingering moisture, ensuring the skin is as dry as possible.

    If the skin remains wet, it will steam during cooking rather than crisp up, leading to disappointing results. A thorough drying process can make all the difference, ensuring your chicken emerges from the smoker with beautifully rendered, crispy skin that is sure to impress.

    To further enhance this process, consider placing the chicken uncovered in the refrigerator for a couple of hours before cooking. This method allows the skin to dry out even more, promoting an even crisper texture during smoking that will elevate your dish to the next level.

    Monitoring Wood Usage for Flavor Balance

    While adding wood chips is essential for flavor, using excessive amounts can backfire. Overloading your smoker with wood can lead to an overwhelmingly smoky flavor that can overpower the chicken’s natural taste and juiciness.

    Start by using a modest amount of wood chips, then assess the smoke intensity during cooking. You can always add more as needed, but removing wood chips mid-cook is challenging. A balanced approach ensures that the chicken remains the star of the dish, enhanced by smoke without being dominated by it.

    Monitoring the color of the smoke is a good indicator of intensity. Ideally, you want a thin, blue smoke rather than thick, white smoke, which can indicate excessive wood. Achieving the right balance will enhance your chicken’s flavor and elevate your reputation as a skilled smoker among your peers and guests.

    Prioritizing Temperature Control for Optimal Results

    Temperature control is the cornerstone of successful smoking. Ignoring temperature variations can lead to uneven cooking and compromised texture. Make it a priority to invest in a high-quality thermometer, and familiarize yourself with the vent systems on your smoker to effectively regulate airflow and temperature.

    Maintain a stable temperature throughout the cook, making minor adjustments as needed to keep it within the optimal smoking range. This diligence will ensure that the chicken cooks evenly, resulting in tender meat and crispy skin that is the hallmark of excellent barbecue and a testament to your smoking prowess.

    With practice, your ability to control temperature will improve, leading to consistently excellent results. Embrace the learning curve, and remember that each cook contributes to your expertise, enhancing your future smoking endeavors and ensuring delicious outcomes every time.

    Frequently Asked Questions About Smoking Chicken

    Which chicken variety is best for smoking?

    Look for fresh, high-quality chickens, ideally free-range or organic. A weight between 3-5 pounds is ideal for even cooking and achieving crispy skin that delights the palate.

    How long should I smoke a chicken for best results?

    Plan for approximately 3-4 hours of smoking, depending on the weight of the chicken and the temperature settings of your smoker. Always monitor the internal temperature to ensure doneness and safety.

    Can I smoke frozen chicken?

    While it’s best to use fresh chicken, you can smoke thawed chicken. Ensure it is completely thawed and thoroughly patted dry before starting the smoking process for optimal results.

    Is brining necessary for chicken?

    Brining is highly recommended as it enhances flavor and moisture retention. Soaking in a brine solution helps achieve a juicier chicken with irresistibly crispy skin that your guests will love.

    How can I determine if the chicken is fully cooked?

    Use a meat thermometer to ensure that the internal temperature reaches 165°F. The juices should run clear when pierced, and the skin should be a beautiful golden brown, indicating the chicken is cooked to perfection.

    Is it necessary to truss the chicken before smoking?

    While not mandatory, trussing helps the chicken cook evenly and maintain its shape, contributing to a more appealing presentation and improved texture that elevates your dish.

    What wood chips are best for smoking chicken?

    Fruit woods like apple and cherry are excellent choices for chicken. They provide mild, sweet flavors that complement the meat without overwhelming it, resulting in a delicious smoked chicken experience.

    Can I smoke chicken without using a smoker?

    Yes! You can also use a grill for indirect smoking with wood chips in a foil packet or an oven with a smoking box. However, the flavor may differ from traditional smoking methods, so keep that in mind.

    How can I keep the skin crispy after smoking?

    Ensure the skin is dry before smoking, and consider broiling for a few minutes post-smoking to enhance crispiness. Resting the chicken after cooking also helps maintain texture and flavor.

    What should I do if my chicken skin isn’t crispy?

    If the skin isn’t crispy, review your drying, brining, and smoking techniques. Make sure you’re not overcrowding the smoker and maintain the right temperature throughout the cooking process for the best results.

    Connect with us on Facebook!

    The Article How to Achieve a Crispy Skin on Smoked Chicken: A Guide appeared first on https://pitmastersarsenal.com

    The Article Crispy Skin on Smoked Chicken: Your Ultimate Guide Was Found On https://limitsofstrategy.com

  • Grill Wok: Your Delicious Guide to Stir-Fried Veggies

    Grill Wok: Your Delicious Guide to Stir-Fried Veggies

    Expert Strategies for Choosing the Ideal Grill Wok for Flavorful Stir-Frying

    Exploring Optimal Materials for Your Grill Wok Selection

    Stainless steel grill wok with stir-fried vegetables, showcasing even heat distribution, at an outdoor barbecue.

    Choosing the right material for your grill wok is essential to achieve outstanding results when cooking delicious stir-fried vegetables. The most commonly recommended options include stainless steel, cast iron, and non-stick coatings, each presenting unique benefits that can enhance your cooking experience. Stainless steel stands out for its remarkable durability and rust resistance, making it an excellent choice for any serious grilling enthusiast. This material heats quickly and ensures even heat distribution, a critical factor for maintaining high cooking temperatures while preparing your favorite dishes.

    In contrast, cast iron has long been favored for its exceptional heat retention capabilities. This sturdy material can endure high temperatures, making it ideal for achieving that perfect sear on your vegetables. However, it’s important to recognize that cast iron requires more maintenance than stainless steel, as it needs regular seasoning to preserve its non-stick qualities and prevent rust from forming over time.

    Modern non-stick coated woks offer unparalleled convenience, providing easy food release and streamlining the cleaning process. These woks are especially advantageous for cooking delicate vegetables, which may stick or burn without careful management. Nevertheless, it is critical to follow the manufacturer’s instructions regarding heat levels to avoid damaging the coating. Ultimately, whatever material you opt for, ensure it aligns with your cooking habits and preferences for the most enjoyable grilling experience possible.

    Identifying the Ideal Size and Shape for Your Grill Wok

    The size and shape of your grill wok are pivotal to your grilling success, particularly when focusing on stir-fried vegetables. Typically, a wok with a diameter ranging from 12 to 16 inches strikes an ideal balance between capacity and ease of use. A larger wok can accommodate multiple servings simultaneously, making it an excellent choice for family gatherings or energetic outdoor barbecues where everyone can savor delicious food.

    Additionally, carefully consider the wok’s shape. A traditional rounded shape is specifically designed for high-heat cooking, facilitating optimal heat circulation around your vegetables. Alternatively, if your grill has a flat surface, a flat-bottomed wok may be more appropriate, ensuring maximum contact with the heat source. Regardless of the shape you decide on, the key is to select a wok that fits comfortably on your grill, promoting even cooking throughout your vegetables.

    It’s also wise to take the weight of the wok into account. While a heavier wok often signifies better durability, it can also be cumbersome to handle. If you frequently toss and stir your veggies for the best stir-fry results, opting for a lighter model might prove to be more practical. Ensure that you measure your grill before making a purchase to guarantee a perfect fit, maximizing both your cooking efficiency and enjoyment throughout the grilling process.

    The Importance of Handle Design in Your Grill Wok Selection

    The design of your grill wok’s handle can significantly influence your overall grilling experience. Long, heat-resistant handles are essential for safe and easy maneuvering, especially when dealing with intense flames. Seek out woks that feature ergonomically designed handles that provide a comfortable grip, allowing you to toss and stir your vegetables with ease and precision without risking burns or accidents.

    Moreover, consider the configuration of the handles. Some woks come with a single long handle, while others feature two short handles on either side. A single long handle simplifies lifting and flipping but may require a bit more skill to balance correctly. Conversely, two short handles offer better stability when removing the wok from the grill, which is especially helpful when dealing with heavy or hot contents.

    It’s also wise to evaluate the materials used for the handles. Handles made from stainless steel and silicone-coated materials deliver durability and heat resistance. Wooden handles can enhance the aesthetic appeal but typically demand additional care to ensure longevity and usability. Regardless of the handle design you choose, prioritize safety and ergonomics to improve your grilling experience with a wok specifically tailored for stir-fried vegetables.

    Crucial Steps for Preparing Vegetables for Stir-Frying

    Colorful vegetables being washed, chopped, and arranged on a wooden cutting board in a kitchen.

    Meticulously Washing and Perfecting Your Chopping Skills

    Preparation serves as the foundation for an exceptional stir-fry, starting with the careful washing and chopping of your vegetables. When utilizing a grill wok for stir-fried veggies, it is crucial to rinse your produce thoroughly under cold water to remove any dirt or pesticide residues. This cleaning step is vital not only for hygiene but also for enhancing flavor by removing any unpleasant remnants, ensuring a cleaner and more enjoyable taste.

    Once your vegetables are washed, the art of chopping begins. Achieving uniform pieces is essential for ensuring even cooking. Rather than slicing your vegetables at random, aim for consistent sizes—typically between 1 to 2 inches in width. This technique ensures that all ingredients, from colorful bell peppers to crunchy green beans, cook at the same rate, allowing for a harmonious blend of flavors and textures. In addition, consider the type of vegetable; softer options like zucchini or mushrooms may benefit from smaller cuts, while sturdier choices like carrots can be sliced thicker for added texture.

    Do not overlook the importance of presentation when using a grill wok for stir-fried veggies. A visually appealing assortment of your chopped produce not only stimulates the appetite but also indicates a diversity of flavors and textures. Strive to incorporate a rainbow of colors—greens, reds, yellows, and purples. This not only enhances the aesthetic appeal of your dish but also promotes a varied nutrient profile, enriching your meal with essential vitamins and minerals.

    Enhancing Flavor with Effective Marination Techniques

    To elevate the taste of your stir-fried veggies, marinating is a crucial step that infuses flavors and transforms simple vegetables into a culinary delight. A basic marinade typically consists of oil, herbs, and spices; however, feel free to unleash your creativity! Experiment with ingredients such as soy sauce, sesame oil, garlic, and ginger for an Asian-inspired twist that tantalizes the palate and enriches the overall flavor profile.

    Allow your chopped vegetables to soak in the marinade for at least 30 minutes, providing the flavors ample time to meld. This process not only enhances taste but also aids in tenderizing the veggies slightly, making them more enjoyable once they hit the grill. For an even more robust flavor, consider marinating overnight in the refrigerator to deepen the flavor profile of your stir-fried veggies.

    When marinating, remember to keep the proportions balanced. Excess oil can result in a greasy finish, while insufficient seasoning may lead to bland vegetables. Aim for a ratio of approximately three parts oil to one part acidity (such as vinegar or citrus juice), adjusting according to your taste preferences. After marinating, allow any excess liquid to drain before grilling, preventing steaming and ensuring your veggies achieve the desired char.

    The Importance of Preheating Your Wok

    A hot wok on a grill with bell peppers and broccoli, ready for high-heat stir-frying.

    Preheating your grill wok is a transformative step in the art of stir-frying, particularly when using a grill wok for stir-fried veggies. The main goal of this step is to create a non-stick surface that facilitates easy food release and promotes caramelization of the vegetables. Simply placing your wok on the grill for a few minutes before adding your vegetables can significantly enhance both the cooking process and the final outcome.

    Aim for high heat during the preheating phase, as this temperature is essential not only for preventing sticking but also for achieving that delightful sear that enhances both flavor and texture. A well-preheated wok ensures that your veggies hit a hot surface immediately, initiating the cooking process while sealing in their natural juices for optimal flavor.

    It’s wise to check the temperature of the wok before adding your vegetables. A simple test is to drop a few drops of water onto the surface; if they sizzle and evaporate almost immediately, your wok is sufficiently hot. Once preheated, add a small amount of oil to the wok before introducing your marinated vegetables. This step not only helps prevent sticking but also creates a beautiful, glossy finish on your stir-fried veggies.

    Improving Vegetable Texture Through Blanching

    Blanching is a technique that can dramatically improve the texture and color of your vegetables, making it an essential step when using a grill wok for stir-fried veggies. By briefly boiling your vegetables before grilling, you can soften them slightly while preserving their vibrant colors and nutritional values. This method is particularly effective for tougher vegetables like broccoli or asparagus, which may require longer cooking times on the grill to achieve the desired tenderness.

    To blanch, fill a pot with water and bring it to a rolling boil. Adding a pinch of salt to the water not only flavors the veggies but also helps maintain their bright hues during cooking. Once the water reaches a boil, add the vegetables and allow them to cook for approximately 1-3 minutes, depending on the type. After blanching, promptly transfer the veggies to an ice bath to halt the cooking process, locking in their color and crunch.

    After cooling, be sure to pat the vegetables dry before adding them to the grill wok. This step is crucial because excess water can lead to steaming instead of stir-frying, resulting in a less desirable texture. By incorporating blanching into your preparation routine, you can achieve a perfect balance of tenderness and crispness, elevating your stir-fried veggies to restaurant-quality levels.

    Strategically Arranging Your Vegetables in the Grill Wok

    The strategic placement of your vegetables in the grill wok can be the difference between a mediocre dish and a culinary masterpiece when using a grill wok for stir-fried veggies. After preparing and marinating your vegetables, it’s essential to arrange them effectively within the wok to maximize heat exposure and ensure even cooking.

    Begin by thoroughly heating your wok, then add the oil and allow it to shimmer before placing the vegetables inside. Start with denser vegetables that require longer cooking times, such as carrots or bell peppers. Arrange them in a single layer, ensuring there’s some space between each piece. This prevents overcrowding and allows for even cooking, avoiding the dreaded steaming effect on your vegetables.

    As cooking progresses, you can begin adding softer vegetables that require less time, such as zucchini or snap peas. This staggered approach guarantees that each type of vegetable is cooked to perfection, maintaining a pleasant crunch without becoming soggy. Additionally, remember to toss the vegetables occasionally using a long-handled spatula or tongs to promote even charring and caramelization, enhancing the overall flavor profile.

    By employing these thoughtful techniques in arranging your vegetables, you’ll not only elevate the flavor but also create a visually stunning presentation that is sure to impress your guests. A well-executed stir-fry derives its charm from the vibrant colors and textures of the veggies, making this step vital in achieving culinary success.

    Mastering Grilling Techniques for Perfectly Stir-Fried Veggies

    Stirring and Tossing for Optimal Flavor and Texture

    Mastering the technique of stirring and tossing your veggies in the wok is imperative for achieving the ideal texture and flavor when using a grill wok for stir-fried veggies. As soon as your vegetables start sizzling in the hot wok, it’s time to get them moving. Keeping your veggies in motion is crucial to ensuring even cooking, guaranteeing that every piece receives equal exposure to heat.

    Utilize a long-handled spatula or tongs to lift and toss the vegetables. This action not only helps distribute heat evenly but also allows those delectable char marks to develop, adding depth to the flavor profile. Picture your wok as a mini arena where the vegetables perform—the more you stir, the better they dance!

    Timing is also critical when it comes to stirring and tossing. You don’t want to overdo it, as some charring is desirable for flavor, but excessive stirring can lead to burning. A good rule of thumb is to stir every 30 seconds, allowing the veggies to rest momentarily to develop that coveted caramelized crust.

    Additionally, consider the type of vegetables you’re cooking. Softer veggies like spinach or bell peppers require less time and can be stirred more frequently, while denser options like carrots may need longer periods on the heat before being stirred. Ultimately, the perfect stir-fry is a balance of heat, motion, and timing, all essential elements when using a grill wok for stir-fried veggies.

    Effectively Managing Grill Heat Zones for Cooking Success

    Understanding how to manage heat zones on your grill can significantly enhance your stir-fry game, particularly when utilizing a grill wok for stir-fried veggies. Grills typically have areas of varying temperatures—some zones are hotter than others—and learning to take advantage of this can elevate your cooking technique to new heights.

    Start by preheating your grill with all burners set to high, then adjust the heat to create zones. For instance, maintain one side at high heat for searing while keeping another at medium for slower cooking or warming food. This setup allows you to sear denser vegetables while moving softer ones to a cooler zone to prevent overcooking.

    When you first add your veggies to the hot side, they will quickly sear and caramelize, locking in flavor. After achieving that desirable char, you can shift them to the cooler side to finish cooking through without burning. This technique maximizes flavor and enhances the texture of your stir-fried veggies, ensuring they are perfectly cooked and visually appealing.

    Using a grill wok for stir-fried veggies also opens the door for experimenting with indirect heat. For example, after searing, you can cover the grill for a few minutes to allow the steam to circulate, which helps soften the vegetables while maintaining their vibrant colors. This control over heat zones is a powerful tool in your grilling arsenal, paving the way for a flawless stir-fry every time.

    Timing Your Cooking for Perfectly Done Vegetables

    Timing is a critical element in the culinary world, and when it comes to using a grill wok for stir-fried veggies, it can mean the difference between crunchy perfection and overcooked mush. Keeping a close eye on cooking time is essential for achieving that ideal crisp-tender texture that makes stir-fried vegetables so delightful.

    As a general guideline, most vegetables require 5 to 10 minutes of cooking time in a hot grill wok, but this can vary based on the type. Softer vegetables like bell peppers and zucchini may only need around 5 minutes, while denser veggies like carrots or broccoli could take closer to 8-10 minutes. A good strategy is to toss the vegetables every couple of minutes to ensure even cooking and to prevent burning.

    Always taste-test as you go. You want your veggies to be tender enough to bite through easily while still maintaining a satisfying crunch. The ideal stir-fried vegetable should retain its vibrant color and nutritional value while also offering a delightful texture and flavor.

    Visual cues can also be beneficial. Look for vibrant colors; if they begin to dull, it may be a sign that they are overcooking. A well-timed stir-fry is a beautiful balance of heat, timing, and attention to detail—all crucial for using a grill wok for stir-fried veggies that impress.

    Elevating Flavor in Your Stir-Fried Veggies

    Incorporating Flavorful Sauces and Seasonings

    Enhancing your stir-fried veggies with the right sauces and seasonings can elevate your dish from ordinary to extraordinary. When utilizing a grill wok for stir-fried veggies, the timing of adding these flavor enhancers is crucial. The final few minutes of cooking present the perfect opportunity to introduce your favorite sauces or seasonings, allowing the flavors to meld without the risk of burning.

    Soy sauce is a staple in many stir-fries, providing a savory umami flavor that pairs beautifully with vegetables. Consider adding a splash of teriyaki or hoisin sauce for a sweet and tangy twist. When applying these sauces, moderation is key; start with a small amount, tossing the veggies to evenly distribute the flavor. You can always add more if needed, ensuring your dish is perfectly seasoned.

    In addition to sauces, consider enhancing your dish with spices and herbs. A sprinkle of sesame seeds adds delightful crunch, while a dash of red pepper flakes can introduce a hint of heat. Fresh garlic or ginger, added just a minute before finishing, can provide an aromatic punch that elevates the entire dish. The key is to balance flavors thoughtfully; each addition should enhance the overall experience without overpowering the natural essence of the vegetables.

    As you cook, keep a close watch on your flavors. If you notice your veggies beginning to dry out, a quick splash of broth or water can add moisture and help the sauces adhere better. This method not only enhances flavor but also keeps your vegetables vibrant and appealing. Mastering the art of flavor enhancement is essential when using a grill wok for stir-fried veggies, ensuring a culinary delight with every bite.

    Brightening Your Dish with Fresh Herbs and Citrus Elements

    Finishing your stir-fried veggies with fresh herbs and a squeeze of citrus adds a bright, refreshing element that can truly elevate your dish. When using a grill wok for stir-fried veggies, these final touches are where you can really shine. Fresh herbs such as cilantro, basil, or parsley introduce an aromatic quality that enlivens the entire dish.

    Finely chop your herbs and sprinkle them over the vegetables just before serving. This simple act infuses your stir-fry with a burst of freshness that contrasts beautifully with the grilled flavors. Furthermore, herbs like basil or cilantro can complement specific vegetable profiles; for instance, basil pairs exceptionally well with zucchini and bell peppers.

    Citrus is another powerhouse for flavor enhancement. A squeeze of lime or lemon juice can brighten the dish, cutting through the richness of any oils or sauces used. This acidity not only elevates the flavor but also balances the natural sweetness of the vegetables. Use citrus sparingly; a little goes a long way in enhancing the dish without overwhelming it.

    When utilizing a grill wok for stir-fried veggies, these finishing touches can transform an already delicious meal into a vibrant, mouthwatering experience. They not only enhance flavor but also boost visual appeal, making your dish as pleasing to the eye as it is to the palate.

    Adding Toppings and Garnishes for Enhanced Visual Appeal

    The final flourish in your stir-fried veggie dish can make all the difference, and selecting the right toppings and garnishes can elevate your meal to restaurant-quality. When using a grill wok for stir-fried veggies, consider adding elements that introduce different textures and flavors. Toasted nuts, such as almonds or cashews, deliver a satisfying crunch that contrasts beautifully with the soft, tender veggies.

    Seeds, like sesame seeds, provide a nutty flavor and added texture. Toast them lightly in the grill wok for a few moments before garnishing your finished dish. This step not only enhances their flavor but also increases their visual appeal as a garnish.

    For an extra layer of flavor, crispy fried onions or shallots can be sprinkled on top just before serving. Their sweetness and crunch create an enticing combination with the grilled vegetables, ensuring that every bite is delightful. Fresh herbs can also serve as a beautiful garnish; a sprinkle of chopped parsley or cilantro adds color and freshness that invites diners to dig in.

    Remember, garnishing isn’t just about aesthetics; it’s about enhancing the overall experience of the dish. Each topping should complement the primary flavors of your stir-fried veggies. By thoughtfully selecting and applying these finishing touches, you’ll create a visually stunning and delicious dish that celebrates the art of grilling.

    Creative Serving Suggestions to Complement Your Stir-Fried Veggies

    Enhancing Your Meal with Delicious Accompaniments

    Pairing your stir-fried veggies with the right accompaniments can create a well-rounded meal that satisfies all taste buds. When utilizing a grill wok for stir-fried veggies, consider options like rice, noodles, or grilled meats to enhance the experience and add substance to your dish.

    White or brown rice makes for a classic pairing, providing a neutral base that allows the vibrant flavors of your stir-fry to shine. For a touch of flair, consider preparing fried rice or jasmine rice, which can introduce additional flavors and aromas that beautifully complement your vegetables. Noodles are another fantastic choice; from soba to rice noodles, they offer a chewy texture that pairs seamlessly with the crispness of the stir-fried vegetables.

    If you’re looking to elevate your meal further, grilled meats such as chicken, shrimp, or beef can add protein and heartiness to the dish. This combination not only creates a satisfying meal but also results in a stunning presentation with a variety of colors and textures on your plate.

    Don’t overlook sauces! A drizzle of soy sauce or a dollop of spicy chili paste can perfectly complement your stir-fried veggies, tying the meal together. By thoughtfully selecting accompaniments, you can create a complete and delightful dining experience that showcases your culinary skills and creativity.

    Artful Plating and Presentation of Your Stir-Fried Veggies

    Visual appeal is crucial when it comes to serving your stir-fried veggies, as a beautifully plated dish can significantly elevate the dining experience. When using a grill wok for stir-fried veggies, consider the arrangement of your food. Start by placing your stir-fried vegetables in the center of a large platter or bowl to create a focal point that draws the eye.

    Utilize contrasting colors to make your dish pop. A vibrant mix of greens, reds, yellows, and purples can attract attention and highlight the freshness of your ingredients. Garnish with fresh herbs sprinkled on top for added color and aroma. This not only makes the dish look appetizing but also indicates freshness and attention to detail in your cooking.

    For a more upscale presentation, consider serving your stir-fried veggies in individual portions, perhaps on a bed of rice or noodles. This approach facilitates easy serving and adds an element of sophistication to your meal. You could also incorporate decorative accents, like edible flowers or citrus wedges, to enhance visual interest and appeal.

    Ultimately, plating is about creating a feast for the eyes that complements the flavors on the plate. A well-presented dish elevates the culinary experience and reflects the level of care and effort you invested in preparing the meal, leaving a lasting impression on your guests.

    Innovative Ideas for Utilizing Leftover Stir-Fried Veggies

    Repurposing leftover stir-fried veggies is an excellent way to minimize waste while enjoying a variety of delicious meals. When using a grill wok for stir-fried veggies, the possibilities for leftovers are virtually endless. One of the simplest options is to incorporate them into an omelet, making for a hearty breakfast or brunch. Whisk some eggs, pour them into a heated skillet, and then add your leftover veggies as the eggs begin to set.

    Wraps are another fantastic way to utilize leftover stir-fried veggies. Take a tortilla or lettuce leaf, fill it with the vegetables, add some protein such as grilled chicken or tofu, and drizzle with sauce for a quick and delicious meal. You can even transform them into a grain bowl; serve your stir-fried veggies over quinoa or farro, topped with avocado, chickpeas, or a dollop of hummus for an energizing lunch.

    For a unique twist, consider using your leftover stir-fried veggies as a topping for pizzas. Spread some sauce on a pre-made crust, add cheese, and pile on the veggies for a flavorful, veggie-packed pizza. The versatility of stir-fried vegetables means you can easily transform them into new dishes, ensuring that nothing goes to waste and every meal remains exciting and enjoyable.

    Thoughtful Beverage Pairings to Complement Your Stir-Fried Veggies

    Complementing your stir-fried veggies with the right beverages can significantly enhance your dining experience. When using a grill wok for stir-fried veggies, consider refreshing drinks that balance the flavors of your dish. Green tea is a classic choice, offering a light, herbal quality that pairs beautifully with grilled flavors and enhances the overall meal.

    If you’re in the mood for something a little stronger, light white wines such as Sauvignon Blanc or Pinot Grigio can elevate your meal. Their crisp acidity cuts through the richness of any oils or sauces, refreshing your palate with each sip. For a more adventurous pairing, consider citrus-based cocktails, such as mojitos or margaritas. The bright flavors of lime and mint can amplify the freshness of your stir-fried veggies.

    Non-alcoholic options are equally important. Freshly squeezed lemonade with mint can provide a cooling effect, while sparkling water with a splash of fruit juice adds a refreshing touch. Whether you’re hosting a gathering or enjoying a quiet meal at home, thoughtful beverage pairings can elevate your stir-fried veggie experience to new heights and enhance your overall enjoyment.

    Essential Cleaning and Maintenance Practices for Your Grill Wok

    Recognizing the Need for Immediate Cleaning After Use

    Cleaning your grill wok promptly after use is vital for maintaining its condition and ensuring lasting durability. When using a grill wok for stir-fried veggies, food residues can harden quickly, making them more challenging to remove if left unattended. As soon as you finish cooking, allow the wok to cool slightly, but not completely, to ensure effective cleaning.

    Utilizing a brush or sponge with warm, soapy water, gently scrub the surface of the wok. Avoid abrasive cleaners or steel wool, as these can scratch the material and diminish its non-stick properties. For stubborn spots, consider soaking the wok in warm, soapy water for a few minutes to loosen any stuck-on food. This attention to immediate cleaning can save you time and effort in the long run, ensuring that your grill wok remains in top condition for all your future cooking adventures.

    It’s also crucial to dry your wok thoroughly after washing. Moisture can lead to rust, particularly in materials like cast iron. Consider heating the wok briefly on the grill after cleaning to evaporate any residual moisture. This practice helps maintain the integrity of the wok and keeps it ready for your next grilling session, ensuring it serves you well for years to come.

    Effective Strategies for Removing Stubborn Residue

    Despite your best cleaning efforts, stubborn residue may occasionally cling to your grill wok. When this happens, there’s no need to panic. There are effective methods for removing these pesky bits without damaging the wok. Begin by soaking the wok in warm, soapy water for about 30 minutes to soften any stuck-on food, making it easier to clean.

    If soaking doesn’t fully resolve the issue, consider using a gentle scrubber designed for non-stick surfaces. Avoid harsh chemicals or abrasive sponges, as these can scratch your wok and compromise its integrity. For cast iron woks, a mixture of coarse salt and a little water can serve as an effective abrasive that aids in lifting stubborn residue while being gentle on the surface.

    For particularly stubborn spots, consider creating a paste made of baking soda and water. Apply this paste to the affected area and allow it to sit for a while before scrubbing gently. This natural approach is effective and safe for most wok materials. Following these cleaning practices ensures that your grill wok remains clean and ready for your next culinary adventure, allowing you to enjoy cooking without worry.

    Best Practices for Storing Your Grill Wok Properly

    Storing your grill wok correctly is essential for preserving its longevity and maintaining its performance. When using a grill wok for stir-fried veggies, it’s best to store it in a cool, dry place to prevent moisture buildup. Avoid stacking heavy items on top of it to prevent scratches or dents, and if possible, store it upright to allow for proper airflow.

    For cast iron woks, consider applying a thin layer of cooking oil before storing to prevent rust formation. This practice helps maintain the seasoning while ensuring the surface remains in optimal condition for your next use. If your wok has a non-stick coating, ensure it’s completely dry before storage to prevent moisture buildup, which can degrade the coating over time.

    Lastly, cover your grill wok with a breathable cloth or store it in a dedicated space away from direct sunlight. This precaution can help protect it from dust and environmental factors that may affect its longevity. By following these simple storage tips, you can ensure that your grill wok remains in great shape for all your future stir-frying endeavors.

    Frequently Asked Questions About Grill Woks

    What exactly is a grill wok, and how is it utilized?

    A grill wok is a specially designed cooking utensil used for grilling vegetables and other foods on a grill. It facilitates even cooking and efficient heat distribution, making it ideal for crafting delicious stir-fries and other grilled dishes.

    Can I use a grill wok on both gas and charcoal grills?

    Yes, a grill wok can be used on both gas and charcoal grills. Ensure that the wok is properly preheated and securely placed on the grill to achieve optimal cooking results without any issues.

    What types of vegetables are best suited for grilling in a wok?

    You can grill a variety of vegetables, including bell peppers, broccoli, zucchini, carrots, and snap peas. Choosing a colorful mix will enhance both flavor and presentation, making your dish visually appealing.

    How can I prevent my vegetables from burning while grilling?

    To prevent burning, make sure your grill wok is preheated properly and adjust the heat zones on your grill. Stir the vegetables frequently for even cooking, which helps to prevent them from burning during the grilling process.

    Is marinating my vegetables necessary before grilling?

    Marinating is not mandatory, but it significantly enhances the flavor of your vegetables. A simple marinade of oil, herbs, and spices can elevate your dish to new heights, making it more flavorful and enjoyable.

    Can I grill frozen vegetables in a wok?

    While it’s possible to grill frozen vegetables, it’s best to thaw them first to ensure even cooking. Frozen veggies tend to release water, which can lead to steaming instead of stir-frying, impacting the desired texture of your dish.

    What’s the best way to clean my grill wok?

    Clean your grill wok immediately after use with warm, soapy water and a soft sponge. For stubborn residue, soak it first or use a mixture of baking soda and water for effective cleaning without damaging the surface.

    Is it safe to use metal utensils on a non-stick grill wok?

    It’s best to avoid using metal utensils on a non-stick grill wok, as they can scratch the surface. Opt for wooden or silicone utensils to preserve the integrity of the coating and extend the life of your wok.

    How long do grilled vegetables typically take to cook?

    Grilled vegetables usually take between 5 to 10 minutes to cook, depending on the type. Softer veggies cook faster, while denser ones require more time for thorough cooking to achieve the best texture.

    What beverages pair well with grilled veggies?

    Beverages such as green tea, light white wines, or citrus-based cocktails pair nicely with grilled veggies, enhancing the fresh flavors of the dish and improving your overall dining experience.

    Connect with us on Facebook!

    The Article Using a Grill Wok for Stir-Fried Veggies: A Tasty Guide appeared first on https://pitmastersarsenal.com

    The Article Grill Wok for Stir-Fried Veggies: A Delicious Guide Was Found On https://limitsofstrategy.com