Category: Cooking Tips

  • Braise Meat for Tender Results: Your Ultimate Guide

    Braise Meat for Tender Results: Your Ultimate Guide

    Master the Art of Braising: Your Comprehensive Cooking Handbook

    Understanding the Braising Technique and Its Functionality

    How to Braise Meat for Tender Results: A pan with browning meat and simmering liquid, surrounded by herbs, illustrating the braising technique.

    Learning how to braise meat to achieve irresistibly tender and flavorful outcomes requires a deep dive into this versatile cooking technique that artfully combines both dry and moist heat. This method is especially effective in transforming tougher cuts of meat into succulent, mouthwatering dishes. The braising process begins with browning the meat in a preheated pan, creating a rich, caramelized crust that is essential for amplifying the overall flavor profile. Following this crucial step, the meat is gently simmered in a liquid at a low temperature, which allows the connective tissues to break down over time. This two-step cooking approach not only tenderizes tougher cuts but also enriches them with the complex flavors extracted from the braising liquid and accompanying herbs and spices.

    The true elegance of braising lies in its incredible adaptability. You can choose from a wide variety of liquids, including stock, wine, beer, or even fruit juices, each reflecting diverse culinary traditions from around the globe. This technique is particularly cherished in cuisines that highlight the art of slow cooking, such as French, Italian, and Asian culinary practices. Ultimately, the result is meat that is not only tender but also richly infused with layered flavors developed throughout the cooking process.

    Selecting the Ideal Cut of Meat for Optimal Braising

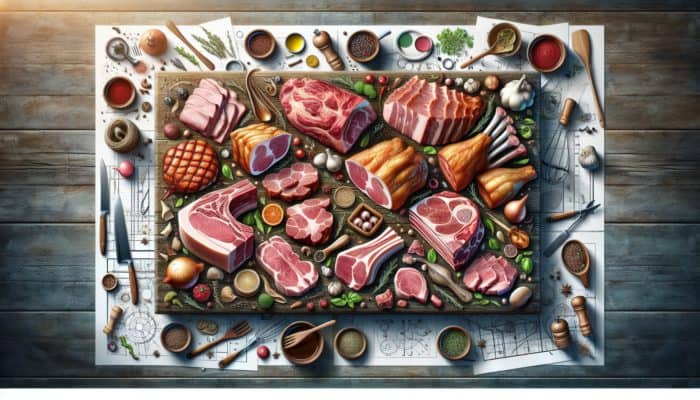
    Choosing the right cut of meat is paramount for achieving outstanding results when braising. Tougher cuts, which are rich in connective tissue and fat, break down beautifully during the slow cooking process, resulting in tender and juicy meat. These cuts are often more budget-friendly, making braising an economical choice for heartwarming meals.

    Here are some excellent cuts to consider for a successful braise:

    • Chuck – Renowned for its rich marbling and abundance of connective tissue.
    • Brisket – Transforms into an incredibly tender and flavorful dish through the braising process.
    • Shank – Loaded with collagen, making it ideal for a hearty braise.
    • Round – A cost-effective option that can yield delicious results when braised.
    • Pork shoulder – A favorite for pulled pork, excelling in braising for maximum flavor.
    • Lamb shank – Offers a distinctive flavor profile that enhances the braising experience.
    • Oxtail – This rich, gelatinous cut creates a luxurious broth full of depth.
    • Short ribs – Celebrated for their remarkable depth of flavor and tenderness after braising.

    By opting for these cuts, you can immerse yourself in a world of diverse flavors and styles, making braising an exhilarating and enriching technique in any culinary repertoire.

    Essential Tools for Successful Braising: What You Need

    Equipping yourself with the right tools is crucial for effective braising. A heavy-bottomed pot or Dutch oven is the ideal cooking vessel, ensuring even heat distribution and consistent temperatures throughout the cooking process. A tight-fitting lid is also necessary, as it seals in moisture and prevents the braising liquid from evaporating too quickly.

    In addition to your cooking pot, there are several essential utensils that facilitate the braising process. Tongs are invaluable for maneuvering the meat without losing heat, while a wooden spoon or spatula allows you to stir in aromatics and effectively deglaze the pot. Investing in a thermometer is also a wise decision, as it helps you monitor the internal temperature of the meat, ensuring optimal doneness without the risk of overcooking. With these tools at your disposal, you will be well-prepared to embark on a successful braising journey, transforming tough cuts of meat into tender culinary masterpieces.

    Effective Techniques for Achieving Perfectly Braised Meat

    Succulent braised meat in rich sauce with herbs on a rustic table, chef's tools in background.

    Essential Steps for Successfully Braising Meat

    Braising is a multifaceted technique that comprises several essential steps critical for achieving ideal tenderness and flavor. These key steps include:

    • Browning the meat – This vital initial step develops rich, complex flavors.
    • Adding aromatics – Ingredients such as onions, garlic, carrots, and herbs significantly elevate the overall dish.
    • Deglazing the pan – This captures the scrumptious browned bits, enriching the sauce.
    • Simmering in liquid – This slow cooking method effectively breaks down tough fibers.

    By diligently following these steps, you not only ensure that your meat becomes tender but also infuse it with robust, layered flavors. The browning phase creates a delectable crust that contributes to the dish’s overall taste, while the addition of aromatics, including vegetables and herbs, elevates the complexity of the dish. Deglazing allows you to incorporate all those flavor-packed bits stuck to the bottom of the pot, enriching your braising liquid. Finally, simmering at a low temperature enables the flavors to meld while gently coaxing the meat into tenderness. Each step plays a crucial role in the final result, ensuring that your braised dish is both delightful and satisfying.

    Techniques to Elevate Flavors During the Braising Process

    Enhancing the flavors during the braising process is a culinary art that can transform your dish from ordinary to extraordinary. While the selection of meat and cooking method is foundational, the combination of herbs, spices, and liquids can create distinctive flavor profiles. Experimenting with different combinations can yield delightful and unexpected culinary results.

    Consider these flavor enhancement techniques:

    • Incorporate fresh herbs such as rosemary, thyme, and bay leaves for aromatic depth.
    • Add spices like cumin, coriander, or smoked paprika for a unique flavor twist.
    • Utilize citrus zest or juice to introduce brightness and acidity.
    • Include umami-rich ingredients like Worcestershire sauce or soy sauce.

    For instance, braising a beef chuck roast with red wine, garlic, and thyme can yield a robust dish characteristic of traditional French cuisine. Conversely, using a blend of coconut milk, ginger, and lemongrass for braising chicken can impart a distinctly Southeast Asian flavor. This versatility allows you to explore the culinary traditions of diverse cultures, making braising an exciting avenue for flavor exploration.

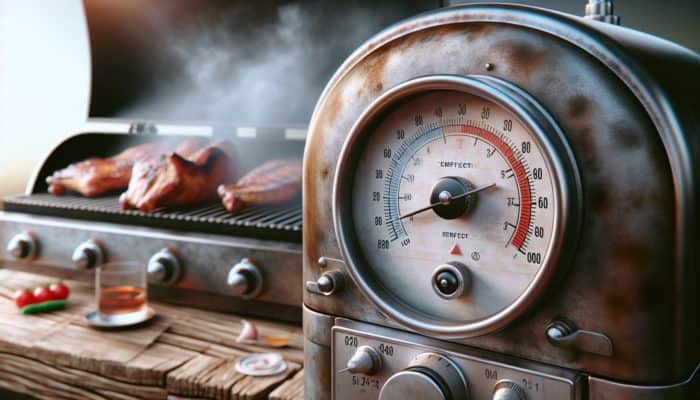
    How to Maintain Optimal Temperature Control During Braising

    A chef braising meat at 165°C in a rustic kitchen, using a thermometer for tenderness.

    Maintaining the ideal temperature is essential for achieving tender results in braising. The essence of this technique is to cook meat at a low simmer, typically between 150 °C and 180°C (300°F and 350°F). This gentle heat effectively breaks down connective tissues without drying out the meat, ensuring it remains moist and tender.

    Here are some actionable steps to maintain the perfect braising temperature:

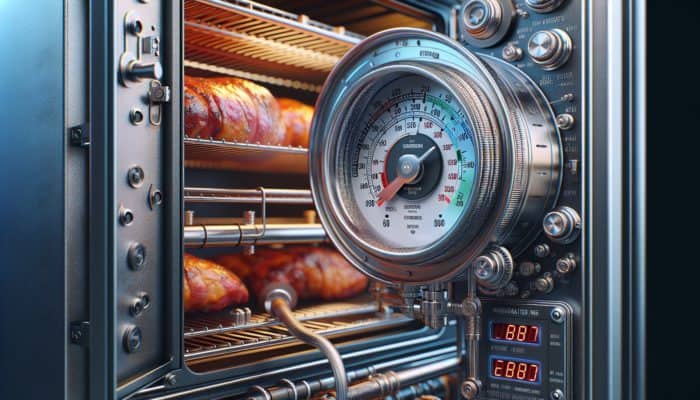
    • Preheat your oven or stovetop to the desired temperature before introducing the meat.
    • Utilize a reliable thermometer to monitor the internal temperature of the meat.
    • Adjust the heat as necessary to maintain a steady simmer without boiling.
    • Cover the pot with a lid to trap heat and moisture, promoting slow cooking.

    By employing these techniques, you can refine your braising skills and consistently achieve tender, flavorful results. A well-executed braise not only highlights the primary ingredients but also brings the dish’s complexities to life. Mastering temperature control is fundamental, allowing you to transform tougher cuts into culinary delights.

    Thorough Preparation Techniques for Meat Prior to Braising

    Steps for Properly Preparing Meat for Braising

    The preparation of meat is a foundational step that sets the stage for successful braising. This process involves several key tasks, including trimming excess fat, seasoning, and potentially marinating the meat to amplify flavor and tenderness.

    Start by trimming away any excessive fat; while some fat enhances flavor, too much can lead to a greasy dish. Seasoning the meat with salt and pepper is crucial, as it not only enhances its flavor but also aids in developing a crust during the browning process. In certain cases, marinating the meat beforehand can further tenderize it and infuse additional flavors. A marinade can consist of various liquids, such as wine, vinegar, or even yogurt, which assists in breaking down tough fibers.

    By properly preparing your meat, you ensure an even distribution of flavors and set yourself up for a successful braise. This foundational step cannot be overlooked, as it directly influences the overall quality and taste of the final dish.

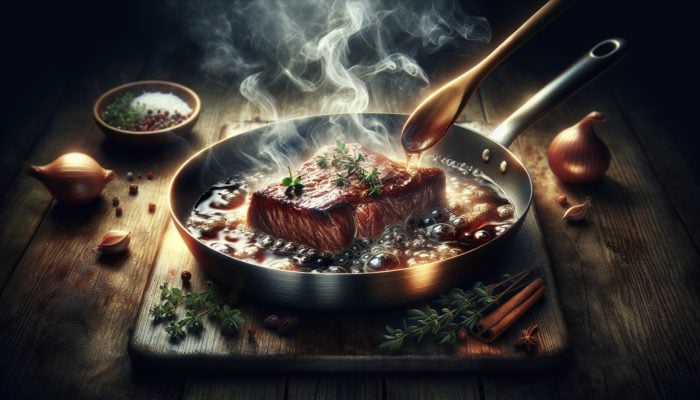
    Understanding the Importance of Browning in the Braising Process

    Browning the meat before braising is an essential step that creates a flavor-rich crust through the Maillard reaction. This chemical reaction occurs between amino acids and sugars when exposed to heat, resulting in complex, savory notes that enhance the overall taste of the dish. Skipping this step can lead to a less flavorful final product.

    To achieve optimal browning, ensure that your pot is adequately preheated and that there is sufficient space to avoid overcrowding the meat. Overcrowding can lower the pot’s temperature, leading to steaming instead of browning. Use a splash of oil in the pan to achieve a good sear, allowing the meat to develop a golden-brown crust on all sides. This process not only enhances flavor but also adds visual appeal to your dish.

    Once browned, remember to deglaze the pan to capture those flavor-packed bits left behind. Incorporating these into your braising liquid will create a rich base for your dish. Mastering the browning step is essential to elevating your braising game, transforming it into a dish that is both flavorful and visually stunning.

    Choosing the Ideal Braising Liquid for Maximum Flavor

    The choice of braising liquid can significantly influence the flavor profile and richness of your final dish. The right liquid will complement the meat and aromatics, creating a cohesive flavor experience. Various options are available, each offering unique characteristics.

    Common choices for braising liquids include:

    • Stock – Rich in flavor, it serves as an excellent base for many braises.
    • Wine – Both red and white wines can introduce acidity and depth to the dish.
    • Beer – Adds a malty sweetness and complexity, perfect for hearty meals.
    • Fruit Juices – These can impart sweetness and unique flavor notes.

    Consider the overall flavor profile you wish to achieve. For instance, using a robust red wine for braising beef chuck can result in an intensely flavorful dish, while a lighter white wine might be better suited for chicken or pork. Don’t hesitate to experiment with various combinations to uncover new and exciting flavors. The right braising liquid can elevate the dish, enriching the meat and creating a sauce that beautifully ties all elements together.

    Understanding the Critical Nature of Meat Cut Selection in Braising

    Choosing the right cut of meat is essential for achieving success when braising. Tougher cuts, which are abundant in fat and connective tissue, break down beautifully during the lengthy cooking time, resulting in tender, flavorful meat.

    Some of the ideal cuts include:

    • Chuck – Known for its rich flavor and impressive marbling.
    • Brisket – Becomes incredibly tender with slow cooking.
    • Shank – A collagen-rich cut that yields a luxurious broth.
    • Pork shoulder – A go-to for succulent pulled pork dishes.
    • Lamb shank – Provides a unique taste that enhances braised dishes.

    These cuts typically originate from areas of the animal that experience more activity, contributing to their toughness. However, when braised correctly, they transform into melt-in-your-mouth meals. Selecting cuts with good marbling will also enhance the dish, as the fat renders during cooking, keeping the meat moist and flavorful. Understanding these factors enables you to select the optimal cuts for your braising endeavors, ensuring consistently delicious outcomes every time.

    Determining the Ideal Cooking Time and Temperature for Braising

    Braising requires a delicate balance of time and temperature to achieve perfect tenderness. Ideally, the cooking temperature should be set between 150 °C and 180°C (300°F and 350°F) to allow the meat to cook slowly and evenly. This low-and-slow approach is crucial for breaking down the tough connective tissues present in the meat.

    Cooking times will vary based on the size and type of cut being braised. Generally, you can expect braising to take anywhere from 2 to 4 hours. A larger cut may necessitate more time to become tender, while smaller pieces can finish sooner. Monitoring the meat for tenderness is essential; it should be fork-tender and easily pulled apart when fully cooked. Additionally, checking the internal temperature is beneficial, as most braised meats should reach a temperature of around 90°C (195°F) for optimal tenderness.

    By adhering to these guidelines, you can master the braising process, creating tender, flavorful dishes that will impress at any gathering. Understanding the interplay of cooking times and temperatures will empower you to achieve consistent, top-notch results each time you braise.

    Research-Backed Advantages of Braising Meat for Tender and Flavorful Outcomes

    Nutritional Benefits of Braised Meat: What You Need to Know

    Braising not only transforms tough cuts of meat into tender culinary delights but also offers a variety of nutritional benefits. By utilizing less expensive cuts that may be tougher, braising encourages a greater variety in meat consumption while remaining budget-friendly. The slow cooking process retains nutrients that might otherwise be lost with quicker cooking methods.

    Moreover, incorporating vegetables, herbs, and spices during braising enriches the dish with a wealth of nutrients and antioxidants. These components contribute to a more balanced meal, enhancing the overall nutritional profile. By embracing the braising technique, you can create wholesome, satisfying meals that deliver essential nutrients without stretching your budget.

    Transformative Effects of Braising on Meat Texture

    Braising profoundly impacts the texture of meat by breaking down collagen and connective tissues that can make tougher cuts chewy. Throughout the slow cooking process, collagen transforms into gelatin, resulting in a moist and tender texture that is highly desirable in braised dishes.

    This transformation is particularly effective for cuts rich in connective tissue, such as chuck or brisket. The gentle heat allows enzymes to act on the proteins, further tenderizing the meat over time. Consequently, the final dish boasts a luxurious mouthfeel, with flavors deeply infused throughout. Understanding the science behind this transformation is crucial for optimizing your braising process and achieving the desired texture in your meals.

    The Science Behind Tenderizing Through Braising

    The low-and-slow cooking method inherent to braising facilitates a complex array of chemical reactions that lead to tenderization. Enzymes and acids within the cooking liquid work to break down proteins and connective tissues, resulting in soft and succulent meat. Additionally, the gradual heating process helps retain moisture within the meat, preventing it from drying out — a common issue with faster cooking techniques.

    For optimal results, maintaining a consistent temperature allows for effective enzymatic action. As the meat cooks, its fibers relax, and flavor compounds meld from the braising liquid and aromatics. This unique blend of science and culinary technique yields not only tender meat but also an overall harmonious dish that showcases depth and richness. Understanding these principles will empower you to refine your braising techniques and elevate your cooking to new heights.

    Enhancing Flavor Through Braising: The Transformative Process

    Braising is a transformative cooking method that significantly elevates the flavor of meat. The slow cooking process allows flavors to meld together, creating a rich and complex taste profile that is nearly impossible to replicate through quicker cooking methods. As the meat simmers in the braising liquid, it absorbs the surrounding flavors from herbs, spices, and any aromatics added.

    This infusion of flavor not only enhances the meat itself but also enriches the braising liquid, resulting in a sauce that is robust and complementary to the dish. The extended cooking time allows for the development of deep, umami-rich notes that enhance the overall eating experience. By applying the braising technique, you can create dishes that are not only tender but also bursting with flavor, making every bite a delightful experience.

    Avoiding Common Pitfalls in the Braising Process

    Preventing Overcooking or Undercooking Your Meat

    Finding the ideal cooking time is crucial in braising, as both overcooking and undercooking can lead to undesirable outcomes. Overcooking can dry out the meat, rendering it tough and chewy, while undercooking may leave the meat rubbery and unpalatable. Monitoring the tenderness of the meat is key to achieving the perfect braise.

    To circumvent these pitfalls, employ a combination of time and temperature checks. Investing in a reliable meat thermometer can help ensure you reach the desired internal temperature for tenderness. Additionally, checking the meat periodically during cooking allows you to gauge its progress and make necessary adjustments. Recognizing when the meat is truly tender is the cornerstone of successful braising, and attentiveness during this process will yield the best results.

    The Importance of Choosing the Right Cooking Vessel for Braising

    The choice of cooking vessel can significantly influence the outcome of your braise. Using an unsuitable pot, such as one that does not conduct heat evenly, can affect heat distribution and moisture retention, leading to uneven cooking. A heavy-bottomed pot or Dutch oven is ideal for achieving the consistent simmer necessary for successful braising.

    Ensure that your chosen pot is adequately sized to comfortably accommodate the meat and braising liquid, allowing for proper heat circulation. This will also help prevent boiling, which can compromise the desired texture and flavor. Opting for quality cookware specifically designed for braising will guarantee that your meat cooks evenly and retains moisture, yielding a tender, flavorful dish each time.

    The Essential Role of Deglazing in the Braising Process

    Deglazing the pan is a step that should never be overlooked in the braising process. After browning the meat, the browned bits left in the pan are laden with flavor and essential for creating a rich braising liquid. Skipping this step can result in a less flavorful final product.

    To deglaze, add your chosen liquid — be it wine, stock, or vinegar — immediately after browning the meat. Use a wooden spoon to scrape up all the caramelized bits, infusing the liquid with deep flavor. This process not only enhances the braising sauce but also ensures that every component of the dish contributes to the overall flavor. Emphasizing this step will elevate your braising technique, resulting in profoundly satisfying dishes.

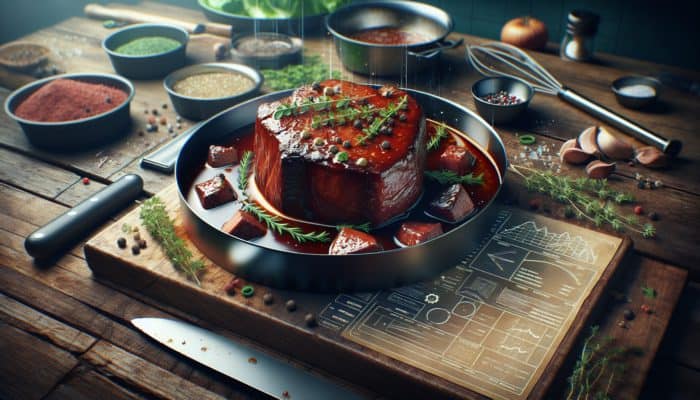
    Final Touches and Serving Ideas for Your Braised Meat

    How to Assess When Your Meat Is Done Cooking

    Determining when braised meat is finished requires careful observation and touch. The meat is considered complete when it is fork-tender and can easily pull apart with minimal effort. Checking the internal temperature is another reliable method; most braised meats should reach a temperature of around 90°C (195°F) for optimal tenderness.

    A good indicator of doneness is the visual appearance of the meat; it should look moist and glistening, not dry or shriveled. Be sure to check the meat periodically as it approaches the expected cooking time, using a fork to test its tenderness. By doing so, you’ll achieve the perfect balance of texture and flavor in your braised dish, resulting in a satisfying meal that showcases your culinary prowess.

    Techniques for Reducing and Thickening the Braising Liquid

    After the meat has finished braising, you may wish to reduce and thicken the braising liquid to create a rich sauce. The reduction process involves simmering the liquid until it thickens and concentrates in flavor. This method intensifies the taste and enhances the overall dish.

    If you prefer a thicker consistency, several techniques can be employed to achieve this. One simple method is to add a roux — a mixture of fat and flour — into the braising liquid and whisk until it thickens. Alternatively, you can use a slurry made from cornstarch and water for a quick thickening effect. Simmering the liquid while whisking will help you achieve the desired consistency. Incorporating these techniques not only elevates the flavor but also enriches the dining experience by providing a delicious sauce that pairs beautifully with the meat.

    Best Serving Suggestions for Your Flavorful Braised Meat

    Braised meat offers incredible versatility in terms of serving options. Its rich, hearty nature pairs beautifully with a wide array of sides, creating a balanced and satisfying meal. Consider classic accompaniments such as creamy mashed potatoes or rustic polenta, both of which perfectly complement the delicious braising sauce.

    Vegetables also shine alongside braised meats; consider serving with roasted root vegetables or a fresh green salad to balance the dish’s richness. When selecting sides, consider the flavors present in the braising liquid, ensuring they enhance the overall dish. With a little creativity, you can create a meal that not only highlights the tender meat but also showcases culinary traditions from around the globe.

    Frequently Asked Questions About the Braising Process

    What is the best cut of meat for braising?

    The best cuts for braising are those with high amounts of connective tissue, such as chuck, brisket, and shank. These cuts become tender and flavorful during the slow cooking process.

    How long does braising take?

    Braising typically takes between 2 and 4 hours, depending on the size and type of meat being used. Monitoring the meat for tenderness is crucial throughout this period.

    Can I braise meat in a slow cooker?

    Yes, a slow cooker is an excellent alternative for braising meat. Just ensure you follow similar steps, including browning the meat beforehand for optimal flavor.

    What type of liquid is best for braising?

    The best liquids for braising include stock, wine, or even beer. Each type adds a unique flavor, so choose based on the dish you wish to create.

    Do I need to marinate meat before braising?

    While marinating is not essential, it can enhance flavor and tenderness, especially for tougher cuts. A simple marinade can add depth to your dish.

    Is braising healthy?

    Braising can be a healthy option, particularly when using lean cuts of meat and incorporating vegetables. The slow cooking process retains nutrients and allows for flavorful, nutritious meals.

    What should I do with leftover braised meat?

    Leftover braised meat can be utilized in various dishes, such as sandwiches, tacos, or salads. It’s versatile and can add flavor to many meals.

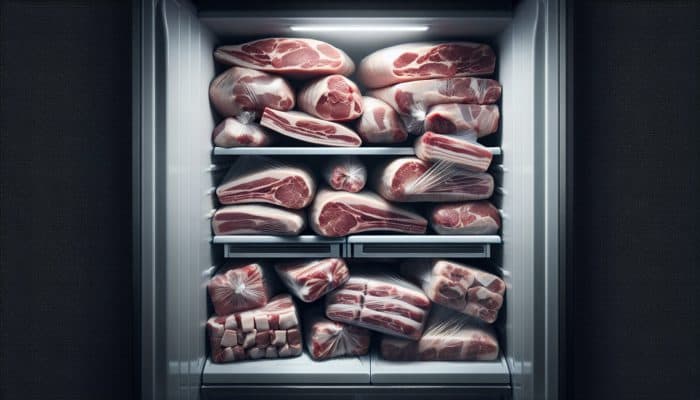
    Can I freeze braised meat?

    Yes, braised meat freezes well. Allow it to cool completely, then store it in a vacuum-sealed bag or airtight container for up to three months.

    How do I know when my braised meat is done?

    Your braised meat is done when it is fork-tender and can easily pull apart. Checking the internal temperature can also help; it should reach around 90°C.

    Can I use non-alcoholic liquids for braising?

    Absolutely! Non-alcoholic liquids, such as stock, vinegar, or fruit juices, can be used for braising and yield delicious results while avoiding the use of alcohol.

    Stay updated with our latest news on Facebook!

    The post How to Braise Meat for Tender Results: A Universal Guide appeared first on https://cookinggods.com

    The Article Braise Meat for Tender Results: A Universal Guide Was Found On https://limitsofstrategy.com

  • Avoid Mistakes New Cooks Make: Essential Tips for Success

    Avoid Mistakes New Cooks Make: Essential Tips for Success

    Elevate Your Culinary Expertise Through Fundamental Cooking Techniques

    Master Knife Skills for Enhanced Safety and Culinary Productivity

    Top Mistakes New Cooks Should Avoid: A chef demonstrating precise knife skills, slicing vegetables uniformly on a cutting board.

    One of the most prevalent mistakes made by beginner cooks is the failure to hone essential knife skills. These skills are not only vital for your safety in the kitchen but also for improving your cooking efficiency. By mastering these foundational techniques, you can accelerate your cooking process while minimizing the risk of injuries during meal preparation. Learning the proper grip for holding a knife—ensuring your fingers are curled away from the blade—enhances control and precision, making slicing and dicing ingredients easier. Additionally, utilizing a rocking motion while cutting promotes even pieces, which is crucial for achieving consistent cooking results across your dishes.

    As your confidence grows, familiarizing yourself with various cutting techniques—such as julienne, chiffonade, and brunoise—will not only enhance the presentation of your meals but also boost your culinary artistry. Understanding the specific uses for different knife types—like the chef’s knife, paring knife, and serrated knife—will enable you to select the ideal tool for any given task. Consistent practice is paramount; it builds your muscle memory, ultimately transforming you into a more adept and efficient cook.

    Precision Ingredient Measurement Techniques for Culinary Excellence

    Accurate measurements are paramount for achieving consistent and desirable outcomes in your cooking endeavors. Utilizing the correct tools and methods ensures that your recipes yield the intended results, thus eliminating the frustration associated with poorly executed dishes. Both novice and experienced cooks must be familiar with metric and imperial measurement units. Essential measuring tools that every kitchen should be equipped with include:

    • Measuring cups (suitable for both liquids and dry ingredients)
    • Measuring spoons
    • Kitchen scale
    • Liquid measuring jug
    • Thermometers
    • Graduated containers

    Each measuring tool serves a distinct purpose; for example, liquid measuring jugs are designed exclusively for liquids, while dry measuring cups are tailored to hold dry ingredients without leaving gaps. Moreover, mastering accurate measuring techniques, such as spooning flour into a cup instead of scooping it, can yield superior results in your culinary creations. Remember, perfecting the art of measuring ingredients is a core skill that can profoundly influence the success of your culinary masterpieces and ensure consistent quality.

    Thorough Recipe Review: A Crucial Step for Successful Cooking

    Taking the time to thoroughly read a recipe before starting the cooking process is a crucial step that many novice cooks often overlook. This practice allows you to understand the entire workflow, from preparation to cooking times, significantly reducing the likelihood of errors during your culinary journey. By familiarizing yourself with the required ingredients and techniques, you can gather all necessary tools and components beforehand, thereby avoiding last-minute surprises that could disrupt your cooking flow.

    Additionally, a comprehensive review of a recipe prepares you for intricate steps or special techniques that may be involved in the cooking process. Knowing the total cooking time is vital for effective meal planning, allowing you to prepare other components or side dishes simultaneously. This foresight streamlines your workflow and enhances your overall cooking experience, making it more enjoyable and efficient.

    Mastering Temperature Control for Culinary Perfection

    Chef adjusting stove knobs, sautéing vegetables and simmering sauce, demonstrating temperature control in kitchen.

    Understanding how to adjust and maintain heat levels is vital for accurately cooking a diverse range of dishes. Different foods require specific heat settings; for instance, sautéing vegetables is best done over medium-high heat, while simmering sauces benefits from low heat. Mastery of heat control helps prevent both burning and undercooking, ensuring your meals achieve the desired perfection every time.

    Learning to navigate the heat settings on your stove, whether gas or electric, is essential for effective cooking. Gas burners allow for quick adjustments, while electric stoves may take longer to heat or cool down. An experienced cook learns to anticipate these changes and modifies their techniques accordingly. Additionally, understanding how heat influences the Maillard reaction can enhance flavors and textures in your dishes, resulting in a professional quality that will impress your guests.

    Streamlining Food Preparation Techniques to Save Valuable Time

    Learning how to prepare ingredients quickly and efficiently not only saves valuable time but also enriches your overall cooking experience. Efficient food preparation techniques, such as chopping, dicing, and marinating, are critical for establishing a smooth workflow in the kitchen. Developing a consistent approach to mise en place—meaning having everything ready before you begin cooking—minimizes stress and maximizes enjoyment while preparing meals.

    To enhance your efficiency, practice techniques like batch cooking, where larger quantities of ingredients are prepared at once, or mise en place, which involves prepping and measuring all your ingredients beforehand. This strategy not only keeps your workspace organized but also allows you to concentrate entirely on the cooking process itself. Ultimately, dedicating time to mastering these techniques can transform your kitchen experience, making it more productive and enjoyable.

    Effective Management of Cooking Temperatures for Optimal Results

    The Significance of Heat Control in Cooking Diverse Culinary Creations

    A chef expertly controls heat levels while cooking diverse dishes, showcasing culinary mastery.

    Heat plays a fundamental role in cooking, directly influencing the texture, flavor, and safety of your food. Understanding how to control and adjust heat levels can dramatically enhance your cooking results. Different cooking methods—including roasting, boiling, and frying—require varying heat levels to achieve the desired outcomes. For example, grilling requires high heat for a short duration to create a beautifully seared exterior while keeping the inside juicy.

    The Maillard reaction, responsible for the delectable browned crust on meats, occurs at elevated temperatures. In contrast, simmering and poaching necessitate lower heat to gently cook ingredients without compromising their integrity. Being mindful of residual heat can also help finish off dishes, ensuring everything is thoroughly cooked without direct exposure to flames. Mastering the science of heat is essential for any aspiring cook who seeks to elevate their culinary skills.

    Identifying Common Temperature Mistakes to Avoid in Cooking

    Overcooking or undercooking can ruin a dish, making it essential for novice cooks to recognize common temperature-related errors. These mistakes often stem from a lack of understanding of various cooking methods and consistent monitoring of heat levels and cooking times. For instance, placing meat in a pan that isn’t properly preheated can lead to a grey, unappetizing crust, rather than the desirable golden-brown finish.

    To prevent these pitfalls, consider implementing the following temperature control tips:

    • Preheat your oven for the full required duration before baking.
    • Utilize a thermometer to check the internal temperature of meat.
    • Adjust heat gradually, rather than making abrupt changes between extremes.
    • Monitor simmering liquids closely to prevent them from boiling over.
    • Use a timer to ensure nothing gets overcooked.
    • Learn the distinctions between cooking on the stovetop and in the oven.

    By recognizing common temperature pitfalls and applying these tips, novice cooks can prevent frustrating errors that often lead to unsatisfactory meals. Mastering temperature control enhances your dishes and builds your confidence in the kitchen.

    The Importance of Using Thermometers for Safe Cooking Practices

    A thermometer is an invaluable kitchen tool, particularly for ensuring that food reaches the appropriate temperature, especially for meats and baked goods. This handy device plays a critical role in maintaining both food safety and quality, thus preventing foodborne illnesses associated with undercooked proteins. For example, chicken must achieve an internal temperature of at least 75°C (165°F) to be considered safe for consumption.

    When utilizing a thermometer, it’s essential to insert it correctly into the thickest part of the meat, avoiding bone contact to obtain an accurate reading. For baked goods, knowing the ideal internal temperatures can prevent doughy centers or burnt exteriors. Regularly calibrating your thermometer ensures it remains accurate, providing you with confidence in your ability to cook a variety of dishes safely and effectively. Understanding the significance of thermometers in the kitchen transforms cooking from a guessing game into a precise science, guaranteeing delicious results every time.

    Key Insights into Common Mistakes New Cooks Should Avoid

    Real-Life Examples of Cooking Errors and Strategies for Avoidance

    Real-life cooking blunders offer invaluable lessons, revealing common pitfalls alongside strategies for avoiding them. For instance, a novice may wrongly assume that all pots and pans possess non-stick properties, leading to disastrous results when attempting to cook eggs in a standard frying pan. This type of error underscores the importance of understanding the characteristics of your cookware and how they impact cooking outcomes.

    Another frequent misstep involves misjudging heat levels while sautéing vegetables, resulting in charred bits instead of a beautifully caramelized finish. By sharing these examples, new cooks can learn to approach their kitchen tasks with greater caution and awareness. Understanding the reasons behind these mistakes empowers cooks to develop improved techniques and achieve better culinary results, as they can anticipate challenges and adapt accordingly.

    Actionable Steps for Enhancing Your Culinary Skills

    Improving your cooking skills requires practice and guidance. Implementing actionable steps can assist new cooks in building confidence and competence in the kitchen. Start by setting achievable goals, such as mastering one new recipe weekly or learning a specific technique, like knife skills or baking. Gradually increasing the complexity of what you prepare can accelerate your learning curve.

    Moreover, consider enrolling in local cooking classes or participating in online tutorials to further enhance your skills. Many platforms offer free resources catering to various skill levels, making cooking more accessible. Seeking feedback from peers or family members can provide insights into areas for improvement, facilitating focused growth. Engaging in communities, both online and offline, introduces new ideas and perspectives, fostering a supportive environment for culinary development.

    Identifying the Best Resources Available for New Cooks

    Access to quality resources can significantly expedite learning for new cooks. Numerous cookbooks specifically cater to beginners, often providing detailed, step-by-step guidance along with practical tips. Online platforms, such as YouTube and cooking blogs, offer visual aids and diverse cooking styles, making it easier to grasp various techniques and concepts.

    In addition to books and videos, participating in local cooking classes offers hands-on experience and the opportunity to ask questions in real time. Community centers and local colleges frequently provide courses tailored for beginners. Another excellent resource is joining cooking forums or social media groups, where you can exchange tips, share experiences, and seek advice from fellow cooking enthusiasts. By exploring a variety of resources, new cooks can develop a well-rounded skill set and deepen their culinary knowledge.

    Avoiding Common Ingredient Mistakes in Cooking

    Choosing Fresh Ingredients for High-Quality Dishes

    Selecting fresh ingredients is crucial for boosting both the flavor and nutritional value of your meals. Knowing what to look for can significantly enhance the quality of your dishes. When shopping for produce, pay attention to the color, texture, and aroma. Fresh fruits and vegetables should display vibrant colors and firm textures, indicating optimal ripeness and freshness.

    For meats, check for bright color, minimal odor, and a firm texture. Ensure that poultry is free from discoloration and has a fresh scent. Moreover, be aware of sell-by dates when purchasing packaged ingredients. If you’re uncertain about specific items, such as seafood, asking the vendor or checking for sustainability certifications can provide added assurance regarding freshness. Prioritizing high-quality ingredients lays the foundation for flavorful and nutritious dishes.

    Wisely Substituting Ingredients When Necessary

    There may be occasions when you need to substitute ingredients due to availability or dietary restrictions. Understanding which substitutions work best is crucial for salvaging a dish when a key ingredient is missing. Instead of panicking, consult reliable substitution charts that guide you toward suitable replacements.

    For example, Greek yogurt can effectively replace sour cream, while applesauce often serves as an excellent alternative to oil in baking recipes. Additionally, you can maintain the flavor profile of a dish by using spices or herbs that complement the original ingredients. Mastering the ability to make these adjustments enhances your flexibility in the kitchen and stimulates creativity, allowing for unique culinary expressions.

    Properly Storing Ingredients for Longevity

    Appropriate storage can significantly extend the life of your ingredients while preserving their quality. Learning the best storage methods is essential for preventing waste and ensuring freshness. For fruits and vegetables, understanding which items should be refrigerated versus those that should be kept at room temperature can greatly impact their longevity. For instance, berries should be refrigerated to prevent mold, while bananas thrive at room temperature.

    Sealing containers correctly and using airtight bags can help maintain the longevity of dry goods, such as grains and pasta. Additionally, labeling containers with the date of storage can help keep a pantry organized and ensure that older items are utilized first. By mastering the art of food storage, cooks can not only reduce waste but also maintain the integrity of their ingredients, resulting in more flavorful meals.

    Timing and Preparation in Cooking

    The Crucial Role of Mise en Place for Culinary Success

    Mise en place, which translates to “everything in its place,” is an essential practice for streamlining the cooking process and alleviating stress. This fundamental skill enables cooks to focus entirely on the culinary tasks at hand without the distraction of searching for misplaced ingredients. Preparing ingredients in advance—such as chopping vegetables, measuring spices, and marinating proteins—optimizes efficiency and enhances your overall culinary experience.

    Moreover, implementing mise en place promotes better organization in the kitchen, contributing to a cleaner cooking environment. By systematically laying out your ingredients, you can quickly locate what you need without wasting time sorting through clutter. This method not only saves time but also boosts your confidence, empowering you to tackle more complex recipes with ease. Ultimately, embracing this practice can transform your cooking from a chaotic experience into an enjoyable culinary journey.

    Effective Time Management Techniques for Cooks

    Effective time management is essential for making cooking more enjoyable and less stressful. Techniques such as planning, prioritizing tasks, and multitasking can help you stay organized. Begin by reviewing your recipe and breaking it down into smaller steps, making the cooking process feel less overwhelming.

    Creating a timeline for each step—from prepping ingredients to cooking—ensures that everything is completed on schedule. Additionally, practice multitasking by starting side dishes or sauces while the main proteins are cooking. This approach maximizes your efficiency and ensures that all components of the meal are ready to serve simultaneously. By implementing effective time management, you can elevate your cooking experience and produce delicious meals with ease.

    Adaptability in Cooking: Handling Last-Minute Changes

    Flexibility is crucial in the culinary world, as unexpected situations can arise at any moment. The ability to adapt to last-minute changes or challenges can save a meal and enhance your cooking skills. For example, if you find yourself lacking a specific ingredient, knowing suitable substitutes can prevent a recipe from going awry.

    Moreover, being prepared to adjust cooking times when something takes longer than anticipated is essential. If a roast is cooking slower than expected, covering it with foil can help retain heat without overcooking the exterior. Embracing a flexible mindset allows you to navigate challenges more efficiently, transforming potential disasters into delightful, improvisational culinary creations.

    Proven Strategies for Avoiding Common Mistakes Made by New Cooks

    Expert Insights on Common Cooking Errors to Prevent

    Understanding the reasons behind common errors can help new cooks effectively avoid them. A frequent mistake involves neglecting to allow meat to rest after cooking. This oversight often results in dry outcomes, as the juices do not have time to redistribute throughout the meat. An expert’s analysis of such errors provides deeper insights into the science of cooking, empowering new cooks with the essential knowledge required to refine their techniques.

    Another prevalent error is rushing the seasoning process. New cooks may tend to add all their seasonings at once, rather than tasting and adjusting throughout the cooking process. This approach can result in overly salty or bland dishes. By learning to season incrementally, you can fine-tune the flavors, leading to well-balanced meals. Such expert insights not only inform novice cooks but also help them cultivate a more intuitive understanding of cooking.

    How Cooks Can Learn from Their Mistakes Effectively

    Learning from mistakes is a crucial part of becoming a more skilled cook. Reflecting on what went wrong and how to rectify it can lead to significant improvements in your culinary abilities. By evaluating each cooking experience, whether it results in success or failure, you can identify patterns in your approach and recognize areas that require enhancement.

    Keeping a cooking journal can be beneficial; document what works, what doesn’t, and any modifications you make. This practice promotes mindfulness and helps you develop a personalized approach to cooking. Over time, the lessons learned from your mistakes will enhance your culinary prowess, enabling you to take on new challenges with confidence and creativity.

    Incorporating Feedback and Constructive Criticism into Your Cooking

    Constructive feedback is invaluable for growth in the kitchen. Learning to accept and implement criticism can refine your cooking techniques and recipes. Engaging family or friends in tasting sessions can provide fresh perspectives on your dishes, highlighting both their strengths and areas that need attention.

    Additionally, seeking feedback from social media groups or culinary communities can introduce new ideas and techniques that you may not have considered. Embracing constructive criticism with an open mind fosters a culture of learning and improvement, ultimately leading to a more competent and creative cook. Welcoming feedback not only enhances your recipes but also enriches your overall culinary journey.

    Ensuring Safety in the Kitchen

    Preventing Common Kitchen Injuries: Tips for Safe Cooking

    Kitchen safety is paramount for all cooks. Understanding how to prevent common injuries, such as cuts, burns, and slips, is essential for a safe cooking experience. For example, always use a sharp knife; dull knives can lead to accidents, as they require more force to cut, raising the risk of slipping and injury.

    When handling hot pots or pans, using oven mitts is essential to prevent burns. Additionally, maintaining a clutter-free workspace reduces the chances of accidents occurring. Always be vigilant while moving around the kitchen; spills should be cleaned immediately to avoid slipping hazards. By prioritizing safety, you can create a secure cooking environment that allows you to focus entirely on your culinary endeavors.

    Fundamentals of Food Safety Everyone Should Know

    Understanding the basics of food safety is crucial for preventing foodborne illnesses. Proper handling, cooking, and storage of food are key elements in maintaining food safety. Always wash your hands before and after handling food, particularly raw meats and seafood, to prevent cross-contamination.

    Cooking food to the correct internal temperature is essential for eliminating harmful bacteria. Utilize separate cutting boards for raw meats and vegetables to avoid cross-contamination. Additionally, promptly refrigerating perishables and maintaining your refrigerator at the correct temperature can help ensure the safety of your food. By mastering these food safety basics, you can guarantee not only the quality of your meals but also the health and well-being of those you serve.

    Maintaining a Clean Cooking Environment for Enhanced Safety

    Keeping a clean kitchen is vital for reducing the risk of contamination and accidents, making regular cleaning and organization crucial for a safe cooking space. Practicing good hygiene by washing utensils and cutting boards after use helps prevent cross-contamination, while regularly wiping down surfaces maintains a sanitary environment.

    Establishing a cleaning routine while cooking—such as washing dishes as you go—can prevent clutter from accumulating and make the cooking process more enjoyable. Here are some effective cleaning tips to keep in mind:

    • Wipe down surfaces before and after cooking.
    • Clean spills immediately to prevent slips.
    • Use separate sponges for dishes and surfaces.
    • Regularly check your pantry for expired items.
    • Store utensils and tools in designated areas to avoid clutter.
    • Deep clean your appliances regularly to maintain their efficiency.

    By maintaining a clean cooking environment, you not only enhance safety but also elevate your overall cooking experience. A tidy kitchen fosters creativity and efficiency, transforming meal preparation into a pleasant task.

    Safe Use of Kitchen Appliances: Best Practices

    Familiarizing yourself with the safe operation of kitchen appliances is essential for preventing accidents. Understand the manufacturer’s guidelines for each appliance and be aware of any safety features it may have. For instance, food processors often come equipped with safety locks that prevent them from operating unless all parts are securely in place.

    Additionally, never leave appliances unattended while in use, particularly items such as blenders or deep fryers. Regular maintenance and cleaning of appliances can prevent malfunctions and ensure safe operation. Being aware of the potential hazards associated with each device fosters a safer cooking environment. Embracing these safety practices ultimately enhances your kitchen experience, allowing you to cook with confidence.

    Enhancing Flavor and Seasoning in Your Dishes

    Achieving a Perfect Balance of Flavors in Your Culinary Creations

    Striking the right balance of flavors can elevate a dish from ordinary to extraordinary. Understanding how to effectively utilize salt, acid, fat, and heat can transform your cooking. Salt amplifies the natural flavors of ingredients, while acid, found in items like vinegar or citrus, can brighten and elevate your dishes.

    Fat contributes richness and enhances mouthfeel; using oils or butters can create a more satisfying texture in your meals. It’s crucial to taste your dishes as you cook, enabling you to adjust seasoning and achieve that perfect flavor balance. Knowledge of these flavor components can lead to more complex and delightful culinary creations, showcasing your growing culinary skills.

    Effectively Using Herbs and Spices to Elevate Your Dishes

    Herbs and spices add depth and complexity to dishes, transforming simple recipes into flavor-packed experiences. Knowing when and how to use them is essential for enhancing the flavor of your meals. Fresh herbs are best added toward the end of cooking to preserve their vibrant flavors, while dried herbs can be introduced earlier in the process to allow their flavors to meld with other ingredients.

    Experimenting with different combinations can lead to exciting new flavor profiles. For instance, pairing rosemary with roasted meats or incorporating cumin into stews can yield dynamic and delicious results. Understanding the potency of spices is crucial; a little can go a long way. By mastering the use of herbs and spices, you’ll elevate your cooking to new heights, creating dishes that are both fragrant and delectable.

    Preventing Over-Seasoning to Maintain the Integrity of Your Dishes

    Over-seasoning can overpower a dish, transitioning it from delightful to unpalatable. Learning to use seasonings judiciously and tasting as you go is critical for preventing this common mistake. A well-seasoned dish should enhance the natural flavors of ingredients rather than mask them.

    Start with small amounts of spices and herbs, gradually building up to your desired level. Remember, it’s easier to add seasoning than to remove it. Keeping a log of your seasoning techniques can also help refine your approach. By developing the skill of balanced seasoning, you’ll enhance your culinary creations and impress those you serve.

    The Art of Presentation and Plating in Culinary Arts

    Mastering Food Presentation for Maximum Visual Appeal

    Presentation significantly enhances a meal’s appeal and enjoyment, impacting the overall dining experience. Learning basic plating techniques is essential for improving the visual allure of your dishes. Plating is not just about aesthetics; it sets the mood and enhances the perceived quality of the meal.

    Consider the use of color and texture; contrasting elements can create visual interest on the plate. Employing garnishes, such as microgreens or edible flowers, adds elegance to your presentation. Investing time in learning the art of plating can transform ordinary meals into memorable experiences, showcasing your skills and attention to detail.

    Simple Plating Techniques for Improving the Aesthetic of Your Dishes

    Simple plating techniques can make your dishes look professional and enticing. Techniques such as layering—stacking ingredients to create height—can add visual intrigue. Another approach is to create a sauce or puree base on the plate before adding your main ingredients, adding depth and color to your presentation.

    Garnishing with fresh herbs, citrus zest, or microgreens can elevate a dish’s aesthetic appeal without requiring excessive effort. Keep in mind that less is often more; a cluttered plate can be overwhelming, while a thoughtfully arranged dish can leave a lasting impression. By mastering these simple plating techniques, you can beautifully showcase your culinary creations and impress your guests.

    Utilizing Color and Texture to Enhance Culinary Appeal

    Color and texture significantly enhance the visual interest of your dishes. Incorporating a variety of colors—greens, reds, yellows—creates a stunning presentation and signifies a range of nutrients, appealing to health-conscious diners. Adding different textures, such as crunchy toppings or creamy sauces, can make a dish more engaging and enjoyable.

    When plating, consider the arrangement of your ingredients; contrasting colors and textures can create a vibrant, eye-catching presentation. For example, pairing crispy roasted vegetables with a smooth, velvety sauce can create a delightful contrast that not only captivates the eye but also enhances the sensory experience of the meal. By focusing on color and texture, you can elevate the dining experience, making meals not just delicious but also visually captivating.

    Frequently Asked Questions (FAQs)

    What Are the Most Common Mistakes New Cooks Should Avoid?

    Steering clear of pitfalls such as not reading recipes thoroughly, lacking proper knife skills, and making inaccurate ingredient measurements can significantly enhance your cooking experience and improve outcomes.

    How Significant Are Knife Skills in Cooking?

    Knife skills are critical for ensuring safety and efficiency; mastering them can prevent injuries and expedite your cooking process.

    What Should I Do If I Over-Season My Dish?

    If you over-season, try adding more of the main ingredients to dilute the flavors or balance with a touch of acid, such as lemon juice or vinegar.

    How Can I Enhance My Cooking Time Management?

    Improving time management can be achieved through planning, prioritizing tasks, and multitasking to ensure that all components of the meal are finished simultaneously.

    Why Is Accurate Measurement of Ingredients Important?

    Accurate measurements are vital for achieving consistent results in cooking, ensuring that the recipes turn out as intended.

    How Can I Safely Use Kitchen Appliances?

    To safely use kitchen appliances, always follow the manufacturer’s guidelines, maintain them properly, and never leave them unattended while in operation.

    What Are the Basics of Food Safety?

    Food safety basics include proper hand washing, cooking food to the correct internal temperature, and preventing cross-contamination in the kitchen.

    How Can I Select Fresh Ingredients?

    Choosing fresh ingredients involves inspecting produce for bright colors, firm textures, and pleasant aromas, as well as checking meats for freshness and sell-by dates.

    What Are Effective Strategies for Learning from Cooking Mistakes?

    Learning from mistakes involves reflecting on what went wrong, maintaining a cooking journal, and seeking constructive feedback from others.

    How Can I Enhance the Presentation of My Dishes?

    Enhancing presentation involves using contrasting colors, layering ingredients, and garnishing thoughtfully to create visually appealing plates that entice diners.

    Stay updated with our latest culinary tips and tricks on our Facebook page!

    The post Top Mistakes New Cooks Should Avoid: Essential Tips appeared first on https://cookinggods.com

    The Article Essential Tips to Avoid Mistakes New Cooks Make Was Found On https://limitsofstrategy.com

  • Cooking Without Power: Essential Techniques and Tips

    Cooking Without Power: Essential Techniques and Tips

    Master the Art of Cooking Without Electricity: A Detailed Exploration

    Understanding the Practice of Cooking Without Electric Power

    A person in a rustic kitchen using ancient cooking methods like open fire, solar oven, and clay pot.

    Cooking without electricity is a fascinating culinary journey that emphasizes meal preparation through methods that exclude the use of electrical or gas-powered appliances. This practice, rooted in time-honored techniques celebrated across numerous cultures, encourages innovation and resourcefulness in the kitchen. By delving into this approach, individuals can discover inventive and practical cooking methods that are environmentally sustainable and promote self-sufficiency. Noteworthy techniques for preparing food without electricity comprise:

    Engaging with these diverse culinary techniques not only enhances one’s cooking repertoire but also deepens the appreciation for the rich cultural heritage embedded within these traditional practices. The journey of cooking without electricity invites creativity and exploration in the kitchen.

    Discover the Multifaceted Advantages of Cooking Without Electricity

    Embarking on the journey of cooking without electricity reveals a multitude of benefits that extend far beyond the act of preparing meals. This approach primarily champions sustainability by significantly lowering reliance on fossil fuels and electricity, which collectively contribute to a substantial reduction in one’s carbon footprint. Moreover, cooking without the convenience of electric appliances often proves to be more cost-effective, utilizing readily available resources rather than dependent on pricey energy sources. Additionally, this cooking style fosters a deeper connection with food, as individuals dedicate time and effort to the craft of meal preparation. Here are some prominent advantages associated with cooking without electricity:

    • Cost savings on energy bills
    • Enhanced food security through increased self-sufficiency
    • Environmental sustainability by lowering carbon emissions
    • Improved health through a focus on fresh, whole ingredients
    • Stronger community connections via shared culinary experiences
    • Encouragement of culinary creativity and experimentation

    By adopting these practices, individuals can transform their cooking experiences into rewarding endeavors that align with their personal values and environmental goals.

    Key Tools You Need for Successful Cooking Without Electricity

    Equipping yourself with the right tools is essential for successfully mastering the craft of cooking without electricity. A selection of indispensable tools simplifies the meal preparation process, facilitating a seamless transition from conventional cooking methodologies. Solar cookers effectively harness sunlight for cooking, while fire pits offer a nostalgic outdoor cooking experience. Manual food processors and blenders allow for ingredient preparation without the need for electricity. Here’s a comprehensive list of essential tools for cooking without electric power:

    • Solar cookers
    • Fire pits or grills
    • Rocket stoves
    • Hayboxes or insulated cookers
    • Portable charcoal grills
    • Manual food processors
    • Cast iron cookware
    • Fermentation vessels

    These tools empower cooks to explore a wide range of culinary possibilities while remaining committed to sustainable cooking practices that respect the environment.

    Exciting Techniques for Culinary Triumphs Without Electrical Appliances

    A person using a solar cooker on a sunny day with dark-colored pots, surrounded by various cuisines.

    A plethora of techniques exists for cooking without electricity, each providing unique benefits and applications across various environments and culinary traditions. Solar cooking utilizes the sun’s abundant energy—a renewable resource—for meal preparation. This method necessitates specific equipment designed to effectively capture and retain solar heat. Best practices for solar cooking include positioning the solar cooker directly towards the sun and utilizing dark-colored pots, which significantly enhance heat absorption for optimal cooking outcomes.

    Methods of open fire cooking, such as grilling and roasting, deliver an authentic culinary experience often associated with social gatherings and celebrations. Safety is a primary concern when cooking over an open flame; thus, ensuring proper ventilation, managing firewood carefully, and having a nearby water source for emergencies are crucial precautions to adhere to.

    Thermal mass cooking employs retained heat for slow and consistent cooking, utilizing materials like bricks or stones to maintain warmth. To achieve maximum efficiency with this method, preheating the thermal mass before placing food inside is vital, ensuring that optimal cooking conditions are achieved.

    Ensuring Safety When Cooking Without Electricity

    Safety should always be a priority when cooking without electricity, as traditional cooking methods can introduce unique risks. Adequate ventilation is crucial, especially when cooking over open flames, to prevent the buildup of harmful gases. Safe fire handling requires the use of appropriate tools while carefully maintaining a safe distance from flammable materials. Adhering to food safety guidelines is essential to prevent spoilage and foodborne illnesses. Key safety considerations include:

    • Maintaining proper food storage temperatures
    • Using clean utensils and cookware
    • Ensuring sufficient ventilation while using open flames
    • Practicing good hygiene during food preparation

    By following these safety measures, cooks can fully embrace the numerous benefits of cooking without electricity while minimizing potential risks.

    Insights from Experts on Cooking Without Electricity

    What Knowledge Can Professionals Share About Cooking Without Electric Power?

    A chef teaching outdoor cooking over an open fire with local ingredients in a sustainable setting.

    Experts in sustainable living and culinary arts advocate for the practice of cooking without electricity, highlighting its numerous benefits for both individuals and the environment. Many culinary professionals stress the importance of selecting seasonal and locally sourced ingredients, which not only enhance flavor but also bolster local economies. Real-world examples include chefs conducting workshops aimed at imparting traditional cooking methods that do not rely on modern conveniences. They promote techniques like open-fire cooking, illustrating how to create delicious dishes while minimizing electricity dependency.

    Moreover, sustainability advocates believe that cooking without electricity can foster healthier eating habits. By steering clear of processed foods, individuals are more inclined to consume fresh, whole ingredients. Chefs frequently encourage participation in community cooking events where participants can share knowledge and skills, cultivating a deeper appreciation for food and its origins.

    How Does Cooking Without Electricity Enhance Your Health?

    Cooking without electricity can greatly improve health by promoting the use of fresh, unprocessed ingredients. This transition often leads to meals that are nutrient-dense and free from artificial additives. Practical steps for adopting healthier cooking practices without electricity involve prioritizing local and seasonal produce, which not only supports farmers but ensures the freshest ingredients are utilized. Embracing techniques like fermentation, which preserves nutrients, and adopting methods such as solar cooking can further enhance meal quality.

    Additionally, cooking without electricity encourages mindfulness in food preparation. Engaging actively with food—such as chopping vegetables or stirring pots over an open flame—can transform the cooking process into a meditative experience that enhances mental well-being. By focusing on the cooking journey and being fully present, individuals can cultivate a healthier relationship with their food.

    What Environmental Advantages Come with Cooking Without Electricity?

    The environmental impact of cooking without electricity is significant, as this approach can drastically lower carbon footprints and encourage sustainable living practices. By forgoing conventional energy sources, individuals help mitigate greenhouse gas emissions. Expert evaluations indicate that methods such as solar cooking and open-fire cooking harness renewable energy sources, thereby minimizing waste and environmental damage.

    Furthermore, cooking without electricity promotes the use of local ingredients, which reduces the environmental costs associated with transporting food over long distances. By adopting sustainable cooking practices, individuals not only elevate their personal health but also actively contribute to safeguarding the planet for future generations.

    Advanced Strategies for Cooking Without Electricity

    How to Optimize Solar Cooking for Best Results?

    Solar cooking harnesses the sun’s energy to prepare meals, establishing itself as an eco-friendly and sustainable alternative to traditional cooking methods. To maximize effectiveness in solar cooking, one must utilize specific equipment—such as solar cookers or solar ovens—designed to concentrate sunlight efficiently. Effective strategies for solar cooking include positioning the cooker to face the sun directly and adjusting its angle throughout the day, alongside using dark, heat-absorbent pots to enhance cooking efficiency.

    Cooking times may vary based on sunlight intensity, so a degree of patience is essential. Foods particularly well-suited for solar cooking include rice, beans, and vegetables, which can be cooked in a single pot to minimize energy loss. Additionally, experimenting with various recipes specifically tailored for solar cooking can yield delightful results while promoting energy conservation.

    Techniques to Explore for Open Fire Cooking

    Techniques for open fire cooking, including grilling or roasting over a campfire, are timeless practices that connect us to our culinary heritage. While incredibly rewarding, cooking over an open flame demands careful attention to safety. Essential safety precautions encompass selecting a designated fire pit area situated away from flammable materials and always having a water source nearby to extinguish the fire if necessary.

    When preparing food, ensure that meats are thoroughly cooked to prevent foodborne illnesses, and use separate utensils for raw and cooked foods to avert cross-contamination. Exploring various cooking techniques—like skewering vegetables or meats on sticks or using cast iron pots over coals—can lead to unforgettable culinary experiences under the open sky.

    Utilizing Thermal Mass for Efficient and Slow Cooking

    Thermal mass cooking exemplifies an innovative approach that leverages retained heat for slow cooking, presenting an efficient alternative to conventional cooking methods. This technique involves using materials such as bricks, stones, or specially designed thermal cookers that hold heat for extended periods. To maximize the effectiveness of thermal mass cooking, preheating the thermal mass before placing food inside is crucial, ensuring that the cooking remains uniform and effective.

    Foods particularly well-suited for this method include stews, soups, and grains, which benefit from the slow, even heat. Furthermore, this technique champions resourcefulness, often requiring minimal fuel and can be employed in a variety of settings, from backyards to remote camping sites.

    Challenges Associated with Cooking Without Electricity

    Overcoming Time Constraints When Cooking Without Electricity

    Cooking without electricity can sometimes present time constraints, particularly with methods like solar cooking that necessitate longer cooking durations. However, effective planning and preparation can help alleviate these challenges. One approach involves utilizing quicker cooking methods for fast meals, such as open-fire cooking or preparing dishes that can be left to cook slowly while engaging in other activities.

    Batch cooking represents another effective tactic, allowing for the simultaneous preparation of multiple meals. By cooking larger quantities, individuals can save time during busy weeks by simply reheating or enjoying leftovers. Additionally, employing techniques like haybox cooking—where food is placed in an insulated container after initial boiling—can significantly reduce cooking time while still delivering delicious, fully cooked meals.

    Adapting Cooking Techniques to Weather Variability

    Weather conditions can significantly affect cooking without electricity methods, particularly solar cooking, which is heavily reliant on sunlight. However, adapting cooking techniques to varying weather conditions is entirely achievable. For instance, on overcast days, one can pivot to open fire cooking or thermal mass cooking, both of which are less dependent on ideal weather conditions.

    In inclement weather, consider indoor cooking options that utilize thermal mass materials or insulated pots. Additionally, planning meals according to local weather forecasts can optimize cooking times and methods, ensuring that meals are prepared efficiently, regardless of external conditions.

    Effectively Managing Limited Resources While Cooking Without Electricity

    Cooking without electricity often necessitates managing limited resources, such as fuel for open fire cooking or water for solar cooking. Developing effective resource management strategies is vital. Prioritizing efficiency by utilizing minimal fuel sources, like small branches or twigs for an open fire, can enhance cooking capabilities.

    Moreover, embracing cooking methods that require fewer resources, such as haybox cooking, can be highly beneficial. This method relies on insulation to retain heat without necessitating continuous fuel consumption. Finally, preserving food through techniques like fermentation or drying can reduce the need for fresh ingredients, enabling cooks to optimize resources while minimizing waste.

    Ensuring Food Safety in the Absence of Traditional Power Sources

    Maintaining food safety while cooking without electricity is critical, especially since conventional refrigeration methods may not be available. Proper storage and cooking techniques are essential to prevent spoilage and foodborne illnesses. First and foremost, ensure that all ingredients are fresh before use, particularly perishables like meats and dairy products.

    Utilizing cool storage methods, such as burying food in cool ground or employing insulated containers, can help maintain safe temperatures. Thoroughly cooking food, especially meats, is vital for eliminating harmful bacteria. Lastly, practicing rigorous hygiene during food preparation, such as washing hands and utensils, can significantly minimize the risk of contamination.

    Research-Backed Advantages of Cooking Without Electricity

    What Do Studies Reveal About Nutritional Benefits?

    Research indicates that cooking without electricity can preserve more nutrients in food compared to traditional cooking methods reliant on electricity or gas. Studies show that techniques such as solar cooking and steaming help retain vitamins and minerals that may be lost during conventional high-temperature cooking methods, such as boiling.

    Moreover, cooking without electricity often emphasizes the use of whole, unprocessed ingredients, contributing to higher nutritional quality in meals. Focusing on fresh produce fosters a diet rich in essential nutrients, leading to improved overall health. Consequently, individuals who adopt these cooking methods are likely to experience significant improvements in their dietary habits and health outcomes.

    How Does Cooking Without Electricity Influence Mental Well-Being?

    Cooking without electricity has the potential to positively impact mental health by encouraging mindfulness and reducing reliance on technology. Engaging in the tactile experience of preparing meals—such as chopping, mixing, and cooking—can serve as a form of meditation, allowing individuals to disconnect from the digital world.

    Actionable steps for enhancing mental well-being through cooking without electricity include establishing a routine that integrates cooking as a form of self-care. This could involve setting aside time each week to explore new recipes, inviting friends or family to share in the culinary experience, or even attending classes to learn traditional cooking techniques. Such activities foster a sense of community and connection, further enhancing mental health.

    How Does Cooking Without Electricity Promote Environmental Sustainability?

    Cooking without electricity significantly contributes to environmental sustainability by reducing greenhouse gas emissions associated with traditional cooking methods. By harnessing renewable energy sources, such as solar or biomass, individuals can diminish their reliance on fossil fuels. Expert evaluations indicate that adopting these practices not only reduces carbon footprints but also supports a sustainable lifestyle.

    Additionally, cooking without electricity frequently encourages a lifestyle centered around local and seasonal ingredients, minimizing the environmental costs linked to food transportation. This holistic approach enhances appreciation for the environment, as individuals become more mindful of their food sources and the impact of their choices on the planet.

    How Can Cooking Without Electricity Enhance Social Connections?

    Cooking without electricity can significantly bolster social connections by promoting communal cooking and shared meals. Traditional cooking methods often unite families and communities, fostering collaboration and bonding over shared culinary experiences.

    One effective way to reinforce community ties is by organizing potlucks or community cooking events, where individuals can exchange recipes and cooking techniques while enjoying each other’s company. Moreover, teaching friends or family members how to cook without electricity creates opportunities for shared experiences and learning, further deepening relationships through the joy of food preparation.

    Incorporating Cooking Without Electricity Into Everyday Life

    How to Seamlessly Incorporate Cooking Without Power Into Your Daily Routine?

    Integrating cooking without electricity into daily life requires thoughtful planning and adaptability. Begin by making small adjustments to your routine, such as dedicating one day a week to explore solar cooking or open-fire techniques. Gradually expanding this practice fosters a smoother transition, making it a more enjoyable experience.

    Additionally, consider meal prepping for the week using cooking methods that don’t require power. For example, utilize haybox cooking for slow-cooked meals or prepare larger batches of food that can be easily reheated. Over time, these practices will become second nature, allowing cooking without electricity to become an integral aspect of your culinary lifestyle.

    How to Introduce Children to the Joy of Cooking Without Electricity?

    Teaching children to cook without electricity can instill invaluable life skills while promoting sustainability. This educational experience can be engaging and enjoyable, making learning fun through hands-on activities and interactive cooking sessions.

    Consider organizing family cooking nights where children can assist in meal preparation using traditional methods like open-fire cooking or solar cooking. Encourage creativity by allowing them to select ingredients and experiment with recipes, fostering a sense of ownership over their culinary creations. This approach not only builds essential skills but also deepens their appreciation for food and its origins.

    Finding Harmony Between Modern and Traditional Cooking Techniques

    Striking a balance between modern and traditional cooking methods allows for flexibility and variety in meal preparation. Merging these approaches can optimize efficiency while still honoring culinary traditions. For instance, a modern slow cooker can be employed alongside traditional methods like solar cooking, resulting in a diverse array of meal options.

    The advantages of this balance include the opportunity to experiment with new techniques while still enjoying the comfort and familiarity of modern conveniences. This fusion can lead to innovative recipes that reflect both contemporary and traditional influences, celebrating the best aspects of both culinary worlds.

    How to Address Challenges and Limitations of Cooking Without Power?

    Addressing common challenges, such as time constraints and weather conditions, is essential to make cooking without electricity more feasible and enjoyable. Effective planning and preparation can mitigate these obstacles. For instance, utilizing quicker cooking methods, like open-fire cooking, can save time when preparing meals.

    Moreover, having backup plans for adverse weather conditions—such as maintaining alternative cooking methods—can ensure that meals are consistently prepared without electricity. Additionally, embracing resourcefulness and creativity in the kitchen can transform limitations into opportunities for culinary innovation, enriching the overall cooking experience.

    Innovations in Cooking Without Electricity

    What Are the Latest Innovations in Cooking Without Power Technology?

    Innovations in cooking without electricity technology are continually emerging, introducing new and efficient ways to prepare meals. Recent advancements include solar cookers designed for enhanced efficiency, such as parabolic solar cookers that effectively concentrate sunlight, enabling quicker cooking times.

    Other innovations involve the creation of portable biomass stoves that utilize waste materials, thereby reducing environmental impact while providing cooking solutions in off-grid settings. As technology continues to evolve, these new tools will further enhance the practicality of cooking without electricity, making it more accessible to a broader audience.

    The Importance of Cooking Without Power in Sustainable Living

    Cooking without electricity is a crucial element of sustainable living, promoting eco-friendly practices that reduce reliance on non-renewable energy sources. By embracing these methods, individuals contribute to a more sustainable lifestyle that minimizes waste and prioritizes local food sources.

    Moreover, cooking without electricity fosters mindfulness in consumption, cultivating awareness of resource usage and food origins. This lifestyle choice not only benefits individuals but also has a broader impact on the community and the environment, contributing to a more sustainable future for all.

    Cultural and Community Aspects of Cooking Without Electricity

    Cooking without electricity nurtures cultural and community connections, often rooted in traditional methods and shared experiences. Celebrating these culinary practices helps preserve cultural heritage while advocating for sustainable living.

    Community events focused on cooking without electricity can unite individuals, allowing them to share stories, recipes, and techniques. This collective experience not only strengthens community bonds but also keeps cultural traditions alive, enriching the culinary landscape for generations to come.

    Frequently Asked Questions About Cooking Without Electricity

    What Are the Most Effective Cooking Methods Without Electrical Power?

    The most effective methods for cooking without electricity include solar cooking, open fire cooking, haybox cooking, and thermal mass techniques. Each method offers unique benefits, such as sustainability and efficiency.

    How Can I Begin Cooking Without Electricity?

    Start by incorporating small changes into your cooking routine, such as using a solar cooker on sunny days or experimenting with open fire cooking during camping trips. Gradually build your skills and confidence to enhance your culinary repertoire.

    What Tools Are Essential for Cooking Without Electricity?

    Essential tools for cooking without electricity encompass solar cookers, fire pits, rocket stoves, insulated hayboxes, and manual food processors. These tools facilitate various cooking techniques efficiently and effectively.

    Is Cooking Without Electricity Safe for Food Preparation?

    Yes, cooking without electricity can be safe if proper food safety practices are followed, including thorough cooking, maintaining hygiene, and ensuring appropriate food storage to prevent spoilage and contamination.

    Can Cooking Without Electricity Lead to Financial Savings?

    Absolutely! Cooking without electricity can result in significant savings on energy bills, as it decreases reliance on electricity and gas. Additionally, sourcing local ingredients can further reduce grocery expenses.

    How Does Cooking Without Electricity Benefit the Environment?

    Cooking without electricity aids in lowering carbon footprints by utilizing renewable energy sources and minimizing waste. It promotes sustainable practices that significantly benefit the planet and its ecosystems.

    What Health Benefits Are Associated with Cooking Without Electricity?

    Cooking without electricity often results in healthier meals, as it emphasizes fresh ingredients and avoids processed foods. This dietary focus can lead to enhanced nutrition and improved overall health.

    Can Children Learn Cooking Skills Without Electricity?

    Yes! Teaching children to cook without electricity can impart valuable skills and foster a sense of sustainability. It can be an engaging and educational experience that nurtures creativity in the kitchen.

    How Can I Maximize Efficiency When Cooking Without Electricity?

    To maximize efficiency, plan your meals, utilize batch cooking techniques, and experiment with time-saving methods like haybox cooking or thermal mass cooking to minimize fuel consumption.

    What Common Challenges Are Associated with Cooking Without Electricity?

    Challenges include time constraints, weather dependencies, limited resources, and ensuring food safety. Nevertheless, effective planning and adaptability can help overcome these hurdles successfully.

    Discover more on our journey at X!

    The post Cooking Without Power: Essential Techniques and Tips appeared first on Survival Bite.

    The Article Essential Techniques and Tips for Cooking Without Power Was Found On https://limitsofstrategy.com

  • Smoker Temperature Gauge Installation: Essential US Guide

    Smoker Temperature Gauge Installation: Essential US Guide

    Enhance Your Barbecue Skills by Selecting the Perfect Smoker Temperature Gauge

    Explore the Different Types of Smoker Temperature Gauges Available on the Market

    How to Install a Smoker Temperature Gauge: A traditional smoker with an analog gauge showing ideal temperature, classic barbecue setup with smoking meat.

    Selecting the appropriate smoker temperature gauge is essential for serious barbecue aficionados eager to enhance their grilling proficiency. In the U.S. market, you will primarily find two predominant types: analog and digital gauges. Analog gauges feature a dial system with a needle that indicates temperature levels. Many barbecue enthusiasts are drawn to these analog gauges due to their straightforward design and consistent reliability, especially in traditional setups. They typically function without batteries and can withstand high temperatures, making them a preferred choice for those who appreciate classic barbecue methods.

    Conversely, digital gauges have gained immense popularity thanks to their remarkable accuracy and often include backlit displays for easy visibility in various lighting conditions. A wide variety of digital models come with advanced features like timers and alarms, which are incredibly useful for managing cooking times efficiently. Some high-end digital gauges even offer mobile device connectivity, allowing you to monitor temperature remotely—a game-changing benefit during lengthy smoking sessions.

    Your decision between an analog and a digital gauge ultimately hinges on your cooking preferences and techniques. If you prioritize simplicity and reliability, an analog gauge may be the ideal choice for you; however, if you seek advanced features and superior accuracy, investing in a digital gauge can substantially enhance your smoking experience.

    Ready to Dive In and Listen to Expert Advice?


    Key Features to Consider for an Optimal Smoker Temperature Gauge Selection

    When selecting a smoker temperature gauge, several critical features warrant your attention, as they can significantly enhance your cooking journey. The foremost aspect is accuracy; your gauge should provide real-time readings that accurately represent the internal conditions of your smoker. An exemplary gauge will maintain a tolerance of less than five degrees Fahrenheit, ensuring that your meats consistently reach the perfect level of doneness.

    Durability is another essential consideration, particularly for smokers that often encounter high temperatures and various outdoor conditions. Opt for gauges constructed from stainless steel or other heat-resistant materials to avoid wear and tear over time. Furthermore, ease of reading is equally crucial; look for gauges with large, clear dials or displays that can be easily viewed from a distance. If you frequently cook in low-light environments, consider models equipped with illuminated screens or well-marked indicators to enhance visibility.

    Lastly, search for additional features such as wireless connectivity, temperature threshold alerts, and programmable settings, which can significantly enhance convenience, especially during extended smoking sessions. By focusing on these essential attributes, you can choose a smoker temperature gauge that perfectly aligns with your specific needs and elevates your overall barbecue experience.

    Where to Find the Best Smoker Temperature Gauges for Your Needs

    In the United States, smoker temperature gauges are readily available at a variety of retailers, catering to diverse preferences and budget considerations. Local hardware stores can serve as an excellent starting point, offering a selection of gauges that you can assess in person. This hands-on experience is particularly beneficial for those who value the opportunity to ask questions and receive expert advice from knowledgeable staff members.

    For a broader selection, online retailers like Amazon and Walmart boast extensive inventories of gauges that cater to everything from budget-friendly options to premium models. Shopping online not only enables you to read customer reviews and compare prices but often leads to better deals and exclusive promotions.

    Additionally, specialty barbecue shops offer an exceptional option, featuring gauges specifically designed for smoking and grilling. These stores typically stock high-quality, professional-grade instruments and can provide expert recommendations tailored to your specific smoker.

    Whether you choose to shop online or in-store, be sure to evaluate factors such as warranty and return policies, as these can provide invaluable peace of mind regarding your purchase.

    Comprehensive Guide for Installing and Calibrating Your Smoker Temperature Gauge

    A close-up of a smoker with a temperature gauge installed at the cooking chamber level for accurate readings.

    Proper installation and calibration of your smoker temperature gauge are crucial for achieving accurate readings and improving your overall smoking experience. Begin by selecting the optimal location on your smoker, ideally at the level of the cooking chamber, as this placement will ensure that the gauge accurately reflects the temperature where the meat is cooked. This strategic positioning allows for precise temperature readings, which is essential for achieving optimal cooking results.

    Once you have identified the ideal location, carefully follow the installation instructions provided with your gauge. Equally important is regular calibration. Without proper calibration, the temperature readings may be misleading, potentially leading to overcooked or undercooked meats that fail to meet your culinary expectations.

    To calibrate your gauge, use a secondary thermometer to compare readings. Adjust the gauge according to the manufacturer’s instructions until both thermometers display the same temperature. It is advisable to perform this calibration at least once per season or after significant temperature fluctuations in your cooking environment.

    By ensuring both proper installation and calibration, you will not only enjoy a more precise smoking process but will also enhance your cooking results, making every barbecue session an enjoyable success.

    Preparing Your Smoker for Gauge Installation: Essential Steps to Follow

    Critical Safety Measures to Implement Before Installation

    Before initiating the installation of your smoker temperature gauge, prioritizing safety is of utmost importance to avoid potential accidents. Always ensure that your smoker is completely cool and, if applicable, unplugged. Working with a hot smoker poses significant burn risks and other injuries, underscoring the importance of patience throughout this process.

    If your smoker has been recently used, allow it to cool down for at least 30 minutes to an hour. This waiting period is not only crucial for your safety but also helps prevent mishaps during installation. Additionally, ensure that the area surrounding the smoker is free of any flammable materials, including paper towels, grilling tools, and wood piles, as these could pose hazards.

    Finally, wear appropriate protective gear, such as gloves and safety glasses, especially when utilizing power tools during installation. Implementing these straightforward yet effective safety precautions will ensure a seamless installation process without any unpleasant surprises.

    Essential Tools Required for a Successful Installation

    A smoker temperature gauge installation setup with tools on a wooden workbench.

    Installing a smoker temperature gauge requires just a few common tools, most of which can be sourced from your local hardware store. The primary tool you will need is a drill, which is essential for creating a hole in your smoker for the gauge. Ensure you have the correct drill bit size that corresponds with the gauge’s stem diameter for a proper fit.

    You will also require screws and a screwdriver to secure the gauge to your smoker. If your gauge includes a mounting bracket, verify whether additional hardware is necessary for installation. A small wrench or pliers may also be helpful, particularly if your gauge features nuts that need tightening.

    Finally, having a measuring tape or ruler handy can assist you in pinpointing the exact location for the installation, ensuring precise placement. By gathering these tools in advance, you will streamline the installation process and enhance your chances of success.

    Cleaning and Preparing the Smoker Surface for Installation

    Before proceeding with the installation of your smoker temperature gauge, it’s crucial to thoroughly clean and prepare the installation surface. This step is vital for ensuring a secure fit and accurate temperature readings. Begin by using a soft cloth or sponge to wipe down the area where you plan to install the gauge. Remove any grease, soot, or debris that may have accumulated from previous grilling sessions, as these can interfere with the gauge’s performance.

    If your smoker has a painted or coated surface, exercise caution not to scrub too vigorously, as this could damage the finish. Instead, utilize a mild detergent mixed with warm water to gently clean the surface. Rinse thoroughly and allow it to dry completely before moving forward with the installation.

    Additionally, inspect the designated area for any rust or corrosion that could hinder the gauge’s installation. If you discover any issues, take the necessary steps to address them using appropriate rust treatment products. Ensuring a clean and well-prepared surface will facilitate an easy installation and contribute to the longevity of your smoker temperature gauge.

    A Comprehensive Step-by-Step Guide to Installing Your Smoker Temperature Gauge

    Identifying and Marking the Ideal Installation Location

    Determining the perfect location for your smoker temperature gauge is critical for achieving accurate readings. Start by selecting a spot on your smoker that offers a clear view of the thermometer while keeping a safe distance from direct heat sources. Typically, the best location is near the cooking chamber, where the gauge can effectively monitor the temperature.

    Once you’ve pinpointed the location, use a pencil or marker to clearly mark the spot. Ensure the mark is at an appropriate height for easy viewing without requiring you to bend down or strain. For optimal results, utilize a measuring tape to ensure symmetry and alignment with any other gauges on your smoker.

    It’s advisable to step back and visually assess the marking before proceeding to drill. This final check guarantees that the gauge’s placement will not obstruct any cooking processes or lids on your smoker. Taking the time to mark accurately will lay the groundwork for a smooth and successful installation.

    Drilling the Hole for Gauge Installation

    With your installation spot marked, it’s time to drill the hole for your smoker temperature gauge. Selecting the correct drill bit size is vital; it should match the diameter of the gauge’s stem for a snug fit. Using the wrong size can complicate securing the gauge, ultimately leading to inaccurate readings.

    Position your drill perpendicular to the smoker’s surface to create a straight hole. Begin at a slow speed to avoid damaging the smoker’s material, then gradually increase the speed as you drill through. Clear any metal shavings or debris as you go to maintain a tidy work area.

    After drilling through the surface, double-check the size and cleanliness of the hole. It should allow the gauge to fit securely without being overly tight, ensuring ease of installation. A well-drilled hole will significantly enhance the gauge’s accuracy and overall longevity.

    Securing the Gauge Post-Installation

    Once you have drilled the hole, the next step is to secure the gauge in place. Begin by gently inserting the gauge’s stem into the drilled hole. Ensure it fits snugly without requiring excessive force, as this could damage both the gauge and the smoker.

    After the gauge is inserted, use the screws or nuts provided with it to properly secure it in place. You may need a small wrench or screwdriver to tighten these components adequately. Exercise caution not to over-tighten, as this can lead to damage or misalignment of the gauge.

    After securing it, take a step back and visually inspect the gauge to confirm it is level and positioned correctly for optimal reading. The gauge should be easily visible from a comfortable distance, allowing you to monitor your smoker’s temperature without hassle. Proper installation is critical for maintaining accurate readings, making this final step essential for a successful smoker setup.

    Expert Tips for Successfully Installing a Smoker Temperature Gauge

    Real-Life Success Stories from Gauge Installations

    Across the United States, barbecue enthusiasts have dramatically enhanced their smoking experiences by successfully installing temperature gauges. For instance, in Texas, a backyard pitmaster opted for a digital gauge on his offset smoker, allowing him to maintain the perfect temperature for brisket throughout the lengthy smoking process. This installation not only contributed to his award-winning recipes but also enabled him to monitor temperatures from the comfort of his home through a smartphone app.

    In Colorado, a competitive barbecue team selected an analog gauge for their vertical smoker. They appreciated the simplicity of the gauge, which required no batteries and provided reliable readings even at high altitudes, where temperature fluctuations can be more pronounced. Their choice paid off during competitions, as they consistently produced perfectly smoked ribs that impressed judges.

    In Florida, a family successfully installed multiple gauges on their smoker, allowing them to monitor various cooking zones. This approach enabled them to experiment with different smoking techniques, yielding delicious results and igniting a newfound passion for barbecue. These examples illustrate how diverse installation strategies can lead to successful outcomes across varied smoking environments and preferences.

    Practical Steps for Troubleshooting Common Gauge Issues

    Even with optimal installations, there may be instances when smoker temperature gauges fail to provide accurate readings. If you find that your gauge is not delivering correct readings, start by checking for loose connections. Ensure that the gauge is securely fastened and that there are no gaps between the gauge and the smoker.

    If connections are intact, recalibrating the gauge may be necessary. Use a secondary thermometer to compare readings, and adjust the gauge according to the manufacturer’s instructions to ensure accuracy.

    If issues persist, consider implementing the following troubleshooting steps:

    • Inspect for damage: Look for cracks or breaks in the gauge that could affect its functionality.
    • Check the gauge’s placement: Ensure it’s not positioned too close to direct heat sources.
    • Verify the smoker’s temperature: Use a secondary thermometer to confirm that the smoker is reaching the expected temperature.
    • Consult the warranty: If the gauge is new and not functioning correctly, check if it’s covered under warranty for replacement.

    By following these steps, you can quickly identify and resolve common problems with your smoker temperature gauge, ensuring reliable cooking results every single time.

    Expert Insights on the Optimal Placement of Your Gauge

    The placement of your smoker temperature gauge is crucial for ensuring accurate readings. Experts recommend positioning the gauge at the cooking chamber level to capture the most precise internal temperature while the smoker is in operation. This allows the gauge to accurately reflect the cooking environment, which is essential for maintaining control over the smoking process.

    Avoid placing the gauge too close to direct heat sources, as this can lead to consistently higher readings, potentially resulting in overcooked meats. Instead, consider positioning it slightly off-center or even on the opposite side of the heat source to minimize temperature fluctuations and improve accuracy.

    Here are some expert tips for optimal gauge placement:

    • Position the gauge at the desired level within the cooking chamber for accurate readings.
    • Keep the gauge away from direct flames or heat sources.
    • Consider multiple gauges for different cooking zones if your smoker design allows it.
    • Ensure the gauge is visible from your cooking station for easy temperature monitoring.

    By strategically placing your smoker temperature gauge, you can enhance your cooking precision and achieve consistently excellent results.

    The Importance of Regular Maintenance for Your Gauge

    Regular maintenance of your smoker temperature gauge is essential for ensuring its longevity and accuracy. Just as you would not neglect the upkeep of your smoker, your gauge also requires attention to function optimally. Cleaning the gauge frequently keeps it free from grease and soot buildup, which can obstruct readings and diminish performance.

    It’s advisable to inspect the gauge regularly for any signs of wear or damage. Look for cracks in the glass face, corrosion on the body, or any discrepancies in the readings. If you observe any issues, address them promptly to prevent further complications and ensure reliable performance.

    Here are some maintenance tips to keep your smoker temperature gauge in top condition:

    • Clean with a soft cloth and mild detergent regularly.
    • Inspect for signs of rust or damage and replace if necessary.
    • Ensure connections remain tight and secure after each use.
    • Store the smoker covered to protect the gauge from environmental factors.

    By incorporating these maintenance practices into your routine, you will not only extend the life of your smoker temperature gauge but also ensure that your cooking remains consistently excellent, enhancing your overall grilling experience.

    Understanding the Different Types of Smoker Temperature Gauges

    Being familiar with the various types of smoker temperature gauges available can help you make an informed decision that best suits your needs. Generally, analog and digital gauges are the most prevalent. Analog gauges are renowned for their durability and simplicity, as they require no batteries and provide consistent readings even in extreme temperatures. They typically feature large dials that are easy to read at a glance, making them ideal for traditional setups.

    In contrast, digital gauges offer advanced features, such as wireless connectivity and backlit displays, making them user-friendly, especially during nighttime cooking or low-light conditions. Some models can log temperature data over time, providing you with deeper insights into your smoking sessions and allowing for more precise control.

    Here’s a quick overview of the different types:

    • Analog Gauges: Durable, battery-free, straightforward to use, perfect for traditional setups.
    • Digital Gauges: High accuracy, often equipped with additional features such as alarms, making them ideal for tech-savvy users.
    • Wireless Gauges: Facilitate remote monitoring, perfect for extended cooking sessions.
    • Infrared Gauges: Deliver quick surface temperature readings, useful for checking grill hot spots.

    By understanding the advantages and drawbacks of each type, you can make a well-informed decision that enhances your smoking experience and achieves the best possible cooking results.

    The Crucial Importance of Calibrating Your Smoker Temperature Gauge

    Understanding the Significance of Calibration

    Calibration of your smoker temperature gauge is vital for ensuring its accuracy. Accurate readings are crucial in smoking, where maintaining the appropriate temperature can significantly influence the flavor and texture of your meats. A poorly calibrated gauge can lead to overcooked or undercooked food, resulting in disappointing outcomes even for the most experienced pitmasters.

    Calibration helps expose any discrepancies between the gauge’s readings and the actual temperatures, enabling you to make adjustments as needed. Regular calibration also prolongs the life of your gauge by preventing unnecessary strain from incorrect readings, ensuring that it continues to operate optimally for years to come.

    To ensure your gauge maintains its accuracy, plan to calibrate it at least once per season or whenever you notice inconsistencies in its readings. Adopting this proactive approach will help guarantee consistent, high-quality smoking results every time you fire up your grill.

    A Step-by-Step Guide to Calibrating Your Smoker Temperature Gauge

    Calibrating your smoker temperature gauge is a straightforward process that can be accomplished using a separate, reliable thermometer. Start by placing the secondary thermometer next to the smoker’s gauge, ensuring both instruments are exposed to the same air temperature for accurate comparison.

    Next, preheat your smoker to a set temperature, ideally one that you frequently use during smoking sessions. Allow both gauges to stabilize for about 15 to 20 minutes, then compare the readings. If there is a discrepancy, adjust your smoker’s gauge according to the manufacturer’s guidelines, which may involve a simple twist or adjustment of its calibration screw.

    If your gauge does not feature a calibration option, take note of the difference and compensate for it during your next smoking session. By following these steps, you can ensure your gauge remains reliable and accurate, resulting in perfectly smoked meats every time you grill.

    How Often Should You Calibrate Your Gauge?

    To maintain the accuracy of your smoker temperature gauge, frequent calibration is advisable. Calibration should ideally occur at least once per season and more often if there are significant temperature fluctuations or after extensive use.

    If you’ve recently purchased a new gauge, it’s wise to calibrate it before its initial use. The manufacturer may not perfectly calibrate new gauges, and checking them ensures you start your smoking endeavors on the right foot.

    Additionally, if you notice discrepancies in your readings, such as a gauge indicating a much higher or lower temperature than expected based on your smoking experience, it’s time for recalibration. By adhering to these recommendations, you’ll ensure your smoker temperature gauge remains accurate, providing you with dependable readings throughout your barbecue sessions.

    Essential Tools Needed for Calibration

    Calibrating your smoker temperature gauge does not require an extensive toolkit. However, a few essential tools can ensure a smooth calibration process. First and foremost, you will need a reliable thermometer—this can be either an instant-read thermometer or another type that you trust for accuracy.

    Additionally, a small wrench or pliers may be necessary if your gauge has calibration screws that require adjustment. Having a calibration key, if provided by the manufacturer, can also be beneficial and streamline the process.

    Finally, a notepad or a digital device for note-taking during calibration can help you keep track of any adjustments made and discrepancies noted. By gathering these tools in advance, you’ll facilitate the calibration process and ensure your gauge delivers precise readings when you’re ready to smoke.

    Diving into the Functionality of a Smoker Temperature Gauge

    Understanding the Mechanics Behind Temperature Measurement

    A smoker temperature gauge measures the internal temperature of your smoker, playing a vital role in maintaining the desired cooking temperature. The mechanism typically involves a probe that senses heat and a dial or digital display that conveys this temperature to the user.

    In analog gauges, a bi-metallic strip or thermocouple reacts to heat, causing a needle to move along a calibrated scale. Digital gauges, in contrast, utilize a sensor to detect temperature changes and convert those readings into a digital format for easier interpretation.

    Key components of thermometer mechanisms include:

    • Sensing Element: Detects temperature changes within the smoker.
    • Display: Presents the temperature readings (dial for analog, screen for digital).
    • Calibration Mechanism: Allows for adjustments to ensure accuracy.
    • Housing: Protects internal components from the environment of the smoker.

    Understanding how these components work together enhances your appreciation of the gauge and aids in troubleshooting any issues that may arise.

    The Crucial Role of Temperature in the Smoking Process

    Temperature control is fundamental in the smoking process, as it directly impacts the flavor, texture, and safety of your meats. Each type of meat necessitates specific temperature ranges to achieve optimal cooking results, making it essential to maintain consistency throughout the smoking journey.

    For instance, brisket typically benefits from a low and slow approach, with temperatures ranging between 225°F and 250°F, which allows the connective tissues to break down and results in tender meat. On the other hand, poultry needs to reach an internal temperature of 165°F for safety; however, many pitmasters prefer smoking it at slightly higher temperatures for enhanced flavor and texture.

    Understanding the importance of temperature also extends to food safety, as cooking meats at safe temperatures helps prevent the risk of foodborne illnesses. By closely monitoring temperatures with your smoker gauge, you can ensure that your smoked dishes turn out delicious and safe for consumption.

    Factors Influencing Gauge Accuracy

    Several factors can impact the accuracy of your smoker temperature gauge, potentially compromising the quality of your smoking results. One of the primary factors is the gauge’s placement. If the gauge is positioned too close to direct heat or flames, it will register higher temperatures, leading to uneven cooking.

    Calibration is another critical aspect. A gauge that hasn’t been calibrated regularly can produce readings that deviate from actual temperatures, resulting in frustration during cooking.

    Moreover, the quality of the gauge itself also plays a role. Lower-quality gauges may not provide reliable readings, while high-quality models often feature more accurate sensors and superior construction, ensuring longevity and precision.

    By understanding these factors, you can take proactive measures to ensure your gauge operates effectively and provides accurate readings throughout your smoking sessions.

    Reaping the Benefits of Using a Smoker Temperature Gauge

    Achieving Consistent Cooking Results Every Time

    One of the greatest advantages of using a smoker temperature gauge is the significant improvement in cooking consistency. With precise temperature readings readily available, you can maintain optimal cooking conditions throughout the entire smoking process. This consistency is essential for achieving the ideal flavor profile and texture in your meats.

    For example, when smoking ribs, maintaining a steady temperature between 225°F and 250°F allows the meat to cook uniformly, rendering fat and collagen into tender, juicy bites. Without a reliable gauge, it’s easy to fluctuate between temperatures, leading to dry or undercooked meat that fails to impress.

    Moreover, the ability to monitor temperatures throughout the cooking process provides greater control, helping you make necessary adjustments as needed. This translates to less guesswork and more dependable outcomes, whether you are a novice or an experienced pitmaster looking to refine your skills.

    Enhancing Food Safety Standards with Accurate Measurements

    Utilizing a smoker temperature gauge also plays a crucial role in improving food safety. Monitoring the internal temperature of meat ensures it reaches safe levels, thereby reducing the risk of foodborne illnesses. For example, poultry should be cooked to an internal temperature of at least 165°F, while pork and beef have their specific safe limits as well.

    By employing a temperature gauge, you can verify that your meats reach these temperatures without needing to cut into them, which can lead to moisture loss and a less appealing final product. This is particularly important for larger cuts of meat, where assessing internal temperatures can be challenging without reliable tools.

    Regularly checking the temperature also allows you to avoid the “danger zone” of 40°F to 140°F, where bacteria can proliferate, ensuring that your culinary creations are not only delicious but also safe for consumption.

    Convenient Monitoring Solutions to Enhance Your Cooking Experience

    A smoker temperature gauge provides unparalleled ease of monitoring during your cooking sessions. Instead of constantly lifting the smoker lid to check on the meat, which can lead to heat loss and extended cooking times, you can simply glance at your gauge to assess the temperature.

    Digital gauges, in particular, often come equipped with features like remote monitoring and alarms that notify you when your smoker reaches a predetermined temperature. This convenience allows you to focus on other tasks, socialize with guests, or relax while your food cooks, all while maintaining confidence that you’re effectively managing your smoking game.

    By utilizing a temperature gauge, you streamline your cooking process, resulting in a more enjoyable and less stressful smoking experience, regardless of your skill level.

    Ensuring Longevity of Your Smoker Temperature Gauge Through Proper Maintenance

    Essential Cleaning Practices for Optimal Performance

    To keep your smoker temperature gauge functioning at its best, regular cleaning is essential. Over time, grease, soot, and other residues can accumulate, obstructing readings and negatively impacting performance. Start by using a soft cloth dampened with mild detergent to wipe down the gauge, ensuring you avoid abrasive cleaners that could scratch the surface.

    For deeper cleaning, especially if the gauge has been exposed to heavy smoke, a mixture of vinegar and water works wonders. Soak a cloth in this solution and gently wipe the gauge, allowing it to penetrate any tough buildup. Rinse thoroughly with water to eliminate any cleaning agents.

    After cleaning, ensure the gauge is completely dry before reattaching it to your smoker. Regular cleaning not only maintains the accuracy of your readings but also prolongs the gauge’s life, ensuring it remains a reliable tool for all your smoking endeavors.

    Strategies for Protecting Your Gauge from Environmental Factors

    Protecting your smoker’s temperature gauge from the elements is crucial for its longevity and optimal performance. Exposure to rain, snow, or extreme temperatures can damage the internal components of the gauge, leading to inaccurate readings or complete failure.

    When your smoker is not in use, consider covering it with a protective tarp or investing in a smoker cover that shields it from moisture and UV rays. This simple precaution can prevent rust and corrosion, significantly extending the life of your gauge.

    Additionally, if you’re using a digital gauge, removing it when the smoker is not in operation—especially if it’s portable—can protect it from potential damage. Store it in a cool, dry place to safeguard it against environmental factors. By implementing these preventive measures, you can ensure your gauge remains in excellent condition and ready for your next barbecue adventure.

    Identifying When to Replace Your Smoker Temperature Gauge

    Recognizing when to replace your smoker temperature gauge is crucial for maintaining cooking quality. If you notice that your gauge consistently provides inaccurate readings, even after calibration, it may be time for a replacement.

    Additionally, if the glass face becomes cracked or damaged, it compromises the gauge’s integrity and readability, necessitating a new purchase. Regular inspections are essential—if you find rust or corrosion on the gauge body that cannot be cleaned, it’s likely time for a replacement to ensure reliable performance.

    Another sign that you need a new gauge is if it fails to respond quickly to temperature changes. A sluggish response time can lead to mismanagement of your smoking environment, resulting in unsatisfactory cooking results. By being proactive and replacing your gauge when necessary, you guarantee the best possible outcomes for all your grilling endeavors.

    Your Frequently Asked Questions Addressed

    How often is it necessary to calibrate my smoker temperature gauge?

    It’s recommended to calibrate your smoker temperature gauge at least once per season or whenever you notice discrepancies in readings that could affect performance.

    How can I ascertain if my temperature gauge is accurate?

    To test accuracy, compare your gauge’s readings with those of a reliable secondary thermometer, adjusting as necessary for any discrepancies identified during the comparison.

    Is a digital thermometer suitable for my smoker?

    Yes, digital thermometers are excellent for smokers, providing precise readings and various features, such as alarms and remote monitoring capabilities that enhance your cooking experience.

    What steps should I take if my gauge is reading too high?

    Check the gauge’s placement to ensure it’s positioned away from direct heat, recalibrate it if necessary, and consider the possibility of damage if issues persist.

    How can I effectively clean my smoker temperature gauge?

    Use a soft cloth dampened with mild detergent, or a vinegar-water solution for tougher residue, ensuring the gauge is dry before reinstalling it.

    What type of temperature gauge is recommended for beginners?

    Analog gauges are often recommended for beginners due to their simplicity and reliability; however, digital gauges are also user-friendly and provide accurate readings that facilitate the learning process.

    Is it necessary to disconnect the gauge when not in use?

    While not always necessary, removing a digital gauge can protect it from moisture and damage when the smoker is not in operation, prolonging its lifespan.

    Can I install the gauge myself?

    Absolutely! Installing a smoker temperature gauge is a straightforward process that can be completed with basic tools by closely following the manufacturer’s instructions.

    What temperature should my smoker be set at for ribs?

    For optimal results, set your smoker to maintain a temperature of about 225°F to 250°F when cooking ribs for the best flavor and tenderness.

    How long can I expect a smoker temperature gauge to last?

    With proper care and maintenance, a quality smoker temperature gauge can last several years. However, it’s essential to replace it if you notice inaccuracies or physical damage that could impact its performance.

    Connect with us on Facebook for More Expert Tips!

    The Article How to Install a Smoker Temperature Gauge: A US Guide appeared first on https://pitmastersarsenal.com

    The Article Install a Smoker Temperature Gauge: Your Essential US Guide Was Found On https://limitsofstrategy.com

  • Low-Carb Pizza Dough: The Ultimate Recipe Guide

    Low-Carb Pizza Dough: The Ultimate Recipe Guide

    Transform Your Cooking with the Wonders of Low-Carb Pizza Dough

    Discover the Revolutionary Benefits of Low-Carb Pizza Dough

    Best Low-Carb Pizza Dough Recipes: A chef preparing low-carb pizza with almond and coconut flours on a marble countertop, surrounded by keto diet books and fresh toppings.

    The innovative concept of low-carb pizza dough offers a thrilling new option for those who want to enjoy delicious pizza while minimizing their carbohydrate intake. This alternative is particularly appealing for individuals adhering to ketogenic diets, where the goal is to significantly reduce carbohydrate consumption to promote effective weight loss and maintain steady blood sugar levels. By utilizing alternative flours and distinctive ingredients, low-carb pizza dough provides an enjoyable texture and flavor profile, allowing you to indulge in your favorite meals without the guilt associated with traditional high-carb choices.

    Furthermore, the adaptability of low-carb dough opens up limitless possibilities for creating various styles of pizza, from the classic Margherita to more adventurous topping combinations that appeal to diverse tastes. The secret lies in carefully selecting the right blend of ingredients to craft a dough that tantalizes your palate while accommodating dietary preferences and restrictions.

    Unveil the Numerous Benefits of Adopting Low-Carb Dough

    Opting for low-carb dough unveils a multitude of advantages that make it an ideal choice for many individuals. One notable benefit is its ability to stabilize blood sugar levels. Conventional pizza dough often contains high amounts of refined carbohydrates, which can lead to rapid spikes in blood sugar, especially for those managing diabetes or dealing with insulin resistance. Low-carb alternatives mitigate this issue, providing a steady source of energy throughout the day.

    Additionally, incorporating low-carb dough into your meals can significantly assist in achieving your weight loss goals. By lowering carbohydrate intake, your body may enter a state of ketosis, where it utilizes fat for energy instead of sugars. This metabolic shift not only aids in weight loss but can also enhance mental clarity and focus. For those on restrictive diets, low-carb pizza dough serves as a satisfying meal option that does not compromise on taste or enjoyment.

    Essential Ingredients for Crafting Delicious Low-Carb Pizza Dough

    When it comes to creating the ultimate low-carb pizza dough, selecting the right ingredients is paramount. Common components include almond flour, coconut flour, cheese, and eggs.

    • Almond flour: This gluten-free flour is low in carbohydrates and rich in protein and healthy fats. It delivers a delightful nutty flavor and a pleasing texture that enhances your pizza experience.
    • Coconut flour: A highly absorbent alternative that adds a subtle coconut taste, it typically requires more liquid than other flours, making it versatile for various recipes.
    • Cheese: Commonly used varieties include mozzarella and cream cheese. Cheese not only adds richness but also acts as a binder, improving both the flavor and texture of the dough.
    • Eggs: Acting as a binding agent, eggs provide structure and moisture, making the dough more manageable during preparation.

    When combined, these ingredients yield a dough that is low in carbohydrates yet rich in flavor and satisfaction, allowing for endless culinary creativity.

    Get Inspired with Expert Tips for Outstanding Low-Carb Pizza Dough Recipes

    Chef kneading low-carb pizza dough with fresh ingredients on a rustic table.

    Explore Popular and Delicious Low-Carb Pizza Recipes

    The world of low-carb pizza dough is filled with a plethora of recipes that have garnered praise from both culinary experts and passionate home cooks. Below is a carefully selected list of beloved options that showcase the versatility of low-carb ingredients:

    • Almond Flour Pizza Crust: This recipe uses almond flour, mozzarella cheese, eggs, and seasonings to create a crust that perfectly balances heaviness and crispiness.
    • Coconut Flour Pizza Base: Combining coconut flour, eggs, and cheese results in a light, airy base with a hint of coconut flavor, ideal for adventurous eaters.
    • Cauliflower Pizza Crust: Grated cauliflower mixed with cheese and eggs offers a gluten-free, vegetable-rich option that is both nutritious and flavorful.
    • Fathead Dough: A popular choice made with almond flour and mozzarella, this dough is known for its remarkable stretchiness and satisfying texture.

    These examples highlight the array of ingredients available and demonstrate how easy it is to whip up a delightful low-carb pizza base in the comfort of your own kitchen.

    Follow These Practical Steps to Prepare Low-Carb Dough with Ease

    Making low-carb pizza dough is a straightforward process that anyone can master with a few simple steps. Here’s a guide to efficiently prepare your dough:

    • Combine the Ingredients: Begin by mixing your chosen flour (either almond or coconut), cheese, eggs, and any seasonings in a mixing bowl until everything is well blended.
    • Knead the Dough: Once mixed, knead the dough until it reaches a smooth consistency, ensuring all components are thoroughly incorporated for the best texture.
    • Roll Out the Dough: Transfer the dough to a floured surface and roll it out to your desired thickness, remembering that thinner crusts yield a crunchier finish.
    • Preheat Your Oven: While preparing the dough, preheat your oven to approximately 220°C for optimal baking results.

    By adhering to these steps, even novice cooks can produce astonishing results, crafting a low-carb pizza crust that is both satisfying and versatile, ready to be topped with your favorite ingredients.

    Master the Art of Perfecting Dough Texture and Flavor

    Low-carb pizza dough with almond flour and mozzarella, topped with herbs and cheese blend on a rustic wooden table.

    The texture and flavor of low-carb pizza dough are essential components that can greatly influence the overall pizza experience. Achieving the perfect dough requires an understanding of ingredient balance. For instance, combining almond flour and mozzarella cheese produces a slightly chewy texture reminiscent of traditional pizza crust. In contrast, coconut flour can offer a light, airy quality that some may prefer.

    To enhance the taste, incorporating herbs and spices such as garlic powder or Italian seasoning can significantly elevate the flavor profile. A useful tip is to experiment with different cheese types; blending in cream cheese can create a creamier texture, while using a mix of cheeses can yield a more complex flavor experience.

    Ultimately, the ideal low-carb pizza dough achieves a harmonious balance between texture and flavor, ensuring that every bite is both satisfying and delightful.

    Explore Customization Options and Flavor Variations

    The true beauty of low-carb pizza dough lies in its adaptability to cater to different dietary preferences and flavor profiles. The options for variations and customizations are virtually limitless, allowing you to personalize recipes to suit your unique tastes.

    If you love culinary experimentation, consider infusing spices directly into the dough. Adding crushed red pepper flakes can introduce a delightful heat, while Italian herbs can contribute an aromatic essence. Additionally, think about substituting traditional mozzarella with other cheese varieties like cheddar or parmesan to alter the flavor and texture. For those seeking nut-free alternatives, options such as flaxseed or sunflower seed flour can be utilized. These substitutes not only provide distinct flavors but also offer nutritional benefits while keeping carbohydrate counts low.

    The possibilities with low-carb pizza dough are virtually endless, empowering you to create a dish that aligns perfectly with your culinary interests and dietary needs.

    Step-by-Step Guide to Creating Low-Carb Pizza Dough

    Essential Steps for Crafting the Perfect Low-Carb Pizza Dough

    Creating low-carb pizza dough involves several straightforward steps that ensure a successful and enjoyable outcome. Follow these essential guidelines to craft your dough:

    • Gather Your Ingredients: Begin by collecting all necessary ingredients, including your preferred low-carb flour, cheese, eggs, and any desired seasonings.
    • Combine the Dough: Start with the dry ingredients, then add the cheese and eggs, blending until a cohesive dough forms. Knead the mixture for a few minutes until it reaches a smooth and elastic texture, ensuring even distribution of all components.
    • Allow the Dough to Rest: Let the dough rest for about 10-15 minutes, allowing it to improve its texture and making it easier to roll out.
    • Shape the Dough: After resting, roll out the dough to your preferred thickness and shape it, preparing it for baking.

    By adhering to these steps, you can create a low-carb pizza dough that is both flavorful and easy to prepare, setting the stage for delightful homemade pizzas.

    Harnessing a Food Processor for Efficient Dough Preparation

    Utilizing a food processor can greatly streamline the process of making low-carb pizza dough. This versatile kitchen appliance allows for rapid mixing and kneading of ingredients, saving valuable time for busy home cooks. To use a food processor, simply add the dry ingredients, followed by the cheese and eggs, and pulse until the mixture forms a cohesive dough ball.

    This method not only reduces preparation time but also ensures that all ingredients are uniformly incorporated, which is crucial for achieving the desired texture. For those who find traditional mixing methods tedious, a food processor can revolutionize the process, enabling you to create low-carb pizza dough in mere minutes.

    Optimal Resting Time for Dough for Best Results

    Allowing your low-carb pizza dough to rest is a pivotal step that can significantly enhance its texture. A resting period of about 10-15 minutes is ideal, as it allows the ingredients to meld together and the gluten structure to relax. When gluten is given the chance to rest, the dough becomes more pliable and easier to roll out, which is essential for achieving a uniform thickness.

    During this resting phase, the starches in the flour can fully hydrate, resulting in an improved overall structure once baked. Skipping this step can lead to a tougher texture and complicate the shaping process. Therefore, allowing your dough a moment to relax is an integral part of crafting a delectable low-carb pizza crust.

    Key Ingredients for Successful Low-Carb Pizza Dough

    When creating low-carb pizza dough, certain ingredients are indispensable for ensuring a successful and flavorful outcome. The following components are critical:

    • Almond flour: This primary flour used in many low-carb recipes offers a subtle nutty flavor and low carbohydrate content, making it a top choice.
    • Mozzarella cheese: Essential for binding the dough and contributing richness, mozzarella helps achieve a stretchy, chewy crust that mimics traditional pizza.
    • Eggs: Serving as a binder, eggs provide structure and moisture, facilitating ease of handling during preparation.
    • Seasonings: Incorporating herbs and spices like garlic powder, oregano, or basil enhances the flavor and aroma of the crust, making it more enjoyable.

    Together, these ingredients form the foundation of a scrumptious low-carb pizza dough that can satisfy even the most discerning pizza aficionados.

    Steps for Baking Your Dough to Achieve Perfect Crispiness

    Baking your low-carb pizza dough to perfection requires a few essential steps to ensure a crispy and flavorful crust. Begin by preheating your oven to 220°C, allowing it to reach the optimal temperature for effective baking. Once your dough is rolled out to your desired thickness, transfer it to a baking sheet lined with parchment paper or a greased pizza stone.

    Bake the crust for around 10-15 minutes, or until it turns a lovely golden brown color. This initial baking period helps set the structure of the dough, ensuring it can support the weight of your toppings without becoming overly soft or soggy. To achieve the best texture, keep a close eye on the crust during the final minutes of baking, as oven temperatures may vary.

    By following these baking guidelines, you will create a low-carb pizza crust that is not only delicious but also provides a satisfying crunch that perfectly complements your favorite toppings.

    Identifying the Best Ingredients for Low-Carb Pizza Dough

    The Benefits of Choosing Almond Flour

    Almond flour stands out as a foundational ingredient in many low-carb pizza dough recipes, celebrated for its extensive health benefits and culinary versatility. With its low carbohydrate content compared to traditional wheat flour, it is an ideal selection for those aiming to reduce their carbohydrate intake. Almond flour is nutrient-rich, providing essential vitamins and minerals, healthy fats, and ample protein, making it a nourishing addition to any meal plan.

    Incorporating almond flour into your pizza dough not only enhances its nutritional value but also lends a subtle nutty flavor and satisfying texture. The grainy consistency offers a pleasant chew that closely resembles traditional pizza, making it a favorite among those following low-carb diets. Its versatility extends beyond pizza dough, as it can also be used in a variety of baked goods, allowing for extensive culinary creativity.

    Is Coconut Flour an Effective Alternative?

    Coconut flour is another excellent choice for low-carb pizza dough, known for its absorbent properties and mild coconut flavor. While it differs significantly from almond flour in terms of texture and moisture retention, it offers a unique profile that can be advantageous in specific recipes. A standout benefit of coconut flour is its natural gluten-free status, making it an attractive option for individuals with gluten sensitivities or allergies.

    However, it is crucial to note that coconut flour requires a higher liquid-to-flour ratio, necessitating adjustments when used in pizza dough recipes. A helpful guideline is to use about one-quarter of the amount of coconut flour compared to other flours, while increasing the liquid content accordingly. This adjustment ensures that the dough maintains the proper consistency while still delivering an enjoyable texture and flavor.

    Enhancing Dough Flavor with Cheese

    Incorporating cheese into low-carb pizza dough is not only acceptable but often beneficial, as it can significantly enhance both the flavor and texture of the crust. Cheese, particularly mozzarella, contributes to the dough’s elasticity, enabling it to stretch and hold together during baking. This characteristic closely resembles traditional pizza crusts, making it an appealing choice for those seeking a low-carb alternative.

    Adding cheese to the dough can also impart a rich, savory flavor that elevates the overall pizza experience. For those who prefer a cheesier base, consider experimenting with various cheese types such as cheddar or parmesan. This flexibility allows you to customize the taste of your pizza crust while adhering to low-carb dietary guidelines.

    Moreover, incorporating cheese not only enhances flavor but also adds nutritional value, providing protein and calcium, making your low-carb pizza a more balanced meal.

    Expert Techniques for Crafting Exceptional Low-Carb Pizza Dough

    Experimenting with Different Types of Flours

    One of the most exciting aspects of creating low-carb pizza dough is the opportunity to experiment with different types of low-carb flours. Each flour brings unique characteristics to the dough, allowing you to tailor your pizza base to your specific taste preferences. For instance, blending almond flour with coconut flour can result in a more complex texture while simultaneously decreasing the overall carbohydrate content.

    As you explore new combinations, consider incorporating flours such as flaxseed meal or pea protein flour, which can introduce distinct flavors and nutritional benefits. Each blend will yield different outcomes in terms of texture and taste, so be sure to document your experiments to identify which combinations work best for you. This approach not only enhances your baking skills but also expands your culinary repertoire.

    Best Practices for Adjusting Dough Hydration Levels

    Fine-tuning the hydration levels of your low-carb pizza dough is critical for achieving the ideal texture. Proper hydration ensures that the dough is neither too dry nor excessively sticky, both of which can lead to unsatisfactory results. When working with flours like coconut flour, which absorb more moisture, finding the right balance of liquid to dry ingredients is essential.

    Begin by adding a small amount of liquid and gradually increase it until you achieve a workable dough consistency. If your dough appears too dry, incorporate a tablespoon of water or egg until you reach the desired texture. Conversely, if it’s too sticky, adding a bit more flour can help correct the issue. Balancing hydration levels is crucial for producing a low-carb pizza dough that is easy to work with and yields the perfect crust.

    Infusing Flavor Enhancers into Your Dough

    To elevate the taste of your low-carb pizza dough, consider adding flavor enhancers such as herbs and spices, which can make a significant difference. Incorporating dried herbs like oregano, basil, or thyme directly into the dough infuses each bite with aromatic flavors that beautifully complement your pizza toppings.

    Additionally, think about adding garlic powder or onion powder for an extra layer of taste that enriches the overall flavor profile. These simple additions can turn a basic dough into a culinary delight, making it more enjoyable and satisfying to eat. The beauty of low-carb pizza dough lies in its versatility, allowing you to experiment with various flavor combinations until you discover the perfect blend that resonates with your palate.

    Optimizing Yeast and Leavening Agents for Superior Dough

    Utilizing the right amount of yeast or alternative leavening agents is essential for improving the rise and texture of your low-carb pizza dough. While traditional pizza recipes often rely on yeast for leavening, low-carb alternatives can also utilize baking powder or baking soda to achieve a similar effect.

    If you choose to use yeast, allow the dough to rise for the specified time (if indicated in your recipe), which can contribute to a lighter texture. However, many low-carb recipes may forgo this step due to the absence of high-carb ingredients. When using baking powder, ensure it is included in the dry ingredients and adhere to the recommended ratios for optimal results.

    Experimenting with various leavening agents will enable you to determine which method yields the best texture and flavor for your low-carb pizza crust, enhancing your overall cooking experience.

    Expert Recommendations for Perfecting Your Low-Carb Pizza Dough

    Achieving the Ideal Dough Thickness for Optimal Enjoyment

    Finding the perfect thickness for your low-carb pizza dough is essential for a satisfying pizza experience. The thickness of the dough can significantly influence both texture and cooking time, making it crucial to strike a balance that aligns with your preferences. Use a rolling pin to evenly roll out the dough, applying consistent pressure to ensure uniform thickness.

    For a crispier crust, opt for a thinner dough, while a thicker crust offers a chewier base. Remember that thickness will also impact cooking times; thinner crusts may bake faster than thicker ones. A good practice is to start with a thickness of about 1/4 inch and adjust according to your preferences. This method will help you achieve the perfect balance of texture and flavor in your pizza.

    Should You Pre-Bake Your Crust for Optimal Results?

    Pre-baking your low-carb pizza crust is a highly recommended technique that can significantly enhance the final product. This method prevents the crust from becoming soggy after adding toppings, ensuring a crispy and delightful base for your pizza. By pre-baking the crust for about 10-15 minutes before layering on your toppings, you allow the dough to firm up, creating a solid foundation.

    During this initial baking phase, monitor the crust closely to ensure it doesn’t over-brown. The aim is to achieve a light golden color without fully cooking it, as it will continue to bake once the toppings are added. Pre-baking your crust is a valuable tip for anyone looking to perfect their low-carb pizza experience.

    Avoiding Common Mistakes in Dough Preparation

    When crafting low-carb pizza dough, being aware of common pitfalls can lead to a more successful outcome. One frequent mistake is overmixing the dough, which can result in a dense texture rather than the light and airy crust you desire. Mixing just until combined is generally sufficient.

    Another common error is using excessive liquid; since low-carb flours vary in absorbency, it’s crucial to begin with less and gradually add more as needed. Neglecting to allow the dough to rest can also impact its pliability and texture, leading to a tougher crust.

    By being mindful of these common mistakes, you can enhance your low-carb pizza-making skills, ultimately resulting in a more delicious pizza that aligns with your dietary goals.

    Frequently Asked Questions About Low-Carb Pizza Dough

    What Are the Key Ingredients in Low-Carb Pizza Dough?

    Low-carb pizza dough typically includes ingredients like almond flour, coconut flour, eggs, and cheese, which combine to create a delightful low-carb alternative to traditional dough.

    Can Low-Carb Pizza Dough Be Frozen for Future Use?

    Yes, low-carb pizza dough can be frozen. Wrap it tightly in plastic wrap and store it in an airtight container for up to three months. Thaw it in the refrigerator before rolling it out for use.

    Is Low-Carb Pizza Dough Suitable for Gluten-Free Diets?

    Yes, most low-carb pizza dough recipes made with almond flour or coconut flour are gluten-free, making them an excellent choice for individuals with gluten sensitivities or celiac disease.

    What Is the Carbohydrate Content in Low-Carb Pizza Dough?

    The carbohydrate content in low-carb pizza dough varies based on the specific ingredients utilized. However, it typically ranges from 2 to 5 grams of net carbs per serving, which is significantly lower than that of traditional pizza dough.

    Can You Use Low-Fat Cheese in the Dough?

    It is possible to incorporate low-fat cheese into low-carb pizza dough; however, it may impact the texture and flavor. Full-fat cheese generally yields better results in terms of taste and consistency.

    How Long Can Cooked Low-Carb Pizza Be Stored?

    Cooked low-carb pizza can be stored in the refrigerator for up to three days. Ensure it is kept in an airtight container to maintain its freshness.

    What Toppings Work Well on Low-Carb Pizza?

    Low-carb pizza can support a variety of toppings, including low-carb vegetables, meats, cheeses, and sauces. Popular choices include pepperoni, olives, bell peppers, and mozzarella.

    Can Low-Carb Pizza Dough Be Made Without Cheese?

    Yes, it is possible to create low-carb pizza dough without cheese; however, the texture and flavor may differ. Consider using additional binders, such as flaxseed meal or chia seeds, to maintain structure.

    Is Low-Carb Pizza Dough Kid-Friendly?

    Many children enjoy low-carb pizza dough, especially when topped with their favorite ingredients. It can serve as a healthier alternative for families aiming to reduce carbohydrate intake.

    How Can You Enhance the Flavor of Low-Carb Pizza Dough?

    To amplify the taste of low-carb pizza dough, incorporate herbs, spices, or garlic powder into the mix. Experimenting with different cheeses can also significantly elevate the flavor profile of your pizza.

    Join Our Community on Facebook!

    The post Best Low-Carb Pizza Dough Recipes: Ultimate Guide appeared first on https://cookinggods.com

    The Article Low-Carb Pizza Dough Recipes: Your Ultimate Guide Was Found On https://limitsofstrategy.com

  • Essential Tips for Success in BBQ Competitions

    Essential Tips for Success in BBQ Competitions

    Mastering Preparation Techniques for Success in BBQ Competitions

    Developing a Comprehensive Strategy for Your BBQ Competition

    How to Stay Calm During BBQ Competitions: A chef at a BBQ competition, strategizing with a clipboard, surrounded by organized ingredients and timers.

    How to Stay Calm During BBQ Competitions: Formulating a comprehensive plan is a crucial element for effectively managing the intense pressures that BBQ competitions bring. This strategic approach ensures that you remain organized throughout the cooking process while tackling the many challenges that arise on competition day, including meticulous timing and effective ingredient management. This preparation empowers you to focus fully on your culinary tasks, leading to a more successful outcome. Here are essential planning steps to integrate into your BBQ competition strategy:

    • Identify your specific competition category (e.g., ribs, brisket, chicken) to tailor your strategy more effectively.
    • Develop a comprehensive timeline leading up to the competition, including practice sessions that guarantee optimal readiness.
    • Set a detailed cooking schedule for competition day that enhances time management and ensures efficient preparation.
    • Compile a list of all necessary ingredients and equipment for each dish to avert last-minute scrambles.
    • Prepare for potential setbacks (e.g., equipment failure or inclement weather) to maintain your composure and focus.
    • Clarify team roles when collaborating with others to ensure each member has clear responsibilities.
    • Create a checklist to monitor your progress throughout the event.
    • Examine the judging criteria to fine-tune your preparation and effectively meet expectations.

    By developing a comprehensive plan, you create a clear roadmap that minimizes the need for last-minute decisions, significantly alleviating the anxiety that often accompanies such situations. This meticulous preparation enables you to concentrate on executing your cooking techniques without the distraction of uncertainty about what comes next. Armed with a solid strategy, you can confidently address each element of the competition with clarity and assurance.

    Essential Tools for Achieving Success in BBQ Competitions

    Ensuring that all your tools and equipment are ready well in advance can help you avoid last-minute crises during BBQ competitions. Gather everything you need while also considering backups for essential items. A well-prepared competitor arrives equipped with the right tools, significantly reducing stress levels and boosting confidence on competition day. Below are vital pieces of equipment to compile:

    • Grill or smoker (along with the necessary fuel).
    • Employ meat thermometers to monitor cooking temperatures accurately.
    • Knives and cutting boards for efficient food preparation.
    • Marinade injectors and brushes to elevate the flavor of your dishes.
    • Wood chips or charcoal for imparting that authentic smoke flavor, if appropriate.
    • Aluminum foil for wrapping meats during the cooking process.
    • Coolers for storing meat until it’s time to cook, ensuring freshness.
    • Cleaning supplies, including brushes and sanitizers, are crucial for maintaining hygiene standards.

    By organizing your equipment well ahead of time, you ensure that everything will be operational and readily accessible when required. This proactive strategy not only alleviates panic but also allows you to concentrate fully on the cooking process, resulting in improved performance and enjoyment during the competition.

    Curious About Additional Details?


    Refining Your Recipes Through Consistent Practice

    Consistent practice is the cornerstone of building confidence and minimizing anxiety in BBQ competitions. By replicating competition conditions at home, you can refine your techniques and improve your timing, ensuring that everything operates seamlessly on the big day. Practicing your recipes under conditions that closely mimic the actual competition will help you identify potential challenges early on and address them proactively. When honing your recipes, consider the following aspects:

    • Cook under time constraints similar to those you’ll face on competition day.
    • Experiment with various flavor profiles and techniques to discover the optimal combination for your dishes.
    • Invite friends or family to taste and provide constructive feedback on your creations.
    • Document your cooking times, temperatures, and methods for future reference and consistency.
    • Adjust seasoning and cooking techniques based on feedback and results to refine your approach.
    • Incorporate proper meat handling techniques, including trimming and marinating, to ensure optimal quality and safety.
    • Record your observations to monitor progress and enhancements over time.
    • Experiment with different wood types or smoking techniques to elevate flavor and depth in your BBQ.

    The more you practice, the more comfortable you’ll feel on competition day. This comfort translates into a calm demeanor, enabling you to focus on delivering your very best work without the anxiety that uncertainty can induce. Your preparation will shine through in the quality of your BBQ, demonstrating your dedication and skill.

    Strategically Preparing Your Competition Meat for Success

    High-quality meat cuts marinating in rubs and sauces, labeled and stored in a cooler for competition.

    Selecting and preparing your meat ahead of time is a vital step that saves you time during the competition while cultivating a serene working environment. By prepping your meat in advance, you eliminate last-minute decisions and stressors that could disrupt your concentration. Here’s a thorough guide on how to prepare your competition meat effectively:

    • Select the highest-quality cuts of meat suitable for your category, ensuring the best possible flavor and texture.
    • Trim excess fat and silver skin to achieve optimal cooking results and presentation.
    • Marinate or season the meat following your established recipes to infuse flavor.
    • Store prepared meat in a cooler or refrigerator until you are ready to cook, maintaining freshness.
    • Label your cuts to avoid confusion on competition day, ensuring everything is organized.
    • Test various rubs or marinades during practice to determine the best flavor profile for your dishes.
    • Consider pre-cooking methods, such as brining or injecting, to enhance flavor and moisture retention.
    • Ensure your meat reaches the right temperature before cooking for even results and safety.

    Having your meat prepped and ready allows you to focus solely on cooking without the chaos of last-minute preparations. This organization not only boosts your confidence but also enables you to approach the competition with a calm and composed mindset, ready to impress the judges with your culinary skills.

    Proven Strategies for Staying Calm During BBQ Competitions

    Effectively Managing Stress on Competition Day

    Managing stress on competition day is essential for achieving peak performance in BBQ competitions. Observing how top competitors handle pressure can provide valuable insights into effective stress management techniques. Many seasoned BBQ professionals have developed specific strategies to maintain calmness and focus, regardless of the challenges posed by the competition. For instance, some competitors emphasize the importance of a solid morning routine, including physical activity and mindfulness practices such as meditation or yoga, to create a positive start to the day.

    Additionally, having a reliable support system can significantly alleviate stress levels. Competitors often stress the benefits of a well-coordinated team, where communication is open, and responsibilities are clearly defined and shared. Another beneficial strategy identified by experts is cultivating a positive mindset. Competitors who can adapt quickly to unexpected challenges and concentrate on finding solutions rather than dwelling on problems tend to perform more effectively, showcasing their skills confidently.

    In summary, effectively managing stress on competition day entails thorough preparation, maintaining a positive outlook, and fostering strong team dynamics. By implementing these strategies, you can approach your BBQ competition with confidence, creating an environment that promotes calmness and success.

    How to Maintain Focus on Your Tasks During Competition

    A BBQ competitor using timers, checklists, and sticky notes in a designated area, practicing deep breathing and staying hydrated.

    Maintaining focus throughout a BBQ competition is vital to ensuring that you execute your strategy effectively. Under pressure, distractions can derail even the most experienced competitors. Here are actionable steps you can take to maintain focus on your tasks during the competition:

    • Set timers for specific cooking phases, such as marinating or resting, to ensure optimal cooking times and achieve the best results.
    • Create a detailed checklist to track tasks and ensure nothing is overlooked during the competition.
    • Break larger tasks down into smaller, manageable steps to maintain clarity and focus.
    • Limit distractions by designating a specific cooking area for you and your team to work efficiently.
    • Utilize visual reminders, such as sticky notes, to highlight critical tasks and stay organized.
    • Practice deep breathing techniques to regain focus during overwhelming moments, allowing for mental clarity.
    • Stay hydrated and nourished to maintain steady energy levels, reducing fatigue.
    • Incorporate brief moments of reflection to reassess your progress and refocus on your goals throughout the competition.

    By maintaining focus, you can navigate the competition with clarity and purpose. Implementing these steps creates a productive environment that minimizes stress and maximizes your ability to deliver an exceptional BBQ performance.

    Learning from Experienced BBQ Competitors

    Gaining insights from seasoned BBQ competitors is invaluable for anyone seeking to enhance their calmness during competitions. Experienced competitors possess firsthand knowledge of what strategies work effectively and which do not, making their advice essential for newcomers. Here are key lessons derived from experts that can help you cultivate calmness during competitions:

    • Preparation is vital: Successful competitors stress the importance of being over-prepared for any situation.
    • Stay adaptable: Embrace changes and unexpected challenges with a positive attitude to maintain momentum.
    • Communicate openly: Foster a team culture where everyone feels comfortable voicing concerns and exchanging ideas.
    • Focus on the experience: Enjoy the process rather than becoming fixated solely on winning, which can lead to unnecessary stress.
    • Develop a pre-competition routine: Establish rituals that help you relax and get in the zone, enhancing your focus.
    • Reflect on past performances: Analyze what went well and identify areas for improvement to guide your preparation.
    • Seek mentorship: Connect with seasoned professionals who can share their experiences and tips for success.
    • Embrace community: Participate in BBQ events outside of competition to foster camaraderie and build confidence.

    By absorbing these essential lessons from experienced competitors, you equip yourself with the knowledge and tools necessary to approach competitions with greater calmness and composure. This understanding not only enhances your performance but also enriches your overall BBQ competition experience.

    Effective Mental Strategies for Remaining Calm During BBQ Competitions

    Incorporating Mindfulness Practices into Your Routine

    Practicing mindfulness is a powerful technique for maintaining calmness during BBQ competitions. By remaining present and fully engaged in the moment, you can alleviate anxiety and enhance your performance. Mindfulness techniques, such as deep breathing, can be particularly effective in high-pressure environments. Integrating mindfulness into your preparation and competition routine can be achieved through various practices:

    • Begin each day with a brief meditation to center your thoughts and focus your mind.
    • During practice runs, focus entirely on the cooking process and your sensory experiences to enhance awareness.
    • Utilize deep breathing exercises to calm nerves before and during the competition, facilitating relaxation.
    • Incorporate visualization techniques to rehearse your cooking process mentally, boosting confidence.
    • Take moments to pause and assess your emotions throughout the competition, allowing for emotional regulation.
    • Practice being fully present while engaging with your team and other competitors to foster connection.
    • Develop a mantra or affirmation to recite when anxiety arises, reinforcing a positive mindset.
    • Engage in physical activities, such as yoga, to cultivate mindfulness in movement and release tension.

    These strategies help cultivate a sense of calm and control amidst the chaos of competition. Mindfulness allows you to concentrate on what truly matters—your cooking and the overall experience. By incorporating these practices into your routine, you can enhance your ability to remain calm and composed, leading to improved outcomes and satisfaction.

    Harnessing the Power of Visualization for Success

    Visualizing success can significantly elevate your confidence and calmness during BBQ competitions. This mental technique involves picturing yourself executing your tasks flawlessly and achieving the desired results. Athletes and performers across various fields have employed visualization to enhance their performance. Here’s how to effectively integrate visualization into your competition preparation:

    • Set aside time before the competition to envision yourself cooking successfully and achieving your goals.
    • Imagine the sights, sounds, and smells of the competition to create a vivid mental image that enhances focus.
    • Visualize overcoming potential challenges you may encounter on the day of the event to build resilience.
    • Focus on the emotions you will feel upon achieving your goals, reinforcing positive feelings and motivation.
    • Practice visualization regularly to build a robust mental framework for success, enhancing confidence.
    • Include specific details, such as presentation and flavor, in your mental imagery to enhance clarity.
    • Share your visualization practices with your team to encourage collective confidence and unity.
    • Record your visualizations to reflect on them in the future for continuous improvement and motivation.

    Engaging in visualization before a competition creates a mental environment of success that can translate into real-world outcomes. By envisioning your success, you not only bolster your confidence but also foster a calm, focused mindset that enhances performance under pressure.

    Utilizing Positive Self-Talk Techniques for Enhanced Calmness

    Positive self-talk plays a critical role in maintaining a calm mindset during BBQ competitions. The way you communicate with yourself can significantly impact your confidence levels and stress management. By replacing negative thoughts with constructive affirmations, you create a supportive mental environment conducive to success. Here are effective strategies for fostering positive self-talk:

    • Identify any negative thoughts that arise and challenge their validity to foster a positive mindset.
    • Develop a set of affirmations that resonate with you and reinforce your skills and capabilities.
    • Recite these affirmations during practice and in the days leading up to the competition to instill confidence.
    • Surround yourself with supportive team members who share uplifting messages and encouragement.
    • Keep a journal to document your progress and positive experiences, reinforcing a growth mindset.
    • Visualize successful outcomes as a form of self-motivation and encouragement to boost confidence.
    • Recognize your achievements, no matter how small, as a source of motivation and positivity.
    • Engage in motivational listening, such as podcasts or talks, to cultivate a positive mindset that supports calmness.

    By integrating positive self-talk into your routine, you cultivate an optimistic mindset that can help you navigate the challenges of competition. This positivity not only promotes calmness but also enhances your ability to perform at your best when it matters most, allowing you to shine in the spotlight.

    What Advantages Are Associated with Staying Calm During BBQ Competitions?

    Enhancing Your Overall Performance in BBQ Competitions

    Maintaining calmness during BBQ competitions significantly improves your focus and decision-making skills, ultimately leading to superior cooking results. When you approach the competition with a clear mind, you can execute your strategies more effectively and adapt to any challenges that arise. Here are some performance advantages linked to maintaining calmness:

    • Increased concentration on cooking techniques and timing for better results.
    • Improved ability to troubleshoot issues as they occur, demonstrating flexibility.
    • Enhanced creativity in flavor combinations and presentation, showcasing your culinary skills.
    • Greater consistency in cooking temperatures and results, leading to higher quality dishes.
    • Stronger teamwork dynamics that lead to better overall performance and collaboration.
    • More effective communication with team members under pressure, fostering unity.
    • Increased enjoyment of the cooking process, which can lead to better outcomes and satisfaction.
    • Ability to remain composed and professional in front of judges, enhancing your impression.

    This emphasis on calmness not only leads to improved performance but also elevates the quality of your barbecue creations. By nurturing a calm environment, you set yourself up for success, achieving the desired outcomes and impressing the judges with your culinary skills and artistry.

    Elevating Your Enjoyment During Competitions

    While competitions can often turn stressful, maintaining calmness allows you to appreciate the experience fully. When you effectively manage your stress levels, the event transforms from a pressure cooker into a joyful opportunity to showcase your skills and connect with fellow barbecue enthusiasts. Here’s how calmness amplifies your enjoyment during competitions:

    • Allows you to relish the cooking process instead of fixating solely on results, enhancing creativity.
    • Encourages interaction with other competitors, fostering a sense of community and shared passion.
    • Fosters a spirit of fun and camaraderie among team members, enhancing the team experience.
    • Helps you embrace the learning experience rather than fear failure, promoting personal growth.
    • Promotes a healthier perspective on competition as a celebration of culinary art.
    • Encourages appreciation for the skills and talents of others, fostering respect and collaboration.
    • Allows you to focus on the flavors and details of your barbecue dishes, enhancing quality.
    • Creates lasting memories that enhance your overall passion for barbecue and competition.

    This elevated sense of enjoyment can lead to a more fulfilling competition experience, motivating you to continue participating in future events. By maintaining a calm presence, you not only enhance your performance but also deepen your appreciation for barbecue culture and community.

    How Does Calmness Influence Judging Outcomes in Competitions?

    Judges often notice and appreciate a competitor’s calm demeanor, which can positively affect their scores. A composed competitor projects confidence and professionalism—traits that judges frequently seek in competition settings. Here’s how maintaining calmness can influence judging outcomes:

    • A calm demeanor enhances your presence, creating a positive impression on judges.
    • Allows you to express your passion for barbecue with clarity and confidence, resonating with judges.
    • Enables you to articulate the story behind your dish effectively, adding depth to your presentation.
    • Reduces the likelihood of mistakes that could negatively impact the judging process, ensuring quality.
    • Promotes a focused approach to presentation, flavor, and texture, showcasing your culinary skills.
    • Encourages positive interactions with judges, fostering goodwill and rapport.
    • Demonstrates your ability to manage pressure, a valued trait among competitors and judges alike.
    • Creates an overall positive atmosphere that judges can sense, enhancing their perception of your performance.

    This favorable impression can enhance your scores, showcasing not only your culinary skills but also your character as a competitor. By prioritizing calmness, you position yourself as a worthy competitor in the eyes of the judges, increasing your chances of success.

    Fostering Better Team Dynamics Through Calmness

    Maintaining calmness promotes improved communication and collaboration among team members, enhancing overall team performance and morale during competitions. When team members can effectively manage their stress levels, they are more likely to work together harmoniously. Here are ways calmness impacts team dynamics:

    • Encourages open communication, facilitating the exchange of ideas and information effectively.
    • Fosters a supportive environment where team members encourage and uplift one another, boosting morale.
    • Helps share responsibilities based on individual strengths effectively, maximizing team efficiency.
    • Reduces conflict and misunderstandings that can arise under pressure, promoting harmony.
    • Facilitates constructive feedback, leading to continuous improvement and skill enhancement.
    • Encourages teamwork and unity, enhancing overall morale and collaboration.
    • Fosters a more enjoyable team atmosphere, making the experience more rewarding and memorable.
    • Leads to improved coordination in executing cooking tasks, enhancing performance outcomes.

    By cultivating calmness within your team, you establish a foundation for success that enhances both performance and enjoyment. A united and calm team is more likely to excel, thereby strengthening positive relationships and experiences for everyone involved.

    Physical Techniques to Sustain Calmness During Competitions

    Incorporating Deep Breathing Exercises into Your Routine

    Deep breathing exercises are an effective method for quickly alleviating stress and maintaining a calm state during competitions. They serve as a simple yet powerful tool for centering your thoughts and regaining focus when pressures rise. Engaging in deep breathing can counteract the physical symptoms of stress, such as an increased heart rate and tension. Here are techniques to incorporate deep breathing into your competition routine:

    • Practice diaphragmatic breathing by inhaling deeply through your nose, allowing your abdomen to expand fully.
    • Exhale slowly through your mouth, focusing on releasing tension with each breath.
    • Set aside a few moments before starting to cook to perform deep breathing exercises, centering your mind.
    • Use deep breathing during moments of high stress to regain composure and clarity.
    • Incorporate guided breathing exercises into your pre-competition routine to help maintain calmness and focus.
    • Engage in rhythmic breathing to synchronize your breath with your cooking pace, enhancing mindfulness.
    • Consider using breathing apps or recordings to assist you during practice and competition.
    • Encourage team members to participate in deep breathing sessions together, fostering unity and calmness.

    By integrating these deep breathing techniques into your routine, you create a calm and focused state that enhances your performance and enables you to navigate the challenges of BBQ competitions with ease. This physical technique serves as a powerful tool for maintaining composure and clarity in the face of external pressures.

    Prioritizing Regular Hydration for Optimal Performance

    Maintaining hydration is crucial for preventing physical discomfort and stress during BBQ competitions. Dehydration can lead to fatigue, decreased focus, and heightened anxiety—all of which are detrimental to optimal performance. Making hydration a priority not only supports your physical well-being but also fosters a calm mindset. Here’s how to ensure you stay hydrated throughout the competition:

    • Carry a refillable water bottle to track your fluid intake easily and encourage regular hydration.
    • Set reminders to drink water at regular intervals, particularly in warm conditions to prevent dehydration.
    • Incorporate electrolyte-rich beverages to replenish lost nutrients and maintain hydration levels.
    • Monitor your hydration levels by paying attention to your body’s signals, ensuring optimal performance.
    • Encourage your team to prioritize hydration collectively for mutual support and well-being during the competition.
    • Consider consuming hydrating snacks, such as fruits and vegetables, to stay hydrated while enjoying your food.
    • Avoid excessive caffeine and sugary drinks, as they can lead to dehydration and increased anxiety.
    • Prepare a hydration plan leading up to the competition to establish good habits and routines.

    By prioritizing proper hydration, you can enhance both your physical and mental performance, keeping stress levels in check and ensuring that you remain focused and calm during the competition. This straightforward yet effective strategy provides the stamina needed for a successful event.

    Strategically Taking Breaks to Recharge

    Incorporating short breaks during the BBQ competition can help you recharge and sustain a calm demeanor. As the competition progresses, it’s easy to become overwhelmed by the tasks at hand, which can lead to mental fatigue and increased stress. Taking breaks allows you to step back, recharge, and refocus, which is essential for maintaining calmness. Here are effective ways to integrate breaks into your competition day:

    • Schedule brief breaks between cooking stages to evaluate progress and regroup your thoughts.
    • Step away from the competition area to clear your mind and take a deep breath, allowing for mental clarity.
    • Engage in light stretching or physical activity during breaks to relieve tension and promote relaxation.
    • Use breaks to communicate with teammates, ensuring everyone is aligned and on the same page.
    • Reflect on your strategy and adjust as needed during these moments to enhance your execution.
    • Encourage team members to take breaks together, fostering a sense of camaraderie and unity.
    • Utilize these moments to hydrate and nourish yourself for sustained energy throughout the competition.
    • Practice mindfulness during breaks to further enhance your focus and calmness, allowing for reflection.

    By implementing these breaks into your competition routine, you create opportunities for recovery, reflection, and reconnection with your team. This enables you to approach the remainder of the competition with renewed energy and a calm mindset, contributing to a more successful and enjoyable experience.

    How Can Support Systems Enhance Your Calmness During Competitions?

    Leveraging Team Member Support for Enhanced Performance

    A supportive team can significantly mitigate stress during BBQ competitions by sharing responsibilities and offering encouragement. The dynamics of your team play a vital role in how well you manage competition pressures. Here’s how relying on your team can help you stay calm:

    • Designate specific roles for each team member to distribute tasks evenly and enhance efficiency.
    • Communicate openly to ensure that everyone is on the same page, fostering a collaborative environment.
    • Encourage team members to provide positive reinforcement to one another, boosting morale and confidence.
    • Hold regular check-ins during the competition to address concerns collectively and work together to resolve them.
    • Celebrate small successes as a team to boost morale and motivation, fostering unity.
    • Assist each other with problem-solving to alleviate stress and enhance performance together.
    • Share the load by helping each other with equipment and setup, minimizing individual stress.
    • Foster a culture of teamwork that values collaboration over competition, enhancing the overall experience.

    By relying on your team, you cultivate a supportive environment that enhances calmness and fosters a collective sense of purpose, ultimately leading to improved performance and a more enjoyable competition experience.

    Gaining Insights from Mentors for Professional Growth

    Mentors provide invaluable guidance and reassurance, helping you maintain calmness during competitions. Their wealth of experience can equip you with strategies to manage stress and effectively navigate competition challenges. Here are ways mentors can assist you in sustaining a calm demeanor:

    • Offer insights from their own experiences to prepare you for common challenges and pitfalls.
    • Provide constructive feedback on your cooking techniques and strategies to enhance your skills.
    • Encourage you to adopt a positive mindset and remind you of your strengths, boosting confidence.
    • Help you establish realistic goals for competitions based on your current skills and aspirations.
    • Assist in developing a personalized pre-competition routine tailored to your needs for optimal performance.
    • Facilitate connections with other competitors for additional support and shared learning experiences.
    • Share resources, such as guides and tips, to enhance your preparation and overall experience.
    • Provide emotional support, reminding you that competitions are growth opportunities, not just evaluations.

    By leveraging the wisdom and support of mentors, you cultivate a greater sense of calm and confidence as you approach BBQ competitions. Their guidance ultimately enhances both your performance and enjoyment of the event, facilitating personal and professional growth.

    Engaging with the BBQ Community for Enhanced Support

    Connecting with fellow competitors fosters camaraderie and support that can alleviate feelings of isolation during BBQ competitions. Engaging with the BBQ community not only builds friendships but also creates opportunities for shared learning and encouragement. Here’s how interacting with the BBQ community can help you maintain calmness:

    • Attend BBQ workshops or events to network with experienced competitors and professionals, enhancing your knowledge.
    • Participate in discussions on social media platforms to share experiences and tips for mutual growth.
    • Join BBQ clubs or forums to connect with others who share your passion for BBQ and competition.
    • Encourage open conversations about challenges and strategies with peers to foster a supportive environment.
    • Share resources and techniques that have worked well for you and learn from others, enhancing skills.
    • Build a support network that extends beyond competitions, fostering lasting relationships.
    • Offer to mentor newcomers to reinforce your knowledge and skills, creating a positive cycle of support.
    • Celebrate community events and competitions to foster a sense of belonging and shared passion.

    By actively engaging with the BBQ community, you create a supportive network that helps you navigate the ups and downs of competition with greater calm and confidence. This connection not only enhances your experience but also promotes your growth as a competitor, enriching your BBQ journey.

    Research-Backed Benefits of Staying Calm During BBQ Competitions

    Influence on Cooking Quality and Outcomes

    Staying calm has a profound effect on the quality of your BBQ dishes. When you approach cooking with a clear mind, your focus sharpens, enabling you to pay greater attention to detail and exercise creativity. This enhanced clarity can lead to improved cooking outcomes and presentations. Here’s an expert analysis of how calmness influences cooking quality:

    • Clear focus enhances precision in timing and temperatures, crucial for perfect BBQ results.
    • Reduces the likelihood of errors, such as overcooking or under-seasoning, ensuring consistency.
    • Facilitates better flavor development through thoughtful preparation and attention to detail.
    • Enables innovative approaches to cooking techniques and presentations, showcasing your culinary artistry.
    • Encourages the use of quality ingredients rather than hasty decisions, elevating overall quality.
    • Allows for mindful tasting and adjustments, leading to balanced flavors and enhanced dishes.
    • Enhances overall presentation quality, resulting in a more visually appealing dish that impresses judges.
    • Improves the ability to troubleshoot issues effectively as they arise, ensuring smooth execution.

    Calmness acts as a catalyst for superior cooking, allowing you to shine during competitions. This enhanced quality not only impresses judges but also boosts your satisfaction with your work, reinforcing your passion for BBQ.

    Long-Term Health Advantages of Staying Calm

    Staying calm during competitions contributes to overall well-being and stress management, leading to long-term health benefits. Maintaining composure in high-pressure situations has positive implications for both mental and physical health. Here’s how calmness supports long-term health:

    • Reduces chronic stress levels, which can lead to various health issues over time.
    • Enhances mental clarity, supporting decision-making and problem-solving skills, crucial for success.
    • Improves emotional regulation, resulting in improved interpersonal relationships and teamwork.
    • Encourages healthy coping mechanisms rather than resorting to unhealthy outlets, promoting well-being.
    • Promotes overall satisfaction and enjoyment in cooking and competitions, enhancing quality of life.
    • Boosts self-esteem and confidence, contributing to a positive self-image and outlook.
    • Fosters resilience, equipping you to handle future challenges effectively and gracefully.
    • Encourages a balanced lifestyle that incorporates relaxation and self-care practices for mental health.

    By prioritizing calmness during BBQ competitions, you not only enhance your performance but also invest in your long-term health and well-being. This commitment to maintaining a calm mindset creates a foundation for success both in and outside the competition arena.

    Psychological Benefits of Remaining Calm During Competitions

    Calmness during competitions leads to improved decision-making and problem-solving skills, which are essential for success in high-pressure environments. When you maintain a composed state, your cognitive functions are sharper, enabling you to navigate challenges effectively. Here’s how calmness translates into psychological benefits:

    • Enhances concentration, allowing you to focus on critical tasks without distraction, improving efficiency.
    • Improves your ability to think creatively and generate innovative solutions to cooking challenges.
    • Reduces cognitive overload, enabling clearer thinking and decision-making under pressure.
    • Promotes adaptability, allowing you to pivot when circumstances change, leading to better outcomes.
    • Encourages a positive mindset that fosters resilience in the face of setbacks, enhancing your performance.
    • Facilitates better memory recall of techniques and recipes under pressure, improving execution.
    • Builds confidence in your abilities, reducing performance anxiety and enhancing focus.
    • Strengthens your ability to communicate effectively with teammates, enhancing collaboration.

    These psychological benefits not only contribute to improved performance in BBQ competitions but also equip you with valuable skills applicable in everyday life. By cultivating calmness, you enhance your cognitive abilities, setting the stage for future success in competitions and beyond.

    Strengthening Team Dynamics Through Calmness

    Calmness fosters better communication and collaboration among team members, leading to a more cohesive and effective BBQ competition team. A calm environment fosters open dialogue and teamwork, enabling a more harmonious competitive experience. Here’s how calmness enhances team dynamics:

    • Encourages open lines of communication, reducing misunderstandings and fostering trust.
    • Promotes a supportive atmosphere that boosts morale and motivation among team members.
    • Facilitates cooperation and collaboration on tasks, improving efficiency and effectiveness.
    • Strengthens relationships among team members, fostering trust and reliability in teamwork.
    • Encourages constructive feedback and shared learning experiences, promoting skill enhancement.
    • Helps in conflict resolution, maintaining focus on common goals and objectives.
    • Enhances collective problem-solving skills, resulting in improved outcomes and success.
    • Creates a positive competition experience that leads to lasting memories and camaraderie among team members.

    These benefits result in a stronger team dynamic, ultimately leading to improved performance and enjoyment during BBQ competitions. By fostering an environment of calmness, you can create a more effective and cohesive competition team, enhancing the overall experience for everyone involved.

    Reflecting on Performance and Pursuing Improvement After Competitions

    Analyzing Your Competition Performance for Growth

    Reflecting on your performance after a BBQ competition is vital for identifying areas for improvement and maintaining a calm approach for future events. This practice enables you to gain valuable insights into your cooking and competition strategies. Here’s how to effectively analyze your performance after competitions:

    • Review your cooking notes and observations from the competition to identify strengths and weaknesses.
    • Assess feedback from judges and peers to gain a well-rounded perspective on your performance.
    • Reflect on your emotional state during the competition and its impact on your overall performance.
    • Consider what aspects of your preparation were effective and what could be improved for next time.
    • Encourage team members to share their perspectives for a comprehensive analysis of the competition.
    • Set specific goals for the next competition based on your reflections and analysis to guide your preparation.
    • Document key takeaways for future reference and continuous improvement.
    • Develop an action plan to address the identified areas for improvement, ensuring progress.

    Engaging in this reflective process creates a roadmap for growth and improvement that helps you stay calm and focused in future competitions. This continuous evaluation enhances your skills and prepares you for future successes in the BBQ arena.

    Transforming Mistakes into Valuable Learning Opportunities

    Mistakes should not be perceived as failures; rather, they are growth opportunities. Learning from your mistakes is essential for refining your techniques and maintaining a calm demeanor in future BBQ competitions. Here’s how to turn mistakes into valuable learning experiences:

    • Identify specific mistakes made during the competition and analyze the causes of these mistakes thoroughly.
    • Reflect on how these mistakes affected your overall performance and what could have been done differently.
    • Discuss errors with your team to gather diverse perspectives and insights for improvement.
    • Develop strategies to avoid making similar mistakes in the future, enhancing your preparation.
    • Embrace a growth mindset, viewing mistakes as essential learning elements that contribute to progress.
    • Document lessons learned to ensure they are not forgotten and can be referenced in the future.
    • Encourage team discussions about mistakes to foster a culture of learning and collective improvement.
    • Practice resilience by focusing on the improvements you can make moving forward, enhancing your skills.

    By adopting this perspective, you can approach competitions with a calm mindset, ready to embrace challenges as crucial components of your growth as a BBQ competitor. This positive attitude will facilitate your evolution and skill refinement over time.

    Establishing Goals for Future Competitions

    Setting clear goals for future competitions can help you maintain focus and calmness by providing a roadmap for improvement. Goals instill a sense of purpose and direction, enabling you to channel your energy in a productive manner. Here are effective strategies for setting your competition goals:

    • Identify specific areas you want to enhance based on past performances and feedback received.
    • Utilize the SMART criteria (Specific, Measurable, Achievable, Relevant, Time-bound) to define your goals clearly.
    • Share your goals with your team to encourage accountability and support throughout the preparation process.
    • Break larger goals down into smaller, manageable milestones for tracking progress effectively.
    • Establish timelines to achieve your goals and maintain motivation as you work towards success.
    • Regularly revisit and adjust your goals in light of your evolving skills and experiences for continuous improvement.
    • Celebrate achievements along the way to sustain motivation and positivity for future competitions.
    • Involve mentors in your goal-setting process for additional guidance and insights to enhance your journey.

    By setting well-defined goals, you establish a structured approach to your competition preparation, which helps you remain calm and focused. This clarity allows you to concentrate on your growth and development as a BBQ competitor, enhancing your overall experience.

    Seeking Constructive Feedback from Coaches and Peers

    Gathering insights from coaches and peers offers new perspectives on your performance and helps you maintain calmness through constructive criticism. Feedback is essential for growth, allowing you to identify areas for improvement while validating your strengths. Here’s how to effectively seek and utilize feedback:

    • Schedule regular check-ins with coaches or mentors to discuss your progress and areas for improvement.
    • Encourage peers to provide honest feedback on your cooking techniques and strategies for success.
    • Be open to constructive criticism and view it as a tool for improvement, fostering a growth mindset.
    • Ask specific questions to gain a deeper understanding of your performance and areas to enhance.
    • Document feedback for reference during future planning and preparation, ensuring continuous progress.
    • Incorporate actionable suggestions into your practice sessions to refine your techniques and skills.
    • Follow up with those providing feedback to share your improvements and demonstrate growth.
    • Promote a culture of feedback within your team to encourage collective growth and development.

    By actively seeking and applying feedback, you not only enhance your skills but also cultivate a mindset that embraces growth and improvement. This openness will help you remain calm and focused as you evolve into a more effective competitor in the BBQ scene.

    Implementing Relaxation Techniques for Enhanced Calmness

    Integrating relaxation methods into your routine can significantly improve your mental state, ensuring you remain calm and focused during future competitions. These techniques help you manage stress and promote a sense of tranquility. Here are effective relaxation methods to incorporate into your preparation:

    • Practice mindfulness or meditation regularly to cultivate a calm mindset and enhance focus.
    • Engage in gentle physical activities, such as yoga, to release tension and enhance mental clarity.
    • Incorporate soothing music or sounds into your pre-competition routine to help you relax and stay focused.
    • Explore aromatherapy with calming scents, such as lavender or chamomile, to create a peaceful atmosphere.
    • Prioritize adequate rest and recovery in the lead-up to competitions to maintain peak performance.
    • Establish a calming pre-competition ritual that resonates with you, enhancing focus and relaxation.
    • Utilize guided relaxation recordings to ease anxiety and promote mental well-being.
    • Encourage your team to engage in relaxation techniques collectively for mutual support and well-being.

    By implementing these relaxation techniques into your routine, you create a foundation for calmness and focus that will serve you well during BBQ competitions. This commitment to relaxation not only enhances your performance but also enriches your overall experience, allowing you to enjoy the art of BBQ.

    Frequently Asked Questions About Staying Calm During BBQ Competitions

    What are some effective strategies to stay calm during BBQ competitions?

    Effective strategies include practicing mindfulness, visualizing success, and maintaining hydration. Thorough preparation and having a supportive team also significantly contribute to staying calm and focused.

    How can I improve my performance in BBQ competitions?

    Enhancing performance involves meticulous preparation, practicing your recipes, and establishing clear goals for growth. Seeking feedback from experienced competitors can also provide valuable insights.

    What role does teamwork play in managing stress during competitions?

    Teamwork facilitates shared responsibilities and support, reducing individual stress levels. Open communication and collaboration foster a positive environment that enhances overall performance.

    How important is hydration during BBQ competitions?

    Hydration is crucial as it prevents fatigue and helps maintain focus. Regularly drinking water can improve mental clarity and physical performance, contributing to success.

    Can visualization techniques help in competitions?

    Yes, visualization techniques can boost confidence and calmness by mentally rehearsing successful outcomes, helping competitors to feel more prepared and focused during the event.

    What are some common mistakes to avoid during BBQ competitions?

    Common mistakes include a lack of preparation, poor time management, and neglecting team communication. Being aware of these can help prevent unnecessary stress and complications.

    How can I utilize feedback from judges to enhance my performance?

    Analyzing feedback from judges provides insights into your strengths and areas for growth. Use this information to refine your techniques and strategies for future competitions.

    What are the psychological benefits of staying calm during competitions?

    Staying calm enhances decision-making, problem-solving, and emotional regulation, ultimately contributing to better overall performance and a more positive experience during competitions.

    How can I incorporate relaxation techniques into my routine?

    Incorporate techniques such as deep breathing, meditation, or yoga into your routine. Select methods that resonate with you and practice them regularly to cultivate a calm and mindful mindset.

    What should I reflect on post-competition for improvement?

    Reflect on your overall performance, including what went well and areas for improvement. Consider emotional responses and team dynamics to enhance future performances and experiences.

    Connect with us on Facebook!

    The Article How to Stay Calm During BBQ Competitions: Tips for US Competitors appeared first on https://pitmastersarsenal.com

    The Article Stay Calm During BBQ Competitions: Essential Tips for Success Was Found On https://limitsofstrategy.com

  • Grill Fish Without Sticking: Expert Tips from the US

    Grill Fish Without Sticking: Expert Tips from the US

    Proven Methods for Selecting the Perfect Fish for Grilling

    Discover the Best Fish Varieties for Flavorful Grilling Experiences

    Fatty fish like salmon, tuna, and mackerel grilling, with marinated cod and sole.

    Choosing the ideal type of fish is crucial for grilling fish without sticking. Focus on fatty fish varieties such as salmon, tuna, and mackerel due to their higher oil content, which naturally prevents sticking on the grill and enhances flavor. These fish not only maintain their integrity when subjected to high temperatures but also provide a rich taste that complements various seasonings. Conversely, lean fish like cod or sole can also be grilled with success if prepared correctly. Using marinades or thoughtfully chosen seasonings can keep these lean varieties moist and flavorful, significantly minimizing the chances of them sticking to the grill surface.

    Every type of fish has its unique flavor profile and texture, making it essential to consider the specific dish you plan to prepare. For instance, a simply seasoned grilled salmon can serve as an impressive centerpiece, while tilapia can be enhanced with a spicy rub for a bolder flavor experience. Remember, the technique you choose for cooking will greatly influence your grilling success, affecting both the flavor and texture of the final dish.

    The Importance of Freshness and Quality in Fish Selection

    The freshness and overall quality of your chosen fish are paramount for achieving a successful grilling adventure. Prioritizing the freshest fish available directly impacts the flavor and texture of your dish. When assessing the quality of fish, pay attention to key indicators: clear and bulging eyes signify freshness, while dull eyes may suggest that the fish has seen better days. The flesh should feel firm and spring back when pressed. Additionally, a subtle sea smell indicates freshness; if the fish emits a strong, unpleasant odor, it’s likely past its prime.

    Purchasing from reputable sources, such as local fish markets or trusted grocery stores, is essential for ensuring you obtain high-quality fish. Be mindful of how long the fish has been on display and don’t hesitate to seek advice from knowledgeable staff. Choosing top-quality fish not only elevates the flavor of your dishes but also reduces the risk of it falling apart on the grill—an all-too-common issue when dealing with older or less fresh fish.

    Essential Preparation Techniques for Successful Fish Grilling

    Thoroughly preparing the fish is vital for achieving excellent grilling results. Begin by cleaning the fish properly and ensuring that all scales are removed. Gently patting the fish dry with paper towels eliminates excess moisture, which can contribute to sticking on the grill. The skin of the fish is particularly important; keeping the skin intact when grilling serves as a protective barrier, safeguarding the flesh from direct contact with the grill grates and promoting better cooking results.

    Marinating the fish is an outstanding method for intensifying its flavor and moisture content, which in turn minimizes the risk of sticking during the grilling process. An effective marinade should incorporate oil, which acts as a barrier between the fish and the grill. Consider utilizing a blend of herbs, spices, and acidic components like lemon juice or vinegar to enhance the fish without overshadowing its natural taste. Allowing the fish to marinate for at least 30 minutes to several hours can yield exceptional results, making it juicier and more flavorful after grilling.

    Expert Techniques for Preparing Your Grill for Fish Cooking

    A stainless steel grill being cleaned, oiled, and seasoned for fish cooking in an outdoor kitchen.

    Step-by-Step Guide to Thoroughly Cleaning Your Grill Grates

    Maintaining a clean grill is essential for preventing fish from sticking during the grilling process. Residue from previous grilling sessions can lead to unwanted sticking, threatening to ruin your meticulously prepared fish. Begin your grilling endeavors by employing a wire brush to scrub the grates thoroughly. This straightforward yet effective action helps eliminate any leftover food particles, grease, or carbon buildup that can create a sticky surface for your fish.

    Following the scrubbing, it’s advisable to wipe down the grates with a damp cloth or paper towel to ensure they’re completely clean. Additionally, preheating the grill for about 10-15 minutes before placing the fish on it is beneficial. This practice helps burn off any residual buildup, ensuring a pristine cooking surface. A clean grill not only enhances the flavor of your fish but also simplifies the cleanup process afterward.

    Best Practices for Oiling Your Grill Grates Effectively

    Once you have confirmed the cleanliness of your grill grates, the next crucial step is to apply oil properly. Oiling the grates creates a non-stick surface that significantly reduces the risk of your fish clinging to the grill. Utilize a high smoke point oil, such as canola or grapeseed oil, for optimal results. These oils can withstand high temperatures without burning, providing you with a reliable non-stick surface for grilling.

    To apply the oil, pour a small amount onto a paper towel or cloth and, using tongs, evenly wipe the oil over the grates. Avoid applying excessive oil; a light coating suffices and aids in preventing flare-ups during grilling. This preparation is especially important when grilling delicate fish, as they require extra support to remain intact while cooking.

    The Crucial Role of Preheating Your Grill

    Fish searing on a hot grill at 450°F, crust forming, flames and glowing charcoal visible, lid closed.

    Preheating the grill is not merely a suggestion; it’s a foundational step in successfully grilling fish. Target a medium-high heat, ideally between 400-450°F. A hot grill enables a quick sear on the fish, forming a crust that minimizes sticking while retaining moisture. This technique is particularly effective in preventing fish from disintegrating during the grilling process.

    During preheating, keep the lid closed to maintain temperature and ensure the grill grates heat evenly. For gas grills, turn on all burners to reach the desired temperature. If you’re using a charcoal grill, allow the coals to become white-hot before placing the fish on the grates. Once the grill has achieved the right temperature, you’ll be ready to grill your fish to perfection, transforming it into a delightful culinary experience.

    Mastering the Art of Grilling Fish Without Sticking: Expert Tips

    Top Techniques from Renowned Chefs

    Experts and leading chefs have devised various strategies to ensure fish remains intact while grilling. A widely accepted technique is to allow the fish to rest at room temperature prior to grilling, helping it cook more evenly. Additionally, many chefs highlight the significance of using high-quality non-stick sprays or effective oiling methods to enhance the cooking surface of the fish. Below is a compilation of key techniques commonly employed by professional chefs:

    • Ensure a hot grill: Preheat your grill sufficiently to create an effective sear on the fish.
    • Keep the skin intact: Grill fish with the skin on whenever possible, as it serves as a protective barrier.
    • Minimize flipping: Flip the fish only once to prevent tearing its flesh.
    • Utilize indirect heat: For thicker cuts, consider using indirect heat to avoid burning.
    • Employ a fish basket: A grilling basket can provide stability for fragile fillets.
    • Season appropriately: Salt the fish before grilling to help create a crust that minimizes sticking.
    • Monitor doneness: Wait until the fish naturally releases from the grill before attempting to flip it.

    These techniques not only enhance the grilling experience but also help achieve restaurant-quality results right from the comfort of your backyard grill.

    Avoiding Common Mistakes When Grilling Fish

    Grilling fish can be a remarkably rewarding experience, yet several common missteps can lead to sticking and disappointment. One major pitfall is overcrowding the grill. Placing too much fish on the grill at once can lower the temperature and create steam, leading to sticking. Instead, grill fish in manageable batches, ensuring sufficient space for even cooking.

    Another frequent error is flipping the fish too soon. Allowing the fish enough time to form a crust on the grill is essential. A good rule of thumb is to wait until the fish easily releases itself from the grill, which generally takes about 3-5 minutes. Moreover, neglecting to preheat the grill can lead to sticking; always ensure your grill is hot before placing the fish on it.

    Lastly, using inferior quality fish or fish that isn’t fresh can diminish your grilling experience. Always opt for high-quality, fresh fish to guarantee the best results. By steering clear of these common missteps, you can relish perfectly grilled fish without the frustration of it sticking to the grill.

    Best Practices for Grilling with Different Types of Grills

    Grilling fish may vary depending on the type of grill you use. Each grill type offers unique features that can influence how effectively you grill fish. For gas grills, precise temperature control allows for even cooking, making them suitable for both delicate and thicker cuts of fish. Always ensure that the grates are well-oiled and preheated to the correct temperature before placing your fish.

    Charcoal grills impart a delightful smoky flavor but require more attention to temperature management. Creating heat zones by arranging the coals on one side allows for both direct and indirect grilling. This method can help prevent sticking, especially for thicker fish that may benefit from slower cooking using indirect heat.

    Electric grills are user-friendly and often maintain a consistent temperature, significantly reducing the chances of sticking. They are particularly beneficial for indoor grilling, as they handle delicate fish well. Look for electric grills equipped with adjustable temperature settings to find the optimal heat level for your specific type of fish.

    Essential Tools for Successful Fish Grilling

    Having the right tools at your disposal can dramatically enhance your grilling experience. Essential items for grilling fish include a fish grilling basket, which secures the fish and prevents it from falling apart. Look for baskets with heat-resistant handles and a design that accommodates various fish sizes for maximum versatility.

    A wide, slotted spatula is another crucial tool, allowing you to flip fish easily without breaking it apart. When selecting tongs, opt for sturdy, heat-resistant options to ensure you can maneuver the fish without any issues. Furthermore, grill mats or aluminum foil can serve as practical alternatives, especially for ultra-delicate fish.

    Using a reliable meat thermometer is essential to ensure that your fish is cooked to perfection. Look for models that provide quick readings and can withstand high heat. Lastly, a good brush for applying marinades or oils is indispensable. Select brushes with heat-resistant bristles for safe and effective application. Equipping yourself with these tools not only enhances your grilling experience but also helps in achieving the best possible results.

    The Most Effective Tools for Grilling Fish

    Benefits of Using Fish Grilling Baskets

    Fish grilling baskets are among the best tools designed specifically for holding fish while it cooks, preventing it from sticking to the grill grates. These baskets are particularly useful for delicate fish fillets that might otherwise fall apart when flipped. The best features to look for in a fish grilling basket include sturdy construction that withstands high heat, a non-stick surface to prevent adherence, and a design that facilitates easy flipping.

    Additionally, choose baskets that can accommodate various sizes of fish. Some baskets come with adjustable handles for added convenience, allowing you to position them over the grill with ease. A well-designed fish basket not only simplifies grilling but also enhances the overall cooking experience by ensuring even heat distribution around the fish.

    Selecting the Right Spatulas and Tongs for Grilling

    When it comes to flipping fish on the grill, using the correct spatula and tongs is essential. A wide, slotted spatula is highly recommended, as its design allows for easy flipping of the fish while minimizing the risk of breaking it apart. Look for spatulas that are heat-resistant and sturdy, as they need to withstand high temperatures without bending or breaking.

    Tongs are equally important for maneuvering fish without causing damage. Opt for tongs that have a good grip and are constructed from heat-resistant materials. Some tongs feature silicone tips, providing an added layer of protection against high temperatures while also being gentle on delicate fish. By selecting the right spatula and tongs, you enhance your control over the grilling process, leading to better results overall.

    Utilizing Grill Mats and Foil for Hassle-Free Grilling

    Grill mats and aluminum foil can be excellent alternatives for grilling fish, particularly for beginners or for especially delicate fish varieties. Grill mats provide a non-stick surface that helps retain the fish’s moisture while cooking. To use them effectively, ensure that they are designed for high temperatures and can withstand direct flames; this will help you avoid any burning or melting issues.

    When using aluminum foil, create a pouch for the fish by folding it over and sealing the edges. This method helps lock in flavors and moisture. Remember to puncture a few holes in the foil to allow steam to escape during cooking. Both grill mats and foil provide a protective barrier between the fish and the grates, making them excellent tools for keeping your fish intact while grilling.

    How to Use Thermometers for Perfectly Grilled Fish

    Using a meat thermometer is one of the best ways to ensure that your fish is cooked to the perfect temperature, thus avoiding the risk of overcooking. When selecting a thermometer for grilling fish, look for digital probes that can endure high grill heat and provide quick readings. Ideally, the internal temperature of fish should reach 145°F for safe consumption, ensuring that it is both tender and flaky.

    Some thermometers also feature alarms that notify you when the fish has reached its desired temperature, allowing you to focus on other aspects of your grilling. Having a reliable thermometer not only contributes to the quality of the grilled fish but also enhances your confidence in achieving the best results every time.

    The Impact of Marinades and Brushes in Flavoring Fish

    Marinades play a critical role in flavoring and maintaining moisture in fish while on the grill. When selecting marinades, opt for those that include oil as a primary component, as oil aids in creating a barrier against sticking. A fantastic marinade can consist of a variety of ingredients such as citrus juice, herbs, and spices, all contributing to the fish’s flavor profile.

    To apply marinades effectively, use a brush designed for grilling. Select brushes with heat-resistant bristles to ensure safety while working with high temperatures. A brush allows for an even application of the marinade, ensuring that every inch of the fish is infused with flavor. Keep in mind that allowing the fish to marinate for at least 30 minutes enhances its taste and moisture, making it less prone to sticking when grilled.

    Mastering the Art of Seasoning and Marinating Fish for Grilling

    Choosing the Perfect Marinade for Your Fish

    Selecting the right marinade is pivotal, not only for flavor but also for ensuring that your fish remains moist during grilling. An effective marinade should primarily consist of oil, which creates a protective layer around the fish, reducing the risk of sticking. Common oil choices include olive oil, avocado oil, or other high smoke point oils that can withstand grilling temperatures without burning.

    In addition to oil, a good marinade should incorporate flavor-enhancing ingredients. Ingredients like lemon juice, soy sauce, or vinegar introduce acidity that can tenderize the fish. Enhance the marinade with herbs and spices according to your taste preferences. Allowing the fish to soak in the marinade for at least 30 minutes maximizes flavor absorption and moisture retention, ultimately leading to a more enjoyable grilling experience.

    Utilizing Dry Rubs and Seasonings for Enhanced Flavor

    Using a dry rub is an excellent way to enhance the flavor of grilled fish without adding extra moisture that could lead to sticking. A good dry rub typically consists of a blend of herbs, spices, and salt. The salt serves a dual purpose: it flavors the fish while also helping to create a crust that minimizes sticking during the grilling process.

    When preparing to apply a dry rub, consider using a mix of common spices like paprika, garlic powder, black pepper, and dried herbs such as thyme or rosemary. It’s advisable to apply the dry rub 15-30 minutes before grilling; this allows the flavors to penetrate the fish while ensuring that it retains its structural integrity during cooking. This method not only enhances the flavor but also creates a delightful crust that complements the fish’s natural taste.

    Mastering Timing and Application for Seasoning and Marinating

    Timing is crucial when it comes to marinating and seasoning fish for grilling. Ideally, you should marinate fish for a minimum of 30 minutes but can extend it to several hours depending on the type of fish and the marinade used. A shorter marination period is often sufficient for delicate fish, while thicker cuts can benefit from longer marination to absorb more flavors.

    In terms of applying seasonings, it’s best to do so just before grilling. This approach allows you to maintain the freshness of the seasonings and prevents moisture loss. Use a light hand when seasoning; the goal is to enhance the fish’s natural flavor without overpowering it. By mastering the timing and method of seasoning, you can elevate your grilled fish to the next level.

    Balancing Flavors and Acidity in Marinades

    The key to a deliciously grilled fish lies in balancing flavors and acidity. Incorporating citrus or vinegar into your marinade not only adds brightness but also enhances the overall flavor profile. The acidity in these ingredients interacts beautifully with the fish, making it taste fresh and vibrant.

    To achieve a well-balanced marinade, combine your acid with sweetness and salt; this creates a harmonious blend that complements the fish without overwhelming it. For example, a citrus-based marinade can be enriched with honey for sweetness and seasoned with sea salt. This balance elevates the fish’s natural flavor while ensuring it remains moist and delectable. By experimenting with different ingredients, you can create unique profiles that enhance your grilling experience.

    Proven Techniques for Grilling Fish Without Sticking

    Implementing Effective Grilling Methods

    Utilizing the right grilling technique is essential for preventing fish from sticking. The indirect grilling method is particularly effective for thicker fish cuts, as it promotes even cooking while minimizing direct contact with the intense heat. This method allows the fish to cook through without burning, thus retaining its moisture and flavor.

    For thinner fish fillets or delicate varieties, direct grilling can yield great results, provided that the grill is adequately preheated and oiled. Employing a fish basket can also assist with flipping and cooking fish evenly without risking breakage. Additionally, allowing the fish to rest at room temperature for about 15 minutes before grilling helps it cook evenly and prevents sticking. Each technique serves to enhance the flavor and texture of your grilled fish, ensuring a delicious meal.

    Mastering Temperature Control for Perfect Grilling Outcomes

    Maintaining a consistent temperature is a critical factor in grilling fish successfully. Fluctuations in temperature can lead to uneven cooking, which may cause the fish to stick. Using a reliable thermometer to monitor both the grill’s heat and the fish’s internal temperature is essential. Aim for an internal temperature of 145°F for perfectly cooked fish, ensuring that it’s both safe to eat and tender.

    To manage temperature fluctuations, avoid frequently lifting the grill lid, as this can let heat escape. Instead, check the temperature periodically using your thermometer. If you find the grill is too hot, you can move the fish to a cooler section of the grill or adjust the heat. Mastering temperature control will ultimately lead to better grilling outcomes and a reduced chance of sticking.

    Timing and Flipping Techniques for Successful Grilling

    Flipping the fish at the right moment is crucial in preventing it from sticking to the grill. It’s essential to flip the fish only once during cooking; flipping too frequently can result in breakage. Allow the fish to cook undisturbed for 3-5 minutes before attempting to flip it. The fish will naturally release from the grill when it’s ready to be turned.

    Another indication that it’s time to flip is when the fish becomes opaque and starts to flake slightly at the edges. A gentle motion during flipping can help preserve the fish’s structure. By adhering to these timing and flipping strategies, you can significantly reduce the chances of your fish sticking to the grill, resulting in perfectly cooked fillets every time.

    How Does Grill Type Influence Fish Sticking?

    The Advantages of Using Gas Grills for Fish Preparation

    Gas grills are often preferred for their precise temperature control, making them an excellent choice for grilling fish. The even heat distribution helps cook delicate fish evenly, thereby reducing the likelihood of sticking. The ability to adjust the heat instantly allows for quick responses to any temperature fluctuations, ensuring that your fish remains perfectly cooked.

    Another advantage of gas grills is the convenience of preheating. With just a turn of a knob, you can achieve the desired temperature quickly. This feature is particularly beneficial when grilling delicate fish like trout or flounder, which require careful attention to cooking time. Ultimately, the benefits of using a gas grill can lead to a more enjoyable and successful grilling experience.

    Understanding the Challenges of Charcoal Grilling

    Charcoal grills provide a distinctive smoky flavor that many people cherish, but they require more attention to heat management during the grilling process. The uneven heat distribution can pose challenges, particularly when grilling fish. To minimize sticking, it’s important to create heat zones by arranging the coals on one side of the grill, allowing for both direct and indirect cooking.

    For thicker cuts of fish, utilizing the indirect heat method is advisable, as it promotes even cooking without burning. Regularly monitoring the temperature is key; this can prevent flare-ups and sticking. If you plan to use a charcoal grill, mastering heat management will significantly enhance your results while grilling fish.

    The Benefits of Electric Grills for Cooking Fish

    Electric grills offer a range of advantages, particularly for indoor grilling enthusiasts. One of their most significant benefits is their ability to maintain a consistent temperature, which greatly reduces the chances of fish sticking. They are also incredibly user-friendly and allow for precise heat control. This reliability makes them an excellent choice for delicate fish varieties that require gentle cooking.

    When selecting an electric grill for fish, look for features such as adjustable temperature settings and a non-stick surface. These features will facilitate a seamless grilling experience and help you achieve the perfect grill marks without worrying about fish sticking. Overall, electric grills can provide stress-free grilling, particularly for those new to cooking fish.

    Achieving Consistent Results When Grilling Fish

    Effective Techniques for Monitoring Fish Doneness

    Knowing when your fish is perfectly grilled is essential for achieving the best flavor and texture. Using a meat thermometer is the most reliable method; the fish should reach an internal temperature of 145°F for safe consumption. In addition to using a thermometer, visual cues can also be helpful. Look for the fish to be opaque and flaky when it’s done.

    Another sign that indicates the fish is ready is its appearance; it should transition from translucent to opaque and begin to flake at the edges. Allowing the fish to rest for a few minutes after grilling also helps redistribute the juices, leading to a more flavorful and succulent result. Mastering the art of monitoring doneness will ensure you achieve perfectly grilled fish every time.

    The Importance of Resting and Serving Techniques

    After grilling, allowing your fish to rest is an often-overlooked but crucial step. Resting for a few minutes gives the juices time to redistribute within the fish, resulting in a moister and more flavorful dish. While the fish rests, consider preparing complementary sides to elevate your meal further. Grilled vegetables, rice pilaf, or a refreshing citrus salad can provide a delightful contrast to the rich flavors of the fish.

    Drizzling the grilled fish with a citrus-based sauce or fresh herbs can enhance its presentation and flavor. When serving, be sure to present the fish on a warm plate, as this will help maintain an ideal temperature. These steps contribute not only to delivering a beautiful meal but also to a more enjoyable dining experience.

    Best Practices for Cleaning Your Grill

    Cleaning the grill immediately after use is an important practice for maintaining a pristine grilling experience in the future. After you’ve finished grilling, allow the grates to cool slightly, but not completely. Using a wire brush, scrub the grates to remove any food residue or sticking fish remains. For stubborn residue, soaking the grates in warm, soapy water can make cleaning easier.

    Proper cleanup prevents buildup that could affect future grilling sessions, ensuring that your grill remains in optimal condition. Moreover, a clean grill contributes to better flavor profiles for your next meal, as lingering residues may impart unwanted flavors to your fish. By adopting a thorough cleaning routine, you can ensure consistent results and enhance the longevity of your grill.

    The Necessity of Preheating the Grill

    Preheating the grill is a foundational step in achieving perfect grill marks and even cooking. Before you begin grilling, always take the time to preheat the grill to the desired temperature, typically around medium-high heat (400-450°F). This step ensures that the grill grates are hot enough to sear the fish quickly, which helps create a crust that reduces sticking.

    Preheating not only facilitates even cooking but also helps in achieving that coveted grilled flavor and texture. A hot grill prevents the fish from clinging to the grates, allowing for easier flipping and serving. Make preheating a non-negotiable step in your grilling routine, as it sets the stage for the best possible outcomes.

    Key Tips for Seasoning and Marinating Fish

    When it comes to seasoning or marinating fish for grilling, the right approach can elevate your dish significantly. Begin by choosing a marinade that includes oil, acids, and herbs or spices; this combination enhances flavor while creating a barrier that minimizes sticking. Allow the fish to marinate for an appropriate amount of time to absorb these flavors, typically ranging from 30 minutes to a few hours.

    When seasoning, apply a light hand just before grilling to maintain the freshness of the flavors. Consider using a mixture of dry spices for a flavorful crust that locks in moisture. By focusing on your seasoning and marinating techniques, you can ensure that your fish is not only flavorful but also perfectly grilled without the risk of sticking.

    Frequently Asked Questions About Grilling Fish

    What types of fish are ideal for grilling?

    Fatty fish such as salmon and tuna excel in grilling due to their high oil content. Lean fish can also be successfully grilled with proper preparation and care.

    How can you prevent fish from sticking to the grill?

    To avoid sticking, thoroughly clean the grill grates, oil them, preheat the grill, and handle the fish gently during cooking.

    What is the optimal temperature for grilling fish?

    The best grilling temperature for fish is between 400-450°F, ensuring even cooking and the development of a nice crust.

    How long should I allow fish to marinate before grilling?

    Marinate fish for at least 30 minutes or up to several hours, depending on the type and recipe, to enhance flavor and moisture retention.

    What common mistakes should I avoid when grilling fish?

    Avoid overcrowding the grill, flipping too soon, and using fish that isn’t fresh. Proper preparation and timing can help mitigate these issues.

    What tools are essential for grilling fish?

    Crucial tools include a fish grilling basket, a wide spatula, tongs, grill mats, and a meat thermometer for checking doneness.

    How can I determine when my fish is fully cooked?

    Fish is done when it reaches an internal temperature of 145°F, appears opaque, and flakes easily with a fork.

    Is marinating fish really necessary?

    While not required, marinades enhance flavor and moisture, helping to prevent sticking during grilling.

    What side dishes pair well with grilled fish?

    Complementary sides for grilled fish include grilled vegetables, rice, salad, or a citrus sauce to enhance flavor.

    How should I clean my grill after cooking fish?

    Clean the grill immediately after use while it’s still warm, using a wire brush and soapy water if necessary to remove residue.

    Connect with us on Facebook!

    The Article How to Grill Fish Without It Sticking: US Tips appeared first on https://pitmastersarsenal.com

    The Article Grill Fish Without Sticking: Top Tips from the US Was Found On https://limitsofstrategy.com

  • Grilling Burgers Without a Grill: Your Ultimate Guide

    Grilling Burgers Without a Grill: Your Ultimate Guide

    Key Equipment for Mastering Indoor Burger Grilling

    Choosing the Ideal Pan for Perfect Indoor Burger Grilling

    How to Grill Burgers Without a Grill: 12-inch cast iron skillet searing burgers on stovetop, surrounded by steam in warm kitchen.

    To replicate the authentic grilling experience in your home, selecting the right pan is paramount. A cast-iron skillet or a heavy-bottomed frying pan is your best bet, as these options closely resemble a grill’s ability to maintain heat and achieve a perfect sear on the meat. Cast-iron skillets excel at forming a delectable crust on your burgers while ensuring even heat distribution, which is essential for thoroughly cooking the meat. When making your selection, take into account the size of your cooking area; a 12-inch skillet is typically perfect for cooking multiple burgers at once, allowing you to serve more guests or family members efficiently.

    Additionally, the thickness of your pan matters significantly. Thicker pans provide superior heat retention, crucial for producing a great sear. A well-seasoned cast-iron skillet not only offers an excellent cooking surface but also imparts an added layer of flavor to your burgers, making the eating experience that much better. The weight of the pan is another important consideration; heavier pans maintain heat longer, which is vital for the searing process. This results in the delightful Maillard reaction, which browns the meat and develops the rich, complex flavors that we all crave in an ideal burger.

    Must-Have Accessories to Enhance Your Indoor Burger Grilling Experience

    To elevate your indoor grilling adventure, investing in a range of specialized accessories is highly recommended. Grill pans with ridged surfaces allow excess fat to drain away while providing those iconic grill marks that remind you of outdoor grilling. A robust griddle serves a similar purpose, particularly useful for cooking multiple items at once, ensuring everyone enjoys a freshly grilled meal.

    If you focus on keeping your burgers juicy, press weights can be incredibly useful. These tools apply uniform pressure to your patties, ensuring they cook evenly all the way through. When choosing these accessories, look for non-stick or pre-seasoned surfaces to ensure easy food release without sticking. Silicone spatulas are ideal for flipping and transferring burgers without damaging your cookware, making them essential tools in your grilling arsenal.

    In essence, having the right tools not only enhances the quality of your burgers but also transforms the overall cooking process, turning indoor grilling from a mundane task into an exciting culinary journey.

    Essential Safety Gear for Indoor Grilling Protection

    Prioritizing safety is crucial when diving into indoor grilling. Key safety equipment includes oven mitts, splatter guards, and a fire extinguisher. Oven mitts protect your hands from burns when handling hot pans or trays, while splatter guards can prevent oil and juices from making a mess on your stovetop and surrounding areas, keeping your kitchen cleaner and safer.

    A fire extinguisher is essential, particularly when cooking at high temperatures, to be prepared for any unexpected flare-ups. Additionally, keeping a first-aid kit handy for minor accidents that may occur while cooking is a wise choice. Ensure your smoke detectors are functioning correctly; this gives you peace of mind while you focus on creating the perfect burger without distractions.

    Beyond immediate safety gear, it’s advisable to create a designated cooking area for indoor grilling. Make sure your cooking space is clear of flammable materials and that you’re using appliances designed for high heat. By preparing your environment and equipping yourself with the necessary safety tools, you can enjoy indoor grilling with confidence and ease.

    Optimal Ventilation Solutions for Indoor Burger Grilling

    Indoor grilling with range hood, open windows, and air purifier for a comfortable kitchen environment.

    Effective ventilation is critical when grilling indoors to control smoke and odors. Installing a range hood can significantly reduce smoke accumulation and keep your kitchen environment comfortable while you cook. If a hood isn’t available, opening windows or using exhaust fans can promote airflow, allowing fresh air to circulate and smoke to dissipate, leading to a more enjoyable cooking experience.

    In some scenarios, cooking on a balcony or in an outdoor area with sufficient ventilation can be an alternative option. If these aren’t feasible, consider investing in an air purifier designed to eliminate cooking odors and particles from the air. This is particularly beneficial when utilizing cooking methods that produce more smoke, such as high-temperature searing, to ensure your indoor space remains fresh and inviting.

    Utilizing effective ventilation not only enhances your cooking environment but also enriches the overall dining experience, allowing you to concentrate on flavors without being overwhelmed by lingering odors.

    Creating Flavorful Burger Patties

    Selecting Premium Meat for Exceptional Burger Patties

    The cornerstone of any unforgettable burger is the quality of the meat you choose. Selecting high-quality cuts with the appropriate fat content is crucial for achieving juicy and flavorful patties. Ground chuck, which typically contains around 80/20 fat content, is a well-loved option among burger aficionados. This fat ratio ensures that your burgers stay moist and tender during the cooking process, while leaner meats often lead to drier burgers that lack richness.

    Exploring various cuts of beef can lead to exciting flavor profiles; integrating cuts such as brisket or short rib can elevate your burger experience significantly. For those interested in alternative protein sources, minced turkey or plant-based meats can also be utilized to create delicious burgers. However, these options may require adjustments in cooking time and temperature to achieve the desired texture.

    When choosing your meat, freshness is key; sourcing from local butchers or farmers’ markets frequently results in higher-quality selections. Additionally, understanding the animal’s diet and treatment can greatly influence the meat’s flavor and quality, providing your burgers with an unmatched edge in taste.

    Seasoning Strategies for Amplifying Your Burger’s Flavor

    Gourmet burger on grill with salt, pepper, oregano, thyme, garlic powder, smoked paprika, and Cajun spice, steaming.

    The way you season your burger is just as essential as the meat’s quality. A straightforward yet effective method is to start with generous pinches of salt and pepper to enhance the natural flavors of the meat. Nevertheless, experimenting with a variety of herbs and spices can elevate your burgers to new culinary heights, introducing layers of complexity that make them even more appealing.

    Dried herbs such as oregano, thyme, and garlic powder can add depth, while smoked paprika imparts a hint of smokiness reminiscent of outdoor grilling, tantalizing the taste buds. For those looking to spice things up, consider using blends like Cajun seasoning, which can provide a delightful kick that brings your burgers to life.

    Don’t shy away from marinating your patties prior to cooking; a simple mixture of olive oil, balsamic vinegar, and herbs can infuse the meat with additional flavor. Ultimately, the secret to a well-seasoned burger lies in balance—too much seasoning can overpower the meat, while too little may render it bland. Finding that sweet spot is essential for crafting a mouthwatering burger that satisfies every palate.

    Shaping and Sizing Your Burger Patties for Optimal Cooking

    Uniformity in the size of your patties is vital for even cooking. When forming your patties, aim for a consistent thickness—typically around 1 to 1.5 inches—to ensure they cook evenly throughout. A burger press can help you achieve this consistency quickly and easily, but shaping by hand can also be just as effective if you prefer a more personalized touch.

    While shaping the patties, it’s crucial to create a slight indentation in the center. This technique, known as the dimple method, helps the burgers maintain their shape during cooking and prevents them from puffing up. Additionally, handling the meat gently is essential; overworking it can result in tough burgers that lack the tenderness you desire.

    Once shaped, it’s highly advisable to chill the patties in the fridge for at least 30 minutes before cooking. This step not only helps keep their shape but also enhances the texture, resulting in a juicier burger overall. Properly shaped and chilled patties lay the groundwork for a delightful grilling experience that everyone will appreciate.

    The Importance of Chilling Patties Before Cooking

    Chilling your burger patties before cooking is a vital step that can significantly affect the final outcome. By allowing the patties to cool in the refrigerator for at least 30 minutes, you help them maintain their shape during the cooking process. This is especially important for ensuring even cooking and achieving the ideal texture that makes a burger truly enjoyable.

    When the patties are cold, they are less likely to shrink dramatically when exposed to high heat. This results in burgers that not only look appealing but also retain their juiciness and flavor throughout the cooking process. Additionally, chilling helps solidify the fat within the meat, contributing to a more succulent bite once cooked to perfection.

    To chill your patties effectively, place them on a tray lined with parchment paper or a plate without stacking them on top of one another. Loosely covering them with plastic wrap can help prevent contamination from other foods during this chilling period. This simple yet effective technique is often overlooked, but it can greatly enhance the overall quality of your burgers, ensuring they are nothing short of delectable.

    Expert Insights on Indoor Burger Grilling Techniques

    Professional Chefs’ Techniques for Indoor Burger Grilling

    Professional chefs bring a wealth of techniques that can elevate indoor grilling, ensuring home cooks achieve restaurant-quality burgers. One prevalent method is utilizing high heat for proper searing, which locks in moisture and flavor. Chefs typically recommend preheating your pan to a high temperature, which allows for that perfect crust while keeping the inside juicy and tender.

    Another technique involves employing a two-zone cooking method, where you cook the burgers on high heat to sear them and then shift them to a cooler part of the pan to finish cooking through. This approach mimics the indirect grilling often used in outdoor setups, promoting even cooking without the risk of burning the exterior of the patties.

    Furthermore, many chefs advocate for enhancing burgers with a butter baste. Adding a tablespoon of butter to the pan during the last minutes of cooking and spooning it over the patties introduces richness and depth of flavor that elevates the overall taste experience. Here’s a concise list of key techniques that professionals recommend for perfect indoor burgers:

    • Preheat your pan thoroughly before adding burgers.
    • Use a two-zone cooking method for even doneness.
    • Implement a butter baste for added richness and flavor.
    • Experiment with different types of meat for unique flavor profiles.
    • Utilize fresh herbs and spices to enhance taste.
    • Incorporate cheese during the last moments of cooking for perfect melting.
    • Rest the patties post-cooking to allow juices to redistribute effectively.
    • Emphasize the importance of a meat thermometer for precision in cooking.

    These techniques, when adapted for home cooking, can significantly improve the quality of your indoor grilled burgers, ensuring they are delicious and satisfying for everyone involved.

    Avoiding Common Mistakes for Perfect Indoor Grilling

    Steering clear of common pitfalls in indoor burger grilling is crucial for achieving remarkable results. A frequent mistake is overcooking the patties, which can lead to dry and flavorless burgers that lack the juiciness you desire. To mitigate this, it’s essential to monitor the cooking closely and utilize a meat thermometer to check for doneness. Medium-rare burgers should reach an internal temperature of 63°C, while well-done patties should be cooked to 74°C to ensure safety.

    Another common error is neglecting to allow the pan to heat sufficiently before adding the food. Without adequate preheating, patties can stick to the surface and fail to develop a proper sear, resulting in suboptimal flavor. Always check the pan’s readiness by dropping a bit of water onto the surface—if it sizzles, you’re ready to cook.

    Moreover, flipping your burgers too frequently can disrupt the searing process, which is vital for forming that delicious crust. Ideally, aim for a single flip after 3-4 minutes, depending on the thickness of the patty. Pressing down on the patties while they cook can also squeeze out essential juices, resulting in a drier product that may not satisfy your taste buds.

    By being mindful of these common mistakes, you can ensure that your indoor grilling experience yields delicious, perfectly cooked burgers every time, impressing your friends and family alike.

    Maximizing Flavor When Grilling Indoors

    Infusing smoky flavors into your indoor grilled burgers can elevate them to new culinary heights, even without a traditional grill. One popular method is to use liquid smoke, a concentrated flavoring derived from the condensation of smoke. Just a few drops mixed into your burger meat can replicate that beloved taste of outdoor grilling, providing an authentic experience.

    Alternatively, consider using wood chips placed in a smoker box or wrapped in foil with holes punched in it. When heated, these chips release aromatic smoke that can impart delightful flavors to your burgers. Although this method requires a bit more setup, it can yield impressive results that transport your taste buds outdoors, making the effort well worth it.

    Another effective technique for enhancing flavor is to use smoking salts. Sprinkling these salts on your formed patties before cooking can add a depth of savoriness that mimics the essence of grilled meat. Experimenting with different types of wood chips, such as hickory or mesquite, can further enrich the flavor profile of your burgers. With these techniques in your cooking repertoire, you can easily create burgers bursting with flavor without needing to step outside.

    Cooking Techniques to Craft the Ultimate Burger

    The Importance of Proper Pan Preheating for Perfect Burger Grilling

    Preheating your pan is a vital step in achieving that flawless sear on your burger. By heating your pan on high for at least five minutes before adding your patties, you create a hot surface that facilitates the Maillard reaction—the process responsible for browning and flavor development. A preheated pan not only sears the meat’s surface but also helps lock in juices, resulting in a more flavorful burger that will surely impress.

    To check if your pan is adequately preheated, drop a small amount of water onto the surface. If the droplets sizzle and evaporate immediately, your pan is ready for cooking. Proper preheating can significantly impact the final outcome, ensuring that each burger is cooked to perfection and possesses that sought-after crust.

    Moreover, consider the type of cooking fat you use. Choosing oils with a high smoke point, such as canola or avocado oil, is advisable, as they can withstand elevated temperatures required for searing without burning. This step also adds an additional layer of flavor, enhancing the overall taste of your burgers. By mastering the preheating process, you set the stage for consistently successful grilled burgers, ensuring satisfaction with every bite.

    Best Practices for Flipping and Pressing Burgers

    When it comes to flipping burgers, less is often more. Flipping too frequently can disrupt the formation of a good sear, preventing that desirable crust from developing. The ideal approach is to flip your burgers only once, about three to four minutes after placing them on the pan, depending on their thickness and your desired level of doneness.

    Pressing down on the patties while they cook is another common mistake. While it may be tempting to squeeze out excess juices, doing so can result in a dry burger that lacks the moisture and flavor that makes it enjoyable. Instead, allow the natural juices to remain within the patty, contributing to a tastier and more succulent outcome that will impress your guests.

    If you’re eager to achieve a perfectly cooked burger, consider using a meat thermometer to check for doneness. This handy tool eliminates the guesswork involved, ensuring you reach your desired level of doneness without the risk of overcooking. With these flipping and pressing techniques, you’ll be well on your way to mastering the art of indoor burger grilling, delighting everyone at your table.

    How to Accurately Check for Burger Doneness

    Determining when a burger is perfectly cooked is essential for both safety and taste. The most reliable method to achieve this is by using a meat thermometer; the internal temperature of your burger should read 63°C for medium-rare and 74°C for well-done. This ensures that any harmful bacteria are eliminated while maintaining the desired juiciness that makes a burger truly delicious.

    In addition to using a thermometer, visual indicators can also signal when food is done. A well-cooked burger should have a firm texture with a slightly pink center, indicating that it remains moist inside. The exterior should be a deep golden brown, signifying that a good sear has been achieved, contributing to overall flavor.

    Seasoning plays a critical role as well; if you’ve seasoned your burgers effectively, the crust will reflect that, simplifying the process of gauging doneness. If the patties are nicely browned and feel firm yet springy, you’re likely in the right zone for serving. By focusing on these methods, you’ll consistently produce burgers that are perfectly cooked, ensuring an enjoyable dining experience for everyone involved.

    Enhancing Your Burger Experience for Maximum Enjoyment

    Selecting the Best Buns to Complement Your Burgers

    The bun you choose can significantly elevate your burger experience, serving as the ideal vessel for all those delicious fillings. Opt for fresh, sturdy options that can hold up against juicy toppings and fillings. Brioche buns are a popular choice for their slightly sweet flavor and soft texture, providing a delightful contrast to the savory meat while adding an indulgent touch.

    Alternatively, sesame seed buns offer a classic touch that pairs beautifully with traditional burger toppings, evoking a sense of nostalgia. For those seeking a denser option, consider pretzel buns; their unique flavor and chewy texture can add an exciting layer to your burger, making each bite a delightful experience.

    No matter the type, ensure your buns are fresh. Stale buns can detract from the overall experience, resulting in a less enjoyable bite. Lightly toasting the insides of your buns on the grill or in the pan can also improve their texture and prevent them from becoming soggy from the burger juices. By focusing on the quality and type of bun, you can significantly enhance your burger enjoyment, transforming a simple meal into an unforgettable culinary experience.

    Elevating Your Burger with Creative Toppings and Condiments

    Toppings and condiments play a crucial role in defining the flavor profile of your burger, allowing for creativity and personalization. While classics like lettuce, tomato, onion, and pickles are always crowd-pleasers, don’t hesitate to explore more adventurous options that can elevate your creation. Cheese, for instance, can enhance a burger’s appeal; try varieties like cheddar, blue, or pepper jack for an exciting burst of flavor that complements the meat.

    Adding a crispy bacon layer can introduce savory richness, while avocado slices provide creaminess that pairs beautifully with well-seasoned meat, elevating the entire burger experience. Specialty sauces, such as homemade mayonnaise, tangy barbecue sauce, or spicy aioli, can also add an exciting twist that surprises the palate.

    Experimentation is key; consider combining toppings to create unique flavor profiles. For example, a burger topped with jalapeños, pepper jack cheese, and chipotle mayo can deliver a satisfying kick that adds depth to your meal. Remember, the right balance of toppings can elevate your burger from ordinary to extraordinary, making every bite a memorable moment that diners will savor.

    Complementary Side Dishes and Pairings for Your Burgers

    Accompanying your burgers with the right side dishes can create a well-rounded meal that tantalizes the senses. Classic options like crispy fries, coleslaw, or a refreshing garden salad can enhance the overall dining experience, providing contrasting textures and flavors that complement your juicy burgers. When it comes to fries, consider variations like sweet potato fries or loaded fries topped with cheese and bacon for an indulgent treat that tantalizes the taste buds.

    Pairing your burgers with beverages can also elevate the meal; craft beers often complement rich, meaty flavors beautifully, while a crisp soda can cleanse the palate after each bite. For a more indulgent combination, think about serving milkshakes or smoothies alongside your burgers, offering a delightful contrast to the savory components of your meal that enhances the entire experience.

    Overall, thoughtfully chosen side dishes and pairings can transform a simple burger into a full-fledged culinary experience, resulting in a satisfying and enjoyable meal that leaves guests raving long after the table has been cleared.

    Cooking Techniques for Enhancing Burger Texture and Flavor

    Mastering various cooking techniques can significantly improve the texture and flavor of your burger, delivering a more satisfying eating experience. Consider approaches like smashing, where the patty is pressed onto the hot cooking surface, creating a caramelized crust that maximizes flavor and texture. This method is particularly popular in diner-style burgers and can yield irresistible results.

    For a more traditional approach, searing is essential for achieving that coveted golden-brown crust that adds depth to the flavor. By using high heat and allowing the patty to cook undisturbed for a few minutes, you enhance the flavor through the Maillard reaction, making each bite more enjoyable.

    If you prefer a more controlled cooking process, slow-cooking can be effective, especially for thicker patties. This technique allows the burger to cook evenly without burning the exterior, resulting in a juicy and tender product that is sure to impress. Mastering these cooking techniques gives you the versatility to create various burgers, each with its unique profile and taste that reflects your culinary style.

    Research-Driven Benefits of Indoor Burger Grilling

    Healthier Cooking Options Through Indoor Grilling

    Grilling burgers indoors can offer healthier cooking methods compared to traditional outdoor techniques. Research indicates that indoor grilling may limit exposure to harmful compounds commonly associated with outdoor grilling, such as polycyclic aromatic hydrocarbons (PAHs) and heterocyclic amines (HCAs) that develop when meat is cooked at high temperatures over an open flame.

    Indoor grilling not only reduces the formation of these harmful substances but also allows for more controlled cooking temperatures, ensuring better health outcomes and safety for your meals. By monitoring your cooking techniques, you can minimize risks while enjoying the delicious flavors of grilled food.

    Furthermore, indoor grilling can be tailored to incorporate healthier ingredients and cooking methods, such as opting for leaner meats and including fresh vegetables. By consciously choosing ingredients and cooking techniques, you can create a balanced meal that prioritizes flavor and health, satisfying your cravings without compromising your dietary goals.

    Year-Round Enjoyment with Indoor Grilling

    Indoor grilling provides the convenience of enjoying burgers all year round, regardless of the weather. Whether it’s snowing in winter or raining in spring, you can whip up delicious burgers without worrying about outdoor elements affecting your cooking plans. This consistent access to grilling allows for greater creativity in meal preparation, enabling you to explore new flavors and techniques no matter the season.

    Additionally, indoor grilling is often more convenient. You can set up and cook in your kitchen without the need for extensive outdoor setups, making it easier to experiment with different flavors, toppings, and techniques, all while turning it into a fun culinary experience for you and your guests.

    The reliability of indoor grilling allows you to refine your skills over time, achieving better results with each attempt. This consistency is ideal for anyone looking to elevate their burger game, making it a preferred method for many home cooks who appreciate the ease and accessibility of indoor grilling.

    Environmental Impact of Indoor Grilling

    Indoor grilling can be more energy-efficient than outdoor grilling, especially in urban settings where heating outdoor grills typically requires more fuel. Studies have shown that indoor grilling can lead to lower emissions and resource usage, contributing positively to sustainability efforts while allowing you to enjoy delicious meals.

    Additionally, cooking indoors often requires less preparation than traditional grilling, which can involve setting up the grill, preparing charcoal or gas, and managing the cleanup afterward. By using a stovetop or electric grill, energy consumption is minimized, benefiting the environment while providing a convenient cooking option that fits seamlessly into your lifestyle.

    With the increasing focus on sustainable cooking practices, embracing indoor grilling can be a responsible choice that aligns with environmentally conscious living, allowing you to enjoy your favorite meals while being mindful of your impact on the planet.

    Cleaning and Caring for Your Indoor Grilling Equipment

    Best Practices for Cleaning Your Indoor Grilling Equipment

    Post-cooking maintenance is essential for extending the life of your grilling equipment and ensuring optimal cooking results for future meals. After using your pan, allow it to cool down slightly before attempting to clean it. This precaution prevents thermal shock, which can warp or damage your cookware, ensuring it remains in top condition for years to come.

    For general cleaning, use warm, soapy water and a soft sponge to gently scrub away any food residue that may have accumulated during cooking. It’s vital to avoid abrasive cleaners or scrubbers, as these can scratch the surface of your pans and compromise their non-stick properties. For stubborn residues, consider soaking the pan in warm, soapy water or applying a paste of baking soda and water to help lift the grime away.

    If you’ve used a cast iron pan, remember to follow proper care guidelines, such as thoroughly drying it after washing and applying a light coat of oil to prevent rust. By properly maintaining your grilling equipment, you can ensure it remains in excellent condition for years to come, allowing you to enjoy countless delicious burger feasts.

    Maintaining Non-Stick Surfaces for Longevity

    When it comes to non-stick surfaces, proper maintenance is crucial to ensure their longevity and effectiveness. To care for these surfaces, avoid using metal utensils or harsh cleaners that can scratch or damage the coating. Instead, opt for silicone or wooden utensils that are gentle on the surface, preserving their integrity and ensuring a smooth cooking experience.

    Regularly seasoning your non-stick pans can further enhance their performance and lifespan. A light application of cooking oil creates a protective layer that prevents sticking and prolongs the life of the coating. It’s also essential to follow the manufacturer’s guidelines for cleaning and care; adhering to these recommendations will help maintain the non-stick properties of your cookware and ensure consistent cooking results.

    By prioritizing care for your non-stick surfaces, you can enjoy a seamless cooking experience that not only makes grilling easier but also improves the quality of your burgers, allowing you to create delightful meals without frustration.

    Best Practices for Storing Your Grilling Tools

    Proper storage of your grilling tools can significantly extend their lifespan and maintain their performance. After cleaning, ensure your pans and accessories are completely dry before storing them. Moisture can lead to rust or corrosion, particularly in metal utensils and cast iron pans, which can affect their functionality over time.

    Store your pans in a cool, dry place, ideally hanging or stacked, to prevent scratches and damage. If you have non-stick pans, consider placing a soft cloth or paper towel between stacked pans to avoid damaging the coating. For accessories like spatulas and press weights, designate a specific drawer or container to keep them organized and easily accessible whenever you’re ready to grill.

    Using protective covers for your grilling tools can also help prevent dust accumulation and physical damage. By taking the time to store your tools properly, you can ensure they remain ready for use and maintain their integrity for all your indoor grilling adventures, allowing you to cook with confidence and ease.

    Troubleshooting Common Indoor Grilling Issues

    Resolving Sticking Burgers

    If your burgers stick to the pan, it’s often a sign that the pan is not hot enough or that the meat is too lean. To prevent sticking, ensure your pan is adequately preheated before adding the patties. A hot pan creates a natural sear that helps release the meat, making it easier to flip without damaging the patty.

    Using a small amount of oil can also be beneficial; opt for oils with high smoke points, such as canola or grapeseed, to create a non-stick environment that promotes easy cooking. Additionally, consider the fat content of your meat; burgers made from lean cuts may benefit from added fat, such as bacon or oil, to enhance moisture and prevent sticking during the grilling process.

    If you find that burgers still stick despite these efforts, gently using a spatula to loosen the edges before flipping can help. By following these tips, you can enjoy perfectly seared burgers without the frustration of sticking, allowing you to savor your meal fully.

    Managing Smoke and Odors for a Comfortable Cooking Environment

    Managing smoke and odors is crucial for a pleasant indoor grilling experience. If you notice smoke beginning to accumulate, consider opening windows and using exhaust fans to enhance ventilation. This allows fresh air to circulate and helps dissipate any lingering odors, ensuring your cooking space remains comfortable.

    Cooking at a moderate temperature can also help reduce smoke production. While high heat is vital for achieving a good sear, excessive heat can lead to excessive smoke, especially from fats. Adjusting your cooking temperature as necessary can help balance flavor development with effective smoke management, making the process more enjoyable.

    Additionally, consider using an air purifier or placing bowls of vinegar or baking soda around the kitchen to neutralize odors. These simple strategies can greatly improve indoor air quality while you enjoy your grilling session, creating a more pleasant environment for everyone involved.

    Achieving Consistent Results When Grilling Indoors

    Consistency in burger grilling can be challenging, but with practice and a few helpful tips, it’s entirely achievable. Start by using a timer to monitor cooking times; this helps eliminate guesswork and ensures a more reliable cooking experience that you can replicate consistently over time.

    Maintaining even heat throughout your cooking surface is crucial. If using a stovetop, consider rotating your pans if your burner has hot spots to ensure uniform cooking. Additionally, practicing your flipping technique can contribute to consistent results. The more comfortable you become with flipping and monitoring your burgers, the better your outcomes will be, leading to perfectly cooked burgers every time.

    Finally, adjusting your cooking times based on patty thickness and personal preference can help promote consistency, allowing you to cater to various tastes and preferences. With these strategies in place, you’ll develop a reliable approach to indoor grilling that consistently delivers delicious burgers, impressing your friends and family alike.

    Advanced Tips and Tricks for Indoor Burger Grilling

    Creating Authentic Grill Marks Indoors

    Achieving those coveted grill marks indoors is not only visually appealing but also adds an extra dimension of flavor to your burgers. To create grill marks, invest in a ridged grill pan. These pans feature raised surfaces that mimic the lines of an outdoor grill, giving your burgers an authentic appearance.

    When cooking, gently press down on the patties for a few seconds to create the desired marks. To achieve a crisscross pattern, rotate the patties 90 degrees halfway through cooking. This simple technique not only enhances the visual appeal of your burgers but also increases the surface area that caramelizes, enhancing flavor.

    Timing is key—press down only once per side to prevent juices from escaping. With the right techniques, you can master the art of creating impressive grill marks indoors, elevating your burger presentation and impressing your guests with both flavor and aesthetics.

    Infusing Smoky Flavors into Your Burgers for Enhanced Taste

    Incorporating smoky flavors into your burgers can significantly enhance their appeal, even without a traditional grill. One effective method is to add liquid smoke to your meat mixture. Just a few drops can impart rich, smoky undertones reminiscent of outdoor grilling that will tantalize your taste buds.

    If you want to go further, consider using smoked salts. Sprinkling these on your patties before cooking can introduce a depth of flavor that enhances the overall taste of your burgers. Another option is to use wood chips; if you have a stovetop smoker, you can infuse your burgers with authentic smoky flavors by adding chips to the smoker box and letting them smolder while you cook.

    Each of these methods can significantly transform your indoor grilling experience, allowing you to enjoy the essence of outdoor cooking from the comfort of your kitchen, resulting in burgers that are nothing short of spectacular.

    Exploring Different Meats for Unique Burgers

    While beef is the classic choice for burgers, experimenting with different meats can yield exciting culinary results that surprise and delight. Ground turkey or chicken can provide a lighter alternative, but be sure to adjust cooking times and temperatures, as these meats can dry out more easily than beef, requiring careful attention during grilling.

    For a richer flavor, consider using lamb, which can bring a unique twist to your burgers that many find appealing. Alternatively, plant-based options like black bean or chickpea patties can cater to vegetarian and vegan preferences while still delivering on taste and texture, making them a fantastic addition to your grilling repertoire.

    When working with different meats, closely monitor the cooking temperature to ensure even cooking. For example, turkey and chicken should be cooked to at least 74°C to ensure safety, while lamb can be enjoyed at varying degrees of doneness according to personal preference. By exploring various meats, you’ll discover new flavor profiles and textures that keep your burger game fresh and exciting, ensuring every meal is a delightful adventure.

    Mastering the Art of Seasoning for Maximum Burger Flavor

    The skill of seasoning is essential for any burger enthusiast looking to elevate their creations. To enhance flavor effectively, begin with a base of salt and pepper, but don’t hesitate to experiment with different spice blends that cater to your palate and preferences.

    Consider marinating your patties to infuse deeper flavors into the meat. A mixture of olive oil, balsamic vinegar, and herbs can create a delicious marinade that profoundly enhances the taste of the meat. For dry seasoning, try blends like garlic powder, smoked paprika, or even Cajun seasoning to add layers of complexity that your diners will appreciate.

    Mastering seasoning is about finding balance; taste your mixture before shaping the patties to ensure it aligns with your flavor preferences and enhances the overall burger experience. By honing your seasoning skills, you’ll elevate your burgers and create a memorable culinary experience that keeps everyone coming back for more.

    Frequently Asked Questions about Indoor Burger Grilling

    Can I grill burgers without an actual grill?

    Yes, you can grill burgers without a traditional grill by using a cast-iron pan, grill pan, or stovetop griddle to achieve results similar to those of outdoor grilling.

    What is the best type of meat for indoor grilling?

    Ground chuck, with a fat content of around 80/20, is ideal for juicy burgers, but you can also experiment with other meats, such as turkey or lamb, for different flavors.

    How do I prevent my burgers from sticking to the pan?

    Ensure your pan is adequately preheated and use a small amount of high-smoke-point oil to create a non-stick environment, promoting easier cooking.

    What’s the ideal cooking temperature for burgers indoors?

    Cook burgers at high heat for searing, and check the internal temperature with a meat thermometer—medium-rare is approximately 63°C, while well-done is around 74°C.

    How can I add smoky flavor to my burgers indoors?

    You can use liquid smoke, smoked salts, or wood chips in a stovetop smoker to infuse smoky flavors into your indoor burgers, enhancing their overall taste.

    Is it necessary to chill burger patties before cooking?

    Yes, chilling burger patties for at least 30 minutes helps them maintain shape during cooking and enhances their texture, resulting in a more enjoyable burger.

    What are some common mistakes to avoid when grilling burgers indoors?

    Avoid overcooking, not preheating the pan, flipping too frequently, and pressing down on the patties while they cook, as these can all lead to less-than-ideal results.

    What toppings are best for burgers?

    Classic toppings include lettuce, tomato, onion, and pickles, but try adding cheese, bacon, or avocado for extra flavor and variety that enhances your burger experience.

    How do I clean my grilling equipment after cooking?

    Let pans cool, then use warm, soapy water and a soft sponge. For stubborn residues, soak the pans and use a paste of baking soda to help remove any stuck-on bits.

    Can I use plant-based meat for burgers?

    Absolutely! Plant-based meats can offer delicious alternatives to traditional beef burgers, and they often require different cooking times and methods for optimal results.

    Connect with us on Facebook for more grilling tips and recipes!

    The post How to Grill Burgers Without a Grill: A Universal Guide appeared first on https://cookinggods.com

    The Article Grilling Burgers Without a Grill: A Complete Guide Was Found On https://limitsofstrategy.com

  • Toast Without a Toaster: Simple Methods You Can Try

    Toast Without a Toaster: Simple Methods You Can Try

    Must-Have Kitchen Tools for Creating Perfectly Toasted Bread

    Which Kitchen Essentials Are Optimal for Toasting Bread?

    How to Make Toast Without a Toaster: A kitchen scene showing bread toasting methods: frying pan, oven, and grill.

    Diving into the art of making toast without a toaster unveils a plethora of exciting culinary opportunities, leveraging various kitchen tools that provide distinct methods and enhance flavor profiles. The most commonly utilized tools include:

    • Frying Pan: Exceptional for stovetop toasting, this option offers precise heat control for quick toasting results.
    • Oven: Ideal for batch toasting, it allows for an even, golden-brown finish on multiple slices simultaneously.
    • Grill: Provides a delicious charred flavor, making it particularly suitable for thicker slices of bread.

    Using a frying pan is notable as the most straightforward method; it enables cooks to keep a close watch on the bread, ensuring it reaches the perfect level of crispiness. While the oven might take longer, it excels at toasting larger quantities evenly. Grilling, on the other hand, infuses a unique smoky flavor that enhances the toast experience, especially for those who enjoy a hint of char in their meal. Each method can be tailored to various bread types and desired outcomes.

    How to Prepare Your Bread for Optimal Toasting Results

    Properly preparing your bread is vital before embarking on the toasting journey to achieve the best results. Start by allowing your bread to reach room temperature; this step is crucial for ensuring even toasting throughout. Here are some effective tips for preparing your bread:

    • Slice Evenly: Cut your bread into uniform slices to ensure even toasting.
    • Consider the Type of Bread: Different types of bread have unique toasting characteristics, and understanding these can significantly enhance your results.
    • Proper Storage: Use bread that has been stored correctly to avoid sogginess or excessive dryness.

    Cutting your bread into even slices guarantees consistent heat exposure for each piece, minimizing the chance of some slices burning while others remain undercooked. When selecting your bread, it’s essential to consider how various types—such as wholemeal, sourdough, or brioche—respond to heat. For example, denser breads like sourdough may need slightly longer toasting times compared to lighter varieties. Additionally, proper bread storage enhances its toasting quality; stale or overly moist bread can lead to disappointing outcomes.

    Essential Safety Tips for Toasting Bread Without a Toaster

    Toasting bread without a toaster introduces specific safety considerations. By following some straightforward safety tips, you can ensure the process remains both effective and secure. Here are the key precautions to adhere to:

    • Use Oven Mitts: Protect your hands from burns when handling hot pans or trays.
    • Monitor Your Bread Closely: Stay vigilant while toasting to prevent burning.
    • Ensure Proper Ventilation: Open windows or activate exhaust fans to avoid smoke accumulation.

    Wearing oven mitts is crucial, especially when dealing with hot surfaces or turning slices in a pan. Bread can swiftly transition from perfectly toasted to burnt, making constant vigilance essential. Furthermore, ensuring proper ventilation in your kitchen is essential for managing smoke, particularly when using high-heat methods like grilling or broiling. Prioritizing safety will facilitate a risk-free and enjoyable toasting experience.

    Advanced Techniques for Toasting Bread in a Frying Pan

    A chef toasting bread in a frying pan with flames, in a rustic kitchen.

    How to Set Up Your Frying Pan for Ideal Toasting

    Setting up your frying pan for toasting is a straightforward yet crucial process. Begin by heating your pan over medium heat, which is perfect for achieving even toasting while avoiding burning the bread too quickly. If you wish, adding a small amount of butter or oil can enhance flavor and prevent sticking. Once the pan reaches the desired temperature, carefully place your bread inside, ensuring there’s enough space between slices for optimal heat distribution.

    Regularly flipping the bread is vital to achieve the perfect toast. Each side requires close monitoring; adjusting the heat may be necessary if the bread begins to darken too quickly. Checking the bread every 30 seconds is practical to assess its toastiness. This method provides flexibility, allowing you to adapt to the thickness of the bread and your preferences for crispiness. Ultimately, using a frying pan offers complete control over the toasting process, leading to exceptional results.

    What Is the Ideal Temperature for Frying Pan Toasting?

    A medium heat setting is ideal for toasting bread in a frying pan. This temperature strikes the perfect balance, allowing the bread to toast evenly without the risk of burning. Excessively high heat can cause the exterior to char while leaving the interior soft and undercooked. Conversely, too low a heat may lead to limp, unappealing toast.

    Maintaining this medium heat may require periodic adjustments based on the type of bread you are using. For example, denser breads, such as wholegrain or sourdough, may benefit from a slightly longer toasting time. If your initial attempts yield variations in toastiness, take note of the heat levels and adjust as necessary. A consistent temperature will ensure a reliable toasting experience, guaranteeing that each slice meets your expectations.

    What Is the Recommended Toasting Time for Bread in a Frying Pan?

    Slices of bread toasting in a frying pan, turning golden brown, with a timer set to 2-3 minutes.

    Toasting bread in a frying pan typically takes around 2-3 minutes per side, depending on your heat settings and the type of bread. It is crucial to keep a close watch on your bread during this process to prevent overcooking or burning. The timing may vary based on the thickness of the slices; thicker pieces may need more time.

    For optimal results, flip the bread halfway through the toasting process. This practice not only promotes even browning but also allows you to keep a close eye on the progress. If you’re aiming for a specific level of crispness, feel free to adjust the time according to your preferences. Some individuals may prefer a light toast, while others enjoy a darker, crunchier finish. By mastering the timing, you can perfect the art of frying pan toasting.

    Can You Use Different Bread Types for Frying Pan Toasting?

    Absolutely, you can toast various types of bread in a frying pan. Whether it’s white, wholemeal, or artisan sourdough, each type offers distinct flavors and textures when toasted. However, the toasting time may need adjustments based on the density and moisture content of the bread.

    Lighter breads, such as white sandwich bread, toast quickly, often requiring less time than denser varieties like rye or sourdough. It’s crucial to consider the thickness of the slices as well; thicker slices will generally require a longer toasting period. Experimenting with different kinds of bread can lead to delightful discoveries, as each type offers unique flavors that can enhance your meal. This versatility makes using a frying pan an excellent method for toasting.

    Effective Strategies for Toasting Bread Without a Toaster

    What Techniques Do Culinary Professionals Recommend for Toasting Bread?

    Culinary experts frequently suggest specific techniques for toasting bread without relying on a traditional toaster, emphasizing methods that enhance both flavor and texture. Grilling is a popular choice among chefs, as it imparts a charred flavor that many find appealing. The high heat of grilling caramelizes the sugars in the bread, yielding an attractive crust. Alternatively, the oven is praised for its even toasting capabilities, particularly for larger quantities of bread.

    Chefs may also recommend pairing certain types of bread with specific methods. For example, sourdough is frequently grilled to achieve a smoky flavor, while lighter breads are better suited for the oven for even toasting. This expert insight highlights the importance of selecting the appropriate method based on the type of bread used, ensuring that every slice is toasted to perfection.

    How to Achieve Consistently Perfectly Toasted Bread?

    Achieving perfectly toasted bread requires careful attention and strategic adjustments based on your kitchen setup. One key step is closely monitoring the bread throughout the toasting process. This vigilance helps you catch any potential issues before they escalate, ensuring that your toast maintains the desired color and texture.

    Adjusting heat settings is another critical factor. Many chefs recommend starting at medium heat and modifying as necessary. If you notice the bread is toasting too quickly, reducing the heat can help. Conversely, if you prefer a darker toast, a slight increase in temperature may be warranted. Additionally, flipping the bread regularly ensures even browning. By implementing these actionable steps, you can refine your toasting technique and consistently produce outstanding results.

    What Common Mistakes Should You Avoid When Toasting Bread?

    Several common mistakes can undermine your efforts when toasting bread without a toaster. A major issue stems from using excessively high heat, which can scorch the bread before it has a chance to toast properly. Another frequent error involves neglecting to flip the bread; failing to do so can result in uneven toast, with one side burnt while the other remains pale.

    Overcrowding the pan is another common pitfall. When multiple slices are crammed together, they may not receive adequate heat, leading to uneven toasting. Real-world examples illustrate this point: many home cooks find their toast lacks a golden finish due to insufficient space in the pan. To correct these mistakes, ensure proper heat settings, flip the bread regularly, and provide ample room for each slice in your pan. These adjustments can significantly enhance your toasting outcomes.

    Expert Insights on Toasting Bread in the Oven

    What Temperature Should You Set Your Oven For Toasting Bread?

    When employing an oven for toasting bread, preheating to a temperature range of approximately 180-200°C is optimal. This temperature ensures that the bread toasts evenly without the risk of burning. A hotter oven can lead to rapid browning on the exterior while leaving the inside soft and chewy. Conversely, too low a temperature may result in a longer wait without achieving the desired crispiness.

    The advantage of using an oven lies in its ability to distribute heat evenly, making it an excellent choice for toasting multiple slices at once. Preheating the oven is a crucial step; placing bread in a cold oven can lead to uneven cooking and disappointing results. By adhering to the recommended temperature range, your toasting experience will be much more reliable and enjoyable.

    How to Arrange Bread in the Oven for Optimal Toasting?

    Proper arrangement of your bread in the oven is crucial for achieving even toasting. Place the bread slices on a baking sheet in a single layer, ensuring they do not overlap. Overlapping can lead to uneven browning, as the bread pieces may shield one another from the heat, preventing optimal toasting.

    Using a baking sheet lined with parchment paper can also facilitate the process, making it easier to remove the bread once toasted. For best results, consider rotating the baking sheet halfway through the cooking time to ensure even exposure to heat. This simple yet effective method guarantees that every slice emerges with a consistent color and crispness, creating a satisfying toasting experience.

    What Is the Ideal Toasting Time for Bread in the Oven?

    Toasting bread in the oven generally takes about 5-10 minutes, depending on your desired level of toastiness. Keeping a watchful eye on the bread is vital to prevent burning, especially as different ovens may have slight variations in heating. Flipping the bread halfway through the toasting process helps achieve an even finish, allowing both sides to develop a beautiful, golden brown hue.

    If you’re aiming for a lighter toast, checking the bread around the 5-minute mark is advisable. If you prefer a darker, crunchier result, continue to toast while monitoring closely. This method offers flexibility, enabling you to adjust according to your taste preferences. By mastering oven toasting, you can easily produce batches of perfectly toasted bread for any occasion.

    How Can You Determine When Your Bread is Perfectly Toasted?

    Determining when your bread is perfectly toasted involves visual cues and intuition. Begin checking the bread after approximately 5 minutes. The ideal toast should exhibit a golden brown color and a crisp texture. If the bread appears pale or soft, it likely requires more time in the oven.

    The aroma can also serve as a helpful indicator; the smell of toasted bread is distinctive and signals that it’s nearing completion. If you’re ever in doubt, you can slice a piece to check its texture. This approach allows you to refine your toasting technique, ensuring that your bread meets your standards of perfection every time.

    Grilling Bread for a Charred and Smoky Flavor

    Which Grill Type is Most Effective for Toasting Bread?

    Both gas and charcoal grills can effectively toast bread. While gas grills are often preferred for their ease of use and precise temperature control, making them ideal for achieving the desired level of toastiness without burning, charcoal grills add an extra layer of flavor, imparting a smoky taste that many enthusiasts appreciate.

    When selecting your grill, consider the flavor profile you wish to achieve for your toast. If you’re after a simple, evenly toasted slice, a gas grill may be your best option. However, if you aim to elevate your culinary experience with a charred, smoky finish, a charcoal grill is the ideal choice. Ultimately, each grill type has its advantages, and the choice should be based on personal preferences and the equipment you have available.

    How to Prepare Your Grill for Toasting Bread?

    Proper preparation of your grill is crucial for successful toasting. Begin by preheating the grill to medium heat, ensuring it is adequately heated for effective cooking. Clean the grates to remove any residual food or grease, as these can impact the flavor and appearance of your toast. Once clean, lightly oil the grates to prevent the bread from sticking and ensure a smooth cooking process.

    Achieving even heat distribution is essential, so check that all areas of the grill are heated before placing your bread. You can also use a grilling stone or a cast-iron skillet for more control over the toasting process. These accessories help maintain even heat and create a more consistent toast. With the grill prepared, you’re ready to enjoy the unique flavors that come from grilling bread.

    What Is the Recommended Grilling Time for Bread?

    Grilling bread typically takes about 1-2 minutes per side, making it a quick method to achieve that desired charred flavor. Staying close to the grill during this process is essential, as bread can go from perfectly toasted to burnt in just a few seconds. Adjusting the grill’s heat may be necessary, depending on the type of bread and its thickness; thinner bread will toast faster than thicker varieties.

    For best results, flip the bread once before the first side develops too much color. This prevents burning and allows for an even char across both sides. If you’re experimenting with various types of bread, take note of how each reacts to the heat, refining your technique as you go. This attention to detail can significantly enhance your grilled toast experience.

    Which Types of Bread Are Best for Grilling?

    When it comes to grilling bread, dense varieties such as sourdough or ciabatta work exceptionally well. Their sturdy structure withstands intense heat, helping to develop an appealing, charred crust. Lighter breads may become too soft or fragile when exposed to direct heat and can easily fall apart during the grilling process.

    Additionally, slicing the bread thicker for grilling allows for a more substantial surface area that can handle the heat. Experimenting with different types of bread can lead to delightful discoveries; for instance, a rustic whole grain can offer a unique flavor when grilled. Ultimately, selecting the right bread will enhance your grilling experience and ensure delicious results.

    How to Enhance the Flavor of Grilled Bread?

    Enhancing the flavor of grilled bread can transform a simple slice into a gourmet experience. One popular method is to brush the bread with olive oil or garlic butter before grilling; this adds richness and depth to the flavor. Consider infusing herbs or spices into your oil to create a more complex taste profile.

    Another effective approach is to pair grilled bread with toppings that complement its smoky flavor. Spreads like pesto, tapenade, or even a simple mixture of olive oil and balsamic vinegar can elevate your dish. Experimenting with different flavor combinations will allow you to discover your personal favorites. By taking the time to enhance your grilled bread, you can create a memorable culinary experience that excites the palate.

    Exploring Alternative Methods for Toasting Bread

    Can You Use a Microwave for Toasting Bread?

    While unconventional, you can indeed utilize a microwave to toast bread. However, it’s essential to note that the results differ significantly from other methods, as microwaves tend to steam rather than crisp. To microwave toast, place your bread on a microwave-safe plate and heat it in short intervals, checking frequently to avoid sogginess.

    To improve the texture, consider placing a cup of water in the microwave alongside the bread. This method can help prevent the bread from becoming overly rubbery. While it won’t achieve the crispiness of fried, grilled, or oven-toasted bread, this method can serve as a quick alternative in a pinch. It’s important to manage expectations; microwave-toasted bread will not deliver the satisfying crunch of other methods, but it can be a functional option.

    What Are the Advantages of Using a Sandwich Press for Toasting?

    A sandwich press is an excellent tool for toasting bread quickly and evenly. This appliance is particularly useful for creating paninis or grilled sandwiches that require a crispy exterior and warm, melty interior. The design of a sandwich press allows heat to circulate evenly around the bread, enhancing the toasting process.

    Utilizing a sandwich press can save time compared to traditional methods, as it requires less attention once the bread is placed inside. Additionally, many models come with adjustable settings, enabling you to control the level of browning and crispiness to your preference. This versatility makes the sandwich press a popular choice for those who frequently enjoy toasted bread, offering a reliable and efficient solution.

    How Does a Broiler Work for Toasting Bread?

    A broiler is an effective tool for quickly toasting bread by utilizing high heat from above. To use a broiler, place the bread on a baking sheet and position it close to the heating element. This method allows for rapid browning, but it requires careful monitoring to prevent burning.

    Toasting bread under the broiler typically takes 1-3 minutes, depending on the thickness of the slices. It’s beneficial to check the toast regularly, as the intense heat can lead to quick changes in the bread’s color. Using a broiler is particularly advantageous for those who enjoy a crisp top while maintaining a softer interior. By understanding how to use your broiler effectively, you can achieve perfectly toasted bread with minimal effort.

    Can You Use an Air Fryer to Toast Bread?

    Yes, an air fryer can efficiently toast bread, offering a unique cooking method that mimics traditional frying without excess oil. To toast bread in an air fryer, place it in the basket and set the temperature to a moderate level. Cooking times typically range from 3 to 5 minutes, depending on your desired level of toastiness.

    One of the benefits of an air fryer is its ability to circulate hot air around the food, ensuring even cooking and browning. This method can also produce a crispy texture that rivals other toasting techniques. If you enjoy experimenting with flavors, consider adding seasonings or lightly brushing the bread with oil before air frying. The versatility of an air fryer makes it an excellent choice for those looking to toast bread without traditional methods.

    Is a Toaster Oven Suitable for Toasting Bread?

    A toaster oven is an excellent appliance for toasting bread, offering the convenience of a traditional toaster while providing added versatility. Toaster ovens can cook a variety of foods and typically have adjustable settings that allow you to control the level of browning and crispiness.

    When toasting bread in a toaster oven, you can achieve an even, golden finish similar to that of a conventional oven. Preheating the toaster oven may enhance results, and it is important to keep a watchful eye on the bread to prevent over-toasting. If you enjoy preparing multiple slices at once, a toaster oven can efficiently handle larger batches, making it a practical option for busy kitchens. Overall, a toaster oven is a reliable and adaptable tool for anyone looking to perfect their toast.

    Enhancing Your Toast with Delicious Toppings and Spreads

    What Are Some Popular Toppings to Elevate Your Toast?

    Toppings can significantly enhance your toast, transforming a simple snack into a culinary delight. Some popular toppings include:

    • Butter: A classic choice that melts beautifully into warm bread, enhancing its richness.
    • Jam or Marmalade: Adds sweetness and fruitiness, perfect for breakfast or a light snack.
    • Avocado: Creamy and nutritious, often seasoned with salt and pepper for added flavor.
    • Cheese: Melts wonderfully when placed on hot toast, offering a savory experience that many love.
    • Nut Butters: Peanut or almond butter provides protein and a rich texture, perfect for energy.
    • Hummus: A healthy, savory option that pairs well with wholegrain bread, adding a creamy element.

    Each topping brings its unique flavor and texture, allowing for endless combinations. For instance, buttery toast topped with jam can be a sweet treat, while avocado spread serves as a nutritious meal option. Experimenting with various toppings allows you to discover new favorites, creating a toast that suits every mood or occasion.

    How to Choose the Perfect Spread for Your Toast?

    Selecting the right spread for your toast is crucial in achieving the desired flavor profile. Consider the taste you wish to create; if you’re leaning towards something sweet, spreads like honey or fruit preserves can beautifully complement your toast. Alternatively, savory options such as hummus or ricotta cheese offer a completely different experience.

    Balancing textures is also worth considering; creamy spreads can pair well with crunchy toasts, while chunky toppings may require a sturdier bread base. Factor in any dietary preferences or restrictions; many delicious vegan and gluten-free spreads cater to various needs. By thoughtfully selecting your spreads, you can create a toast experience that is both satisfying and enjoyable.

    Can You Create Gourmet Toast at Home?

    Gourmet toast can be crafted at home with quality ingredients and a bit of creativity. Using artisanal breads as your base sets the stage for a gourmet experience. Consider experimenting with different toppings, such as flavored butters, gourmet cheeses, or fresh herbs, to elevate your dish.

    Combining unique flavor profiles can enhance the gourmet aspect of your toast. For example, a slice of sourdough topped with ricotta cheese, honey, and fresh figs creates a sophisticated dish. Don’t hesitate to experiment with seasonal ingredients and local produce, integrating unique flavors that reflect your culinary style. Making gourmet toast at home not only allows for creativity but also offers a chance to impress guests or indulge in a special treat.

    Effective Strategies for Making Toast Without a Toaster

    What Are the Best Practices for Even Toasting?

    To achieve even toasting, ensuring proper heat distribution and flipping the bread regularly is essential. This approach allows both sides to receive equal exposure to heat, promoting uniform browning. Whether you’re using a frying pan, oven, or grill, keeping a close eye on the bread is crucial to prevent one side from browning too quickly.

    Another best practice is to avoid overcrowding the cooking surface. Providing adequate space for each slice ensures that hot air can circulate effectively, resulting in consistent toasting. If you’re toasting multiple pieces, consider working in batches to maintain control over the cooking process. By adhering to these best practices, you can develop a successful toasting technique, resulting in perfectly toasted bread every time.

    How Can You Save Time When Toasting Bread?

    Saving time while toasting bread comes down to preparation and efficiency. Preheating your cooking surface, whether it’s a pan, oven, or grill, allows you to start toasting immediately. Additionally, preparing multiple slices at once can significantly reduce overall cooking time.

    Utilizing appliances like a toaster oven or sandwich press can yield faster results compared to traditional methods. These devices often have settings specifically designed for quick toasting. If you’re using a frying pan, consider opting for a larger one to accommodate more slices, maximizing your cooking time. These actionable steps will streamline your toasting process, leaving you with more time to enjoy your meal.

    What Are the Most Reliable Methods for Toasting Bread?

    When it comes to reliable methods for toasting bread, using an oven or frying pan stands out due to their control over heat and ability to achieve even results. These methods not only allow for consistent browning but also provide flexibility in accommodating various bread types and thicknesses.

    Real-world examples demonstrate the effectiveness of these methods; many home cooks favor frying pans for their speed and direct heat control, while others appreciate the convenience of an oven for larger batches. Ultimately, both methods offer reliable results when approached with care. By understanding the nuances of each technique, you can confidently toast bread to perfection, no matter the occasion.

    Troubleshooting Common Toasting Problems

    Why Is My Bread Burning Instead of Toasting Properly?

    If your bread is burning instead of toasting, it’s likely due to excessively high heat settings or inadequate monitoring. When the heat is too high, the exterior can char quickly while the interior remains undercooked. To rectify this issue, adjust your heat settings to a medium level and keep a close watch on the bread during toasting.

    Another factor to consider is the thickness of your bread; thicker slices may require lower heat and longer cooking times to ensure proper toasting. If burning occurs frequently, experimenting with different types of bread can also lead to improved results. By making these adjustments, you can effectively prevent burning and enjoy perfectly toasted bread.

    How Can You Fix Unevenly Toasted Bread?

    Unevenly toasted bread can result from improper heat distribution or inadequate flipping. To rectify this issue, start by flipping the bread more frequently during the toasting process. This ensures that all sides receive equal exposure to heat, resulting in a more uniform outcome.

    Additionally, check that your bread slices are cut evenly; inconsistent thickness can lead to uneven toasting, as thinner slices will cook faster than thicker ones. If you’re using a cooking surface that doesn’t distribute heat evenly, consider rotating or repositioning the bread throughout the process for more consistent results. By implementing these strategies, you can achieve a perfectly toasted slice every time.

    What Should You Do If Your Toast Is Too Soft?

    If your toast is too soft, it may require adjustments in toasting time or temperature. Increasing the toasting time slightly can help achieve a crispier texture. If this approach doesn’t yield the desired results, consider increasing the temperature marginally to promote browning.

    Ensure that the bread is not overly thick, as thicker slices may take longer to toast adequately. If you’re using methods like the microwave, remember that the texture may differ from traditional toasting; in such cases, reconsidering the cooking method altogether can yield better outcomes. By making these adjustments, you can enjoy a perfectly toasted slice that meets your texture preferences.

    Frequently Asked Questions About Toasting Bread

    Can I toast frozen bread?

    Yes, you can toast frozen bread using a frying pan or oven. Just add a minute or two to the toasting time to ensure it thaws and toasts properly.

    Is it safe to toast bread on an open flame?

    Toasting bread over an open flame is possible, but it requires careful monitoring. Ensure the bread is kept at a safe distance from the flame to prevent burning.

    What types of bread work best for grilling?

    Dense breads, such as sourdough or ciabatta, are ideal for grilling, as they hold up well to high heat and develop a nice char.

    Can I toast bread in an air fryer from a frozen state?

    Yes, you can toast frozen bread in an air fryer. Just set it to a moderate temperature and check periodically to achieve your desired toastiness.

    Why is my toast coming out uneven?

    Uneven toast can result from inconsistent bread thickness or improper heat distribution. Regularly flipping the bread can help achieve more uniform results.

    How do I keep my toast from sticking?

    To prevent sticking, lightly oil the cooking surface or use a non-stick pan. This simple step can significantly enhance the toasting process.

    How can I make my toast more flavorful?

    Brushing toast with olive oil or butter before toasting can enhance its flavor. Experimenting with herbs and spices can also add unique tastes.

    Is it possible to toast bread in the microwave?

    Yes, you can toast bread in the microwave, but the texture will differ from traditional methods. Use short intervals and monitor closely.

    What’s the best way to store bread for toasting?

    Store bread in a cool, dry place to maintain its freshness and optimal quality. For longer storage, consider freezing it and toasting directly from the frozen state.

    Can I use a sandwich press for grilling cheese sandwiches?

    A sandwich press is excellent for grilling cheese sandwiches, allowing for even melting and a crispy exterior.

    Connect with us on Facebook!

    The post How to Make Toast Without a Toaster: Simple Techniques appeared first on https://cookinggods.com

    The Article Make Toast Without a Toaster: Easy Methods to Try Was Found On https://limitsofstrategy.com

  • Best Cuts of Pork for Beginner Pitmasters: Top Picks

    Best Cuts of Pork for Beginner Pitmasters: Top Picks

    Elevate Your Barbecuing Skills with Expert Knowledge on Pork Cuts

    Discover the Most Popular Pork Cuts for Delicious Barbecuing

    An array of labeled pork cuts on a rustic kitchen table, surrounded by cooking utensils and herbs.

    Pork is an incredibly versatile meat that boasts a wide range of cuts, each uniquely suited for both novice cooks and seasoned culinary experts. The most favored pork cuts offer a variety of flavors and textures that can enhance any cooking method. Gaining a comprehensive understanding of these cuts is essential for anyone eager to master the art of barbecue. Here’s an insightful list highlighting the top 5 most sought-after pork cuts:

    • Pork Shoulder
    • Pork Loin
    • Pork Ribs
    • Pork Belly
    • Pork Tenderloin

    Each of these cuts can dramatically enhance your barbecue experience when prepared with the right techniques. For example, pork shoulder is particularly prized for its robust flavor and is ideal for low and slow cooking, while pork loin presents a leaner option perfect for quick roasting. Both of these cuts can be transformed into mouthwatering dishes that highlight the rich, savory qualities inherent to pork.

    How to Evaluate the Top Quality of Pork Cuts

    Assessing the quality of pork is primarily based on critical factors such as marbling, the lean-to-fat ratio, and color. In the United States, pork is graded into three main categories: USDA Prime, Choice, and Select, with Prime representing the highest quality. Generally, higher grades correlate with enhanced flavor and tenderness, making them more desirable for barbecue. Keep these essential quality indicators in mind when selecting your pork:

    • Marbling: Intramuscular fat that enhances overall flavor and juiciness.
    • Color: A fresh pinkish-red hue indicates the meat’s quality.
    • Texture: A firm texture is preferred, avoiding excessive softness.
    • Fat Coverage: A substantial fat layer on cuts such as shoulder aids in moisture retention during cooking.
    • Freshness: Always check the sell-by date to ensure optimal freshness.

    Choosing higher quality cuts can significantly enhance your barbecue results, resulting in tender and flavorful dishes that are sure to impress your guests.

    Key Considerations for Selecting the Best Pork Cuts for Barbecue

    Selecting the right cut of pork is crucial for achieving the desired flavor and texture in your barbecue dishes. A valuable rule of thumb is to choose cuts that contain adequate fat, as this fat will render during the cooking process, helping to keep the meat moist and flavorful. Look for cuts that strike a balance between muscle and fat, ensuring they absorb smoke flavors beautifully. Here are some important considerations to keep in mind when choosing your pork cuts:

    • Cooking Method: Select cuts based on your cooking method of choice—whether smoking, grilling, or slow cooking.
    • Fat Content: Opt for cuts with good marbling, particularly in options like pork shoulder and belly.
    • Bone-in vs. Boneless: Choose bone-in cuts as they tend to impart more flavor.
    • Size: Consider portion sizes according to your cooking method and the number of servings needed.
    • Visual Inspection: Assess the color and ensure a good fat cap is present.

    By thoughtfully considering these factors, you can select cuts that will yield delectable results and significantly enhance your overall barbecue experience.

    Best Practices for Storing Various Pork Cuts Safely

    Pork cuts like chops, belly, tenderloin, wrapped in plastic and freezer bags, stored in refrigerator and freezer.

    Properly storing pork is essential for maintaining its freshness and flavor. To extend the shelf life of pork and prevent spoilage, it’s crucial to store different cuts appropriately. Fresh pork should be refrigerated within a temperature range of 32-38°F, with freezing recommended for longer storage periods. Here’s how to effectively handle the storage of various pork cuts:

    • Refrigeration: Store fresh cuts in the coldest part of the refrigerator.
    • Freezing: Wrap cuts tightly in plastic wrap or freezer bags to prevent freezer burn.
    • Thawing: Always thaw pork in the refrigerator or in cold water, never at room temperature.
    • Shelf Life: Fresh pork can be refrigerated for 3-5 days, while frozen cuts might last for 4-6 months.
    • Special Requirements: Some cuts, such as pork belly, may require specific handling to maintain texture.

    Understanding these storage techniques not only helps preserve the meat’s quality but also ensures that your culinary endeavors are both safe and successful.

    Exploring the Nutritional Benefits of Different Pork Cuts

    Pork is a nutrient-rich protein source, offering essential vitamins and minerals. Various cuts of pork present differing nutritional profiles, making it a versatile ingredient for diverse dietary needs. Here are some of the nutritional advantages associated with popular pork cuts:

    • Protein: Pork is an exceptional source of high-quality protein, vital for muscle growth and repair.
    • B Vitamins: Pork is rich in important B vitamins, including B6 and B12, crucial for energy metabolism.
    • Iron: Packed with heme iron, pork can help prevent iron deficiency.
    • Zinc: Essential for immune function, pork is a good source of zinc.
    • Phosphorus: This mineral plays an important role in bone health and energy production.

    Incorporating various cuts of pork into your meals allows you to enjoy not only delicious dishes but also significant nutritional benefits that contribute to overall health and wellness.

    Pork Shoulder: The Go-To Choice for Barbecue Beginners

    Why Pork Shoulder Is the Ideal Cut for Barbecue Enthusiasts

    A succulent pork shoulder roast cooking over a smoky barbecue at a lively outdoor gathering.

    Pork shoulder, often referred to as pork butt, is a highly recommended cut for those beginning their barbecue journey. Its forgiving nature makes it particularly well-suited for slow cooking methods, allowing the meat to become extraordinarily tender and flavorful. The abundant fat content in pork shoulder ensures that it remains juicy throughout the cooking process, making it an ideal choice for novice cooks. Additionally, this cut is larger, making it perfect for gatherings and barbecues, as it can easily serve a crowd.

    Many beginners may feel intimidated by the prospect of smoking meat, but pork shoulder serves as an excellent entry point due to its resilience. It can withstand varying cooking temperatures and times without drying out, resulting in a tender and satisfying final product. Whether you’re preparing pulled pork or carnitas, the rich, savory essence of pork shoulder is sure to delight your guests.

    Step-by-Step Preparation of Pork Shoulder for Smoking

    Preparing pork shoulder for smoking involves several critical steps to ensure optimal results. The initial step is to trim any excess fat to allow for even cooking while still retaining enough fat for flavor and moisture. Applying a dry rub can also elevate the flavor; consider using a blend of salt, pepper, paprika, garlic powder, and brown sugar for a well-rounded seasoning.

    Once your pork shoulder is prepped, setting up the smoker is crucial. Aim to maintain a consistent temperature between 225-250°F for the best smoking results. Keep in mind that the smoking process can take several hours—typically around 1.5 hours per pound—so patience is key. Here are some tips for effectively preparing pork shoulder for smoking:

    • Trim excess fat, but retain a fat cap for moisture retention.
    • Apply a dry rub at least an hour before cooking, or overnight for enhanced flavor.
    • Preheat your smoker to a stable temperature.
    • Consider using wood chips like hickory or applewood for added smoky flavor.
    • Wrap the shoulder in foil during the final hours of cooking to help retain moisture.

    By following this preparation method, you will achieve a tender and flavorful pork shoulder that can be utilized in a myriad of delicious barbecue dishes.

    Cooking Techniques for Perfectly Tender Pork Shoulder

    The most effective cooking techniques for pork shoulder revolve around low and slow methods that enable the fat to render and the meat to become tender. Two primary methods stand out: slow smoking and braising. Slow smoking not only infuses the meat with aromatic flavors but also ensures that collagen breaks down, resulting in melt-in-your-mouth tenderness.

    Braising is another effective technique, particularly for those who may not have access to a smoker. This method involves cooking the pork shoulder in a flavorful liquid, such as broth or beer, at a low temperature. Both techniques allow the meat to absorb rich flavors while maintaining moisture. Consider these cooking methods:

    • Slow smoking at 225-250°F for a duration of 12-16 hours.
    • Braising in a Dutch oven at 300°F for 4-6 hours.
    • Using a meat thermometer to ensure an internal temperature of 195-205°F for optimal tenderness.
    • Allow the meat to rest post-cooking to let juices redistribute.
    • Shred the meat for pulled pork, or serve in large slices.

    By mastering these cooking techniques, you can elevate your pork shoulder to new heights, ensuring that your barbecue experience is both enjoyable and memorable.

    Popular Recipes That Highlight Pork Shoulder

    Pork shoulder is incredibly versatile, and numerous popular recipes emphasize its rich flavor and tender texture. One of the most iconic dishes featuring pork shoulder is pulled pork, where the meat is slow-cooked until it can be easily shredded. This dish is perfect for sandwiches or served alongside classic sides like coleslaw and baked beans.

    Another beloved recipe is carnitas, a traditional Mexican dish where the pork is cooked in its own fat until crispy and served in tacos or burritos. You can also prepare a savory pork shoulder roast, seasoned with an array of herbs and spices, and cooked to perfection. Here are some popular recipes to consider:

    • Pulled pork sandwiches topped with coleslaw and barbecue sauce.
    • Carnitas cooked with spices and served in soft tortillas.
    • Pork shoulder roast seasoned with garlic, rosemary, and thyme.
    • Smoked pork shoulder served with a vinegar-based sauce.
    • Pork shoulder chili made with beans and spices for a hearty meal.

    These recipes not only highlight the cut’s versatility but also provide an opportunity for beginners to experiment with flavors and cooking techniques, making pork shoulder an excellent choice for budding pitmasters.

    Pork Loin: The Healthy Option for Nutritional Barbecuing

    Why Choose Pork Loin for Healthier Barbecue Meals?

    Pork loin is an exceptional choice for those seeking a leaner cut of meat that still delivers on flavor. Unlike pork shoulder, which is richer and fattier, pork loin provides a healthier alternative without sacrificing taste. Its lower fat content means it cooks more quickly, making it ideal for weeknight meals or when time is limited.

    Despite being leaner, pork loin can still be incredibly juicy and tender when cooked properly. The key to success lies in avoiding overcooking, as this can lead to dryness. For beginners, pork loin presents an excellent opportunity to practice precision in cooking while still yielding delicious results that will impress family and friends.

    How to Cook Pork Loin to Achieve Perfection?

    Cooking pork loin to perfection demands careful attention to detail, especially when monitoring internal temperatures. The ideal internal temperature for pork loin is 145°F, ensuring it remains juicy while being safe to consume. To achieve this, it’s wise to utilize a meat thermometer for accurate readings.

    Begin by seasoning the pork loin with your choice of herbs and spices, or marinating it for added flavor. Searing the meat in a hot skillet or on a grill will help develop a delicious crust before finishing it in the oven. Here are some tips for cooking pork loin perfectly:

    • Utilize a meat thermometer to ensure it reaches 145°F.
    • Let the meat rest for 10 minutes after cooking to allow juices to redistribute.
    • Marinate or apply a dry rub for enhanced flavor.
    • Consider using indirect heat on the grill for a more even cooking process.
    • Avoid overcooking by closely monitoring the temperature.

    By adhering to these guidelines, you can transform pork loin into a tender and flavorful centerpiece for any meal.

    Culinary Creations Featuring Pork Loin

    Pork loin is remarkably versatile, making it suitable for a wide range of dishes. It can be roasted whole, cut into chops, or even sliced for stir-fries, making it a favorite among home cooks. A popular dish is a roasted pork loin, often accompanied by seasonal vegetables and a savory sauce.

    Additionally, pork loin can be cut into chops, perfect for quick grilling or pan-frying while retaining juiciness. You can also utilize pork loin in stir-fries, where its lean profile allows it to absorb flavors from marinades and sauces beautifully. Here are some delicious dishes you can create with pork loin:

    • Herb-crusted roasted pork loin with garlic and rosemary.
    • Pork chops glazed with honey mustard, grilled to perfection.
    • Stir-fried pork loin with vegetables and a soy sauce marinade.
    • Pork loin sliders with a spicy slaw for a fun twist.
    • Stuffed pork loin filled with spinach, cheese, and sun-dried tomatoes.

    The possibilities are extensive, showcasing the adaptability of pork loin in both simple and elaborate dishes that cater to a variety of tastes.

    Pork Ribs: The Quintessential Choice for Barbecue Lovers

    Understanding the Types of Pork Ribs Available for Cooking

    Pork ribs are a beloved barbecue staple, offering unparalleled flavor and tenderness when prepared correctly. The two primary types of pork ribs are baby back ribs and spare ribs. Baby back ribs are shorter and leaner, making them ideal for quicker cooking methods, while spare ribs are larger with more fat, providing a richer flavor.

    Baby back ribs are perfect for grilling, as they cook faster and remain tender, while spare ribs excel in slow smoking, allowing the fat to render beautifully. Understanding the differences between these cuts can help you select the right ribs for your next barbecue. Here’s a breakdown of pork rib types:

    • Baby Back Ribs: Lean, tender, and quick-cooking.
    • Spare Ribs: Meatier and richer in flavor, ideal for slow cooking.
    • St. Louis-Style Ribs: A trimmed version of spare ribs, offering a uniform shape.
    • Country-Style Ribs: Cut from the shoulder, these are meatier and often cooked like chops.
    • Rib Tips: The small, flavorful pieces cut from spare ribs, perfect for snacking.

    Selecting the appropriate type of pork rib can elevate your barbecue game and ensure that your dishes are bursting with flavor.

    Essential Steps to Achieve Perfectly Tender Ribs

    Achieving tender ribs relies on a combination of proper seasoning, slow cooking, and meticulous temperature regulation. The secret to achieving tender ribs lies in low and slow cooking methods, which allow collagen in the meat to break down, resulting in fall-off-the-bone tenderness. Whether you choose to smoke or bake, maintaining a consistent temperature is crucial.

    A common practice is to apply a dry rub to the ribs well in advance, allowing the flavors to permeate the meat. Cooking at a low temperature, around 225°F, guarantees a long, slow cook that yields tender results. Consider these methods to achieve perfectly tender ribs:

    • Utilize a dry rub to enhance flavor; applying it the night before yields the best results.
    • Cook at a low temperature (225°F) for several hours.
    • Wrap ribs in foil during cooking to retain moisture.
    • Finish with a glaze or barbecue sauce during the last 30 minutes of cooking.
    • Allow the ribs to rest before slicing to retain juices.

    By following these methods, you can prepare ribs that are not only tender but also bursting with flavor.

    Exciting Recipes Featuring Pork Ribs

    When it comes to ribs, the flavor possibilities are endless. Popular recipes often highlight the smoky, savory qualities of pork ribs. One classic dish is dry-rubbed ribs, where a blend of spices creates a savory crust that enhances the meat’s natural flavors.

    Another favorite is glazed ribs, where a sticky barbecue sauce caramelizes on the surface, adding sweet and tangy notes that complement the meat. For those who enjoy experimentation, you can try Asian-inspired ribs with a soy sauce and ginger marinade, offering a unique flavor profile. Here are some popular rib recipes to try:

    • Dry-rubbed ribs with a blend of spices, smoked to perfection.
    • Glazed ribs coated with homemade barbecue sauce for a sticky finish.
    • Asian-style ribs marinated in soy sauce, garlic, and ginger.
    • Sweet and spicy ribs with a honey-chipotle glaze.
    • Rib tips cooked low and slow, ideal for snacking.

    These recipes showcase the versatility of pork ribs, making them a must-try for any beginner pitmaster looking to impress.

    Choosing the Best Pork Ribs for Your Barbecue

    Selecting high-quality pork ribs is essential for achieving flavorful and tender results. When choosing ribs, inspect the meat for color, marbling, and freshness. Ideal ribs should exhibit a bright pink color with good marbling, indicating a balance of fat and meat.

    Additionally, freshness is key; always verify the sell-by date and avoid ribs that appear discolored or emit an off-putting smell. For baby back ribs, look for meat that is well-attached to the bone, while spare ribs should possess a generous top layer of meat. Here’s how to select the best pork ribs:

    • Check for a vibrant pink color and fresh appearance.
    • Look for good marbling to ensure flavor and tenderness.
    • Choose ribs with a firm texture; avoid overly soft meat.
    • Inspect the bone area; meat should be well-attached and not overly trimmed.
    • Consider purchasing from reputable butchers or sources for higher quality.

    By following these tips, you can ensure that your pork ribs will be of the highest quality, making your barbecue a delicious success.

    Expert Guidance for Selecting the Best Pork Cuts for New Barbecue Enthusiasts

    Expert Recommendations for Novice Barbecue Cooks

    When beginning your barbecue adventure, experts frequently suggest pork shoulder as the top cut for beginner pitmasters. Its forgiving nature and robust flavor make it an ideal choice for those new to smoking and grilling. Many successful cooks have started their culinary journeys with pork shoulder, discovering it manageable while producing fantastic results.

    A real-world example includes a novice cook who crafted mouth-watering pulled pork simply by adhering to straightforward preparation and cooking methods. The cut’s ability to absorb smoke and render fat allows even those with minimal experience to create tender, flavorful meat. Here’s what experts suggest:

    • Start with pork shoulder for its forgiving cooking attributes.
    • Don’t hesitate to experiment with different rubs and sauces.
    • Practice patience; low and slow cooking yields the best results.
    • Utilize a meat thermometer for precise cooking temperatures.
    • Learn from failures; every cooking experience is a chance to improve.

    By embracing these recommendations, you can build confidence and skill as you navigate your barbecue journey.

    Ways for Beginners to Improve Their Barbecue Skills

    Enhancing your barbecue skills as a beginner involves a combination of practice, experimentation, and learning from others. One effective way to enhance your skills is to experiment with different cuts of pork, trying out various cooking methods and flavor profiles. Engaging with the barbecue community—whether through social media, forums, or local competitions—can provide invaluable insights and inspiration.

    Understanding the science behind slow cooking and how different temperatures affect the meat can significantly elevate your barbecue abilities. Here are some actionable steps for skill improvement:

    • Experiment with different pork cuts to discover personal preferences.
    • Join local barbecue clubs or online communities for shared knowledge.
    • Maintain a record of your cooking methods and results to refine your techniques.
    • Try various wood types for smoking to explore flavor variations.
    • Attend workshops or classes taught by experienced pitmasters.

    By adopting a mindset of continuous learning, you can substantially enhance your barbecue skills and create exceptional dishes that reflect your growing expertise.

    Avoiding Common Mistakes in Barbecuing

    As you embark on your barbecue journey, it’s crucial to be aware of common mistakes that could hinder your success. Overcooking remains one of the most prevalent pitfalls, especially with lean cuts like pork loin, which can dry out quickly. Additionally, neglecting to apply sufficient seasoning can lead to bland results, while improper temperature management can compromise both flavor and safety.

    By recognizing these common errors, you can actively work to avoid them in your cooking endeavors. Here are some frequent pitfalls to watch for:

    • Overcooking meat; always use a meat thermometer.
    • Neglecting to apply seasoning, which can lead to bland flavors.
    • Failing to rest meat after cooking, causing juices to escape.
    • Not monitoring cooking temperatures; maintain steady heat.
    • Rushing the cooking process; patience is crucial for tender results.

    By avoiding these common missteps, you can enhance your skills and ensure that your barbecue creations are both delicious and memorable.

    Pork Belly: A Flavorful Exploration for Aspiring Cooks

    Why Pork Belly Should Be Part of Your Barbecue Menu

    Pork belly is a decadent cut that offers a rich, fatty flavor, making it a favorite among adventurous cooks. This cut can be transformed into a variety of delicious dishes, such as crispy pork belly or tender burnt ends, when cooked correctly. Its unique composition of fat and meat allows for multiple cooking methods, including roasting, smoking, and braising.

    Choosing pork belly for barbecue not only enhances your dishes but also provides an opportunity to experiment with flavors and techniques. Cooks can play around with various seasonings and sauces, making it a versatile option for those looking to broaden their culinary skills. Here are several reasons to consider pork belly:

    • Rich flavor profile that elevates any dish.
    • Adaptable to various cooking methods, from smoking to grilling.
    • Offers a chance to experiment with different seasonings and marinades.
    • Creates impressive dishes that can wow your guests.
    • Often more affordable compared to other premium cuts.

    Incorporating pork belly into your barbecue repertoire can elevate your cooking and impress friends and family with its delicious results.

    Best Cooking Methods for Pork Belly

    Cooking pork belly effectively requires a method that allows the fat to render while achieving a crispy exterior. Two popular methods include slow roasting and smoking. Slow roasting at a low temperature allows the fat to melt, resulting in tender, juicy meat. For those who enjoy the flavors of smoke, a smoker can impart a unique taste that complements the richness of the pork.

    Regardless of the method, attaining that sought-after crispy skin is often the final touch. Scoring the skin enables better fat rendering, while finishing at a high temperature can achieve that desired crunch. Here are the best methods for cooking pork belly:

    • Slow roast at 275°F for several hours until tender.
    • Smoke at a consistent temperature for several hours for added flavor.
    • Score the skin prior to cooking to enhance crispiness.
    • Finish under the broiler or at a high temperature to achieve a crunchy texture.
    • Allow the meat to rest before slicing to retain juices.

    By following these methods, you can create pork belly dishes that are both tender and bursting with flavor.

    Strategies for Achieving Perfectly Crispy Pork Belly

    Achieving that perfectly crispy pork belly requires a blend of technique and timing. The process typically begins with scoring the skin, which allows fat to escape during cooking, ultimately leading to a crispy exterior. Cooking at a low temperature will render much of the fat, ensuring the meat remains juicy and tender.

    As the pork belly nears completion, a final blast of high heat will crisp up the skin, creating a delightful textural contrast. Timing is crucial, as you want to ensure the meat is fully cooked while still achieving that coveted crunch. Here are some strategies for achieving crispy pork belly:

    • Score the skin to enable effective fat rendering.
    • Cook at a low temperature (around 275°F) for a couple of hours.
    • Raise the heat or finish under the broiler for several minutes.
    • Thoroughly dry the skin before cooking to promote crispiness.
    • Let the pork belly rest before slicing to maintain moisture.

    By employing these techniques, you can serve crispy pork belly that’s destined to become a favorite among your barbecue offerings.

    Pork Tenderloin: Quick and Flavorful Cooking for Busy Cooks

    Why Pork Tenderloin Is a Fantastic Quick-Cooking Option

    Pork tenderloin stands out as an excellent choice for those seeking a quick and convenient protein option. This cut is not only lean but also cooks relatively quickly, making it ideal for busy weeknights or spontaneous meals. The tenderloin is the most tender cut of pork, providing a delicate texture that is sure to impress.

    Thanks to its mild flavor, pork tenderloin can easily absorb marinades and seasonings, allowing for a versatile range of dishes. Beginners can enjoy a satisfying cooking experience without the risk of overcomplicating the process. Here are some reasons why pork tenderloin is a fantastic option:

    • Lean and healthy protein option, perfect for lighter meals.
    • Cooks quickly, making it ideal for busy schedules.
    • High versatility; suitable for grilling, roasting, or stir-frying.
    • Tender texture that appeals to a wide range of palates.
    • Absorbs marinades exceptionally well, enhancing overall flavor.

    The convenience and flavor of pork tenderloin make it a superb addition to any beginner’s barbecue repertoire.

    Successful Grilling Techniques for Pork Tenderloin

    Grilling pork tenderloin successfully involves a few key steps to ensure it remains juicy and flavorful. A marinade or rub adds depth to the cut, while preheating the grill to a medium-high temperature allows for a good sear. Searing the tenderloin creates a caramelized crust and seals in essential juices.

    Once seared, the tenderloin should be moved to a cooler part of the grill to finish cooking indirectly, ensuring it doesn’t dry out. The target internal temperature should reach around 145°F, followed by a resting period that permits juices to redistribute. Consider these tips for grilling pork tenderloin:

    • Marinate for at least 30 minutes to enhance flavor.
    • Preheat the grill to medium-high for optimal searing.
    • Sear on all sides to lock in juices before moving to indirect heat.
    • Utilize a meat thermometer to check for doneness.
    • Allow the meat to rest for a few minutes before slicing.

    By adhering to these guidelines, you’ll create a grilled pork tenderloin that’s juicy, flavorful, and sure to impress.

    Simple Recipes Featuring Pork Tenderloin

    Pork tenderloin is well-suited for a variety of straightforward yet delicious recipes that are perfect for beginners. One simple recipe involves marinating the tenderloin in a blend of olive oil, garlic, and herbs before grilling or roasting it. This technique allows the meat to absorb flavors while remaining tender.

    Another easy dish is herb-crusted pork tenderloin, where a mixture of fresh herbs and spices is rubbed onto the surface prior to cooking. This method creates a fragrant crust that complements the natural flavor of the pork. Here are some simple recipes to consider:

    • Marinated pork tenderloin grilled to perfection with a zesty glaze.
    • Herb-crusted tenderloin roasted alongside potatoes and seasonal vegetables.
    • Stir-fried pork tenderloin with vegetables and a soy sauce marinade.
    • Pork tenderloin medallions sautéed in garlic and served with a pan sauce.
    • Stuffed pork tenderloin with spinach and cheese for an elegant touch.

    These simple recipes highlight the versatility of pork tenderloin and provide an excellent way for beginners to build their confidence in the kitchen.

    Pork Chops: A Versatile Choice for Every Cook

    How to Choose the Best Pork Chops for Flavorful Cooking

    Choosing the best pork chops involves understanding the various types available and recognizing what to look for in terms of quality. Pork chops can be found as bone-in or boneless, with bone-in cuts generally offering more flavor and moisture. Thickness is another important factor; thicker chops can be grilled or cooked at higher temperatures, while thinner cuts are better suited for quick cooking.

    Look for chops that exhibit a pinkish color and possess a good amount of marbling for the best results. Ideally, the fat should be evenly distributed throughout the meat, contributing to its overall flavor and tenderness. Here’s how to choose the best pork chops:

    • Opt for bone-in chops for enhanced flavor.
    • Consider thickness; thicker chops generally retain moisture better.
    • Look for marbling, which adds flavor and juiciness.
    • Avoid overly pale or discolored cuts, which may indicate lower quality.
    • Buy from a trusted source to ensure freshness and quality.

    Making informed choices when selecting pork chops can lead to a satisfying and flavorful meal.

    Best Cooking Methods for Delicious Pork Chops

    Pork chops can be cooked using various methods, each yielding different textures and flavors. Grilling is a popular choice, especially for outdoor cooking, as it imparts a smoky flavor and creates a delightful char. Pan-searing is another excellent method, allowing for a delicious crust to develop while keeping the inside tender.

    Baking is also an option, particularly when cooking thicker cuts, while brining beforehand can enhance moisture retention. The cooking method you select can significantly impact the final dish, so consider these methods for the best results:

    • Grill over medium heat for a smoky flavor and caramelized crust.
    • Pan-sear in a hot skillet for a crisp exterior and juicy interior.
    • Bake in the oven at 350°F for thicker chops.
    • Brine chops beforehand for enhanced juiciness.
    • Finish with a sauce or glaze for added flavor.

    By experimenting with these methods, you can discover the perfect approach for cooking pork chops to your taste.

    Tips for Preventing Pork Chops from Drying Out During Cooking

    Preventing pork chops from drying out requires a few essential techniques aimed at maintaining moisture throughout the cooking process. One effective method is to brine the chops before cooking, which can help infuse flavor and moisture. Another important step is to avoid overcooking; utilizing a meat thermometer ensures you reach the ideal internal temperature without exceeding it.

    Allowing the pork chops to rest for a few minutes after cooking is also crucial, as this permits the juices to redistribute, ensuring that each bite remains juicy. Here are some strategies to prevent dryness:

    • Brine chops to enhance moisture and flavor.
    • Utilize a meat thermometer to monitor cooking temperatures accurately.
    • Avoid cooking on high heat for extended periods; aim for medium heat.
    • Allow the chops to rest after cooking to retain juices.
    • Consider topping with a sauce or glaze for added moisture.

    By incorporating these techniques, you can ensure that your pork chops are succulent and satisfying.

    Flavorful Marinades to Enhance Pork Chops

    Marinades serve as an excellent means to elevate the flavor of pork chops, offering a range of tastes to suit different palates. Popular marinades often include ingredients like soy sauce, garlic, and herbs, creating a savory profile that beautifully complements the meat. A simple marinade can consist of olive oil, balsamic vinegar, and rosemary for a fresh, herbaceous flavor.

    Another flavorful option involves using citrus juices, such as lemon or lime, combined with spices for a zesty kick. Here are some flavorful marinades to consider:

    • Soy sauce, garlic, and ginger for an Asian-inspired flavor.
    • Honey, mustard, and vinegar for a sweet and tangy profile.
    • Cilantro, lime, and garlic for a fresh, zesty marinade.
    • Balsamic vinegar, olive oil, and rosemary for a rich, savory blend.
    • Chipotle peppers in adobo sauce for a spicy kick.

    These marinades not only enhance the flavor of pork chops but also provide an opportunity to experiment with various tastes in your cooking.

    Creative Serving Ideas for Pork Chops on Various Occasions

    Pork chops can be dressed up or down, making them suitable for a variety of occasions. For casual meals, serve pork chops with classic sides like mashed potatoes or coleslaw for a comforting experience. Conversely, for more formal settings, consider plating chops with a reduction sauce, accompanied by seasonal vegetables for an elegant touch.

    Different flavor profiles can also dictate how you present your pork chops. For a barbecue gathering, a smoky flavor with tangy barbecue sauce creates a festive atmosphere, while a herb-crusted version might be perfect for a dinner party. Here are some ideas for serving pork chops:

    • With classic sides like mashed potatoes and green beans for casual dining.
    • With a wine reduction sauce and roasted vegetables for an elegant presentation.
    • In a sandwich format with slaw for a fun, interactive meal.
    • With a side of fruit salsa for a fresh, summery dish.
    • As part of a charcuterie board for a stylish appetizer option.

    By considering the occasion and matching flavors and presentation, pork chops can be transformed into a dish that fits any dining experience.

    Next Steps to Enhance Your Barbecue Skills

    Ways to Continue Improving Your Barbecue Mastery

    Continuing to enhance your barbecue skills requires a mix of experimentation, education, and community engagement. To refine your techniques, consistently try out different cuts of pork and explore new recipes. Engaging with local barbecue competitions or online forums can provide valuable feedback and inspiration from seasoned pitmasters.

    Moreover, investing time in understanding the science behind cooking can significantly enhance your skills. Whether it’s mastering temperature control or learning about flavor combinations, each step will contribute to your growth as a cook. Here’s how to keep progressing:

    • Experiment with new cuts and cooking methods regularly.
    • Join local barbecue clubs or online communities for tips and support.
    • Study the science of cooking meat to understand flavor development.
    • Attend workshops or cooking classes to learn from experts.
    • Document your cooking experiences to track progress and learn from mistakes.

    By adopting a mindset of continuous improvement, you can elevate your barbecue game and savor the delicious rewards of your efforts.

    Essential Equipment for Barbecue Success

    Having the right equipment is vital for successful barbecue sessions, ensuring you can cook both efficiently and effectively. Essential tools include a quality smoker or grill, which enables various cooking methods, from smoking to direct grilling. A meat thermometer is also crucial for ensuring meats are cooked to the proper internal temperature, preventing both undercooking and overcooking.

    Basic tools such as tongs, spatulas, and brushes are necessary for handling meat and applying sauces. Investing in high-quality equipment can make a significant difference in both the cooking process and the final results. Here are some must-have barbecue tools:

    • A reliable smoker or grill for versatile cooking methods.
    • A meat thermometer for accurate temperature readings.
    • Tongs and spatulas for safe and easy meat handling.
    • Brushes for evenly applying marinades or sauces.
    • Disposable gloves for maintaining hygiene while handling food.

    Equipping yourself with the right tools will set you up for success in your barbecue endeavors.

    Where to Find More Recipes and Inspiration for Barbecuing

    Finding additional recipes and inspiration for your barbecue journey can be both enjoyable and rewarding. Cookbooks focused on barbecue provide structured guidance and innovative recipes, while online platforms such as food blogs and YouTube channels offer a wealth of visual content and tips. Engaging with social media groups dedicated to barbecue can also provide fresh ideas and connect you with other cooking enthusiasts.

    Local barbecue competitions can serve as excellent sources of inspiration, showcasing different styles and techniques you may wish to try. Consider these resources for further learning and exploration:

    • Barbecue cookbooks featuring expert recipes and techniques.
    • Food blogs and websites dedicated to barbecue enthusiasts.
    • YouTube channels with instructional cooking videos.
    • Social media groups where members share tips and recipes.
    • Local barbecue competitions for firsthand experience and inspiration.

    By exploring these resources, you can continually discover new ideas and techniques that will enhance your barbecue skills and satisfaction.

    Frequently Asked Questions About Pork Cuts and Barbecue Techniques

    Which Cuts of Pork Are Most Suitable for Smoking?

    The prime cuts of pork for smoking include pork shoulder, ribs, and pork belly. These cuts possess ample fat content, which helps keep the meat moist and flavorful throughout the lengthy cooking process.

    How Long Should You Cook Pork Shoulder for Optimal Results?

    Pork shoulder should be cooked low and slow, typically around 1.5 hours per pound at a temperature of 225-250°F. The aim is to reach an internal temperature of 195-205°F for tender, pull-apart meat.

    What Is the Best Way to Store Different Cuts of Pork?

    To store pork cuts, refrigerate fresh meat at 32-38°F. For longer storage, wrap it tightly in plastic wrap or freezer bags and freeze. Always check the sell-by date to ensure freshness.

    Can Pork Loin Be Used for Barbecue?

    Yes, pork loin is a great option for barbecue, especially when cooked carefully to prevent drying out. It’s best suited for quick cooking methods like grilling or roasting.

    How Do You Know When Pork Is Fully Cooked?

    Use a meat thermometer to check for doneness. Pork should reach an internal temperature of 145°F, followed by a resting period to allow juices to redistribute.

    What Types of Seasoning Pair Well with Pork?

    Pork pairs well with a variety of seasonings, including garlic, rosemary, thyme, paprika, and brown sugar. Marinades with soy sauce, citrus, or vinegar can also enhance flavor.

    How Can I Make Pork Ribs Tender?

    To achieve tender pork ribs, cook them low and slow, either by smoking or braising. Wrapping them in foil during the cooking process can help retain moisture.

    Is It Necessary to Marinate Pork Tenderloin?

    While not mandatory, marinating pork tenderloin enhances flavor and can help keep the meat moist. A simple marinade can add depth to the dish.

    Can I Reuse Marinades?

    It’s not safe to reuse marinades that have been in contact with raw meat. If you wish to use a marinade as a sauce, set some aside before adding it to the meat.

    What Are Some Common Mistakes When Cooking Pork?

    Common mistakes when cooking pork include overcooking, not using enough seasoning, and failing to rest the meat after cooking. Avoiding these pitfalls can improve the quality of your dishes.

    Connect with us on Facebook!

    The Article Best Cuts of Pork for Beginner Pitmasters: Top Choices appeared first on https://pitmastersarsenal.com

    The Article Top Choices for Beginner Pitmasters: Best Cuts of Pork Was Found On https://limitsofstrategy.com