Category: Cooking Tips

  • Vegan Guest Cooking: Key Tips for a Successful Meal

    Vegan Guest Cooking: Key Tips for a Successful Meal

    Unlocking the Secrets to a Nutritionally Complete Vegan Diet

    What Essential Nutrients Should Vegans Prioritize for Optimal Health?

    How to Cook for a Vegan Guest: A vibrant vegan dinner table with dishes rich in protein, iron, calcium, vitamin B12, and omega-3 fatty acids.

    When you are preparing meals for a vegan guest, understanding their unique dietary needs is vital for ensuring they receive the nourishment they require. A vegan diet excludes all animal products, which necessitates an awareness of specific nutrients essential for overall health and vitality. Key nutrients to focus on include protein, iron, calcium, vitamin B12, and omega-3 fatty acids. These nutrients play crucial roles in bodily functions and overall well-being, making them indispensable for anyone aiming to provide a fulfilling dining experience for their vegan guests.

    The nutrient protein can come from a variety of plant-based sources, including legumes, tofu, tempeh, and seitan. These alternatives not only meet protein requirements but also enhance the flavor and texture of the meal, making it more enjoyable. Additionally, iron is another vital nutrient, found in foods like lentils, chickpeas, and leafy greens. To boost iron absorption, pairing these iron-rich foods with vitamin C-rich foods, such as bell peppers and citrus fruits, can significantly enhance nutrient uptake.

    Vitamin B12 poses a challenge for those adhering to a vegan diet since it is primarily found in animal products. To address this deficiency, vegans should consider fortified foods such as select plant milks and breakfast cereals, along with taking B12 supplements as needed. Furthermore, omega-3 fatty acids, essential for promoting heart and brain health, can be sourced from flaxseeds, chia seeds, and walnuts. By being attentive to these crucial nutrients, hosts can craft meals that are not only delicious but also nutritionally comprehensive, enhancing the well-being and satisfaction of their vegan guests.

    How to Effectively Build a Balanced Vegan Diet?

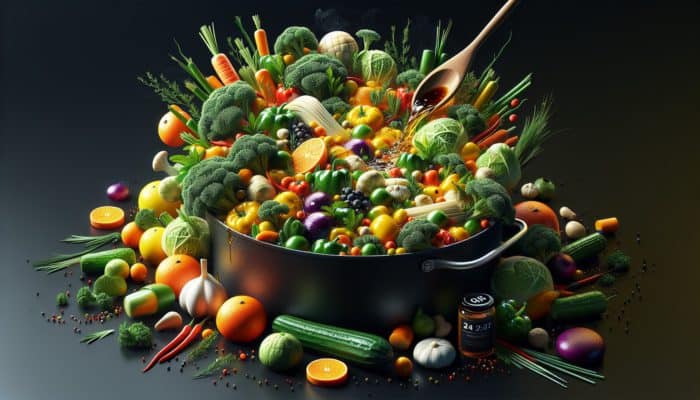
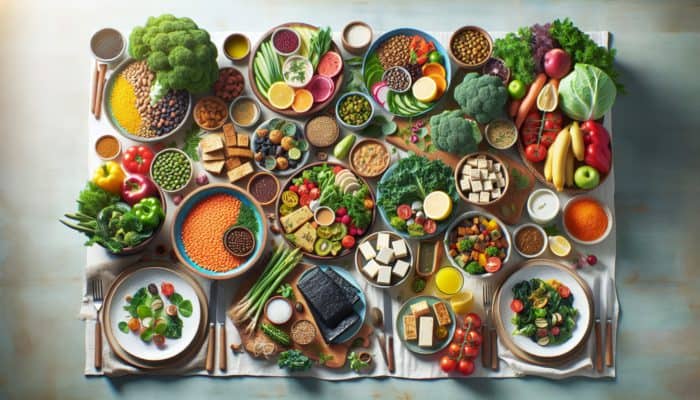
    Creating a balanced vegan diet requires a strategic approach to meal planning that encompasses a variety of food groups. An ideal vegan plate should include diverse protein sources, healthy fats, a colorful assortment of fruits and vegetables, and whole grains. This variety is essential for meeting all nutritional needs without relying on any animal-derived products.

    To ensure sufficient protein intake, it is advisable to incorporate options such as legumes, nuts, seeds, and whole grains. For instance, quinoa is an exceptional choice due to its complete protein profile, making it a versatile ingredient for salads or side dishes. Healthy fats can be added through foods like avocados, olive oil, and coconut products, which enhance both flavor and the overall nutritional value of meals. By prioritizing a rich variety of fruits and vegetables on the plate, you are providing essential vitamins and minerals, along with fibre, critical for promoting digestive health.

    Whole grains such as brown rice, quinoa, and oats are excellent choices that help sustain energy levels and promote satiety. A practical method for achieving this balance is through meal prepping and exploring various global cuisines. For example, immersing yourself in Indian or Mediterranean vegan recipes can inspire a wide range of meals rich in flavor and texture, ensuring that vegan guests have an enjoyable and satisfying dining experience.

    What Common Food Allergies Should Hosts Be Aware of When Catering to Vegans?

    When hosting vegan guests, it is crucial to remain vigilant about potential food allergies that could complicate meal preparation. Common vegan food allergies include nuts, soy, gluten, and certain legumes. Each of these allergens can provoke severe reactions in sensitive individuals, making it essential for hosts to inquire about allergies when planning the menu.

    Nuts frequently appear in many vegan dishes to boost protein content and add texture. When planning your menu, consider substituting nuts with seeds, such as sunflower seeds or pumpkin seeds, which can provide similar textures without the associated allergenic risks. Soy is another common allergen, prevalent in foods like tofu, tempeh, and various plant-based milks. For guests who are sensitive to soy, alternatives like chickpea flour or pea protein can effectively replace soy ingredients.

    Gluten, found in wheat and certain other grains, is another consideration for individuals with celiac disease or gluten intolerance. Gluten-free grains such as quinoa, rice, and buckwheat can be creatively incorporated into satisfying meals. Lastly, while legumes are essential in vegan diets, some individuals may have allergies to specific types. By proactively understanding these dietary restrictions, hosts not only ensure safety but also demonstrate thoughtfulness and care in their hosting efforts.

    Expert Advice for Crafting Meals for Vegan Guests

    Chefs preparing colorful vegan dishes in a modern, eco-friendly kitchen.

    What Cooking Techniques Enhance the Quality of Vegan Meals?

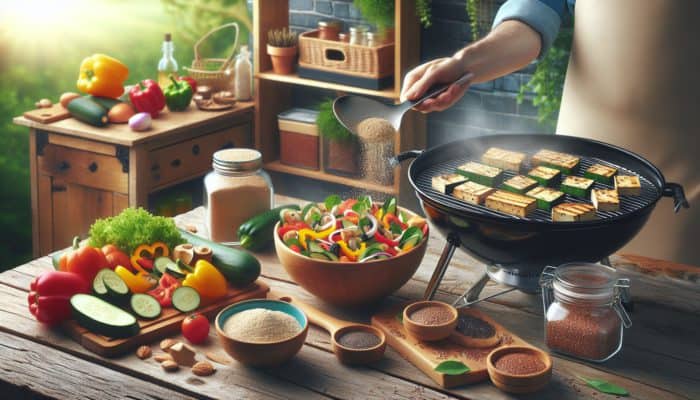
    Cooking for a vegan guest requires an understanding of various techniques that can enhance the natural flavors of plant-based ingredients. Techniques such as roasting, grilling, and steaming can transform ordinary vegetables into extraordinary dishes that are sure to please the palate.

    Roasting vegetables brings out their natural sweetness, leading to delightful caramelization that elevates any meal. For example, roasting carrots and Brussels sprouts with a drizzle of olive oil and a sprinkle of sea salt results in a flavor-packed side dish that is both visually enticing and nutritious. Grilling imparts a smoky flavor to vegetables and plant-based proteins like tofu or tempeh, enhancing their taste and texture. The charred marks from grilling not only add visual appeal but also contribute to the complexity of flavors.

    Steaming is another excellent technique that maintains the nutrients in vegetables while providing a tender texture. This method is especially beneficial for greens like kale or spinach, which can be lightly steamed and incorporated into dishes such as stir-fries or salads. By utilizing these techniques, hosts can demonstrate their culinary expertise and ensure that vegan dishes are as flavorful and fulfilling as their non-vegan counterparts.

    How to Modify Recipes to Suit Vegan Guests’ Preferences?

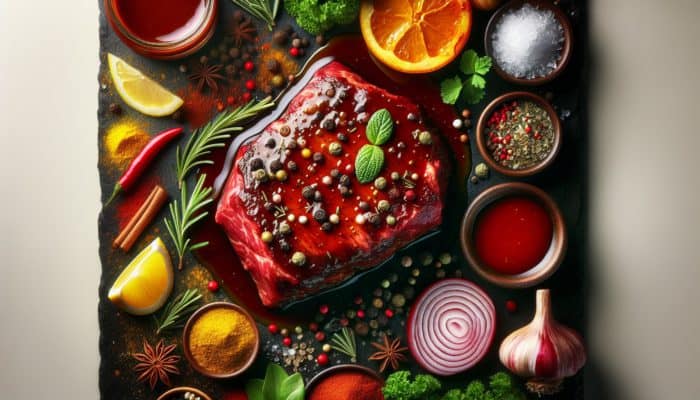
    Adapting traditional recipes to accommodate vegan guests is a valuable skill that can lead to exciting culinary innovations. The key lies in identifying animal-based ingredients and substituting them with plant-based alternatives while preserving the intended flavor and texture.

    For dairy products, alternatives like almond milk, coconut cream, or cashew cheese can seamlessly replace milk, cream, and cheese in most recipes. For example, crafting creamy pasta sauces can involve using a blend of soaked cashews and nutritional yeast, which yields a rich and satisfying alternative. When it comes to eggs, substitutes like flaxseed meal mixed with water or aquafaba (the liquid from canned chickpeas) serve as effective binding agents in baked goods or dishes such as quiches.

    Meat substitutes such as jackfruit, mushrooms, and lentils can replicate the texture of meat in dishes like tacos or curries. When cooked and seasoned correctly, jackfruit can resemble pulled pork, while lentils provide hearty protein for stews and soups. By thoughtfully adapting recipes, hosts not only ensure their vegan guests feel included but also have the chance to explore exciting new flavors and textures, enriching the overall dining experience.

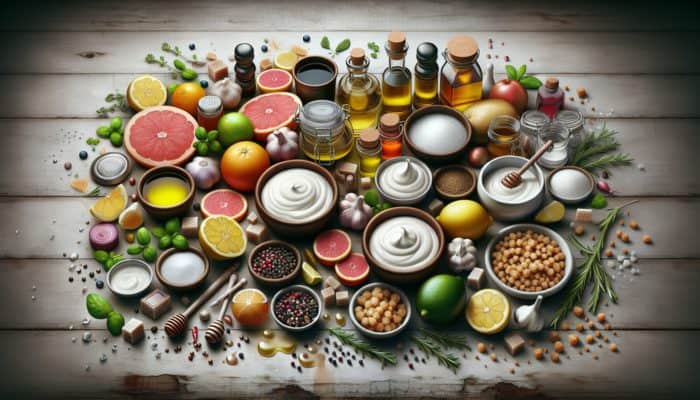
    What Are the Best Vegan Substitutes for Common Cooking Ingredients?

    Marinated tofu grilling, nutritional yeast on salad, flaxseeds and chia seeds in jars on table.

    When preparing meals for vegan guests, identifying the most suitable substitutes for common ingredients is essential for creating satisfying and enjoyable dishes. Popular alternatives include tofu as a meat substitute, nutritional yeast for cheese, and flaxseeds or chia seeds as replacements for eggs. Each of these substitutes can replicate the properties of their animal-based counterparts while offering unique flavors and health benefits.

    Tofu is incredibly versatile, easily marinated, grilled, or stir-fried, making it an excellent meat alternative across various cuisines. For instance, marinated tofu can enhance a salad or serve as a standout main dish when grilled. Nutritional yeast, often affectionately referred to as “nooch,” provides a cheesy flavor that can be sprinkled on popcorn or pasta dishes to enrich their taste without relying on dairy.

    Egg replacements are particularly important in baking, with options like mixing flaxseed meal or chia seeds with water to create a gel-like consistency that mimics eggs. For a creamy texture in soups or sauces, cashew cream or silken tofu blended until smooth can provide a rich base. Familiarity with these substitutes expands your culinary toolkit and ensures that vegan guests enjoy delicious and fulfilling meals that cater to their dietary preferences.

    Crafting an Exciting Vegan-Friendly Menu

    How to Select Irresistible Vegan Appetisers That Impress?

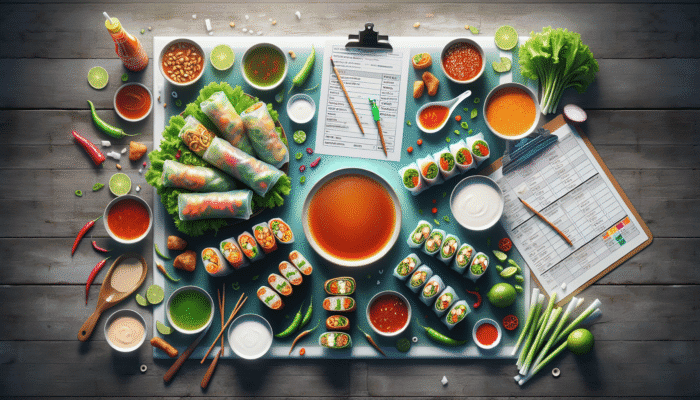
    Choosing appetisers for vegans presents an excellent opportunity to showcase your creativity while ensuring that guests enjoy a delightful kick-off to their meal. Appetisers should be light, flavorful, and easy to share, making them ideal for social dining. Popular choices include stuffed mushrooms, vegan dips, and vegetable skewers.

    Stuffed mushrooms can be filled with a mixture of sautéed garlic, spinach, and breadcrumbs, resulting in a satisfying bite-sized treat. Vegan dips such as hummus or guacamole, served with fresh vegetable sticks or pita chips, offer a refreshing and nutritious option. Vegetable skewers, drizzled with a balsamic glaze and grilled to perfection, can be both visually appealing and delicious.

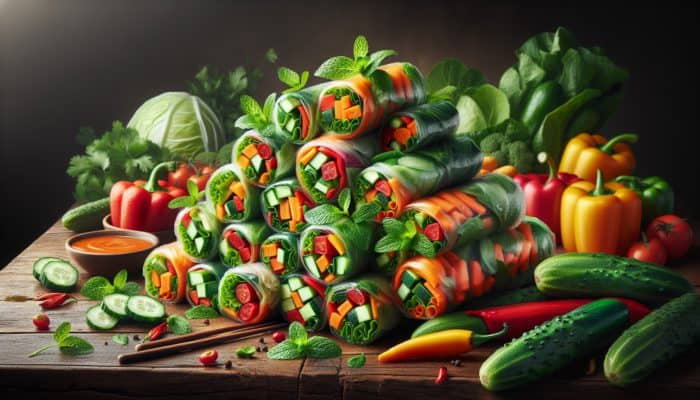
    Other enticing vegan appetiser ideas include bruschetta topped with ripe tomatoes and basil, or mini spring rolls filled with fresh veggies and served with a tangy dipping sauce. Consider offering stuffed mini peppers or spiced roasted chickpeas, both of which are hearty and bursting with flavor. By curating a selection of vibrant vegan appetisers, hosts can ensure their guests are eager for the main meal ahead.

    How to Create a Satisfying and Balanced Vegan Main Course?

    A well-rounded vegan main course is crucial for delivering a fulfilling dining experience. The key components to consider include a source of protein, whole grains, and a variety of vegetables. This combination not only ensures nutritional adequacy but also results in a visually appealing and flavorful dish.

    For the protein component, options like lentils, chickpeas, or quinoa can serve as hearty bases. For instance, a rich lentil stew, brimming with vegetables and served over brown rice, is both satisfying and nourishing. Whole grains such as farro or bulgur add texture and depth to dishes while remaining gluten-free if needed.

    When incorporating vegetables, aim for a colorful assortment to enhance both nutrition and presentation. Roasted seasonal vegetables, sautéed greens, or a fresh salad can provide essential vitamins and minerals. Additionally, consider adding flavorful sauces or dressings that elevate the dish, such as tahini dressing or a zesty chimichurri. Balancing these elements creates a main course that is not only appealing but also embodies the essence of vegan cooking, celebrating the diversity and richness of plant-based ingredients.

    What Desserts Are Ideal for Vegan Guests?

    Vegan desserts can be just as delicious and satisfying as their non-vegan counterparts, showcasing a vast array of flavors and textures. When planning a dessert for vegan guests, it is vital to explore options that are inherently plant-based or easily adaptable. Fruit-based desserts, chocolate delights, and nut-based treats can all beautifully cater to vegan tastes.

    Fruit-based desserts like sorbets or fruit tarts highlight the natural sweetness of fruits while providing a refreshing end to any meal. Chocolate desserts made with dark chocolate, typically dairy-free, can include vegan brownies or chocolate mousse crafted from avocados, yielding a delightful creamy texture.

    For nut-based desserts, consider almond flour cookies or cashew cheesecake, sweetened naturally with maple syrup or agave nectar. Other popular vegan dessert ideas encompass chia seed pudding, coconut milk ice cream, or energy balls made from oats and dates. By selecting desserts that align with vegan principles, hosts ensure their guests leave the table satisfied and impressed by the variety of vegan options available.

    How to Select Vegan-Friendly Beverages That Complement the Meal?

    Choosing beverages that enhance a vegan meal requires careful examination of ingredient lists to ensure all options are devoid of animal products. Vegan-friendly beverages can range from herbal teas and fruit juices to vegan wines and craft beers, catering to diverse tastes and preferences.

    Herbal teas like peppermint or chamomile can provide a calming conclusion to the meal, while fresh fruit juices such as orange or apple can be invigorating and refreshing. For a more sophisticated selection, vegan wines—produced without animal-derived fining agents—pair beautifully with meals. Many wine brands now clearly indicate their products as vegan-friendly, simplifying the selection process.

    Craft beers, which are often naturally vegan, can add a local touch and pair excellently with robust flavors in the meal. Creative cocktails made with fresh ingredients and botanicals can also elevate the dining experience, allowing for innovative concoctions that complement the meal’s theme. By thoughtfully selecting beverages, hosts can enhance the overall dining experience while ensuring that all offerings align with their guests’ dietary preferences.

    What Strategies Can Help Accommodate Various Dietary Restrictions?

    When hosting a vegan guest, it is vital to accommodate any additional dietary restrictions to foster an inclusive and enjoyable atmosphere. Dietary needs can range from gluten-free to nut allergies, necessitating careful planning. Clear communication is essential; asking guests about their dietary preferences and restrictions well in advance can significantly assist in menu planning.

    Labeling dishes is a practical strategy to ensure guests know what they are consuming, especially for those with allergies or intolerances. For instance, providing clear labels for gluten-free or nut-free dishes can alleviate concerns and allow guests to enjoy the meal without hesitation. Having alternative options available ensures that everyone feels considered and valued.

    Offering a diverse array of dishes can also accommodate various dietary needs, allowing guests to choose from a range of vegan-friendly options. For example, including a gluten-free grain like quinoa alongside traditional options ensures that guests with gluten sensitivities can partake in the meal. By being proactive and thoughtful, hosts create a welcoming environment that celebrates inclusivity while catering to diverse dietary requirements.

    What Advantages Come with Hosting a Vegan Guest?

    How Can Hosting a Vegan Guest Enhance Your Culinary Skills?

    Hosting a vegan guest can be a transformative experience, pushing you to explore new recipes and cooking techniques that you may not have tried before. Engaging with vegan cuisine encourages creativity and expands your culinary repertoire, allowing you to experiment with diverse ingredients and flavors that highlight the essence of plant-based cooking.

    Each vegan dish you prepare provides an opportunity to refine specific culinary skills. For instance, mastering the art of vegetable preparation—such as julienning or spiralizing—can elevate the presentation of your meals. Learning to balance flavors using spices and herbs is another skill developed through vegan cooking, as plant-based ingredients often require additional flavor profiles to shine and captivate the palate.

    Additionally, delving into fermentation techniques to create products such as kimchi or vegan cheese can deepen your knowledge of food preservation and enhancement. Techniques like grilling and roasting can also be refined, allowing the natural sweetness and textures of vegetables to be fully appreciated. By embracing these challenges, you not only impress your vegan guests but also enrich your cooking abilities, laying the groundwork for future culinary adventures that celebrate creativity.

    What Health Benefits Can Arise from Hosting a Vegan Guest?

    Hosting a vegan guest often leads to a more conscious approach to meal planning and dietary choices. Incorporating more plant-based ingredients into your cooking may inspire healthier eating habits that positively impact your overall well-being. Preparing vegan meals encourages the use of whole foods, reducing dependency on processed foods that are high in sugar and unhealthy fats.

    Plant-based diets are associated with numerous health benefits, including lower cholesterol levels, improved digestion, and a reduced risk of chronic diseases. Engaging with vegan cuisine allows hosts to explore a variety of fruits, vegetables, legumes, and grains, resulting in nutrient-rich, antioxidant-laden meals that promote better health.

    This experience may inspire a long-term shift toward a more plant-focused diet, extending beyond the hosting occasion and contributing to lasting health benefits for both hosts and their families. By venturing into vegan cooking, you encourage a lifestyle that values health and nutrition, setting a positive example for others and fostering a community focused on wellness.

    How Does Hosting a Vegan Guest Promote Sustainable Living?

    By hosting a vegan guest, you actively support a lifestyle that champions environmental sustainability. Plant-based diets are recognized for their lower ecological footprint, as they typically require fewer natural resources like water and land compared to animal-based diets. This shift towards plant-based consumption significantly reduces greenhouse gas emissions and deforestation, making a considerable impact on our planet.

    Embracing vegan cooking can also inspire mindful purchasing decisions, as many vegan products are sourced from local farmers or produced sustainably. Supporting local suppliers fosters community relationships and diminishes the carbon footprint associated with transporting food over long distances, thus promoting a healthier planet.

    Moreover, incorporating vegan ingredients allows for a more varied diet that respects environmental considerations. Utilizing seasonal and local produce in your meals supports eco-friendly practices while ensuring freshness and quality. By hosting a vegan guest, you advocate for sustainable living, inspiring others to reflect on their environmental impact and make conscious dietary choices that contribute to a greener future.

    How to Shop Effectively for Vegan Ingredients?

    Where to Locate Fresh Vegan Produce for Your Culinary Creations?

    Finding fresh vegan produce is essential for crafting vibrant, flavorful meals that tantalize the senses. Local farmers’ markets serve as excellent sources for seasonal vegetables and fruits, often featuring organic options that enhance the quality of your meals. Engaging with local growers allows you to inquire about their farming practices, ensuring you source produce that aligns with vegan principles and sustainable practices.

    Grocery stores focusing on organic and natural foods typically carry a broad assortment of fresh produce. Seek out stores that support local suppliers, as this often translates to fresher options on the shelves. Additionally, many supermarkets now have dedicated organic sections, making it easier to find high-quality ingredients suitable for vegan diets.

    Community-supported agriculture (CSA) programs also provide excellent opportunities for receiving a regular supply of fresh, locally grown produce. By subscribing to a CSA, you not only support local farmers but also enjoy a diverse selection of fruits and vegetables throughout the growing season. By prioritizing fresh ingredients sourced sustainably, you can ensure that the meals you prepare for vegan guests are both nutritious and delicious, showcasing the best that nature has to offer.

    What Plant-Based Proteins Should Be on Your Shopping List?

    When shopping for plant-based proteins, it’s crucial to select ingredients that are not only nutritious but also versatile enough for a variety of dishes. Some of the top options include lentils, chickpeas, black beans, quinoa, and tofu. These ingredients are rich in protein and can be incorporated into a multitude of recipes, from salads to hearty stews.

    Lentils are an excellent protein source and rich in dietary fiber, available in various colors, including green, brown, and red, each offering unique flavors and cooking times. Chickpeas, whether used as whole beans or ground into flour, showcase incredible versatility and can be featured in delicious dips like hummus or tossed into salads for added texture and nutrition.

    Black beans are another protein powerhouse, ideal for tacos, soups, or burrito fillings. Quinoa, often celebrated as a superfood, is a complete protein that can serve as a base for bowls or salads. Tofu, derived from soybeans, can be marinated, grilled, or scrambled, making it a staple in many vegan cuisines. By stocking up on these protein-rich ingredients, you can create a wide variety of meals that are both satisfying and nutritious, catering to the needs of vegan diners.

    How to Identify Vegan-Friendly Packaged Foods While Shopping?

    Identifying vegan-friendly packaged foods requires a keen eye for detail, particularly regarding ingredient labels. To ensure that products are free from animal-derived ingredients, start by thoroughly reading the ingredient list. Look out for common non-vegan ingredients such as milk, eggs, honey, and gelatin, which may appear in various packaged goods.

    Many brands now proudly label their products as “vegan,” making it easier to select compliant options. Certifications from reputable vegan organizations can also provide reassurance that the products meet vegan standards, simplifying the shopping process for conscientious consumers.

    Additionally, familiarize yourself with common animal-derived additives that may not be immediately obvious. For instance, ingredients like casein (a milk protein) and certain insect-derived colorings may be present in seemingly vegan products. By educating yourself on these aspects and maintaining a list of trusted brands, you can shop confidently and ensure your selections align with your vegan dietary preferences, making informed choices as you navigate the aisles.

    Proven Strategies for Cooking for a Vegan Guest

    What Time-Saving Techniques Can Enhance Vegan Cooking?

    Implementing time-saving strategies is crucial for efficient vegan cooking, especially when hosting guests. Batch cooking, utilizing pre-made vegan products, and meal prepping can significantly reduce the time spent in the kitchen. By dedicating a few hours each week to preparing meals in advance, you can ensure that healthy options are readily available whenever needed.

    Batch cooking involves preparing large quantities of a single dish, which can subsequently be refrigerated or frozen for later consumption. For instance, cooking a big pot of lentil soup or preparing a batch of quinoa can provide the foundation for multiple meals throughout the week. Using pre-made vegan products, such as sauces or marinades, can also streamline the cooking process, allowing you to focus on assembling dishes instead of starting from scratch with every meal.

    Meal-prepping ingredients, such as chopping vegetables or marinating tofu, saves time on the day of hosting. Having everything ready to go enables a smooth cooking process, allowing you to enjoy the experience rather than feeling rushed. By implementing these time-saving strategies, you can create delicious vegan meals without overwhelming yourself in the kitchen, ensuring a stress-free environment for both you and your guests.

    How to Present Vegan Dishes in an Attractive Manner?

    Presentation plays a vital role in the dining experience, especially when hosting vegan guests. Attractive plating can enhance the visual appeal of meals and foster a more inviting atmosphere. Techniques such as garnishing, artfully arranging food on the plate, and using contrasting colors can significantly enhance the overall dining experience.

    Garnishing with fresh herbs, such as basil or parsley, can add vibrant color and freshness to dishes, elevating their appeal. Arranging food in visually striking manners—such as stacking ingredients or using diverse shapes—can enhance the overall presentation. For example, a carefully layered salad in a glass can showcase the variety of textures and colors, making it more enticing.

    Utilizing interesting serving dishes, such as wooden boards or colorful bowls, can also elevate the meal. Consider employing smaller plates for appetisers or tapas-style dining, allowing guests to sample a variety of dishes. By focusing on presentation, you create a memorable dining experience that impresses guests and highlights the creativity inherent in vegan cuisine.

    How to Ensure Vegan Guests Feel Welcomed and Valued During Their Visit?

    Making vegan guests feel welcomed and catered to requires thoughtful planning and open communication before and during the meal. Start by engaging your guests in a conversation about their dietary preferences and restrictions, ensuring their needs are understood and accounted for in the menu-planning process.

    Offering a variety of options that cater to different tastes demonstrates inclusivity and consideration for your guests. Providing a dedicated vegan section on the menu or clearly labeled dishes helps guests feel comfortable and valued. Additionally, engaging with your guests during the meal, asking for feedback, and showing enthusiasm for the dishes being served can greatly enhance their dining experience and foster a sense of belonging.

    Creating a warm and inviting atmosphere through thoughtful table settings, ambient lighting, and background music can also enhance the experience. By prioritizing your guests’ needs and creating an inclusive environment, you foster appreciation and belonging, ensuring that the meal is memorable for everyone involved.

    Addressing Dietary Restrictions and Preferences for Vegan Guests

    What Steps Should Be Taken If a Vegan Guest Has Additional Dietary Needs?

    When hosting a vegan guest with additional dietary needs, such as gluten-free or nut allergies, it is essential to be well-informed and prepared. This requires clear communication before the event to understand any specific restrictions. Once you have this information, you can adapt your menu accordingly to ensure inclusivity and safety for all guests.

    For gluten-free options, consider using grains like quinoa or rice instead of traditional pasta or bread. Legumes and vegetables can provide ample protein and texture, ensuring that the meal is satisfying and nutritious. When addressing nut allergies, be mindful of common ingredients and opt for seeds or legumes as substitutes where necessary.

    Additionally, it’s crucial to avoid cross-contamination during food preparation. Using separate utensils and surfaces for allergen-free dishes helps prevent unwanted reactions. By taking these proactive measures, you create an environment where all guests feel safe and comfortable, allowing everyone to enjoy the meal together without worry.

    How to Effectively Communicate Dietary Needs with Guests?

    Effective communication regarding dietary needs with guests is crucial to ensure a positive dining experience. Before the event, reach out to your guests to inquire about their dietary preferences and restrictions. This initial conversation sets the foundation for menu planning and demonstrates your consideration for their needs.

    Be open and receptive to their dietary requirements, asking specific questions about ingredients they avoid or prefer. This approach not only aids in meal planning but also fosters trust and transparency between you and your guests. During the meal, inviting feedback from your guests allows them to voice any concerns or preferences, reinforcing their value in the dining experience.

    Additionally, providing clear dish labels can help guests navigate their options and feel confident about what they are consuming. By prioritizing open communication, you ensure everyone feels included and valued in the dining experience, fostering an enjoyable, inclusive atmosphere for all.

    How to Ensure a Variety of Flavors and Textures in Your Menu?

    A diverse menu featuring a variety of flavors and textures is vital for keeping the meal interesting and satisfying. When planning dishes for vegan guests, aim to integrate a range of ingredients that offer contrasting textures, from crunchy to creamy, and from spicy to sweet. This approach guarantees that every bite is an exciting experience that delights the palate.

    Incorporating elements such as roasted vegetables, fresh salads, hearty grains, and sauces can create a symphony of flavors and textures. For instance, a grain bowl featuring quinoa, roasted sweet potatoes, fresh greens, and a tangy dressing offers a delightful mix of textures and tastes that excite the senses.

    Additionally, consider using herbs and spices to enhance flavors and add depth to your dishes. Experimenting with global cuisines can also introduce exciting flavor combinations that intrigue and satisfy your guests’ palates. By focusing on variety, you create a memorable dining experience that appeals to a wide range of tastes and preferences, ensuring that everyone leaves satisfied.

    How to Cater to Religious Dietary Laws and Considerations?

    When hosting guests with specific religious dietary laws, it is essential to be respectful and knowledgeable about their requirements. For instance, some guests may adhere to Halal or Kosher diets, which dictate specific methods of food preparation and permissible ingredients. Understanding these guidelines ensures that your menu accommodates everyone’s needs and beliefs.

    For Halal requirements, ensure that all meat and poultry served is certified Halal and that there is no cross-contamination with non-Halal items. Similarly, when catering to Kosher guests, ensure that dairy and meat products are not mixed and that all ingredients are certified Kosher.

    Engaging in a conversation with guests about their dietary laws before the event can clarify any uncertainties and guarantee a smooth dining experience. By being proactive and respectful, you create an inclusive environment that values and honors your guests’ beliefs and practices, making the meal enjoyable for everyone.

    What Are Best Practices for Managing Allergies and Intolerances?

    Managing food allergies and intolerances requires vigilance and care to ensure a safe dining experience for all guests. When hosting a vegan guest with allergies, gather comprehensive information about their specific allergens during the planning stage. This understanding allows you to create a menu that avoids any potential triggers and ensures the safety of all.

    During meal preparation, it’s vital to use separate utensils and cooking surfaces for allergen-free dishes to prevent cross-contamination. Clearly labeling all dishes empowers guests to identify what they can eat safely, reducing anxiety about potential allergic reactions.

    When potential allergens are present in the menu, consider offering alternative dishes that are both compliant and delicious. Engaging with your guests throughout the meal allows for feedback and necessary adjustments, ensuring that everyone feels comfortable and safe. By prioritizing food safety and awareness, you create an inviting atmosphere that caters to the needs of all guests, fostering a sense of community and care.

    Frequently Asked Questions About Vegan Dining

    What constitutes a vegan diet?

    A vegan diet excludes all animal products, including meat, dairy, eggs, and honey, focusing solely on plant-based foods such as fruits, vegetables, grains, legumes, and nuts.

    How can I ensure that meals are suitable for vegans?

    To ensure meals are vegan-friendly, avoid all animal-derived ingredients and opt for plant-based alternatives for dairy, meat, and eggs. Be diligent about reading labels and select certified vegan products whenever possible.

    What are some common sources of protein in a vegan diet?

    Common vegan protein sources include lentils, chickpeas, black beans, quinoa, tofu, tempeh, and seitan, all of which provide essential amino acids for a balanced diet.

    Are there vegan substitutes available for dairy products?

    Yes, there are numerous vegan substitutes for dairy, including almond milk, coconut yogurt, cashew cheese, and nutritional yeast, which can effectively mimic the taste and texture of traditional dairy products.

    What strategies can I employ to enhance the flavor of vegan dishes?

    To enhance the flavor of vegan dishes, incorporate a variety of herbs, spices, and umami-rich ingredients such as miso, nutritional yeast, and citrus zest to add depth and complexity to your meals.

    What vegan-friendly desserts can I serve?

    Vegan-friendly desserts can include fruit sorbets, chocolate avocado mousse, coconut milk ice cream, or baked goods made with almond flour, flaxseeds, or chia seeds.

    How can I accommodate gluten-free vegan guests?

    To accommodate gluten-free vegan guests, use gluten-free grains such as quinoa, brown rice, or corn, and avoid wheat-based products. Ensure that all dishes are prepared without cross-contamination to maintain safety.

    What beverages are suitable for vegan guests?

    Suitable beverages for vegan guests include herbal teas, fruit juices, vegan wines, and craft beers, all of which are free from animal-derived ingredients.

    How can I communicate dietary needs with my guests?

    Engage in open communication with your guests before the event to understand their dietary needs. Ask specific questions and remain receptive to their preferences to ensure everyone feels included and valued.

    What creative vegan appetisers can I serve?

    Creative vegan appetisers include stuffed mushrooms, vegetable skewers, hummus with pita and fresh veggies, bruschetta, and spiced roasted chickpeas, all showcasing a variety of flavors and textures.

    Connect with us on Facebook!

    The post How to Cook for a Vegan Guest: Essential Tips appeared first on https://cookinggods.com

    The Article Cooking for a Vegan Guest: Essential Tips for Success Was Found On https://limitsofstrategy.com

  • Steam Vegetables for Flavor: Essential Tips to Boost Taste

    Steam Vegetables for Flavor: Essential Tips to Boost Taste

    Elevate Your Health: Master the Art of Steaming Vegetables for Maximum Flavor and Nutritional Benefits

    What Is Steaming and How Does This Cooking Method Preserve Nutrients and Enhance Taste?

    Best Ways to Steam Vegetables for Flavour: Colorful vegetables like broccoli, carrots, and bell peppers steaming over boiling water in a modern kitchen.

    Uncovering the best methods to steam vegetables for flavor and health involves recognizing that steaming is a highly effective culinary technique. It utilizes steam generated from boiling water to gently cook food, particularly vegetables. This cooking approach effectively retains the natural flavors, vibrant colors, and essential nutrients of vegetables, making it a preferred method among health-conscious chefs and home cooks. Unlike boiling, which often results in soggy vegetables that lose vital nutrients, steaming preserves both taste and texture. By employing this technique, you can craft dishes that not only delight your palate but also maximize the health benefits of fresh produce.

    Embracing the steaming technique brings numerous and impactful benefits for enhancing the flavor and nutritional profile of your vegetables.

    • Significantly retains nutrients better than boiling or frying
    • Preserves the natural colors and flavors of vegetables
    • Minimizes the requirement for additional fats or oils
    • Improves the digestibility of the vegetables
    • Offers a versatile cooking method suitable for a variety of vegetables
    • Requires minimal kitchen tools
    • Enables quick cooking times

    By adopting the steaming technique, you can unlock the full potential of your vegetables, making every meal a healthful and flavorful delight.

    Choosing the Right Vegetables for Optimal Steaming Results

    Choosing the best vegetables for steaming is vital for maximizing both flavor and nutritional benefits. Certain vegetables excel in steaming due to their texture and moisture levels. The ideal candidates are those that soften beautifully while still maintaining their satisfying crunch and vibrant colors, ultimately contributing to a visually appealing plate presentation.

    Consider these excellent vegetables that are perfect for steaming:

    • Broccoli
    • Carrots
    • Green beans
    • Cauliflower
    • Asparagus
    • Spinach
    • Peas
    • Brussels sprouts

    These vegetables not only steam exceptionally well but also present unique flavors that can be enhanced with appropriate seasonings, making them a superb choice for any meal.

    Essential Kitchen Equipment for Perfectly Steamed Vegetables

    To steam vegetables successfully, you’ll need some fundamental kitchen equipment that can greatly enhance your steaming experience. Investing in the right tools ensures even cooking and maximum flavor, allowing you to effortlessly create delicious and nutritious meals.

    Here’s a list of essential steaming equipment:

    • Steamer basket (either bamboo or metal)
    • A pot or saucepan with a tight-fitting lid
    • A reliable heat source (stove or electric cooker)
    • A timer or clock to keep track of cooking times
    • Tongs for safe and easy handling of hot vegetables
    • A knife and a chopping board for preparation
    • A colander for rinsing vegetables

    With these essential tools at your disposal, you are well-prepared to embark on a flavor-packed journey of steaming that transforms your vegetables into culinary masterpieces.

    How to Prepare Vegetables for Perfect Steaming and Flavor Enhancement

    Freshly cleaned and cut vegetables arranged on a kitchen counter, ready for steaming with subtle steam rising.

    Preparation plays an essential role in ensuring your vegetables cook evenly and burst with flavor when served. Properly cleaned and cut vegetables greatly enhance your overall steaming experience, resulting in delightful dishes on your plate. Taking the time to prepare your vegetables correctly sets the stage for a successful steaming session, allowing their natural flavors to shine.

    Here are some crucial preparation tips for steaming vegetables:

    • Wash thoroughly to eliminate dirt and pesticides
    • Trim ends and tough parts for improved texture
    • Cut into uniform pieces to promote even cooking
    • Rinse in cold water just before steaming
    • Pat dry to remove excess moisture for optimal steaming
    • Consider marinating them for an additional flavor boost
    • Let them rest for a few minutes after cutting to enhance flavor

    By following these steps, you not only improve the cooking process but also elevate the flavor of your steamed vegetables, ensuring a delightful dining experience.

    Understanding Steaming Times for Different Vegetables

    Each vegetable has its unique steaming time, which is crucial for achieving the perfect texture. Overcooking can lead to mushy, unappetizing vegetables, while undercooking can result in an undesirable crunch. A timer becomes your best ally in this process, helping you achieve perfectly steamed vegetables every time.

    Here are some common vegetables along with their recommended steaming times:

    • Broccoli florets: 4-5 minutes
    • Carrots (sliced): 5-7 minutes
    • Green beans: 4-6 minutes
    • Cauliflower florets: 5-6 minutes
    • Asparagus (whole): 3-5 minutes
    • Spinach: 2-3 minutes
    • Peas: 3-5 minutes
    • Brussels sprouts (halved): 6-8 minutes

    By adhering to these steaming times, you can ensure that your vegetables are perfectly cooked, retaining their flavor and nutritional value, making them a delectable addition to any meal.

    Innovative Techniques to Enhance Flavor in Steamed Vegetables

    How Can You Infuse Flavors While Steaming Vegetables for Enhanced Taste?

    Vegetables steaming with herbs, citrus peels, spices, soy sauce, and wine for enhanced flavor.

    Infusing flavors during the steaming process can elevate your vegetables from simple side dishes to culinary masterpieces. By utilizing aromatic herbs, spices, or liquid infusions, you can enhance the taste, allowing the flavors to penetrate the vegetables while they cook. This adds depth and transforms ordinary steamed vegetables into a flavorful experience that excites the palate.

    Consider these effective methods for infusing flavors:

    • Add herbs directly to the steaming water, such as thyme or rosemary
    • Incorporate citrus peels for a zesty note
    • Include a splash of soy sauce or balsamic vinegar in the steaming water
    • Add garlic or onion to the steaming water for added depth
    • Experiment with wine or beer instead of water for a unique twist
    • Utilize spice blends tailored to the specific vegetable type
    • Finish steaming with infused oils for added richness

    Through these flavor infusion methods, you create a multi-dimensional taste experience that showcases the vegetables’ natural characteristics while adding a gourmet touch to your meals.

    Using Broths and Stocks to Enhance Flavor During Steaming

    Broths and stocks are culinary powerhouses that can dramatically enhance the flavor of steamed vegetables. By substituting plain water with a flavor-rich broth during steaming, you add an extra layer of depth that elevates the entire dish, making it more satisfying and enjoyable.

    Here are some insightful tips for effectively using broths and stocks:

    • Select broths that complement specific types of vegetables
    • Chicken or vegetable stocks are versatile options
    • Enhance the broth with herbs and spices for added flavor
    • Opt for low-sodium options to manage salt levels
    • Infuse the broth with additional aromatics before steaming
    • Mix different types of broth for complex flavors
    • Experiment with homemade broths for a unique taste

    Utilizing rich broths not only enhances the flavor of your steamed vegetables but also provides an opportunity to explore new tastes and culinary traditions, making your meals more exciting.

    Timing and Temperature Control for Optimal Flavor During Steaming

    Timing and temperature are critical elements in the steaming process. Adjusting these factors ensures that vegetables are cooked to perfection while preserving their natural flavors and textures. Maintaining a consistent steam temperature maximizes flavor infusion and enhances mouthfeel, resulting in a more enjoyable dish.

    Here are some expert tips for optimal timing and temperature control:

    • Ensure a rolling boil to maintain constant steam
    • Start with high heat and then reduce to medium once steaming
    • Cover the pot with a tight lid to trap steam effectively
    • Use a thermometer to check the water’s bubbling state
    • Monitor steaming time closely to prevent overcooking
    • Adjust water levels as necessary to maintain a steady stream
    • Allow vegetables to rest briefly post-steaming for flavor absorption

    Mastering these techniques enables you to take control of the steaming process, allowing you to cook with confidence and achieve consistently flavorful results.

    Expert Insights on Best Practices for Steaming Vegetables to Maximize Flavor

    What Do Culinary Experts Recommend About Steaming Techniques for Flavor Enhancement?

    Culinary professionals consistently emphasize the importance of specific techniques to maximize flavor during the steaming process. They advocate for minimizing water usage, precise timing, and incorporating aromatics to enhance the natural essence of vegetables. These expert insights can significantly elevate your steaming results, ensuring that your dishes are both tasty and nutritious.

    Real-world examples of expert steaming techniques include:

    • Chef Alice Waters promotes using seasonal vegetables paired with fresh herbs for maximal flavor.
    • Chef Thomas Keller highlights the benefits of employing a bamboo steamer to impart subtle, unique flavors.
    • Nutritionists suggest lightly salting vegetables before steaming to enhance their natural sweetness.
    • Culinary schools teach that selecting the correct steaming vessel can significantly impact flavor—bamboo steamers are often favored.
    • Professional chefs recommend testing doneness with a sharp knife to ensure the perfect texture.
    • Incorporating a splash of vinegar into the steaming water is a trick many culinary experts swear by.
    • Celebrity chefs frequently create signature broths to steam vegetables, showcasing their individual culinary style.

    These recommendations provide invaluable insights into achieving extraordinary flavor through effective steaming techniques, allowing you to elevate your cooking.

    How Can You Experiment with Different Flavors When Steaming Vegetables?

    Experimentation is key to discovering delicious steamed vegetables. With a plethora of herbs, spices, and seasoning options at your disposal, you have the freedom to create unique flavor combinations that perfectly suit your palate. The beauty of steaming lies in its versatility and adaptability to various flavor profiles.

    Here are some inventive ways to experiment with flavors while steaming:

    • Try out different herb combinations for a fresh twist each time
    • Incorporate international spices to elevate your traditional recipes
    • Mix sweet and savory elements, such as pairing sweet carrots with warming cinnamon
    • Infuse oils like sesame or chili for an Asian-inspired touch
    • Explore diverse cuisines—steaming with Italian herbs can impart a Mediterranean flair
    • Add a touch of heat with chili flakes or pepper for an exciting kick
    • Use nuts and seeds as toppings post-steaming for added depth and texture

    By experimenting with flavors, you will not only discover new tastes but also enrich your culinary repertoire, making every meal a creative adventure.

    What Are the Best Practices for Effective Steaming of Vegetables?

    Best practices for steaming encompass various techniques that guarantee vegetables retain their flavor and nutrients. By adhering to these principles, you can consistently achieve delicious results every time you steam.

    Key best practices for successful steaming include:

    • Always use fresh, high-quality vegetables to ensure the best flavor
    • Ensure proper steam circulation by avoiding overcrowding in the steamer
    • Maintain an appropriate water level to ensure continuous steam production
    • Test vegetables for doneness without frequently lifting the lid
    • Limit the addition of fats to keep the dish light and healthy
    • Finish with a splash of citrus or vinegar for brightness and balance
    • Experiment with presentation to make the dish visually appealing and enticing

    Incorporating these best practices into your cooking routine will not only enhance the flavor of your dishes but also elevate the overall enjoyment of your steamed creations.

    Health Benefits of Consuming Steamed Vegetables Regularly

    What Are the Nutritional Advantages of Steaming Vegetables for Health?

    Steaming vegetables offers numerous nutritional advantages that significantly contribute to a healthy diet. This cooking method allows for the preservation of vital vitamins and minerals, making it a superior technique compared to boiling or frying, which can lead to nutrient loss and diminished health benefits.

    Here are the key nutritional benefits of steaming:

    • Preserves water-soluble vitamins such as Vitamin C and B-complex vitamins
    • Retains essential minerals crucial for bodily functions
    • Maintains the phytonutrient content that is beneficial for health
    • Reduces the need for added fats or oils, keeping dishes light and healthy
    • Enhances the overall digestibility of fibrous vegetables
    • Enables a higher intake of vegetables in daily diets
    • Sustains the natural flavor without overpowering with seasonings

    These advantages highlight the importance of incorporating steamed vegetables into your meals, ensuring optimal health and well-being.

    How Does Steaming Affect the Texture of Vegetables?

    Steaming has a profound impact on the texture of vegetables, making it one of the most effective methods for preserving their natural crispness and bite. Unlike boiling, which may result in mushy vegetables, steaming maintains the structure that makes vegetables enjoyable to eat and visually appealing on the plate.

    The texture benefits of steaming include:

    • Maintains a tender yet firm consistency that is satisfying
    • Preserves vibrant colors, enhancing the overall appearance
    • Enhances the natural sweetness of vegetables, making them more appealing
    • Reduces the risk of overcooking, which can negatively affect mouthfeel
    • Allows for vibrant presentations on the plate, impressing guests
    • Prepares vegetables for seamless incorporation into various dishes
    • Improves the overall dining experience through appealing textures

    For these reasons, steaming is the preferred method for many chefs and home cooks alike, delivering delicious results that are both nutritious and enjoyable.

    Can Steaming Improve the Digestibility of Vegetables?

    Steaming can indeed enhance the digestibility of vegetables, making them more accessible for those with sensitive digestive systems. The steaming process breaks down some fibrous components, allowing for easier nutrient absorption while retaining the vegetable’s health benefits.

    Consider the following benefits of steaming regarding digestibility:

    • Softens vegetable fibers without losing valuable nutrients
    • Facilitates better nutrient absorption in the body
    • Helps reduce gas production from certain fibrous vegetables
    • Allows for a wider variety of vegetables to be consumed comfortably
    • Encourages increased vegetable intake among those with digestive issues
    • Promotes a balanced diet through enhanced vegetable digestibility
    • Provides an easy-to-digest option for post-surgery or recovery diets

    These benefits highlight the role of steaming in fostering a healthy, balanced approach to vegetable consumption, making it a wise choice for everyone.

    Flavor Pairings and Seasonings for Steamed Vegetables

    What Herbs and Spices Work Best for Enhancing Steamed Vegetables?

    Selecting the right herbs and spices can significantly elevate the flavor of steamed vegetables, transforming them into delightful culinary creations. The key lies in pairing herbs and spices that complement the unique characteristics of each vegetable, enhancing their natural tastes.

    Consider these herbs and spices for flavor enhancement:

    • Basil for a fresh, aromatic touch
    • Thyme, which pairs beautifully with root vegetables
    • Dill, especially for enhancing the taste of steamed carrots and potatoes
    • Cumin for a warm, earthy note
    • Garlic powder to add depth without overpowering the dish
    • Paprika for a smoky, vibrant finish
    • Chili flakes for a hint of heat
    • Parsley for a bright, fresh garnish

    Combining these flavors will yield a delightful balance that enhances the natural sweetness of vegetables, creating dishes that are not only pleasing to the palate but also visually appealing.

    How to Use Citrus and Vinegar to Add Zest to Steamed Vegetables?

    Citrus fruits and vinegar serve as excellent flavor enhancers that can brighten up steamed vegetables. The acidity of these ingredients cuts through the richness of dishes and uplifts the overall taste, making them more vibrant and enjoyable.

    Explore these ways to incorporate citrus and vinegar into your steamed dishes:

    • Add fresh lemon juice before serving to enhance the dish’s freshness
    • Use lime juice for a tangy kick that complements greens beautifully
    • Incorporate white wine vinegar for a subtle tang that works well
    • Try balsamic vinegar for a sweet and rich contrast
    • Garnish with citrus zest for an aromatic finish
    • Create a citrus vinaigrette for drizzling over steamed dishes
    • Mix vinegar with herbs for an exciting marinade pre-steaming

    These simple techniques can elevate your dishes while adding complexity to the overall flavor profile, making your meals more enjoyable.

    Combining Vegetables for Complementary Flavors and Nutritional Benefits

    Combining different vegetables creates a harmonious flavor profile while enhancing nutritional benefits. Selecting vegetables that complement each other can lead to delightful combinations that are both visually appealing and satisfying.

    Here are some ideas for pairing vegetables effectively:

    • Carrots and peas offer a sweet and colorful mix
    • Broccoli and cauliflower provide a hearty texture contrast
    • Asparagus and green beans create a crisp, vibrant dish
    • Spinach and bell peppers add a nutritional powerhouse to your plate
    • Brussels sprouts and bacon enhance sweetness with savory depth
    • Beets and carrots create a visually striking plate
    • Sweet potatoes and green beans balance sweetness with earthiness

    These combinations not only enhance flavor but also ensure a nutritious and varied diet, making your meals exciting and healthful.

    How to Incorporate Nuts and Seeds for Added Texture in Steamed Vegetables?

    Adding nuts and seeds to steamed vegetables provides delightful texture contrasts while enhancing flavors. This practice enriches the eating experience and introduces healthy fats and proteins into your meal, making it more satisfying and nutritious.

    Here are ways to incorporate nuts and seeds into your dishes:

    • Top steamed broccoli with toasted almonds for a crunchy finish
    • Add sesame seeds to asparagus for a nutty flavor
    • Sprinkle pumpkin seeds over carrots for added earthiness
    • Incorporate walnuts into steamed spinach for a hearty bite
    • Mix sunflower seeds with peas for a nutritious boost
    • Garnish with crushed peanuts for a spicy Thai flair
    • Experiment with nut butters in sauces for a creamy texture

    These toppings can provide exciting contrasts and enhance the overall flavor profile of your steamed vegetables, creating dishes that are both delicious and visually appealing.

    Using Oils and Butters to Enhance the Flavors of Steamed Vegetables

    Utilizing various oils and butters can greatly enhance the flavor of steamed vegetables, introducing richness and depth into every bite. The right choice of fats can transform a simple dish into a gourmet experience, making it more enjoyable and satisfying.

    Consider these options for oils and butters to enhance your steamed vegetables:

    • Drizzle extra virgin olive oil for a fruity finish
    • Use sesame oil for an Asian-inspired dish
    • Incorporate herb-infused butters for a rich touch
    • Try truffle oil for a luxurious flavor enhancement
    • Add garlic oil for a fragrant, savory boost
    • Combine melted butter with lemon juice for a classic pairing
    • Experiment with coconut oil for a sweet twist on your vegetables

    These additions enhance the overall flavor and contribute to a more satisfying and enjoyable meal, making every dish memorable.

    Steaming Vegetables for Various Culinary Dishes

    How Can Steamed Vegetables Enhance Main Courses?

    Steamed vegetables can significantly enhance main courses, serving as nutritious and flavorful accompaniments. Their vibrant colors and fresh taste add visual appeal and balance to heavier dishes. When paired with grilled meats or seafood, steamed vegetables elevate the dining experience, providing a delightful contrast in both flavor and texture.

    Here are ways in which steamed vegetables enhance main courses:

    • Add color and vibrancy to meat dishes, making them more appetizing
    • Provide a nutritious contrast to rich sauces, balancing the meal
    • Enhance the overall flavor profile of the entire dish
    • Create a light, healthy balance alongside heavier proteins
    • Serve as a base for sauces and gravies, absorbing flavor
    • Complement grilled dishes with their tender texture, adding depth
    • Incorporate seasonal vegetables for freshness and variety

    By integrating steamed vegetables into your main courses, you ensure a well-rounded plate that is visually appealing and nutritionally balanced, enhancing the overall dining experience.

    Using Steamed Vegetables in Salads and Soups for Added Nutrition

    Incorporating steamed vegetables into salads and soups can significantly boost their nutritional content while adding delightful textures. The gentle cooking method enhances flavors, allowing the vegetables to shine alongside other ingredients, creating comforting and wholesome meals.

    Consider these ways to use steamed vegetables effectively:

    • Add steamed broccoli to salads for a nutritious crunch and added fiber
    • Incorporate steamed carrots into soups for an infusion of natural sweetness
    • Mix steamed asparagus with grains for a hearty, nutritious salad
    • Blend steamed spinach into creamy soups for added nutrition and depth
    • Top soups with a medley of colorful steamed vegetables for vibrancy
    • Use steamed peas to add a pop of color and sweetness to dishes
    • Combine various steamed vegetables in a grain bowl for a balanced meal

    These methods not only enhance the flavor profile of your meals but also encourage greater vegetable consumption, making healthy eating enjoyable.

    Steaming Vegetables: Perfect for Appetizers and Snacks

    Steamed vegetables can serve as healthy appetizers or snacks, offering a nutritious alternative to traditional options. Their inherent flavors can be accentuated with dips or seasonings, making them a delightful choice for gatherings or casual snacking.

    Here are creative uses for steamed vegetable appetizers:

    • Serve with hummus or tzatziki for a refreshing and healthy snack
    • Prepare a vegetable platter featuring an array of steamed options
    • Include steamed cauliflower bites tossed in a spicy sauce
    • Offer steamed green beans with a soy dipping sauce for added flavor
    • Present steamed carrots and celery with a peanut dip for a crunchy treat
    • Utilize steamed broccoli in mini quiches for a delightful bite-sized snack
    • Pair steamed asparagus with balsamic reduction for an elegant starter

    Embracing steamed vegetables not only adds nutritious elements to your menu but also creates a sophisticated yet simple snacking experience that everyone will enjoy.

    Research-Backed Benefits of the Best Ways to Steam Vegetables for Flavor

    What Does Research Say About Steaming and Flavor Preservation?

    Research indicates that steaming is one of the best methods for preserving the flavor of vegetables while retaining essential nutrients. Studies show that steaming helps maintain the integrity of natural compounds that contribute to flavor, making it superior to other cooking methods.

    To effectively steam vegetables based on research findings, consider these actionable steps: Use minimal water to prevent flavor dilution during cooking

    • Control cooking time precisely to avoid nutrient loss
    • Incorporate flavorful broths or herbs to enhance the taste
    • Use a steaming basket to maximize steam circulation
    • Experiment with different vegetables to discover unique flavor profiles
    • Monitor temperature closely for optimal steaming conditions
    • Pair vegetables with complementary herbs and spices for enhanced flavor

    Implementing these steps can significantly improve your steaming outcomes, ensuring that vegetables not only taste exceptional but also provide maximum nutritional benefits, contributing to a healthier lifestyle.

    How Does Steaming Impact Nutrient Retention in Vegetables?

    Steaming has been proven to retain more nutrients in vegetables compared to boiling or frying. This method preserves water-soluble vitamins, minerals, and phytonutrients, making it an efficient cooking technique for health-conscious individuals who wish to maximize the benefits of their produce.

    Here are ways that steaming positively impacts nutrient retention:

    • Reduces leaching of vitamins into water, preserving essential nutrients
    • Maintains the natural texture of vegetables, encouraging higher consumption
    • Enhances absorption of fat-soluble vitamins when paired with healthy fats
    • Allows for various cooking methods without compromising nutrition
    • Encourages a higher intake of vegetables, benefiting overall health
    • Promotes a better balance of nutrients when combined with other foods
    • Facilitates the cooking of fibrous vegetables that may otherwise be less appealing

    These factors underscore the importance of steaming in a balanced diet, supporting both nutrient retention and enjoyable eating experiences, ensuring that you derive the most from your meals.

    What Are the Long-Term Health Benefits of Regularly Steaming Vegetables?

    Incorporating steamed vegetables into your diet offers several long-term health benefits, including improved digestion, enhanced nutrient absorption, and a reduced risk of chronic diseases. Regular consumption of steamed vegetables can lead to a healthier lifestyle overall, making it an essential part of your culinary routine.

    Consider these long-term health benefits associated with steaming vegetables:

    • Supports healthy digestion through improved fiber breakdown
    • Enhances nutrient absorption, boosting overall health
    • May contribute to weight management through low-calorie, nutrient-dense choices
    • Reduces the risk of chronic diseases by increasing vegetable intake
    • Encourages a more balanced, plant-based diet
    • Promotes sustained energy levels and general well-being
    • Fosters a positive relationship with vegetables through enjoyable preparation methods

    Steaming is a simple yet powerful way to ensure you consistently reap the benefits of vegetables, making it a key component of a healthy lifestyle.

    Tips and Tricks for Perfect Steaming Every Time

    How Can You Prevent Overcooking Vegetables While Steaming?

    Preventing overcooking is crucial for maintaining the flavor and texture of steamed vegetables. Overcooked vegetables can become mushy and lose their vibrant colors, diminishing their appeal and nutritional value, ultimately affecting your dining experience.

    Here are effective tips to prevent overcooking:

    • Use a timer to track cooking times accurately and avoid mishaps
    • Check for doneness regularly without lifting the lid too often
    • Cut vegetables into uniform sizes to promote even cooking
    • Use a fork or knife to test for tenderness without breaking apart
    • Remove vegetables from the heat promptly once cooked to perfection
    • Immerse in ice water briefly to halt cooking if necessary
    • Follow recommended steaming times for each vegetable type for best results

    By employing these techniques, you can ensure your vegetables are perfectly steamed every time, preserving their taste and nutritional benefits while delighting your guests.

    What Are Some Quick Steaming Techniques for Busy Cooks?

    Quick steaming techniques can save time while still delivering delicious, flavorful results. These methods enable you to enjoy well-cooked vegetables without spending too much time in the kitchen, making them perfect for busy weeknight dinners or when time is of the essence.

    Here are some effective quick steaming techniques:

    • Cut vegetables into smaller pieces for faster cooking times
    • Use a microwave steamer for quick and convenient options
    • Use high heat to generate steam quickly and efficiently
    • Pre-soak tougher vegetables to shorten steaming time
    • Consider using a pressure cooker for rapid steaming results
    • Layer vegetables by cooking those that require longer before adding quicker cooking varieties
    • Employ a stovetop steaming setup for efficient use of time

    These strategies ensure flavorful results without lengthy culinary efforts, making it easy to incorporate healthy vegetables into your meals.

    How to Store Steamed Vegetables for Later Use?

    Proper storage of steamed vegetables is essential for maintaining their flavor and freshness. When stored correctly, steamed vegetables can be enjoyed later without compromising quality, allowing you to meal prep effectively.

    Here are some tips for storing steamed vegetables:

    • Cool vegetables quickly to prevent mushiness from residual heat
    • Use airtight containers to keep moisture in and flavors fresh
    • Label and date your containers for easy identification later
    • Store in the refrigerator for up to 3-5 days for optimal freshness
    • Reheat gently to preserve texture when consuming leftovers
    • Consider freezing steamed vegetables for longer-term storage options
    • Check for signs of spoilage before use to ensure quality

    By following these storage guidelines, you can enjoy delicious steamed vegetables for days after cooking, making mealtimes easier and more convenient.

    How to Season Steamed Vegetables for Enhanced Flavor?

    Enhancing the taste of steamed vegetables with seasonings can elevate their appeal and create a more satisfying dining experience. The right combination of herbs, spices, and fats can turn ordinary vegetables into extraordinary dishes, making every meal special.

    Consider these tips to season your steamed vegetables effectively:

    • Use fresh herbs for a vibrant burst of flavor that invigorates
    • Add a pinch of salt to enhance the natural sweetness of the vegetables
    • Drizzle with olive oil or melted butter for added richness and depth
    • Incorporate spice blends tailored to the type of vegetables you are using
    • Experiment with sauces or dressings for added complexity and flavor
    • Finish with a squeeze of lemon for brightness and freshness
    • Consider marinating vegetables before steaming for an infused flavor

    These techniques will significantly enhance the overall flavor of your steamed vegetables, ensuring that they are not only healthy but also delicious and enjoyable to eat.

    Creative Ways to Serve Steamed Vegetables for Maximum Enjoyment

    How Can You Make Steamed Vegetables Visually Appealing?

    Making steamed vegetables visually appealing can greatly enhance the overall dining experience. Presentation plays a crucial role in enhancing the enjoyment of food, and beautifully arranged vegetables can impress both guests and family members, making your meals more inviting.

    Here are some ways to enhance the visual appeal of your steamed vegetables:

    • Use a variety of colors for vibrant presentations that catch the eye
    • Arrange vegetables in patterns or clusters for an artistic effect
    • Garnish with chopped herbs for a fresh, appealing touch
    • Serve on a contrasting plate to make the colors pop
    • Top with toasted nuts or seeds for added texture and interest
    • Include edible flowers for an elegant finish to your dish
    • Layer vegetables for beautiful height and structure on the plate

    These techniques can transform a simple dish into an eye-catching centerpiece, elevating your meals to a whole new level of sophistication and enjoyment.

    Incorporating Steamed Vegetables into Various Cuisines for Added Flavor

    Steamed vegetables can be seamlessly adapted to various cuisines, enhancing their versatility and flavor. Different cultures offer unique flavor profiles that can be applied to steamed dishes, allowing for a world of culinary exploration and creativity.

    Here are some creative ideas for incorporating steamed vegetables into diverse cuisines:

    • Use Asian-inspired sauces like teriyaki or hoisin for a delicious and unique twist
    • Incorporate Mediterranean flavors with olive oil, garlic, and fresh herbs
    • Utilize Indian spices like curry or cumin for aromatic and flavorful dishes
    • Blend with Mexican flavors by adding lime and cilantro for freshness
    • Pair with Italian sauces, such as pesto or marinara, for an Italian flair
    • Experiment with Middle Eastern spices like za’atar or sumac for exotic tastes
    • Incorporate Caribbean flavors, using jerk seasoning or coconut milk for a tropical twist

    These diverse options showcase the adaptability of steamed vegetables, creating exciting dishes that reflect global culinary traditions and flavors.

    Innovative Recipes Featuring Steamed Vegetables for Culinary Creativity

    Innovative recipes can showcase the versatility of steamed vegetables, turning them into memorable meals that delight the senses. Combining unexpected ingredients and techniques can produce unique and delicious dishes that celebrate the natural flavors of fresh produce.

    Here are some innovative recipe ideas featuring steamed vegetables:

    • Steamed vegetable spring rolls with a spicy dipping sauce for a fresh appetizer
    • Quinoa salad with steamed spinach, lemon, and feta for a nutritious meal
    • Vegetable stir-fry with steamed broccoli and cashew sauce for a quick dinner
    • Steamed vegetable quesadillas filled with cheese and fresh herbs for a tasty treat
    • Vegetable curry featuring steamed cauliflower and chickpeas for a hearty dish
    • Steamed broccoli soufflé with cheese and herbs for a light yet satisfying option
    • Layered vegetable lasagna with steamed zucchini and marinara sauce for a comforting meal

    These recipes highlight the incredible potential of steamed vegetables, inviting creativity into your cooking and making every meal a delightful experience.

    FAQs About Steaming Vegetables for Optimal Results

    What is the best way to steam vegetables for maximum flavor?

    The best way to steam vegetables involves using a steamer basket placed over boiling water, ensuring even cooking while retaining essential nutrients and flavor.

    How long should I steam vegetables for optimal results?

    Steaming times vary by vegetable, typically ranging from 2 to 8 minutes. Use a timer and check for doneness regularly to avoid overcooking.

    Can I steam frozen vegetables directly?

    Yes, you can steam frozen vegetables directly from the freezer without thawing them first. Just increase the steaming time slightly to ensure they cook through.

    What vegetables are best suited for steaming?

    Excellent choices for steaming include broccoli, carrots, green beans, asparagus, and spinach, as they maintain their flavor and texture exceptionally well.

    What can I add to the steaming water to infuse flavor?

    You can enhance the steaming water with herbs, spices, lemon slices, or vegetable broth to infuse additional flavors into the vegetables as they cook.

    How can I tell when steamed vegetables are done cooking?

    Steamed vegetables are done when they are tender yet still firm to the touch. A fork or knife should pierce them easily without breaking them apart.

    Can I reuse the steaming water for other purposes?

    Yes, you can reuse the steaming water as a base for soups or sauces, as it contains nutrients released from the vegetables during the cooking process.

    Is steaming vegetables healthier than boiling them?

    Yes, steaming is generally healthier than boiling since it preserves more nutrients and flavors that may be lost when boiling vegetables in water.

    Can I steam vegetables in the microwave?

    Yes, you can steam vegetables in the microwave using a microwave-safe dish with a lid, adding a small amount of water to generate steam.

    Are there any disadvantages to steaming vegetables?

    One potential disadvantage is that some vegetables may lose their vibrant color if overcooked, but this can be mitigated by careful timing and monitoring.

    Check out our awesome updates on Facebook!

    The post Best Ways to Steam Vegetables for Flavour: Unlocking Taste appeared first on https://cookinggods.com

    The Article Steam Vegetables for Flavour: Top Tips to Enhance Taste Was Found On https://limitsofstrategy.com

  • Local BBQ Contest: Essential Tips for Judging Success

    Local BBQ Contest: Essential Tips for Judging Success

    Comprehensive Guide to Key Categories in BBQ Competitions

    Essential BBQ Contest Categories Every Enthusiast Must Know

    Judges evaluating ribs, brisket, pork, and chicken at a vibrant BBQ competition with grills and smoke.

    A deep understanding of the different BBQ contest categories is essential for judges across the United States. Each BBQ competition showcases a variety of distinctive styles, each with its own unique judging criteria. The most prevalent categories include:

    • Ribs: Judged based on tenderness, flavor, and visual appeal.
    • Brisket: Evaluated for texture, smokiness, and moisture retention.
    • Pork: Assessed for seasoning, juiciness, and complexity of flavors.
    • Chicken: Judged on skin crispness, meat tenderness, and depth of seasoning.

    Every category demands that judges possess a thorough knowledge of specific standards. For instance, ribs and brisket require a keen understanding of how smoke interacts with various meats, while pork and chicken emphasize seasoning and moisture retention. Judges must meticulously evaluate not only the flavors but also the visual presentation that sets each entry apart on the judging table.

    Mastering the Art of Judging Ribs and Brisket Effectively

    In the assessment of ribs and brisket, judges concentrate on three critical criteria: tenderness, flavor, and appearance. An ideal rib should easily detach from the bone without falling apart, providing a bite that strikes a perfect balance between tenderness and satisfying texture. Similarly, brisket should be tender while maintaining its shape, allowing for effortless slicing.

    • Tenderness: Ribs should smoothly separate from the bone, while brisket should yield easily to gentle pulling.
    • Flavor: An ideal blend of smoke, spices, and the meat’s natural taste should create a delightful flavor experience.
    • Appearance: The color, glaze, and overall presentation must be visually enticing and appealing.
    • Moisture: Both ribs and brisket should retain a juicy texture without appearing greasy.

    Experienced judges recognize that appearance can sometimes be misleading: a beautifully glazed rib may appear appetizing yet taste bland, while a rustic-looking brisket could burst with flavor. Therefore, possessing a refined palate is essential for discerning the true taste quality that lies beneath the visual presentation.

    Key Factors for Judging Pork and Chicken Entries

    The evaluation of pork and chicken entries involves a more in-depth assessment of moisture content, flavor complexity, and aesthetics of presentation. Each type of meat comes with its own set of expectations. For pork, judges typically look for a balanced harmony of sweet and savory flavors, achieved through well-crafted rubs or sauces.

    • Moisture: Pork should be juicy without any greasy residue; chicken should demonstrate excellent moisture retention.
    • Flavor: The seasoning should enhance the natural flavor of the meat rather than overpower it.
    • Presentation: The dish should be artfully arranged, with garnishes that elevate visual appeal.
    • Cooking Technique: Techniques such as smoking, grilling, or slow-cooking should be evident in both texture and flavor.

    While moisture is crucial for both meats, judges must also be vigilant regarding seasoning. An excessively sweet pork entry or a chicken dish with overpowering spices can detract from the overall evaluation. Presentation is equally significant, as it forms the first impression before the judges’ taste buds engage.

    Expert Insights for Judging at Local BBQ Competitions

    Judges tasting ribs and brisket at a lively local BBQ contest with smoke and banners.

    How BBQ Professionals Evaluate and Score Entries

    BBQ professionals utilize a comprehensive scoring system that encompasses critical aspects—taste, tenderness, and visual appeal. They recognize that every bite must reveal a complex interplay of flavors, alongside the right texture that satisfies the palate.

    Skilled judges typically employ a numerical scoring system, assigning varying weights to taste, tenderness, and appearance. For instance, taste could constitute 50% of the total score, while tenderness and appearance might represent 30% and 20%, respectively. This systematic approach ensures that every entry is judged fairly and consistently, minimizing bias.

    To achieve accurate ratings, experts rely on their extensive knowledge of BBQ techniques and flavor profiles. Many have dedicated years to refining their palates, sampling a diverse array of BBQ styles, and honing their ability to appreciate subtle flavor nuances. This expertise allows them to discern the intricate details of each entry, leading to more informed and authoritative evaluations.

    Techniques Employed by Experienced Judges During Competitions

    Experienced judges apply various techniques to uphold the integrity of the judging process. One common method is blind tasting, which guarantees that judges are not influenced by the appearance or branding of the entries. By eliminating any identifying markers, judges can concentrate solely on the flavors and textures present in each sample.

    In addition to blind tastings, many competitions involve multiple assessment rounds. Judges frequently work in teams to discuss evaluations and reach a consensus score. Standardized judging forms are typically utilized to ensure that every entry is evaluated against the same criteria, thereby minimizing personal bias.

    Real-life events frequently demonstrate the consistency and reliability of expert judging techniques. For example, during Kansas City BBQ Society competitions, judges may participate in practice sessions to familiarize themselves with the various styles and flavors. By refining their skills in a controlled environment, they become better equipped to evaluate diverse entries during actual contests.

    Steps to Begin Your Journey as a BBQ Judge

    A diverse group of aspiring BBQ judges tasting various BBQ styles at a culinary school certification course.

    Individuals aspiring to become BBQ judges should strive to grasp the nuances of this delightful culinary art. Training often begins with attending certification courses offered by BBQ associations or culinary schools in the local area. These courses cover essential judging criteria and the intricate details of flavor evaluation.

    Participating in practice sessions is another important step. These gatherings allow aspiring judges to sample various BBQ styles, learn to identify subtle differences, and refine their palates. For example, potential judges might taste multiple variations of pulled pork to appreciate the effects of different rubs, sauces, and cooking techniques.

    To become proficient judges, individuals should also volunteer at events. By working alongside seasoned judges, they gain invaluable insights into the judging process, learn the rules governing different competitions, and build connections within the BBQ community. This hands-on experience serves as a solid foundation for a knowledgeable and reliable judging career.

    Strategic Preparation for Judging a BBQ Contest

    Essential Supplies Every Judge Should Bring to a BBQ Contest

    Being well-prepared is critical for judges attending a BBQ contest. To perform effectively, judges should arrive equipped with vital tools that facilitate the evaluation process. A well-prepared judge will bring:

    • A notebook: Invaluable for recording scores and comments.
    • Pens: Essential for completing scoring sheets and making notes.
    • Judging forms: Pre-prepared sheets outlining evaluation criteria.
    • Utensils: Disposable forks, knives, and plates for sampling entries.
    • Water: Essential for cleansing the palate between tastings.
    • Wet wipes: Important for maintaining cleanliness after sampling various entries.
    • Comfortable clothing: Since many judges spend hours tasting, comfort is crucial.

    Judges must develop a clear plan regarding time management and evaluations. The contest environment can be bustling, and having everything organized will help maintain focus and ensure a smooth judging experience.

    Strategies for Maintaining Objectivity During the Judging Process

    Upholding objectivity is critical for judges during a BBQ contest. To guarantee impartiality, judges should avoid discussing entries with fellow judges until all scores have been submitted. This practice prevents groupthink and ensures that each judge’s opinion is based solely on their own evaluations.

    Another essential strategy is for judges to refrain from eating prior to the contest. Arriving with a neutral palate is vital for accurately assessing the flavor profiles of the entries. Judges may also choose to limit their caffeine intake and avoid consuming strong-flavored foods leading up to the event to keep their taste buds finely tuned.

    Judges benefit from creating a personal rubric based on their understanding of high-quality BBQ. This self-created framework enables them to evaluate entries against their criteria, enhancing consistency. By focusing on their established standards rather than external influences, judges can preserve the integrity of the competition.

    Understanding the Structured Judging Process in BBQ Competitions

    The judging process in a BBQ contest follows a systematic format that ensures fairness and thorough evaluation. Judges typically start by familiarizing themselves with the contest rules and regulations. Once prepared, they engage in the tasting process, carefully sampling each entry.

    The initial step involves tasting each submission. Judges take their time, concentrating on flavor, texture, and aroma. After tasting, they score each entry based on predefined criteria. Judges often share their observations before finalizing scores, adding depth to the evaluation process.

    After scoring, all judges must submit their forms to the contest organizers, who tally the scores. A crucial aspect of this process is adherence to contest guidelines, ensuring that all judges share a common understanding of what constitutes quality BBQ. Following this structured approach fosters transparency and trust among participants and judges alike.

    Effective Strategies for Scoring and Evaluating BBQ Entries

    Identifying Traits That Distinguish Winning BBQ Entries

    A winning BBQ entry typically excels in three primary areas: taste, tenderness, and presentation. Taste is paramount, as judges seek a well-balanced flavor profile that harmonizes smokiness, spice, and the meat’s natural flavors. The ideal entry should surprise and delight the palate, offering a memorable experience that encourages subsequent tastings.

    Tenderness also plays a critical role in a successful entry. Ribs should easily fall off the bone without disintegrating, while brisket should slice cleanly, revealing a juicy interior. The texture must also be pleasing—too tough or overly mushy can quickly disqualify an entry from contention.

    Lastly, presentation significantly impacts the judging process. A visually appealing dish captures attention and can create a favorable bias before the first bite. Elements such as the sheen of the sauce, meat arrangement, and garnishes contribute to the overall impression. A thoughtfully executed presentation can substantially elevate an entry’s score, underscoring the importance of aesthetics in BBQ competitions.

    Utilizing a Scoring Sheet Effectively for Accurate Judgments

    Using a scoring sheet efficiently is fundamental for judges striving for accuracy and consistency. Each scoring sheet typically features defined criteria based on the competition’s guidelines. Judges should familiarize themselves with these specifications beforehand to ensure a smooth evaluation process.

    When filling out a scoring sheet, judges should assign numerical values to various aspects of the BBQ, such as flavor, tenderness, and appearance. For instance, if a dish excels in flavor but falls short in tenderness, the judge may give a high score in one area while assigning a lower rating in another. This nuanced approach enables a fair assessment of each entry.

    Moreover, judges should take care not to rush the scoring process. Reflecting on each entry before finalizing scores ensures that every detail is considered. Regular reviews of the scoring sheets can assist judges in identifying overall trends in their evaluations and maintaining consistency throughout the contest.

    Avoiding Common Scoring Errors in BBQ Judging

    Even seasoned judges can fall victim to common scoring errors that compromise the integrity of the judging process. One frequent oversight is allowing personal bias to influence scores. For example, a judge may favor a particular flavor profile, leading them to award higher scores to entries that align with their preferences while neglecting other quality aspects.

    Inconsistent scoring is another prevalent mistake. Judges must strive for uniformity in their evaluations across all entries. This includes applying the same standards and criteria to each dish to ensure fairness. A judge who gives high marks to one entry should do so consistently for others of similar quality.

    Minor details may also be overlooked during the hectic contest environment. Judges should take their time and be vigilant about observing all aspects of each entry. Maintaining a checklist of criteria can help avoid such oversights, ensuring that every aspect of the BBQ is thoroughly and consistently evaluated.

    Proven Strategies for Judging at Local BBQ Competitions

    Fostering a Consistent Judging Style for Reliability

    Establishing a consistent judging style is vital for maintaining reliability in evaluations. To nurture a personal judging approach, individuals should engage in regular practice. Tasting various BBQ styles and documenting personal scores can help refine one’s palate and enhance awareness of different flavor profiles.

    Additionally, judges should adhere to a structured scoring system. Creating a rubric based on specific criteria allows for consistent evaluations across different contests. This not only aids in personal development but also fosters trust among peers who may notice the consistency in one’s scoring.

    Networking with fellow judges is also beneficial. Participating in discussions about judging philosophies can provide insights into best practices. Sharing experiences and learning from others enhances growth and promotes the adoption of effective strategies, resulting in a more refined judging style.

    Best Practices for Conducting Blind Tastings as a Judge

    Blind tasting is an effective method for ensuring impartiality in the judging process. To implement this practice, judges should remove any identifying labels from the entries to eliminate brand bias. This requires meticulous attention to detail, ensuring that flavors and textures remain the primary focus during the evaluation.

    When conducting blind tastings, judges should also use consistent utensils for sampling. This practice prevents cross-contamination of flavors and allows for a more accurate assessment of each entry. Additionally, it’s advisable for judges to create a comfortable environment that enables them to concentrate solely on the tasting experience.

    To enhance the effectiveness of blind tasting, judges should establish clear evaluation criteria before the contest. Having predetermined standards helps streamline the scoring process and ensures that all judges assess entries uniformly. This strategy not only strengthens the integrity of the judging process but also enriches the overall experience.

    Providing Constructive Feedback as a BBQ Judge

    Delivering constructive feedback is a crucial skill for BBQ judges, as it helps participants improve their craft. Judges should aim to highlight strengths while also identifying areas for enhancement. A balanced approach fosters a supportive environment and encourages skill development among competitors.

    When offering feedback, clarity is essential. Judges should communicate their observations in a manner that is specific and actionable. For example, instead of saying, “The flavor was off,” a judge could specify, “The rub was overly sweet, which masked the natural flavor of the pork.” Such comments provide competitors with clear guidance for improvement.

    Real-world examples illustrate the value of constructive feedback. Judges who invest time in discussing entries post-competition often find participants greatly appreciate their insights. This open communication fosters trust and respect, enhancing the overall competition experience and nurturing lasting relationships within the BBQ community.

    Evaluating Different BBQ Categories with Precision

    Evaluating various BBQ categories requires specialized knowledge of each type. Judges must develop a keen awareness of the unique characteristics inherent in ribs, brisket, pulled pork, and chicken. For example, when judging ribs, the focus should be on balancing smoke and meat flavors, while brisket evaluation should prioritize tenderness and moisture retention.

    Each category also demands familiarity with the relevant cooking techniques. For instance, understanding the difference between low-and-slow smoking and high-temperature grilling equips judges to appreciate the subtleties of texture and flavor. Categories like chicken require judges to assess skin crispness, which can significantly influence the overall score.

    Additionally, judges should consider the cultural implications of each BBQ style. Regional influences may shape not only flavor profiles but also presentation styles. By understanding the broader context surrounding each category, judges can provide more nuanced evaluations that reflect both quality and authenticity.

    The Importance of Teamwork in BBQ Judging

    Teamwork plays a critical role in the BBQ judging process, especially in larger competitions. Collaboration among judges promotes consistency and fairness, as multiple viewpoints can yield a more thorough evaluation of each entry. When judges work in pairs or groups, they can discuss their observations and collectively arrive at a consensus score.

    However, teamwork can also present challenges, such as potential disagreements over scores. To mitigate this, teams should establish clear communication guidelines and agree on evaluation criteria before judging begins. Regular discussions throughout the process can help ensure that all judges are aligned in their assessments, reducing the likelihood of conflict.

    Effective teamwork can enhance the overall judging experience, allowing judges to learn from one another and refine their skills. Furthermore, the camaraderie built during the process fosters a sense of community within the BBQ judging landscape, creating lasting relationships among judges and competitors alike.

    Exploring Different BBQ Styles Across Regions

    Unique Regional BBQ Styles Found Throughout the U.S.

    The United States boasts a diverse array of BBQ styles, each with its own distinctive flavors, techniques, and cultural significance. The most notable regional styles include Texas BBQ, renowned for its beef-centric dishes; Kansas City BBQ, famous for its sweet and tangy sauces; Memphis BBQ, which emphasizes dry rubs; and Carolina BBQ, characterized by vinegar-based sauces.

    Texas BBQ often highlights brisket, where the focus lies on a perfectly smoked cut with a caramelized bark. In contrast, Kansas City BBQ showcases a variety of meats, with a strong emphasis on sauce that strikes a perfect balance between sweetness and tanginess.

    Memphis BBQ adopts a different approach, frequently featuring pulled pork with a dry rub that allows the meat’s natural flavors to shine through. Meanwhile, Carolina BBQ heavily relies on vinegar-based sauces, particularly in pulled pork dishes. Each of these styles presents unique flavor profiles that judges must familiarize themselves with to make informed evaluations.

    Judging Texas BBQ with Precision and Expertise

    Judging Texas BBQ necessitates an appreciation for its unique characteristics, particularly the emphasis on beef, especially brisket. A hallmark of exemplary Texas BBQ is the deep smoky flavor that permeates the meat, achieved through slow smoking over quality wood.

    When assessing Texas BBQ, judges should evaluate the brisket for tenderness, seeking a balance between a melt-in-your-mouth consistency and structural integrity. The bark, or outer layer, should be well-formed and flavorful without being burnt.

    • Flavor: A robust, smoky essence should dominate, complemented by a well-seasoned rub.
    • Tenderness: Brisket should yield effortlessly to a fork without falling apart entirely.
    • Moisture: The interior should be juicy, showcasing proper cooking techniques.
    • Appearance: A visually appealing bark with a glossy finish is essential for scoring.

    Ultimately, Texas BBQ should leave a lasting impression, inviting judges to savor each bite while appreciating the artistry behind the cooking technique.

    Effectively Evaluating Kansas City and Memphis BBQ

    Kansas City and Memphis BBQ offer unique tasting experiences that necessitate specific evaluation techniques. Kansas City BBQ is renowned for its sweet and tangy sauces that play a central role in the overall flavor profile. Judges should assess how well the sauce complements the meat, ensuring it enhances rather than overwhelms the natural flavors.

    Conversely, Memphis BBQ emphasizes the use of dry rubs, allowing the quality of the meat to shine through. Judges should evaluate the evenness of the rub application and how well it penetrates the meat, impacting both flavor and texture.

    When judging Kansas City BBQ, it’s crucial to examine the sauce consistency; a sauce that is too thick may overshadow the meat, while one that is too thin might fail to deliver the desired flavor impact. For Memphis BBQ, judges should focus on the balance between the dry rub and the inherent meat taste, ensuring that each bite is flavorful without being overly seasoned.

    Overall, both styles provide a delightful representation of regional BBQ culture, and judges must be equipped to appreciate the intricacies of each method to deliver fair evaluations.

    The Crucial Role of Appearance in BBQ Judging

    Visual Characteristics That Make a BBQ Entry Stand Out

    A visually appealing BBQ entry is a feast for the eyes, setting the stage for the tasting experience to come. Judges often look for specific attributes that enhance the visual appeal of a dish, as aesthetics can significantly influence their initial impressions.

    To captivate judges, BBQ must display a perfect char and a glossy finish, indicating proper cooking techniques and flavorful marinades. The arrangement of the meat should be intentional, allowing each component to shine without overcrowding the plate.

    • Color: A vibrant and appetizing hue that suggests proper cooking and seasoning.
    • Char: A well-formed crust or bark adds depth to both flavor and appearance.
    • Presentation: An organized and artistic arrangement enhances visual appeal.
    • Garnishes: Thoughtful use of garnishes can elevate the overall aesthetics of the dish.

    Overall, these visual components work together to create a dish that not only looks appealing but also signals the quality of the BBQ within. Judges understand that enticing visuals can heighten anticipation, making them more receptive to the flavors they are about to experience.

    Assessing BBQ Presentation for Maximum Impact

    Evaluating BBQ presentation requires a meticulous examination of how well the dish is arranged and garnished. Judges should look for an organized layout that emphasizes the main components while avoiding overcrowding. An appealing presentation can enhance the overall impression and potentially elevate the score.

    When assessing presentation, judges should also consider the cleanliness of the serving dish. A tidy plate without spills or smudges conveys professionalism and attention to detail, positively reflecting on the entry.

    Moreover, judges should note the use of garnishes. Thoughtfully chosen garnishes can add color and texture, enhancing visual appeal. However, judges must also ensure that garnishes do not overshadow the BBQ itself; the focus should remain on the meat.

    Ultimately, a well-presented BBQ entry captures the eye and excites the palate, underscoring the importance of aesthetics in the judging process.

    The Impact of Color in BBQ Judging

    Color is a critical factor in BBQ judging, serving as an immediate visual cue that can indicate the quality of the cooking process. The right color can reveal vital information—such as doneness and the effectiveness of seasoning—before the first bite even occurs.

    Judges look for rich, appetizing colors that indicate proper cooking techniques. For instance, well-smoked brisket should exhibit a deep mahogany hue with a glossy finish, while ribs should showcase a vibrant red or brown tint with a caramelized glaze. Conversely, dull or overly charred colors may signal a less-than-ideal cooking process.

    Moreover, the application of rubs and sauces can significantly impact color. Judges need to assess whether the color is consistent throughout the entry, as patches of uneven coloring can indicate an uneven cooking process. Careful attention to color and its implications enhances the judge’s ability to evaluate BBQ effectively.

    Assessing Plate Composition for Optimal BBQ Judging

    Plate composition plays an essential role in BBQ judging, as the arrangement and balance of elements can significantly impact judges’ perceptions. A well-composed plate draws the eye and enhances the overall dining experience.

    Judges should examine how different elements are presented alongside the BBQ. The placement of sides, garnishes, and sauces should complement the main dish without overwhelming it. A balanced plate showcases the cook’s attention to detail, reinforcing the quality of the BBQ.

    Additionally, judges should consider the proportion of meat to sides. A plate that is overloaded with sides may detract from the main attraction—the BBQ itself. Proper plate composition not only enhances visual appeal but also communicates the cook’s understanding of the dining experience, making it a vital aspect of BBQ judging.

    Evaluating BBQ Sauces and Rubs for Quality

    Defining Elements of an Exceptional BBQ Sauce

    A quality BBQ sauce is foundational to creating an outstanding BBQ dish. The best sauces achieve a delicate balance between sweetness, acidity, and spice, enhancing the overall flavor without masking the meat’s natural taste. When judging sauces, several key elements must be considered.

    • Flavor balance: A harmonious blend of sweet, tangy, and spicy notes that complements the meat effectively.
    • Texture: The sauce should possess a smooth consistency, allowing it to adhere nicely to the meat.
    • Aroma: The scent should be inviting, with spices and ingredients distinctly recognizable.
    • Finish: A good sauce leaves a lingering taste that invites another bite without being overwhelming.

    Judges should evaluate how well the sauce contributes to the overall dish. A sauce that perfectly complements the meat’s flavor profile can elevate an entry from good to unforgettable. Conversely, a poorly executed sauce can detract from an otherwise excellent BBQ dish, making this evaluation crucial in the judging process.

    Effectively Analyzing BBQ Rubs for Distinction

    Assessing BBQ rubs involves a careful examination of their flavor profile, texture, and adherence to the meat. Rubs often serve as the unsung heroes of BBQ, providing depth and complexity that can enhance the meat to new heights.

    When evaluating a rub, judges should first consider its flavor balance. The combination of spices, herbs, and sugars should create a well-rounded taste that enhances the meat without overpowering it. An effective rub should also have a pleasant texture, allowing it to coat the meat evenly for optimal flavor distribution.

    Moreover, judges must evaluate how well the rub adheres to the meat. A rub that falls off during cooking indicates improper application or technique, which can affect both flavor and presentation. Ultimately, a well-executed rub should harmonize with the BBQ, adding layers of flavor that contribute to an exceptional dining experience.

    The Influence of Sauces and Rubs on Overall Scoring

    Sauces and rubs significantly influence the overall scoring of BBQ entries, as they play a pivotal role in flavor, texture, and presentation. Judges must consider how these elements enhance the quality of the meat and contribute to the overall experience.

    When scoring, judges should assess how well the sauce integrates with the meat. An exemplary BBQ entry will showcase a sauce that complements rather than masks the natural flavors. Similarly, the rub should enhance the meat’s profile, adding depth and character without overwhelming the palate.

    Ultimately, judges recognize that sauces and rubs are integral to the BBQ experience. Their contributions can elevate an entry from mediocre to outstanding, making them essential components in the judging criteria.

    Finalizing Scores and Celebrating BBQ Contest Winners

    Accurately Calculating Final Scores in BBQ Contests

    Calculating final scores in a BBQ contest is a vital process that ensures fairness and accuracy in evaluation. After all judges have submitted their scoring sheets, contest organizers must carefully tabulate the scores to determine the winners.

    Typically, the scoring system involves averaging the scores from all judges for each entry. This method minimizes individual biases and ensures that each entry is assessed based on a collective perspective. Organizers often utilize spreadsheets or specialized software to facilitate the calculations, ensuring both accuracy and efficiency.

    Before announcing final scores, organizers should double-check all calculations and look for any discrepancies. This verification process is essential to maintain the integrity of the contest and ensure that all participants feel fairly evaluated.

    Considerations to Make Prior to Announcing BBQ Contest Winners

    Before announcing the winners, judges should take a moment to collectively review their scores. This step ensures that all judges are aligned in their evaluations and allows for open discussion regarding any discrepancies that may have arisen during the judging process.

    Judges should also consider aspects such as tie-breaking criteria. Establishing clear guidelines for resolving ties before the announcement is crucial, as it prevents confusion and maintains transparency. Open communication among judges fosters a collaborative atmosphere, reinforcing the integrity of the competition.

    Finally, judges should prepare for the announcement by crafting positive and encouraging statements to share with participants. Recognizing the hard work and dedication of all competitors fosters a sense of community and celebrates the spirit of BBQ.

    Celebrating the Winners of a BBQ Contest

    Celebrating winners in a BBQ contest is essential, as it acknowledges the effort and skill that goes into crafting exceptional BBQ. Presenting awards and recognition creates a rewarding experience for contestants while fostering a sense of camaraderie within the BBQ community.

    Judges should provide positive feedback both publicly and privately. Highlighting the strengths of the winning entries encourages participants to continue improving their craft and instills a sense of pride in their achievements. Celebrating in a meaningful way reinforces the notion that BBQ competitions are about more than just winning; they are about passion and connection.

    Moreover, taking the time to celebrate winners creates an uplifting atmosphere that enhances the overall experience. Acknowledging the accomplishments of all participants fosters a supportive community, encouraging future collaborations and friendships within the BBQ world.

    Addressing Ties and Disputes in BBQ Judging with Fairness

    Addressing ties and disputes in BBQ judging requires a clear and fair approach. Establishing specific criteria for breaking ties is essential to uphold integrity within the contest. Judges should agree upon these criteria before the contest begins, ensuring all participants are aware of the rules.

    In the event of a tie, judges should reconvene to discuss the entries in question. This open dialogue allows for a collaborative approach to resolving disputes, ensuring that all perspectives are considered. If necessary, a revote may be conducted to determine the final outcome.

    Transparency throughout this process is vital. Contest organizers should communicate clearly with participants regarding the resolution of ties and disputes, reinforcing the integrity of the judging process. By fostering an atmosphere of fairness and respect, judges can ensure that every participant feels valued and heard.

    Frequently Asked Questions About BBQ Judging

    What Is the Most Critical Criterion in BBQ Judging?

    Taste is generally regarded as the most important aspect of BBQ judging; however, tenderness and appearance also significantly influence the overall evaluation.

    How Do Judges Ensure Fairness During the Contest?

    Judges ensure fairness by adhering to predefined criteria, employing blind tasting techniques, and collaborating to discuss their evaluations.

    What Tools Do Judges Typically Use to Evaluate BBQ?

    Judges commonly utilize scoring sheets, pens, utensils for tasting, and water to cleanse their palates between tastings.

    Can Judges Discuss Entries with Each Other During the Contest?

    Judges should refrain from discussing entries with one another until after all scores have been submitted to maintain objectivity.

    How Important Is Presentation in BBQ Judging?

    Presentation plays a crucial role, as an appealing visual display can enhance the overall impression of the BBQ entry.

    What Role Do Sauces Play in Scoring BBQ?

    Sauces significantly contribute to the overall flavor, texture, and appearance of BBQ, making them essential components in the scoring process.

    How Do Judges Handle Ties in Scoring?

    Judges establish clear criteria for breaking ties before the contest and may engage in discussions or revotes if necessary.

    What Are the Common Mistakes Judges Make?

    Common mistakes include allowing personal bias to influence scores, inconsistent scoring practices, and overlooking minor details during evaluations.

    How Can Someone Become a Certified BBQ Judge?

    To become a certified BBQ judge, individuals should participate in training programs or courses offered by BBQ organizations and engage in practice sessions.

    Why Is Teamwork Important in BBQ Judging?

    Teamwork enhances consistency and fairness in evaluations, allowing judges to share perspectives and ensure that all entries are assessed thoroughly.

    Connect with us on Facebook for more BBQ tips!

    The Article How to Judge a Local BBQ Contest: A Guide appeared first on https://pitmastersarsenal.com

    The Article Judge a Local BBQ Contest: Essential Tips and Guide Was Found On https://limitsofstrategy.com

  • BBQ Marinades vs. Rubs: Your Essential US Guide

    BBQ Marinades vs. Rubs: Your Essential US Guide

    Master BBQ Techniques with Flavor-Packed Marinades and Rubs

    Understanding BBQ Marinades: Their Purpose and Functionality

    A close-up of meat marinating in BBQ sauce with herbs, spices, vinegar, and citrus slices.

    BBQ marinades are liquid blends crafted to deeply infuse meats with a symphony of flavors while boosting tenderness before they hit the grill. These aromatic mixtures combine various components that work synergistically to penetrate the meat’s surface, transforming its taste and texture. Essential ingredients in these marinades commonly include vinegar, citrus juice, oil, <a href="https://limitsofstrategy.com/herbs-for-pasta-dishes-top-picks-in-the-uk/">herbs</a>, and spices. The acidic elements are crucial as they break down proteins, facilitating deeper flavor infusion, resulting in a culinary experience that is tender, juicy, and bursting with flavor.

    • Vinegar (like apple cider and balsamic)
    • Citrus juices (such as lemon, lime, and orange)
    • Oils (like olive oil and vegetable oil)
    • Herbs (including rosemary, thyme, and parsley)
    • Spices (such as paprika, cumin, and black pepper)
    • Sweeteners (like honey, brown sugar, and molasses)
    • Soy sauce or Worcestershire sauce
    • Garlic and onion

    Grasping the specific roles of each ingredient is vital for crafting effective marinades. An ideal equilibrium of acidity and oil enhances flavor while ensuring that the meat achieves the perfect level of tenderness. Employing a marinade can significantly elevate your BBQ experience, especially when complex flavors are crucial for creating an unforgettable meal.

    Exploring the Advantages of BBQ Rubs for Flavor Enhancement

    BBQ rubs are dry seasoning blends that amplify the flavor of meats through surface application. In contrast to marinades, which seep deeply into the meat, rubs create a savory crust during cooking. This blend typically consists of an array of spices, herbs, and occasionally sugars, which allow the meat’s natural flavors to shine while adding an extra layer of zest to every bite.

    The versatility of rubs is noteworthy, as they vary significantly depending on regional traditions and preferences, often encompassing sweet, spicy, and smoky elements. This adaptability makes rubs a favorite among BBQ enthusiasts eager to explore diverse flavor profiles without the lengthy marination process.

    Comparing Marinades and Rubs: Key Differences and Uses

    The principal distinction between marinades and rubs lies in their application methods and their effects on meat. Marinades soak into the meat, promoting deeper flavor penetration and enhancing tenderness, while rubs adhere to the surface, crafting a flavorful crust that enriches texture and taste during cooking.

    When choosing between the two, consider factors such as the meat type, cooking technique, and desired flavor profile. Marinades are particularly suitable for tougher cuts that benefit from tenderization, whereas rubs excel at highlighting the natural flavors of meats without altering their texture. Making an informed choice can significantly enhance your BBQ experience.

    Explore Iconic Marinade Recipes that Define American BBQ Culture

    American BBQ scene with meats marinating in colorful sauces, surrounded by marinade bottles, herbs, and spices.

    Traditional Marinade Recipes to Transform Your American BBQ

    Traditional American marinades have become integral to BBQ culture, showcasing flavors that reflect the nation’s rich culinary diversity. These beloved mixtures frequently feature sweet and tangy notes, with ingredients that resonate with local tastes. Below are three cherished marinade recipes that are sure to impress your guests:

    • Bourbon Marinade: A delightful blend of bourbon, brown sugar, soy sauce, and garlic that delivers a rich and intricate flavor experience.
    • Cola Marinade: Utilizes cola for its sweetness and acidity, combined with Worcestershire sauce and onion for an unexpected yet delightful twist.
    • Mustard Marinade: A zesty concoction of yellow mustard, apple cider vinegar, and spices that adds a bold flavor kick to your meats.

    These marinades not only elevate flavor but also aid in tenderizing meats. The balance of sweetness and acidity is particularly prized in American BBQ, complementing the smoky flavors developed during cooking.

    How Do Marinades Influence Meat Texture?

    Marinades play a crucial role in modifying the texture of meat, primarily due to their acidic components. Ingredients like vinegar, citrus juice, and yogurt contain natural enzymes and acids that break down proteins in the meat. This process results in a softer and more tender texture, significantly enhancing the overall dining experience.

    The science behind this tenderization is compelling; the acids disrupt the protein structure, enabling moisture retention during cooking. Moreover, longer marinating periods can yield even more tender results. However, caution is warranted; excessive marinating, particularly in highly acidic mixtures, can lead to a mushy texture. Striking the right balance is essential to maximize the benefits of marinades.

    Identifying the Most Effective Ingredients for Marinades

    A still life of marinade ingredients including vinegar, citrus, yogurt, oils, herbs, and sweeteners on a rustic table.

    The efficacy of a marinade greatly depends on its ingredients, with certain components proving particularly beneficial for both flavor enhancement and tenderness. Acids are essential for breaking down protein fibers; commonly utilized acids include vinegar, citrus juices, and yogurt. Oils also play a critical role, providing moisture and aiding in flavor penetration within the meat.

    Flavor enhancers like herbs and spices are equally important. Fresh or dried herbs, including rosemary, thyme, and oregano, can significantly elevate the overall taste. Additionally, sweeteners such as honey or brown sugar can help balance acidity and create a caramelized finish when grilled.

    To craft a well-rounded marinade, consider combining:

    • Acid (vinegar or citrus juice)
    • Oil (olive or canola oil)
    • Herbs (basil, cilantro, or parsley)
    • Spices (cumin, coriander, or paprika)
    • Sweeteners (honey or maple syrup)
    • Salt (to enhance overall flavor)
    • Garlic or onion for added depth

    Experimenting with various combinations will yield unique flavors tailored to different meats, allowing for culinary creativity and exploration.

    Insights from BBQ Experts: Marinades and Rubs Explained

    BBQ Experts’ Strategies for Choosing Between Marinades and Rubs

    The decision to utilize a marinade or a rub often hinges on the type of meat, the cooking method, and the desired flavor profile. Experts assess the cuts of meat and their unique characteristics, including tenderness and fat content, before making their choice. For example, tougher cuts like brisket benefit from marinating to tenderize the meat, while more delicate cuts like chicken may only require a rub to enhance their inherent flavors.

    Real-world examples underscore this decision-making process. A BBQ pitmaster might opt to marinate pork shoulder overnight in a citrus-based mixture to break down connective tissues, ensuring a juicy and flavorful outcome when smoked. Conversely, for ribs, a dry rub featuring brown sugar and spices may be preferred to create a caramelized crust during grilling.

    Ultimately, the choice between marinades and rubs is informed by an understanding of each meat’s unique characteristics and the desired final outcome, enabling BBQ enthusiasts to customize their approach for maximum flavor impact.

    Essential Best Practices for Applying Marinades

    Applying marinades effectively is key to achieving the desired flavor and tenderness in meat. One best practice involves ensuring even coverage. Utilize a resealable plastic bag or a shallow dish to guarantee that the marinade fully envelops the meat, ensuring every part is exposed to the aromatic mixture.

    Timing is another critical aspect; marinating for too short a duration may result in insufficient flavor penetration, while excessive marination can lead to undesirable mushiness. A general guideline suggests marinating chicken for 30 minutes to 2 hours, whereas tougher cuts of beef or pork can benefit from overnight marination.

    Additionally, consider reserving some marinade before it comes into contact with raw meat for later use as a baste or sauce. This practice enhances flavor complexity while minimizing the risk of bacterial contamination. Regularly turning the meat during marination can also help achieve uniform flavor distribution, leading to a more satisfying BBQ experience.

    Enhancing BBQ Flavor Profiles with Rubs

    Rubs serve as a fantastic way to elevate BBQ flavor profiles by creating a savory crust on the meat, enriching the overall experience through a process known as caramelization. When meat is cooked at high temperatures, the sugars and spices in the rub caramelize, forming a flavorful exterior that beautifully contrasts with the tender interior.

    Applying a rub requires more than just sprinkling it on; massaging it into the meat ensures proper adherence. This technique allows the flavors to meld with the meat’s surface. It’s essential to apply rubs well in advance to allow flavors to penetrate; ideally, rubs should rest on the meat for at least 30 minutes before cooking, although longer periods yield deeper flavor absorption.

    Expert insights suggest that balancing sweetness and spice in rubs can significantly influence the final taste. A well-crafted rub should include a mix of ingredients that complement the specific meat; sweet elements like brown sugar can enhance the richness of pork, while spicy components like cayenne can amplify the flavor of beef.

    The Interaction of Marinades and Rubs with Various Cooking Techniques

    The interaction between marinades and rubs with different cooking techniques is crucial in determining the final outcome of BBQ dishes. Various methods, such as grilling, smoking, or roasting, can influence how flavors develop and are absorbed by the meat.

    When grilling, high heat rapidly caramelizes the sugars in rubs, resulting in a delightful crust. However, for marinades, the cooking method should be adjusted to prevent burning. For instance, marinated meats may benefit from indirect grilling, where they are cooked away from direct flames, allowing the marinade’s flavors to develop without charring.

    Smoking presents another opportunity for flavor enhancement. When meats are marinated and then smoked, the deep, smoky flavors can penetrate the meat, complementing the marinade’s profile. For optimal results, experts recommend marinating meats like brisket or ribs before smoking them for extended periods, allowing the flavors to meld beautifully.

    Roasting allows both marinades and rubs to flourish, as the dry heat creates a wonderful crust while enabling the interior flavors to develop. The key is to closely monitor cooking time and temperature to ensure that the meat remains tender and juicy, regardless of the chosen method.

    Diverse Regional Variations of BBQ Rubs Across the United States

    Key Characteristics of Southern BBQ Rubs

    Southern BBQ rubs are celebrated for their bold and vibrant flavors, often characterized by a blend of paprika, cayenne, and brown sugar. This combination reflects the region’s penchant for hearty, flavorful dishes that tantalize the palate. Southern-style rubs typically feature sweet and spicy profiles, making them ideal for meats like ribs and pulled pork.

    The inclusion of vital ingredients like kosher salt and black pepper provides a robust flavor foundation, while the addition of cayenne pepper introduces a kick that balances the sweetness of brown sugar. This equilibrium is especially important when cooking over indirect heat, allowing the spices to develop fully without overwhelming the meat.

    Regional variations may also incorporate unique elements, such as mustard powder or dried herbs, which can impart an earthy depth to the mix. Southern BBQ enthusiasts frequently experiment with these ingredients, crafting family recipes that reflect local culinary traditions and heritage.

    What Sets Western BBQ Rubs Apart?

    Western BBQ rubs are distinguished by their use of unique ingredients like coffee or ancho chiles, imparting a flavor profile that sets them apart from other regional styles. The addition of coffee grounds, for instance, can provide a rich, earthy flavor that complements the natural smokiness of grilled meats.

    Ancho chiles, known for their mild heat and sweet undertones, can enhance the complexity of Western-style rubs. These ingredients reflect the diverse culinary influences found in the Western United States, where BBQ traditions have evolved to embrace a wider array of tastes and flavors.

    Western rubs often feature a spice blend that includes smoked paprika, garlic powder, and onion powder, creating a complex flavor profile that resonates with BBQ lovers. The emphasis on unique ingredients makes Western rubs a favorite choice for experimenting with various types of meat, from beef brisket to smoked chicken.

    Identifying the Hallmarks of Northeastern Rubs

    Northeastern BBQ rubs are recognized for their subtle flavors, typically featuring fresh herbs and lighter spices compared to their Southern and Western counterparts. Common ingredients include rosemary, thyme, and sage, providing a fragrant backdrop that enhances the inherent flavors of the meat without overshadowing them.

    This approach aligns well with the cooking styles prevalent in the Northeastern states, where grilling and indirect cooking are commonly employed methods. Rubs from this region often incorporate elements like apple cider vinegar or maple syrup, introducing a sweet-tart contrast that brightens the overall flavor.

    Northeastern BBQ enthusiasts often utilize locally available herbs, resulting in unique blends that can vary significantly from one cook to another. The emphasis on fresh, seasonal ingredients contributes to a lighter, more aromatic BBQ experience that resonates with the region’s culinary ethos.

    Understanding the Unique Features of Midwestern BBQ Rubs

    Midwestern rubs are characterized by a balanced blend of sweet and savory flavors, making them well-suited for the hearty cuisine for which the region is known. Common ingredients include garlic powder, black pepper, and a hint of brown sugar, crafting a flavor profile that complements dishes such as ribs and brisket.

    The focus on sweetness in Midwestern rubs often leads to caramelization during cooking, enhancing both the visual appeal and taste of the meat. This region’s BBQ culture also embraces local ingredients, such as cornmeal or even beer, to create distinctive rubs that reflect the area’s agricultural heritage.

    Midwestern BBQ enthusiasts frequently experiment with variations of their rubs, incorporating different spice blends to achieve personalized flavors. The ability to adapt and modify these core ingredients allows for a wide array of unique tastes, making Midwestern rubs a versatile choice for BBQ lovers.

    Optimal Cooking Techniques for Utilizing Marinades and Rubs

    Best Cooking Methods for Preparing Marinated Meats

    Marinated meats can be prepared using various cooking techniques, each impacting the final flavor and tenderness in unique ways. Grilling is one of the most favored methods, allowing the marinade’s flavors to caramelize while forming an enticing crust on the surface. It’s crucial to monitor the heat during grilling to prevent burning the marinade, particularly if it contains sugars.

    Smoking is another excellent method for marinated meats, as the low and slow cooking approach allows for deep flavor infusion. The smoke beautifully complements the marinade, creating a rich, complex flavor profile. For optimal results, select tougher cuts of meat that benefit from extended cooking times, such as brisket or pork shoulder.

    Roasting is equally effective, especially for whole cuts like chicken or pork loin. Marinating before roasting can yield juicy, flavorful results. The high oven heat caramelizes the marinade, creating a delicious crust while ensuring the interior remains moist and tender.

    Regardless of the cooking method selected, allowing sufficient time for the marinade to work its magic is crucial. Ultimately, balancing time and temperature is vital for achieving the perfect texture and flavor.

    Achieving a Perfect Crust with Rubs

    Creating the ideal crust with rubs is a vital aspect of BBQ that enhances both texture and flavor. The technique of application is essential—rubs should be applied generously and massaged into the meat to ensure an even coating. This process allows the spices to adhere and develop during cooking, forming a delightful crust.

    Cooking at the correct temperature also plays a critical role in achieving a well-defined crust. For optimal results, start with direct heat, particularly for steaks and chops. This method enables the sugars in the rub to caramelize quickly, producing a crispy exterior.

    After a brief sear, switch to indirect heat to finish cooking the meat without burning the rub. Monitoring the internal temperature is crucial to avoid overcooking, which can lead to dryness. The combination of high heat for caramelization followed by lower heat for cooking creates a perfect balance, yielding a delightful crust while maintaining moisture within the meat.

    Combining Marinades and Rubs for Maximum Flavor

    Utilizing both marinades and rubs can elevate BBQ to new heights, enhancing flavor complexity and tenderness. Begin by marinating the meat for several hours or overnight, depending on the cut. Following marination, pat the meat dry to eliminate excess liquid, which aids the rub in adhering better. Next, apply the rub generously, ensuring even distribution across the surface.

    Timing is crucial when employing both techniques. Apply the rub just before cooking to maximize flavor impact while preventing it from becoming soggy. The dual flavor layers created through this method can lead to a more satisfying and rich BBQ experience.

    Moreover, consider experimenting with different flavor profiles; reflect on the specific characteristics of the meat and how they interact with your selected marinade and rub combination. The possibilities are endless, allowing for creativity in the pursuit of the ultimate BBQ experience.

    Maximizing Flavor through Marinade and Rub Timing

    Timing is a critical consideration when utilizing marinades and rubs, as it can significantly influence the final flavor profile. For marinades, the soaking duration is vital—too short may lead to insufficient flavor, while excessively long can result in an undesirable texture. Aim for specific time frames based on the type of meat; chicken may need 30 minutes to two hours, while beef or pork can benefit from overnight marination.

    Once the marination period concludes, apply the rub immediately before cooking to ensure that the flavors remain vibrant and do not become diluted. This timing allows the spices to form a crust as they cook, enhancing the overall flavor experience.

    Another tip is to allow the meat to rest for a few minutes after cooking. This resting period helps the juices redistribute, enhancing juiciness and ensuring a flavorful bite. The combination of proper marinade time, thoughtful rub application, and resting results in BBQ that delights the senses.

    Proven Strategies for Mastering BBQ Marinades and Rubs

    Effectively Experimenting with Marinades and Rubs

    Experimentation is a vital component of mastering BBQ, particularly regarding marinades and rubs. Start by selecting a foundational recipe for either a marinade or rub, and then modify it to suit your taste preferences. For marinades, consider experimenting with varying the acid (choosing between vinegar, citrus, or even yogurt) or introducing new herbs and spices.

    For rubs, think about the balance between sweet and savory. Adjust the levels of sugar or spice to cater to your palate. Explore incorporating unique elements, such as local spices or herbs, to develop a signature blend. Keep track of your modifications for future reference, noting which combinations yield the best outcomes.

    Additionally, don’t hesitate to experiment with different meats. A marinade that works wonders on chicken might not yield the same results on beef, and vice versa. Use each experience as a learning opportunity to deepen your understanding of how flavors interact with various proteins.

    The Advantages of Using Both Marinades and Rubs

    Leveraging both marinades and rubs can significantly enhance the overall BBQ experience, maximizing flavor and tenderness. Marinades provide deep flavor penetration and tenderize the meat, while rubs create a flavorful crust that heightens texture and taste during cooking.

    Combining these two techniques allows for a layered flavor profile that is both complex and satisfying. The interaction between the marinade and rub can create a unique taste experience that exceeds the sum of its parts. For instance, marinating chicken in a citrus-based mixture followed by a herbed rub can create a delightful balance of brightness and depth.

    Moreover, using both techniques can help achieve consistency in BBQ results. The more flavors introduced, the less likely any single element will dominate the dish, providing a well-rounded flavor experience that appeals to a wide range of palates.

    Professionals’ Approach to Balancing Flavor with Marinades and Rubs

    BBQ professionals excel at balancing flavor through careful consideration of the strength and duration of marinades, alongside the composition of rubs. They understand that successful flavor balancing lies in layering tastes without overshadowing the meat’s natural qualities.

    When selecting a marinade, professionals often opt for a base that complements the meat’s flavor profile while incorporating elements that enhance tenderness. For example, a robust marinade for beef may include soy sauce and garlic, while a lighter marinade for chicken might focus on citrus and herbs.

    Similarly, the composition of rubs is critical. Professionals frequently strike a balance between sweet, savory, and spicy components, tailoring the blend to suit the specific meat and cooking method. By adjusting the ratios of sugar, salt, and spices, they can create harmonious seasoning that elevates the dish without masking its inherent flavors.

    This nuanced approach to flavor balancing defines professional BBQ, ensuring that each dish showcases the best attributes of the meat while providing a memorable dining experience.

    Health and Safety Practices for Marinades and Rubs

    Essential Food Safety Guidelines for Marinades

    Food safety is paramount when working with marinades, as improper handling can lead to harmful bacterial growth. Adhere to these essential guidelines to ensure safe marination practices:

    • Always marinate meat in the refrigerator to prevent bacterial growth.
    • Avoid reusing marinades that have come into contact with raw meat.
    • Utilize a separate container for basting or serving to prevent cross-contamination.
    • Ensure that any unused marinade is stored in a clean, airtight container if not used immediately.
    • Marinate for appropriate durations based on the type of meat to prevent texture degradation.

    Following these guidelines will help guarantee a safe and enjoyable BBQ experience, preventing foodborne illnesses. Prioritizing food safety is vital for maintaining the integrity of your cooking practices and enhancing the enjoyment of your dishes.

    Proper Storage Techniques for Rubs

    Proper storage of rubs is essential for preserving their freshness and flavor over time. Rubs should be kept in airtight containers to prevent exposure to air, which can degrade the quality of the spices. A cool, dry place is ideal for storage, away from direct sunlight that can also impact flavor.

    Consider labeling your containers with the date they were made to monitor freshness. Most rubs maintain their optimal flavor for several months, but their potency can diminish over time. Regularly check for any signs of moisture or clumping, as these can indicate spoilage.

    For the best results, consider creating smaller batches of rubs that can be used within a few months, ensuring you always have a fresh and flavorful blend on hand for your BBQ endeavors.

    Nutritional Considerations for Marinades and Rubs

    While marinades and rubs can significantly enhance BBQ flavor, it’s crucial to consider their nutritional impact. Many marinades contain added sugars, sodium, and calories, which can affect the overall nutritional profile of the dish. For those aiming to maintain a healthier diet, moderation is key.

    When crafting marinades or rubs, consider using lower-sodium soy sauce, natural sweeteners like honey or agave, or even omitting added sugars altogether. Focusing on fresh herbs and spices can provide robust flavor without unnecessary calories or sodium.

    Additionally, being mindful of portion sizes can help balance flavors without compromising health. By making informed ingredient choices, BBQ enthusiasts can enjoy delicious meals while being conscious of dietary goals.

    Matching Marinades and Rubs with Various Meats

    Optimal Marinades for Beef

    Beef, renowned for its robust flavor, pairs exceptionally well with marinades featuring bold ingredients. Marinades that include soy sauce, garlic, and Worcestershire sauce are particularly effective, as the umami notes enhance the meat’s natural richness. Acids like vinegar or citrus juice play a crucial role in tenderizing tougher cuts, making them more enjoyable to eat.

    A classic marinade for beef could blend soy sauce, minced garlic, ginger, and a splash of red wine vinegar. This mixture not only adds depth of flavor but also aids in breaking down proteins, resulting in a tender and juicy outcome.

    Different cuts of beef may benefit from varied marinade types. For instance, a skirt steak might require a quick marinade to enhance its flavor without overpowering it, while a brisket could soak in a marinade overnight for maximum tenderness. Tailoring the marinade to the specific cut is essential for achieving the best results.

    Choosing Ideal Rubs for Pork

    When selecting rubs for pork, focusing on sweet and spicy elements that complement its natural flavors is crucial. Ingredients like brown sugar, paprika, and cayenne pepper work harmoniously to create a balanced rub that enhances the overall taste.

    A popular rub for pork might combine brown sugar, smoked paprika, garlic powder, and black pepper. This blend highlights the sweetness of the pork while providing a bit of heat, creating a flavorful crust that caramelizes beautifully during cooking.

    Different cuts of pork can also dictate the choice of rubs. For instance, a rubbed pork tenderloin might benefit from a more herbaceous approach, using rosemary and thyme, while ribs can shine with a spicier blend. Understanding the characteristics of the specific cut is key to selecting the right rub for maximum flavor enhancement.

    Best Marinades and Rubs for Chicken

    Chicken is incredibly versatile and can be enhanced by a variety of marinades and rubs. Marinades with citrus-based mixtures, such as lemon or lime juice combined with olive oil, garlic, and herbs, work effectively to impart flavor while tenderizing the meat.

    For a flavorful chicken rub, consider seasonings like paprika, garlic powder, and dried oregano, which create a delightful crust that develops during cooking. This balance allows the natural flavors of the chicken to shine through while adding depth.

    When selecting marinades and rubs, consider the cooking method. For grilled chicken, a marinade can add moisture, while a dry rub is ideal for roasting or baking. Experimenting with different combinations will yield unique flavors, making chicken a favorite canvas for BBQ enthusiasts.

    Enhancing Lamb Flavor with Marinades

    Lamb is a richly flavored meat that pairs beautifully with marinades featuring strong elements like rosemary, garlic, and lemon juice. These ingredients perfectly complement lamb’s robust taste while also providing a tenderizing effect, making them ideal for cuts such as leg of lamb or lamb chops.

    A marinade that combines olive oil, crushed garlic, chopped rosemary, and lemon juice can work wonders. The acidity of the lemon helps break down the meat’s fibers, resulting in a tender bite while the herbs infuse their aromatic qualities.

    When working with lamb, considering the cooking method is also essential. Grilling lamb can enhance the smoky flavors, while roasting can bring out a different depth. Effectively utilizing marinades allows BBQ lovers to explore the rich, complex flavors that lamb offers.

    Selecting the Right Rubs for Seafood

    Seafood requires a more delicate approach when it comes to rubs, focusing on light, aromatic herbs that enhance natural flavors without overpowering them. Rubs featuring ingredients like dill, lemon zest, and garlic work exceptionally well for fish and shellfish.

    A simple rub for salmon could include lemon zest, fresh dill, and a touch of sea salt. This combination highlights the fish’s succulence while providing a fresh, zesty finish. For shellfish, a blend of smoked paprika and garlic powder can add depth while still allowing the inherent flavors to shine through.

    The key to rubs for seafood is to keep them light and fresh. Overly heavy or spicy rubs can mask delicate flavors, so it’s important to select ingredients that complement rather than overpower seafood’s natural taste.

    Elevate Your BBQ Skills with Advanced Techniques for Marinades and Rubs

    Steps to Refine Your BBQ Skills Over Time

    Perfecting your BBQ skills involves practice, experimentation, and a deeper understanding of marinades and rubs. Start by mastering the fundamentals, then gradually introduce new ingredients and techniques into your cooking repertoire. Utilize resources like cookbooks, online tutorials, and local BBQ competitions to broaden your knowledge and skills.

    Engaging with fellow BBQ enthusiasts can also provide invaluable insights, as sharing experiences fosters growth and creativity. The key is to stay open to learning and adapting, allowing you to refine your skills and elevate your BBQ game continually.

    Over time, developing a personal style and signature flavors will bolster your confidence and enjoyment of the BBQ process. Remember, the journey of mastering BBQ is as important as the final result.

    Key Takeaways for BBQ Enthusiasts

    For BBQ enthusiasts, the key takeaways from exploring marinades and rubs include understanding the significance of flavor balance, the impact of cooking techniques, and the versatility of these approaches. Recognizing how different ingredients interact with various meats can lead to more satisfying results and an elevated BBQ experience.

    Experimenting with diverse combinations of marinades and rubs fosters creativity and personalization, making each BBQ session unique. Additionally, prioritizing food safety and proper ingredient storage will help ensure a successful cooking outcome.

    Embrace the diversity of BBQ culture, and don’t hesitate to explore regional variations and techniques. The world of BBQ is vast, and there’s always something new to learn and integrate into your culinary journey.

    Finding More Resources for BBQ Techniques

    Numerous resources are available for those looking to delve deeper into BBQ techniques, ranging from books to online platforms. Seek out reputable cookbooks that focus on BBQ, particularly those authored by seasoned pitmasters who share their expertise and recipes.

    Online communities, forums, and social media groups dedicated to BBQ provide platforms for sharing tips, techniques, and personal experiences. Participating in local BBQ competitions or cooking classes can also enhance your skills while enabling you to connect with others who share your passion.

    Additionally, many cooking websites and blogs offer a wealth of information on BBQ methods, marinades, and rubs, making them valuable resources for enthusiasts at all skill levels.

    Frequently Asked Questions About BBQ Marinades and Rubs

    What is the most effective way to marinate meat?

    The most effective way to marinate meat is to ensure even coverage using a resealable plastic bag or a shallow dish, allowing it to soak in the refrigerator for the appropriate length of time based on the type of meat.

    Can rubs be effectively used on vegetables?

    Absolutely, rubs can enhance the flavor of vegetables. Applying a light coating of oil along with a generous sprinkle of your favorite rub can make grilled or roasted vegetables incredibly flavorful.

    How long should chicken be marinated for optimal results?

    Chicken should be marinated for at least 30 minutes and can be soaked for up to 2 hours for optimal flavor and tenderness, depending on the marinade’s acidity.

    Are marinades safe to reuse after marinating meat?

    No, marinades should not be reused after coming into contact with raw meat, as they can harbor harmful bacteria. Always discard used marinades to ensure food safety.

    What happens if meat is marinated for too long?

    If meat is marinated for too long, especially in acidic mixtures, it can turn mushy and lose its desirable texture. It’s essential to follow recommended marinating times for the best outcomes.

    How can I enhance the flavor of grilled vegetables effectively?

    To enhance the flavor of grilled vegetables, consider using a marinade or rub that incorporates herbs, spices, and a bit of acidity. Allow the vegetables to soak in the mixture for a brief period before grilling.

    What are some common pitfalls when using rubs?

    Common mistakes with rubs include not applying enough seasoning, failing to massage the rub into the meat, or using a rub on meats that don’t complement the flavors. Experimenting with various combinations can help avoid these pitfalls.

    How can I assess if my marinade is effective?

    An effective marinade will result in tender meat with a rich flavor profile. After marinating, the meat should taste significantly more flavorful compared to unseasoned meat.

    Are there any health benefits to using marinades and rubs?

    Using marinades and rubs can enhance flavor without the need for excessive fats or sauces, promoting healthier cooking methods. Additionally, incorporating herbs and spices can provide nutritional benefits.

    Can I create my own unique marinades and rubs?

    Absolutely! Crafting your own marinades and rubs allows for personalization and creativity. Start with a basic recipe and modify it with your favorite flavors and ingredients for unique results.

    Connect with us on Facebook for more BBQ tips!

    The Article Understanding BBQ Marinades vs. Rubs: A US Guide appeared first on https://pitmastersarsenal.com

    The Article BBQ Marinades vs. Rubs: The Ultimate US Guide Was Found On https://limitsofstrategy.com

  • Smart Ovens: Elevate Your Modern Cooking Skills

    Smart Ovens: Elevate Your Modern Cooking Skills

    Maximize Your Culinary Skills with Innovative Smart Ovens

    Understanding the Functionality and Benefits of Smart Ovens

    How to Cook with Smart Ovens: A modern kitchen with a smart oven connected to a smartphone, cooking various dishes with precision.

    Smart ovens represent a groundbreaking evolution in cooking appliances, seamlessly blending advanced technology with traditional cooking methods to significantly improve culinary efficiency and accuracy. These state-of-the-art devices come equipped with Wi-Fi connectivity, allowing users to remotely manage their cooking via smartphone applications or voice controls. With a variety of sophisticated features, smart ovens often include pre-programmed cooking settings tailored for different cuisines, making it easy for even the most inexperienced cooks to achieve restaurant-quality meals effortlessly. By offering unparalleled convenience and precision, smart ovens have become essential in modern kitchens, empowering users to enhance their cooking prowess with ease.

    The appeal of smart ovens lies in their remarkable multifunctionality. Not only do they streamline the cooking process, but they also elevate it. Imagine being able to preheat your oven while grocery shopping or adjusting its settings from the comfort of your couch. This unparalleled level of control redefines traditional cooking practices, making them more accessible and effective for everyone—from busy professionals to passionate home chefs. Engaging with your oven in real-time opens up a new realm of culinary creativity and convenience that was previously unimaginable, making cooking an enjoyable and stress-free experience.

    Explore the Extensive Benefits of Incorporating Smart Ovens

    The benefits of integrating smart ovens into your daily cooking routine are vast and varied. A primary advantage is the accurate temperature control, which ensures consistent cooking results essential for dishes that require specific heat levels. This precision not only enhances food quality but also improves safety by minimizing the risk of overcooking or undercooking. The smart oven’s ability to maintain ideal cooking conditions fosters a more reliable culinary experience, allowing even the most intricate recipes to shine brilliantly.

    Time-saving features present another significant advantage. Many smart ovens come equipped with programmable settings, enabling users to set cooking durations and temperatures ahead of time. This functionality is particularly advantageous for individuals with hectic schedules, freeing up time for other important activities while guaranteeing a delicious meal is ready at the end of the day. Furthermore, numerous smart ovens can be monitored remotely, allowing users to check on their dishes without being confined to the kitchen, thus enhancing flexibility and convenience.

    Additionally, smart ovens cater to an extensive array of cooking styles and dishes, from baking and roasting to air frying and dehydrating. This remarkable versatility opens up countless culinary possibilities, empowering home cooks to experiment and hone their skills in innovative ways. The ability to diversify cooking techniques not only encourages creativity but also inspires cooks to explore new flavors and textures in their meals, transforming the cooking experience into a delightful adventure.

    Explore the Variety of Smart Oven Models Available Today

    When delving into the realm of smart ovens, you will discover various models, each tailored to meet specific kitchen requirements and culinary preferences. Countertop models are especially popular due to their user-friendly design and portability. These compact appliances can be easily placed on any kitchen surface, making them ideal for smaller spaces or for those who prefer not to install built-in units. Many countertop smart ovens come with advanced features, such as pre-programmed cooking modes and app connectivity, enhancing their usability and accessibility.

    Built-in units offer a more permanent culinary solution, integrating seamlessly into kitchen cabinetry to create a sleek, modern aesthetic. These ovens typically feature larger capacities and additional functionalities, such as steam cooking or convection options, which broaden the range of cooking techniques available, ultimately elevating the entire kitchen experience.

    Combination ovens represent yet another innovative option, merging multiple cooking functions into a single appliance. These versatile units often combine convection, microwave, and sometimes air-frying capabilities, making them incredibly beneficial for those looking to maximize kitchen efficiency. The ability to prepare various dishes without needing multiple devices simplifies cooking and inspires culinary exploration, allowing for an enjoyable and creative cooking experience.

    Transforming the Cooking Experience with Smart Ovens

    A modern kitchen with a smart oven showing a recipe app, surrounded by diverse ingredients and tools.

    Smart ovens significantly enhance the overall cooking experience by merging innovative features with user-friendly designs. One notable characteristic is the integration of recipe applications that offer step-by-step cooking guidance, allowing users to navigate complex recipes with confidence and ease. Many smart ovens come preloaded with a diverse collection of recipes, and users can also download additional options to explore exciting culinary territories. This access to a variety of recipes stimulates creativity and encourages users to experiment with new ingredients and techniques, enhancing their overall culinary journey.

    The addition of voice control functionality is another revolutionary feature, enabling users to operate their ovens hands-free. This capability is invaluable during food preparation when your hands may be busy with chopping or mixing. With simple voice commands, you can preheat the oven or adjust settings, ensuring a smooth and uninterrupted cooking process. This advancement not only streamlines the cooking experience but also adds a layer of convenience that enhances kitchen productivity, making the entire process more enjoyable.

    Moreover, smart ovens provide automatic cooking adjustments that assess the cooking environment and make real-time modifications for optimal results. Whether you’re baking a soufflé or roasting a chicken, these intelligent ovens help ensure your dishes are perfectly cooked every time, minimizing guesswork and boosting your confidence in your culinary skills. This level of sophistication equips home chefs with the necessary tools to tackle even the most challenging recipes with assurance and ease.

    Essential Maintenance Practices for Smart Ovens

    Proper maintenance and care of smart ovens are crucial for ensuring their longevity and optimal performance. Regular cleaning is vital; most smart ovens feature self-cleaning functions that simplify this task. However, manual cleaning remains important to maintain the appliance’s pristine condition. It is essential to adhere to the manufacturer’s cleaning guidelines to prevent damage to sensitive components and to ensure the oven continues to operate effectively.

    Another critical maintenance aspect is keeping the oven’s software updated. Smart ovens frequently receive firmware updates aimed at enhancing performance and introducing new features. Staying current with these updates ensures your appliance remains fully functional and operates as intended. Additionally, be attentive to any filters that may need replacement, as neglecting this can impact performance and energy efficiency.

    Moreover, it’s important to routinely inspect the oven’s seals and gaskets to ensure they are in good condition. Any wear or deterioration can lead to heat loss, compromising cooking efficiency and increasing energy consumption. By implementing these essential maintenance practices, users can ensure their smart ovens provide reliable service for years to come, enabling consistent culinary success and satisfaction.

    How Smart Ovens Utilize Innovative Technology

    Understanding the Cutting-Edge Technology Behind Smart Ovens

    Smart ovens leverage advanced technology that integrates sensors, algorithms, and connectivity features to create a seamless cooking experience. Central to this technology are several key components that work in harmony to facilitate precise cooking:

    • Sensors: These devices monitor the internal cooking temperature and adjust settings as necessary for accurate cooking.
    • Wi-Fi Connectivity: This feature allows users to control and monitor the oven remotely via smartphone applications, enabling adjustments from virtually anywhere in the home.
    • Algorithms: Sophisticated algorithms calculate cooking times and temperatures based on specific recipes or cooking modes, ensuring optimal results with every dish.
    • Smart Home Integration: Many smart ovens can connect with other smart home devices, creating a cohesive kitchen ecosystem that enhances overall functionality and ease of use.

    The real-time monitoring capabilities of smart ovens guarantee that food is cooked evenly and efficiently. For example, if the oven detects temperature fluctuations, it can automatically adjust heat output to maintain a consistent cooking environment. This level of precision is critical for achieving perfect results, especially for delicate recipes like soufflés or pastries, where even minor variations can lead to disappointing outcomes.

    Furthermore, the inclusion of smartphone applications allows users to access a wealth of resources right at their fingertips. From recipe suggestions to cooking advice, these applications can significantly enhance the cooking experience, making it more engaging and less intimidating for home cooks. This integration of technology and culinary expertise empowers users to explore new cooking methods and expand their culinary horizons, making cooking a delightful and creative endeavor.

    Efficiently Connecting and Controlling Your Smart Oven

    Connecting and controlling a smart oven generally involves a straightforward process that begins with downloading the manufacturer’s app on your smartphone. After installation, you will need to create an account, which usually requires basic information such as your email address and password. The next step is pairing your oven with your home network, typically done through the app’s Wi-Fi settings, where you select your oven from a list of available devices.

    Once connected, users can control a wide array of settings, from preheating the oven to adjusting cooking times and temperatures, all from their mobile devices. Many smart ovens also send notifications to your phone, alerting you when your food is ready or if any issues arise that require your attention. This ability to stay connected enhances the cooking experience, allowing for a more flexible approach to meal preparation, making it easier to juggle various tasks in the kitchen.

    Additionally, some models come equipped with voice control capabilities that integrate with popular virtual assistants. This functionality allows users to operate their ovens using simple voice commands. For instance, you might say, “Preheat the oven to 180 degrees,” and the oven will respond accordingly. Such hands-free operation is particularly beneficial when multitasking in the kitchen, making the cooking process more efficient and enjoyable.

    Key Features to Consider When Choosing a Smart Oven

    When selecting a smart oven, it’s vital to evaluate various features that can significantly enhance your cooking experience. Here are some important aspects to consider:

    • Wi-Fi Connectivity: Ensure the oven can connect to your home network for remote control and monitoring.
    • Preset Cooking Programs: Look for ovens that offer a diverse range of preset options for different types of dishes, simplifying the cooking process and ensuring perfect results.
    • Voice Control Compatibility: Choose models that are compatible with smart home assistants for hands-free operation, enhancing convenience.
    • Integration with Other Smart Devices: Consider ovens that can communicate with other smart appliances, such as refrigerators or cooktops, for a cohesive cooking experience that streamlines meal preparation.

    These features not only enhance the cooking experience but also help achieve consistent results. For instance, preset cooking programs eliminate the guesswork of cooking times and temperatures, which is particularly beneficial for those less experienced in the kitchen.

    Moreover, voice control compatibility can be a game-changer for multitasking cooks. You can ask your oven to adjust temperatures or cooking times while you’re busy preparing ingredients. Furthermore, the integration with other smart devices can create a connected kitchen, streamlining your cooking process and making meal preparation more cohesive and enjoyable.

    Discover the Numerous Advantages of Using a Smart Oven

    Incorporating a smart oven into your culinary routine brings forth a multitude of benefits. One notable advantage is the significant improvement in time efficiency. Smart ovens can drastically reduce cooking times by optimizing heating, often eliminating the need for preheating altogether. This efficiency is especially valuable for busy households where every minute counts, enabling quicker, hassle-free meal preparation that fits seamlessly into your lifestyle.

    Another essential advantage is enhanced cooking precision. With advanced sensors and algorithms, smart ovens ensure meticulous temperature control, guaranteeing that your dishes are perfectly cooked every single time. This level of accuracy is particularly advantageous for complex recipes that require precise conditions, such as baking bread or preparing delicate pastries that demand utmost attention to detail.

    Smart ovens also offer unparalleled convenience with features such as remote control and automated cooking programs. Imagine being able to initiate dinner preparations from your office or scheduling your oven to cook while you’re out running errands. This level of connectivity and control allows for a flexible cooking schedule, making it easier to prepare meals around your life rather than the other way around.

    Finally, many smart ovens promote energy efficiency. By optimizing cooking times and minimizing unnecessary heating, these appliances can significantly reduce energy consumption. This not only benefits the environment but can also translate into cost savings on your electricity bills—a win-win for both you and the planet.

    Best Practices for Maintaining and Caring for Your Smart Oven

    Maintaining a smart oven is crucial for ensuring its longevity and optimal performance. Regular cleaning is foundational. Most smart ovens are equipped with self-cleaning modes, but manual cleaning is often necessary to keep the appliance in peak condition. Use gentle, non-abrasive cleaners and follow the manufacturer’s instructions for the best results, avoiding any damage to the oven’s surfaces.

    In addition to routine cleaning, staying up to date with software upgrades is essential. Manufacturers frequently release updates that enhance functionality and performance, so it is vital to maintain current software. These updates often introduce new features or improve energy efficiency settings, contributing to a better overall cooking experience.

    Another critical maintenance aspect involves checking and replacing any filters or seals. Many smart ovens come equipped with filters designed to capture grease and food particles, which can degrade performance if neglected. Regularly inspecting these components and replacing them as needed will ensure that your oven operates at peak efficiency and continues to perform reliably over time.

    Lastly, always consult the manufacturer’s guidelines for troubleshooting common issues, such as connectivity problems or error codes. Familiarizing yourself with these resources empowers you to address any challenges that may arise, ensuring that you can enjoy your smart oven for many years to come.

    Expert Strategies to Maximize Your Cooking with Smart Ovens

    Professional Recommendations for Culinary Excellence

    Professional chefs have wholeheartedly embraced smart ovens for their precision and consistency, making them indispensable tools in both commercial and home kitchens. One key recommendation from culinary experts is to utilize the preset cooking programs for common dishes. These settings are specifically engineered to optimize cooking times and temperatures, ensuring that items like roasted vegetables or baked goods turn out perfectly every time, eliminating guesswork and enhancing confidence in the kitchen.

    Moreover, chefs encourage experimenting with custom settings to further refine recipes. The versatility of smart ovens allows users to adjust cooking modes, tailoring their dishes to personal preferences. For example, if a recipe calls for baking but you desire a crispier finish, switching to convection mode can help achieve that ideal texture, elevating your dish to a new level.

    Another invaluable tip is to leverage real-time monitoring features. Many smart ovens permit users to track cooking progress via smartphone applications, offering alerts when it’s time to check or adjust the dish. This eliminates guesswork and enables cooks to focus on other tasks without constantly monitoring the oven. Additionally, professional chefs suggest maintaining a cooking journal to document adjustments and outcomes, which can help refine techniques and enhance culinary skills over time.

    How Smart Ovens Can Enhance Your Cooking Skills

    Smart ovens are transformative tools that can significantly elevate your cooking abilities. They provide precise control over cooking conditions, allowing users to experiment and learn in ways that traditional ovens cannot facilitate. The ability to monitor temperature and cooking progress in real-time fosters a deeper understanding of culinary techniques, empowering cooks to achieve professional results at home.

    Furthermore, many smart ovens come equipped with educational resources via their companion apps. These resources can include video tutorials, cooking tips, and interactive guides to help users navigate complex recipes. By offering this level of support, smart ovens can demystify cooking processes and encourage users to try new techniques and cuisines, enriching their culinary journeys.

    For instance, a smart oven can guide you through the intricacies of sous vide cooking, a method many home cooks find daunting. By following the app’s instructions, users can confidently create perfectly cooked meats and vegetables that retain their moisture and flavor. This hands-on learning experience not only builds confidence but also unveils a world of culinary opportunities that may have seemed out of reach.

    Additionally, many smart ovens include features that allow for adapting traditional recipes. Users can evolve family favorites by incorporating modern cooking techniques, expanding their culinary repertoire while preserving cherished traditions and flavors.

    Emerging Trends Shaping the Future of Smart Oven Technology

    The field of smart oven technology is rapidly advancing, with several exciting trends emerging that enhance functionality and user experience. One significant trend is the increasing integration with smart home ecosystems. As more households adopt smart home devices, the ability of smart ovens to connect and communicate with other appliances, such as refrigerators or dishwashers, is becoming increasingly crucial for a coordinated kitchen setup that maximizes efficiency.

    Another notable trend is the enhancement of voice control capabilities. Many smart ovens now support advanced voice commands through popular virtual assistants, allowing users to operate their devices entirely hands-free. This feature is particularly beneficial in fast-paced kitchens where multitasking is essential, enabling seamless cooking without interruptions.

    AI-driven cooking assistants are also gaining traction in smart oven technology. These intelligent assistants can analyze available ingredients and suggest recipes, making meal planning easier and more spontaneous. This functionality not only simplifies the cooking process but also encourages users to experiment with new ingredients and dishes, fostering culinary creativity and exploration.

    Lastly, a heightened focus on energy efficiency is evident in smart oven designs. Many manufacturers prioritize eco-friendly features, such as energy-saving modes and improved insulation. As sustainability becomes increasingly important to consumers, smart ovens that emphasize energy conservation are likely to gain popularity, reflecting a shift towards more responsible cooking practices that benefit both users and the environment.

    Creative Cooking with Smart Ovens: Recipes and Techniques

    Beginner-Friendly Recipes to Get You Started

    For those new to cooking with smart ovens, starting with straightforward recipes can build both confidence and familiarity with the appliance. Some beginner-friendly dishes that can be easily prepared include roasted vegetables, baked chicken, and simple casseroles. These recipes often feature preset cooking modes, making it easy for novice cooks to achieve delicious outcomes without extensive experience.

    For example, roasted vegetables can be prepared by chopping your choice of seasonal veggies, tossing them in olive oil, salt, and pepper, and selecting the roasting preset on your oven. The smart oven will manage the rest, ensuring even cooking and caramelization for a delectable side dish that impresses every time.

    Baked chicken is another uncomplicated recipe that promises impressive results. By seasoning the chicken and placing it in the oven, users can select a preset program designed for poultry, which automatically sets the temperature and time. This guarantees perfectly cooked chicken, removing the anxiety of undercooking or overcooking.

    Casseroles also make excellent starting dishes. Many smart ovens come equipped with bake or casserole settings that optimize cooking conditions for layered dishes. These recipes typically require minimal preparation and can be assembled swiftly, making them ideal for busy weeknight dinners when time is of the essence.

    Here’s a helpful list of other beginner-friendly recipes for smart ovens:

    • Stuffed bell peppers
    • Sheet pan fajitas
    • Pasta bake
    • Fruit crumbles
    • Garlic bread
    • Oven-baked fish fillets

    Embracing these easy recipes not only simplifies the cooking experience but also reinforces the advantages of using a smart oven, helping users gain confidence in their culinary skills and inspiring them to explore more complex dishes in the future.

    Advanced Cooking Techniques to Master with Smart Ovens

    For those eager to elevate their cooking skills, smart ovens unlock a world of advanced cooking techniques that require precise temperature control and timing. One standout method is sous vide cooking, which involves sealing food in vacuum bags and cooking it at low temperatures for extended periods. Smart ovens equipped with sous-vide settings can automate this process, ensuring perfect doneness without the risk of overcooking, yielding tender, flavorful results that will impress every guest.

    Another advanced technique is dehydration, ideal for creating snacks like dried fruits or jerky. Smart ovens with dehydration modes allow users to precisely control temperature and time, ensuring food retains its nutrients while achieving the desired texture without additives or preservatives. This method is excellent for health-conscious individuals looking to create nutritious snacks at home.

    Proofing bread is another area where smart ovens excel. With the right settings, users can create a warm, controlled environment that promotes yeast activity, resulting in beautifully risen dough. This level of precision is essential for achieving the perfect loaf, and many smart ovens include dedicated proofing modes designed specifically for this purpose, making bread-making accessible to everyone.

    Lastly, air frying has become a popular choice for those seeking to enjoy crispy foods without excess oil. Smart ovens equipped with air-frying capabilities circulate hot air around the food, mimicking the frying process while significantly reducing fat. This technique is perfect for preparing everything from crispy vegetables to golden-brown chicken wings without the guilt of traditional frying.

    Adapting Traditional Recipes for Smart Ovens

    Adapting traditional recipes for smart ovens can be a rewarding process, allowing cooks to optimize their favorite dishes for modern technology. The key to successful adaptation is understanding the appliance’s capabilities and adjusting cooking times and temperatures accordingly to achieve the best results.

    Begin by consulting the smart oven’s app or manual for guidance on cooking times and temperature settings for specific dishes. Many smart oven apps offer conversion guides that help translate traditional recipes into formats compatible with smart ovens, ensuring optimal cooking results while harnessing the appliance’s full potential.

    For instance, if a traditional recipe calls for a conventional oven temperature of 180 degrees Celsius, the smart oven may suggest a slightly lower temperature for more even heating. Additionally, cooking times may need to be adjusted, as smart ovens often cook more efficiently than traditional ovens, ensuring food is cooked perfectly without being overdone.

    It’s also beneficial to experiment with the various cooking modes available on smart ovens. For example, if a recipe specifies baking, you might find that switching to convection mode yields a better final product, especially for pastries and baked goods that benefit from even heat distribution, resulting in superior texture and flavor.

    Finally, don’t hesitate to document your adaptations in a cooking journal. Noting changes and outcomes can help you refine your techniques and create a repertoire of successful smart oven recipes tailored to your preferences and cooking style, expanding your culinary expertise over time.

    The Benefits of Cooking with Smart Ovens

    Maximizing Time and Energy Efficiency in Your Cooking

    Smart ovens excel in both time and energy efficiency, making them a valuable addition to any kitchen. One of the most significant ways they save time is through optimized cooking processes. Many smart ovens eliminate the need for preheating by quickly reaching the desired temperature, allowing users to commence meal preparations without delay. This feature is particularly advantageous for busy families or individuals with hectic schedules, as it streamlines the cooking process and reduces overall kitchen time, enabling more meals to be prepared with less hassle.

    Additionally, the precise temperature control of smart ovens contributes to energy efficiency. By maintaining cooking temperatures consistently, these ovens reduce energy consumption and lower utility bills, making them environmentally friendly choices. This not only benefits the environment but also helps users feel positive about their cooking choices and their impact on energy use, making smart ovens a sustainable option.

    Smart ovens often come equipped with energy-saving modes that automatically adjust cooking times and temperatures based on the dish being prepared. This further enhances their efficiency, optimizing resource use and minimizing waste. Ultimately, the time and energy savings provided by smart ovens make them a practical choice for contemporary households seeking to simplify their cooking routine while being conscious of their environmental footprint.

    Achieving Enhanced Cooking Results with Smart Ovens

    One of the standout benefits of cooking with smart ovens is the enhanced quality of the final dish. With their precise temperature control and advanced cooking algorithms, smart ovens ensure consistent results that can be challenging to replicate with traditional ovens. This accuracy is particularly crucial for recipes that require exact conditions, such as baking or delicate roasting, where even minor deviations can lead to unsatisfactory outcomes.

    The even heat distribution of smart ovens eliminates hot spots that can cause uneven cooking. By ensuring that every portion of the dish receives uniform heat, these ovens help achieve optimal textures and flavors. Whether you’re baking a cake, roasting vegetables, or preparing a rack of lamb, the superior results attained through smart ovens can elevate your culinary creations to a new level of excellence, impressing friends and family alike.

    Moreover, many smart ovens feature steam cooking and convection baking, further improving the quality of the dishes they prepare. These methods can impart moisture and create a desirable crust or texture, making even simple recipes taste gourmet. Consequently, home cooks can enjoy restaurant-quality meals from the comfort of their kitchens, making smart ovens a worthwhile investment for any culinary enthusiast.

    Transforming Your Kitchen Experience with Smart Ovens

    Smart ovens have the potential to transform your kitchen experience by offering convenience, control, and connectivity that traditional ovens cannot match. One of the primary improvements is the ability to monitor and control your oven remotely. With a smartphone app, users can preheat their ovens while commuting home from work, ensuring dinner is ready upon arrival. This flexibility fosters a more relaxed cooking environment, as meal preparation can be easily coordinated with other commitments, enhancing the overall cooking experience.

    Furthermore, integrating smart technology simplifies meal planning and preparation. Many smart ovens come equipped with built-in recipe databases that guide users through the cooking process, offering step-by-step instructions and suggesting optimal cooking settings. This functionality can help demystify complex recipes, making them more accessible to home cooks of all skill levels, thus encouraging culinary experimentation and creativity.

    Additionally, smart ovens typically feature user-friendly interfaces that streamline operation. Touchscreen controls and programmable settings allow for quick adjustments without the hassle of searching for knobs or buttons, making the cooking process more intuitive and enjoyable. With these advancements, smart ovens can enhance not only the quality of the food prepared but also the overall cooking experience, fostering a deeper appreciation for the art of cooking and the joy of creating delicious meals.

    Versatile Cooking Options Offered by Smart Ovens

    The versatility of smart ovens stands out as one of their most significant advantages, empowering users to explore various cooking methods and techniques without the need for multiple appliances. Smart ovens can handle a wide array of cooking tasks, including baking, roasting, air frying, dehydrating, and even sous vide cooking. This multifaceted capability makes them an excellent choice for anyone looking to expand their culinary repertoire and experiment with new cooking styles.

    For instance, baking is a common application for smart ovens. Many models come equipped with specific baking modes that optimize heat distribution, ensuring baked goods rise and brown evenly for perfect results that delight every palate. Roasting is another area where smart ovens excel, as their precise temperature control allows for juicy meats and perfectly caramelized vegetables, enhancing the overall taste and presentation of each dish.

    Air frying has gained popularity due to its ability to create crispy, fried textures with significantly less oil. Smart ovens with air-frying capabilities can deliver the same satisfying crunch without the added calories and mess of traditional frying, allowing for healthier meal options without sacrificing taste, making it easier to enjoy indulgent meals guilt-free.

    Dehydrating is another technique that smart ovens can perform, enabling users to preserve fruits and vegetables or make healthy snacks like homemade jerky. This versatility opens the door for creative experimentation in the kitchen, empowering users to try new recipes and techniques with ease and confidence, ultimately enhancing their culinary skills.

    Ensuring Safety with User-Friendly Features in Smart Ovens

    Safety is a paramount consideration in modern kitchen design, and smart ovens feature a range of features that enhance user safety. One key safety feature is automatic shut-off, which turns off the oven after a specified period of inactivity, preventing accidental overheating and potential fire hazards. This feature is particularly beneficial for busy households where distractions can lead to forgetfulness and safety concerns, providing peace of mind while cooking.

    Another essential safety feature is the child lock, which prevents young children from accidentally turning on the oven or changing settings. This peace of mind allows parents to encourage their children’s involvement in the kitchen without worrying about safety risks, fostering a positive cooking environment for everyone.

    Many smart ovens also incorporate user-friendly interfaces, often featuring intuitive touch displays that simplify operation. These interfaces allow users to easily navigate through settings, choose cooking modes, and program cooking times with just a few taps, making it accessible for cooks of all experience levels. This combination of safety features and user-friendly designs contributes to a more efficient and enjoyable cooking environment, allowing home cooks to focus on creating delicious meals without unnecessary stress.

    Effective Cleaning and Maintenance Strategies for Smart Ovens

    Practical Cleaning and Maintenance Practices

    Effective maintenance is crucial for ensuring the longevity and optimal performance of your smart oven. Regular cleaning is one of the most significant aspects of maintenance, as it prevents the build-up of food residues and grease, which can affect performance and cause unpleasant odors. Most smart ovens feature self-cleaning modes that make deep cleaning convenient. However, manual cleaning is also essential and should utilize gentle, non-abrasive materials to avoid damaging surfaces and components.

    It’s advisable to clean the oven after each use to maintain hygiene and performance. A damp cloth can often suffice for wiping down the interior, while any stubborn stains may require a baking soda paste for effective removal. Pay close attention to the oven’s door and seal, as these areas are prone to residue build-up and need regular maintenance to ensure they function properly.

    In addition to regular cleaning, it’s essential to perform routine checks on your oven’s components, including any removable parts and filters. Some smart ovens have grease filters that need to be cleaned or replaced periodically to maintain proper airflow and efficiency. Always refer to the manufacturer’s guidelines for cleaning specific components to ensure the longevity of your appliance.

    Troubleshooting Common Challenges with Smart Ovens

    Even the most advanced smart ovens may encounter issues from time to time. Common problems include connectivity issues, error codes, and uneven cooking. To effectively troubleshoot these challenges, start by consulting the user manual or the manufacturer’s website, which often provides detailed solutions for common issues.

    For connectivity issues, ensure your Wi-Fi network is operational and that your oven is within range of the router. Restarting the oven or your network router can sometimes resolve these issues and restore functionality, allowing you to continue your cooking activities uninterrupted.

    If you encounter error codes displayed on the oven’s interface, refer to the manual for specific troubleshooting steps for that code. Many manufacturers also offer customer support services to help users resolve more complex issues that may arise, ensuring that you can maintain a seamless cooking experience.

    Uneven cooking can often be attributed to improper placement of food within the oven or an uncalibrated temperature setting. Ensure the oven racks are correctly positioned and avoid overcrowding, which can impede airflow. If uneven cooking persists, consider recalibrating the oven according to the manufacturer’s instructions to ensure optimal performance.

    Extending the Lifespan of Your Smart Oven

    Extending the life of your smart oven involves a combination of regular maintenance, careful usage, and adherence to manufacturer guidelines. One of the most effective ways to prolong your oven’s lifespan is to follow the recommended cleaning schedule, keeping both the interior and exterior free of grease and food particles.

    Avoid using harsh chemicals or abrasive materials during cleaning, as these can damage the oven’s surfaces. Instead, opt for gentle, non-toxic cleaners and soft cloths. Additionally, be mindful of how you use your oven; avoid overloading it or placing heavy items that could cause damage, as this can impact both efficiency and longevity.

    Regularly check and replace any filters or seals as recommended by the manufacturer. These components are crucial for maintaining optimal performance and efficiency. Furthermore, keep the oven’s software up to date, as manufacturers frequently release updates that improve functionality and fix bugs, thereby enhancing the user experience.

    Finally, ensure your oven is well-ventilated and placed in a location that is not exposed to moisture or extreme temperatures. Proper care and attention can significantly extend the life of your smart oven, allowing you to enjoy its benefits for many years to come without the need for premature replacements.

    Frequently Asked Questions (FAQs) About Smart Ovens

    What is a smart oven?

    A smart oven is a modern cooking appliance that integrates technology, allowing for remote control, precise cooking, and various automated functions to enhance the cooking experience. These ovens are designed to make cooking easier and more efficient for users, combining convenience with culinary excellence.

    How do I connect my smart oven to Wi-Fi?

    To connect your smart oven to Wi-Fi, download the manufacturer’s app, set up an account, and follow the prompts to connect the oven to your home network. This process usually involves selecting your oven from a list of available devices within the app, allowing for seamless integration into your smart home ecosystem.

    Can I use my smart oven without an app?

    Most smart ovens can be used manually without the app, but you will miss out on remote control features and automated settings designed to enhance your cooking experience. The app often provides valuable resources and functionalities that enrich the cooking process, making it worthwhile to utilize.

    What types of recipes can I cook in a smart oven?

    Smart ovens can handle a wide variety of recipes, including baking, roasting, air frying, steaming, and dehydrating, making them versatile cooking appliances suitable for any kitchen. This adaptability allows users to explore a wide range of culinary techniques and styles, from simple to complex dishes.

    Are smart ovens energy-efficient?

    Yes, smart ovens are designed to be energy-efficient, often reducing cooking times and optimizing heat use, which can lead to lower energy consumption than traditional ovens. This efficiency not only helps the environment but also saves users money on utility bills, making them an eco-friendly choice.

    Do smart ovens have safety features?

    Many smart ovens come equipped with safety features such as automatic shut-off, child locks, and cooking alerts to prevent overheating and ensure safe operation during cooking. These features provide peace of mind while using the appliance, making them a reliable addition to any kitchen.

    How do I clean my smart oven?

    Cleaning your smart oven typically involves using its self-cleaning mode, followed by manual cleaning with non-abrasive cleaners for any stubborn stains or residues that may remain. Regular maintenance is essential to keep the appliance in top condition, ensuring optimal performance over time.

    What should I do if my smart oven won’t connect to Wi-Fi?

    If your smart oven won’t connect to Wi-Fi, check your router, ensure the oven is within range, and restart both the oven and router. Consult the user manual for specific troubleshooting tips to resolve connectivity issues and restore functionality.

    Can I adapt traditional recipes for my smart oven?

    Yes, you can adapt traditional recipes for smart ovens by adjusting cooking times and temperatures based on the appliance’s settings and by consulting any manufacturer-provided conversion guides. This ensures optimal results while utilizing modern technology to enhance your cooking.

    How can I extend the life of my smart oven?

    To extend the life of your smart oven, maintain a regular cleaning schedule, avoid using harsh cleaners, keep software updated, and check filters and seals as per the manufacturer’s guidelines. Proper care can help ensure long-lasting functionality, allowing you to enjoy your smart oven’s benefits for years to come.

    Stay updated with our latest news and tips on our Facebook page!

    The post How to Cook with Smart Ovens: Mastering Modern Kitchen Tech appeared first on https://cookinggods.com

    The Article Smart Ovens: Master Modern Kitchen Cooking Techniques Was Found On https://limitsofstrategy.com

  • Spring Rolls at Home: The Ultimate Guide for Fresh Delights

    Spring Rolls at Home: The Ultimate Guide for Fresh Delights

    Key Ingredients for Crafting Flavorful Fresh Spring Rolls

    Selecting Fresh Vegetables and Aromatic Herbs for Maximum Flavor

    Fresh spring rolls with lettuce, carrots, cucumbers, bell peppers, mint, and coriander on a rustic wooden table.

    Creating delicious and healthy fresh spring rolls at home begins with the careful selection of crisp vegetables. Opt for ingredients like lettuce, carrots, cucumbers, and bell peppers, as each offers a distinct texture and flavor that contributes to the overall dish. Including vibrant herbs such as mint and coriander not only adds a refreshing touch but also enhances the flavor profile of your rolls significantly. Whenever possible, source locally grown and seasonal vegetables, as they tend to provide superior flavor and increased nutritional benefits.

    To elevate your spring roll experience, consider incorporating a colorful array of vegetables that present various textures and colors. For instance, shredded carrots lend a delightful crunch, while cucumber offers a juicy and refreshing bite. Don’t hesitate to experiment with unique ingredients like purple cabbage to create visual intrigue or avocado to introduce a creamy element. The combination of these fresh ingredients not only enhances the dish visually but also results in a deliciously satisfying culinary experience.

    Enhancing Your Spring Rolls with Protein Options

    Including a source of protein in your fresh spring rolls can greatly enhance their substance and nutritional value. Popular protein options include shrimp, tofu, and chicken, each providing unique flavors and textures. Shrimp offers a succulent and slightly sweet taste, while marinated or fried tofu serves as an excellent vegetarian alternative. Grilled chicken can also be seasoned to perfection, adding depth and richness to your rolls.

    Additionally, consider diversifying your protein choices by incorporating items such as tempeh for its nutty flavor or crab meat for an indulgent touch. The versatility of protein sources allows you to cater to various dietary preferences, ensuring that everyone can enjoy your homemade fresh spring rolls, making them a crowd-pleaser at any gathering.

    Finding the Best Rice Paper Wraps for Your Spring Rolls

    Choosing high-quality rice paper wraps is essential for achieving the perfect texture in your spring rolls. The ideal wraps should be pliable yet sturdy, providing a delicate yet reliable casing for your selected ingredients. Brands that utilize premium rice flour typically yield better results, ensuring that the wraps won’t tear easily when filled.

    When shopping for rice paper, look for options that are transparent and come in a variety of sizes. Larger wraps allow for more fillings, while smaller ones are ideal for bite-sized portions. Practicing how to handle these wraps is crucial for mastering the rolling technique, as understanding their behavior when soaked in water is key. A well-executed rice paper wrap can elevate your spring rolls into a culinary delight, making the effort worthwhile.

    Creating Delicious Dipping Sauces to Complement Your Spring Rolls

    Fresh spring rolls with an assortment of dipping sauces: peanut, spicy hoisin, and light lime-fish sauce.

    No fresh spring roll is complete without the ideal dipping sauce to enhance its flavors. Prepare a variety of sauces, including classic peanut sauce, hoisin sauce, and sweet chili sauce, each bringing a unique taste experience to your dish. For example, peanut sauce combines creamy peanut butter with soy sauce and lime juice to create a rich, nutty accompaniment that pairs beautifully with the fresh ingredients in your rolls.

    Exploring different dipping sauces can significantly enrich your spring roll experience. A spicy hoisin sauce blended with sriracha provides an exciting burst of flavor, while a light sauce made from lime, fish sauce, and sugar offers a refreshing contrast. These sauces not only deepen the dish’s flavor but also allow for customization based on individual taste preferences, transforming every meal into a unique culinary adventure.

    Adding Noodles for Extra Texture and Satisfaction

    Incorporating thin rice noodles or vermicelli noodles into your fresh spring rolls adds another layer of texture, making them more filling and satisfying. These noodles are typically soft and slippery, allowing them to blend seamlessly with the other ingredients. Moreover, they absorb the flavors of the sauces and seasonings, enhancing the overall taste of the rolls.

    To prepare the noodles, cook them according to the package instructions, then rinse them under cold water to halt the cooking process. This step is crucial for maintaining their integrity and preventing them from becoming mushy. Including noodles in your spring rolls not only creates a more substantial dish but also makes it a perfect light meal or appetizing starter for any gathering.

    Techniques for Preparing Ingredients for Optimal Quality

    How to Slice Vegetables Thinly for Ideal Texture?

    A chef slices thin vegetables with a knife and mandoline on a cutting board, using a peeler and towel.

    Mastering the technique of slicing vegetables thinly is vital for creating visually appealing and well-balanced fresh spring rolls. Using a sharp knife or a mandoline slicer allows you to achieve uniform slices that not only enhance the visual appeal but also provide a harmonious texture when combined with other ingredients. Aim for slices that are approximately the thickness of a coin, ensuring they are thin enough to be pliable without falling apart.

    To slice with precision, ensure you have essential tools at your disposal: a sharp chef’s knife for clean cuts, a mandoline slicer for perfect thickness, a cutting board for stability, a vegetable peeler for creating ribbons, and a kitchen towel to dry the vegetables. Effectively using these tools will streamline your slicing process, enhancing your overall productivity in the kitchen and ensuring that your spring rolls are as visually pleasing as they are delicious.

    Cooking Your Protein to Perfection for Flavorful Spring Rolls

    Properly cooking your chosen protein is essential for maintaining its texture and flavor when added to spring rolls. Whether you choose shrimp, tofu, or chicken, each protein requires specific cooking techniques to achieve the best results. For shrimp, a quick sauté in a hot pan with minimal seasoning will preserve their juiciness. In contrast, tofu should be pan-fried until golden to bring out its flavor.

    When preparing chicken, ensure it is grilled or poached just until cooked through to avoid dryness. Allow your proteins to cool before adding them to the rolls; this step prevents the rice paper from becoming soggy. Properly cooked protein enhances the integrity of the spring roll, ensuring that each bite is both satisfying and bursting with flavor, making your rolls a hit with family and friends.

    How to Soak Rice Paper Wraps for Optimal Use?

    Soaking rice paper wraps correctly is a vital step in the spring roll-making process. Immerse the rice paper in warm water for approximately 5-10 seconds to soften it without making it overly sticky or fragile. Begin by filling a shallow dish with warm water and fully submerge the wrap.

    Once the rice paper begins to soften, remove it from the water and lay it flat on a clean surface, such as a cutting board or countertop. It’s essential to work swiftly because the rice paper continues to soften once removed from the water. A well-soaked wrap should be pliable and easy to handle, allowing you to create tight and secure rolls that hold their shape beautifully.

    Enhancing Flavors by Marinating Ingredients

    Marinating your vegetables and proteins before assembling your spring rolls can significantly elevate their flavor profile. A simple marinade might consist of soy sauce, lime juice, and a hint of honey. Allow your ingredients to soak in the marinade for at least 30 minutes, or even overnight, to infuse them with rich, vibrant flavors. This step is particularly beneficial for tofu, as it absorbs flavors exceptionally well, enhancing its taste in the final dish.

    When marinating vegetables, consider using ingredients that complement the overall flavor of the spring rolls. For example, a splash of rice vinegar can brighten the flavor of cucumbers, while a dash of sesame oil can add depth to carrots. The goal is to create a balanced flavor that enhances the fresh taste of the spring rolls, ensuring that each bite is a delightful experience.

    Proven Techniques for Crafting Fresh Spring Rolls at Home

    Effective Rolling Techniques for Perfectly Formed Spring Rolls

    Mastering the art of rolling spring rolls is crucial for achieving a tight, well-formed roll that doesn’t tear the rice paper. Start by placing your soaked rice paper on a clean surface. Position your ingredients towards the lower third of the wrap, ensuring not to overfill. Begin by folding the bottom of the wrap over the filling, then tuck in the sides as you roll it up tightly. This method helps secure the contents within the wrap while maintaining its structural integrity.

    Practice makes perfect—experiment with different rolling techniques to discover what works best for you. Some individuals prefer the ‘burrito’ style, while others may adopt a more delicate approach. The key is to ensure that the roll is snug without exerting excessive pressure, which could lead to tearing. With time and experience, you will develop an intuitive sense of how tightly to roll your spring rolls for the best results.

    Achieving a Perfect Balance of Flavors in Your Spring Rolls

    Striking an ideal balance of flavors in your fresh spring rolls requires careful ingredient selection and thoughtful combinations. Aim to include elements that offer contrasting tastes, such as sweet, salty, and fresh. For example, pairing sweet mango with savory shrimp creates a delightful contrast, while fresh herbs like mint and coriander contribute brightness and vibrancy to the overall dish.

    To further enrich the flavor profile, consider using complementary sauces as dips. A rich peanut sauce can counterbalance the freshness of the vegetables, while a zesty lime dipping sauce can elevate the overall tasting experience. The goal is to curate a multi-dimensional flavor journey that keeps your palate engaged from the first bite to the last, transforming your meal into a truly memorable experience.

    Presentation Tips for Visually Stunning Spring Rolls

    The visual presentation of your fresh spring rolls significantly influences the enjoyment of the dish. Arrange them attractively on a platter, perhaps in a circular pattern or in elegant stacks, to create visual appeal. Consider using vibrant garnishes like a sprig of mint or a sprinkle of sesame seeds to enhance the dish further. Serving your spring rolls alongside a variety of dipping sauces not only elevates the flavor but also adds an interactive element to the dining experience.

    When serving fresh spring rolls at a gathering, consider sharing dipping sauce recipes or flavor combination tips with your guests. This interaction not only engages your diners but also invites them to create their unique flavor experiences. Ultimately, the goal is to transform your fresh spring rolls into not just a delicious treat but also a feast for the eyes, encouraging everyone to indulge and enjoy.

    How to Select the Freshest Ingredients for Your Spring Rolls?

    Choosing the freshest ingredients is vital for ensuring your spring rolls are bursting with flavor. When selecting vegetables, look for vibrant colors and a crisp texture. Fresh herbs should emit a fragrant aroma and have bright leaves, free from wilting or browning. For proteins, always opt for high-quality options, whether it’s sustainably sourced shrimp or organic tofu, as these choices significantly impact both flavor and health benefits.

    Building a good relationship with local farmers’ markets or trusted grocery stores can enhance your ingredient selection process, as these sources often have a better turnover of produce, ensuring fresher options. By prioritizing freshness and quality, you guarantee that your homemade spring rolls will not only taste better but also be more nutritious, making every bite an immensely satisfying experience.

    Creating Delicious Dipping Sauces to Enhance Your Spring Rolls

    How to Prepare a Classic Peanut Sauce for Your Rolls?

    The classic peanut sauce is an essential accompaniment for any fresh spring roll enthusiast. To create this rich, nutty dipping sauce, begin by blending smooth peanut butter with soy sauce, lime juice, and a touch of sweetness, like honey or maple syrup. The balance of these ingredients yields a sauce that is both creamy and flavorful, perfectly complementing the fresh ingredients in your spring rolls. Feel free to adjust the ratios to find your ideal balance of salty and sweet flavors.

    For an added kick, consider incorporating finely chopped garlic or ginger, both of which introduce depth and complexity to the sauce. Adjusting the thickness of your peanut sauce is also essential; if you prefer a thicker dip, simply reduce the amount of liquid, or for a thinner consistency, add warm water until you reach the desired texture. This versatile sauce can be customized to suit your taste, making it a vital component of your spring roll experience.

    How to Craft a Spicy Hoisin Sauce for Extra Flavor?

    If you enjoy a bit of heat, creating a spicy hoisin sauce is an excellent option to accompany fresh spring rolls. Blend hoisin sauce with sriracha and a splash of water to achieve your desired consistency. The combination of sweet, spicy, and tangy notes provides a complex flavor that pairs beautifully with the freshness of the rolls.

    Feel free to personalize your spicy hoisin sauce by adjusting the spice levels to match your preferences. Adding a squeeze of lime juice can brighten the flavors, while a sprinkle of sesame seeds adds delightful crunch. This sauce not only elevates the taste of your spring rolls but also adds an element of fun and customization for your guests, making each meal more enjoyable.

    What Ingredients Make a Refreshing Dipping Sauce?

    A refreshing dipping sauce can enhance the lightness of spring rolls, making it an ideal complement. Begin with a base of lime juice, which provides acidity and brightness. Add fish sauce for umami depth, and a touch of sugar to balance the acidity. These three ingredients combine to create a light and zesty sauce that beautifully complements the freshness of your rolls.

    Consider adding fresh herbs such as cilantro or basil to infuse an aromatic quality into your sauce. Additionally, finely chopped chili can introduce a hint of heat, further elevating the flavor profile. By utilizing simple, fresh ingredients, you can create a dipping sauce that enhances your spring rolls without overwhelming their delicate flavors, making every bite enjoyable.

    Proper Storage and Reheating Techniques for Fresh Spring Rolls

    Best Practices for Storing Fresh Spring Rolls

    Properly storing fresh spring rolls is essential for maintaining their texture and flavor for later enjoyment. To keep them fresh, place your spring rolls in an airtight container lined with a damp cloth. This method helps retain moisture and prevents the rice paper from drying out. It’s best to consume them within a day for optimal freshness.

    If you’re preparing spring rolls in advance for a gathering, consider storing them separately from the dipping sauces. This prevents the rolls from becoming soggy and ensures a satisfying crunch when served. Additionally, if you lack a suitable container, wrapping the rolls individually in damp paper towels can be a good alternative, ensuring they stay moist and delicious until you’re ready to serve.

    Reheating Techniques to Maintain Texture

    When reheating fresh spring rolls, it’s essential to do so gently to preserve their delicate texture. One effective method is to steam the rolls for a few minutes until heated through. This technique retains moisture and ensures that the rice paper remains pliable and enjoyable, just like when they were freshly made.

    Avoid using a microwave to reheat spring rolls, as this can cause them to become chewy and rubbery. If steaming isn’t an option, consider pan-frying them briefly in a non-stick skillet over low heat, flipping occasionally for even heating. By employing gentle reheating methods, you can enjoy your spring rolls as fresh and delicious as the day they were made, making every bite satisfying.

    Can Fresh Spring Rolls Be Frozen for Future Enjoyment?

    Freezing fresh spring rolls is certainly possible, but it’s important to consider the potential texture changes that may occur upon thawing and reheating. To freeze, arrange the spring rolls in a single layer on a baking sheet and place them in the freezer until firm. Once frozen, transfer them to an airtight container or freezer bag for long-term storage.

    When you’re ready to indulge in your frozen spring rolls, remove them from the freezer and allow them to thaw in the refrigerator overnight. To reheat, steam them or pan-fry gently as mentioned earlier. Keep in mind that the texture of the rice paper may not be as crisp as when freshly made, but the flavors will remain delightful, allowing you to enjoy your creations even after freezing.

    Exciting Variations and Customizations for Your Spring Rolls

    Incorporating Fruits for a Sweet Twist in Your Rolls

    Integrating fruits into your fresh spring rolls can introduce a delightful sweet twist and an unexpected burst of flavor. Fruits such as mango, papaya, or even strawberries pair beautifully with traditional savory ingredients. The natural sweetness of these fruits enhances the overall taste and creates a balanced contrast with other fillings.

    When including fruit in your spring rolls, opt for ripe selections to ensure they positively contribute to the overall flavor. For instance, mango slices can add creaminess, while cucumber provides a satisfying crunch, creating a dynamic texture. Feel free to explore unique combinations—try pairing mango with shrimp or avocado with papaya for a refreshing and vibrant roll. The addition of fruits not only enhances flavor but also adds visual appeal to your dish, making it more enticing.

    Creative Protein Alternatives for Diverse Spring Rolls

    Exploring creative protein alternatives in your fresh spring rolls can diversify your fillings and cater to various dietary preferences. Some excellent options include:

    • Tempeh for a nutty flavor
    • Crab meat for an indulgent option
    • Seitan for a meaty texture
    • Grilled eggplant for a hearty vegetarian choice
    • Chickpeas for a protein-packed option

    These alternatives allow you to personalize your spring rolls based on what you have on hand and your flavor preferences. Experiment with different cooking methods, such as roasting or marinating, to enhance the flavors of your chosen proteins, making your rolls truly unique.

    Using Unique Herbs and Spices for Flavor Enhancement

    Enhancing the flavor profile of your fresh spring rolls can be achieved by incorporating unique herbs and spices. While mint and coriander are traditional favorites, consider experimenting with basil, dill, or lemongrass to introduce new layers of flavor. Each herb brings its distinct character, transforming your spring rolls into a culinary adventure that tantalizes the taste buds.

    In addition to herbs, spices like sesame seeds, crushed peanuts, or even a pinch of curry powder can add depth and complexity. Consider the overarching theme of your spring rolls when selecting these ingredients. For example, Thai basil and lemongrass can create an aromatic experience, while dill and lemon can evoke Mediterranean vibes. The beauty of spring rolls lies in their versatility, allowing you to explore diverse flavor combinations that excite the palate.

    Experimenting with Different Wrappers for Unique Textures

    While rice paper is the traditional choice for spring rolls, experimenting with various wrappers can significantly alter the texture and taste of your rolls. Consider using wheat flour wrappers for a thicker, more indulgent bite, or lettuce leaves for a gluten-free, crunchy alternative. Each wrapper offers unique characteristics, allowing for a personalized spring roll experience tailored to your preferences.

    If you decide to use a different wrapper, be mindful of the cooking methods required. For example, wheat flour wrappers may need to be cooked prior to rolling, while lettuce leaves can simply be filled and rolled. Experimenting with various wrappers can lead to delightful surprises and encourage creativity in your spring roll preparations, resulting in dishes that are as fun to make as they are to eat.

    Research-Backed Benefits of Making Fresh Spring Rolls at Home

    Nutritional Advantages of Homemade Spring Rolls

    Homemade spring rolls can provide numerous nutritional advantages compared to store-bought options, primarily due to the control you have over the ingredients. By choosing fresh vegetables, lean proteins, and wholesome wraps, you can create a nutrient-dense meal packed with vitamins, minerals, and antioxidants. Aim to incorporate a variety of colors and types of vegetables to maximize nutritional benefits and promote overall health.

    To optimize the nutritional value of your spring rolls, consider the following actionable steps:

    • Utilize whole grains instead of refined rice paper.
    • Include a diverse range of vegetables to enhance nutrient intake.
    • Opt for lean proteins or plant-based alternatives.
    • Be mindful of the dipping sauces; choose those made from wholesome ingredients.

    By prioritizing nutrition in your homemade spring rolls, you can enjoy a delicious meal that supports your health and wellbeing, making each bite not just tasty but beneficial.

    How Making Spring Rolls at Home Saves You Money

    Preparing spring rolls at home can be a cost-effective alternative to purchasing them from restaurants or takeout. Not only do you save money by sourcing ingredients in larger quantities, but you also gain the flexibility to control portion sizes and ingredient quality. Buying items like rice paper, vegetables, and proteins in bulk can lead to significant savings over time, making the process economically advantageous.

    Furthermore, cooking at home allows you to customize recipes based on what you already have in your pantry or fridge, minimizing food waste and maximizing your budget. Overall, making spring rolls at home gives you the freedom to enjoy a gourmet experience without breaking the bank, allowing you to indulge in delicious meals on a budget.

    The Environmental Impact of Homemade Meals

    Cooking meals at home, including fresh spring rolls, can have a positive environmental impact. By preparing your dishes, you significantly reduce packaging waste compared to purchasing pre-packaged or takeaway food. Choosing locally sourced ingredients also supports sustainable farming practices and diminishes the carbon footprint associated with food transportation, contributing to a healthier planet.

    Additionally, cooking at home promotes mindful eating and reduces reliance on processed foods, which can contribute to environmental degradation. By prioritizing homemade meals, you not only create delicious dishes but also make choices that align with sustainable eating practices, benefiting both your health and the planet. This approach encourages a more responsible and eco-friendly lifestyle.

    Troubleshooting Common Issues with Spring Rolls

    What Should You Do About Torn Rice Paper?

    Encountering torn rice paper can be frustrating when making fresh spring rolls, but it is manageable with the right techniques. If your rice paper tears during soaking or rolling, remain calm. You can often salvage the situation by using a second piece of rice paper to reinforce the torn area. Overlaying the torn piece with a fresh wrap can provide the necessary support and allow you to continue assembling your rolls.

    To prevent tearing in the future, ensure that you soak the rice paper for the correct duration; over-soaking can weaken the wraps and lead to tearing. Additionally, handle the rice paper gently during assembly and consider laying it flat on a clean, damp surface to minimize friction. With practice, you will learn to manage the rice paper more adeptly, resulting in beautifully rolled spring rolls that are both appealing and delicious.

    What Steps to Take If Your Rolls Are Too Loose?

    If you find your spring rolls are too loose and fall apart easily, it may be due to overfilling or an inadequate rolling technique. To remedy this issue, tighten your rolling technique by applying gentle, even pressure as you roll. Be sure to fold in the sides securely before completing the roll to create a firm package that holds together well.

    In the future, be mindful of portion sizes. A well-balanced filling should provide substance without overwhelming the rice paper. Practicing your rolling technique will also help you develop a better sense of how tightly to roll. With time, you’ll perfect the art of rolling snug, well-formed spring rolls that are easy to handle and enjoyable to eat.

    How to Prevent Soggy Spring Rolls?

    Soggy spring rolls can be disappointing, but preventing this issue is achievable with a few simple strategies. Firstly, ensure that all ingredients are dry before assembling your rolls. Excess moisture from vegetables can seep into the rice paper, leading to sogginess. Consider using a salad spinner to dry leafy greens and wiping down other vegetables before use to eliminate excess water.

    Additionally, pay attention to your rolling technique. Be sure to roll tightly without applying excessive pressure, which can cause the rice paper to tear or break apart. Here are some tips to help prevent soggy spring rolls:

    • Utilize a clean, dry surface for rolling.
    • Keep ingredients at room temperature before assembly.
    • Limit moisture-heavy fillings.
    • Store rolls in a damp cloth to retain moisture without becoming soggy.

    By following these tips, you can enjoy fresh, crisp spring rolls every time you make them, ensuring a delightful texture and flavor that will impress your guests.

    FAQs About Fresh Spring Rolls

    Can I use different types of rice paper wraps in my rolls?

    Absolutely! You can experiment with various types of rice paper wraps or alternatives like wheat flour wrappers or lettuce leaves for unique textures and flavors in your spring rolls.

    How long can I store fresh spring rolls in the refrigerator?

    Fresh spring rolls can be kept in the fridge for up to 1 day, wrapped in a damp cloth and placed in an airtight container to maintain moisture and freshness.

    What sauces pair best with spring rolls?

    Classic pairings include peanut sauce, hoisin sauce, and sweet chili sauce, but feel free to explore other sauces that suit your taste preferences for a unique experience.

    Can I make spring rolls ahead of time for a party?

    Yes, you can prepare spring rolls in advance and store them in the fridge for a few hours or overnight, but they are best enjoyed fresh for optimal flavor and texture.

    Are spring rolls a healthy option?

    Absolutely! Fresh spring rolls can be packed with vegetables, lean proteins, and healthy fats, making them a nutritious and wholesome meal choice for any occasion.

    Can I freeze fresh spring rolls for later use?

    Yes, you can freeze fresh spring rolls, but their texture may change upon thawing. It’s best to steam or pan-fry them for reheating to regain some of their original quality.

    How can I make my spring rolls more flavorful?

    Enhance flavor by marinating your ingredients, using fresh herbs, and pairing them with a variety of dipping sauces to create a rich and exciting taste experience.

    What fillings should I avoid in spring rolls?

    Avoid overly moist ingredients, such as watery fruits or excessive sauces, as they can make the rice paper soggy and unappetizing when assembled.

    How do I know when the rice paper is ready to use?

    Rice paper is ready when it becomes pliable and slightly tacky but not overly sticky. Soak it for just a few seconds in warm water to achieve this desired consistency.

    Can I use cooked vegetables in my spring rolls?

    Yes, cooked vegetables can be used in spring rolls, but ensure they are cooled and dry before assembly to prevent sogginess and maintain the desired texture.

    Connect with us on Facebook!

    The post How to Make Fresh Spring Rolls at Home: A Universal Guide appeared first on https://cookinggods.com

    The Article Fresh Spring Rolls at Home: Your Ultimate Guide Was Found On https://limitsofstrategy.com

  • Grilling Baskets for Vegetables: Essential Tips and Tricks

    Grilling Baskets for Vegetables: Essential Tips and Tricks

    Discover the Incredible Benefits of Utilizing Grilling Baskets for Perfectly Cooked Vegetables

    Understanding Grilling Baskets: Essential Tools for Every Outdoor Chef

    Stainless steel grilling basket with colorful diced vegetables sizzling over a flaming grill outdoors.

    Grilling baskets are expertly designed tools that ensure food is held securely on the grill, significantly reducing the chances of smaller food items slipping through the grates. These baskets are especially advantageous for grilling vegetables, as they promote even cooking while preventing any pieces from falling into the flames. Some key features of grilling baskets include:

    • Diverse Material Options: Crafted from various materials such as stainless steel, non-stick surfaces, and woven wire, each offering unique benefits.
    • Ergonomic Handle Design: Many models come equipped with long handles that provide safe and comfortable handling during grilling sessions.
    • Varied Mesh Sizes: Different mesh sizes cater to a range of food types, from small diced vegetables to larger chunks.
    • Versatile Flexibility: Certain baskets can be closed, creating a secure environment that helps retain marinades and seasonings effectively.
    • Easy Portability: Lightweight and easy to transport, making them ideal for outdoor grilling adventures.

    These baskets not only streamline the grilling process but also enhance the flavor and texture of grilled vegetables, positioning them as indispensable tools for any grilling enthusiast.

    Uncovering the Different Types of Grilling Baskets to Enhance Your Cooking

    The market boasts a wide array of grilling baskets, each tailored to meet specific cooking needs and personal preferences. The categorization of grilling baskets largely depends on their shape, size, and material. Common types include:

    • Flat Baskets: Perfect for grilling sliced or diced vegetables, providing an expansive cooking surface to accommodate a variety of items.
    • Woven Baskets: Ideal for smaller items like cherry tomatoes or diced peppers, ensuring they remain secure and do not fall through the grill grates.
    • Grill Wok: A deep, bowl-shaped basket designed specifically to hold vegetables securely, making it excellent for stir-frying directly on the grill.
    • Skewers and Baskets: Some models integrate skewers into the basket, allowing for effortless flipping and turning of food for even cooking.
    • Multi-level Baskets: These innovative baskets enable grilling multiple types of vegetables simultaneously, maximizing grill space and efficiency.

    Familiarizing yourself with these various types can greatly assist grillers in selecting the perfect basket suited to their preferred grilling methods and the specific vegetables they aim to cook.

    Key Benefits of Using Grilling Baskets for Enhanced Cooking Experience

    Incorporating grilling baskets into your outdoor cooking routine can significantly elevate your grilling experience by providing user-friendly solutions and superior cooking results. Here are the primary benefits:

    • Prevention of Ingredient Loss: Smaller vegetable pieces are far less likely to fall into the flames, ensuring that no ingredients go to waste during the grilling process.
    • Consistent Cooking: Grilling baskets facilitate even heat distribution, yielding perfectly charred vegetables with each use.
    • Flavor Enhancement: The basket helps retain seasonings and marinades close to the food, intensifying flavor absorption during grilling.
    • Convenient Handling: They make the process of turning and flipping vegetables simpler, allowing for easier management on the grill.
    • Healthier Cooking Methods: Grilling vegetables in a basket typically requires less oil, making it a healthier alternative to frying methods.

    These advantages clearly illustrate why grilling baskets are a favored choice for both novice and seasoned grillers alike, transforming the art of grilling into a more enjoyable and efficient endeavor.

    Selecting the Ideal Grilling Basket for Your Cooking Style and Needs

    Stainless steel grilling basket with vegetables over a flaming charcoal grill at a summer barbecue.

    Choosing the Right Material for Durable Grilling Baskets

    The material of a grilling basket is a key factor in determining its durability and overall performance. Common materials include stainless steel and non-stick coatings, each with distinct advantages. Picking the right material can greatly enhance your grilling experience and ensure the longevity of your basket. Here’s a comprehensive breakdown of the pros and cons of various materials:

    • Stainless Steel: Known for its robustness and rust resistance, this material provides excellent heat retention but may require oiling to prevent sticking.
    • Non-stick Coatings: These are easy to clean, allowing food to release effortlessly, although coatings can wear off over time with frequent use.
    • Woven Wire: This material promotes good airflow and heat distribution but may be less durable and more prone to bending compared to others.
    • Cast Iron: Excellent for heat retention and distribution, making it ideal for searing; however, it can be heavy and requires careful maintenance to avoid rust.

    Selecting the right material hinges on your grilling style and how often you intend to use the basket. Investing in a high-quality, durable material will ensure that your grilling basket remains reliable through many seasons of outdoor cooking.

    Determining the Ideal Size of Your Grilling Basket for Optimal Cooking

    Choosing the appropriate size of a grilling basket is critical for effectively accommodating your food. While a larger basket may seem appealing, it can lead to overcrowding, causing uneven cooking. Conversely, a smaller basket may limit the variety of vegetables you can grill at one time. Here are some considerations for size selection:
    – Assess the quantity of food you typically grill at once. If you often cook for a crowd, a larger basket will prove beneficial.
    – Consider the types of vegetables you plan to grill. Larger, denser vegetables might need more space compared to smaller, diced items.
    – Ensure that your basket fits comfortably on your grill without obstructing heat sources or airflow.
    – Reflect on your personal cooking habits. If you enjoy experimenting with a variety of vegetable mixes, a medium to large basket can provide the necessary flexibility.

    Ultimately, selecting the right size of grilling basket enhances your cooking efficiency, ensuring every vegetable receives the attention it needs for perfect grilling results.

    Essential Features to Look for When Selecting a Grilling Basket

    Stainless steel grilling basket with locking mechanism, removable handle, and ventilation holes on a hot grill with vegetables.

    Grilling baskets come equipped with various features that can significantly enhance their functionality and usability. When purchasing a basket, consider the following essential features:

    • Locking Mechanism: Some baskets have a locking mechanism that securely holds food during grilling, preventing spills and messes.
    • Removable Handle: A detachable handle can improve storage convenience and allow better access to the grill while cooking.
    • Ventilation Holes: These holes promote even cooking and help prevent steaming, ensuring that perfect char is achieved.
    • Heat Resistance: Handles and materials should withstand high temperatures without warping or melting during grilling sessions.
    • Dishwasher Safe: Look for baskets that are dishwasher-friendly to simplify cleanup after cooking.

    Evaluating these features will streamline your grilling process and elevate the quality of the meals you prepare outdoors, ensuring a delightful culinary experience.

    Maintaining Your Grilling Basket for Longevity and Performance

    Proper maintenance is essential to significantly extend the lifespan of your grilling basket. Here are key steps to keep your basket in peak condition:
    Clean After Use: Always clean the basket immediately after grilling to prevent food residue from hardening. Use a soft sponge and mild dish soap to wipe it down thoroughly.
    Avoid Abrasive Materials: Steer clear of steel wool or harsh chemicals that can scratch and damage the non-stick coating or stainless steel surface.
    Seasoning: For cast iron baskets, season them with oil after use to prevent rust and maintain their non-stick qualities.
    Proper Storage: Store the basket in a dry area to avoid moisture damage, and avoid stacking heavy items on top of it to maintain its shape.
    Regular Inspections: Periodically check your grilling basket for signs of wear or damage, such as rust, bent wires, or peeling non-stick coating, and replace it if necessary.

    By adhering to these maintenance tips, you can ensure that your grilling basket remains a reliable tool in your outdoor cooking arsenal for many years to come.

    Expert Insights and Recommendations for Top Grilling Baskets

    Insights from Culinary Experts on the Best Grilling Baskets

    Culinary experts frequently provide specific recommendations regarding grilling baskets. According to seasoned chefs and grilling aficionados, some of the finest options on the market are noted for their durability and performance. Real-world examples of expert recommendations include:
    Weber Gourmet BBQ System: This basket is celebrated for its versatility and quality, allowing for secure grilling of vegetables while also accommodating a wok insert for stir-frying.
    Cuisinart Non-Stick Grilling Basket: Praised for its generous capacity and non-stick surface, making it simple to cook a variety of vegetables without the hassle.
    BBQ-Aid Stainless Steel Grill Basket: This option is favored for its exceptional heat retention and easy cleanup, becoming a staple for many professional grillers.
    Outset Cast Iron Grill Basket: Experts commend its ability to retain heat and impart a delightful char to vegetables, perfect for those seeking robust flavors.
    These selections reflect quality and the preferences of professional grillers, making them reliable choices for home cooks eager to achieve that perfect grilled taste.

    Proper Care for Your Grilling Basket to Ensure Optimal Performance

    Effective maintenance is vital for prolonging the life of your grilling basket. Essential steps for cleaning and caring for your basket include:
    Immediate Cleaning: Clean the basket right after use while it’s still warm, as this facilitates the removal of food particles.
    Gentle Scrubbing: Utilize a soft sponge or cloth with warm soapy water to scrub the basket gently, avoiding scrapers that might damage its surface.
    Thorough Drying: After cleaning, ensure that the basket is dried completely to prevent rust and maintain its integrity.
    Storage Suggestions: Store your grilling basket in a cool, dry place. If possible, hang it to prevent any warping.
    Regular Checks: Periodically inspect for wear and tear, especially after extensive use. Address any signs of damage immediately to prolong the basket’s lifespan.
    These practices will guarantee your grilling basket remains in excellent condition, ready for many enjoyable grilling sessions ahead.

    Latest Innovations in Grilling Baskets: What’s New?

    The market for grilling baskets is ever-evolving, with innovative designs and materials emerging to meet modern grilling needs. Recent trends include:
    Eco-Friendly Materials: Many brands are shifting towards sustainable materials that are not only durable but also non-toxic, appealing to health-conscious consumers.
    Smart Grilling Technology: Some new models boast temperature sensors and smart capabilities, allowing for precise cooking control directly from your smartphone.
    Modular Designs: Baskets that can be adjusted or configured for various uses are gaining popularity, enabling grillers to adapt their tools to specific cooking needs quickly.
    Increased Versatility: Many baskets now feature hybrid designs that can accommodate a variety of food types, from vegetables to meats, simplifying outdoor cooking setups.
    Enhanced Safety Features: New designs focus on user safety, with improved handle designs to prevent burns and secure locking mechanisms to hold food securely during cooking.
    Staying informed about these innovations ensures you utilize the best tools for your grilling needs, making each outdoor cooking experience enjoyable and efficient.

    Choosing the Right Grilling Basket Based on Your Unique Cooking Style

    Selecting the perfect grilling basket depends on several factors that align with your cooking style and preferences. When making your selection, consider:
    Food Type: Think about the vegetables you grill most often. If you favor small, delicate items, opt for a basket with a finer mesh for better support.
    Grilling Frequency: If you grill frequently, investing in a higher-quality, durable basket can be advantageous for consistent results.
    Cooking Method: Decide whether you wish to grill vegetables directly over flames or prefer indirect cooking techniques, as certain baskets are better suited for specific methods.
    Ease of Use and Storage: Choose a basket that fits comfortably on your grill, is easy to handle, and can be stored conveniently when not in use.
    Budget Considerations: Determine your budget to find a basket that meets your needs while ensuring quality.
    By thoughtfully considering these factors, you can confidently select a grilling basket that not only meets your grilling expectations but also enhances your culinary creations.

    Essential Features to Focus on When Choosing Grilling Baskets

    Assessing Durability and Material Quality

    The durability of a grilling basket is essential for long-term use and effective grilling. High-quality materials ensure that the basket can withstand high temperatures and the rigors of outdoor cooking. Consider the following factors:
    Material Strength: Stainless steel is often preferred for its resistance to rust and corrosion, while cast iron offers exceptional heat retention and flavor enhancement.
    Construction Quality: Look for well-welded joints and robust handles that can support the weight of heavy vegetables without bending or breaking.
    Heat Resistance: Ensure that all components of the basket can endure high temperatures without warping or melting, particularly handles and coatings.
    Weight Consideration: A heavier basket may be more durable, but ensure it is manageable for your grilling sessions, especially when loaded with food.
    Investing in a durable grilling basket is essential for ensuring it remains a reliable tool in your grilling arsenal, allowing you to cook confidently for years to come.

    Prioritizing Ease of Use and Cleaning for Grilling Baskets

    A grilling basket should be user-friendly and easy to clean, minimizing the effort required after an enjoyable grilling session. Key features that enhance usability include:
    Non-Stick Surfaces: Baskets with non-stick coatings facilitate food release without residue sticking, simplifying the post-grilling cleanup process.
    Ergonomic Handles: Comfortable, heat-resistant handles make the basket easier to maneuver and prevent burns during grilling.
    Washable Materials: Opt for baskets that are dishwasher safe or can be cleaned easily with minimal scrubbing.
    Lightweight Construction: A lighter basket can make it easier to handle, especially when filled with food, enhancing the overall grilling experience.
    Choosing a grilling basket with these features ensures that your cooking remains stress-free and that cleanup is quick and simple, allowing you to focus on enjoying your meal.

    Exploring Versatility and Multi-Purpose Use of Grilling Baskets

    Certain grilling baskets are designed for versatility and can be used for a variety of foods, making them a valuable addition to your grilling setup. Baskets that offer multi-purpose functionality include:
    Adjustable Compartments: Baskets with sections allow you to grill different types of vegetables or meats simultaneously, maximizing your grill space.
    Hybrid Designs: Some baskets are crafted for both grilling and oven use, providing flexibility in cooking methods and environments.
    Stir-Fry Capability: Baskets that can double as woks or frying pans enable users to experiment with stir-frying vegetables right on the grill.
    Multi-Level Grilling: Baskets that offer two or more levels for grilling allow for cooking various ingredients at different temperatures.
    Choosing a versatile basket enhances your cooking options, making it simpler to experiment and enjoy a diverse range of grilled dishes from the same tool.

    Understanding Size and Capacity Requirements for Grilling Baskets

    Selecting the right size and capacity of a grilling basket is crucial for effectively accommodating different quantities of food. Considerations for selecting the most suitable fit for your grilling needs include:
    Cooking for Groups: If you frequently host gatherings, a larger-capacity basket can save time by grilling multiple servings at once.
    Food Variety: A basket that can accommodate a mix of vegetables allows for creative grilling without the need for multiple tools, simplifying meal preparation.
    Storage Space: Ensure that the size of the basket fits your available storage area, as larger baskets may require more room both in storage and on the grill.
    Personal Preference: Take into account your typical grilling habits; if you often prepare smaller portions, a medium-sized basket could suffice, while larger families may require a more substantial option.
    By evaluating your size and capacity needs, you can choose a grilling basket that aligns with your cooking style and enhances your outdoor culinary experiences.

    Best Practices for Effectively Using Grilling Baskets

    How to Prepare Your Vegetables for Grilling Success?

    Properly preparing your vegetables can greatly enhance the grilling experience. The steps for optimal preparation include:
    Thorough Washing: Always rinse vegetables under cold water to remove dirt and pesticides, ensuring a clean cooking surface that enhances overall flavor.
    Uniform Cutting: Slice your vegetables into even sizes to promote consistent cooking. For instance, thicker pieces may need longer grilling times, while smaller pieces cook quickly.
    Effective Marinating: Marinate your vegetables for at least 30 minutes before grilling to amplify their flavor. A mixture of olive oil, herbs, and spices offers a delightful coating.
    Generous Seasoning: Don’t hesitate to season with salt, pepper, or other spices to elevate the taste during cooking. A light sprinkle of seasoning can make a substantial difference.
    By following these preparation tips, you can ensure that your vegetables turn out perfectly grilled, bursting with flavor and texture.

    Grilling Vegetables Effectively for Maximum Flavor and Texture

    Successfully grilling vegetables requires the right techniques and timing. Here are some essential tips:
    Preheat the Grill: Always preheat your grill to ensure even cooking and to create those desirable grill marks on your vegetables.
    Avoid Overcrowding: Place vegetables in a single layer within the basket, allowing for proper airflow and even heat distribution. This prevents steaming and ensures a nice char.
    Monitor Cooking Times: Different vegetables have varying cooking durations. For example, peppers may take 10-15 minutes, while zucchini cooks in about 5-10 minutes. Keep a close watch to avoid overcooking.
    Utilize Direct and Indirect Heat: Start grilling over direct heat for a quick char, then move to indirect heat to finish cooking without burning.
    By mastering these techniques, you can achieve perfectly grilled vegetables that are both tender and flavorful, impressing guests and family alike.

    Effective Cleaning Methods for Your Grilling Basket After Use

    Cleaning your grilling basket after use is essential for maintaining its condition and longevity. Here’s a step-by-step guide on how to clean your basket effectively:
    Cool Down: Allow the basket to cool down after grilling to prevent burns or injuries during cleaning.
    Scrape Away Residue: Use a spatula or grill brush to carefully remove any leftover food particles.
    Soak for Ease: For stubborn residue, soak the basket in warm, soapy water for about 15-30 minutes before scrubbing.
    Thorough Rinsing: Ensure all soap residue is rinsed away to prevent lingering flavors or harmful chemicals from affecting future meals.
    Complete Drying: Dry the basket with a clean towel or allow it to air dry to prevent rusting, particularly for metal baskets.
    By following these cleaning steps, you can ensure that your grilling basket remains in excellent condition, ready for your next outdoor cooking adventure.

    Comparing the Best Grilling Baskets for Vegetable Preparation

    Examining the Highest Rated Grilling Baskets on the Market

    This section will review and compare the highest-rated grilling baskets available, focusing on their features and user reviews. Some noteworthy options include:
    Weber Stainless Steel Grill Basket: Renowned for its durable construction and ability to securely hold a variety of vegetables, it often receives high marks for ease of use and cleaning.
    Cuisinart Gridler Grill Basket: This versatile option is loved for its non-stick properties, making it easy to cook and clean, and it’s praised for its large capacity.
    BBQ-Aid Grill Basket with Handle: Users appreciate its sturdy design and excellent heat distribution, allowing for perfectly charred vegetables with minimal effort.
    Outset Cast Iron Grill Basket: Known for its heat retention and ability to impart delicious flavor, this option is favored by those seeking a traditional grilling experience.
    These comparisons highlight the benefits of each basket, assisting grillers in selecting the best option tailored to their specific needs and preferences.

    Brand Comparisons for Grilling Baskets: Key Differences

    Various brands offer distinct grilling baskets with unique features that cater to diverse grilling needs. A comparison of leading brands reveals:
    Weber: Renowned for high-quality materials and innovative designs, Weber grilling baskets often come equipped with features that enhance usability, such as ergonomically designed handles and durable construction.
    Cuisinart: Known for their user-friendly designs and non-stick surfaces, Cuisinart baskets are favored for ease of cleaning and versatility in cooking.
    Outset: This brand typically emphasizes traditional materials like cast iron, focusing on heat retention and flavor enhancement, appealing to those who value a classic grilling experience.
    BBQ-Aid: Known for its affordability without sacrificing quality, BBQ-Aid offers durable, functional baskets that cater to both novice and experienced grillers.
    By understanding how different brands compare, you can make a more informed decision based on your cooking style and preferences.

    Understanding Price Ranges for Grilling Baskets

    Grilling baskets are available in a variety of price ranges, and understanding what to expect at different levels can guide your purchase. Price ranges typically include:
    Budget Options ($10-$30): These baskets, often made of lighter materials, may lack some durability but are perfect for casual grillers or those just starting out.
    Mid-Range ($30-$60): Mid-range baskets often feature better materials, such as stainless steel and non-stick coatings, offering a good balance of quality and affordability.
    Premium Options ($60-$100+): High-end baskets tend to be made from durable materials, often with advanced features like multi-functionality, allowing for a more sophisticated grilling experience.
    By evaluating your budget and expectations, you can choose a grilling basket that fits your needs without overspending.

    Effective Strategies for Choosing the Best Grilling Baskets for Vegetables

    Steps for Selecting the Ideal Grilling Basket Tailored to Your Needs

    Choosing the best grilling basket involves carefully considering your specific needs and preferences. Follow these actionable steps to make an informed decision:
    Assess Your Grilling Style: Consider how often you grill and the types of food you typically prepare, as this will influence the size and type of basket you need.
    Evaluate Material Preferences: Reflect on whether you prefer non-stick for easy cleanup or stainless steel for durability and heat retention.
    Review Features: Determine which features are essential for you, such as a locking mechanism, removable handle, or dishwasher safety, and prioritize these when shopping.
    Read User Reviews: Look into user reviews to gain insights into the performance and durability of baskets you are considering.
    Set a Budget: Establish a budget that reflects your expectations for quality and functionality, allowing you to narrow down your choices effectively.
    By following these strategies, you can confidently select a grilling basket that meets your unique grilling needs and enhances your outdoor cooking experiences.

    Avoiding Common Mistakes When Using Grilling Baskets

    Several common mistakes can occur when using grilling baskets. Avoiding these errors can significantly improve your grilling experience:
    Overcrowding: Filling the basket too full can lead to uneven cooking and steaming instead of grilling, diminishing the flavor and texture of your vegetables.
    Neglecting Preheating: Skipping the preheating step can result in poorly cooked food, as they won’t sear properly or develop that desired grill flavor.
    Skimping on Cleanup: Failing to clean your basket promptly can lead to stubborn residue that becomes difficult to remove and may affect the taste of future meals.
    Ignoring Food Preparation: Not adequately washing or cutting vegetables can result in uneven cooking and potential contamination.
    Not Monitoring Cooking Times: Each vegetable has distinct cooking times, and failing to keep track can lead to overcooked or burnt food.
    By being mindful of these common mistakes, you can elevate your grilling game and ensure that your vegetables turn out perfectly cooked and delicious every time.

    Maximizing the Use of Your Grilling Basket for Outstanding Results

    Maximizing the use of your grilling basket can greatly enhance your grilling experience. Here are some expert strategies:
    Experiment with Diverse Foods: Don’t restrict your basket to just vegetables; consider grilling fruits, seafood, or even meats for a varied cooking experience.
    Utilize Marinades and Seasonings: Boost the flavor of your food by marinating or seasoning before grilling, allowing the flavors to infuse during cooking.
    Combine Ingredients: Use the basket to grill multiple ingredients together that complement each other, such as bell peppers and onions, to create a cohesive flavor profile.
    Try Different Cooking Techniques: Experiment with both direct and indirect grilling methods to discover which yields the best results for various food types.
    Host Grilling Gatherings: Engage friends and family by hosting grilling parties where everyone can participate in preparing their own vegetable skewers or baskets, transforming the experience into a fun social event.
    By implementing these strategies, you can get the most out of your grilling basket, turning every grilling session into a delicious adventure.

    Key Insights and Recommendations for Grilling Baskets

    Essential Takeaways from This Comprehensive Guide

    This guide has delved into vital aspects of grilling baskets, focusing on their types, features, and benefits. Key takeaways include:
    – Grilling baskets are invaluable tools for cooking vegetables, offering secure cooking methods that prevent loss and promote even grilling.
    – Material quality, size, and essential features are crucial factors when selecting the right grilling basket for your needs.
    – Expert insights reveal top recommendations and the latest trends, guiding you to make informed purchasing decisions.
    – Best practices for preparing, grilling, and cleaning vegetables enhance your overall grilling experience.
    By understanding these foundational elements, you can maximize your enjoyment and success in grilling.

    Top Recommendations for Grilling Baskets

    Based on the information provided, our top recommendations for grilling baskets are:
    Weber Stainless Steel Grill Basket: Best for durability and versatility in cooking various foods.
    Cuisinart Non-Stick Grill Basket: Ideal for easy cleaning and large capacity, accommodating a wide range of vegetables.
    BBQ-Aid Stainless Steel Grill Basket: Excellent value and reliable performance for everyday grilling needs.
    Outset Cast Iron Grill Basket: Perfect for enhancing flavors with superior heat retention and even cooking.
    These options cater to various grilling styles and preferences, ensuring that you find the ideal basket to elevate your outdoor cooking experience.

    Resources for Further Information on Grilling Baskets

    For those interested in learning more, consider exploring the following resources:
    Grilling Blogs and Forums: Join communities that discuss expert tips, grilling techniques, and product reviews relevant to grilling baskets.
    YouTube Channels: Follow grilling enthusiasts who offer visual tutorials on best practices and recipes for vegetables on the grill.
    Social Media Groups: Engage with groups dedicated to grilling and barbecue techniques, sharing experiences and gaining insights from fellow enthusiasts.
    Cookbooks: Look for grilling cookbooks that offer in-depth information and recipes specifically focused on grilling vegetables.
    These resources can provide further insights into the world of grilling baskets, enhancing your skills and enjoyment of outdoor cooking.

    Frequently Asked Questions (FAQs) About Grilling Baskets

    1. What types of vegetables are best suited for grilling?

    Popular vegetables for grilling include bell peppers, zucchini, asparagus, eggplant, and mushrooms, all of which hold up well on the grill and develop fantastic flavors.

    2. Can I use a grilling basket for meat as well?

    Yes, many grilling baskets are versatile and can be used for meats, seafood, and even fruits alongside vegetables, offering a range of cooking possibilities.

    3. How can I prevent my vegetables from burning on the grill?

    Ensure to cut vegetables evenly, use a moderate heat setting, and avoid overcrowding in the basket to promote even cooking without burning or charring.

    4. What is the best way to clean a non-stick grilling basket?

    Clean it with warm soapy water using a soft sponge; avoid abrasive materials to maintain the integrity of the non-stick surface and ensure longevity.

    5. Should I oil my vegetables before grilling them?

    Yes, lightly oiling vegetables before grilling helps prevent sticking and enhances flavor while promoting a nice char on the surface.

    6. How can I tell when my grilled vegetables are done?

    Vegetables are typically done when they are tender and have visible grill marks. A fork should easily pierce them without resistance, indicating they are perfectly cooked.

    7. Can I place a grilling basket directly over a flame?

    Yes, ensure that the material can handle direct heat; most stainless steel baskets are suitable for direct grilling without any issues.

    8. What is the best way to store my grilling basket?

    Store your basket in a cool, dry place, and consider hanging it to prevent warping or damage to its shape, ensuring it remains ready for use.

    9. Are there eco-friendly grilling baskets available on the market?

    Yes, many brands offer grilling baskets made from sustainable materials, providing a safer option for both you and the environment, aligning with eco-conscious cooking practices.

    10. How long should I preheat my grill before using a grilling basket?

    Preheat your grill for at least 10-15 minutes to ensure it reaches the optimal cooking temperature for the best grilling results.

    Connect with us on Facebook!

    The post Top Grilling Baskets For Vegetables: Essential Guide appeared first on https://cookinggods.com

    The Article Grilling Baskets for Vegetables: Must-Have Guide Was Found On https://limitsofstrategy.com

  • BBQ Heat Mappers: Essential Usage Guide for Grill Mastery

    BBQ Heat Mappers: Essential Usage Guide for Grill Mastery

    Unlock the Full Potential of BBQ Heat Mapping for Impeccable Grilling Outcomes

    Understanding BBQ Heat Mappers: Their Functionality and Benefits

    A high-tech BBQ heat mapper scanning a grill, showing a colorful heat map, with grilled foods in a modern backyard setup.

    BBQ heat mappers represent an innovative advancement in grilling technology, meticulously designed to analyze the temperature distribution across your grill’s surface. Mastering this technology is vital for achieving culinary perfection, as it ensures that your food is cooked evenly and just right. By identifying areas of high heat and cooler spots, BBQ heat mappers enable you to refine your cooking techniques and timing, which results in exquisitely grilled meats, vibrant and perfectly cooked vegetables, and a host of other delicious dishes. Whether you are an enthusiastic backyard griller or a seasoned professional pitmaster, incorporating a heat mapper into your grilling routine can notably enhance your cooking prowess and the quality of your culinary creations.

    Utilizing heat mapping technology in your barbecue practices not only elevates the quality of your meals but also enriches the overall grilling experience. Picture yourself serving flawlessly seared steaks with a delectable crust, alongside juicy, tender chicken—this is the pinnacle of grilling achieved through the strategic application of BBQ heat mappers. Their user-friendly design and substantial impact on cooking outcomes have rendered them essential tools for modern grilling enthusiasts.

    Dive into the Different Types of BBQ Heat Mappers Available in the Market

    There are various types of BBQ heat mappers tailored to accommodate different grilling styles and individual preferences. The primary categories include digital heat mappers and analog versions. Digital heat mappers typically deliver precise temperature readings on easy-to-read displays, often featuring color-coded indicators that represent various heat levels. This intuitive design is especially beneficial for beginners, as the visual cues facilitate a swift understanding of temperature zones at a glance.

    Conversely, analog heat mappers, which may comprise thermal stickers or simple heat-sensitive pads, are often preferred by traditionalists and those who appreciate a more hands-on approach to grilling. They tend to be more budget-friendly and do not require batteries, making them a dependable choice for individuals who value simplicity and durability. Regardless of the type you opt for, the key is to select a heat mapper that aligns with your grilling aspirations and comfort level.

    Discover the Advantages of Utilizing BBQ Heat Mappers in Your Grilling Routine

    Incorporating BBQ heat mappers into your grilling process can significantly elevate the quality of your cooking. Here are several compelling benefits:

    • Provides accurate temperature readings to improve your cooking control and precision.
    • Identifies hot spots and cooler areas on your grill, facilitating optimal food placement.
    • Ensures consistent cooking across various food types, enhancing overall quality.
    • Minimizes the risk of overcooking or undercooking your meals, promoting food safety.
    • Enhances flavor by allowing for ideal cooking temperatures tailored to each ingredient.
    • Improves overall grilling efficiency and effectiveness, making your cooking sessions more enjoyable.
    • Facilitates strategic planning for multi-zone cooking, allowing for simultaneous food preparation.

    By harnessing these benefits, you can refine your grilling skills and truly impress friends and family with impeccably cooked barbecue dishes. Consistency and accuracy are paramount in the world of grilling, and BBQ heat mappers equip you with the insights necessary to achieve those standards.

    Effective Strategies for Using BBQ Heat Mappers to Achieve Optimal Results

    BBQ grill with heat mappers showing temperature zones, meat searing on hot spots, fish on cooler areas.

    To fully leverage the advantages of BBQ heat mappers, begin by positioning them on the grill’s surface prior to cooking. This initial step is essential for gathering accurate data regarding the temperature distribution on your grill. Once in place, closely monitor the readings, as they will reveal the various temperature zones present across your cooking surface. As you analyze the results, adjust your food placement accordingly. For instance, if you identify a hot spot, position thicker cuts of meat there for optimal searing, while more delicate items like fish can be placed in cooler areas to prevent overcooking.

    This strategic approach enhances your ability to achieve the desired doneness for each item and allows you to manage multiple food items simultaneously. For the best results, consider the timing; allow the heat mapper to rest on the grill for several minutes to obtain stabilized readings before you begin cooking. This practice will give you a clearer understanding of heat distribution across your grill, leading to superior cooking outcomes.

    Key Considerations for Selecting the Ideal BBQ Heat Mapper for Your Needs

    Choosing the right BBQ heat mapper is crucial for maximizing your grilling potential. Consider your grill type and cooking style as essential factors in your decision-making process. Look for heat mappers that offer a balance of precision, usability, and compatibility with your specific grill setup. For instance, if you utilize a gas grill, a digital heat mapper may be more effective due to its quick response times and accurate readings.

    Additionally, assess features that can enhance your grilling experience. Some heat mappers come equipped with built-in timers or smartphone connectivity, enabling you to monitor temperatures remotely, which is particularly useful for longer cooking sessions. Understanding your unique grilling needs and how often you barbecue can significantly impact the type of heat mapper that will best serve you, ensuring your investment yields satisfying results every time.

    Prepare Your BBQ Heat Mapper for Grilling Triumph

    Steps to Properly Prepare Your Grill for Accurate Heat Mapping

    Clean stainless steel BBQ grill with shiny grates, empty grease tray, and digital thermometer showing 225°F to 450°F.

    Before utilizing a BBQ heat mapper, it is imperative to properly prepare your grill. A clean grill guarantees accurate temperature readings without interference from leftover food or grease. Follow these essential steps to ready your grill:

    • Thoroughly clean the grill grates to eliminate any debris or old residue that could impact readings.
    • Inspect and empty the grease tray to prevent flare-ups during cooking.
    • Preheat your grill to the desired cooking temperature, generally between 225°F and 450°F.
    • Allow the grill to stabilize for about 10-15 minutes before placing the heat mapper.

    Investing time in grill preparation not only influences heat readings but also enhances the overall cooking process. An adequately preheated grill promotes better browning and cooking times, setting the stage for a successful grilling experience.

    Correctly Positioning the Heat Mapper on Your Grill for Optimal Results

    Once your grill is prepared, the subsequent step is to accurately position the BBQ heat mapper on the grill surface. Ensure it covers the entire area you plan to map, as this will collect comprehensive data on heat distribution. It is crucial that the mapper is stable and secure to prevent any shifts during cooking that could lead to inaccurate readings.

    In some instances, utilizing multiple heat mappers across the grill may be advantageous for capturing temperature variations in different sections, particularly on larger grills or those with uneven heat distribution. This strategy will provide a more detailed understanding of your cooking surface, enabling informed decisions regarding food placement and cooking techniques.

    Understanding the Ideal Temperature Range for Grilling Various Foods

    The ideal grilling temperature can vary significantly depending on the food being prepared. Generally, aim for a temperature range of 225°F to 450°F for most items. For example, lower temperatures are excellent for smoking meats or slow-cooking larger cuts, while higher temperatures are ideal for searing steaks or grilling burgers. Grasping these temperature specifics is essential for successful barbecuing.

    When consulting your BBQ heat mapper, you will notice different zones marked by various colors. As you become more adept at interpreting these maps, you will learn the optimal temperatures for various foods. Utilizing this knowledge allows for better planning during your grilling sessions, ensuring that each item is cooked to perfection without compromising flavor or texture.

    Expert Insights for Mastering BBQ Heat Mappers

    Effective Interpretation of Heat Map Data for Grilling Success

    Interpreting heat map data is a critical skill when utilizing a BBQ heat mapper. Understanding color gradients is essential; red areas represent hot spots, while blue areas indicate cooler zones. This visualization enables you to adjust your grilling technique effectively. For example, if a specific section of the grill appears red, it is ideal for searing meats, while blue zones can be utilized for low-and-slow cooking, such as smoking ribs or briskets.

    Real-life scenarios illustrate the importance of this interpretation skill. Imagine you are grilling a variety of foods, such as chicken, vegetables, and sausages. By placing your heat mapper on the grill and observing the readings, you may discover that the center is significantly hotter than the edges. This insight allows you to adapt your cooking strategy by positioning chicken in the center for quicker cooking while keeping sausages on the cooler edges to prevent overcooking.

    Adjusting Cooking Zones Based on Heat Map Insights for Optimal Results

    Utilizing data from your BBQ heat mapper to create and manage different cooking zones is a sophisticated yet rewarding technique that can transform your grilling experience. Based on the heat map results, you can determine where to place your food for optimal cooking. For instance, if you identify a hot spot, it’s the perfect area for thicker cuts of meat that require a good sear. Conversely, cooler regions are ideal for more delicate items such as fish or vegetables, which can easily overcook if positioned in hotter zones.

    Implementing this strategy not only enhances your cooking results but also enables you to grill multiple items at once, each achieving its perfect doneness. Understanding these cooking zones turns your grill into a versatile cooking appliance, allowing you to execute a variety of dishes simultaneously without sacrificing quality.

    Avoiding Common Mistakes When Using Heat Mappers for Better Grilling

    When utilizing BBQ heat mappers, avoiding common mistakes can significantly enhance your grilling experience. Frequent pitfalls include misinterpreting the temperature scale, neglecting to allow adequate time for the grill to stabilize, and failing to recalibrate the mapper before use. Misreading temperatures can result in improperly cooked food, while rushing the stabilization phase can yield inaccurate readings.

    Moreover, calibrating your heat mapper is essential for ensuring accuracy. This process guarantees that the readings you receive are reliable and can be trusted for optimal cooking. By being aware of these potential pitfalls and taking proactive measures to avoid them, you can create a smoother grilling experience with superior results every time.

    Enhancing Your Grilling Skills Through BBQ Heat Mapping

    Achieving Cooking Consistency with Effective Heat Mapping Techniques

    BBQ heat mapping plays a vital role in maintaining consistent cooking temperatures across your grill. This uniformity is crucial in minimizing the risk of overcooking or undercooking food, leading to better overall results. When you are aware of where the hot spots are and adjust your food placement accordingly, you can ensure that each item is cooked evenly, resulting in a more enjoyable dining experience.

    Consistency not only enhances taste but also improves the texture and juiciness of your food. For example, meats cooked at fluctuating temperatures tend to yield dry or tough results. By leveraging heat mapping technology, you create an environment where each item on your grill benefits from steady heat, resulting in juicier, more succulent dishes that your guests will rave about.

    Effectively Reducing Hot Spots on Your Grill for Better Cooking

    Identifying and managing hot spots is one of the primary advantages of using a BBQ heat mapper. These devices allow you to pinpoint areas of elevated heat, which can be especially beneficial when grilling larger cuts of meat or cooking multiple items at once. By recognizing where the hot spots are, you can avoid placing all your food in these areas, decreasing the likelihood of uneven cooking.

    This skill proves particularly advantageous during cookouts when you’re grilling a variety of items simultaneously. By using your heat mapper to strategically arrange your food based on the identified temperature zones, you can ensure that everything cooks to perfection at the same time. This not only streamlines the cooking process but also allows you to impress your guests with flawlessly executed dishes.

    The Influence of Heat Mapping on Food Flavor and Quality

    Heat mapping can profoundly impact the flavor profile of your grilled items by ensuring they are cooked at the optimal temperature. Cooking foods at incorrect temperatures can lead to charring on the outside while leaving the inside undercooked—a surefire way to compromise flavor. By utilizing your BBQ heat mapper, you can prevent such undesirable outcomes, ensuring that each ingredient is thoroughly cooked and at the right temperature.

    For instance, when grilling vegetables, achieving the right temperature is crucial for caramelization, which enhances their natural sweetness and flavor. Similarly, meats cooked at proper temperatures will retain their juices and inherent flavors, creating a more enjoyable dining experience. Therefore, employing heat mapping technology not only promotes food safety by ensuring correct cooking temperatures but also enriches the overall flavor of your barbecue dishes, resulting in meals that are as delicious as they are visually appealing.

    Proven Techniques to Maximize the Use of BBQ Heat Mappers

    Frequency of Using Your Heat Mapper for Optimal Grilling Results

    For optimal results, it is advisable to use your BBQ heat mapper prior to each grilling session. This practice is particularly important if you are experimenting with new food types or if the grill’s temperature settings have changed since your last use. Consistent use of the heat mapper ensures that you remain aware of your grill’s temperature distribution, leading to more reliable and predictable cooking outcomes.

    Establishing this routine not only enhances your grilling expertise but also builds confidence in your ability to manage heat distribution effectively. The more frequently you use your heat mapper, the more skilled you will become at interpreting the data it provides, resulting in a more intuitive grilling experience.

    Best Practices for Maintaining and Calibrating Your Heat Mapper

    Regular maintenance and calibration of your BBQ heat mapper are essential for ensuring accurate readings. After each use, clean the device thoroughly to eliminate any debris or grease that may have accumulated during grilling. Keeping the heat mapper clean not only extends its lifespan but also ensures that it delivers precise temperature readings.

    Calibration is another critical aspect to consider. Follow the manufacturer’s guidelines to ensure you are calibrating your mapper correctly. Depending on usage and environmental conditions, you may need to recalibrate periodically to maintain accuracy. By adhering to these practices, you can ensure that your heat mapper provides reliable data for years to come, enhancing both your grilling results and overall experience.

    Advanced Techniques for Mastering BBQ Heat Mapping

    Advanced users can elevate BBQ heat mapping by employing sophisticated techniques such as zone mapping. This method involves designating different areas of the grill to varying temperatures, allowing for the simultaneous cooking of diverse food types. For example, you can create a high-heat zone for searing meats while maintaining a low-heat zone for slow-cooking vegetables or keeping dishes warm.

    To implement this technique effectively, start by mapping your grill surface to identify hot and cool spots. Once you gather this information, adjust your burners or charcoal placement accordingly to create distinct temperature zones. By doing so, you can maximize your grill’s efficiency and versatility, delivering a wide variety of perfectly cooked foods at the same time.

    Key Factors to Consider When Selecting the Perfect Heat Mapper for Your BBQ Setup

    When selecting a BBQ heat mapper, compatibility with your grill type and size should be your primary consideration. Look for features that match your grilling requirements, such as digital displays for effortless reading or temperature ranges suitable for the foods you frequently prepare. If you often grill large cuts of meat, a mapper with a broader temperature range may be advantageous.

    Moreover, consider usability. Some heat mappers include intuitive interfaces or smartphone connectivity, which can enhance your grilling experience by providing real-time data at your fingertips. Choosing the right heat mapper tailored to your specific needs will significantly improve your ability to manage heat distributions and elevate your overall grilling performance.

    Troubleshooting Common Issues with Heat Mappers for Seamless Operation

    Common challenges with BBQ heat mappers can include inaccurate readings, connectivity issues, or improper placement leading to erroneous data. To troubleshoot these problems effectively, refer to the manufacturer’s guide for specific advice tailored to your device. Ensuring the mapper is correctly positioned on the grill surface is vital for reliable readings, so double-check its stability before use.

    If you encounter connectivity issues with a digital mapper, verify that it has fresh batteries and is within network range if it operates wirelessly. Regular checks and proper maintenance can prevent these issues from disrupting your grilling experience, allowing you to focus on what truly matters—delivering delicious, perfectly cooked food.

    Best Practices for Effective BBQ Heat Mapping Strategies

    Essential Tips for Beginners Using BBQ Heat Mappers

    For novices, embarking on the journey with a BBQ heat mapper can be a transformative experience. Begin by grilling simple foods like burgers or hot dogs to familiarize yourself with the heat map readings. As you practice, pay attention to how different foods respond to various heat zones and how to adjust your cooking methods based on these insights.

    Do not hesitate to experiment with different cooking techniques, such as modifying food placement according to the heat map results. This hands-on practice will bolster your confidence and understanding of your grill’s capabilities, ultimately leading to more successful and gratifying grilling sessions.

    Long-Term Advantages of Utilizing Heat Mapping in Grilling

    The long-term benefits of using a BBQ heat mapper extend well beyond improved grilling abilities. Over time, you will notice significant enhancements in your grilling techniques, resulting in consistently superior cooking outcomes. As you become adept at interpreting heat maps, you will be able to tackle more complex recipes and techniques with ease.

    This growth in skill will not only enrich your personal grilling experiences but also impress friends and family during gatherings. Ultimately, the knowledge gained through heat mapping will contribute to a more enjoyable and successful barbecue experience, crafting memorable meals that everyone will appreciate.

    Staying Informed on the Latest BBQ Heat Mapping Technology

    As barbecue technology continues to evolve, staying updated on the latest in BBQ heat mapping tools and techniques can significantly enhance your grilling experience. Keep an eye on new products entering the market, as well as advancements in features that could further improve your ability to manage heat distribution effectively.

    Engaging with barbecue communities or following industry leaders online can provide valuable insights into the latest trends and tools, helping you remain informed and competitive in your grilling endeavors. Embracing new technology will only serve to elevate your skills and outcomes as a grill master.

    Integrating Heat Mapping Seamlessly into Your BBQ Routine

    Incorporating BBQ heat mapping into your grilling routines can be a game changer. Make it a habit to use your heat mapper for every cookout, as this practice will enhance your ability to predict and control heat distribution effectively. Regular use will help you become more attuned to your grill’s behavior, allowing for more precise cooking.

    As you integrate heat mapping into your routine, you may start developing your unique techniques based on your grilling style. Whether it involves adjusting cooking times or strategizing your food placement, consistent practice will lead to more successful barbecue sessions and ultimately better meals.

    Common Errors to Avoid When Utilizing BBQ Heat Mappers

    To maximize your experience with BBQ heat mappers, be vigilant about common mistakes. Misinterpreting the heat map or failing to recalibrate your mapper can lead to inaccurate readings and disappointing outcomes. Always take the necessary time to ensure your heat mapper is correctly positioned and cleaned for optimal performance.

    Furthermore, patience is critical when using heat mappers. Avoid rushing through the stabilization process, as this can lead to misread temperatures. By being diligent and attentive to these details, you can ensure accurate heat readings that result in superior cooking outcomes every time.

    Frequently Asked Questions (FAQs) About BBQ Heat Mapping

    What is the Optimal Temperature for Grilling Meat?

    The optimal temperature for grilling meat typically ranges between 225°F and 450°F, depending on the type of meat and the desired cooking method. Higher temperatures are ideal for searing, while lower temperatures are better suited for slow cooking.

    How Long Should I Preheat My Grill Before Using a Heat Mapper?

    Allow your grill to preheat for approximately 10-15 minutes before placing the heat mapper on the surface. This timeframe grants the grill time to stabilize and provides accurate temperature readings.

    Can I Use a BBQ Heat Mapper on Any Type of Grill?

    Yes, you can use a BBQ heat mapper on most grill types, including gas, charcoal, and electric grills. Just ensure that the heat mapper is compatible with your grill’s surface and temperature range.

    How Frequently Should I Clean My BBQ Heat Mapper?

    It is recommended to clean your BBQ heat mapper after each use. This practice prevents grease buildup and residue that can affect its accuracy over time.

    Is Heat Mapping Suitable for Beginners?

    Absolutely, heat mapping is ideal for beginners. It offers valuable insights into temperature distribution, helping new grillers learn how to effectively manage their cooking zones.

    What Should I Do If My Heat Mapper Displays Inaccurate Readings?

    If your heat mapper shows inaccurate readings, first check its placement on the grill to ensure it is stable. Calibrate it according to the manufacturer’s instructions, and clean it if necessary.

    Can I Utilize Multiple Heat Mappers Simultaneously?

    Yes, using multiple heat mappers at once can provide a more comprehensive view of temperature distribution, particularly on larger grills.

    How Does Heat Mapping Enhance the Flavor of Grilled Foods?

    Heat mapping ensures that food is cooked at the optimal temperature, which helps prevent charring or undercooking. This leads to a more flavorful and juicy outcome.

    Are There Advanced Techniques for Using BBQ Heat Mappers?

    Yes, advanced techniques include zone mapping, where different areas of the grill are set to various temperatures to cook multiple foods simultaneously, improving efficiency and versatility.

    What is the Expected Lifespan of a BBQ Heat Mapper?

    The lifespan of a BBQ heat mapper can vary based on usage and maintenance, but with proper care, many devices can last for several years, providing accurate readings throughout their lifespan.

    Connect with us on Facebook!

    The Article How to Use BBQ Heat Mappers: A Guide appeared first on https://pitmastersarsenal.com

    The Article BBQ Heat Mappers: Your Essential Guide for Usage Was Found On https://limitsofstrategy.com

  • Offset Smoker Mastery for Winning Competitions

    Offset Smoker Mastery for Winning Competitions

    Achieve Success in Offset Smoker Competitions

    Understanding the Mechanism of an Offset Smoker

    A detailed view of an offset smoker with a side firebox, emitting smoke, at a barbecue competition with enthusiasts and tender meats cooking inside.

    An offset smoker is a unique barbecue smoker designed to utilize indirect heat from a firebox adjacent to the cooking chamber. This innovative configuration is highly sought after by barbecue aficionados, particularly in competitive environments, due to its exceptional capability to yield deeply flavored, tender smoked meats. The cooking strategy involves a slow and low approach, which is critical for producing the juicy and tantalizing results that judges eagerly anticipate during contests.

    The design of an offset smoker facilitates a distinctive airflow pattern that circulates smoke and heat around the food effectively. This not only amplifies the flavor infusion but also allows for precise temperature regulation, making offset smokers the top pick for serious competitors. Gaining a thorough understanding of how this equipment operates is essential for advancing your barbecue skills and achieving success in competitions.

    Diverse Barbecue Competition Types in the United States

    In the United States, the vibrant world of barbecue competitions encompasses a range of events, from small local gatherings to prestigious national championships such as the American Royal and the Memphis in May World Championship Barbecue Cooking Contest. Each of these competitions has its own set of rules, judging standards, and categories including ribs, brisket, and chicken, creating a rich and competitive landscape for participants.

    Local competitions serve as an ideal starting point for aspiring barbecue pitmasters, providing a more laid-back environment that allows contestants to refine their techniques without the intense pressure often associated with larger events. As competitors advance to more significant contests, the stakes rise alongside the level of skill required. Cultivating a thorough understanding of the specifics of each competition type can significantly enhance your preparation and strategic planning.

    The Unique Advantages of Using an Offset Smoker in Barbecue Competitions

    Choosing an offset smoker for competitive barbecuing is not merely about selecting a piece of equipment; it highlights the unique benefits it provides. The ability to craft intricate flavor profiles is influenced by the choice of wood and various methods of smoke generation, distinguishing offset smokers from other cooking apparatus. This depth of flavor often plays a crucial role in the judges’ evaluations of competition entries.

    Moreover, offset smokers necessitate a profound understanding of fire management and cooking techniques. This requirement for skill and patience attracts committed competitors who view cooking as an art. The journey to mastering an offset smoker can yield unique flavor profiles, improved textures, and ultimately, higher scores during competitions.

    Strategic Preparation for Offset Smoker Competitions

    A competitor selecting marbled meat, preparing for a competition with an offset smoker and tools.

    Successful preparation is the foundation of achievement in offset smoker competitions. Selecting high-quality meats is vital; the meat should be fresh, well-marbled, and ideally suited for the specific category you are entering. Mastering temperature control along with perfecting particular recipes significantly contributes to achieving consistent results. Competitors must also familiarize themselves with the competition’s regulations and manage their time efficiently, as every moment is valuable on contest day.

    For optimal performance in competitions, establishing a dedicated practice schedule leading up to the event is highly beneficial. Achieving consistency in your cooking methods can build confidence and enhance performance when it counts the most. Understanding the competition’s setup, including the schedule and judging criteria, can provide you with a major edge over your rivals.

    Acquire Expertise to Master the Offset Smoker for Competitive Success

    Advanced Techniques Utilized by Top Competitors

    Elite competitors throughout the United States employ various advanced techniques to master their offset smokers effectively. Temperature control is paramount; many experts use multiple thermometers to consistently monitor both the cooking temperature within the chamber and the internal temperature of the meat. The selection of wood type is equally significant, as the kind and quality of wood can dramatically affect the flavor profile of the meat.

    Here are some essential techniques that experts implement:

    • Utilizing a water pan to maintain humidity and effectively regulate temperature throughout the cooking process.
    • Experimenting with various wood types to discover the perfect flavor pairing for each specific meat.
    • Implementing a two-zone cooking method to balance high and low heat areas within the smoker.
    • Regular practice to develop muscle memory for efficient smoker management.
    • Monitoring airflow and making necessary adjustments to the intake and exhaust dampers.
    • Creating a detailed cooking timeline to ensure that each stage is executed on schedule.
    • Maintaining a consistent fire by mastering fuel and airflow management.
    • Using wraps such as butcher paper or foil at different cooking stages to control bark and moisture levels.

    Mastering these techniques requires not only practice but also a willingness to learn from both triumphs and setbacks. Many seasoned pitmasters believe that participating in regular competitions provides an excellent platform for refining these crucial skills.

    Strategies to Elevate Your Barbecue Skills

    A person adjusting an offset smoker in a workshop setting with a pitmaster and barbecue tools.

    Enhancing your skills with an offset smoker is a continuous journey that necessitates dedication and a passion for learning. Initially, consistent practice is critical. The more you cook, the more attuned you become to your smoker’s unique characteristics and the subtleties of temperature management. Participating in workshops or classes led by experienced pitmasters can provide invaluable insights and introduce you to various techniques.

    Consider adopting these actionable steps to elevate your skills:

    • Maintain a cooking journal to document your methods, temperatures, and outcomes.
    • Join a local barbecue club to exchange experiences and acquire knowledge from fellow enthusiasts.
    • Attend barbecue festivals and competitions to observe and network with top competitors.
    • Experiment with new recipes and variations to broaden your culinary repertoire.
    • Watch instructional videos or online tutorials focused on offset smoking techniques.
    • Seek constructive feedback from judges and fellow competitors to identify areas for improvement.
    • Practice cooking under varying environmental conditions to effectively adapt your techniques.
    • Stay informed about the latest trends and innovations within the barbecue community.

    The journey to mastering the offset smoker is filled with valuable learning opportunities, with each competition serving as a significant stepping stone for further development.

    Common Mistakes to Avoid in Competitive Barbecuing

    Beginners frequently encounter several common pitfalls when participating in offset smoker competitions. One prevalent mistake is over-smoking the meat, which can lead to bitter flavors that judges may penalize. Additionally, failing to maintain consistent temperatures can result in uneven cooking, negatively affecting the quality of the final product.

    To avoid these frequent errors, it is crucial to be conscious of the following common mistakes:

    • Neglecting to adequately preheat the smoker before beginning to cook.
    • Overlooking the significance of balanced airflow, which can lead to temperature fluctuations.
    • Using low-quality or improperly stored wood that fails to burn cleanly.
    • Failing to closely monitor meat temperature, increasing the risk of overcooking.
    • Neglecting to season the meat properly before cooking.
    • Rushing the cooking process rather than allowing it to develop naturally.
    • Not adjusting the smoker’s dampers and vents to effectively control temperature and smoke levels.
    • Forgetting to let the meat rest after cooking, which can diminish juiciness.

    By recognizing and addressing these mistakes, you can significantly improve your performance in competitions.

    Comprehensive Preparation Strategies for Competition Success

    Preparing for an offset smoker competition necessitates meticulous planning and execution. Start by selecting premium-quality meats that will leave a lasting impression on judges. Practicing your cooking techniques ahead of time is also vital; fine-tuning your recipes and timing can significantly impact your results. Equally important is mental preparation; maintaining composure and focus can enhance decision-making during the competition.

    To ensure thorough preparation for a competition, consider these actionable steps:

    • Develop a detailed checklist of all necessary equipment and ingredients to avoid last-minute surprises.
    • Conduct a comprehensive practice run to simulate competition conditions and identify potential issues.
    • Plan your cooking schedule to effectively manage time on competition day.
    • Thoroughly understand the competition rules and judging criteria to align your efforts accordingly.
    • Gather feedback from previous competitions to pinpoint areas for enhancement.
    • Mental preparation by visualizing success and cultivating a positive mindset can be beneficial.
    • Ensure your equipment is in optimal condition and familiarize yourself with its operation.
    • Network with other competitors to share tips and strategies that can improve your approach.

    The more thorough your preparation, the more confidently you can approach the competition and aim for victory.

    Essential Equipment for Competitive Barbecuing

    Must-Have Items for Barbecue Competitions

    When gearing up for a barbecue competition, possessing the right tools and ingredients is imperative. Competitors should ensure they have all essential items packed before arriving at the venue. A well-prepared checklist is invaluable, preventing any critical items from being overlooked amidst the excitement of the event.

    Key items that every competitor should bring include:

    • High-quality meats that are suitable for the competition categories in which you are participating.
    • Your favorite rubs and sauces, with precise measurements for consistency and flavor.
    • Essential tools such as knives, cutting boards, and tongs for effective preparation.
    • A well-maintained offset smoker, equipped with sufficient fuel and wood for cooking.
    • Thermometers for accurately monitoring both smoker and meat temperatures.
    • Cleaning supplies to maintain a tidy cooking environment and uphold sanitation standards.
    • Containers for safely storing and transporting cooked meats after completion.
    • Personal items, including protective clothing and sunscreen to shield against the elements.

    Arriving with all necessary supplies can significantly enhance your focus and performance during the competition, allowing you to concentrate on delivering your best barbecue.

    Optimal Setup Techniques for Your Smoker

    Setting up your offset smoker correctly is a crucial step that can greatly influence your cooking outcomes during competition. Begin by placing the smoker in an area that allows for proper airflow, ensuring it is positioned away from obstructions or other heat sources. Preheating the smoker to the desired cooking temperature before introducing meat is essential for achieving even cooking results.

    Essential setup steps include:

    1. Position the smoker with ample space surrounding it for safety and ease of access.
    2. Ensure all vents and dampers are functioning correctly before igniting the fire.
    3. Gradually preheat the smoker, allowing it to stabilize at your target temperature.
    4. Build a consistent fire in the firebox using high-quality fuel and wood.
    5. Monitor temperature and airflow as you add meat to maintain consistency throughout the cooking process.
    6. Keep necessary tools and supplies within reach for quick access during cooking.
    7. Regularly check your fire and make adjustments as needed to prevent temperature drops or spikes.

    A well-set smoker is fundamental for achieving the consistent results required for competitive success, ensuring that your barbecue stands out.

    Efficient Time and Resource Management During Competitions

    Effective time management and resource allocation are critical components for success in barbecue competitions. Planning your cooking schedule is essential to ensure all entries are completed within the allotted time. It is equally crucial to monitor your fuel and wood supplies closely to avoid running out during the cooking process, which could jeopardize your results.

    To manage your time and resources effectively, consider these strategies:

    • Create a detailed timeline outlining each cooking step, including preparation and resting times to stay on track.
    • Utilize efficient cooking methods, such as wrapping meats, to reduce overall cooking time and ensure consistency.
    • Conduct pre-competition practice runs to determine the precise timing for each meat category.
    • Keep a close watch on fuel levels and have backups ready to avoid interruptions during cooking.
    • Communicate with your team to delegate tasks and ensure everyone stays focused on their responsibilities.
    • Stay organized by designating an area for supplies to minimize searching time and maintain efficiency.
    • Be flexible and ready to adapt your plan based on real-time observations and challenges.
    • Practice multitasking efficiently to maximize your cooking time and productivity.

    By mastering time and resource management, you can focus on perfecting your barbecue skills and delivering outstanding results that impress judges.

    Choosing the Right Wood and Fuel for Competitive Barbecuing

    Optimal Wood Types for Competition Smoking

    Selecting the right type of wood for your offset smoker is crucial for imparting distinct flavors to your meats. Different wood varieties provide unique aroma and taste profiles, significantly influencing the final product. Many competitors prefer popular options like oak, hickory, and fruitwoods such as apple and cherry, each offering specific benefits.

    The pros and cons of each wood type include:

    • Oak: Provides a robust, smoky flavor and burns consistently, making it ideal for long cooking sessions.
    • Hickory: Delivers a bold, rich flavor, particularly good for red meats; however, it can be overpowering if used excessively.
    • Apple: Offers a mild, fruity smoke that enhances poultry and pork, adding a touch of sweetness.
    • Cherry: Adds a sweet, fruity flavor while providing a beautiful color to meats, especially effective for ribs.
    • Mesquite: Known for its intense flavor, best used sparingly or for shorter cooking durations to avoid bitterness.
    • Pecan: Provides a rich, nutty flavor and is versatile enough for various meats.
    • Alder: Commonly used for fish, imparting a light, sweet smoke flavor that complements delicate proteins.
    • Maple: Offers mild sweetness, making it ideal for pork and poultry, enhancing their natural flavors.

    Selecting the appropriate wood type according to the meat you are cooking is essential for achieving a harmonious and well-balanced flavor profile.

    Maintaining Fuel Consistency During Extended Cooking Sessions

    Effectively managing fuel during long cooking sessions is vital for sustaining consistent temperatures in your offset smoker. Utilizing high-quality charcoal and well-seasoned wood ensures a steady burn and reliable heat levels throughout the cooking process, which is critical for achieving ideal results.

    To maintain a steady fire, follow these best practices:

    • Utilize hardwood lump charcoal as a base for a long, stable burn that supports consistent temperatures.
    • Prepare and season your wood well in advance to guarantee it burns cleanly and efficiently.
    • Learn to build a fire that maintains consistent temperatures by layering fuel appropriately for optimal airflow.
    • Monitor the firebox closely and add wood in manageable quantities to prevent temperature fluctuations.
    • Employ a charcoal basket or similar setup to enhance airflow and temperature control.
    • Rotate your wood to ensure even burning and prevent the formation of hot spots.
    • Experiment with various fire management techniques to discover what works best for your specific setup.
    • Consider using a temperature controller for precise management during long cooking sessions.

    Mastering fuel management will enable you to maintain a consistent temperature throughout your competition, ultimately leading to better-cooked meats that impress judges.

    Best Practices for Storing Wood for Barbecuing

    Proper wood storage is essential for preserving the quality of your smoking wood. Keeping wood dry and protected from the elements ensures that it burns cleanly and imparts the best flavors to your meats, which is vital in a competitive setting.

    Here are some best practices for wood storage:

    • Store wood in a well-ventilated area to prevent moisture buildup that can lead to mold.
    • Keep wood elevated using pallets or racks to avoid contact with the ground, which can introduce dampness.
    • Cover wood piles with a tarp or in a shed to protect them from rain and snow exposure.
    • Organize wood by type and size for easy access during competitions, streamlining the cooking process.
    • Allow wood to season for at least six months to ensure optimal burning characteristics.
    • Regularly check for signs of mold or rot and discard any compromised pieces to maintain quality.
    • Maintain a consistent supply of various wood types to experiment with unique flavor profiles during competitions.
    • Label your wood storage for easy tracking of seasoning and types to optimize preparation.

    By adhering to these storage practices, you can ensure that your wood remains in peak condition, ready for use during competitions.

    Effective Techniques for Achieving Competitive Barbecue Success

    Creating the Perfect Smoke Ring in Your Barbecue

    Achieving the perfect smoke ring is a hallmark of high-quality barbecue and often serves as an important judging criterion in competitions. A smoke ring appears as a pink layer of cured meat just beneath the surface, formed during the smoking process. Several factors contribute to its formation, including maintaining proper cooking temperature, utilizing the appropriate wood smoke, and meticulous meat preparation.

    Key factors in achieving a desirable smoke ring include:

    • Starting with high-quality, fresh meat that is well-prepared for optimal results.
    • Utilizing a reliable smoker that maintains consistent temperatures throughout the cooking process.
    • Applying a dry rub with salt, which aids in drawing moisture out of the meat, enhancing flavor.
    • Ensuring sufficient exposure to smoke early in the cooking process for maximum absorption.
    • Maintaining lower cooking temperatures initially to encourage smoke penetration.
    • Using wood that produces clean smoke, free from chemicals or additives that can taint flavor.
    • Minimizing handling of the meat during cooking to retain moisture and flavor integrity.
    • Allowing the meat to rest after cooking to improve overall presentation and juiciness.

    Focusing on these elements can significantly increase your chances of achieving that coveted smoke ring, elevating your barbecue to competitive standards.

    Best Practices for Preparing Meat for Competition

    Meat preparation is a crucial step in achieving competition-level barbecue. Properly trimming, seasoning, and marinating can greatly enhance the flavor and texture of your meats. Each cut of meat requires specific techniques to highlight its best qualities, which is essential for standing out in competitions.

    Here are some best practices for meat preparation:

    • Trim excess fat and silver skin to prevent chewiness and ensure even cooking throughout.
    • Apply seasoning generously, allowing the rub to penetrate the meat for maximum flavor infusion.
    • Consider brining or marinating meats to improve moisture retention and enhance flavor profiles.
    • Let the meat rest at room temperature before cooking to promote even cooking and better results.
    • Experiment with injection marinades for added depth of flavor and moisture retention.
    • Use a binder, such as mustard or olive oil, to help the rub adhere effectively to the meat.
    • Cut meats into uniform sizes to ensure consistent cooking times and results.
    • Allow seasoned meat to rest for several hours or overnight for optimal flavor infusion.

    These preparation methods can dramatically affect the final result and help you achieve the quality sought in competitive barbecuing.

    Maintaining Effective Temperature Control During Cooking

    Temperature control is crucial for producing consistent results in offset smoker competitions. Keeping a steady temperature ensures that your meat cooks evenly and correctly, resulting in tender and flavorful barbecue. Here are some essential strategies for effective temperature management:

    • Invest in high-quality thermometers to accurately monitor both smoker and meat temperatures throughout the cooking process.
    • Position thermometers appropriately to avoid misleading readings caused by hot or cold spots within the smoker.
    • Regularly check and adjust air dampers to regulate airflow and maintain desired cooking temperatures.
    • Familiarize yourself with your smoker’s quirks; every unit operates slightly differently, and understanding yours is key.
    • Utilize a water pan to stabilize temperature and add humidity to the cooking environment, benefiting the meat.
    • Learn to manage your fuel and firebox effectively to prevent temperature spikes or drops that can affect cooking outcomes.
    • Conduct regular checks during cooking to make small adjustments as necessary for optimal results.
    • Practice maintaining temperature control under various weather conditions to refine your skills and adaptability.

    Mastering temperature control will lead to more consistent results and is vital for success in competitive barbecue scenarios.

    Research-Backed Benefits of Mastering the Offset Smoker

    Key Advantages of Using an Offset Smoker

    Utilizing an offset smoker in competitions presents numerous advantages that can enhance both your cooking experience and outcomes. Primarily, offset smokers provide precise temperature control and flavor management, which are crucial elements that can determine the success of a competition entry. Their design facilitates the cooking of larger quantities of meat, enabling participants to enter multiple categories in a single competition.

    Benefits of offset smokers include:

    • The ability to cook at low temperatures for extended periods, resulting in exceptionally tender outcomes.
    • Versatile cooking options that allow for the simultaneous preparation of various meats.
    • Enhanced flavor profiles due to the unique smoke characteristics derived from different wood types.
    • Potential for a large cooking capacity, making them ideal for competitions with multiple entries.
    • Higher quality results, as they promote skilled techniques and meticulous attention to detail in cooking.
    • Ability to achieve a distinct barbecue aesthetic that impresses judges and enhances presentation.
    • Longer burn times with consistent temperatures, reducing the need for constant monitoring and adjustments.
    • Encouragement of skill development as pitmasters learn to manage fire and temperature effectively over time.

    Overall, these advantages contribute to a more fulfilling competition experience and better outcomes in the world of competitive barbecuing.

    Impact of Mastering an Offset Smoker on Competition Outcomes

    Competitors who become proficient with the offset smoker often witness a direct effect on their competition results. By thoroughly understanding their equipment and honing their cooking techniques, skilled practitioners can deliver consistent cooking results and superior flavor profiles. This mastery translates into higher scores from judges, who typically reward excellence in both taste and presentation.

    Metrics that improve with mastery include:

    • Consistency in meat texture and doneness, which is critical for judging and overall quality.
    • Flavor complexity that enhances the overall sensory experience of the barbecue, captivating judges.
    • Visual appeal, showcasing well-defined smoke rings and an attractive presentation that draws attention.
    • Ability to replicate successful outcomes across competitions, establishing a reliable track record.
    • Confidence in managing the smoker and adapting to changing conditions, allowing for flexibility.
    • Timeliness in executing each step of the cooking process, ensuring all meats are ready on schedule.
    • Increased positive feedback from judges, leading to repeated successes and recognition.
    • Opportunities for recognition and networking within the barbecue community that can foster growth.

    The pursuit of mastery in offset smoking can significantly influence competition success, distinguishing seasoned competitors from novices in the field.

    Long-Term Benefits of Mastering Barbecue Skills

    Mastering an offset smoker offers numerous long-term benefits that extend beyond individual competitions. As competitors refine their skills, they often experience heightened confidence, which translates into improved performance in future events. Additionally, consistent success helps build a solid reputation within the barbecue community, creating further opportunities for growth and collaboration.

    Long-term benefits include:

    • Increased confidence in cooking techniques and equipment management, leading to better results.
    • Improved performance in upcoming competitions, resulting in more frequent accolades and recognition.
    • A deeper understanding of barbecue culture and community, enriching personal experiences and connections.
    • Networking opportunities with other skilled competitors and industry experts that can enhance learning.
    • Enhanced culinary creativity, leading to the development of unique recipes and flavor combinations.
    • Opportunities to give back to the community through mentorship or teaching, fostering growth.
    • Recognition as a skilled pitmaster can lead to professional opportunities within the culinary world.
    • A strong sense of accomplishment and personal growth along the mastery journey, providing fulfillment.

    The journey of mastering the offset smoker transcends merely winning competitions; it’s about developing lasting skills and relationships within a passionate community of barbecue enthusiasts.

    Conducting Post-Competition Analysis for Ongoing Improvement

    Effectively Assessing Performance After a Competition

    After a competition, evaluating your performance is essential for growth and improvement. Reviewing your results, including feedback from judges, can provide valuable insights into what worked well and identify areas needing refinement. Concentrating on key aspects of your performance will help you make strategic adjustments for future competitions.

    Key areas to focus on include:

    • Analyzing the feedback provided by judges, noting specific comments on flavor, texture, and presentation.
    • Reflecting on your preparation process and identifying any missed opportunities or mistakes that can be corrected.
    • Assessing your time management during the event to uncover areas for enhancement.
    • Reviewing cooking techniques and temperature control to pinpoint inconsistencies that may have arisen.
    • Considering the overall presentation of your entries and how it might be improved for future competitions.
    • Soliciting feedback from peers or mentors who observed your competition activities for diverse perspectives.
    • Documenting your findings in a cooking journal for future reference and continuous growth.
    • Setting specific goals based on your evaluation to track progress in subsequent competitions.

    A thorough evaluation will equip you with the knowledge necessary for continuous improvement and success in future endeavors.

    Strategies for Learning from Competition Mistakes

    Learning from mistakes is integral to personal and competitive growth in barbecue. Analyzing what went wrong is vital for developing strategies to avoid similar pitfalls in the future. The process of transforming failures into learning opportunities will strengthen your skills and enhance your performance.

    Effective methods for learning from mistakes include:

    • Documenting each mistake in a journal, detailing what went wrong and the contributing factors.
    • Seeking constructive criticism from judges and mentors to gain different perspectives on your performance.
    • Conducting a post-event debrief with your team to discuss challenges faced and potential solutions.
    • Attempting to replicate the mistake during practice to understand its causes and develop effective solutions.
    • Being open to change and ready to adapt your techniques based on your findings and feedback received.
    • Setting specific improvement goals based on the lessons learned to track progress and growth.
    • Sharing experiences with fellow competitors to learn from their successes and failures for mutual growth.
    • Participating in additional workshops to reinforce skills and techniques that need enhancement.

    This proactive approach to learning will help you transform each competition into a stepping stone toward future success in barbecuing.

    Effective Preparation Strategies for Upcoming Competitions

    Preparation for future competitions requires an ongoing commitment to refining your techniques and expanding your culinary knowledge. Staying updated on the latest trends in the barbecue scene can also provide an edge over competitors.

    To effectively prepare for future competitions, consider these actionable steps:

    • Continuously practice and refine your recipes, incorporating feedback from previous competitions to enhance your skills.
    • Experiment with new techniques, flavors, or cooking methods to keep your approach fresh and innovative.
    • Attend industry events, workshops, or seminars to stay informed on the latest innovations in barbecuing.
    • Network with other competitors to exchange ideas and learn from their diverse experiences.
    • Regularly assess and update your equipment to ensure peak performance and reliability.
    • Set aside time for creative experimentation to discover unique flavor profiles that can set you apart.
    • Maintain a cooking log that tracks your successes, failures, and areas for improvement for future reference.
    • Commit to a growth mindset, viewing challenges as opportunities for learning and personal enhancement.

    This proactive preparation will help you remain competitive and elevate your skills in every competition, leading to improved outcomes.

    Frequently Asked Questions About Competition Barbecue

    What is the best wood for smoking brisket in a competition?

    Hickory is often regarded as the top choice for smoking brisket due to its strong flavor, which pairs well with the rich, fatty cut of meat. Oak and cherry are also popular options, providing a balance of smoke and sweetness that enhances the final product.

    How long should I rest my meat after cooking?

    Resting meat for at least 30 minutes to an hour after cooking allows juices to redistribute, enhancing flavor and tenderness. Larger cuts may benefit from longer resting periods to achieve optimal results.

    Can I use an offset smoker for other types of cooking?

    Absolutely! An offset smoker is versatile and can be used for various cooking methods, including grilling, roasting, and even baking, depending on how you manage the heat and smoke.

    Should I wrap my meat during the competition cook?

    Wrapping meat during cooking, often referred to as the “Texas Crutch,” can help retain moisture and expedite the cooking process, making it a common practice in competitions to ensure tender results.

    How do I know when my meat is done?

    The most effective way to determine doneness is by using a reliable meat thermometer. Different meats have specific internal temperature targets, such as 195°F for brisket and 165°F for chicken, to ensure they are cooked thoroughly.

    What should I do if it rains on competition day?

    Be prepared for wet conditions by using a waterproof cover for your smoker and ensuring that your cooking area is sheltered. Adjust your cooking techniques to maintain consistent temperatures even in damp weather.

    How can I improve my presentation for judges?

    Focus on cleanliness, color contrast, and creativity in your presentation. Use garnishes, arrange meats attractively, and ensure your entries are visually appealing to captivate the judges’ attention.

    What is the optimal cooking temperature for competition ribs?

    The optimal cooking temperature for competition ribs is typically around 225°F to 275°F. This range allows for slow cooking that develops tenderness while preserving flavor integrity.

    How can I prevent my meat from drying out during long cooks?

    Maintaining moisture can be achieved by using a water pan in your smoker, wrapping meat during cooking, and ensuring that you do not overcook by closely monitoring internal temperatures.

    What common rub ingredients should I use for competition barbecue?

    A well-balanced rub typically includes a mix of salt, sugar, paprika, garlic powder, onion powder, and black pepper. Customize your blend to enhance the flavors of specific meats used in competition for the best results.

    Connect with us on Facebook!

    The Article Mastering the Offset Smoker for Competitions: Winning Tips appeared first on https://pitmastersarsenal.com

    The Article Offset Smoker Mastery: Tips for Competition Success Was Found On https://limitsofstrategy.com

  • Reheat Leftovers: Expert Tips for Perfect Results

    Reheat Leftovers: Expert Tips for Perfect Results

    Unlock the Secrets to Perfectly Reheating Leftovers with Microwave Mastery

    Key Strategies to Boost the Efficiency of Microwaving Leftovers

    Best Ways to Reheat Leftovers Like a Pro: A professional kitchen with a microwave heating a covered dish, steam rising, indicating even heating and moisture retention.

    The most effective techniques for reheating leftovers like a seasoned chef hinge on understanding the unique properties of microwaving. This method allows heat to penetrate food from the center outwards, making it essential for optimizing your reheating skills. By leveraging this knowledge, you can ensure your leftovers retain their original flavors and textures. To microwave your leftovers successfully, integrate these professional strategies:

    • Use a microwave-safe lid: Always cover your dishes using a microwave-safe cover or a damp paper towel to trap moisture and prevent food from drying out.
    • Stir or rotate your food: Midway through the reheating process, stirring or rotating your food promotes uniform heating and significantly improves the quality of your meals.
    • Reheat in short bursts: Opt for brief heating intervals at medium power to avoid overheating and preserve the moisture in your foods.
    • Allow resting time: After microwaving, let your dish rest for a minute to enable heat to distribute evenly throughout the food.

    Implementing these methods is essential for achieving the best outcomes when reheating in the microwave. By adopting these techniques, you can savor your leftovers with rich flavors and ideal textures that closely mimic their initial state, transforming every meal into a delightful occasion.

    Crucial Factors for Selecting Microwave-Safe Containers

    Choosing appropriate containers for microwaving is vital for ensuring both safety and the quality of your food. Certain materials can leach harmful chemicals into your meals when exposed to heat. To ensure a safe reheating experience, always opt for containers made from the following materials:

    • Glass: Sturdy, heat-resistant glass containers are safe for microwave use and do not react with food.
    • BPA-free plastic: Certain plastics are specifically designed to endure microwaving without releasing toxic substances.
    • Ceramic: Microwave-safe ceramic dishes retain heat effectively and are perfect for warming a variety of meals.
    • Silicone: Flexible and heat-resistant, silicone containers are a versatile choice for microwave cooking.

    By selecting these safe materials, you can enhance your reheating experience while ensuring your meals are free from harmful chemicals. This allows you to enjoy your leftovers with complete peace of mind, knowing you’re making safe and healthy choices.

    Tips to Avoid Soggy Food When Reheating Leftovers

    Soggy meals are a frequent problem when reheating leftovers in the microwave. To preserve the desired texture of your food, it’s crucial to implement specific techniques during reheating. An effective strategy involves covering your food loosely to allow steam to escape, thus preventing excess moisture from accumulating and ruining your meal. Additionally, stirring your food occasionally during reheating promotes even heat distribution, further minimizing the risk of sogginess.

    For items likely to become soggy, such as rice or pasta, consider adding a few drops of water to generate steam while still controlling the moisture levels. Furthermore, utilize the microwave’s built-in functions, like defrost or reheat settings, which are specifically designed to manage heat levels more effectively. By employing these strategies, you can enjoy perfectly reheated meals free from the unwelcome texture of sogginess.

    Expert Techniques for Reheating Leftovers with Confidence

    A gourmet chef reheating colorful leftovers in a modern kitchen, steam rising, warm atmosphere.

    Real-World Examples of Successful Reheating Practices

    Gaining insights from real-world examples can significantly enhance your reheating skills. For instance, a professional chef might recommend reheating risotto slowly on the stovetop with a splash of broth to maintain its creamy consistency rather than allowing it to dry out or clump. Another home cook suggests reheating pizza in a frying pan with a lid, achieving a crispy crust while keeping the cheese exquisitely melted.

    These practical tips illustrate how your chosen reheating method can profoundly impact the final outcome. Observing how others navigate reheating challenges can provide innovative solutions and instill confidence in your own reheating techniques. By experimenting with these strategies and tailoring them to your preferences, you’ll be better equipped to enjoy your leftovers just as much as when they were freshly prepared.

    Best Practices for Reheating Leftovers to Preserve Quality

    Implementing best practices for reheating leftovers is crucial to ensure your meals taste as fresh as when they were first cooked. Begin by verifying the internal temperature of the food, ensuring it reaches at least 75°C (165°F) for safety. Additionally, utilize covered dishes to retain moisture and prevent your food from drying out.

    It’s important to recognize that different foods require distinct reheating methods. For instance, use the microwave for quick reheating, the stovetop for soups and sauces, and the oven for baked goods or casseroles. Furthermore, reheating in small, manageable portions can help prevent uneven heating and simplify monitoring doneness. By adhering to these best practices, you can relish delicious, safe, and satisfying leftovers every time.

    Common Pitfalls to Avoid When Reheating Leftovers

    A person reheating food from the fridge in a microwave, resulting in unevenly heated and dry meal.

    Being aware of frequent reheating mistakes can help you sharpen your skills while avoiding unsatisfactory outcomes. One prevalent error is reheating food straight from the fridge without allowing it to reach room temperature first. This can result in uneven heating, leaving certain areas cold while others become overcooked. Another mistake is using high power settings in the microwave, which can lead to dry, tough food instead of the desired tenderness.

    Additionally, neglecting to cover your food can result in moisture loss, leading to dry leftovers. Always use lids or damp paper towels to trap steam and heat. By recognizing these common pitfalls, you can adjust your reheating approach effectively, ensuring that leftovers are not only safe to consume but also enjoyable.

    Enhance Your Reheating Results with Stovetop Methods

    The Benefits of Stovetop Reheating for Optimal Results

    Reheating on the stovetop is an excellent method for warming food evenly, particularly for dishes that require stirring or contain sauces. Direct heat allows for precise control, making it easier to achieve the desired texture and temperature. Utilizing a heavy-bottomed pan or skillet aids in distributing heat uniformly, reducing the likelihood of hot spots and burning.

    Start by placing your leftovers in a skillet over medium heat. Stir continuously to ensure even heating, preventing any areas from becoming overcooked while others remain cold. This approach is particularly effective for risotto, soups, and stews, where maintaining a creamy consistency is essential. The stovetop method provides a more hands-on approach, allowing you to adjust heat levels and closely monitor the reheating process.

    Choosing the Right Cookware for Stovetop Reheating

    Selecting appropriate cookware is essential for achieving optimal results when reheating on the stovetop. Heavy-duty options like cast iron or stainless steel skillets are ideal, as they provide even heat distribution and effectively retain warmth. Avoid using thin pans, which can create hot spots and lead to uneven cooking.

    For reheating sauces or liquids, a saucepan is preferable, as it helps contain splatter while efficiently warming the food. Furthermore, refrain from using non-stick coatings at high heat, as they can release harmful chemicals. By thoughtfully considering the cookware you use, you can enhance your reheating process and savor your leftovers at their best.

    Incorporating Moisture to Prevent Dry Food When Reheating

    Adding moisture during stovetop reheating is essential for keeping food juicy and flavorful. Incorporating a small amount of liquid—such as water, broth, or wine—can rejuvenate your leftovers, preventing them from becoming dry or unappetizing. This is especially important for older or drier meals like roasted vegetables or proteins.

    When reheating, pour a splash of your chosen liquid into the pan before adding your food, as this generates steam that helps maintain moisture levels. Covering your pan with a lid can further trap steam, leading to more effective heating. This technique not only preserves the texture of your leftover meals but also enhances their overall flavor, ensuring a satisfying dining experience.

    Oven Techniques for Reheating Large Portions and Achieving Optimal Results

    The Advantages of Using the Oven for Reheating

    Reheating in the oven is the preferred method for warming larger portions or dishes requiring even heat distribution. It’s especially beneficial for casseroles, baked goods, and any meal that needs a crispy outer layer. The dry heat of the oven helps foods regain their texture, making it an ideal choice for restoring the original appeal of your meals.

    Using the oven can also impart a roasted flavor to your leftovers. For instance, reheating pizza in the oven not only warms it but revitalizes the crust, providing a satisfying crunch. By embracing oven reheating, you can create meals that taste freshly prepared, making it an invaluable technique in your culinary toolkit.

    Setting the Right Temperature for Reheating Leftovers in the Oven

    Determining the appropriate temperature is crucial for successful oven reheating. Typically, a moderate temperature of around 180°C (350°F) is ideal for most meals, ensuring that leftovers are heated throughout without burning or drying out. For thicker dishes like casseroles, starting at a lower temperature may allow heat to penetrate evenly.

    Preheating your oven is equally important; placing food in a cold oven can lead to uneven heating. If reheating multiple items, keep in mind that they may require different times based on their size and density. By closely monitoring your food as it reheats, you can avoid overcooking and ensure a delightful dining experience.

    The Importance of Covering Food for Even Heating in the Oven

    Covering your dish while reheating in the oven is vital for retaining moisture and ensuring even heating throughout the process. Using aluminum foil can prevent the top from browning too quickly while allowing the rest of the dish to heat thoroughly. For items prone to drying out, such as meats or casseroles, consider covering them completely.

    If you desire a crispy top, you can remove the cover during the last few minutes of reheating. This method retains moisture while still providing that ideal crunch. By strategically utilizing covers, you can enhance the quality of your reheated meals, guaranteeing they are not only safe to eat but also thoroughly enjoyable.

    Effectively Monitoring Reheating Times for Optimal Results

    Keeping track of reheating time is essential to prevent overcooking and ensure even warmth throughout your dish. Timing can vary depending on the type of food and the size of the portions. As a general guideline, most leftovers require 20 to 30 minutes in the oven. It’s wise to check on your food periodically, especially if it has been portioned into smaller servings.

    Utilizing a food thermometer can help confirm that the internal temperature has reached the recommended level of 75°C (165°F), ensuring both safety and palatability. Setting a timer will assist you in managing the reheating process effectively, allowing for a stress-free cooking experience. By closely monitoring your food, you can enjoy perfectly reheated meals that retain their original flavor and texture.

    Exploring the Benefits of Toaster Ovens for Reheating

    The Versatility of Toaster Ovens for Reheating Needs

    Toaster ovens are an exceptional appliance for reheating smaller portions, offering the speed of microwaving with the added benefit of achieving crispiness akin to oven reheating. Their compact size makes them ideal for quick meals, whether you’re warming a slice of pizza or reheating pastries. This versatility enables home cooks to achieve impressive results without relying on a conventional oven.

    The ability to toast, bake, broil, and reheat within one appliance makes toaster ovens a preferred option for many. With adjustable settings for temperature and time, you can tailor your reheating process for various food types, resulting in optimal texture and taste. Whether you’re short on time or space, a toaster oven is a valuable addition to your kitchen arsenal.

    Adjusting Settings for Different Foods in a Toaster Oven

    When reheating various types of food, adjusting the settings on your toaster oven can yield the best results. For example, when reheating pizza, select a setting that encourages a crisp crust, typically around 180°C (350°F) for 5 to 10 minutes. Conversely, softer items like bread may require a shorter time at a slightly lower temperature to avoid drying out.

    Experimenting with different settings can help you determine the optimal approach for each food type. Always keep a close eye on your food to prevent overcooking, and refer to your appliance’s manual for specific guidelines. Mastering these adjustments can convert your toaster oven into an effective reheating tool, significantly enhancing the quality of your leftovers.

    Enhancing Your Toaster Oven Experience with Useful Accessories

    Incorporating accessories like baking sheets or racks into your toaster oven can elevate the reheating experience by allowing air to circulate around the food. For instance, placing a slice of bread on a rack ensures that hot air flows evenly, resulting in a crisp finish. Baking sheets are beneficial for items like cookies or pastries, providing a sturdy surface for reheating.

    Consider using a silicone mat to prevent sticking while ensuring even heat distribution. This allows foods to reheat effectively without losing moisture or becoming soggy. By integrating these accessories into your reheating routine, you’ll achieve consistently excellent results, transforming even the simplest meals into delightful dining experiences.

    Guidelines for Time and Temperature When Reheating

    Following specific time and temperature guidelines for various foods is crucial to ensure they are reheated evenly and safely in a toaster oven. As a general rule, most leftovers can be reheated at approximately 180°C (350°F). Here are some helpful guidelines to follow:

    • Pizza: 5-10 minutes
    • Baked goods: 10-15 minutes
    • Casseroles: 15-20 minutes
    • Meats: 10-15 minutes

    These timings will ensure that your leftovers are warmed and safe to eat while maintaining their textures and flavors. Adjusting these guidelines based on your specific toaster oven model will help you achieve optimal reheating results, ensuring delicious meals every time.

    Research-Driven Techniques for Efficient Reheating of Leftovers

    Practical Steps for Safe Food Reheating

    Implementing safe reheating practices is essential for preventing foodborne illnesses. To ensure your leftovers are safe to consume, follow these actionable steps:

    • Prompt Refrigeration: Cool leftovers rapidly and store them in the fridge within two hours to curb bacterial growth.
    • Even Reheating: Utilize methods that guarantee food reaches an internal temperature of at least 75°C (165°F) for safety.
    • Use Appropriate Containers: Choose microwave-safe or oven-safe containers to avoid chemical leaching into your food.
    • Limit Reheating: Reheat food only once to maintain quality and safety.

    By adhering to these essential steps, you can take control of your reheating process, ensuring your meals remain both delightful and safe to eat. Mindful reheating not only preserves the quality of your food but also contributes to better health outcomes.

    Health Benefits Linked to Proper Reheating Methods

    Proper reheating plays a crucial role in maintaining the nutritional value of your food. When you reheat leftovers correctly, you help preserve essential vitamins and minerals, ensuring you continue to benefit from the nutrients present in your meals. Foods rich in water-soluble vitamins, such as vegetables, should be reheated gently to prevent nutrient loss.

    Moreover, quality reheating aids in eliminating harmful bacteria that may develop if food is improperly stored. This dual approach maximizes the health benefits of your leftovers while ensuring that you enjoy them safely. By prioritizing proper reheating practices, you can savor meals that are both nutritious and delicious.

    Analyzing Reheating Techniques and Food Safety

    Understanding the link between reheating and food safety is vital for making informed culinary decisions. The primary concern revolves around the growth of bacteria in improperly stored leftovers. Bacteria can flourish if food is left at room temperature for too long or if it is reheated inadequately.

    To mitigate these risks, always store food in airtight containers and refrigerate promptly after cooking. When reheating, ensure that your food reaches the recommended internal temperature of 75°C (165°F) to eliminate any harmful bacteria. This expert insight underscores the importance of both safe food storage and effective reheating techniques in safeguarding your health while enjoying delicious leftovers.

    Maximizing Flavor When Reheating Leftovers

    Reheating doesn’t have to diminish flavor. There are several techniques you can employ to enhance the taste of your reheated meals. For instance, adding fresh herbs or a splash of vinegar can invigorate previously cooked dishes. Alternatively, consider incorporating new ingredients, such as cheese or spices, to refresh the flavor profile.

    Another effective technique involves using appropriate reheating methods that help retain moisture and texture. For instance, employing a stovetop for soups or a toaster oven for baked goods can significantly enhance the overall taste and quality of your leftovers. By embracing these methods, you can ensure that your reheated meals are just as flavorful as when they were first prepared.

    Time-Saving Techniques for Efficient Reheating of Different Foods

    Discovering quick and efficient methods for reheating various types of leftovers can save you valuable time in the kitchen. One useful tip is to use a microwave-safe lid while reheating, which helps heat food faster and prevents splatter. For robust items like casseroles, consider reheating in smaller portions, as they will warm up more rapidly.

    If you’re reheating multiple items simultaneously, stagger their reheating times based on their density and moisture content. This method allows you to manage time effectively without compromising the quality of any food. By implementing these time-saving techniques, you can enjoy your leftovers swiftly and conveniently.

    Steaming: The Optimal Technique for Delicate Dishes

    Why Steaming is Ideal for Reheating Sensitive Foods

    Steaming is a superb method for reheating delicate dishes, as it preserves both texture and flavor without drying them out. This gentle process is particularly suited for foods such as fish, vegetables, and rice, which can easily become mushy or tough when exposed to direct heat. Steaming ensures even heating while retaining the moisture and nutrients within the food.

    Utilizing a steamer basket or a collapsible steamer insert guarantees that your leftovers heat evenly, preventing overcooking. The steam envelops the food, gently warming it while maintaining its original qualities. For a foolproof reheating technique, consider incorporating steaming into your culinary repertoire, especially for delicate items that require special care.

    Preparing Your Steamer for Optimal Reheating Results

    To achieve the best results when reheating delicate dishes in a steamer, proper preparation is essential. Start by ensuring that your steamer has enough water to generate ample steam, but avoid overfilling, as this can lead to waterlogged food. Bring the water to a boil before adding your leftovers to guarantee immediate heating.

    Place your food in the steamer basket without overcrowding to allow steam to circulate freely. Cover the steamer with a lid to trap the steam, ensuring your dish reheats evenly. By following these preparation steps, you can create a reliable and effective reheating method that delivers perfect results every time.

    Timing Considerations for Steaming Leftovers

    Timing is critical when steaming leftovers; it’s easy to overdo it. Generally, most delicate foods require only a few minutes to reheat thoroughly. As a rule of thumb, start with 3-5 minutes for vegetables and fish, checking frequently to ensure they don’t overcook.

    For denser items like rice or dumplings, you may need to extend the time slightly, around 5-10 minutes, depending on the quantity. By keeping an eye on the clock and checking for doneness, you can avoid overcooking while ensuring your leftovers are warmed through and ready to enjoy.

    Proven Methods for Successful Leftover Reheating

    Real-Life Examples of Effective Reheating Techniques

    Real-world examples of effective reheating strategies can inspire your approach and provide valuable insights. For instance, a home cook might share their experience of reheating lasagna in the oven, initially covering it with foil to retain moisture and then uncovering it for the last 10 minutes to ensure a crispy top. This method ensures that the lasagna remains creamy while still offering a satisfying texture.

    Another example involves reheating stir-fried dishes in a skillet over medium heat with a splash of soy sauce to add moisture and flavor. By learning from these strategies, you can adapt your reheating techniques to suit your preferences and enjoy consistently delightful leftovers.

    Most Efficient Reheating Methods Available

    Efficiency in reheating not only saves time but also ensures that your meals retain their quality. The microwave is often the quickest method, but it may not always deliver the best results in terms of texture. The stovetop is a great option for dishes that require stirring, while the oven is ideal for larger portions or items needing a crispy finish.

    In terms of energy efficiency, toaster ovens and steamers also provide excellent reheating capabilities without consuming as much power as a conventional oven. By identifying the most efficient reheating method for different types of food, you can streamline your kitchen process and enjoy delicious meals without excessive effort.

    Insights from Experts on Reheating Techniques

    Expert analysis on reheating techniques reveals the science behind why certain methods yield better results than others. For instance, microwaves function by agitating water molecules in food, creating heat that cooks evenly. However, this can lead to uneven heating if not managed properly. Conversely, oven reheating utilizes dry heat, allowing for a more gradual warming process that preserves texture and flavor.

    Stovetop methods provide direct control over heat levels, making them ideal for foods that require careful attention. Understanding these underlying principles can help you choose the best reheating techniques for your meals, enhancing both the safety and enjoyment of your leftovers.

    Tailored Reheating Tips for Specific Food Types

    Effective Techniques for Reheating Soups and Stews

    Soups and stews can be reheated easily using either the stovetop or microwave, but each method has its advantages. On the stovetop, pour your soup or stew into a pot and heat over medium-low heat, stirring occasionally. This method allows for even heating and enables you to add a splash of water or broth to maintain moisture throughout.

    In the microwave, use a microwave-safe bowl, covering it with a lid or a damp paper towel to prevent splattering, and heat in short intervals, stirring in between. This ensures everything heats through evenly without burning. Both methods can yield delicious results, but the stovetop offers a bit more control over texture and consistency.

    The Best Way to Reheat Bread and Pastries

    Reheating bread and pastries effectively is crucial for restoring their freshness and crispness. The oven or toaster oven is your best option for this task. Preheat your oven to about 180°C (350°F), then wrap your bread or pastries loosely in foil to prevent drying out. Heat for approximately 10 minutes until warmed through.

    For quicker results, a toaster oven can swiftly reheat small items like croissants or bagels. Set it to a lower temperature and monitor closely, as it typically requires just 3-5 minutes. These methods will help you enjoy baked goods that taste freshly made rather than stale or chewy.

    Methods to Reheat Fried Foods While Preserving Crispiness

    Reheating fried foods can be challenging, as they can easily lose their desirable crispiness if not done correctly. The oven or toaster oven is ideal for this purpose. Preheat your oven to 200°C (400°F), then spread your fried items in a single layer on a baking sheet. Reheat for about 10-15 minutes, turning halfway through to ensure even heating.

    Avoid using the microwave, as it tends to make fried food soggy. If you’re reheating smaller portions, a stovetop frying pan can also work by adding a small amount of oil and reheating over medium heat. This method allows the exterior to regain its crunch while effectively warming the inside. By employing these methods, you can enjoy your fried leftovers just as crispy as when they were first cooked.

    Frequently Asked Questions About Reheating

    Can you safely reheat food multiple times without losing quality?

    It’s best to limit reheating food to once to maintain quality and safety. Each time food is reheated, the risk of bacterial growth increases.

    What is the safest method for reheating food?

    The safest way to reheat food is to ensure it reaches an internal temperature of 75°C (165°F). Use a food thermometer to check for doneness.

    Is it safe to reheat food in plastic containers?

    Only use microwave-safe plastic containers to reheat food, as other plastics may leach harmful chemicals. Always check for a microwave-safe label.

    Can takeaway food be reheated safely?

    Yes, as long as the food has been stored properly in the fridge, it is safe to consume. Be sure to reheat it thoroughly to the recommended temperature before eating.

    Do reheated leftovers lose nutritional value?

    Reheated leftovers can lose some nutritional value, particularly water-soluble vitamins. However, proper reheating methods can minimize this loss.

    Can frozen leftovers be reheated directly without thawing?

    While it’s possible, it’s best to thaw frozen leftovers in the refrigerator before reheating, ensuring more even and thorough warming.

    What’s the best method to reheat pizza?

    The best way to reheat pizza is in a frying pan with a lid on or in the oven, as these methods help retain the crispiness of the crust.

    How long can leftovers be stored in the fridge?

    Leftovers can typically be stored in the fridge for 3-4 days. Ensure they are stored in airtight containers to maintain freshness.

    Is it safe to reheat food in the microwave?

    Yes, reheating food in the microwave is safe as long as you follow proper guidelines, including ensuring even heating and using microwave-safe containers.

    Can a steamer be used to reheat all types of food?

    Steaming is ideal for delicate foods like vegetables and fish, but it is not suitable for items that need a crisp texture, such as baked goods.

    Stay updated with our latest tips on Facebook!

    The post Best Ways to Reheat Leftovers Like a Pro: Universal Tips appeared first on https://cookinggods.com

    The Article Reheat Leftovers Like a Pro: Top Universal Tips Was Found On https://limitsofstrategy.com