Category: Baking Techniques

  • Master Advanced Bread Scoring Techniques for Perfect Loaves

    Master Advanced Bread Scoring Techniques for Perfect Loaves

    Enhance Your Bread Making with Expert Bread Scoring Techniques

    The Importance of Bread Scoring for Every Baker

    Top Techniques for Advanced Bread Scoring: A baker's hands scoring patterns on a rustic sourdough loaf for controlled expansion and a golden crust.

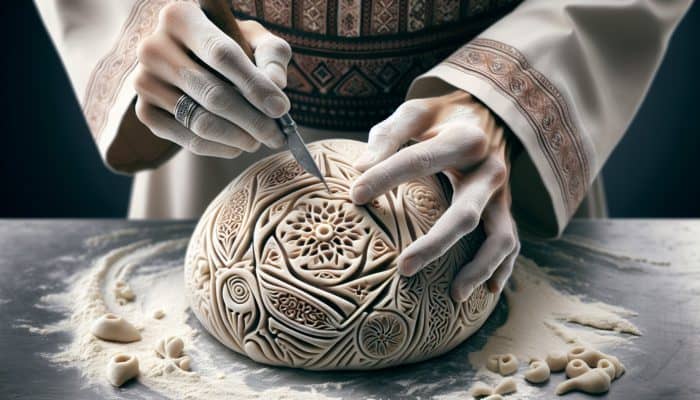
    Bread scoring is a critical baking technique involving the careful incision of bread dough’s surface before it enters the oven. This method is vital as it facilitates controlled expansion of the dough during baking, resulting in a loaf that is not only visually striking but also possesses an ideal texture. By employing effective scoring methods, bakers can successfully manage the dough’s rise, thus minimizing the risks of unwanted bursting while promoting the desired shape and structure of the loaf.

    For successful bread scoring, certain essential tools are necessary. Below is a comprehensive list of indispensable tools every baker should consider adding to their baking toolkit:

    • Lame: A specialized curved blade designed specifically for scoring dough.
    • A sharp knife: A standard kitchen knife can be effective if used with proper technique.
    • Scoring Knife: A tool engineered for making clean, precise cuts on the dough’s surface.
    • Razor Blade: Ideal for crafting delicate, shallow scores that enhance the bread’s appearance.
    • Board or Cutting Surface: A stable surface is crucial for effective and accurate scoring.
    • Flour: Used to dust the blade, reducing sticking during scoring.
    • Measuring Tape or Ruler: For ensuring precise measurements in your scoring patterns.
    • Safety Gloves: To protect your hands when handling sharp tools.

    How Effective Bread Scoring Enhances Your Baking Results

    Utilizing effective scoring strategies offers numerous benefits that significantly elevate the overall quality of your baked bread. One of the primary advantages of proper scoring is the enhancement of both the texture and crust of the bread. Allowing steam to escape through the scored lines promotes a lighter crumb structure and creates a more robust and appealing crust. Furthermore, well-executed scoring enhances the visual appeal of the bread, presenting a rustic charm that underscores the artisan nature of the baking process.

    Moreover, effective scoring optimizes the release of steam, which is essential for achieving a crust that is both crispy and visually striking. This results in a loaf that is as delicious as it is beautiful. Here are key benefits to be mindful of while scoring your bread:

    • Controlled expansion of the dough, leading to desirable shapes.
    • Enhanced aesthetic appeal that attracts attention.
    • Improved texture and quality of the crust.
    • Better steam release during the baking process.
    • Reduced likelihood of unintended bursting or irregular shapes.
    • Greater flavor development through optimal baking conditions.
    • Consistent results across various baking sessions.
    • Increased opportunities for creative presentation.

    Common Mistakes to Avoid in Bread Scoring

    When it comes to bread scoring, several common errors can undermine your efforts and lead to disappointing outcomes. A frequent mistake is making cuts that are too shallow; shallow scores may fail to facilitate the necessary steam escape, resulting in unpredictable bursting during baking.

    Another common issue is uneven scoring, which can create an unattractive appearance and inconsistent baking results. To achieve optimal outcomes, making your scores uniform and intentional is essential. Here’s a list of common mistakes to avoid:

    • Scoring either too shallow or too deep.
    • Inconsistent depth of cuts across the loaf.
    • Employing a dull blade that leads to tearing.
    • Failing to score at the optimal moment.
    • Neglecting to adjust the blade angle for various dough types.
    • Overlooking the importance of practice and refinement of technique.
    • Inadequate flouring of the blade prior to scoring.
    • Ignoring the unique characteristics and behavior of the dough.

    Advanced Techniques to Perfect Your Bread Scoring Skills

    Intricate scoring patterns on artisan bread, enhancing crust texture, on a rustic wooden table.

    Choosing the Best Tools for Professional Scoring

    For those looking to master advanced bread scoring techniques, the selection of appropriate tools is paramount. The best tools should include sharp blades and lames specifically designed for scoring purposes. An effective scoring tool must feature a sturdy handle along with a sharp, replaceable blade to ensure clean cuts that do not damage the dough.

    When selecting your tools, consider the following actionable steps:
    1. Assess Your Needs: Identify the types of bread you plan to score and choose tools that are suitable for those specific styles.
    2. Prioritize Quality: Invest in high-quality tools; sharper blades provide better control during scoring.
    3. Experiment with Various Styles: Try different types of lames, knives, or even rotary cutters to discover what feels most comfortable for you.
    4. Consider Ergonomics: Choose a scoring tool that fits comfortably in your hand, ensuring ease of movement and precision.
    5. Keep Tools Sharp: Regularly replace or sharpen your blades to maintain optimal performance and achieve clean scoring lines.
    6. Explore Innovative Options: Research new tools on the market, such as adjustable scoring devices, to provide versatility in your designs.

    Choosing the right tools is crucial for achieving the desired effects, making the scoring process smoother and more effective.

    Achieving Consistency in Your Scoring Patterns

    Consistent scoring patterns are a skill that requires practice and a profound understanding of the dough’s behavior, as well as the angle of the blade. The key to consistency lies in maintaining even tension on the dough while keeping a steady hand during the scoring process.

    Begin by training your muscle memory; practice scoring on smaller batches to hone your technique. Real-world examples of bakers achieving consistent patterns often include the utilization of templates or guides, which can assist in ensuring uniform spacing and angles in your scores. Here are some practical strategies to help you achieve consistent scoring:
    1. Practice Regularly: The more you score, the more consistently you will become.
    2. Utilize a Template: A scoring template can assist in guiding your blade placement for uniformity.
    3. Maintain Dough Tension: Ensure your dough is at the optimal stage of proofing before scoring to facilitate even expansion.
    4. Control Blade Angle: Keep your blade at a consistent angle during cuts to help manage how the dough expands.
    5. Experiment with Timing: Score at the right moment, typically just before baking, when the dough is fully proofed.
    6. Observe Experienced Bakers: Watch tutorials or live demonstrations from skilled bakers to gain insights into their techniques and adapt them to your own.

    Through dedicated practice and attention to detail, you’ll elevate your scoring skills to a level that significantly enhances your bread-making abilities.

    Mastering Advanced Scoring Techniques for Artisans

    Artisan baker's hands scoring intricate floral and geometric patterns into dough.

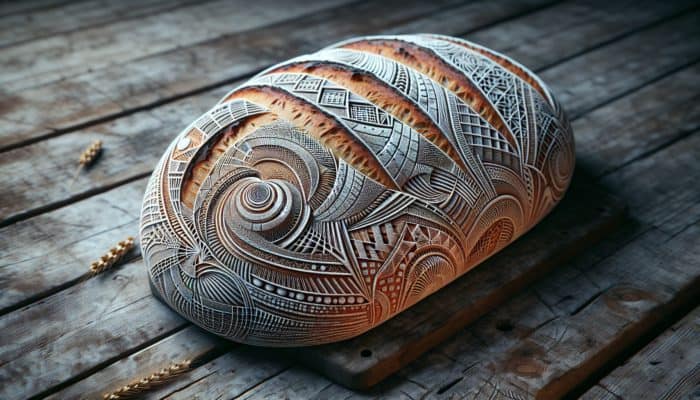
    Advanced scoring techniques extend beyond basic cuts, allowing bakers to showcase their creativity and craftsmanship. Techniques that involve intricate designs and patterns can elevate a simple loaf into an artisan masterpiece, highlighting the baker’s skill and meticulous attention to detail.

    These advanced methods require not only precision but also a thorough understanding of how the dough behaves post-scoring. For example, creating floral patterns or geometric shapes can add stunning visual appeal, and the choice of pattern can influence the texture and structure of the loaf as it bakes. Here are some expert insights into advanced scoring techniques:
    1. Develop a Signature Style: Many artisan bakers create unique scoring patterns that reflect their personal style, making their bread instantly recognizable.
    2. Combine Shapes: Experiment with blending different shapes and patterns for a multi-dimensional effect.
    3. Consider Dough Characteristics: Understand how various dough types behave when scored; for example, high-hydration doughs may require gentler cuts.
    4. Utilize Multiple Cuts: Don’t hesitate to layer your cuts for complex effects. A simple slash combined with a swirl can yield stunning results.
    5. Look to Nature for Inspiration: Observe natural forms, such as flowers or leaves, and translate them into beautiful scoring designs.
    6. Take Your Time: Don’t rush your scoring; a steady hand and careful execution will yield the best results.

    The impact of advanced scoring on the quality of bread is substantial, as these intricate designs not only enhance visual appeal but can also improve the overall structure and crust of the loaf.

    Incorporating Scoring into Your Bread Presentation

    Integrating scoring into the final presentation of bread can significantly elevate its aesthetic appeal, making it more enticing for customers or guests. Scoring should serve not only a functional purpose but also enhance the overall look of the bread.

    When planning your scoring designs, carefully consider the visual elements. Aligning the scoring with the bread’s shape and size can create a harmonious appearance that draws the eye. Here are some expert tips on aligning scoring with the overall design of the bread:
    1. Match Shapes: Ensure that the scoring patterns complement the shape of the loaf; long scores are ideal for baguettes, while round scores are suited for boules.
    2. Utilize Colour Contrast: Dusting the crust with flour or seasoning before scoring can create striking contrasts when baked.
    3. Think about Texture: The crust’s texture can be enhanced through scoring; consider using a combination of deep and shallow cuts for visual interest.
    4. Incorporate Themed Designs: If baking for a specific occasion, consider themed designs that reflect the event, such as hearts for Valentine’s Day or leaves for autumn.
    5. Experiment with Decorative Flourishes: Small additional cuts or flourishes can add a professional touch to your bread, making it stand out.
    6. Document the Process: Capture photographs of your scoring process to create a portfolio that showcases your skills and unique style.

    By thoughtfully incorporating scoring into your final presentation, you can create loaves that are not only delicious but visually stunning, appealing to both the eyes and the palate.

    Preparing Dough for Optimal Scoring

    Determining Dough Readiness for Scoring

    Assessing the readiness of your dough for scoring is a crucial step that ensures your cuts will yield the desired results during baking. The optimal dough should be at its peak proofing stage—light, airy, and with a smooth surface that feels slightly tacky to the touch.

    To determine when your dough is primed for scoring, consider the following factors:
    1. Proofing Level: The dough should have approximately doubled in size and feel light and airy when gently poked.
    2. Surface Tension: A well-proofed dough will exhibit a tight, smooth surface, indicating readiness for scoring.
    3. Elasticity: The dough should spring back slightly when pressed, demonstrating that the gluten structure is well-developed.
    4. Visual Cues: Look for a domed shape; if the dough begins to flatten, it may be over-proofed and unsuitable for scoring.
    5. Sound Test: Gently tap the side of the bowl; a hollow sound indicates that the dough is ready.
    6. Timing: Be mindful of proofing times; variations can occur based on factors such as ambient temperature and dough hydration.

    By accurately assessing dough readiness, you ensure that your scoring will facilitate optimal expansion, resulting in a beautifully baked final product.

    Achieving the Right Dough Tension for Scoring

    Achieving the correct dough tension is crucial for effective scoring. Proper tension impacts how the cuts open during baking, influencing the final shape and texture of the bread. If the tension is too tight, the dough may resist scoring and burst unpredictably. Conversely, if the tension is too loose, the dough may not maintain its shape during baking.

    Here are some techniques you can utilize to ensure optimal dough tension:
    1. Knead Appropriately: Develop the gluten structure effectively through thorough kneading; this foundation is essential for achieving good tension.
    2. Handle Gently: When shaping your dough, be gentle to avoid deflating the air pockets that contribute to tension.
    3. Incorporate Rest Periods: Allow rest periods during shaping; this relaxation can help maintain consistent tension throughout.
    4. Utilize the Stretch and Fold Technique: This method, during bulk fermentation, builds tension without excessively degassing the dough.
    5. Monitor Hydration Levels: Adjust hydration based on the flour type used; some flours may require more water to maintain proper tension.
    6. Use a Bench Scraper: When shaping, a bench scraper can help create tension by effectively sealing the seams of the dough.

    By mastering these techniques, you’ll create dough that is optimally tense, leading to more successful scoring and baking outcomes.

    The Role of Dough Hydration in Scoring

    Dough hydration is a critical factor in the scoring process, affecting both the extensibility and responsiveness of the dough. Hydration levels directly influence how the dough behaves during baking, impacting the final appearance and texture of the bread.

    A well-hydrated dough typically expands beautifully when scored, allowing the cuts to open effectively and achieve the desired shape. Conversely, low hydration can result in a stiff dough that may crack or burst in undesirable ways. Here’s how dough hydration impacts scoring results:
    1. Extensibility: Higher hydration doughs are generally more extensible, allowing for smoother and more defined scores.
    2. Crust Quality: Proper hydration contributes to a crispy crust by enabling better steam generation during baking.
    3. Air Pocket Formation: Adequate hydration supports the development of air pockets essential for achieving a light, airy crumb.
    4. Scoring Precision: A well-hydrated dough permits cleaner cuts and more precise scoring patterns.
    5. Fermentation Impact: The fermentation process is influenced by hydration; over-hydrated dough can lead to excessive fermentation, compromising the structure.
    6. Flavor Development: Hydration levels can also affect the Maillard reaction, influencing both the color and flavor of the final baked loaf.

    Understanding the significance of dough hydration enables bakers to make informed decisions about their recipes, ultimately achieving optimal scoring results.

    Exploring Scoring Patterns and Designs

    Essential Scoring Patterns Every Beginner Should Master

    For novice bakers, mastering basic scoring patterns is the foundational step toward developing advanced techniques. Basic patterns, such as straight lines and simple crosses, not only help control the dough’s expansion but also serve as essential skills that every baker should master before progressing to more complex designs. Practicing these scoring patterns will build your confidence and enhance your scoring technique over time. Here are some fundamental patterns that beginners should focus on:

    1. Straight Lines: Making straight cuts along the loaf’s length can effectively guide the dough’s expansion and is one of the simplest patterns to start with.
    2. Crosses: A simple cross pattern adds visual appeal while allowing the dough to expand effectively.
    3. Diagonal Cuts: Scoring diagonally across the loaf creates a traditional artisan look and promotes uniform expansion.
    4. Single Slash: A single, deep slash down the center can create an attractive opening as the loaf expands during baking.
    5. Grid Pattern: A basic grid pattern involves making evenly spaced cuts both horizontally and vertically, resulting in a classic look.
    6. Curved Lines: Incorporating gentle curves in your scoring can add sophistication to your loaves.

    By focusing on these basic patterns, you will establish a solid foundation that will enable you to explore more advanced designs with confidence.

    Intermediate Scoring Designs to Try as You Progress

    As bakers progress beyond the basics, intermediate scoring designs offer greater opportunities for creativity and complexity. Patterns like spirals and geometric shapes require a steady hand and a deeper understanding of dough behavior. These designs not only enhance the visual appeal of the bread but also contribute to its overall structure during the baking process.

    To improve your scoring designs as an intermediate baker, consider the following strategies:
    1. Refine Your Technique: Focus on maintaining a consistent depth and angle while scoring; this is crucial for achieving clean, professional-looking patterns.
    2. Incorporate Movement: Experiment with swirling motions to create spiral patterns, adding a dynamic look to your bread.
    3. Utilize Guides: Consider using templates or stencils to help you accurately and consistently achieve geometric shapes.
    4. Layer Patterns: Combine different patterns, such as overlays of crosses or diagonal lines, to create intricate designs that showcase your skill.
    5. Observe Advanced Techniques: Watch professional bakers or attend workshops to learn about their approaches to intermediate scoring designs.
    6. Practice on Smaller Batches: Use test loaves to practice new designs without the pressure of producing a perfect result on a larger scale.

    By honing your intermediate scoring techniques, you can elevate your baking to an artisan level, creating breads that are not only delicious but also visually striking.

    Advanced Artistic Scoring Techniques to Explore

    Advanced artistic scoring techniques can transform bread into exquisite works of art, showcasing the baker’s creativity and technical skill. Techniques for creating intricate designs require both practice and a thorough understanding of how the dough responds to scoring.

    These advanced methods often involve multiple scoring cuts and a keen eye for detail. If you’re looking to master artistic scoring, consider the following approaches:
    1. Inspiration from Nature: Draw inspiration from natural forms, such as flowers or leaves, to create organic patterns in your scoring.
    2. Experiment with Depth: Varying the depth of your cuts can create stunning visual contrasts and textures on the crust.
    3. Mix Patterns: Combine different styles of scoring to create a unique and personalized design that reflects your artistry.
    4. Utilize a Ruler or Template: For geometric patterns, using a ruler can ensure precision and uniformity in your cuts.
    5. Focus on Timing: Scoring at the right moment is critical for achieving the best results; practice timing your scores just before placing the dough in the oven.
    6. Document Your Creations: Keep a visual record of your artistic scores to analyze what works best and to catalog your progress.

    By embracing these advanced artistic techniques, you can create bread that delights the senses, elevating your baking from mere sustenance to a culinary masterpiece.

    The Science of Bread Scoring Explained

    Impact of Scoring on Bread Expansion

    Scoring plays a pivotal role in controlling bread expansion during the baking process. By providing designated pathways for the dough to rise, scoring allows for an even and aesthetically pleasing rise. When executed correctly, it prevents the loaf from bursting in unpredictable ways, which can lead to an undesirable appearance and texture.

    Scoring has several noteworthy impacts on bread expansion:
    1. Controlled Release of Steam: The cuts allow steam generated from the dough during baking to escape in a controlled manner, promoting an even rise.
    2. Guided Shape: Scoring directs how the dough expands, helping maintain the desired shape, whether round or elongated.
    3. Even Crust Formation: Properly scored bread expands uniformly, leading to a more even crust that is visually appealing.
    4. Influence on Texture: Scoring allows for a more controlled crumb structure, resulting in a lighter, airier texture.
    5. Aesthetic Appeal: The way a loaf expands through scoring creates beautiful patterns and shapes that enhance the overall presentation.
    6. Preventing Over-Baking: By allowing steam to escape, scoring can help prevent the loaf from overbaking, ensuring optimal moisture retention.

    Understanding how scoring affects bread expansion enables bakers to make informed decisions about their techniques, leading to consistently impressive baking results.

    How Scoring Affects Crust Formation

    The impact of scoring on crust formation is significant and cannot be overstated. Proper scoring techniques lead to more controlled expansion, helping achieve a desirable crust. When the dough is scored correctly, it allows steam to escape, which directly affects both the texture and appearance of the crust.

    Here are several key aspects of how scoring influences crust formation:
    1. Even Expansion: Scoring promotes even expansion, contributing to a more uniform crust that is less likely to crack unexpectedly.
    2. Crispness: The steam escaping through the scores helps form a crispy crust by creating a dry outer layer while keeping the interior moist.
    3. Colour Development: The exposure created by scoring allows for better browning during baking, resulting in a visually appealing golden crust.
    4. Texture Variation: Different scoring patterns can create varied crust textures; for instance, deeper cuts may lead to a more rugged appearance.
    5. Surface Area: The cuts increase the surface area of the crust, enhancing flavor through the Maillard reaction, which occurs during browning.
    6. Feedback Loop: Observing how the crust develops as a result of scoring can inform future baking decisions, allowing bakers to refine their techniques.

    Scoring is integral to achieving the perfect crust, transforming not just the look but also the overall flavor and texture of the bread.

    The Relationship Between Scoring and the Maillard Reaction

    Scoring significantly influences the Maillard reaction, a chemical process that occurs between amino acids and reducing sugars, contributing to the browning of baked goods. This reaction is essential for developing the aroma and flavor of bread, and effective scoring can enhance its impact.

    Here’s how scoring affects the Maillard reaction in bread baking:
    1. Increased Surface Area: Scoring increases the surface area exposed to heat, promoting more significant browning reactions during baking.
    2. Steam Release: The cuts allow steam to escape, which helps maintain the ideal conditions for the Maillard reaction to occur effectively.
    3. Enhanced Flavor: Improved browning due to scoring can lead to a richer, more complex flavor profile in the finished loaf.
    4. Visual Appeal: The browning that results from the Maillard reaction not only enhances flavor but also improves the visual presentation of the bread.
    5. Crust Development: A well-scored loaf will generally have a more robust crust that is not only beautiful but also contributes to the overall sensory experience.
    6. Optimized Baking Conditions: Scoring helps regulate the oven environment by allowing for controlled steam escape, which can further influence the Maillard reaction.

    Understanding the relationship between scoring and the Maillard reaction enables bakers to create loaves that are not only visually impressive but also rich in flavor.

    Effects of Scoring Techniques on Bread Texture

    Different scoring techniques can significantly influence the texture of bread by altering how the dough expands and sets during the baking process. The depth, angle, and pattern of the cuts all contribute to the final crumb structure and softness, key characteristics of quality bread.

    When implementing scoring techniques, consider the following effects on texture:
    1. Depth of Cuts: Deeper cuts allow for greater expansion, resulting in a light and airy crumb structure, while shallower cuts may lead to denser bread.
    2. Angle of Blade: The angle at which you score can create varying levels of crust crispness; a flat angle may encourage more open crumb structures.
    3. Pattern Complexity: More complex patterns can create interesting textures on the crust, adding to the overall mouthfeel of the bread.
    4. Timing of Scores: Timing impacts how the dough responds to scoring; scoring too early can lead to deflation and undesirable textures.
    5. Interaction with Dough Hydration: Higher hydration doughs may benefit from different scoring techniques to ensure they expand correctly, while drier doughs may require deeper cuts.
    6. Post-Bake Handling: The way you handle the loaf after baking, combined with your scoring technique, can further influence the final texture.

    By mastering various scoring techniques, bakers can control the aesthetic qualities of their bread and achieve the desired texture that makes each loaf unique and enjoyable.

    Research-Backed Benefits of Advanced Bread Scoring Techniques

    Enhancing Visual Appeal Through Effective Scoring

    Enhancing the aesthetics of bread through scoring can lead to a more visually appealing product, significantly increasing its market value and customer satisfaction. A beautifully scored loaf captures attention and creates a lasting impression, making it essential for both home bakers and professional artisans alike.

    Real-world examples illustrate how scoring enhances bread aesthetics in bakeries that specialize in artisanal products. Here are several benefits of scoring in this context:
    1. Visual Appeal: Intricate and well-executed scores can transform an ordinary loaf into a stunning visual masterpiece.
    2. Brand Identity: Unique scoring patterns can create a signature style associated with a particular bakery, enhancing brand recognition.
    3. Customer Engagement: Visually appealing breads can attract customers, encouraging them to purchase and try new products.
    4. Presentation for Events: For special occasions, such as weddings or holidays, a beautifully scored loaf can serve as a stunning centerpiece.
    5. Increased Value: Artisan breads that are aesthetically pleasing often command higher prices, reflecting the skill and effort involved in their creation.
    6. Culinary Trends: The rise of social media platforms has made beautiful bread more marketable, leading to increased sales for visually stunning products.

    By focusing on aesthetics through scoring, bakers can elevate their offerings, create a memorable experience for consumers, and enhance their overall market presence.

    Steps to Improve Bread Texture with Advanced Scoring Techniques

    Improving bread texture through advanced scoring techniques involves creating a more even crumb structure and a desirable crust texture. The right scores can enhance the eating experience, contributing to the overall enjoyment of the bread.

    To achieve improved texture through advanced scoring, consider these actionable steps:
    1. Experiment with Scores: Try different scoring patterns to observe how they influence the texture; for example, cross-hatching may create an interesting contrast.
    2. Focus on Depth: Pay close attention to the depth of your cuts; a good balance will allow for optimal expansion while preserving the integrity of the loaf.
    3. Observe Dough Behavior: Take note of how different types of dough respond to scoring; adjust your techniques based on hydration and gluten development.
    4. Incorporate Different Flours: Varying flour types can yield different textures; experimenting with blends may lead to new scoring techniques that enhance the bite.
    5. Control Baking Environment: Monitor oven temperature and steam levels; these factors heavily influence crust and crumb texture as well as scoring effectiveness.
    6. Document Your Results: Keep a record of your experiments with scoring techniques and their effects on texture to create a blueprint for success.

    By employing advanced scoring techniques to improve bread texture, bakers can create loaves that not only look appealing but also provide a delightful sensory experience.

    The Contribution of Scoring to Bread Flavor Development

    Scoring plays a significant role in bread flavor development, influencing both the Maillard reaction and the overall steam release during baking. By allowing steam to escape properly, scoring creates an environment conducive to flavor enhancement.

    Expert analysis reveals the following relationships between scoring and bread flavor development:
    1. Steam Release: Properly scored bread releases steam that allows for even heat distribution, enabling flavor to develop uniformly.
    2. Crust Browning: The Maillard reaction, influenced by scoring, contributes to the bread’s color and complex flavors; deeper cuts can enhance this effect.
    3. Aroma Development: As steam escapes through the cuts, it carries aroma compounds that significantly enhance the sensory experience of the bread.
    4. Improved Crust Texture: A well-developed crust not only provides a satisfying crunch but also serves to encapsulate and concentrate flavors within the loaf.
    5. Unique Flavor Profiles: Experimentation with different scoring techniques can lead to unique flavor profiles, depending on how the dough responds to the scoring method.
    6. Feedback Loop: Observing how scoring influences flavor can inform future baking techniques, allowing bakers to refine their methods for better results.

    By understanding the role of scoring in flavor development, bakers can create loaves that are not only visually stunning but also rich in flavor, thereby enhancing the overall consumer experience.

    Essential Tools and Equipment for Effective Scoring

    Selecting the Ideal Blade for Scoring

    Choosing the right blade for scoring is crucial for ensuring clean cuts and optimal performance. The ideal scoring blade should be sharp, durable, and suitable for the type of dough being used. Using the appropriate blade can significantly impact the quality of your scores and, ultimately, the final loaf.

    When selecting a scoring blade, consider the following factors:
    1. Sharpness: A sharp blade is essential for making clean cuts without tearing the dough; opt for blades that are easily replaceable when they dull.
    2. Blade Type: Different blade types, such as curved or straight, can affect scoring; experiment with various styles to find what works best for you.
    3. Handle Comfort: Ensure the blade’s handle feels comfortable in your hand; a good grip allows for better control and precision while scoring.
    4. Durability: Choose blades made from high-quality materials that can withstand regular use without compromising performance.
    5. Size and Shape: Depending on your scoring needs, consider the size and shape of the blade to ensure it is suitable for the patterns you wish to create.
    6. Ease of Use: Select a blade that you feel confident using; familiarity will enhance your precision and ultimately improve your scoring technique.

    By carefully selecting the right blade for scoring, you set yourself up for success in your bread-making endeavors.

    Best Practices for Maintaining and Sharpening Your Scoring Tools

    Maintaining and sharpening scoring tools is essential for achieving clean and precise cuts, which significantly impact the final appearance of the bread. Regular maintenance ensures that your tools remain effective and safe to use.

    To effectively maintain and sharpen your scoring tools, follow these tips:
    1. Regular Cleaning: Clean your blades after each use to prevent dough residue from building up, which can affect performance.
    2. Sharpening Tools: Use a whetstone or sharpening tool to keep blades sharp; dull blades can tear dough instead of providing clean cuts.
    3. Storage: Store blades in a protective sheath or holder to prevent accidental damage and to maintain sharpness.
    4. Check for Wear: Regularly inspect blades for signs of wear or damage; replacing blades when necessary will improve scoring quality.
    5. Lubrication: Occasionally apply food-safe oil to the blade and handle to prevent rust and ensure smooth operation.
    6. Practice Safety: Always handle sharp blades with care; consider using safety gloves or protective gear to protect yourself during maintenance.

    By prioritizing the maintenance and sharpening of your scoring tools, you will ensure that they remain in optimal condition, leading to better scoring results.

    Innovative Scoring Tools Available Today

    Innovative scoring tools on the market have transformed the way bakers approach scoring, offering unique features that facilitate better results and enhanced creativity. These tools can help achieve intricate and distinctive designs that elevate the quality of your bread.

    Some of the innovative scoring tools available to bakers include:
    1. Specialized Lames: Many new lames come with ergonomic handles and interchangeable blades, providing flexibility and ease of use.
    2. Rotary Cutters: These allow for swift, even cuts and can be adjusted for depth, making them ideal for complex designs.
    3. Adjustable Scoring Devices: Tools that permit customizable scoring depths and patterns provide versatility in crafting unique designs.
    4. Multi-Blade Scoring Tools: These enable bakers to create multiple scores simultaneously, saving time and allowing for complex patterns in a single motion.
    5. Digital Scoring Guides: Some advanced baking setups include digital guides that assist bakers in achieving precise cuts based on preset templates.
    6. Flexible Blades: New materials allow for blades that can bend slightly, offering greater control and reducing the risk of tearing the dough.

    By exploring these innovative scoring tools, bakers can refine their techniques and create bread that is not only visually appealing but also showcases their skill and creativity.

    Customizing Scoring Techniques for Various Bread Types

    Optimal Scoring Techniques for Sourdough Bread

    Scoring techniques for sourdough bread are unique due to the dough’s higher hydration and fermentation characteristics. Successfully scoring sourdough requires a nuanced understanding of its specific behavior, enabling bakers to achieve optimal results.

    Here are some of the best scoring techniques for sourdough bread:
    1. Deep Cuts: Sourdough often benefits from deeper cuts, allowing for controlled expansion as moisture escapes during baking.
    2. Cross Patterns: A simple cross pattern helps the dough expand evenly, creating a beautiful rise and a consistent crust.
    3. Wavy Cuts: Incorporating wavy or curved cuts can add visual interest and allow for a more dramatic rise.
    4. Multiple Cuts: Consider scoring multiple lines close together; this can create a lovely open crumb structure and enhance crust texture.
    5. Adjusting Blade Angle: Experiment with the angle of the blade; steeper angles can create more dramatic openings in the crust.
    6. Timing is Key: Ensure you score at the right moment, just before baking, to maintain the dough’s structure and prevent excessive deflation.

    By mastering these sourdough-specific scoring techniques, bakers can elevate their loaves, achieving the characteristic appearance and texture that sourdough is renowned for.

    Scoring Techniques for Baguettes and Batards

    Scoring baguettes and batards requires a different approach compared to other bread types, primarily due to their shape and dough consistency. The unique characteristics of these loaves demand careful consideration in scoring techniques to ensure beautiful results.

    Here’s how to effectively score baguettes and batards:
    1. Long, Diagonal Cuts: For baguettes, long diagonal slashes (typically 3-5) along the length of the loaf are classic and effective.
    2. Gentle Pressure: Use gentle pressure while scoring to ensure the dough remains intact and does not collapse.
    3. Spacing: Ensure slashes are evenly spaced to allow for uniform expansion and to avoid overcrowding.
    4. Depth Control: Aim for a depth of around 1/4 inch; this depth allows for a good opening without compromising the dough structure.
    5. Angle of Cuts: Keep the cuts angled at around 30 degrees; this helps create a beautiful bloom during baking.
    6. Adjust Timing: Score just before placing in the oven to ensure the dough retains its proofing levels and avoids deflation.

    By applying these scoring techniques to baguettes and batards, bakers can achieve the traditional look and texture that these loaves are celebrated for.

    Best Scoring Techniques for Artisan Breads

    Scoring techniques for artisan breads can vary widely, reflecting the creativity and skill of the baker. Artisan loaves often lend themselves to more complex designs, allowing bakers to showcase their artistry truly.

    Here are some scoring techniques that are best suited for artisan breads:
    1. Intricate Patterns: Consider elaborate patterns such as leaves or flowers, which can be achieved with precision and practice.
    2. Layered Designs: Overlaying different scoring patterns can create depth and visual interest in the final product.
    3. Using a Template: For highly detailed patterns, using a template can help achieve consistent designs quickly.
    4. Experimenting with Depth and Angle: Varying the depth and angle of cuts can significantly influence the crust and crumb structure.
    5. Incorporating Symbols: Personal symbols or motifs can add a unique touch to artisan loaves, making them more memorable.
    6. Focusing on Presentation: Think about the final presentation; consider how your scores will affect the visual appeal of the bread when served.

    By employing these artisan scoring techniques, bakers can create loaves that are not only delicious but also works of art, showcasing both skill and creativity.

    Tackling Common Scoring Challenges

    How to Correct Uneven Scoring Cuts

    Addressing uneven scoring cuts can be a frustrating challenge, yet it is a common issue that many bakers encounter. Identifying the cause of uneven scores, such as improper blade angle or dough tension, is key to correcting the problem.

    To rectify uneven scoring cuts, consider the following strategies:
    1. Adjust Blade Angle: Ensure that you maintain a consistent angle while scoring; a steeper angle can lead to uneven cuts.
    2. Check Dough Tension: Proper tension is crucial; if the dough is too loose or too tight, it may not respond well to scoring.
    3. Practice Consistency: Regularly practice your scoring technique to develop muscle memory that fosters consistent cuts.
    4. Use a Guide: Consider using a guide or template to help maintain uniformity in your scoring patterns.
    5. Evaluate Your Tools: Dull or inappropriate tools can lead to uneven cuts; ensure your scoring blade is sharp and well-suited for the task.
    6. Document and Learn: Keep track of what works and what doesn’t; this documentation will help you improve your technique over time.

    With a little practice and attention to detail, you can overcome uneven scoring cuts and achieve beautiful, consistent results in your baking.

    Strategies to Prevent Bread from Bursting During Baking

    Preventing bread from bursting during baking is critical to achieving a successful loaf. A well-executed scoring technique can mitigate the risk of undesirable bursting, ensuring that your loaf rises beautifully.

    To prevent your bread from bursting during baking, consider the following steps:
    1. Score at the Right Depth: Aim for a scoring depth that allows for controlled expansion; cuts that are too shallow may not facilitate proper steam release.
    2. Monitor Proofing Levels: Ensure that your dough is at the optimal proofing level before scoring; over-proofed dough is more likely to burst.
    3. Adjust Timing: Score your bread just before placing it in the oven to retain the dough’s structure and prevent excessive deflation.
    4. Consider Dough Characteristics: Different doughs behave differently; high-hydration doughs may require deeper cuts to manage expansion effectively.
    5. Control Oven Environment: Proper steam levels in the oven can impact how the bread expands; consider using a steam tray or a water pan.
    6. Practice Scoring Techniques: The more you practice, the better you will become at understanding how your dough behaves and how to score effectively.

    By implementing these strategies, you can significantly reduce the risk of bursting and achieve beautifully baked loaves.

    Effective Methods for Correcting Scoring Mistakes

    Correcting scoring mistakes involves understanding what went wrong and adjusting your technique accordingly. Whether you’ve made shallow cuts or uneven patterns, learning from these errors is essential for improvement.

    To rectify scoring mistakes, consider the following approaches:
    1. Assess the Error: Take a moment to evaluate what went wrong—was the depth incorrect, or was the angle off?
    2. Adjust Patterns Mid-Bake: If possible, you may be able to make adjustments during baking; however, this requires careful observation and timing.
    3. Learn for Future Bakes: Document what you’ve learned from the mistake, including any adjustments you made and the outcomes.
    4. Practice More: The more you practice, the better you’ll become at anticipating how your scoring will affect the final product.
    5. Seek Feedback: If you’re part of a baking community, consider seeking feedback from peers to gain insights into your technique.
    6. Be Patient: Improving your scoring technique takes time; don’t be discouraged by mistakes, as they are part of the learning process.

    By focusing on correction and learning, you will improve your scoring skills and produce consistently high-quality bread.

    Frequently Asked Questions About Bread Scoring

    What is the best tool for scoring bread?

    The best tool for scoring bread is a sharp lame or scoring knife, as they provide the precision and control needed for clean cuts.

    How deep should I score my bread?

    Score your bread about 1/4 inch deep, allowing for proper expansion without compromising the dough’s structure.

    Can I score bread after it has risen?

    Yes, scoring is typically done just before baking to ensure the dough maintains its shape and structure.

    What happens if my cuts are too shallow?

    If your cuts are too shallow, the loaf may not expand properly, leading to a burst or uneven rise during baking.

    How can I create intricate designs in my scoring?

    To create intricate designs, practice consistently, use templates, and experiment with different blade angles and depths.

    Does dough hydration impact scoring?

    Yes, higher hydration levels can result in more extensible dough, allowing for cleaner and more defined scores.

    What should I do if my bread bursts in the oven?

    If your bread bursts, assess your scoring technique, ensure proper proofing, and adjust your depth and timing for future bakes.

    Is scoring necessary for all types of bread?

    While not all bread types require scoring, artisanal and free-form loaves need to be scored to control expansion and enhance their appearance.

    Can I use a regular knife to score bread?

    Yes, a sharp, regular knife can be used for scoring, but a dedicated scoring tool, such as a lame, provides better precision.

    How often should I sharpen my scoring tools?

    Sharpen your scoring tools regularly, ideally after every few uses, to maintain optimal performance and achieve clean cuts.

    Connect with us on Facebook!

    The post Top Techniques for Advanced Bread Scoring: Master the Art appeared first on https://cookinggods.com

    The Article Advanced Bread Scoring Techniques: Master the Craft Was Found On https://limitsofstrategy.com

  • Choux Pastry Secrets for Mastering the Art Flawlessly

    Choux Pastry Secrets for Mastering the Art Flawlessly

    Master the Art of Choux Pastry: Essential Strategies for Perfection

    To truly excel in the craft of choux pastry, diving deep into the essential strategies that lead to perfection is paramount. A thorough understanding of premium ingredients, exact ratios, and meticulous temperature regulation is vital. These factors are fundamental in creating the desired light and airy texture that makes choux pastry uniquely delightful and utterly irresistible.

    Selecting Top-Quality Ingredients for Exceptional Choux Pastry

    High-quality choux pastry ingredients including robust flour and fresh eggs on a rustic table.

    The success of any remarkable choux pastry is closely linked to the quality of its components. The foundation of this exquisite pastry lies in the choice of flour. It is recommended to opt for a strong all-purpose flour or, when available, a specialized pastry flour containing approximately 11-12% protein. This perfect balance provides the necessary structure while ensuring a light, airy crumb. Avoid using cake flour, as its lower protein content results in a dough lacking the strength required to hold its shape during baking.

    Additionally, the selection of butter plays a crucial role in determining the flavor profile of your choux. It is best to use unsalted butter to maintain control over the saltiness of your pastry. Ensure that the butter is fresh and of the highest quality; premium brands typically contain a higher fat content, significantly enhancing the overall taste and richness of your pastry.

    Lastly, large eggs are vital for producing the ideal choux. They provide essential moisture and structural support. The technique of incorporating eggs into your dough is critical; begin by whisking them in a bowl, then gradually add them to your cooked flour and butter mixture. This gradual process is essential for achieving a smooth and glossy consistency, which is perfect for piping.

    Achieving the Right Ingredient Ratios for Perfect Choux Pastry Consistency

    Mastering the ratios of your ingredients is crucial for attaining the perfect choux pastry consistency. The traditional ratio for creating choux pastry typically adheres to the formula of 1:1:2:2—one part flour, one part butter, two parts water, and two eggs. This straightforward yet effective formula guarantees the ideal rise and texture of your pastry.

    For example, if you start with 100 grams of flour, you should use the same amount of butter (100 grams) and double the amount of water (200 grams). This careful calibration ensures that your pastry rises beautifully and maintains its structure after baking.

    It is essential to recognize that these ratios may need small adjustments based on the humidity and temperature conditions in your kitchen. If your environment is particularly warm, you might need to slightly reduce the water or eggs to prevent a loose dough. Conversely, in cooler conditions, you may require a little extra liquid. Trust your instincts and pay close attention to the dough’s consistency as you mix.

    Maintaining Optimal Temperature Control During Mixing and Baking of Choux Pastry

    Temperature regulation is vital during both the mixing and baking processes of choux pastry. When cooking the flour and butter mixture, it’s crucial to do so over medium heat. This method ensures the butter melts thoroughly while the flour cooks without browning. The mixture should form a cohesive ball that pulls away from the sides of the pan, indicating readiness for the next stage.

    Once the mixture is cooked, allow it to cool slightly before adding the eggs. If the mixture is too hot, it can inadvertently cook the eggs, leading to a lumpy texture. Conversely, if it cools too much, the dough may not rise adequately when baked. A useful guideline is to allow the mixture to cool to approximately body temperature before incorporating the eggs.

    Maintaining a consistent temperature during the baking phase is equally important. Preheat your oven thoroughly and avoid opening the door during the initial half of the baking time, as this can cause the pastries to collapse. For optimal results, the ideal baking temperature for choux pastry is around 200°C (390°F). This high heat is crucial for transforming the water in the dough into steam, resulting in the light and airy texture characteristic of well-crafted choux pastry.

    Step-by-Step Guide to Crafting Exceptional Choux Pastry

    Illustration of hands crafting choux pastry, from dough to baking, in a warm kitchen.

    Having discussed the essential strategies, let’s delve into a comprehensive step-by-step guide that will empower you to create your own choux pastry masterpiece. By adhering to these meticulous instructions, you will be well-equipped to produce perfect choux every single time.

    Key Techniques for Preparing Choux Pastry Dough with Precision

    Crafting choux pastry dough may seem simple, yet it demands careful attention to detail. Start by accurately measuring your ingredients. In a medium saucepan, combine water, butter, and salt. Bring this blend to a gentle boil over medium heat, ensuring that the butter melts completely.

    Once the mixture reaches a boil, promptly remove the pan from the heat and immediately incorporate the flour. Stir vigorously with a wooden spoon or spatula until the mixture forms a cohesive ball that separates from the sides of the pan. This step is essential, as it allows the flour to cook and develop the necessary structure for your pastry.

    Next, transfer the dough to a mixing bowl and allow it to cool for approximately five minutes. This cooling period is vital to prevent the eggs from cooking upon contact. Gradually add the eggs, mixing thoroughly until the dough achieves a smooth and glossy appearance. The dough should fall from the spatula in a thick ribbon. If it feels too stiff, add a little more egg; if it’s too runny, incorporate a bit more flour.

    Once your dough reaches the desired consistency, let it rest for a minimum of 15 minutes. This resting phase is crucial for relaxing the gluten, resulting in a more tender pastry that is easier to pipe and shape.

    Mastering Piping Techniques for Perfect Choux Pastry

    Piping choux pastry is an art that significantly influences the shape and uniformity of your pastries. Begin by preparing your piping bag fitted with a round tip—typically, a 1cm (0.4 inches) plain tip works perfectly for éclairs and cream puffs.

    Fill your piping bag with the prepared pastry dough. To achieve uniform shapes, pipe the dough onto a lined baking sheet while holding the bag at a 90-degree angle. Gently squeeze the bag while lifting it to create a peak, then stop applying pressure before pulling away to avoid leaving tails.

    For éclairs, pipe straight lines measuring about 10cm (4 inches) long, while for cream puffs, create small mounds approximately 4cm (1.5 inches) in diameter. For a smooth finish, lightly dip your finger in water and gently smooth down any peaks left from piping. This small yet impactful step will help ensure a polished appearance once baked.

    Be sure to leave ample space between the pastries on the baking tray, as they will expand during the baking process. Maintaining at least 5cm (2 inches) of space between each piped piece is an excellent guideline to follow.

    Essential Baking Tips for Achieving Flawless Choux Pastry

    Golden-brown choux pastry baking in a steamy oven at 200°C, cooled on a wire rack.

    Baking is where the true magic happens for choux pastry. To ensure even rising and thorough cooking, preheat your oven to 200°C (390°F) and position your baking tray in the center of the oven.

    To create steam—essential for the rise of the pastry—place a small oven-safe dish filled with water at the bottom of your oven. This generates a humid environment that prevents the pastries from drying out too quickly, aiding in achieving that perfect puff.

    Avoid opening the oven door during the first 20 minutes of baking. A sudden temperature drop can lead to collapsing pastries, producing flat and disappointing results. After the first 20 minutes, you can briefly check on their progress. If they are rising beautifully and developing a lovely golden brown hue, you are on the right track.

    When the pastries are fully baked, they should be golden and firm to the touch. Remove them from the oven and allow them to cool on a wire rack. This cooling phase is essential to prevent sogginess; if left on the baking tray, moisture can accumulate, negatively impacting the texture.

    Effective Solutions for Common Choux Pastry Problems

    Even the most experienced bakers may encounter challenges while preparing choux pastry. Being able to identify these common issues and their solutions is vital for mastering the secrets to creating flawless choux pastry.

    Identifying and Resolving Flat Pastries: Common Causes and Solutions

    Flat choux pastries can result from several factors. A primary cause is insufficient steam during the baking process. If your dough lacks moisture or the oven environment is excessively dry, the pastries may not rise as expected. To remedy this, ensure your water-to-flour ratio is precise, and consider adding extra egg for added moisture.

    Improper mixing can also lead to flat pastries. If the dough isn’t mixed thoroughly after incorporating the eggs, it may become too dense, obstructing the necessary lift. Mix until the dough is smooth and glossy to facilitate that light and airy texture.

    Moreover, avoid opening the oven door prematurely. A sudden drop in temperature can lead to collapsing pastries. Exercise patience and wait until they have risen well before checking on them.

    Preventing Soggy Bottoms in Your Choux Pastry

    Soggy bottoms can be a frustrating issue when baking choux. This problem often arises from either underbaking or excess moisture in the dough. To prevent soggy bottoms, ensure your pastries are baked until they achieve a golden brown color and feel firm to the touch.

    Utilizing a baking sheet lined with parchment paper can also aid in absorbing moisture. If you find that your pastries remain soggy, consider returning them to the oven for extra baking time to ensure they dry out completely.

    Another practical tip is to pierce the bottom of the pastries with a toothpick after baking, allowing steam to escape. This technique helps prevent moisture from being trapped inside, resulting in a crispier finish.

    Addressing Cracking Issues During the Baking Process

    Cracking in choux pastry is a common issue caused by various factors. One primary reason for cracking is baking the pastries at excessively high temperatures. While a high initial temperature is vital for rising, the pastry may rise too quickly and develop cracks if the temperature is too elevated.

    To address this, consider reducing the temperature slightly after the first 15 minutes of baking, allowing for a more gradual rise.

    Overmixing the dough after adding the eggs can also lead to a fragile structure that struggles to support the rising process. Mix just until the ingredients are combined and smooth for optimal results.

    Lastly, ensure that you are using fresh ingredients. Stale flour or old eggs can negatively impact the quality of your pastry, leading to unsatisfactory outcomes.

    Exploring Advanced Techniques to Elevate Your Choux Pastry Skills

    Once you have mastered the fundamentals, it’s time to explore advanced techniques that will take your choux pastry creations to extraordinary levels.

    Crafting Choux Au Craquelin: A Flavorful and Textural Enhancement

    Choux au craquelin is a delightful variation on classic choux pastry, featuring a crunchy topping that adds delightful texture and flavor. To prepare this variation, create a simple sugar cookie dough using equal parts flour, butter, and brown sugar.

    Roll the craquelin dough into a thin sheet and cut it into smaller circles than your piped choux. Before baking, place a circle atop each piped pastry. As the pastries rise, the craquelin spreads, forming a delightful, crunchy topping that beautifully contrasts with the soft interior of the pastry below.

    This technique not only enhances visual appeal but also enriches the overall flavor profile of your choux creations, making them even more enticing to enjoy.

    Incorporating Unique and Exciting Flavors into Your Choux Pastry

    Infusing flavors into your choux pastry dough can lead to innovative and exciting creations. Consider infusing your butter with vanilla, citrus zest, or spices like cinnamon before mixing it with the flour. Such subtle enhancements can elevate your pastries, making them distinct and memorable.

    Another exciting option is directly incorporating extracts or flavorings into the dough. For instance, adding a touch of almond extract can provide a delightful twist to classic éclairs. Be cautious with the amounts used, as a little can have a significant impact on the flavor.

    For the more adventurous, consider adding cocoa powder to your flour to create chocolate choux pastry. This rich base pairs beautifully with fillings like cream or custard, resulting in an indulgent treat that is hard to resist.

    Perfecting the Art of Decorating and Filling Choux Pastry

    The final step in perfecting your choux pastry involves mastering the techniques of decorating and filling. Classic fillings such as whipped cream, pastry cream, or custard are always popular choices. To fill your pastries, use a piping bag fitted with a small round tip. Insert the tip into the base of the pastry and gently squeeze until you feel slight resistance.

    For decoration, consider glazing your éclairs with a simple chocolate ganache or icing. A light dusting of powdered sugar on cream puffs adds an elegant touch. You might also experiment with edible gold leaf or colorful sprinkles for a festive flair that impresses.

    Remember, presentation is key to captivating your guests. Take the time to arrange your pastries artfully on a plate, and consider pairing them with fresh fruit or a berry coulis for an added splash of color and flavor contrast.

    Exploring Practical Applications of Choux Pastry: Versatile Culinary Uses

    Understanding the diverse applications of choux pastry can unlock a world of culinary creativity. Here are some classic and modern uses of choux pastry that showcase its incredible versatility.

    Crafting Classic Éclairs and Profiteroles with Flair

    Éclairs and profiteroles are among the most recognized forms of choux. Éclairs are long, filled pastries traditionally stuffed with pastry cream and topped with chocolate icing. To create perfect éclairs, pipe elongated shapes onto a baking sheet. Once baked and cooled, fill them with your preferred filling and drizzle with chocolate ganache for a classic finish that delights the palate.

    On the other hand, profiteroles are small, round puffs often filled with whipped cream or ice cream. They can be served plain or drizzled with chocolate sauce. To create profiteroles, pipe small rounds and bake just as you would for éclairs. Once filled, they can be beautifully assembled into a croquembouche, creating an impressive centerpiece for any gathering or celebration.

    Transforming Choux Pastry into Delicious Churros and Beignets

    Choux pastry can also be adapted to create beloved fried treats such as churros and beignets. For churros, pipe the dough into hot oil and fry until they achieve a golden brown hue. After frying, toss them in cinnamon sugar for a delightful treat that is crispy on the outside and soft on the inside.

    Beignets, the iconic French doughnuts, can similarly be made using choux pastry. Pipe small dough balls into hot oil and fry until they puff up and turn golden. Dust them with powdered sugar for an indulgent dessert that is sure to be a hit.

    Exploring Savory Applications of Choux Pastry for Unique Dishes

    Choux pastry isn’t just for sweet treats; it can also be utilized to create a variety of savory dishes. Cheese puffs, or gougères, are a fantastic example of this versatility. By adding grated cheese, such as Gruyère or cheddar, to your choux pastry dough before piping and baking, you can create delightful appetizers or party snacks.

    These cheesy delights are perfect for entertaining or as a tasty addition to any meal. You can also experiment by incorporating herbs or spices into the dough, making them versatile options that complement a range of flavors.

    Expert Insights on Mastering Choux Pastry: Learning from Professionals

    Gaining insights from professional pastry chefs can provide invaluable guidance in perfecting your choux pastry skills. Here are expert tips and common pitfalls to avoid along your journey.

    Valuable Advice from Professional Pastry Chefs

    Many professional pastry chefs emphasize the importance of practice in mastering choux. Renowned chefs recommend beginning with small batches to refine your technique before moving on to larger quantities. They also highlight the necessity of patience; choux pastry can be unforgiving, and it may take several attempts to achieve that perfect puff.

    Another crucial piece of advice is to trust your instincts regarding ingredient ratios. While standard recipes serve as valuable guidelines, slight modifications may be necessary depending on environmental factors, such as humidity or altitude, which can affect your dough.

    Avoiding Common Mistakes in Choux Pastry Preparation

    One of the most prevalent mistakes is underestimating the significance of high-quality ingredients. Always choose fresh, top-quality components to ensure the best results in your baking endeavors. Additionally, many bakers tend to rush through the mixing process. Taking your time and ensuring the dough is well combined is essential for achieving optimal texture.

    Another frequent error is neglecting to allow the pastry to cool adequately before filling. This oversight can lead to a soggy filling and an unsatisfactory texture. Always ensure that your choux pastry is completely cool before adding any fillings to maintain the best quality.

    Exploring Innovative Trends in Choux Pastry Creation

    The choux pastry landscape is continuously evolving, with innovative trends emerging regularly. There is a growing interest in health-conscious adaptations, including gluten-free or vegan choux pastry options. Many chefs are experimenting with alternative flours and egg substitutes to ensure that everyone can enjoy these delightful pastries.

    Furthermore, flavor fusion is gaining popularity, with bakers incorporating unique combinations and global influences into their choux creations. From matcha éclairs to spiced profiteroles, the possibilities are virtually limitless, allowing for creativity and innovation in the kitchen.

    Frequently Asked Questions About Choux Pastry: Your Concerns Addressed

    Can Choux Pastry Be Frozen for Later Use?

    Yes, you can freeze choux pastry. Simply pipe the dough onto a baking sheet and freeze until solid. Once frozen, transfer the pastry to a zip-top bag and store it for up to three months. When you’re ready to bake, proceed directly from frozen, adding a few extra minutes to the baking time for optimal results.

    How Long Can Choux Pastry Be Stored Safely?

    Choux pastry is best enjoyed fresh but can be stored in an airtight container for up to two days. To ensure optimal texture and flavor, it is advisable to consume filled pastries within a few hours of preparation.

    Is It Possible to Make Gluten-Free Choux Pastry?

    Absolutely! You can substitute regular flour with a gluten-free all-purpose blend. Just ensure that the blend contains xanthan gum for the best structure and texture. You may also need to adjust the liquid content, as gluten-free flours can absorb moisture differently compared to traditional flour.

    What Causes My Choux Pastry to Collapse During Baking?

    Choux pastry may collapse due to underbaking, which prevents it from setting properly. Always bake until the pastries are golden brown, and avoid opening the oven door too early to maintain consistent heat throughout the baking process.

    Can I Use Oil Instead of Butter in Choux Pastry Preparation?

    While butter is essential for flavor and texture, you can use a neutral oil as a substitute. However, this may alter the overall taste and richness of the pastry, so it is generally advisable to stick with butter for the best results.

    How Can I Achieve a Crispier Texture in My Choux Pastry?

    To create a crispier choux pastry, ensure proper baking time and temperature. You can also pierce the pastries after baking to allow steam to escape, which prevents sogginess and enhances the final texture.

    What Are Popular Fillings for Choux Pastry Creations?

    Typical fillings for choux pastry include whipped cream, pastry cream, custard, and ice cream. For savory alternatives, consider using cheese, herbed cream cheese, or savory custards that add depth and flavor.

    Can I Prepare Choux Pastry Dough Ahead of Time?

    While choux pastry is best baked fresh, you can prepare the dough in advance and refrigerate it for up to a day. Remember to let it reach room temperature before piping and baking for optimal results.

    What’s the Best Method for Storing Filled Choux Pastry?

    Filled choux pastries can be stored in an airtight container in the refrigerator for up to two days. It is advisable to fill them just before serving to maintain the best texture and flavor.

    How Do I Know When My Choux Pastry Is Done Baking?

    Choux pastry is fully baked when it is golden brown and firm to the touch. Additionally, it should sound hollow when lightly tapped on the bottom, indicating that it has cooked through properly.

    Connect with us on Facebook for the latest updates!

    The post Choux Pastry Secrets: Master the Art Flawlessly appeared first on https://cookinggods.com

    The Article Choux Pastry Secrets: Flawlessly Master the Art Was Found On https://limitsofstrategy.com

  • Choux Pastry Secrets for Effortless Technique Mastery

    Choux Pastry Secrets for Effortless Technique Mastery

    Master the Art of Choux Pastry: Essential Techniques for Culinary Excellence

    To truly master the intricate craft of choux pastry, it is essential to explore the key strategies that pave the way to culinary brilliance. Perfecting this pastry requires a thorough understanding of the finest ingredients, honing precise ratios, and employing strict temperature control during the entire process. These elements are crucial for achieving the coveted light and airy texture that makes choux pastry a favorite among pastry lovers and culinary enthusiasts alike.

    Selecting High-Quality Ingredients for Impeccable Choux Pastry

    High-quality choux pastry ingredients including robust flour and fresh eggs on a rustic table.

    The excellence of any remarkable choux pastry is fundamentally tied to the selection of premium ingredients. The cornerstone of this exquisite pastry is the flour. It is advisable to choose a high-quality all-purpose flour or, when possible, a specialized pastry flour with a protein content ranging from 11-12%. This ideal composition provides the necessary structure while ensuring a tender crumb. It’s essential to steer clear of cake flour, as its lower protein content results in a dough that lacks the strength required to maintain its shape throughout the baking process.

    Moreover, the choice of <a href=”https://cookinggods.com/14-breakfast-green-smoothies/”>butter</a> plays a pivotal role in shaping the flavor profile of your choux. Opting for unsalted butter is recommended, as it allows for better control over the salt content in your pastry. Ensure that the butter is fresh and of high quality; top-tier brands typically exhibit a higher fat content, which significantly enhances the flavor and contributes to the luxurious mouthfeel of your pastry.

    Finally, eggs are vital for creating the ideal choux. Large, fresh eggs are usually the best option, providing essential moisture and structural support. The technique for incorporating eggs is equally important; begin by whisking the eggs in a bowl, then gradually blend them into your cooked flour and butter mixture. This gradual incorporation is crucial for achieving a smooth and glossy consistency that is perfect for piping.

    Achieving Ideal Choux Pastry Consistency Through Perfect Ingredient Ratios

    Understanding and mastering the ratios of your ingredients is fundamental to achieving the perfect choux pastry consistency. The classic ratio for preparing choux pastry typically adheres to the formula of 1:1:2:2—one part flour, one part butter, two parts water, and two eggs. This straightforward yet effective formula ensures the ideal rise and texture that every baker aspires to achieve.

    For example, if you start with 100 grams of flour, be sure to use 100 grams of butter and double the water to 200 grams. This careful balance ensures that your pastry rises beautifully while maintaining its structure after baking, resulting in a delightful final product that is sure to impress.

    It is crucial to recognize that these ratios may require slight adjustments based on the humidity and temperature conditions of your kitchen. In particularly warm environments, reducing the water or eggs slightly can help prevent a loose dough, while cooler settings might necessitate adding a bit more liquid. Trust your instincts and carefully observe the consistency of the dough as you mix.

    Maintaining Optimal Temperature for Mixing and Baking Choux Pastry

    Temperature control is vital during both the mixing and baking stages of choux pastry preparation. When cooking the flour and butter mixture, it is essential to do so over medium heat. This method guarantees that the butter melts completely and the flour cooks without browning. The mixture should come together into a cohesive ball that pulls away from the sides of the pan—this is a clear indication that it is ready for the next step.

    Following the preparation of the mixture, allow it to cool slightly before incorporating the eggs. If the mixture is too hot, it can inadvertently cook the eggs, resulting in a lumpy texture that is less than desirable. Conversely, if the mixture is too cool, it may fail to rise adequately in the oven. A practical guideline is to cool the mixture down to approximately body temperature before adding the eggs.

    Maintaining a consistent temperature during the baking phase is equally essential. Preheat your oven thoroughly and refrain from opening the door during the first half of the baking time, as this can cause your pastries to collapse. The ideal baking temperature for choux pastry is around 200°C (390°F). This high heat is critical for transforming the water in the dough into steam, resulting in the light and airy texture that characterizes expertly crafted choux pastry.

    Step-by-Step Guide to Crafting the Perfect Choux Pastry

    Illustration of hands crafting choux pastry, from dough to baking, in a warm kitchen.

    Having discussed essential strategies, let’s move into a comprehensive step-by-step guide designed to empower you in creating your perfect choux pastry masterpiece. By diligently following these meticulous instructions, you will be well-equipped to produce the ideal choux.

    Expert Techniques for Preparing Choux Pastry Dough

    Creating choux pastry dough may seem straightforward, yet it demands meticulous attention to detail. Begin by accurately measuring your ingredients. In a medium saucepan, combine water, butter, and salt. Bring this mixture to a gentle boil over medium heat, ensuring that the butter melts completely.

    Once the mixture reaches a boil, promptly remove the pan from heat and immediately incorporate the flour. Stir vigorously with a wooden spoon or spatula until the mixture forms a cohesive ball and separates from the sides of the pan. This step is vital for ensuring that the flour cooks properly and develops the necessary structure for your pastry.

    Next, transfer the dough to a mixing bowl and allow it to cool for approximately five minutes. This resting period is crucial to prevent the eggs from cooking upon contact. Gradually add the eggs, mixing thoroughly until the dough is smooth and glossy. The dough should fall from the spatula in a thick ribbon. If it feels too stiff, add a bit more egg; if it’s too runny, you may need to incorporate additional flour.

    Once your dough achieves the desired consistency, allow it to rest for a minimum of 15 minutes. This resting phase is essential for relaxing the gluten, resulting in a more tender pastry that rises beautifully during baking.

    Mastering Piping Techniques for Uniform Choux Pastry Shapes

    Piping choux pastry is an art form that significantly influences the shape and consistency of your pastries. Begin by preparing your piping bag fitted with a round tip—typically, a 1cm (0.4 inches) plain tip is ideal for crafting éclairs and cream puffs.

    Fill your piping bag with the prepared pastry dough. To ensure uniform shapes, pipe the dough onto a lined baking sheet while holding the bag at a 90-degree angle. Gently squeeze the bag while lifting it to form a peak, then stop applying pressure before pulling away to avoid trailing ends.

    For éclairs, pipe straight lines that measure about 10cm (4 inches) long, and for cream puffs, create small mounds that are approximately 4cm (1.5 inches) in diameter. To achieve a smooth finish, lightly dip your finger in water and gently smooth down any peaks left from piping. This will create a polished appearance once baked.

    Be sure to leave ample space between the pastries on the baking tray, as they will expand during the baking process. A good rule of thumb is to maintain at least 5cm (2 inches) of space between each piped piece to ensure even cooking.

    Key Baking Tips to Achieve Flawless Choux Pastry

    Golden-brown choux pastry baking in a steamy oven at 200°C, cooled on a wire rack.

    Baking is where the true magic of choux pastry happens. To ensure consistent rising and even cooking, preheat your oven to 200°C (390°F) and position your baking tray in the center of the oven.

    To create essential steam, which is crucial for the rise of the pastry, place a small oven-safe dish filled with water at the bottom of the oven. This will generate a humid environment that helps prevent the pastries from drying out too quickly during the baking process.

    Avoid opening the oven door during the first 20 minutes of baking. A sudden drop in temperature can cause your pastries to collapse, leading to flat and disappointing results. After 20 minutes, you can check their progress briefly. If they are rising nicely and developing a golden brown color, you know they are on the right track.

    Once the pastries are fully baked, they should appear golden and firm to the touch. Remove them from the oven and allow them to cool on a wire rack. This cooling phase is essential to prevent sogginess; if left on the baking tray, moisture can accumulate and negatively impact the texture of your pastries.

    Identifying and Solving Common Choux Pastry Challenges

    Even seasoned bakers may encounter challenges when creating choux pastry. Being able to identify common issues and their solutions is vital for mastering the secrets to a flawless choux pastry.

    Recognizing Flat Pastries: Common Causes and Effective Remedies

    Flat choux pastries can result from various factors. A primary cause is insufficient steam during the baking process. If your dough lacks moisture or if the oven environment is too dry, the pastries may not rise as expected. To remedy this, ensure your water-to-flour ratio is accurate, and consider adding more egg for additional moisture.

    Improper mixing can also lead to flat pastries. If the dough isn’t mixed thoroughly after adding the eggs, it may become too dense, inhibiting the necessary lift. Mix until the dough is smooth and glossy to ensure the light texture you desire.

    Moreover, it’s crucial to avoid opening the oven door prematurely. A sudden temperature drop can result in collapsing pastries. Wait until they have risen well before checking on them to ensure a successful outcome.

    Preventing Soggy Bottoms in Your Choux Pastry

    Soggy bottoms can be a frustrating issue when baking choux. This problem often arises from either underbaking or excess moisture in the dough. To prevent this, ensure your pastries are baked until they achieve a golden brown color and feel firm to the touch.

    Utilizing a baking sheet lined with parchment paper can also assist in effectively absorbing moisture. If you discover that your pastries remain soggy, consider returning them to the oven for additional baking time to ensure they dry out completely.

    Another practical tip is to pierce the bottoms of the pastries with a toothpick after baking, allowing steam to escape. This technique helps prevent moisture from being trapped inside, resulting in a crispier finish that enhances the overall quality.

    Addressing Cracking Issues During Baking

    Cracking in choux pastry is a common issue that can occur due to several factors. One primary reason for cracking is baking the pastries at excessively high temperatures. While a high initial temperature is vital for rising, if it is too high, the pastry may rise too quickly and develop cracks.

    To address this, consider reducing the temperature slightly after the first 15 minutes of baking, allowing for a more gradual rise that helps to maintain structural integrity.

    Overmixing the dough after adding the eggs can also lead to a fragile structure that struggles to support the rising process. Mix just until combined and smooth to achieve optimal results.

    Lastly, ensure that you are using fresh ingredients. Old flour or stale eggs can negatively impact the quality of your pastry, leading to unsatisfactory outcomes that can be easily avoided.

    Exploring Advanced Techniques to Enhance Your Choux Pastry Skills

    Once you have mastered the fundamentals, it’s time to delve into advanced techniques that can elevate your choux pastry creations to new culinary heights.

    Creating Choux Au Craquelin: A Crunchy and Flavorful Variation

    Choux au craquelin is a delightful twist on traditional choux pastry, featuring a crunchy topping that enhances both texture and flavor. To prepare this variation, create a simple sugar cookie dough using equal parts flour, butter, and brown sugar.

    Roll the craquelin dough into a thin sheet and cut it into smaller circles than your piped choux. Before baking, place a circle atop each piped pastry. As the pastries rise in the oven, the craquelin will spread, forming a delightful, crunchy topping that beautifully contrasts with the soft pastry beneath, creating a visually appealing and delicious treat.

    This technique not only adds visual allure but also enriches the overall flavor profile of your choux creations, making them even more delightful to savor.

    Infusing Unique Flavors into Your Choux Pastry Dough

    Adding flavors to your choux pastry dough can lead to exciting and innovative creations that stand out. Consider enhancing your butter with vanilla, citrus zest, or spices like cinnamon before mixing it with the flour. Such subtle enhancements can elevate your pastries, transforming them into truly memorable delights.

    Another exciting option is to incorporate extracts or flavorings directly into the dough. For instance, a hint of almond extract can add a delightful twist to classic éclairs. Be cautious with the amounts, as even a small quantity can significantly impact the overall flavor.

    For a more adventurous variation, consider adding cocoa powder to your flour to create a rich chocolate choux pastry. This decadent base pairs beautifully with fillings like cream or custard, resulting in a delectable dessert that is sure to impress.

    Perfecting the Art of Decorating and Filling Choux Pastry

    The final step in perfecting your choux pastry is mastering the art of decorating and filling. Classic fillings such as whipped cream, pastry cream, or custard are always popular choices. To fill your pastries, utilize a piping bag fitted with a small round tip. Insert the tip into the base of the pastry and gently squeeze until you feel slight resistance, indicating that it’s filled properly.

    For decoration, consider glazing your éclairs with a simple chocolate ganache or icing. A light dusting of powdered sugar on cream puffs adds an elegant touch. You might also experiment with edible gold leaf or colorful sprinkles for a festive flair that enhances visual appeal.

    Remember, presentation is paramount. Take the time to artfully arrange your pastries on a plate, and consider pairing them with fresh fruit or a berry coulis for added color and flavor contrast that will captivate your guests.

    Diverse Applications of Choux Pastry: Unleashing Culinary Versatility

    Understanding the various applications of choux pastry can unlock a world of culinary possibilities. Here are some classic and modern uses of choux pastry that highlight its remarkable versatility.

    Crafting Classic Éclairs and Profiteroles with Choux Pastry

    Éclairs and profiteroles are among the most recognized forms of choux. Éclairs are long, filled pastries traditionally filled with pastry cream and topped with chocolate icing. To create perfect éclairs, pipe elongated shapes onto a baking sheet. Once baked and cooled, fill them with your preferred filling and drizzle with chocolate ganache for a classic finish that delights the senses.

    Conversely, profiteroles are small, round puffs often filled with whipped cream or ice cream. They can be served plain or drizzled with chocolate sauce for an indulgent treat. To create profiteroles, simply pipe small rounds and bake just as you would for éclairs. Once filled, they can be beautifully assembled into a croquembouche, creating an impressive centerpiece for any special occasion.

    Transforming Choux Pastry into Delicious Churros and Beignets

    Choux pastry is incredibly adaptable, allowing you to create popular fried treats like churros and beignets. For churros, pipe the dough into hot oil and fry until they achieve a golden brown hue. Toss them in cinnamon sugar for a delightful treat that is crispy on the outside while remaining soft on the inside.

    Beignets, the iconic French doughnuts, can also be made using choux pastry. Pipe small dough balls into hot oil and fry until they puff up and turn golden. Dust them with powdered sugar for an indulgent dessert that will surely impress your family and friends.

    Exploring Savory Applications of Choux Pastry in Culinary Creations

    Choux pastry isn’t limited to sweet treats; it can also be utilized to craft a variety of savory dishes. Cheese puffs, or gougères, are a fantastic example. By adding grated cheese, such as Gruyère or cheddar, to your choux pastry dough before piping and baking, you create delightful savory snacks.

    These cheesy delights make for perfect appetizers or party snacks. You can also experiment by incorporating herbs or spices into the dough, making them versatile additions to any meal and a wonderful way to impress your guests.

    Expert Insights for Mastering Choux Pastry: Learning from the Professionals

    Gaining insights from professional pastry chefs can provide invaluable guidance in perfecting your choux pastry skills. Here are expert tips and common pitfalls to avoid on your journey to culinary mastery.

    Valuable Advice from Seasoned Pastry Chefs

    Many professional pastry chefs emphasize the significance of practice in mastering choux. Renowned chefs recommend starting with small batches to refine your technique before advancing to larger quantities. They also stress the necessity of patience; choux pastry can be unforgiving, and it may take several attempts to achieve that perfect puff that you envision.

    Another crucial piece of advice is to trust your instincts regarding ingredient ratios. While standard recipes serve as valuable guidelines, slight modifications might be necessary based on environmental factors like humidity or altitude that can influence the final result.

    Avoiding Common Mistakes in Choux Pastry Preparation

    One of the most prevalent mistakes bakers make is underestimating the significance of quality ingredients. Always choose fresh, high-quality ingredients to ensure the best possible results. Additionally, many bakers rush through the mixing process. Taking your time to ensure the dough is well combined is essential for achieving optimal texture.

    Another frequent error is neglecting to allow the pastry to cool adequately before filling. This oversight can lead to a soggy filling and an unsatisfactory texture. Always let your choux pastry cool completely before adding any fillings to ensure a delightful experience.

    Exploring Innovative Trends in Choux Pastry Creations

    The world of choux pastry is continually evolving, with innovative trends emerging regularly. There’s a growing interest in health-conscious adaptations, including gluten-free or vegan choux pastry options. Many chefs are experimenting with alternative flour and egg substitutes, ensuring that everyone can enjoy these delightful pastries without dietary restrictions.

    Additionally, flavor fusion is gaining popularity, with bakers incorporating unique combinations and global influences into their choux creations. From matcha éclairs to spiced profiteroles, the possibilities are truly limitless, inviting creativity and experimentation into your baking.

    Frequently Asked Questions About Perfecting Choux Pastry

    Can I Freeze Choux Pastry for Later Use?

    Yes, you can successfully freeze choux pastry. Pipe the dough onto a baking sheet and freeze until solid. Once frozen, transfer the pastry to a zip-top bag and store it for up to three months. When you’re ready to bake, proceed directly from frozen, adding a few extra minutes to the baking time to ensure they cook through.

    What is the Best Way to Store Choux Pastry?

    Choux pastry is best enjoyed fresh but can be stored in an airtight container for up to two days. To maintain optimal texture and flavor, it is advisable to consume filled pastries within a few hours of preparation.

    Can I Make Gluten-Free Choux Pastry?

    Absolutely! You can substitute regular flour with a gluten-free all-purpose blend. Just ensure that the blend contains xanthan gum for the best structure. You may need to adjust the liquid content since gluten-free flours can absorb moisture differently compared to regular flour.

    What Causes My Choux Pastry to Collapse During Baking?

    Choux pastry may collapse due to underbaking, which prevents it from setting properly. Ensure you bake until the pastries are golden brown, and avoid opening the oven door too early to maintain consistent heat throughout the process.

    Is It Possible to Use Oil Instead of Butter in Choux Pastry?

    While butter is essential for flavor and texture, you can use a neutral oil as a substitute if necessary. However, this may alter the overall taste and richness of the pastry, so it’s generally best to stick with butter for optimal results in your baking.

    How Can I Achieve a Crispier Choux Pastry?

    To create a crispier choux pastry, ensure you are following proper baking times and temperatures. You can also pierce the pastries after baking to allow steam to escape, helping to avoid sogginess and resulting in a delightful texture.

    What Are Popular Fillings for Choux Pastry?

    Typical fillings for choux pastry include whipped cream, pastry cream, custard, and ice cream. For savory alternatives, consider cheese, herbed cream cheese, or savory custards for a unique twist.

    Can I Prepare Choux Pastry Ahead of Time?

    While choux pastry is best baked fresh, you can prepare the dough in advance and refrigerate it for up to a day. Remember to allow it to reach room temperature before piping and baking for the best results.

    What is the Best Way to Store Filled Choux Pastry?

    Filled choux pastries can be stored in an airtight container in the refrigerator for up to two days. It is advisable to fill them just before serving to ensure the best texture and flavor.

    How Do I Know When My Choux Pastry Is Done Baking?

    Choux pastry is fully baked when it is golden brown, firm to the touch, and sounds hollow when lightly tapped on the bottom, indicating that it has achieved the perfect texture.

    Join our Facebook community for the latest updates!

    The post Choux Pastry Secrets: Master the Art Flawlessly appeared first on https://cookinggods.com

    The Article Choux Pastry Secrets: Perfect Your Technique Effortlessly Was Found On https://limitsofstrategy.com