Discover the Exquisite Flavors of Authentic Peruvian Ceviche
What Elements Contribute to Peruvian Ceviche’s Popularity in Culinary Circles?

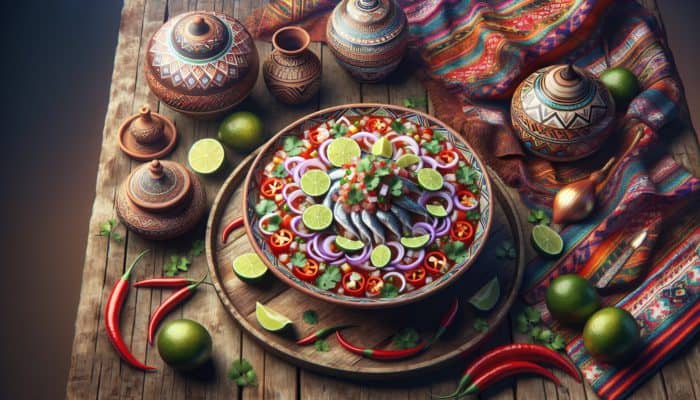
Peruvian ceviche is a true culinary masterpiece that exemplifies the art of marinating fresh raw fish in a delightful blend of citrus juices, primarily lime or lemon, perfectly complemented by chili peppers, onions, and an array of spices. This dish is revered for its invigorating and vibrant taste, celebrated in numerous variations throughout Peru and globally. It embodies the rich cultural heritage of Peru and demonstrates a deep appreciation for high-quality ingredients sourced from both land and sea. The bright, zesty flavors of ceviche not only tantalize the palate but also transport diners to the coastal regions of Peru, where this beloved dish was born. As a cornerstone of Peruvian cuisine, ceviche has garnered international acclaim, with restaurants and home cooks alike embracing its colorful charm and unique allure.
The remarkable versatility of ceviche is showcased in its many interpretations, with regional variations highlighting local ingredients and culinary traditions. While traditional ceviche often features firm, white fish, innovative adaptations have introduced a diverse range of seafood options, vegetables, and even fruits. The beauty of ceviche lies in its simplicity; achieving the ideal balance of citrus, spice, and textural elements transforms fresh ingredients into an extraordinary gastronomic experience that celebrates the ocean’s bounty and the rich flavors of Peru.
Essential Ingredients for Crafting Authentic Ceviche
The secret to creating outstanding ceviche lies in its ingredients, which must include the freshest, high-quality fish, vibrant citrus juices, and a carefully curated mix of spices and herbs. Each element plays a pivotal role in establishing the dish’s unique flavor profile. Selecting the right fish is crucial; opt for sushi-grade varieties such as sea bass, snapper, or tilapia to achieve the perfect texture and flavor balance. Choosing firm, fresh fish not only enhances the overall taste but also guarantees food safety, a vital aspect when preparing dishes featuring raw seafood.
The use of citrus juices, particularly lime or lemon, is critical for marinating the fish, as they provide the necessary acidity to ‘cook’ the fish, transforming its texture and amplifying its flavor. Incorporating spices such as ají amarillo and fresh herbs like cilantro further elevates the dish, adding layers of complexity. Other ingredients, such as finely sliced red onions and a hint of garlic, contribute aromatic depth to the ceviche. Ultimately, the harmonious fusion of these quality ingredients creates a symphony of flavors that tantalizes the palate, solidifying ceviche’s status as a culinary delight.
How to Choose the Best Fish for Your Ceviche?
Choosing the right fish is vital for crafting exceptional ceviche. Look for fresh, sushi-grade fish varieties like sea bass, snapper, or tilapia. The fish should feel firm to the touch and should be free of any unpleasant odors, ensuring the best taste and texture. Establishing a reliable relationship with local fishmongers or suppliers is essential, as they can provide valuable insights into the freshest options available. Signs of freshness include bright, clear eyes, shiny skin, and a clean, ocean-like scent rather than a fishy aroma.
Additionally, it is important to consider the sustainability of the fish you select. Opting for sustainably sourced seafood promotes responsible fishing practices and helps preserve fish populations for future generations. Familiarizing yourself with the fishing methods and harvest seasons of various fish species can enhance your ceviche experience while contributing to environmental conservation. By making informed choices, you can savor delicious, high-quality ceviche while supporting responsible seafood practices.
Master Proven Techniques and Discover Top Peruvian Ceviche Recipes to Try
Perfecting the Art of Marinating Fish for Ceviche
Marinating fish for ceviche requires a delicate balance of acidity and time. Utilize fresh citrus juices and marinate for approximately 10 to 30 minutes, depending on the thickness of the fish. Over-marinating can lead to overly soft fish, so finding the right balance is crucial to preserving ceviche’s texture and flavor. The natural enzymes found in citrus juices work to break down proteins, resulting in tender, ‘cooked’ fish. However, if marinated for too long, the fish can become mushy, compromising the dish’s overall appeal and enjoyment.
To ensure optimal marination, keep the following essential tips in mind:
- Utilize fresh, high-quality citrus juices for the best flavor.
- Cut the fish into uniform pieces to guarantee even marination.
- Start with shorter marination times and adjust based on personal preference.
- Conduct taste tests periodically to reach your desired texture and flavor.
- Keep the marinating fish refrigerated to maintain food safety.
- Use a non-reactive bowl to avoid any chemical reactions with the citrus.
By adhering to these guidelines, you can create perfectly marinated ceviche that emphasizes the freshness of your chosen fish while ensuring a delightful texture, providing a satisfying culinary experience every time.
What Spices Should You Incorporate into Your Ceviche?
Spices are integral to adding depth and heat to ceviche. Commonly used spices include ají amarillo, cilantro, and garlic. These ingredients are essential for achieving the characteristic flavor profile of traditional Peruvian ceviche. Ají amarillo, a yellow chili pepper indigenous to Peru, infuses a distinct fruity heat that elevates the dish beyond basic citrus. Fresh cilantro contributes aromatic notes, while minced garlic adds subtle warmth and complexity.
Experimenting with various spice combinations can lead to the discovery of your preferred flavor profile. Popular combinations include:
- Ají amarillo, lime juice, and cilantro
- Garlic, lime juice, and red onion
- Ají panca, lime juice, and fresh parsley
- A mix of jalapeño, lime, and coriander for a spicier twist
- Cilantro, diced bell peppers, and lemon for a refreshing variation
- Garlic, lime, and ginger for an Asian-inspired flair
With numerous options at your disposal, feel free to explore and customize your ceviche to suit your personal taste. The right spice combination can transform your dish into an unforgettable culinary experience that delights every palate.
How Can You Achieve the Perfect Texture in Your Ceviche?
Achieving the ideal texture in ceviche demands careful attention to the fish’s freshness and the marinating duration. The fish should feel firm yet tender, exhibiting slight resistance when bitten. Freshness is essential, as older fish can become mushy or develop off-flavors. Additionally, the thickness of the fish significantly influences the marination time; thicker cuts may require longer marination to achieve the desired texture.
Expert analysis indicates that different fish varieties yield varying textures when prepared as ceviche. For example, sea bass offers a delicate yet firm texture, while tilapia tends to be softer. The marination process also impacts the outcome; a shorter marination results in a firmer texture, whereas a longer marination creates a more tender fish. When experimenting with various fish types, closely monitor the marination process, tasting as you go to achieve your ideal texture. By fine-tuning these elements, you can create a vibrant ceviche that is as pleasing to the palate as it is visually appealing.
Innovative Variations of Peruvian Ceviche to Experiment With
Enhancing Your Ceviche with Fruits and Vegetables
Incorporating fruits such as mango or pineapple, along with vegetables like avocado or cucumber, can elevate both the flavor and texture of ceviche. These ingredients introduce a sweet, refreshing contrast to the fish, resulting in a delightful explosion of flavors. The natural sugars in fruits like mango not only balance the acidity of citrus but also add a delightful juiciness that complements the overall ceviche profile.
For instance, mango ceviche combines the succulent sweetness of ripe mango with the zesty punch of lime and the heat of ají. Similarly, avocado contributes a creamy texture that pairs beautifully with the crispness of cucumber and the bright flavors of the marinated fish. Consider these enticing combinations:
- Mango, avocado, and jalapeño for a tropical twist
- Pineapple, cucumber, and red onion for a refreshing summer ceviche
- Watermelon, mint, and lime for a unique take on traditional recipes
- Tomato, avocado, and cilantro for a classic Mediterranean flair
These creative combinations not only enhance the visual appeal of ceviche but also provide exciting flavor profiles that captivate diners. By incorporating seasonal fruits and vegetables, you can craft a ceviche that reflects your culinary creativity and passion.
What Unique Twists Can You Add to Traditional Ceviche Recipes?
Experimenting with ceviche opens the door to a myriad of exciting new flavors. Consider introducing ingredients like coconut milk, passion fruit, or even a drizzle of honey to create unique and delicious variations. These inventive elements add a new dimension to this classic dish, allowing you to explore a range of global culinary influences while honoring Peruvian traditions.
For example, incorporating coconut milk adds a creamy texture that beautifully balances the acidity of the citrus. This twist reflects the flavors of tropical regions, making it an ideal dish for summer gatherings. Passion fruit, with its aromatic, tangy sweetness, complements the fish while adding an exotic flair. You might also experiment with a drizzle of honey, which can harmonize the dish’s contrasting flavors, creating a delightful interplay between sweetness and acidity. Other unique twists could include:
- Cilantro and lime-infused coconut ceviche
- Passion fruit and ginger for a tropical kick
- A hint of soy sauce or sesame oil for an Asian-inspired flavor
- Sweetchilli sauce for added heat and sweetness
These innovations elevate ceviche beyond its traditional roots, inviting diners to expand their palates and explore new flavor realms that excite the senses.
How Can You Create a Flavorful Vegetarian Ceviche?
Vegetarian ceviche can be crafted using ingredients such as mushrooms, hearts of palm, or tofu. Marinating these components in citrus juice and spices allows them to mimic the flavors and textures of traditional fish-based ceviche. By exploring plant-based alternatives, you can create a vibrant dish that maintains ceviche’s refreshing essence while catering to diverse dietary preferences.
For example, marinated mushrooms, especially shiitake or oyster varieties, can replicate the tender, meaty texture of fish. Hearts of palm introduce a unique chewiness, while tofu absorbs surrounding flavors beautifully. To enhance this dish, consider incorporating complementary ingredients such as:
- Red onion and cilantro for aromatic elements
- Avocado for creaminess
- Cucumber for crunch
- Cherry tomatoes for a burst of sweetness
Marinate these ingredients in lime juice, garlic, and spices, allowing them to soak in the flavors for at least 30 minutes. This refreshing vegetarian ceviche will captivate even the most dedicated seafood lovers, proving that ceviche can be enjoyed in diverse forms while staying true to its vibrant roots.
Exploring Various Types of Seafood to Enhance Your Ceviche
Exploring different seafood options, such as shrimp, scallops, or octopus, can yield delightful ceviche variations. Each type adds unique textures and flavors to the dish, allowing you to create ceviche that suits any occasion. For instance, shrimp ceviche is a favored choice, offering a sweeter taste and a firm texture that harmonizes beautifully with zesty citrus and spicy notes.
Scallops, celebrated for their delicate, buttery flavor, elevate ceviche to a gourmet experience. When preparing scallop ceviche, select the freshest scallops, as their subtle flavor shines through in the dish. Conversely, octopus introduces a slightly chewy texture, providing an exciting alternative to traditional fish-based ceviche. Consider experimenting with these combinations:
- Shrimp ceviche with mango and a hint of chili
- Scallop ceviche with citrus, cilantro, and jalapeño
- Octopus ceviche with lime, red onion, and parsley
- A mixed seafood ceviche featuring shrimp, scallops, and fish
By incorporating various types of seafood, you can create a ceviche that showcases the diversity of ocean flavors while appealing to a wide range of preferences, ensuring your dish is both unique and memorable.
Research-Backed Benefits of Enjoying Peruvian Ceviche Recipes
Uncovering the Nutritional Benefits of Ceviche
Ceviche serves as an excellent source of protein, vitamins, and minerals, making it a nutritious meal option. The fresh ingredients contribute to its health benefits, including omega-3 fatty acids from the fish and vitamin C from the citrus. As a low-calorie dish packed with nutrients, ceviche is an ideal choice for health-conscious diners looking to incorporate more seafood into their diets.
The fish utilized in ceviche typically provides a lean source of protein, delivering essential amino acids that support muscle growth and repair. Furthermore, omega-3 fatty acids, abundant in many fish varieties, have been linked to numerous health benefits, including enhanced heart health, reduced inflammation, and improved brain function. The vitamin C provided by citrus juices not only strengthens the immune system but also plays a crucial role in collagen production, promoting healthy skin.
Additionally, ceviche is often served with nutritious sides like sweet potatoes or corn, further enhancing its nutritional value. By enjoying a balanced meal of ceviche, you can reap the benefits of fresh, wholesome ingredients while indulging in a culinary experience that delights the senses and nourishes the body.
How Does Ceviche Integrate into a Healthy Lifestyle?
Incorporating ceviche into a healthy lifestyle offers numerous benefits. It is low in calories, high in nutrients, and an excellent source of lean protein, making it a smart choice for health-conscious eaters. Due to its emphasis on fresh ingredients, ceviche often contains lower levels of unhealthy fats and added sugars compared to many other meal options, making it ideal for those striving to maintain a balanced diet.
By prioritizing fresh fish and vegetables, ceviche presents a dish that is not only flavorful but also contributes positively to your overall well-being. Its high protein content provides satiety, helping to manage hunger and prevent overeating. Moreover, the combination of omega-3 fatty acids and vitamins in ceviche can support heart health and cognitive function, making it a nourishing choice for all.
Furthermore, ceviche can be easily adapted to accommodate various dietary preferences, including gluten-free or low-carb diets. By experimenting with different ingredients and preparation methods, you can create a dish that aligns with your personal health goals while enjoying the vibrant flavors of Peru.
What Are the Health Benefits of Citrus in Ceviche?
Citrus juices in ceviche serve not only to enhance flavor but also to provide significant health benefits. They are rich in vitamin C, which bolsters the immune system, and their acidity aids in the digestion of raw fish, making ceviche a healthful and delicious meal. The bright, tangy flavors imparted by lime or lemon enrich the overall sensory experience while supplying valuable nutrients that support good health.
Vitamin C is essential for numerous bodily functions, including collagen synthesis and iron absorption. A robust immune system relies on adequate vitamin C intake to help fend off illnesses and infections. Additionally, the acidity of the citrus juices plays a crucial role in the marination process, effectively ‘cooking’ the fish by denaturing proteins, ensuring a safe and enjoyable dining experience.
Moreover, the bright acidity of citrus helps to balance the rich flavors of fish and spices in ceviche, creating a harmonious dish that is both refreshing and satisfying. By incorporating citrus into your ceviche, you can enjoy a healthful meal that celebrates the vibrant flavors of Peru while nourishing your body and enhancing your overall well-being.
Can Enjoying Peruvian Ceviche Boost Your Mood?
The fresh ingredients found in Peruvian ceviche, particularly fish rich in omega-3 fatty acids, can enhance brain function and uplift your mood, making it a delightful and invigorating dish. Numerous studies suggest that omega-3 fatty acids positively influence mental health by reducing symptoms of anxiety and depression. Including these essential fatty acids in your diet through dishes like ceviche can support your emotional well-being while allowing you to enjoy a delicious meal.
Additionally, the vibrant flavors and colors of ceviche can stimulate the senses, creating a joyful dining experience. The combination of zesty citrus, fresh herbs, and high-quality fish creates a sensory feast that delights both the palate and the eyes. The act of preparing and sharing ceviche with friends and family fosters positive social interactions, further enhancing your mood and overall enjoyment.
As you embrace the joy of cooking and sharing dishes like ceviche, you may find that the fresh, wholesome ingredients inspire a greater appreciation for food and its role in your well-being. By incorporating ceviche into your culinary repertoire, you can nourish both your body and soul while indulging in a delightful dish that celebrates Peru’s rich flavors.
Essential Tips for Serving and Enjoying Ceviche
Top Accompaniments to Enhance Your Ceviche Experience
Ceviche pairs beautifully with a variety of sides, including sweet potatoes, corn, or plantains. These accompaniments not only add texture and flavor but also complement the ceviche’s freshness. The sweetness of roasted sweet potatoes, for instance, balances the dish’s acidity, while corn contributes a satisfying crunch. Traditional Peruvian sides enhance the ceviche experience, inviting diners to immerse themselves in the full spectrum of flavors.
Incorporating sides into your ceviche presentation creates a more balanced meal. Consider these popular accompaniments:
- Fresh corn on the cob, either grilled or boiled
- Sweet potato, either mashed or sliced and roasted
- Plantain chips for a crunchy texture
- Avocado slices for a creamy element
These delicious side dishes not only enhance the overall dining experience but also provide additional nutrients, making your meal more satisfying. By carefully selecting accompaniments that complement ceviche, you can create a harmonious flavor profile that showcases the best of Peruvian cuisine.
How to Present Ceviche Beautifully for Special Occasions
For special occasions, consider presenting ceviche in elegant ways, such as in martini glasses or on a bed of lettuce. Garnishes like fresh herbs or edible flowers can add a touch of sophistication, transforming your ceviche into a visually stunning dish that impresses guests. Presentation is key to elevating the dining experience, making it feel more festive and memorable.
Using creative serving vessels can enhance the visual appeal of ceviche. Martini glasses, for instance, create a sleek, modern look, while individual servings can add an elegant touch to formal gatherings. Additionally, a bed of fresh greens, such as arugula or mixed salad leaves, adds a vibrant pop of color and freshness to the plate. Consider garnishing with:
- Fresh microgreens or cilantro for a burst of color
- Lime wedges for an extra citrusy touch
- Edible flowers for a unique presentation
- Chili slices for a bold visual statement
These finishing touches can transform a simple dish into a culinary showcase, making your ceviche the highlight of the meal while delighting guests with its beauty and flavor.
What Are the Ideal Beverages to Pair with Ceviche?
Pairing ceviche with the right beverages can significantly enhance the dining experience. Light and refreshing options such as pilsner beer, white wine, or a citrus-based cocktail can beautifully complement the dish’s flavors. The ideal beverage should balance the ceviche’s acidity and spice while enriching its overall sensory experience.
For wine enthusiasts, consider a crisp Sauvignon Blanc or a dry, unoaked Chardonnay that can harmonize with the zesty notes of ceviche. Additionally, a light, fruity cocktail, such as a mojito or a margarita, can elevate the meal by providing a delightful contrast to the dish’s freshness. Here are some recommended drink pairings:
- Pilsner beer is a light and refreshing option
- Sauvignon Blanc to complement the citrus flavors
- Daiquiri for a tropical twist
- Mojito for a refreshing minty kick
Selecting complementary beverages can significantly enrich your ceviche experience. By considering flavor profiles and choosing drinks that enhance the dish’s essence, you can create a memorable culinary journey that celebrates the vibrant flavors of Peruvian cuisine.
Proven Strategies for Crafting Exceptional Peruvian Ceviche
How to Store and Preserve Ceviche Effectively
Proper storage of ceviche is crucial for maintaining its freshness. Keep it refrigerated and consume it within 24 hours for optimal quality. For longer storage, freeze the marinated fish separately from the other ingredients. Ceviche is best enjoyed fresh, as the marination process can alter the fish’s texture over time. If you plan to prepare ceviche in advance, consider these effective storage strategies:
1. Store marinated ceviche in an airtight container in the refrigerator, ensuring it is well submerged in citrus juice to maintain its freshness.
2. If you anticipate leftovers, consider marinating the fish and preparing the accompaniments separately, combining them just before serving.
3. For longer storage, freeze the fish before marinating. Thaw it in the refrigerator before marinating to ensure optimal texture and flavor.
4. Always label and date any stored ceviche to monitor its freshness and guarantee safe consumption.
By following these guidelines, you can safely enjoy your ceviche while preserving its delightful taste and texture, ensuring that every bite is as enjoyable as the first.
Safety Measures for Preparing Delicious Ceviche
Preparing ceviche safely involves using fresh, high-quality ingredients and adhering to proper hygiene practices. Always utilize clean utensils and surfaces, and ensure the fish is fresh to avoid foodborne illnesses. Following stringent food safety protocols is essential when working with raw seafood to guarantee a safe and enjoyable culinary experience.
When preparing ceviche, keep these important safety tips in mind:
- Purchase fish from reputable sources, ensuring it is sushi-grade and fresh.
- Keep all ingredients properly refrigerated until you are ready to use them.
- Use separate cutting boards for raw fish and vegetables to prevent cross-contamination.
- Wash your hands thoroughly before and after handling raw ingredients.
By adhering to these safety measures, you can confidently prepare ceviche while minimizing the risk of foodborne illnesses, allowing you to enjoy this delightful dish with peace of mind.
How to Scale Ceviche Recipes for Larger Gatherings
Scaling ceviche for large gatherings requires careful planning and execution. Increase ingredient quantities proportionally and consider marinating the fish in batches to ensure even curing. This approach allows you to serve a delicious ceviche that maintains its quality, even when preparing for a crowd.
To successfully scale your ceviche recipe for larger gatherings, follow these actionable steps:
1. Determine the number of servings you need and adjust your ingredient quantities accordingly.
2. Choose a large, non-reactive bowl for marinating the fish, ensuring ample space for the ingredients to blend.
3. If marinating in batches, divide the fish and marinade into smaller portions to maintain even curing.
4. Prepare accompaniments in bulk, ensuring you have sufficient quantities to complement the main ceviche dish.
By following these steps, you can effectively prepare a large batch of ceviche that retains its delicious flavors and textures, allowing all your guests to enjoy this delightful dish at your gathering.
Choosing the Best Fish for Authentic Peruvian Ceviche
Select fresh, high-quality fish, such as sea bass or flounder, to create authentic Peruvian ceviche. Ensure the fish is sushi-grade to guarantee both safety and flavor. The freshness and quality of the fish are paramount, as these factors significantly impact the overall taste and texture of the finished dish.
When selecting fish for ceviche, consider the following attributes:
- Look for firm, shiny skin and bright, clear eyes to indicate freshness.
- Smell the fish; it should have a clean, ocean-like scent, not a fishy odor.
- If possible, purchase fish from local sources or reputable markets to ensure quality.
- Choose fish known for its flavor and texture, such as snapper or halibut.
By making informed choices when selecting fish, you can create an authentic ceviche that showcases the freshness and quality of the ingredients central to this beloved dish while delighting your diners with every bite.
Traditional Peruvian Ceviche Ingredients and Their Creative Variations
Explore classic ingredients such as lime, ají amarillo, and red onions. These components form the backbone of traditional ceviche, providing the essential flavors and textures that characterize this iconic dish. By understanding the traditional elements, you can experiment with variations that add your unique twist and creativity.
In addition to traditional ingredients, consider these popular variations:
- Incorporate sweet potato or choclo for a traditional Peruvian touch
- Explore different fish types, such as mackerel or yellowtail, for unique flavors
- Add fruits like mango or pineapple to create a tropical twist
- Experiment with spice levels by adjusting the amount of ají amarillo used
By embracing both traditional and modern components, you can craft a ceviche that highlights the vibrant flavors of Peru while expressing your culinary creativity. The balance of textures, flavors, and colors creates an unforgettable dish that celebrates this iconic cuisine.
FAQs About Peruvian Ceviche
What exactly is ceviche?
Ceviche is a delightful dish made from fresh raw fish marinated in citrus juices, typically lime or lemon, along with a blend of spices and herbs. It is celebrated for its refreshing flavor and vibrant presentation, making it a popular choice in Peruvian cuisine.
How long should I marinate fish for ceviche?
Marinate fish for ceviche for 10 to 30 minutes, depending on the thickness of the fish. Monitor the texture closely to avoid over-marinating, which can result in an undesirable, mushy texture.
Can I use frozen fish for ceviche preparation?
Yes, using frozen fish for ceviche is acceptable, but ensure it is properly thawed before marinating. Sushi-grade fish is recommended for optimal safety and flavor, guaranteeing a delicious dish.
What vegetables can I add to enhance my ceviche?
Common vegetables to enhance ceviche include red onions, cucumbers, and avocados. These ingredients add texture and flavor, enriching the dish and creating a harmonious balance.
Is ceviche a healthy meal option?
Ceviche is considered a healthy option, as it is high in protein and low in calories. It contains beneficial nutrients such as omega-3 fatty acids and vitamin C from the citrus juices, making it a nutritious choice for many diets.
What type of fish is best suited for ceviche?
The best choices for ceviche include firm, white fish like sea bass, snapper, tilapia, or flounder. Always select sushi-grade fish to ensure safety and quality in your ceviche preparation.
How can I create a vegetarian version of ceviche?
Vegetarian ceviche can be made using ingredients such as mushrooms, hearts of palm, or tofu, marinated in citrus juices and spices to replicate the traditional flavors and textures of ceviche.
What drinks pair well with ceviche?
Light and refreshing drinks, such as pilsner beer, Sauvignon Blanc, and citrus-based cocktails, complement the flavors of ceviche beautifully, enhancing the overall dining experience.
How do I store leftover ceviche properly?
Store leftover ceviche in an airtight container in the refrigerator and consume it within 24 hours. For longer storage, freeze the marinated fish separately from the other ingredients to maintain optimal freshness and quality.
Can I use other seafood options in ceviche?
Absolutely! You can use a variety of seafood, including shrimp, scallops, or octopus, to create unique ceviche variations, each offering distinct flavors and textures that enhance the overall dish.
Connect with us on Facebook!
The post Best Peruvian Ceviche Recipes to Try: A Culinary Journey appeared first on https://cookinggods.com
The Article Peruvian Ceviche Recipes: Must-Try Dishes for Food Lovers Was Found On https://limitsofstrategy.com