Discover Key Nutrients That Enhance Hair Strength and Resilience
Understand the Role of Protein in Promoting Optimal Hair Health

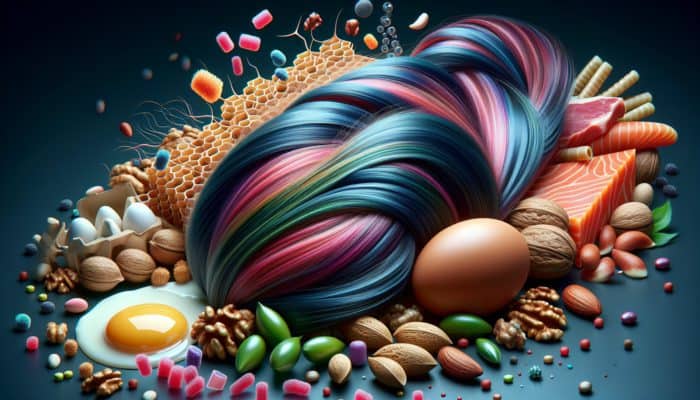
Strengthening weak hair strands is essential for maintaining vibrant locks. Protein acts as a fundamental building block that supports the strength of each hair strand. The primary protein component in hair is keratin, which plays a crucial role in providing structure and durability. Insufficient protein intake can lead to hair that is brittle and prone to breakage. Therefore, it is essential to include a variety of protein-rich foods in your diet to improve hair health. Consider these key protein sources that can significantly boost hair strength:
- Eggs
- Fish, particularly salmon and mackerel
- lean meats such as chicken and turkey
- Legumes, including lentils and chickpeas
- Nuts and seeds, especially walnuts and flaxseeds
- Dairy products, such as Greek yoghurt and cottage cheese
- Quinoa, recognized as a complete plant-based protein
- Tofu and tempeh for those following vegetarian or vegan diets
These nutrient-dense foods not only deliver essential proteins but also provide additional nutrients beneficial for overall hair health. For instance, the omega-3 fatty acids found in fatty fish nourish the scalp, while zinc from legumes and nuts plays a vital role in hair repair and growth. By ensuring a balanced intake of these protein sources, you can significantly improve the strength and resilience of your delicate hair strands.
Why Are Vitamins and Minerals Essential for Maintaining Healthy Hair?
Vitamins and minerals are indispensable for sustaining the strength and vitality of hair. Among the most crucial vitamins for hair health are Biotin, vitamin D, and vitamin E, along with essential minerals like iron and zinc. For example, biotin is widely recognized for its ability to strengthen hair and stimulate growth. A deficiency in these vital nutrients can lead to hair that appears dull and brittle, rendering it more susceptible to breakage. To enrich your diet with the right vitamins and minerals, consider incorporating these foods:
- Spinach and other leafy greens that provide iron and vitamins A and C
- Carrots and sweet potatoes rich in beta-carotene, which converts into vitamin A
- Avocados packed with vitamin E, which improves blood circulation to the scalp
- Shellfish, especially oysters, known for their high zinc content
- Citrus fruits like oranges and kiwis, which are rich in vitamin C, facilitating iron absorption
- Seeds, such as sunflower seeds, abundant in vitamin E
- Fortified cereals that often include added biotin and other essential vitamins
- Berries, loaded with antioxidants and vitamin C
These nutrients work synergistically to strengthen hair at the cellular level, ensuring not only strength but also shine and overall vitality. By focusing on a diet rich in these vital nutrients, individuals can effectively combat the challenges associated with fragile hair strands.
How Does Hydration Affect Hair Vitality?
Proper hydration is crucial for maintaining hair strength, as it plays a significant role in keeping the hair shaft moisturized and preventing dryness. When hair becomes dehydrated, it loses its elasticity, becoming brittle and vulnerable to damage. To ensure that your hair remains properly hydrated, it is essential to adopt a comprehensive approach that includes both internal and external hydration strategies. Consuming an adequate amount of water daily is foundational; aim for at least eight glasses, adjusting based on your activity level and environmental factors.
Integrating hydrating foods into your diet also supports hair moisture levels. Foods such as watermelon, cucumbers, and oranges are high in water content, contributing to your overall hydration. Additionally, consider utilizing hydrating hair products containing ingredients like aloe vera, glycerin, or hyaluronic acid, which attract and retain moisture within the hair.
Regularly applying deep conditioning treatments or hair masks can provide an extra infusion of hydration, allowing hair strands to absorb essential moisture and nutrients. Maintaining proper hydration is not only about drinking water; it also involves creating a balanced routine that includes hydrating foods and effective hair care products.
Implement Expert Strategies to Fortify Fragile Hair Strands

Follow Professional Recommendations for Effective Hair Care Routines
Experts in the hair care industry consistently emphasize the importance of a dedicated regimen designed to strengthen weak hair strands. Many professionals recommend conducting a thorough evaluation of your current hair condition to identify specific issues, such as dryness or damage. An effective daily hair care routine should include gentle cleansing, conditioning, and the application of protective products.
For instance, a recommended routine may involve using a sulfate-free shampoo that cleanses the hair without stripping it of its natural oils, followed by a nourishing conditioner that adds moisture and strength. Professionals frequently suggest applying heat protectant sprays before styling to safeguard hair from damage caused by heat tools. Real-world examples illustrate how adherence to such routines can significantly enhance hair strength over time.
Moreover, regular trims are essential for removing split ends, which can compromise the integrity of hair strands. Hair specialists often advocate for incorporating a weekly deep conditioning treatment or hair mask to provide intensive moisture and repair. By adhering to these expert recommendations, individuals can actively work toward reinforcing their weak hair strands.
What Scientific Evidence Supports Hair Strengthening Techniques?
Scientific research has unveiled various methods to reinforce weak hair strands, focusing on both topical treatments and dietary adjustments. One significant discovery is the efficacy of topical applications that contain specific proteins and amino acids mimicking the natural structure of hair. Treatments enriched with hydrolysed proteins can notably enhance hair elasticity and strength, thereby reducing the risk of breakage.
Additionally, advancements in hair care have led to the development of serums and treatments infused with ingredients like biotin and keratin. These components are scientifically validated to nourish and strengthen hair from the exterior. For a practical approach, individuals should seek products labeled with these beneficial ingredients and integrate them into their regular hair care routines.
Beyond topical treatments, dietary modifications can also play a crucial role in addressing hair health issues. Scientific studies consistently link adequate consumption of vitamins and minerals, particularly biotin and vitamin D, to improved hair strength. A balanced diet abundant in these nutrients promotes healthy hair growth and resilience. As research continues to advance, staying informed about the latest scientific findings can empower individuals to make knowledgeable choices regarding their hair care.
What Treatments Do Dermatologists Recommend for Weak Hair?

Dermatologists often provide invaluable insights into specialized treatments designed for individuals with weak hair strands. A commonly recommended option is the use of minoxidil, a topical solution clinically proven to stimulate hair growth and strengthen existing strands. This FDA-approved treatment is particularly effective for thinning hair and is available in various formulations.
Moreover, dermatologists frequently emphasize the advantages of professional hair treatments, such as PRP (Platelet-Rich Plasma) therapy. This innovative procedure involves drawing a small amount of blood, processing it to concentrate the platelets, and subsequently injecting the concentrated platelets into the scalp to stimulate hair follicles. Research has shown promising outcomes in enhancing hair density and strength with this method.
Additionally, dermatologists may recommend regular scalp treatments or chemical peels, which can help eliminate buildup and improve overall scalp health, thereby promoting stronger hair growth. These expert insights highlight the importance of consulting a healthcare professional for personalized recommendations that address individual hair concerns, ensuring the most effective path to strengthening weak hair strands.
How Does Diet Affect Hair Strength?
Identify Top Nutrient-Rich Foods That Support Hair Health
The relationship between diet and hair strength is profound, as the body requires a variety of nutrients to support healthy hair growth and resilience. Including foods rich in essential vitamins, minerals, and proteins can significantly enhance hair health. Some of the most beneficial foods to consider are:
- Fatty fish such as salmon, which is abundant in omega-3 fatty acids
- Spinach and other leafy greens, loaded with iron and vitamins A and C
- Sweet potatoes, high in beta-carotene, which supports a healthy scalp
- Nuts, particularly walnuts and almonds, known for their high vitamin E content
- Eggs, providing biotin and protein essential for strengthening hair
- Berries, which are rich in antioxidants and vitamin C
- Legumes, offering plant-based protein along with iron
- Whole grains, supplying B vitamins and fiber
These nutrient-dense foods work synergistically to cultivate strong, healthy hair. For example, the omega-3 fatty acids found in fatty fish not only nourish hair follicles but also contribute to scalp health, helping to alleviate dryness. Incorporating a diverse range of fruits and vegetables ensures a broad spectrum of vitamins and minerals, which are essential for maintaining hair strength and preventing breakage.
Which Harmful Nutrients Should Be Avoided for Optimal Hair Health?
While emphasizing beneficial nutrients is crucial for hair health, it is equally important to recognize dietary components that can negatively affect hair strength. Certain harmful nutrients may hinder hair growth and contribute to weakness. Trans fats and excessive saturated fats, commonly found in processed foods, can lead to inflammation and diminish circulation to the scalp, adversely affecting hair health.
Furthermore, consuming excessive sugar can trigger hormonal imbalances that may exacerbate hair loss. Diets high in refined carbohydrates can cause spikes in blood sugar levels, potentially leading to hair thinning over time. Additionally, certain preservatives and additives frequently found in processed foods can disrupt nutrient absorption, further detracting from hair health.
To optimize hair strength, individuals should aim to minimize the intake of these detrimental nutrients. Instead, focusing on whole, nutrient-dense foods will create an environment conducive to strong hair growth and overall well-being.
How Does Nutrition Impact Hair Structure and Quality?
A balanced diet significantly affects the structure and health of hair strands. The nutrients consumed are integral to the formation and maintenance of keratin, the primary protein that composes hair. An inadequate intake of essential vitamins and minerals can weaken hair structure, resulting in strands that are more prone to breakage and damage.
Proteins from dietary sources help fortify the hair shaft, providing the necessary building blocks for resilience. Biotin, found in foods such as eggs and nuts, is crucial for keratin synthesis, which directly influences hair strength and texture. Additionally, vitamins A, C, and E contribute to maintaining healthy hair by promoting adequate oil production and protecting strands from environmental stressors.
Moreover, hydration plays a pivotal role in the cellular structure of hair. A well-hydrated body ensures that nutrients are effectively transported to hair follicles, promoting optimal growth and strength. In essence, a diet rich in diverse nutrients not only enhances the appearance of hair but also fortifies its structure, making it essential for anyone looking to strengthen weak hair strands.
Why Is Proper Hydration Crucial for Hair Strength?
The link between hydration and hair strength is critical. Sufficient water intake is necessary for maintaining the moisture balance in hair strands, which directly impacts their health and resilience. Well-hydrated hair demonstrates greater elasticity, is less susceptible to breakage, and shows an improved overall appearance.
To maintain adequate hydration, it is essential to strive for a sufficient amount of water intake daily. A general guideline suggests aiming for eight glasses, but individual hydration needs may vary based on activity levels and environmental conditions. Additionally, incorporating hydrating foods like cucumbers, oranges, and melons can contribute to overall hydration levels.
Utilizing hydrating hair products can further enhance moisture retention. Look for shampoos and conditioners that contain humectants such as glycerin or aloe vera, which draw moisture into the hair. Regularly applying deep conditioning masks can also improve hydration, allowing hair to effectively absorb vital moisture and nutrients. By prioritizing hydration, individuals can significantly enhance the strength and health of weak hair strands.
The Importance of Supplements for Strengthening Hair
Certain supplements can play a vital role in enhancing hair strength, particularly for individuals who may not receive adequate nutrients through their diet alone. Vitamins like biotin, vitamin D, and folic acid have gained recognition for their effectiveness in promoting hair health. Biotin, often referred to as the “hair vitamin,” is essential for keratin synthesis and is available in supplement form for those needing an additional boost.
Minerals such as zinc and iron are equally critical, as they contribute to hair structure and growth. A deficiency in zinc can lead to hair loss, while iron is essential for maintaining healthy blood circulation to the scalp. Omega-3 fatty acids, found in capsule form, can also promote scalp health and reduce inflammation, supporting stronger hair.
When incorporating supplements into your regimen, it is vital to consult with a healthcare professional to determine appropriate dosages and ensure they align with individual health needs. These targeted supplements can provide the necessary support for strengthening weak hair strands and fostering overall hair vitality.
Adopt Daily Practices for Stronger Hair
Employ Gentle Techniques to Handle Hair with Care
Implementing gentle hair handling techniques is vital for preventing breakage and preserving the strength of weak hair strands. Using aggressive brushing or styling methods can cause significant damage, particularly for individuals with fine or fragile hair. To maintain hair health, begin by using a wide-toothed comb to detangle wet hair, as it is more vulnerable to breakage when damp.
Avoid pulling at knots; instead, gently work through them, starting from the ends and gradually moving up to the roots. Additionally, limiting the use of hair ties and clips that can create tension and lead to breakage is advisable. Opting for fabric-covered hair ties can help reduce this risk.
When styling, consider air-drying rather than relying on heat tools, as excessive heat can weaken hair strands over time. If heat styling is necessary, always apply a heat protectant spray to shield hair from potential damage. By adopting these gentle handling techniques, individuals can significantly minimize the risk of breakage and maintain their hair’s integrity, promoting overall strength.
Implement Best Practices for Washing Your Hair Effectively
Establishing an effective hair-washing routine is crucial for enhancing hair strength and promoting overall health. The key to a successful regimen lies in both the frequency and technique of washing. Ideally, hair should be washed two to three times a week, depending on hair type and oil production. Over-washing can strip the scalp of its natural oils, leading to dryness and brittleness.
When washing, begin by thoroughly wetting the hair with lukewarm water, which helps open the hair cuticles for optimal cleansing. Use a gentle, sulfate-free shampoo, applying it mainly to the scalp while massaging in circular motions to avoid tangling. It is essential to rinse thoroughly to remove all product residue.
Next, apply a nourishing conditioner tailored to your hair type, focusing on the mid-lengths and ends. Allow it to sit for a few minutes to penetrate the hair shaft, then rinse with cool water to seal the cuticles. This technique enhances shine and reduces frizz. Incorporating a weekly deep conditioning treatment can further boost moisture and strength. By following an effective washing routine, individuals can significantly improve the health and strength of their hair.
Utilize Protective Styles for Enhanced Hair Resilience
Protective styling techniques are essential for minimizing damage to fragile hair strands and enhancing overall hair health. These styles reduce manipulation, shielding hair from environmental stressors and preventing breakage. Some of the most effective protective styling approaches include braiding, twists, and updos.
Braids, whether simple or intricate, can secure hair and lessen the need for daily styling, thus minimizing damage. Twists offer a low-maintenance yet stylish option. Additionally, updos such as buns or ponytails can effectively protect the ends of hair, especially when secured loosely to avoid tension.
It is advisable to rotate protective styles to prevent stress on the same areas of hair. Regularly moisturizing hair while in protective styles also helps maintain hydration levels, ensuring strands remain healthy. Furthermore, salon treatments, such as adding weaves or wigs, can serve as protective measures, allowing natural hair to rest and recover. By integrating these protective styling techniques into daily routines, individuals can create a nurturing environment that promotes stronger hair.
Identify the Most Effective Hair Products for Weak Strands
Select Shampoos and Conditioners that Strengthen Your Hair
Choosing the right shampoo and conditioner can significantly impact the strength of weak hair strands. When selecting these products, it is crucial to look for specific ingredients recognized for their strengthening properties. Shampoos containing keratin, hydrolysed proteins, and amino acids help fortify the hair shaft while cleansing. Avoiding sulfates is essential, as they can strip natural oils and cause dryness.
Conditioners should focus on hydrating and nourishing the hair. Ingredients like argan oil, shea butter, and aloe vera are excellent for providing moisture and enhancing strength. Additionally, seek conditioners with silicones that can help seal the hair cuticle, reducing frizz and enhancing shine.
Incorporating a leave-in conditioner can further enhance daily hydration and protection. The combination of these products, tailored to individual hair types, can create a solid foundation for strengthening weak hair strands and mitigating damage.
Explore the Benefits of Strengthening Serums and Oils for Optimal Results
Integrating strengthening serums and oils into your hair care regimen can provide an additional layer of support for weak hair strands. These products are formulated with concentrated ingredients that can penetrate the hair shaft, delivering nourishment and protection. Oils such as coconut oil, jojoba oil, and argan oil are particularly renowned for their ability to hydrate and strengthen hair.
For instance, coconut oil is celebrated for its unique ability to penetrate the hair shaft due to its small molecular structure, providing deep conditioning and minimizing protein loss. Jojoba oil closely resembles natural scalp oils, making it an excellent moisturizer that supports scalp health. Argan oil is rich in antioxidants and fatty acids that enhance shine while minimizing frizz.
When applying serums, it is advisable to do so on damp hair to allow for better absorption. Focusing on the ends, which are often the driest and most damaged part of the hair, can help prevent breakage. Regular application of these strengthening serums and oils can lead to significantly improved hair health and resilience.
Why Are Leave-In Treatments Essential for Maintaining Hair Health?
Leave-in treatments play a pivotal role in maintaining hair strength throughout the day. These products are designed to be applied after washing and left in your hair, providing ongoing nourishment and protection. The benefits of using leave-in treatments are manifold, as they assist in detangling hair, reducing frizz, and delivering hydration.
Look for leave-in conditioners that contain ingredients such as keratin, panthenol, and natural oils to enhance hair health. Keratin aids in rebuilding the hair’s structural integrity, while panthenol adds moisture and shine. Natural oils, like argan or coconut oil, provide continuous hydration and protect hair from environmental stressors.
To effectively incorporate leave-in treatments, apply them to damp hair after washing, concentrating on mid-lengths and ends. This method ensures that hair receives continuous hydration and strength throughout the day, making leave-in treatments an essential aspect of any hair care routine aimed at reinforcing weak strands.
Utilize Protein Treatments for Effective Hair Repair
Protein treatments are an essential component of hair care for individuals aiming to repair and strengthen weak hair strands. These treatments contain hydrolysed proteins that penetrate the hair shaft, effectively rebuilding its structure and enhancing elasticity. Regular application of protein treatments can significantly boost hair strength, thereby reducing the likelihood of breakage.
When selecting a protein treatment, look for products that include ingredients such as keratin, wheat protein, or silk amino acids. Keratin is particularly effective for rebuilding hair, while wheat protein aids in strengthening and fortifying. Silk amino acids contribute to softness and shine, creating a comprehensive treatment experience.
Typically, protein treatments should be utilized every 4-6 weeks, depending on the condition of the hair. It is essential to follow up with a deep conditioning treatment after a protein treatment to replenish moisture and restore balance. By incorporating these protein treatments into a hair care regimen, individuals can effectively repair weak strands and promote overall hair strength.
Scientific Insights on Strengthening Weak Hair Strands
Research Highlighting Effective Ingredients for Hair Strengthening
Research has uncovered numerous ingredients that effectively fortify weak hair strands. Among these, hydrolysed proteins have been shown to enhance hair elasticity and significantly reduce breakage. Studies indicate that when applied topically, hydrolysed keratin can penetrate the hair shaft, effectively replenishing lost proteins and increasing strength.
Another promising ingredient is biotin, which has gained popularity for its role in promoting hair health. Research suggests that biotin supplementation may lead to improved hair growth and thickness, especially in individuals experiencing hair thinning. Additionally, studies have demonstrated that vitamins A, C, and E possess antioxidant properties that protect hair from oxidative stress, thereby contributing to overall strength.
Furthermore, omega-3 fatty acids have been shown to support scalp health and enhance hair density. These findings highlight the importance of selecting hair care products that incorporate scientifically proven ingredients, allowing individuals to effectively strengthen weak hair strands.
Understanding the long-term benefits of consistent hair-strengthening practices can inform more informed hair care decisions. Research indicates that individuals who maintain a routine of using nourishing products and protective styles experience improved hair health over time. This diligent care can lead to stronger, shinier hair that is less prone to breakage and overall damage.
Moreover, studies suggest that adhering to a balanced diet rich in vitamins, minerals, and proteins not only enhances hair strength but also promotes growth. The long-term benefits of prioritizing hair care include increased resilience against environmental factors, reduced hair loss, and an improved overall appearance.
It is essential to note that while immediate results may be visible, the cumulative effects of long-term care can lead to transformative changes in hair health. By investing in a comprehensive hair care routine, individuals can enjoy lasting benefits that contribute to overall hair vitality.
How Does Strengthening Weak Hair Lead to Improved Growth?
Strengthening weak hair strands can positively influence hair growth, as damaged hair is often more susceptible to breakage, hindering growth. Research indicates that when hair is fortified through proper nutrition, hydration, and the use of restorative products, it becomes less prone to damage and loss.
Regularly employing strengthening treatments can enhance hair resilience, enabling strands to grow longer and healthier. Additionally, maintaining a healthy scalp environment is vital for optimal growth. Products that promote scalp health, combined with a nutrient-rich diet, create ideal conditions for hair to thrive.
In essence, focusing on strengthening weak hair strands not only enhances the quality and appearance of hair but also supports a healthier growth cycle. By establishing a robust hair care routine, individuals can witness substantial improvements in hair growth, overall health, and vitality.
Key Lifestyle Factors Influencing Hair Strength
How Effective Stress Management Contributes to Hair Health
Stress is a significant factor that can adversely impact hair strength, leading to conditions like telogen effluvium, where hair falls out prematurely. Effectively managing stress is crucial for sustaining healthy hair. Techniques that have proven beneficial for both mental well-being and hair health include:
- Meditation and mindfulness practices to reduce anxiety
- Regular physical activity, which elevates mood and diminishes stress
- Deep breathing exercises to enhance relaxation
- Engaging in hobbies or creative pursuits to distract from stressors
- Establishing a consistent sleep routine to improve overall health
- Connecting with friends and family for social support
- Limiting caffeine and alcohol intake, which can heighten stress
- Practicing time management techniques to alleviate overwhelm
Incorporating these stress management strategies can create a more conducive environment for hair growth and strength. By prioritizing mental well-being, individuals can help mitigate the negative effects of stress on hair health, allowing for a more robust and resilient mane.
Why Is Quality Sleep Essential for Hair Strength?
Adequate sleep plays a vital role in maintaining healthy hair, as it enables the body to undergo critical repair processes. During sleep, the body produces growth hormones that assist in tissue repair, including the growth of hair follicles. Insufficient sleep can lead to various health issues, including impaired hair growth and increased hair loss.
To optimize hair health, aim for 7-9 hours of quality sleep each night. Practicing good sleep hygiene, such as establishing a consistent sleep schedule, creating a comfortable sleep environment, and limiting screen time before bed, can enhance sleep quality.
Individuals who prioritize restful sleep often report improved overall hair health, including increased shine and reduced breakage. Establishing a bedtime routine that promotes relaxation can significantly contribute to better sleep and, consequently, stronger hair.
How Does Regular Exercise Impact Hair Vitality?
Regular exercise is another lifestyle factor that positively influences hair vitality. Engaging in physical activity enhances blood circulation, which improves the delivery of essential nutrients to hair follicles. This increased circulation can lead to healthier hair growth and enhanced strength.
Types of exercise that are beneficial for hair health include cardiovascular activities, such as running, cycling, or swimming, as well as strength training that helps build overall fitness. Aim for at least 150 minutes of moderate exercise each week to reap the benefits.
Moreover, exercise has the added advantage of reducing stress levels, further contributing to healthier hair. By incorporating regular physical activity into daily routines, individuals can support not only their physical fitness but also the health and vitality of their hair.
What Role Does Nutrition Play in Hair Strength?
Nutrition plays a vital role in hair strength, with a balanced diet rich in essential vitamins and minerals being crucial for optimal hair health. Key nutrients that support hair strength include proteins, iron, zinc, and vitamins A, C, and E. Foods that provide these nutrients should be staples in a hair-healthy diet.
Protein sources, such as lean meats, legumes, and dairy, not only contribute to hair structure but also supply the necessary amino acids for healthy growth. Iron-rich foods, like spinach, lentils, and fortified cereals, enhance oxygen delivery to hair follicles, promoting hair growth.
A diet inclusive of colorful fruits and vegetables ensures a wide array of antioxidants, which protect hair from oxidative stress. By prioritizing nutrition, individuals can significantly improve their hair strength and overall health, fostering a more resilient mane.
Get Answers to Common Questions About Hair Health
What foods should I eat to strengthen my hair?
Foods rich in protein, omega-3 fatty acids, vitamins A, C, and E, along with minerals like zinc and iron, are excellent for bolstering hair strength. Incorporate fish, nuts, leafy greens, eggs, and berries into your diet.
How often should I wash my hair for optimal strength?
Washing your hair two to three times per week is generally recommended to maintain strength. Over-washing can strip natural oils, leading to dryness and breakage.
Can stress impact hair health?
Yes, stress can significantly affect hair health, leading to conditions such as hair loss. Effective stress management techniques, such as meditation and exercise, can help maintain hair strength.
What role do protein treatments play in hair care?
Protein treatments aid in repairing and strengthening weak hair strands by replenishing lost proteins and improving elasticity. Regular use can reduce breakage and enhance overall hair health.
Are there specific vitamins that promote hair growth?
Vitamins such as biotin, vitamin D, and vitamin E play crucial roles in promoting hair growth and strength. Including these in your diet or as supplements can be beneficial.
How does hydration affect hair strength?
Proper hydration is essential for hair strength, as it helps keep hair moisturized and prevents brittleness. Drinking adequate water and using hydrating hair products are key.
What benefits do leave-in conditioners offer?
Leave-in conditioners provide ongoing moisture and protection for hair throughout the day. They help detangle hair, reduce frizz, and enhance overall hydration, contributing to strength.
Can exercise improve hair health?
Yes, regular exercise enhances blood circulation, promoting the delivery of nutrients to hair follicles. It also reduces stress, which can positively impact overall hair strength and vitality.
How does sleep influence hair health?
Adequate sleep is crucial for hair health, as it allows the body to repair tissues, including hair follicles. Quality sleep promotes the growth and overall vitality of hair.
What are some effective protective styling methods?
Effective protective styling methods include braids, twists, and updos. These styles minimize manipulation and protect hair from environmental damage, promoting overall strength.
Connect with us on Facebook!
The Article: Strengthening Weak Hair Strands: Universal Tips appeared first on Amitys Hair Salon.
The Article Strengthening Weak Hair Strands: Essential Tips for Repair Was Found On https://limitsofstrategy.com