Must-Have Utensils for Mastering the Art of Whipping Cream
Key Utensils You Need for Whipping Cream Like a Pro
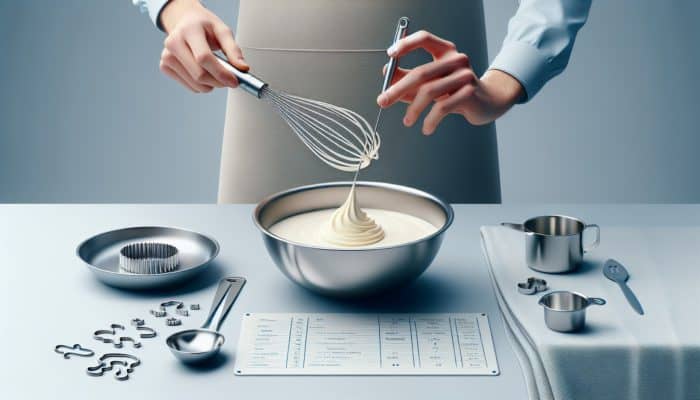
Whipping cream manually can feel intimidating, especially for beginners, but with the right utensils, you can achieve results that are just as impressive as those created using electric mixers. The process is surprisingly simple when equipped with essential tools that assist in creating perfectly whipped cream. A sturdy whisk, a carefully selected bowl, and a bit of patience are your best friends in this delightful culinary journey. Here’s a comprehensive list of indispensable tools to ensure your success:
- A balloon whisk designed for optimal air incorporation
- A metal or glass mixing bowl to maintain the cream’s chill
- A rubber spatula for mixing in flavors or serving
- A measuring cup to ensure precise quantities
- A kitchen towel to minimize mess during the whipping process
Selecting the right whisk is paramount; a balloon whisk, with its broad, rounded wires, is specifically crafted to incorporate air effectively, ensuring your cream reaches that delightful fluffy texture we all adore. When choosing a bowl, aim for one that feels comfortable in your hand and can be chilled ahead of time. This chilling step can drastically expedite and simplify the whipping process. Together, these essential utensils enhance your enjoyment of creating homemade whipped cream and make it an even more rewarding experience.
Tips for Selecting the Ideal Bowl for Whipping Cream
The choice of a bowl for whipping cream is vital in determining your success in achieving the desired consistency. For the best results, opt for a chilled metal or glass bowl as these materials are superior at conducting cold compared to plastic. Keeping the cream at the right temperature during whipping is crucial for attaining that light, airy texture we all strive for. To prepare your bowl, simply place it in the freezer for about 10-15 minutes before you begin. This small yet effective trick can help your cream whip faster and increase its volume significantly.
Upon using your chilled bowl, ensure it is impeccably clean and completely dry; any leftover oil or residue can impede the whipping process and inhibit the cream from achieving its maximum potential. A deeper bowl is also advisable, as it allows for more vigorous whisking without the concern of splatters, enabling you to introduce air more efficiently. By paying attention to these crucial details, you can elevate your whipped cream from simply good to truly exceptional, making your desserts shine like never before.
The Importance of Choosing a High-Quality Whisk
Investing in a top-notch whisk can significantly enhance your experience of whipping cream by hand. The balloon whisk is often the preferred choice, featuring a wide, rounded head and long, flexible wires that are expertly designed for optimal aeration. This unique construction allows for the efficient incorporation of air into the cream, achieving that ideal fluffy texture we all desire. With its larger surface area, a balloon whisk enables you to whip more cream in less time, making the effort not only quicker but also less strenuous.
The design of the whisk promotes maximum movement, which is essential when whipping cream effectively. As you whisk, you break down the fat molecules within the cream, resulting in a stable emulsion that can trap air. This is why utilizing a quality whisk significantly boosts your chances of success. The right tool not only simplifies the task but also enhances the overall enjoyment of the process. Investing in a durable whisk can elevate your culinary experience, ensuring that you achieve remarkable results every time you whip cream.
Proven Techniques for Hand-Whipping Cream Without an Electric Mixer

Expert Techniques Recommended by Professional Chefs for Whipping Cream
Professional chefs recommend a variety of techniques for whipping cream by hand, each offering unique advantages. The simplest approach involves using a balloon whisk in a back-and-forth motion, which effectively incorporates air into the cream. Begin by stabilizing the bowl with one hand while whisking vigorously with the other. This straightforward method is accessible to anyone, regardless of their cooking skill level.
Another effective technique is the circular motion method, where you whisk in large circles, gradually increasing your speed. This not only aerates the cream but also helps achieve a more uniform texture. For those adventurous chefs, consider trying the ‘figure-eight’ method, where you create a figure-eight shape with your whisk in the bowl. This approach is particularly useful for larger quantities of cream, as it allows for comprehensive mixing without compromising volume.
For a more advanced technique, think about combining various methods. Start with the circular motion to introduce air, then switch to a focused back-and-forth motion to build volume. Regardless of the method you choose, it’s essential to keep the cream cold and take breaks as needed. Hand-whipping requires some muscle, so pacing yourself will yield the best results in the end.
How to Achieve the Ideal Whipped Cream Consistency for Your Desserts
Achieving the perfect consistency when whipping cream is crucial for creating a delightful topping for desserts. There are distinct stages throughout the whipping process, and recognizing these stages will guide you in reaching that perfect point. Initially, the cream will become frothy; as you continue whisking, it will thicken and form soft peaks. Soft peaks are achieved when you lift the whisk out of the cream, and the mixture holds its shape while the tip curls back over.
As you progress, the cream will become stiffer, leading to the formation of medium peaks. At this stage, the cream holds its shape more firmly, with the tips standing straight up when you lift the whisk. The ultimate goal is to achieve stiff peaks, where the cream stands upright without collapsing. This stage is ideal for creating toppings for cakes, pies, or even incorporating into mousses.
Experts advise being attentive during the whipping process, as overwhipping can yield grainy or butter-like textures. To determine when your cream is perfectly whipped, regularly lift the whisk to check the peaks. With practice, you’ll develop a keen sense of when to stop, ensuring your whipped cream is light, airy, and perfectly suited for any dessert creation.
Enhancing Flavors and Additives in Your Whipped Cream

Elevating whipped cream with a variety of flavors can transform your desserts into extraordinary culinary masterpieces. Culinary experts recommend incorporating different additives to create unique flavor profiles tailored to your dishes. For instance, pure vanilla extract is a classic addition that imparts a warm, sweet aroma, beautifully complementing many desserts. To utilize, simply add a teaspoon of pure vanilla extract to your cream before you begin whisking.
Another delightful option is to infuse your cream with citrus zest, such as lemon or orange. This addition not only brightens the flavor but also introduces a refreshing twist. Fresh herbs like rosemary or mint can provide aromatic depth, making them perfect for pairing with fruit-based desserts. When adding flavorings, it’s crucial to do so before starting the whipping process, allowing the ingredients to blend seamlessly for maximum impact.
If you prefer a hint of sweetness, consider using powdered sugar instead of granulated sugar. This not only sweetens the cream but also aids in stabilizing it, ensuring your whipped cream maintains its texture for a longer period. A sprinkle of cocoa powder can create a rich chocolate variant, perfect for topping hot cocoa or desserts. The opportunities are endless, so don’t hesitate to experiment with your favorite flavors to discover the perfect combination that matches your palate.
Your Comprehensive Guide to Hand-Whipping Cream
Steps to Prepare Cream for Optimal Whipping
Before starting the task of whipping cream, proper preparation is essential for achieving the best possible results. First and foremost, ensure that your cream is cold, as cold cream whips more easily and retains its structure better. Here are some straightforward preparation steps to follow:
- Store your cream in the refrigerator for several hours or overnight to ensure it’s adequately chilled.
- Chill your whisk and bowl in the freezer for about 10-15 minutes prior to use.
- Measure out the desired quantity of cream, typically at least one cup for effective whipping.
- If you plan to add sugar or flavorings, have them ready at this stage.
By taking the time to chill both your tools and cream, you set the stage for success. Cold cream whips faster and achieves peak volume more efficiently, resulting in a lighter, fluffier final product. Once your ingredients are prepared, you’re ready to embark on the enjoyable journey of whipping cream by hand.
The Hand-Whipping Process: Step-by-Step Instructions
The actual process of whipping cream by hand may require some effort, but with the right technique, you’ll find it immensely rewarding. Begin by pouring your cold cream into the chilled bowl. Utilizing your balloon whisk, start whisking vigorously. Establishing a good rhythm is essential; aim to maintain a consistent motion, using your wrist to power the whisk.
Initially, you’ll notice the cream becoming frothy. Continue whisking, and soon it will thicken. As you keep going, you’ll progress through the stages of soft peaks to medium peaks and finally to stiff peaks. Remember to take breaks if your arm becomes fatigued, as this process can demand considerable physical effort.
As you reach the stiff peak stage, exercise caution to avoid overwhipping, as this can lead to your cream turning grainy or even transforming into butter. It’s best to stop whisking as soon as you achieve that perfect light and airy texture. Once ready, you can use the whipped cream immediately or incorporate it into your favorite desserts, knowing that your handcrafted creation is primed to impress.
Steps to Take If You Accidentally Overwhip Cream
Overwhipping cream is a frequent misstep for many, resulting in a grainy texture or, in the worst-case scenario, butter. However, if you find yourself in this predicament, don’t lose hope! There are effective methods to salvage your overwhipped cream. The first step is to assess the extent of the overwhipping. If the cream has just begun to clump but remains slightly soft, you can continue whisking gently to reintroduce some air.
If the cream has thickened excessively, consider adding a small amount of unwhipped cold cream back into the mixture. Start with a tablespoon and gently fold it in using a rubber spatula. This can help restore some of the lost lightness. Be sure to fold carefully rather than stirring, as this technique helps maintain the airy texture we aim for.
In more severe cases where the cream has fully separated, it may be too late to salvage it entirely. In such instances, you can repurpose it as a filling for cakes or pastries, or even blend it back into a dessert where a thicker texture is acceptable. Understanding how to manage overwhipped cream can transform potential disasters into delightful opportunities in the kitchen.
Best Practices for Storing Whipped Cream
Properly storing whipped cream is essential for maintaining its texture and freshness over time. Once whipped, cream can be stored in an airtight container in the fridge, where it typically lasts for 2-3 days. To help preserve its fluffy consistency, consider incorporating a stabilizer, such as cornstarch or powdered sugar, during the whipping process. This addition helps prevent the cream from separating as time passes.
When storing, ensure the container is clean and dry. Cover it tightly to prevent the cream from absorbing any unpleasant odors from the fridge, which can alter its flavor. If you discover your whipped cream has started to deflate when you’re ready to use it again, a quick re-whipping with a whisk can restore some of its original lightness.
For longer-term storage, consider freezing whipped cream. However, it’s important to note that freezing can affect its texture, so it’s best suited for use in recipes rather than as a topping. When freezing, spoon dollops onto a baking sheet, freeze until solid, then transfer to a sealed bag or container. This method allows for easy portioning later when needed.
The Timeline for Whipping Cream by Hand
Factors That Affect the Time Required to Whip Cream
The time needed to whip cream by hand can vary based on several factors. One of the most significant elements is the temperature of the cream; colder cream whips faster and more efficiently than cream that has been left at room temperature. Additionally, the type of whisk you are using is crucial; a balloon whisk will aerate the cream more quickly than a standard whisk, significantly reducing the whipping time.
The volume of cream is another contributing factor. Whipping a larger quantity invariably takes longer than whipping a smaller amount. Therefore, if you are preparing a large batch, it’s wise to divide it into smaller portions for more manageable whipping. The speed and technique of your whisking will also influence the time; a consistent, vigorous motion will yield quicker results than a slow, gentle approach.
Lastly, the type of bowl can impact whipping time. A cold metal or glass bowl will conduct temperature better than plastic, promoting quicker and more effective whipping. Understanding these factors can help you manage your expectations and produce whipped cream with ease and efficiency.
Average Time Required for Hand-Whipping Cream
On average, hand-whipping cream can take anywhere from 5 to 10 minutes, depending on the factors mentioned earlier. If you start with cold cream and use a quality balloon whisk, you may achieve soft peaks within the first few minutes. As you continue, the process can extend to 7-10 minutes to achieve stiff peaks, especially for larger quantities.
If you’re using a standard whisk, you might find the time needed increases slightly due to reduced aeration efficiency. Maintaining a cold temperature for the cream, along with chilled whisk and bowl, can help keep the whipping time shorter. Developing a rhythm and persevering through the initial stages will help you gauge your progress and keep you motivated as you whip.
It’s essential to recognize that while patience is required, the outcomes are undoubtedly rewarding. The satisfaction of creating fluffy, homemade whipped cream by hand is a skill that enhances your culinary repertoire and impresses your guests, making the effort worthwhile.
Effective Strategies for Speeding Up the Whipping Process
If you’re looking to accelerate the whipping process without compromising quality, consider these practical tips to enhance your efficiency:
- Keep the cream as cold as possible before starting the whipping process.
- Utilize a larger bowl to allow for greater air incorporation.
- Opt for a balloon whisk for maximum aeration.
- Whisk in a circular motion to build volume swiftly.
Using a larger bowl not only provides ample space for vigorous whisking but also helps to prevent splatter. A balloon whisk is designed for optimal aeration, which can considerably reduce your whipping time. Remember, maintaining a steady, brisk pace is key; the more consistent your motion, the faster you’ll achieve that perfect texture.
Additionally, consider working in smaller batches. Whipping smaller quantities will naturally take less time, allowing you to efficiently whip multiple batches without compromising quality. These tips can streamline the process, making whipping cream by hand both quick and enjoyable.
Storing and Utilizing Whipped Cream
Best Practices for Storing Whipped Cream to Maintain Freshness
Proper storage of whipped cream is crucial for retaining its delightful texture and flavor over time. The optimal way to store it is in an airtight container, which prevents the absorption of odors from the fridge and helps maintain its freshness. Ideally, whipped cream should be consumed within 2-3 days after whipping. However, if you wish to extend its longevity, consider adding stabilizers such as cornstarch or powdered sugar during the whipping process; these ingredients help maintain its structure and prevent separation.
When storing, avoid using containers that previously held strong-smelling foods, as whipped cream can absorb these odors. If you need to store whipped cream for more than a few days, freezing is a viable option, although it may slightly affect the texture. For freezing, scoop dollops onto a baking sheet, freeze until solid, and then transfer to a freezer-safe bag or container. This method allows for easy portioning when you’re ready to use them.
Before serving stored whipped cream, a quick whisk can help restore some of its volume, making it fluffy and light again. This technique not only preserves its quality but ensures you always have fresh whipped cream on hand for your culinary creations.
Innovative Ways to Use Whipped Cream in Your Culinary Creations
Whipped cream is remarkably versatile and can enhance a wide array of dishes beyond its traditional role as a dessert topping. For starters, it works wonderfully for adorning hot beverages like coffee, hot chocolate, or even chai lattes, adding a creamy richness that elevates the entire drinking experience.
In the realm of baking, whipped cream can be folded into mousses or cakes, providing a light texture that beautifully contrasts with denser components. Picture a light lemon mousse or a decadent chocolate cake layered with whipped cream—both are divine. You can also use it to create trifles, layering whipped cream with fresh fruits, sponge cake, and custard for an impressive dessert presentation.
Culinary enthusiasts can even employ whipped cream as a base for salad dressings or dips, adding a creamy element to savory dishes. Blend it with herbs and spices for a delightful twist that complements salads or crudités. The adaptability of whipped cream allows it to shine in both sweet and savory dishes, making it a staple in any kitchen.
Understanding the Shelf Life of Whipped Cream
Understanding the shelf life of whipped cream is essential for both safety and culinary quality. Freshly whipped cream typically lasts about 2-3 days when stored in the fridge, depending on how well it’s been stabilized during the whipping process. If you’ve added sugar or stabilizers, it may last slightly longer, as they contribute to maintaining its structure and flavor.
When considering whipped cream for longer storage, freezing is a feasible option. However, it’s important to note that while frozen whipped cream can last for 2-3 months, the texture may not return to its original state once thawed. It’s best suited for blending into recipes rather than serving as a topping afterward.
Always check for signs of spoilage, such as off-odors or visible changes in texture, before using stored whipped cream. This attention to detail ensures you enjoy the best quality product while minimizing any risks related to food safety.
How to Revive Over-Whipped Cream for Optimal Results
If you find yourself with over-whipped cream, there’s no need to panic! There are effective techniques to rescue it and restore its smooth texture. The most straightforward method is to incorporate a small amount of cold, unwhipped cream back into the overwhipped mixture. Start with a tablespoon, gently folding it into the grainy cream using a spatula. This reintroduces moisture and helps loosen the mixture.
If the cream is extremely thick and has started to separate, you may need to be a bit more aggressive in your approach. Use a whisk to gently blend the added cream, allowing it to regain some of its airy texture. It’s essential to fold rather than stir to maintain that lightness.
In more severe cases of overwhipping, you might need to repurpose the cream entirely, using it in baking recipes where a thicker texture is acceptable, such as in buttercream or as a filling for pastries. This way, you can transform a potential disaster into a delicious creation, showcasing your resourcefulness in the kitchen.
Can You Successfully Freeze Whipped Cream?
Freezing whipped cream is indeed a viable option, though it comes with considerations regarding texture and flavor. To freeze whipped cream effectively, dollop it onto a baking sheet lined with parchment paper, then place it in the freezer until solid. Once frozen, transfer the dollops to an airtight container or freezer-safe bag, ensuring you label it with the date.
Freezing can affect the texture of whipped cream, making it slightly less stable once thawed. However, it’s perfect for incorporating into recipes where texture is less critical, such as smoothies or baked goods. When you’re ready to use it, allow it to thaw in the fridge and give it a gentle whisk to restore some volume before serving.
It’s advisable to use frozen whipped cream within 2-3 months for optimal quality. While there may be minimal changes to the texture, the convenience of having whipped cream ready to use makes freezing a practical solution for busy kitchens.
Research-Backed Benefits of Hand-Whipping Cream
Does Hand Whipping Affect the Flavor Quality of Cream?
The methods of whipping cream and their impact on flavor quality is a fascinating topic. Research indicates that the technique used can indeed influence both the flavor and texture of the cream. Hand-whipped cream tends to have a fresher, more pronounced dairy taste compared to cream whipped with an electric mixer, which may sometimes introduce air too rapidly, leading to a slightly different mouthfeel.
When whipped by hand, the gradual incorporation of air allows for a more controlled emulsification of the fat, often resulting in a creamier texture that preserves the rich flavor profile of the cream. This subtle difference can be especially noticeable in high-quality creams with distinct flavors, where the hand-whipping method allows those nuances to shine through beautifully.
Moreover, the process of hand whipping fosters a deeper connection to your culinary creations. The tactile nature of whisking by hand can enhance your appreciation of the ingredients, leading to a more mindful cooking experience that is reflected in the final taste.
Health Benefits of Hand Whipping Cream
The act of whipping cream by hand isn’t just a culinary skill; it also offers some surprising health benefits. Engaging in this physical activity can increase arm strength and improve dexterity, as the repetitive motion of whisking engages various muscle groups. Over time, this can contribute to better overall fitness and coordination.
Additionally, the act of making whipped cream by hand can serve as a form of mindfulness. Focusing on the task at hand provides a break from the hustle and bustle of daily life, promoting mental well-being. This practice of mindfulness can help reduce stress and anxiety, making the cooking process more enjoyable and fulfilling.
In a world dominated by electric mixers, taking the time to whip cream by hand can serve as a reminder of the joys of traditional cooking methods, fostering a deeper connection to the food you prepare and consume.
Environmental Impact of Manual Whipping
Using a mixer to whip cream consumes electricity, whereas opting for manual whipping is an eco-friendly alternative that reduces your carbon footprint. By choosing to whip by hand, you contribute to a more sustainable kitchen practice. This small choice not only saves energy but also minimizes waste associated with electric appliances.
Additionally, manual whipping encourages a more thoughtful approach to food preparation. When engaged in hand-whipping, you’re likely to become more aware of your ingredients, sourcing them responsibly and valuing their quality. This connection can lead to a greater appreciation for local produce and sustainability, as you strive to create the best possible results with minimal environmental impact.
Taking these actionable steps can inspire a culinary journey that prioritizes both quality and sustainability. Choosing to whip cream by hand is a simple yet effective way to embrace a more eco-conscious lifestyle while enjoying the rich rewards of homemade creations.
How Hand Whipping Influences Cream Quality
Hand whipping can indeed affect the quality of whipped cream, often leading to superior results compared to machine whipping. The key to achieving optimal cream quality lies in the gentle incorporation of air, which is facilitated through manual techniques. Hand whipping allows for greater control over the process, enabling you to gauge the texture and consistency at every stage, ensuring that the cream reaches its perfect state without overwhipping.
Additionally, the slower method of hand whipping helps maintain the cream’s structural integrity. When whipped too quickly with a mixer, the risk of breaking the emulsion increases, potentially leading to a less stable product. By manually whisking, you create a more cohesive mixture that retains its airy quality for a longer duration.
Practical tips for achieving the best results include using cold ingredients and bowls, as well as incorporating stabilizers when necessary. These steps, combined with the mindful technique of hand whipping, can elevate the quality of your whipped cream, making it a standout component in any dessert.
Resolving Common Whipping Issues
Steps to Take When Cream Refuses to Whip
Sometimes, despite your best efforts, cream simply refuses to whip properly. There are several common causes for this frustrating issue. One primary reason could be the temperature of the cream; if it is too warm, the fat molecules won’t emulsify effectively. Always ensure your cream is cold before whipping to maximize success and achieve that desired fluffiness.
Another potential issue is the fat content of the cream. Use Heavy cream or whipping cream, as they contain a higher fat content necessary for creating stable whipped cream. If the cream is low-fat or non-dairy, it may not whip at all. Lastly, ensure your tools are clean and dry; any residue can hinder the whipping process and negatively impact the final product.
If you encounter a situation where the cream won’t whip, the best approach is to start over with cold, high-fat cream, and try again. It’s all part of the learning experience in the kitchen, making your eventual success all the more satisfying.
How to Address Lumps in Your Whipped Cream
Lumps in whipped cream can be an unwelcome surprise, but they are often preventable with a few simple techniques. One primary cause of lumps is overwhipping, where the cream begins to curdle. To avoid this, keep a close eye on the cream as you whip, stopping at the soft peak stage to assess the texture.
If lumps do occur, there’s no need to panic. One effective method for fixing lumpy cream is to gently whisk in a small amount of cold, unwhipped cream. This will help smooth out the texture and reintroduce some air. Utilize a gentle folding motion to avoid further breaking down the whipped cream.
Another preventive measure is to ensure your bowl and utensils are entirely clean and dry before starting. Any leftover fat or residue can lead to uneven whipping and lumps. By taking these precautions, you can achieve a smooth and beautiful whipped cream every time.
How to Fix Grainy Whipped Cream
Grainy whipped cream can be an unpleasant outcome, often resulting from overwhipping the cream or using low-fat alternatives that don’t whip well. Thankfully, fixing grainy cream is possible by adding a touch of unwhipped cold cream back into the mixture. Start with a tablespoon, folding it in gently with a spatula until you achieve a smoother texture.
If the graininess persists, you may consider straining the whipped cream through a fine-mesh sieve. This will help eliminate any lumps and restore a smoother consistency, albeit with a slight loss of volume.
To prevent graininess in future batches, always use high-fat cream and monitor the whipping process carefully. By stopping at the right moment, you can avoid graininess and enjoy perfectly smooth whipped cream every single time.
How to Resolve Flat Whipped Cream
Flat whipped cream is a common issue that can arise from various factors. If your whipped cream lacks volume, it’s often due to using low-fat cream or not incorporating enough air during the whipping process. Ensure you’re using heavy cream, which contains a higher fat content, allowing for better aeration and stability.
To revitalize flat whipped cream, try re-whipping it briefly using a clean, cold whisk. If the cream still doesn’t hold its shape, consider adding a stabilizer like cornstarch or powdered sugar, which can help the cream maintain its volume.
Additionally, whipping the cream in smaller batches can yield better results, as it’s easier to effectively incorporate air. By keeping these tips in mind, you can overcome the challenge of flat whipped cream, ensuring a light and fluffy topping for your desserts.
Frequently Asked Questions About Whipping Cream
Can I whip cream that’s not cold?
Whipping cream at room temperature is challenging since cold cream whips more easily and achieves better volume. Always start with chilled cream for optimal results.
What is the best cream for whipping?
Heavy cream or whipping cream, which contains at least 36% fat, is ideal for whipping. Higher fat content allows for better aeration and stability in the final product.
How can I tell if my cream is overwhipped?
Overwhipped cream appears grainy and may start to separate. It loses its light, fluffy texture and can become butter-like if whisked for too long.
Is it possible to whip cream without a whisk?
Yes, you can use a fork or a jar with a tight lid, shaking vigorously. However, a whisk is the most effective tool for aerating the cream adequately.
How long does whipped cream last in the fridge?
Whipped cream typically lasts about 2-3 days in the fridge when stored in an airtight container. Adding stabilizers can extend its freshness and texture longevity.
Can I use sweetened condensed milk instead of cream?
Sweetened condensed milk can provide a similar texture, but it won’t whip in the same way as cream. It can add sweetness to recipes where whipped cream is required.
What can I use instead of whipped cream?
Alternatives include whipped coconut cream, whipped topping, or non-dairy whipped creams, which can be excellent substitutes for various dietary needs and preferences.
Can you re-whip previously whipped cream?
Yes, you can re-whip whipped cream if it has slightly deflated. Adding a little cold cream while re-whipping can help restore its volume and fluffiness.
Why is my whipped cream too runny?
Runny whipped cream is often the result of using low-fat cream or insufficient whipping. Ensure you use heavy cream and whip until stiff peaks form for the best texture.
Is it safe to eat whipped cream past its shelf life?
Eating whipped cream past its shelf life is not recommended, as it may pose a risk of foodborne illness. Always check for signs of spoilage before consuming.
Stay updated with our exciting news on Facebook!
The post How to Whip Cream Without a Mixer: Simple Techniques appeared first on https://cookinggods.com
The Article Whip Cream Without a Mixer: Easy Techniques to Try Was Found On https://limitsofstrategy.com
Leave a Reply