Year: 2025

  • LDW Coverage: Discover the Key Benefits for Renters

    LDW Coverage: Discover the Key Benefits for Renters

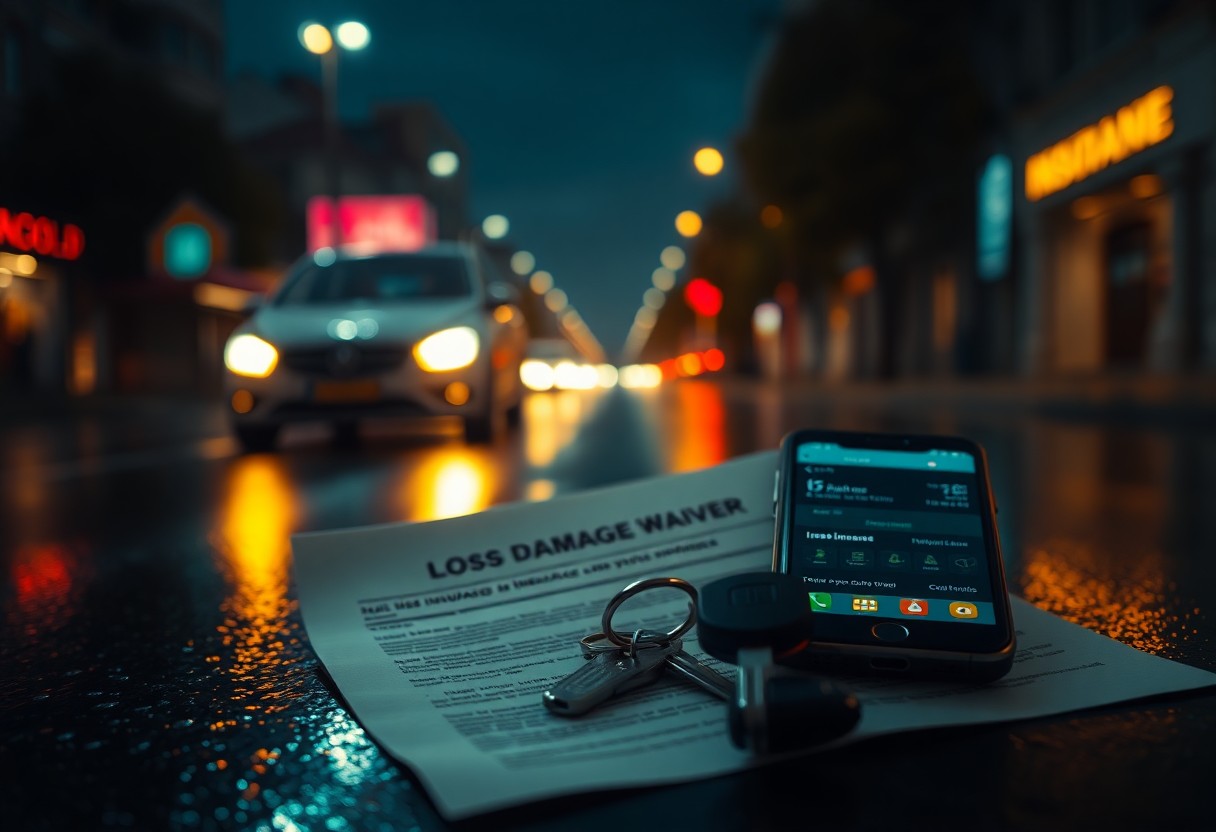
    Gaining a solid understanding of the various rental car protection options is vital before signing your rental agreement. When you choose to rent a vehicle, the Loss Damage Waiver (LDW) acts as a key safeguard against theft, damage, and unexpected financial setbacks. This coverage enhances your rental experience by shifting most of the financial risks from you to the rental company. With LDW in place, you can enjoy your journey with an added layer of security that goes beyond standard insurance policies. The decision to include LDW in your rental agreement should be based on your unique needs; being informed about its benefits empowers you to make smart decisions to protect yourself from unexpected costs during your rental period.

    Here’s the formatted content for your specified sections:

    Maximizing Your Rental Experience: The Importance of Loss Damage Waiver (LDW)

    When you rent a car, it’s crucial to understand that the Loss Damage Waiver (LDW) serves as a protective agreement between yourself and the rental agency. This waiver effectively relieves you of financial responsibility for vehicle damage or theft, making it a critical consideration when establishing your rental terms. LDW ensures that you can fully enjoy your driving experience without the persistent anxiety of potential financial repercussions from unforeseen incidents, allowing you to focus on your travels rather than worries about costs.

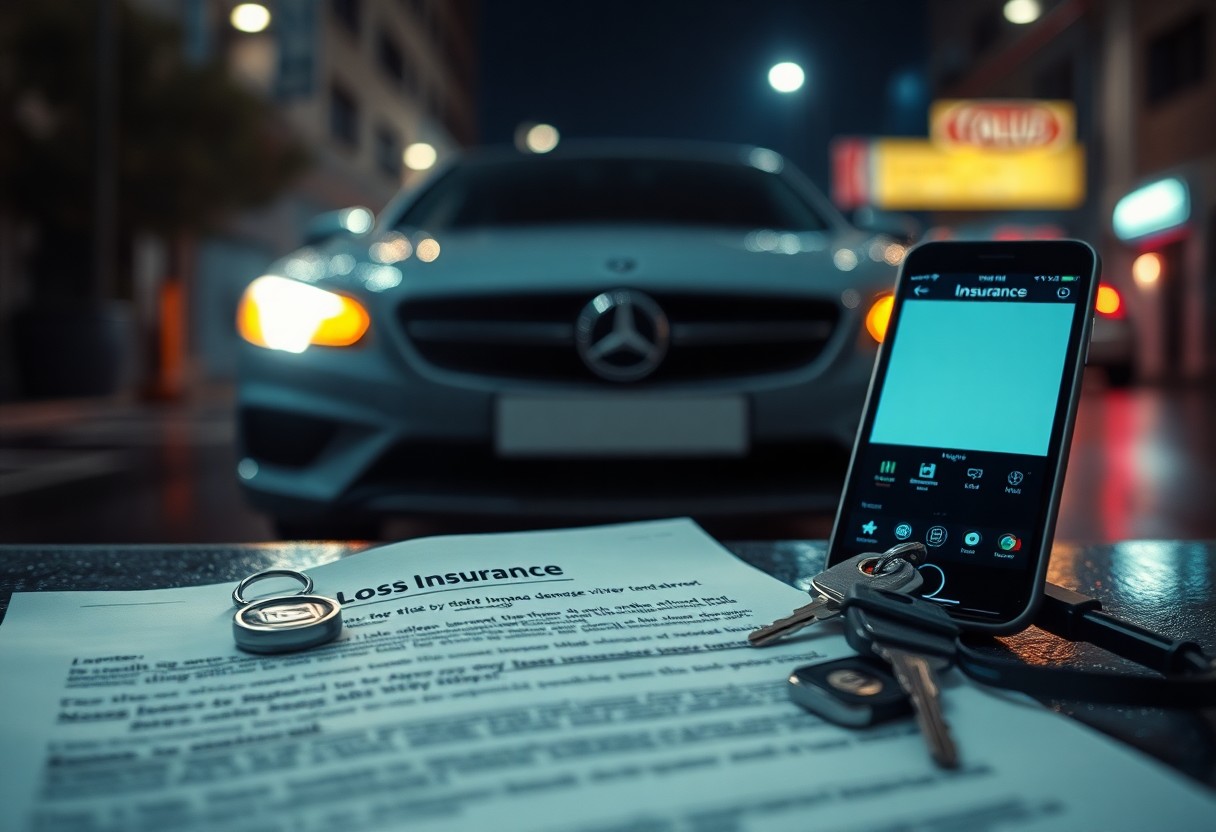
    Clarifying LDW: Essential Information You Must Know

    Choosing LDW coverage means transferring the financial risks associated with theft or damage from yourself to the rental agency. Unlike standard insurance policies, LDW is a contractual agreement that eliminates your liability for any damage or loss that occurs during the rental period, provided you follow the rental agreement’s terms. This feature makes LDW an appealing option for those who seek peace of mind while driving, knowing they are shielded from hefty expenses that can arise unexpectedly.

    Criteria For Eligibility: Ensure You Qualify for LDW Coverage

    To qualify for LDW, you must meet certain requirements: you need to be at least 21 years old, possess a valid driver’s license, and have an acceptable driving history. In some instances, rental companies may require you to be 25 or older for specific vehicle classes. Therefore, it is essential to confirm that you meet all these criteria before finalizing your rental agreement. Failing to meet these conditions could void your LDW coverage, leaving you fully responsible for any damages incurred. The rental agency will thoroughly review your credentials and driving history to ensure you qualify for this vital protection.

    Exploring the Comprehensive Coverage Offered by LDW

    LDW is regarded as one of the most robust protection options available in car rental insurance, typically providing coverage that aligns with the full value of your rental vehicle. This protection extends to theft, accidents, vandalism, and even natural disasters, with daily rates generally falling between $20 and $40, depending on the vehicle type and rental location. Understanding the complete scope of what LDW entails can greatly affect your rental experience and overall financial security during your travels.

    Understanding the Range of Protection Under LDW Policies

    A typical LDW policy covers about 85% of potential damage scenarios, ensuring that you are protected against a variety of risks. This coverage includes damage from collisions, adverse weather conditions, vandalism, and theft. Once you sign the rental agreement, the coverage is activated automatically, remaining valid for the entire duration of the rental, which provides you with immediate financial security against unforeseen incidents that may occur during your trip.

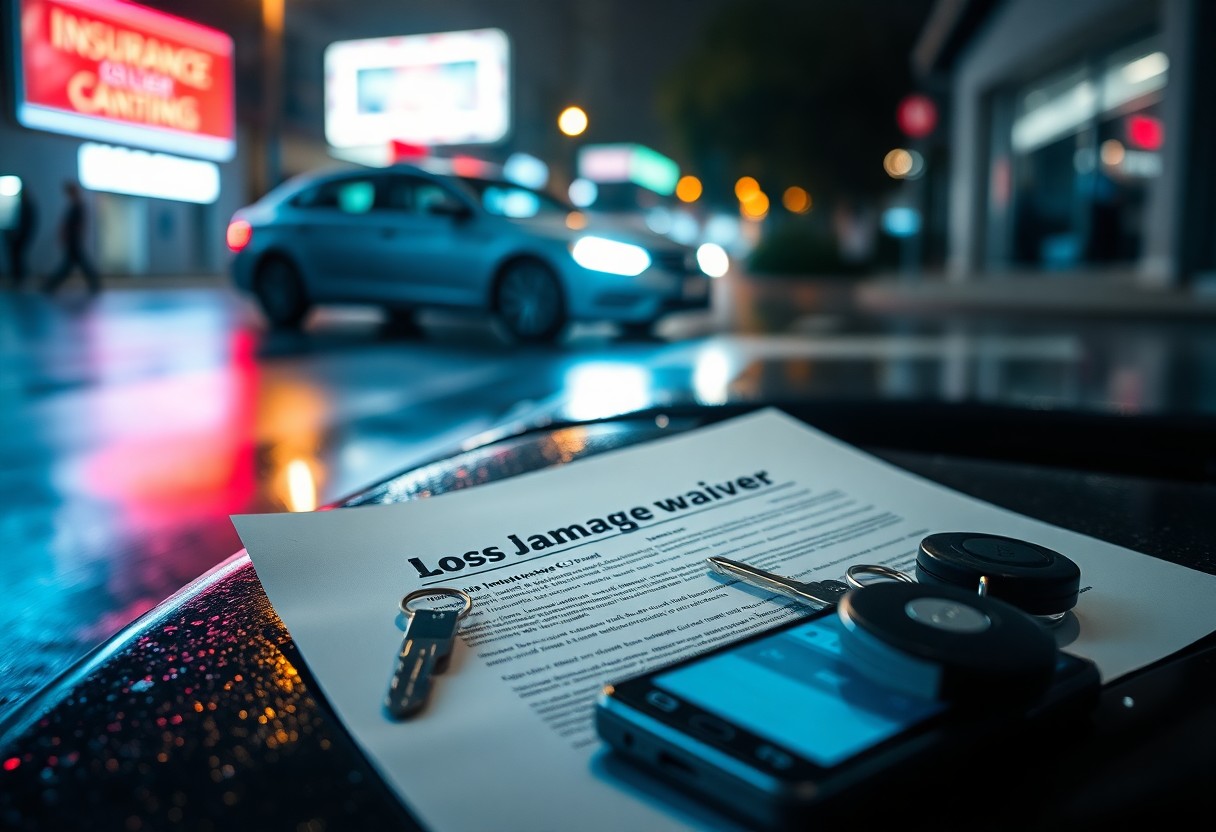
    Identifying Key Exclusions and Limitations of LDW Coverage

    It’s essential to recognize that LDW does not cover every situation. Specific exclusions include damage incurred due to reckless driving, unauthorized drivers, off-road use, and driving under the influence. These limitations are standard among most rental companies and could invalidate your protection if violated. Additionally, LDW policies often exclude damage to tires, windows, and interior upholstery unless they are involved in a larger covered incident. Be aware that your policy may also include geographic restrictions, typically limiting coverage to certain countries or regions. Some rental companies may also impose damage assessment fees even with LDW coverage, which could range from $50 to $200 per incident.

    Making Informed Choices: Comparing Rental Car Coverage Options

    Understanding the differences between various rental car coverage options is essential for making informed choices that align with your specific rental needs. Each type of coverage offers distinct levels of protection and varying financial implications, which can significantly impact your overall rental experience.

    Overview of Different Coverage Options

    Basic Insurance LDW Protection
    Limited damage coverage Comprehensive damage protection
    High deductibles Zero deductible
    Claims affect your insurance No impact on personal insurance

    Highlighting Key Differences: LDW vs. CDW

    Selecting LDW instead of Collision Damage Waiver (CDW) offers you comprehensive protection that goes beyond just collision coverage. While CDW covers damage resulting solely from accidents, LDW provides protection against theft, vandalism, and natural disasters, making it a more thorough safety option for your rental experience.

    Evaluating Overlapping Coverage: Personal Insurance and LDW

    There may be overlaps between your personal auto insurance and LDW that are important to consider. It’s wise to review your existing insurance policies to avoid unnecessary expenses for duplicate coverage and to identify any potential protection gaps that may need addressing. Understanding these overlaps can be complex, as certain credit cards also provide rental car protection, which may render LDW potentially redundant. However, credit card coverage often comes with significant limitations and may require you to decline the rental company’s LDW, placing you at risk of incurring unexpected expenses should an incident occur.

    Understanding the Financial Impact of LDW Coverage

    Your decision regarding LDW coverage can dramatically affect your overall rental costs. Without LDW, you could be held responsible for repair expenses that might reach up to $50,000 for luxury vehicles or the full market value in the event of theft. LDW coverage provides immediate financial security against unforeseen damages that could occur during your rental period, alleviating the burden of financial liability and allowing you to travel without undue stress.

    Decoding the Cost Structure of LDW

    In addition to the standard rental fee, opting for LDW typically incurs an additional charge of $20-30 per day, although this rate can vary depending on factors such as location, vehicle type, and rental agency. Furthermore, your personal auto insurance or the benefits provided by your credit card may offer similar coverage, so it’s advisable to explore these alternatives before deciding to purchase additional protection.

    Assessing the Value of LDW Coverage for Your Rental

    By comparing the daily cost of LDW against potential out-of-pocket expenses, you can determine whether this coverage meets your needs. The zero deductible benefits and comprehensive damage protection provided by LDW make it particularly advantageous for international travel or business rentals. To arrive at an informed decision, consider factors such as your current insurance coverage, the duration of your rental, and the risks associated with your destination. If you are renting in a high-risk area or for an extended time, the peace of mind from complete coverage frequently justifies the additional cost, especially considering that 30% of rental car incidents happen in unfamiliar locations.

    Navigating the Duration and Terms of LDW Coverage

    Rental car companies typically specify LDW coverage with particular terms and conditions that can influence the extent of protection you receive. Generally, your coverage encompasses 24-hour protection throughout the rental period, with clear guidelines regarding authorized drivers and acceptable vehicle usage. Familiarizing yourself with these terms is essential to ensure that your coverage remains valid for the entire duration of your rental.

    Coverage Activation and Duration Explained

    Typically, LDW coverage becomes effective when you pick up the vehicle and concludes at the designated return time specified in your rental agreement. As long as you adhere to the rental terms, your protection remains intact for the entire rental duration, whether for a single day or several weeks, ensuring you are consistently covered throughout your travels.

    Integrating LDW Terms into Your Rental Agreement

    For your protection, the terms of LDW are directly integrated into your rental contract. It is crucial to review these terms carefully, as they outline specific conditions that could nullify your coverage, such as driving on unpaved roads or allowing unauthorized drivers to operate the vehicle. Rental agreements typically contain a designated section detailing your LDW coverage, outlining your rights and responsibilities, including how to report incidents and the necessary documentation for claims. This section also specifies exclusions and limitations that could impact the validity of your coverage.

    Unpacking the Advantages of LDW Protection for Renters

    When it comes to enhancing your rental experience, LDW delivers comprehensive protection against numerous risks. This coverage shields you from financial liability in cases of theft, accidents, or damage to the rental vehicle. With LDW, you are entitled to up to 100% coverage for vehicle damage or loss, effectively alleviating concerns about unexpected repair costs or replacement fees that could arise during your rental period.

    Financial Security Offered by LDW Coverage

    In the face of an incident, LDW serves as your financial safety net. You can avoid paying high deductibles that typically range from $500 to $2,000. Moreover, this coverage protects you from potential charges for loss of use while the rental vehicle is being repaired, preventing you from accruing additional expenses during this time.

    Enjoying Peace of Mind with Comprehensive LDW Coverage

    Throughout your rental period, LDW guarantees you experience complete protection. This coverage alleviates any stress surrounding potential accidents, theft, or vandalism, enabling you to focus on enjoying your journey rather than worrying about possible damage to the vehicle. The mental comfort that LDW offers goes far beyond basic coverage; you receive 24/7 support for claims processing, and you won’t need to involve your personal insurance company at any point. This means your personal insurance rates remain stable, allowing you to avoid the hassle of lengthy claim procedures with your regular provider.

    Key Takeaways Regarding LDW Coverage

    With this comprehensive overview of Loss Damage Waiver coverage, you now have the essential information needed to make informed rental car decisions. LDW provides protection against vehicle damage and theft throughout your rental period, which can potentially save you thousands in repair costs. By weighing the daily fee against possible risks, you can determine if this additional coverage aligns with your specific needs. When renting your next vehicle, you will be equipped with a thorough understanding of what LDW covers, its limitations, and how it can protect your finances throughout your entire rental experience.

    Your Questions Answered: Frequently Asked Questions (FAQ)

    Q: What does Loss Damage Waiver (LDW) cover in a rental car agreement?

    A: LDW covers damage to the rental vehicle caused by accidents, theft, and vandalism. It pays for repairs or replacement costs if the vehicle is damaged or stolen during your rental period. The coverage extends to protection against natural disasters and most types of physical damage. However, it is important to note that LDW does not cover damage resulting from reckless driving or when unauthorized individuals operate the vehicle.

    Q: How does LDW differ from my personal auto insurance coverage?

    A: LDW is a waiver provided by the rental company, not an insurance policy. It relieves you from financial responsibility for vehicle damage or theft without needing to involve your personal insurance. This means you don’t have to file a claim with your insurance, pay a deductible, or worry about an increase in your insurance rates. Personal auto insurance may have coverage gaps for rental cars, which LDW effectively fills.

    Q: Is purchasing Loss Damage Waiver worth the additional cost?

    A: The value of LDW depends on your individual circumstances. The daily cost ranges from $20 to $40, but it offers direct protection without necessitating the involvement of your personal insurance. LDW can lead to substantial savings if the rental vehicle is damaged or stolen, as you wouldn’t have to pay anything out of pocket. This coverage is particularly advantageous if you want to avoid insurance claims or if your personal insurance has limited rental car coverage.

    The Article: Understanding Loss Damage Waiver LDW Coverage and Benefits appeared first on https://rentacar24.org/

    The Article Loss Damage Waiver (LDW) Coverage: Key Benefits Explained Was Found On https://limitsofstrategy.com

  • Route 66 Attractions: Essential Highlights for Your Trip

    Route 66 Attractions: Essential Highlights for Your Trip

    Embark on an exhilarating journey along the legendary Route 66, a remarkable 2,448-mile adventure stretching from Chicago to Los Angeles. This iconic highway serves as a gateway to a multitude of experiences, whether you opt for a brisk one-week highlights tour or a comprehensive exploration lasting three weeks. As you journey through eight diverse states, you will discover unique attractions, such as the majestic Gateway Arch in St. Louis and the quirky Cadillac Ranch in Texas. Your adventure reaches its peak at the Santa Monica Pier, but the route is filled with nostalgic diners, historic motels, and stunning landscapes, making it a must-do road trip for any true travel enthusiast.

    Maximize Your Route 66 Adventure with Essential Insights

    As you get ready for your Route 66 journey, it’s vital to appreciate that this 2,448-mile historic highway links Chicago and Los Angeles through a rich network of eight states. The journey can vary significantly in duration, spanning anywhere from 8 to 21 days based on your travel style and preferences. This route showcases an intriguing blend of preserved original segments and contemporary alignments, striking a perfect balance between historical significance and modern travel experiences that will captivate any road trip enthusiast.

    Unearth the Rich Historical Significance of Route 66

    The historical significance of Route 66 dates back to 1926, when it was established as one of America’s first numbered highways. Traveling along this road means following in the footsteps of millions of Americans fleeing the Dust Bowl during the 1930s. It earned the beloved nickname “The Mother Road” thanks to author John Steinbeck, becoming a symbol of hope during the Great Depression, linking rural communities with opportunities in the West, and profoundly shaping the American landscape.

    Immerse Yourself in the Unique Charm of Route 66 Today

    Today, Route 66 radiates a unique charm, as approximately 85% of the original road remains drivable. You can explore well-preserved sections adorned with vintage motels, classic diners, and iconic roadside attractions, each contributing to the rich narrative of American culture. This route now functions as a living museum of Americana, offering a genuine glimpse into mid-20th century life while inviting you to delve into the stories that have shaped the nation’s identity.

    Each year, Route 66 draws over 500,000 visitors from around the world. Along the way, you will encounter numerous preservation initiatives dedicated to maintaining historic buildings and landmarks. The route also provides access to stunning national parks and monuments, including the breathtaking Grand Canyon and the awe-inspiring Petrified Forest, transforming your journey into a captivating exploration of America’s natural beauty.

    Crafting Your Perfect Route 66 Trip Duration

    To fully appreciate the beauty and historical significance embedded in Route 66’s 2,448-mile expanse from Chicago to Los Angeles, it is advisable to allocate 2 to 4 weeks for your journey. The time you devote to the road will depend on your desired travel pace, the number of stops you wish to make, and your personal exploration style. Whether you choose a quick drive or a thorough adventure, you will encounter countless opportunities to experience historic sites, local diners, and iconic landmarks defining this legendary route.

    Identifying Key Factors That Impact Travel Time

    Several factors can influence the overall duration of your Route 66 adventure, including your driving speed, the number of stops you decide to make, and weather conditions throughout the route. As you navigate through eight diverse states, each offering distinct attractions and experiences, your daily mileage may range from 150 to 500 miles, depending on your interests. By understanding these variables, you can create a realistic itinerary that aligns with your travel objectives and expectations.

    Optimal Timeframes Tailored to Various Itinerary Styles

    Your time requirements will differ according to your travel style: consider planning for 7-10 days for a quick highlights tour, 2 weeks for a balanced experience, or 3-4 weeks for an extensive exploration. Adjust your schedule to target specific regions or attractions that pique your interest the most. A practical approach involves segmenting your journey into manageable parts, allowing for shorter driving days in areas rich with attractions, such as Oklahoma and Arizona. Additionally, factor in rest days in major cities like St. Louis or Albuquerque, while being mindful of seasonal weather patterns that could affect your travel speed and comfort.

    Essential Strategies for Effective Route Planning

    Planning your Route 66 adventure entails setting clear objectives and establishing time constraints. A minimum of 2 weeks is advisable to explore key attractions without feeling rushed. Strive for daily driving distances under 200 miles to ensure ample time for sightseeing and spontaneous discoveries along your journey.

    Thorough State-by-State Exploration for Maximum Enjoyment

    Your journey will take you through eight states, each presenting unique experiences and attractions. Illinois begins your adventure in Chicago, Missouri showcases the iconic Gateway Arch, Oklahoma celebrates its rich western heritage, and California concludes your trip at the Santa Monica Pier, marking the end of your unforgettable journey.

    Key Navigation Tips for a Seamless Travel Experience

    To ensure a smooth travel experience, keep these essential tips in mind:

    • Have offline maps available for areas with limited cell service
    • Download GPS coordinates for historic segments to navigate effectively
    • Carry a physical Route 66 guidebook for quick reference
    • Check road conditions daily to avoid unexpected delays

    Keep in mind that cell service may be unreliable in more remote areas.

    Route 66 demands thoughtful planning to avoid getting lost on older segments. Here are some additional strategies:

    • Mark gas stations every 100 miles to ensure fuel availability
    • Note the locations of emergency services along your route
    • Prepare alternate routes for potential detours
    • List 24-hour facilities for emergencies during your trip

    Be aware that certain historical sections may be unpaved or temporarily closed for maintenance.

    Must-Visit Attractions That Define Route 66

    Elevate your Route 66 adventure by exploring these unmissable attractions that embody America’s vibrant heritage. From historic landmarks to whimsical roadside gems, each site adds its own unique flavor to your journey. You’ll discover well-preserved sections of the original highway and modern interpretive centers that narrate the storied history of the Mother Road.

    Discover Stunning Natural Landmarks Along the Route

    Early travelers on Route 66 often passed by some of America’s most breathtaking natural wonders without realizing their significance. Today, you can visit the majestic Grand Canyon, the colorful Painted Desert, and the mysterious Meramec Caverns. These stunning natural attractions provide perfect opportunities for hiking, photography, and reconnecting with nature during your travels.

    Immerse Yourself in History at Iconic Historical Sites

    If you have a passion for American history, Route 66 offers numerous opportunities to dive deep into the past. From the Chain of Rocks Bridge in Missouri to the Painted Desert Trading Post in Arizona, you’ll encounter preserved architecture and museums that recount the tales of the road’s golden age.

    Many historical landmarks along Route 66 have been carefully restored to reflect their original glory. You can visit the Coleman Theater in Miami, Oklahoma, explore the Painted Desert Trading Post, or stop at the various preserved gas stations that line the route, each holding a piece of history waiting to be discovered.

    Delight in the Quirkiness of Unique Roadside Attractions

    Quirky pieces of Americana await you at every turn. The Cadillac Ranch in Texas, the Blue Whale of Catoosa in Oklahoma, and a multitude of neon signs offer unforgettable photo opportunities and memorable experiences along your journey.

    These iconic roadside attractions have become symbols of Route 66. Unique stops like the Giant Rocking Chair in Fanning, Missouri, or the enormous Blue Whale in Catoosa, Oklahoma, provide perfect chances for memorable snapshots and engaging stories to share with fellow travelers.

    Your Comprehensive Guide to Preparing for the Trip

    To ensure a successful Route 66 journey, meticulous planning is crucial. Allocate 2-4 weeks for the full 2,448-mile adventure based on your pace and planned stops. Booking accommodations and car rentals in advance can save you money and ensure availability, especially during peak travel seasons. Your preparation should encompass mapping out daily driving distances, identifying key attractions, and researching local events happening along your route.

    Choosing the Optimal Times for Traveling Route 66

    If you’re aiming for the best weather conditions, consider planning your Route 66 trip during spring (March to May) or fall (September to November). These seasons typically offer mild temperatures and lighter crowds at attractions. Avoid the summer months (June-August), when temperatures can soar above 100°F in desert regions and tourist destinations become overcrowded. Winter travel may present unique challenges, such as potential snow and ice in the Midwest areas.

    Essential Packing List for Your Route 66 Adventure

    As you prepare to embark on the Mother Road, your essential packing kit should include a reliable GPS device, paper maps as a backup, a well-maintained vehicle, and an emergency roadside kit. Don’t forget to bring a good camera for capturing precious memories, comfortable driving attire, and ample water to stay hydrated. It’s vital to pack your valid driver’s license, vehicle insurance, and emergency contact numbers.

    Additionally, consider these extra items: a first-aid kit stocked with essential medications, a portable phone charger, a flashlight with extra batteries, basic tools for minor repairs, and a stash of snacks for the road. A cooler for drinks can be handy, and ensure you have weather-appropriate gear for varying conditions. Keep your packing light yet practical, as you’ll be making frequent stops and managing luggage regularly. It’s also wise to have jumper cables and a spare tire in good condition in your vehicle’s trunk.

    Smart Budgeting for Your Route 66 Adventure

    Exploring Route 66 can be an affordable experience. Daily expenses typically range from $100 to $300, depending on your choices and preferences. For a two-week journey, you should expect to spend between $2,000 to $4,000 for two travelers, covering accommodation, meals, fuel, and activities.

    Analyzing Your Travel Costs by Category

    Here’s a breakdown of average daily expenditures: accommodation generally costs between $50-150, food ranges from $30-60, gas costs approximately $40-60, and activities typically amount to $20-40 per person. These expenses may fluctuate based on your travel style and the states you visit.

    Strategic Money-Saving Tips for Travelers

    To maximize your budget, consider these category-specific savings strategies:

    • Book motels in advance to secure better rates
    • Utilize gas price comparison apps to locate the best deals
    • Choose local diners instead of chain restaurants for authentic dining experiences
    • Purchase an attractions pass for discounted access to multiple sites
    • Travel during off-peak seasons for significant savings

    Employing these strategies can help you save 30-40% on your total trip expenses.

    This comprehensive budgeting approach encompasses:

    • Packing your own snacks and drinks to cut costs
    • Using reward points for accommodations to save money
    • Sharing costs with travel companions for a more economical journey
    • Exploring free attractions and museums for budget-friendly enjoyment
    • Considering camping options for affordable lodging

    These additional tips can help ensure your Route 66 adventure is both affordable and enjoyable.

    Your Exciting Route 66 Journey Awaits

    In essence, your Route 66 adventure promises a unique blend of American history, culture, and natural beauty across eight diverse states. While this iconic journey can be completed in two weeks, allowing three weeks will grant you more time to explore significant landmarks and hidden treasures. From the vibrant streets of Chicago to the scenic Santa Monica Pier, your road trip will guide you through nostalgic diners, historic motels, and awe-inspiring natural wonders. By strategically planning your stops, booking your rental car, and preparing for varying weather conditions, you can create a personalized Route 66 experience that aligns perfectly with your travel preferences and interests.

    Answers to Your Common Questions About Route 66

    Q: How long does it take to drive the entire Route 66?

    A: A complete trip along Route 66 spans 2,448 miles and typically takes 2-3 weeks for a thorough experience. If you’re aiming for a quicker journey with brief stops, you can complete the drive in 8-10 days. The ideal duration is around 14 days, providing sufficient time to visit major attractions and explore historic towns. Plan for 4-6 hours of driving each day to fully enjoy the sites without feeling rushed.

    Q: What’s the best time to travel along Route 66?

    A: The optimal seasons for driving Route 66 are spring (March to May) and fall (September to November), as these periods offer pleasant weather and less crowded attractions. The summer months can bring extreme heat, particularly in the desert regions of Arizona and New Mexico, while winter may introduce snow and ice in the Midwest sections. Spring and fall provide mild temperatures and lighter crowds at significant attractions.

    Q: What are the top five must-see attractions along Route 66?

    A: The top attractions along Route 66 include the Gateway Arch in St. Louis, Missouri; the Cadillac Ranch in Amarillo, Texas; the breathtaking Painted Desert in Arizona; the whimsical Blue Whale of Catoosa in Oklahoma; and the iconic Santa Monica Pier in California. Each of these destinations showcases different facets of Route 66’s rich history and culture, offering unique photo opportunities and memorable experiences.

    The Article: Route 66 Road Trip Guide Duration Highlights and Must-See Attractions appeared first on https://rentacar24.org/

    The Article Route 66 Road Trip Guide: Must-See Attractions and Highlights Was Found On https://limitsofstrategy.com

  • Must-Try Belizean Treats That You Can’t Miss

    Must-Try Belizean Treats That You Can’t Miss

    Embarking on a culinary adventure in Belize offers a unique and enriching experience, allowing you to uncover the <a href="https://limitsofstrategy.com/recado-discover-traditional-belizean-soups-with-bold-flavors/">authentic flavors</a> that characterize this vibrant nation. Belize is celebrated for its delicious variety of sweet and savory snacks, each delicacy telling a story of the diverse cultural influences that shape Belizean history. From the irresistible coconut-based tableta to the mouthwatering tamarind balls, every bite is a journey through flavor that you won’t soon forget. As you navigate bustling local markets or quaint neighborhood shops, these culinary treasures offer a genuine insight into the heart of Belizean culture. This detailed guide is designed to help you discover and savor the most cherished local delicacies that both residents and visitors adore.

    Dive into the Tempting Realm of Belize’s Traditional Sweet Treats

    The sweet confections of Belize showcase a delightful blend of Caribbean and Latin American culinary traditions, creating an irresistible array of flavors and textures. Each treat is crafted with care, often using locally sourced ingredients that highlight the region’s rich agricultural heritage. From the creamy richness of coconut delicacies to the tangy sweetness found in tamarind-based snacks, these desserts not only satisfy your sweet tooth but also connect you to the vibrant cultural history of the area. Exploring these traditional sweets is an essential part of experiencing Belizean hospitality, as locals take pride in sharing their cherished recipes and culinary secrets.

    The Article Belizean Treats You Can’t Afford to Miss Was Found On https://limitsofstrategy.com

  • Breath Testing for IBS: Improving Treatment Strategies

    Breath Testing for IBS: Improving Treatment Strategies

    Revolutionize Your IBS Management with Advanced Breath Gas Chromatography Techniques

    <a href="https://mcrtherapies.com/gas-chromatography-enhancing-gut-health-insights/">Irritable Bowel Syndrome (IBS)</a> is a complex gastrointestinal disorder affecting millions globally. If you struggle with symptoms such as abdominal pain, bloating, or irregular bowel habits, the emotional and physical burden of IBS can be overwhelming. The symptoms of IBS can vary widely among individuals, making it difficult to diagnose and manage effectively. This diversity underscores the importance of tailored treatment plans that address the unique experiences and symptoms of each patient, ensuring a more effective approach to managing IBS.

    The exact causes of IBS remain somewhat elusive; however, it is widely accepted that this condition arises from a multifactorial interplay of elements, including gut motility issues, heightened sensitivity in the gastrointestinal tract, and alterations in the gut microbiome. As you navigate your IBS journey, you may find that various triggers—ranging from stress to particular dietary choices or hormonal changes—can exacerbate your symptoms. Understanding these unique triggers is essential for developing a comprehensive management strategy tailored to your individual needs.

    Additionally, the stigma surrounding digestive disorders can foster feelings of loneliness and frustration among those affected. By gaining a deeper understanding of IBS, you empower yourself to take control of your health, exploring treatment avenues that can significantly improve your overall quality of life and well-being.

    Key Information About IBS and the Importance of Breath Testing Techniques

    • IBS is a common gastrointestinal disorder characterized by symptoms like abdominal pain, bloating, and altered bowel habits.
    • Conventional IBS treatments, including dietary changes and medications, may not fully address the individual symptoms or triggers unique to each patient.
    • Breath testing serves as a crucial diagnostic tool for IBS, as it reveals specific patterns of gas production within the gut.
    • Through breath testing, healthcare providers can create personalized treatment plans by identifying intolerances, such as lactose or fructose intolerance.
    • Tailoring IBS treatment based on breath test results can significantly enhance symptom management and overall wellness for patients.

    shortcomings of conventional IBS treatmentsRecognizing the Limitations of Conventional IBS Treatment Approaches

    Conventional IBS management often employs a generic, one-size-fits-all strategy that may not adequately address your specific symptoms and triggers. Many healthcare practitioners primarily depend on dietary modifications, medications, and lifestyle changes to alleviate the symptoms of IBS. While these methods may provide relief for some patients, they frequently fall short for others, leaving them feeling frustrated and in pursuit of alternative solutions.

    If you’ve tried various diets or medications, you might have encountered the same limitations, only to find that your symptoms persist or even intensify. Furthermore, traditional treatments tend to focus more on managing symptoms rather than targeting the root causes of IBS. This can result in a frustrating cycle of trial and error, making it difficult for you to find an effective solution that truly works.

    The lack of personalized treatment options creates challenges in discovering an effective approach that meets your unique health needs. As a result, many individuals with IBS continue to struggle in silence, unsure of how to effectively manage their condition and achieve lasting relief.

    Utilizing Breath Testing for Precise IBS Diagnosis and Management

    Breath Gas Chromatography (BGC) is rapidly establishing itself as a groundbreaking diagnostic tool for IBS. This innovative technique examines breath samples for specific gases such as hydrogen and methane, offering critical insights into your gut health. Unlike traditional diagnostic methods that may require invasive procedures or lengthy testing protocols, BGC provides a non-invasive alternative that can be performed in a comfortable setting.

    During the breath testing process, you will exhale into a specialized device that collects samples over a specified timeline. Analyzing these samples allows healthcare providers to detect the gases produced during the fermentation of undigested carbohydrates in your gut. Elevated levels of hydrogen or methane can indicate specific types of dysbiosis or imbalances within your gut microbiome, potentially contributing to the IBS symptoms you experience.

    This non-invasive testing method simplifies the diagnostic journey while equipping you with vital information about your unique gut profile, allowing for a more effective and targeted treatment approach tailored to your specific needs.

    Identifying Your Unique Triggers Through Breath Testing

    One of the most significant advantages of breath testing is its ability to pinpoint specific triggers that may worsen your IBS symptoms. By analyzing the gases present in your breath, healthcare providers can gain valuable insights into how your body metabolizes particular foods and carbohydrates. For example, if your breath test shows heightened hydrogen levels following the consumption of certain sugars, it may suggest that your body has difficulty breaking down those sugars, leading to fermentation and gas production in your digestive system.

    This targeted approach enables you to identify which foods may be problematic for your digestion. Rather than adhering to a generalized elimination diet that may not effectively address your individual triggers, breath testing offers a more customized strategy for symptom management. By collaborating closely with your healthcare provider, you can create a personalized dietary plan based on your breath test results, empowering you to make informed and effective dietary choices that support your overall health.

    personalization of IBS treatment plansTailoring Your IBS Treatment Strategy Using Breath Test Insights

    Once you have completed your breath testing and received your results, the next step is to customize your treatment strategy based on the insights derived from your analysis. This tailored approach allows you to address the underlying causes of your IBS symptoms, rather than merely managing them. For instance, if your breath test reveals an overgrowth of specific bacteria associated with methane production, your healthcare provider might suggest particular dietary modifications or the use of targeted probiotics to help restore balance in your gut microbiome.

    Moreover, understanding your unique gas profile can influence your medication choices. Some patients may benefit from medications specifically designed to address symptoms linked to their gas production, while others may require entirely different treatment modalities. By leveraging the outcomes of your breath testing as a foundation for your treatment plan, you can work closely with your healthcare provider to devise a strategy that aligns with your individual health needs and preferences.

    Exploring the Benefits of Breath Testing for Effective IBS Management

    Adopting a Non-Invasive Diagnostic Approach

    The non-invasive nature of breath testing stands out as a significant benefit, alleviating the physical and emotional stress often associated with traditional diagnostic procedures. By opting for breath testing, you can bypass the discomfort and anxiety that frequently accompany more invasive testing methods.

    Rapid Results for Timely Diagnosis

    Additionally, breath testing provides quick results that can accelerate the diagnostic process. Rather than waiting anxiously for lab results from invasive tests, you can gain vital insights into your gut health in a much shorter time frame. This efficiency enables you to implement dietary changes or other interventions sooner, leading to improved symptom management and a better quality of life.

    Effective Management of IBS Symptoms

    For those dealing with IBS, the ability to receive prompt results and initiate treatment sooner is crucial. By streamlining the diagnostic process, breath testing empowers you to take proactive control of your symptoms, significantly enhancing your overall health and well-being.

    Substantial Enhancements in Quality of Life

    Ultimately, the advantages of breath testing can profoundly affect your overall quality of life. By providing a non-invasive, efficient, and effective mechanism for diagnosing and managing IBS, breath testing enables individuals to regain control over their symptoms, paving the way for improved well-being.

    Integrating Breath Testing into Standard IBS Care Protocols

    As awareness of Breath Gas Chromatography expands within the medical community, the incorporation of breath testing into standard IBS care practices is becoming increasingly feasible. Healthcare professionals are recognizing the significance of this innovative diagnostic tool and are gradually integrating it into their treatment protocols. If you are in search of IBS treatment options, it is vital to discuss the potential of breath testing with your healthcare provider.

    Your provider may be able to refer you to specialized clinics or laboratories that offer breath testing services. As this method continues to gain traction, it is expected that more healthcare practitioners will receive training in its application and interpretation, leading to improved diagnostic accuracy and more personalized treatment plans for individuals like you who are navigating the complexities of IBS.

    treatment through Breath Gas Chromatography (BGC)The Promising Horizon of IBS Treatment Via Breath Testing

    The integration of breath gas chromatography into clinical practice heralds a hopeful future for IBS treatment. As ongoing research continues to unveil the connections between gut health and various gastrointestinal disorders, breath testing could become a foundational element in enhancing our comprehension of these relationships. With continuous technological advancements and a growing body of evidence supporting its efficacy, BGC has the potential to transform the diagnosis and management of IBS.

    Beyond improving diagnostic accuracy, breath testing may facilitate the development of more personalized treatment strategies that cater specifically to your health needs. As healthcare providers deepen their understanding of how different gases correlate with various IBS symptoms and triggers, they will be better equipped to create targeted interventions that address the root causes of IBS, rather than simply alleviating symptoms. Ultimately, Breath Gas Chromatography represents a significant shift in how IBS is understood, diagnosed, and managed.

    By offering a non-invasive method for analyzing breath samples and identifying specific triggers, BGC empowers you to take charge of your health journey. As this innovative approach continues to gain momentum within the medical community, it has the potential to revolutionize the understanding and treatment of IBS, leading to improved outcomes and a better quality of life for individuals affected by this intricate condition.

    If you’re interested in exploring alternative treatments for IBS, consider visiting the blog section of MCR Therapies’ website. One insightful article discusses the benefits of acupuncture and dry needling for managing digestive issues like IBS. This article explores how these therapies can alleviate symptoms and promote overall gut health. To learn more, you can access their blog here. If you’re curious about trying acupuncture or dry needling for your IBS, feel free to reach out to MCR Therapies here.

    Your Questions Answered: Breath Testing for IBS

    What is the purpose of breath testing for IBS?

    Breath testing for IBS serves as a non-invasive diagnostic method designed to detect specific gases produced by bacteria in the digestive tract. This technique can assist in identifying conditions such as small intestinal bacterial overgrowth (SIBO) and lactose intolerance, both of which may contribute to IBS symptoms.

    How is the breath testing process conducted?

    During a breath test, the patient ingests a specific substance, such as lactose or glucose, and subsequently breathes into a collection device at regular intervals. The collected breath samples are then analyzed for gases like hydrogen and methane, which may indicate bacterial overgrowth or other digestive issues.

    What advantages does breath testing offer for IBS management?

    Breath testing yields valuable insights into the underlying causes of IBS symptoms, enabling more targeted and effective treatment options. It is a non-invasive and relatively simple process, helping to reduce unnecessary treatments or medications.

    Who can benefit from breath testing for IBS?

    Individuals experiencing IBS symptoms such as bloating, gas, diarrhea, and abdominal pain may find breath testing beneficial in uncovering underlying digestive issues. This testing is particularly advantageous for those who have not achieved satisfactory results from conventional IBS treatments.

    Is breath testing for IBS easily accessible?

    Access to breath testing for IBS is increasing as awareness of its benefits grows. Many gastroenterology practices and specialized clinics now offer breath testing as part of their diagnostic services for patients with digestive concerns. However, availability may vary based on location and the healthcare provider.

    Presented By: Breath Gas Chromatography

    The Article: IBS Remedies: How Breath Testing Revolutionizes Treatment appeared first on https://mcrtherapies.co.uk

    The Article IBS Remedies: The Impact of Breath Testing on Treatment appeared first on https://mcrtherapies.com

    The Article Breath Testing for IBS Remedies: Enhancing Treatment Options Was Found On https://limitsofstrategy.com

  • Mould Prevention Tips for Leather Shoes: Effective Removal Guide

    Mould Prevention Tips for Leather Shoes: Effective Removal Guide

    This detailed guide will empower you with the essential knowledge and proven strategies necessary to effectively protect and restore your leather shoes from harmful mould growth. It is vital to understand that mould can cause irreversible damage to your leather footwear if not addressed immediately. Leather shoes are particularly vulnerable to mould development in environments with high humidity and poor storage conditions. By implementing effective storage practices and consistently engaging in regular maintenance routines, you can ensure your leather shoes remain free from mould, significantly enhancing their lifespan. This comprehensive guide outlines time-tested techniques to both prevent mould formation and efficiently eliminate it when it arises, ensuring your footwear remains in excellent condition.

    Understand How Leather Interacts with Mould Growth

    A comprehensive understanding of how leather interacts with mould spores is crucial for effective shoe care. Your leather shoes are continually exposed to microscopic fungal spores that exist in the air around us. These spores can settle on leather surfaces and proliferate under suitable conditions, leading to significant damage to your cherished footwear. By gaining insight into the fundamental relationship between leather and mould, you can implement proactive measures that will enhance your shoes’ protection against mould, thereby prolonging their lifespan.

    Learn About the Different Types of Mould That Can Affect Leather Shoes

    Leather shoes can be affected by various types of mould, each presenting unique challenges for treatment. Understanding these mould types is the first step toward effective management:

    • White mould – The most prevalent type, identifiable by fuzzy patches.
    • Green mould – Typically found in damp environments, often indicating poor storage conditions.
    • Black mould – The most aggressive type, known for its persistence and potential health risks.
    • Brown mould – Often appears on untreated leather surfaces, signifying neglect.

    Once you identify the specific type of mould affecting your shoes, you can choose the most effective treatment method to address the issue, ensuring your footwear remains in top shape.

    Mould Type Characteristics
    White Fuzzy patches that are relatively easy to remove
    Green Commonly appears in environments with high humidity levels
    Black Deeply penetrates materials, making it the hardest to treat
    Brown Surface-level growth with moderate damage potential
    Grey Often found mixed with dust, showing moderate spread

    Identify Key Environmental Factors That Foster Mould Growth

    Certain environmental conditions create ideal circumstances for mould to thrive on your shoes. Recognizing these factors is crucial for prevention:

    • Humidity levels exceeding 60% can create a breeding ground for mould.
    • Poor air circulation within storage areas can trap moisture.
    • Darkness combined with warmth can promote fungal growth.
    • Inadequate storage conditions can exacerbate the problem.

    This understanding empowers you to devise improved storage solutions for your valuable footwear and take proactive steps to mitigate mould growth.

    Furthermore, recognizing these environmental factors is essential for effective prevention:

    • Temperature maintained between 77-86°F is ideal for storage.
    • Lack of adequate ventilation can lead to moisture accumulation.
    • Accumulation of moisture in storage areas creates a conducive environment for mould.
    • Extended storage in dark spaces without airflow significantly increases the risk.

    This combination of factors creates optimal conditions for mould growth, necessitating careful consideration in your shoe storage practices to ensure they remain free from fungal threats.

    Implement Effective Strategies to Prevent Mould Growth

    To effectively safeguard your leather shoes from mould, it requires a combination of proactive measures. Focus on creating optimal storage conditions and establishing consistent maintenance routines to keep your footwear mould-free. Familiarizing yourself with these essential prevention techniques can save you from costly repairs and potential damage to your shoes in the long run, allowing you to enjoy your leather footwear without worry.

    Establish Optimal Storage Conditions for Your Footwear

    For optimal shoe storage, ensure that you place your footwear in well-ventilated areas where humidity levels consistently remain below 60%. Avoid closed-off spaces such as sealed closets or damp basements that can trap moisture and allow mould to flourish. Elevate your shoes on raised surfaces or shoe racks to promote air circulation. Additionally, consider using silica gel packets or cedar blocks to absorb excess moisture effectively. This combination of practices will significantly reduce the risk of mould growth on your leather shoes.

    Engage in Regular Maintenance Practices for Shoe Longevity

    Even with the best storage solutions, it is crucial to complement them with a consistent care routine. Clean your shoes after each use, paying particular attention to the removal of dirt and moisture that can foster mould growth. Utilizing wooden shoe trees not only helps maintain the shape of your footwear but also absorbs moisture generated from daily wear, promoting a healthier environment for your shoes.

    Another vital aspect of maintenance involves applying a quality leather conditioner every 3-4 months, which helps keep the leather supple and resistant to mould growth. Regularly inspect your shoes for any signs of moisture or early mould development, which often manifests as small white or dark spots. By staying vigilant and proactive, you can extend the lifespan of your beloved leather shoes.

    Follow a Structured Approach for Effective Mould Removal

    To effectively eliminate mould from your leather shoes, it is essential to follow a systematic process that utilizes specific tools and methods to ensure safe and effective cleaning without risking damage to your treasured footwear.

    Required Materials

    Essential Items Optional Items
    – White vinegar
    – Cotton cloths
    – Protective gloves
    – Leather conditioner
    – Lemon juice
    – Shoe cream
    – Soft brush
    – Shoe trees

    Begin with a Thorough Initial Cleaning Process

    Start by taking your mouldy shoes outside to prevent any spores from spreading indoors. Gently wipe away visible mould using a damp cloth soaked in warm water. Allow your shoes to air dry completely before proceeding to the next cleaning step, ensuring that you do not trap moisture within the leather.

    Implement Effective Disinfection Techniques

    To effectively eliminate mould, create a solution of 12% vinegar. Apply this mixture evenly across your shoes using a clean cloth, ensuring that you cover all affected areas, including seams and stitching. A thorough disinfection process is crucial for preventing future mould growth and maintaining the integrity of your leather.

    Treat both the exterior and the interior of your shoes, paying special attention to hidden areas where mould may develop. After treatment, allow your shoes to dry naturally in a well-ventilated area to ensure complete mould eradication. This careful approach will safeguard your footwear from further mould-related issues.

    Maintain Your Shoes in Optimal Condition Post-Mould Treatment

    To keep your treated shoes in optimal condition, it’s important to monitor them regularly. After mould removal, check your shoes weekly for the first month to ensure that no mould returns. Store them in a well-ventilated area with humidity levels below 65% to prevent future mould growth, ensuring your shoes remain healthy and protected.

    Apply Leather Conditioning for Long-Lasting Protection

    Applying small amounts of leather conditioner can significantly extend the lifespan of your shoes. Use a high-quality leather conditioner every 3-4 months to maintain the natural moisture balance of the leather. This regular nourishment is essential for keeping your shoes flexible and resistant to future mould growth, ensuring they remain in excellent condition for years to come.

    Adopt Comprehensive Protective Measures for Long-Term Care

    For long-term protection, applying a water-repellent spray to your leather shoes every six months is advisable. This creates a protective barrier that prevents moisture from seeping into the leather while allowing it to breathe naturally. Additionally, consider placing silica gel packets or cedar blocks in your shoe storage area. These moisture-absorbing materials can decrease humidity levels by up to 40%, creating an environment where mould spores cannot thrive. Remember to replace these materials every 3-6 months for maximum effectiveness, ensuring ongoing protection for your footwear.

    Essential Tools and Products for Mould Prevention and Removal

    To effectively prevent and remove mould from your leather shoes, you will need a well-organized toolkit comprising basic tools and products. This toolkit should include protective gear, cleaning solutions, and preventive items that will assist you in maintaining your footwear in optimal condition and ready for use.

    Gather Key Cleaning Materials for Effective Care

    Key cleaning materials include 12% white vinegar solution, cotton cloths, soft brushes, and protective gloves. You’ll also require leather conditioner, shoe cream, and specialized leather cleaners. These materials are vital for safely removing mould without harming the leather surface of your shoes, ensuring their longevity and attractiveness.

    Invest in Prevention Equipment for Comprehensive Care

    One of the most crucial aspects of leather shoe care is having the right prevention tools. Your essential kit should include wooden shoe trees, silica gel packets, cedar shavings, and moisture-absorbing mats, all of which contribute to maintaining optimal air circulation and controlling humidity levels in your storage environment.

    Cleaning and prevention equipment work hand in hand to protect your shoes. If you live in high-humidity areas, a dehumidifier can be an invaluable addition to your shoe care regimen. Ensure your storage space has adequate ventilation, and consider using perforated shoe boxes or open shoe racks to enhance airflow. Regular use of these tools can help you avoid up to 90% of common mould problems, preserving the quality of your leather footwear.

    Avoid Common Mistakes in Leather Shoe Care to Prevent Mould

    Effective leather shoe care requires specific attention to detail to prevent mould growth. The most common errors include improper drying techniques, the use of direct heat sources, and storing shoes in completely sealed spaces. By understanding these mistakes, you can better protect your leather shoes from mould damage and significantly extend their lifespan, ensuring they remain a cherished part of your wardrobe.

    Recognize Storage Errors That Foster Mould Growth

    Storing your shoes in dark, poorly ventilated areas creates ideal conditions for mould to thrive. Shoes require proper air circulation to prevent moisture accumulation. Keeping wet shoes in closed containers or placing them flat on surfaces without airflow can result in severe mould issues, particularly on leather soles, leading to irreversible damage.

    Avoid Treatment Mistakes That Can Compromise Your Shoes

    Mistakes made during the mould treatment process can lead to permanent damage to your leather shoes. The use of harsh chemicals, bleach, or incorrect cleaning techniques can compromise the leather’s natural properties, resulting in a loss of aesthetic appeal. It’s essential to avoid rushing the drying process or using excessive amounts of water during cleaning, as these can be detrimental to the leather.

    Errors in treatment often occur when you skip crucial steps in the cleaning process. Using unsuitable products, neglecting to treat the entire shoe surface, or failing to condition the leather after cleaning can result in recurring mould problems. Your shoes require thorough care with appropriate cleaning agents like vinegar (12% solution), followed by conditioning to restore the leather’s protective properties and prevent future mould growth.

    Empower Yourself with Knowledge and Tools for Comprehensive Shoe Care

    Now that you possess all the necessary tools and knowledge to protect your leather shoes from mould and effectively address any existing mould issues, it’s time to implement these strategies. Your regular shoe care routine should encompass proper drying techniques, suitable storage with excellent air circulation, and the use of moisture absorbers. Should you discover mould on your shoes, you can handle it efficiently with a vinegar solution, followed by restoring the leather’s condition with proper conditioning afterward. These straightforward steps will enable you to keep your leather shoes in peak condition while preventing future mould complications.

    Your Frequently Asked Questions Answered About Mould Prevention

    Q: What preventative measures can I take to stop mould from forming on my leather shoes during storage?

    A: To prevent mould, store shoes in a well-ventilated area that offers good air circulation. Avoid dark, humid spaces, and never store damp shoes in closed containers. Utilize wooden shoe trees, silica gel packets, or cedar shavings to absorb moisture effectively. Consider making ventilation holes in shoe boxes if you choose to use them for storage. Elevate shoes off flat surfaces using ribbed carpets or shoe racks to promote airflow underneath, ensuring a healthy environment for your footwear.

    Q: What is the most effective method for cleaning mould from leather shoes?

    A: Begin by taking the shoes outside and gently wiping away surface mould with a damp cotton cloth soaked in hot water. Allow them to air dry completely before applying a 12% vinegar solution with a cloth or sponge to eradicate deeper mould. Ensure you cover the entire shoe surface to avoid unsightly water marks. After the cleaning process, allow the shoes to air dry thoroughly, then apply leather conditioner and shoe cream to restore moisture and protection to the leather, ensuring they remain in excellent condition.

    Q: What steps should I follow if my leather shoes get wet to prevent mould growth?

    A: Start by cleaning wet shoes with a damp cloth to remove any dirt. Dry them in a well-ventilated area at room temperature, steering clear of direct heat sources. Position shoes on their side or an uneven surface to improve air circulation. Avoid placing shoe trees in soaking wet shoes; instead, use newspaper to absorb moisture. Only insert wooden shoe trees once the shoes are partially dry. Replace wet newspaper as necessary until the shoes are completely dry, ensuring they remain free from mould.

    The Article Preventing and removing mould from leather shoes tips and effective methods appeared first on My Shoes Finder

    The Article Mould Prevention and Removal Tips for Leather Shoes Was Found On https://limitsofstrategy.com

  • Media Marketing Strategies for 2025: Earned vs. Paid Insights

    Media Marketing Strategies for 2025: Earned vs. Paid Insights

    Unlocking the Full Potential of Diverse Media Types for a Winning Marketing Strategy

    In the rapidly evolving landscape of public relations (PR) and media marketing, professionals are delving into the unique benefits of earned media in contrast to paid media. Each category of media is indispensable in constructing a formidable media strategy. As we approach 2025, the seamless integration of these media types—with owned and shared media—is crucial for enhancing reach, fostering trust, and driving sustainable growth in any marketing initiative.

    Amplifying Marketing Success with Targeted Paid Media Strategies

    Understanding Paid Media: Practical Applications and Illustrative Examples

    Paid media encompasses all advertising efforts that necessitate financial investment for placements. This approach is a direct pathway to elevate your brand visibility and broaden your audience reach across a variety of advertising platforms. Common forms of paid media include:

    • Digital Ads: These consist of banner ads, display ads, and video ads strategically placed on websites and applications to capture the attention of potential customers effectively.
    • Fan Acquisition: Techniques aimed at boosting your follower count across various social media platforms.
    • Boosted Content: This involves promoting existing content to increase its visibility and reach among a broader audience.
    • Native Advertising: Ads crafted to blend seamlessly with the platform’s organic content, ensuring a non-intrusive user experience.
    • Content Syndication: Distributing your content across multiple third-party websites to maximize its exposure and engagement potential.
    • Sponsored Content: Partnering with publishers to create promotional articles or posts that effectively highlight your brand.
    • Content Distribution: Strategically ensuring that your content reaches your intended audience through paid channels.
    • Pay to Play: Investing in media placements to secure visibility in your preferred channels.
    • Media Relations: Building connections with media outlets to create paid opportunities for increased exposure.
    • Influencer Marketing and Shout-Outs: Compensating influencers to promote your brand and engage their audience effectively.
    • Experiential Marketing: Crafting immersive experiences that your brand sponsors to captivate and engage potential customers.
    • Marcomm: Encompasses a variety of marketing communications strategies that integrate paid media channels.

    Paid Media in MarketingKey Advantages of Integrating Paid Media into Your Marketing Strategy

    Integrating paid media into your marketing strategies offers numerous benefits that are essential for modern marketing approaches:

    1. Immediate Results: Unlike organic marketing strategies that may require time to produce results, paid media can deliver quick visibility and significant traffic increases almost instantly.
    2. Targeted Reach: With sophisticated targeting capabilities, you can reach specific demographics, interests, and behaviors that align closely with your ideal audience.
    3. Scalability: Paid media campaigns can be easily scaled to fit your budget and campaign goals, providing flexibility for necessary adjustments.
    4. Measurable ROI: With the help of analytics tools, you can accurately measure performance and return on investment, allowing for effective evaluations of your campaigns’ success.
    5. Control Over Messaging: Paid media gives you direct control over the content and presentation of your advertisements, ensuring alignment with your brand values.

    Implementing Proven Paid Media Tactics for Superior Results

    To fully harness the benefits of paid media, consider adopting the following impactful strategies:

    • Utilize Programmatic Advertising: Automate your advertising purchases to efficiently target specific audiences on a larger scale.
    • Leverage Social Media Ads: Platforms like Facebook, Instagram, LinkedIn, and Twitter offer robust advertising options to effectively engage diverse audiences.
    • Invest in Search Engine Marketing (SEM): Use Google Ads and similar search engine platforms to capture traffic driven by user intent and search behavior.
    • Experiment with Video Advertising: Engage audiences with compelling video content on platforms such as YouTube and TikTok.
    • Optimize for Mobile: Ensure that your paid media campaigns are mobile-friendly, as a significant portion of digital traffic now originates from mobile devices.
    • A/B Testing: Continuously test different ad creatives, copy, and targeting strategies to enhance overall campaign performance.
    • Retargeting Campaigns: Re-engage users who have previously interacted with your brand to improve conversion rates and foster customer loyalty.

    Understanding the Critical Role of Earned Media in Modern Marketing

    The Transformation of Earned Media: Definition and Significance

    Earned media represents the publicity and visibility gained through non-paid efforts, including all organic coverage received by your brand. This form of media greatly enhances your credibility and authority within your industry. Traditionally, earned media focused primarily on gaining mentions in journalistic outlets and blogs. However, since 2024, the landscape has expanded to encompass a myriad of digital interactions, broadening the definition and scope of what earned media entails.

    Benefits of Earned Media for BrandsSubstantial Advantages of Earned Media for Your Brand

    The benefits of earned media are considerable, especially in fostering long-term trust and establishing authority:

    1. Credibility and Trust: Earned media is frequently perceived as more trustworthy since it is not directly funded, which enhances consumer trust in your brand.
    2. Organic Reach: This type of media can lead to viral sharing, enabling organic growth without the need for continual financial investments.
    3. SEO Advantages: Securing high-quality backlinks from reputable sources can significantly enhance your website’s search engine rankings and overall visibility.
    4. Long-Term Impact: The effects of earned media can persist well beyond the initial coverage, providing enduring benefits for your brand.
    5. Improved Brand Reputation: Positive reviews and word-of-mouth referrals can significantly enhance your brand’s image among consumers.

    Strategies for Effectively Harnessing the Benefits of Earned Media

    To successfully tap into the potential of earned media, consider implementing these effective strategies:

    • Public Relations (PR): Cultivate strong relationships with journalists and media outlets to secure valuable coverage for your brand.
    • Content Marketing: Create high-quality, shareable content that attracts mentions and links from other authoritative sources.
    • Influencer Relations: Collaborate with key influencers who can authentically promote your brand to their followers.
    • Social Media Engagement: Actively participate in discussions on platforms such as Twitter (now X) and Reddit to boost your brand’s visibility.
    • Encourage Reviews and Testimonials: Promote positive user reviews on platforms such as Yelp, Google Reviews, and industry-specific sites.
    • Referral Programs: Implement structured programs to incentivize existing customers to refer new clients to your business.
    • Link Building: Employ strategies to earn high-quality backlinks from authoritative websites to enhance your SEO.
    • Participate in Industry Events: Gain visibility by sponsoring or contributing to relevant industry events and webinars.

    Optimizing Owned and Shared Media for Maximum Marketing Effectiveness

    The Integral Role of Owned Media in Your Marketing Framework

    Owned media refers to the marketing channels that your brand controls, including your website, blog, email newsletters, and social media profiles. These platforms are essential for establishing a consistent brand voice and delivering valuable content to your audience.

    Key Elements of Owned Media:

    • Website: Serving as the central hub for your digital activities, it should provide comprehensive information about your products or services.
    • Blog: A platform for sharing insights, updates, and valuable content designed to attract and engage your target audience.
    • Email Marketing: Facilitates direct communication with your audience, promoting lead nurturing and relationship building.
    • Social Media Profiles: Channels where you can interact with your audience, share content, and effectively promote your brand.

    Effective Approaches for Utilizing Shared Media

    Shared media encompasses content that is disseminated across social networks and other platforms, often generated by users or fans. This includes user-generated content (UGC), shares, likes, and comments that organically broaden your brand’s reach.

    Effective Strategies for Shared Media:

    • Encourage UGC: Motivate your audience to create and share content related to your brand through engaging contests and campaigns.
    • Foster Community Engagement: Build a strong community by actively interacting with your audience across social media platforms.
    • Leverage Social Sharing Tools: Incorporate social sharing buttons on your website and blog to make it easy for users to share content.
    • Collaborate with Influencers: Partner with influencers to amplify your reach through their established audiences.
    • Monitor and Respond: Keep track of shared mentions and respond promptly to maintain a positive brand image and encourage engagement.

    Concept of E.E.A.T.Understanding the Significance of E.E.A.T. in Your Media Strategy

    Defining E.E.A.T. and Its Importance in Marketing

    E.E.A.T. stands for Expertise, Authoritativeness, and Trustworthiness. This principle is crucial in the realms of SEO and digital marketing, as it significantly influences how search engines assess and rank your content. Building a strong E.E.A.T. profile can greatly enhance your online visibility and boost credibility among consumers.

    Enhancing E.E.A.T. Through Integrated Media Strategies

    By harmonizing earned, paid, owned, and shared media, you can significantly strengthen your E.E.A.T. using the following methods:

    • Showcasing Expertise: Utilize your owned media platforms to publish high-quality, informative content that showcases your skills and knowledge.
    • Building Authoritativeness: Earned media coverage from reputable sources and endorsements from influencers can help position your brand as a leader in its field.
    • Fostering Trustworthiness: Consistent and transparent communication across all media types helps build trust with your audience and stakeholders.
    • Generating Backlinks: Efforts in earned media, including PR outreach and collaborations with influencers, can result in valuable backlinks that enhance your site’s SEO.
    • Engaging with Your Audience: Active engagement through shared media, such as responding to comments and discussions, enhances your brand’s trustworthiness and reliability.

    Developing a Comprehensive Media Strategy that Integrates All Four Media Types

    Effective Approaches for a Unified Media Strategy

    To fully leverage the potential of your media initiatives, it is essential to integrate earned, paid, owned, and shared media into a cohesive strategy. Here are practical ways to achieve this:

    1. Define Clear Objectives: Identify specific goals for each media type, whether it’s boosting reach, enhancing credibility, or driving conversions.
    2. Align Content Across Channels: Ensure consistency in your messaging and branding across all media platforms to create a unified brand presence.
    3. Leverage Synergies: Utilize paid media to amplify your earned media efforts, such as promoting positive PR stories through digital advertising.
    4. Monitor and Analyze Performance: Use analytics tools to assess the effectiveness of each media type and adjust your strategy based on insights.
    5. Adapt to Trends: Stay informed about the latest media trends and technologies to keep your strategy relevant, competitive, and effective.

    Case Studies Demonstrating Success Through Media Integration

    Case Study 1: Tech Innovators Inc.
    Tech Innovators Inc. effectively combined earned and paid media by launching a groundbreaking product. They employed paid digital ads to generate excitement and direct traffic to their website. Simultaneously, they engaged in PR initiatives to secure features in leading tech publications, significantly increasing their credibility. By leveraging social media sharing and influencer partnerships, they created a viral effect that notably enhanced their brand authority and sales.

    Case Study 2: EcoFriendly Solutions
    EcoFriendly Solutions educated its audience on sustainability topics by merging content marketing (owned media) with sponsored content (paid media). Their efforts in earned media, such as securing features in environmental blogs and actively participating in industry forums, positioned them as leaders in their niche. Integrating shared media through user-generated content campaigns further amplified their messaging, fostering customer trust and loyalty.

    Trends Shaping Media MarketingEmerging Trends Influencing the Future of Media Marketing in 2025

    As we advance through 2025, several key trends are shaping the future of media marketing:

    • AI-Driven Personalization: Utilizing artificial intelligence to create highly personalized advertising and content experiences tailored to individual preferences and behaviors.
    • Interactive Content: Boosting engagement by incorporating interactive features such as polls, quizzes, and augmented reality experiences to captivate your audience.
    • Video Dominance: The growth of video content continues, with a strong emphasis on short-form and live-streaming formats across various platforms.
    • Sustainability and Social Responsibility: Brands are increasingly prioritizing their commitment to social and environmental causes to build consumer trust and loyalty.
    • Voice Search Optimization: Adapting content strategies for voice search to capture a growing segment of search traffic from voice-activated devices.
    • Privacy and Data Security: Navigating the complexities of increasing regulations and consumer concerns regarding data privacy in media strategies.
    • Hybrid Events: Blending in-person and virtual elements to create inclusive and scalable event experiences that cater to diverse audiences.

    Common Questions About Media Strategies

    1. What differentiates earned media from paid media?

    Earned media refers to organic publicity achieved through PR, word-of-mouth, and influencer mentions, while paid media involves financial investments for advertising placements aimed at increasing reach and visibility.

    2. What benefits do businesses gain from combining earned and paid media?

    Integrating earned and paid media helps businesses maximize their reach while also building credibility, resulting in a balanced and effective marketing strategy.

    3. How does E.E.A.T. influence SEO performance?

    E.E.A.T. (Expertise, Authoritativeness, Trustworthiness) plays a crucial role in SEO, helping search engines assess the quality and reliability of your content, which directly impacts search rankings.

    4. Is a media strategy focused solely on owned media effective?

    While owned media is vital for maintaining control over messaging, a combination of earned, paid, and shared media results in a more comprehensive and successful overall strategy.

    5. What are effective methods for securing media coverage in 2025?

    Effective techniques for securing media coverage include developing strong PR relationships, producing high-quality and newsworthy content, collaborating with influencers, participating actively in industry events, and engaging broadly on social media.

    6. How can paid media enhance earned media efforts?

    Paid media can bolster earned media initiatives by promoting favorable PR stories, directing traffic to shareable content, and increasing visibility to attract more organic mentions.

    7. What role does social media play in shared media strategies?

    Social media acts as a vital platform for shared media, enabling content sharing, encouraging user engagement, and amplifying brand messages through user networks.

    8. How essential is it to integrate all four media types into a singular strategy?

    The Article: Media Marketing Strategies for 2025: Earned vs Paid Insights Was Found On https://ai.ezi.gold

    The Article Media Marketing Strategies: Insights on Earned vs Paid for 2025 Was Found On https://limitsofstrategy.com

  • January Hair Trends: Fresh Styles for a Chic New You

    January Hair Trends: Fresh Styles for a Chic New You

    Revamp Your Look with January’s Must-Try Hair Trends

    As we embrace the New Year, it’s the perfect opportunity to consider updating your hairstyle to align with January’s trending styles. One remarkable option making waves this month is the sophisticated blunt bob with bangs, which is capturing attention and redefining elegance. This timeless cut features sleek, straight lines that create a striking silhouette, while the bangs inject a youthful and playful essence into your overall appearance, making it a go-to choice for anyone looking to refresh their style.

    This adaptable hairstyle not only frames your face beautifully but also transitions seamlessly between various styling preferences, making it perfect for both casual outings and more formal events. The allure of the blunt bob with bangs lies in its versatility; you can style it sleek and polished for a sophisticated look or opt for a tousled, carefree vibe for a relaxed occasion. It’s a style that speaks to the heart of modern hair fashion, allowing you to express your unique personality while staying fashion-forward.

    Moreover, the bangs can be customized to suit your individual face shape, whether you desire a bold full fringe or soft, wispy side-swept bangs. As you embark on your journey of personal transformation this January, this style serves as a vibrant expression of renewal, empowering you to showcase your individuality while remaining effortlessly chic.

    Essential Insights into January’s Top Hair Trends You Can’t Miss

    • The blunt bob with bangs is not just a hairstyle; it’s a statement that leaves a lasting impression for any occasion.
    • Face-framing highlights add depth and brightness to your hair, elevating your natural beauty to new heights.
    • A textured pixie cut offers a low-maintenance yet edgy option that embodies modern elegance and youthfulness.
    • Sleek and straight hair signifies a polished and sophisticated look, ideal for professional settings and elegant gatherings.
    • Soft waves contribute a romantic and feminine flair, creating an effortlessly inviting appearance that enchants onlookers.

    face-framing highlights hair trendsIlluminate Your Look with Stunning Face-Framing Highlights

    Accentuate Your Features with Expertly Placed Highlights

    Face-framing highlights are a fantastic choice for anyone looking to rejuvenate their hairstyle, as they beautifully enhance a wide variety of hair colours and textures. Whether your hair is long and flowing or styled in a trendy bob, these highlights can elevate your look without overpowering it. This technique not only breathes new life into your style but also draws attention to your best features.

    By placing lighter shades around your face, you can emphasize your features and create a more vibrant, engaging appearance. This highlighting method adds dimension to your hair, drawing focus to your eyes and cheekbones, resulting in a refreshed and youthful vibe that exudes confidence and charm.

    Achieve a Soft, Natural Look with Thoughtful Highlighting Techniques

    To effectively incorporate face-framing highlights, it’s essential to adopt a subtle and natural approach. This means avoiding harsh lines or stark contrasts in color, and instead focusing on a soft, sun-kissed glow that beautifully harmonizes with your skin tone and overall hair colour. When highlights are applied correctly, your hair can reflect light in a manner that appears naturally sunlit, enhancing your features while radiating warmth and approachability.

    This delicate transition not only revitalizes your look but also maintains an effortless charm that is perpetually in vogue. The key to successful highlighting lies in the finesse of application, ensuring that your hairstyle remains chic and sophisticated.

    Embrace a Refreshing Transformation with Face-Framing Highlights

    This January, as you immerse yourself in the spirit of transformation, consider how face-framing highlights can infuse luminosity and warmth into your overall appearance. These highlights have the potential to refresh your style, making you feel rejuvenated and poised to embrace the New Year with enthusiasm and confidence.

    With a touch of creativity and the right application techniques, you can utilize these highlights to enhance your features, adding a fresh and inviting element to your hairstyle. This change aligns perfectly with the theme of renewal, encouraging you to embrace new beginnings with flair and self-assurance.

    Elevate Your Hair Care Routine with Vibrant Highlights

    Incorporating face-framing highlights into your hair care regimen can lead to a chic yet effortless look. Whether your goal is to make a bold statement or add warmth to your hair, these highlights are an excellent way to refresh your style, empowering you to stride into the New Year with a renewed sense of self and confidence.

    By using appropriate hair care products and maintaining your highlights, you can keep them vibrant and fresh, allowing your personality to shine through your hairstyle while enjoying a modern, stylish look.

    bold and textured pixie cutUnleash Your Boldness with a Textured Pixie Cut

    If you’re ready to take a leap and embrace a dramatic transformation, the textured pixie cut is a fantastic choice this January. This daring haircut embraces your natural texture while enhancing your facial features in an exceptionally flattering way. The pixie cut is not only edgy and chic but can also be softened with layers, resulting in a playful and contemporary look that radiates confidence.

    Perfect for those who wish to make a striking statement while keeping maintenance minimal, this style offers a plethora of styling options. With straightforward styling techniques, you can effortlessly achieve a tousled, casual appearance or opt for a sleek finish for a more polished look. This haircut symbolizes both renewal and transformation, encouraging you to step outside your comfort zone and welcome a revitalized version of yourself as you enter the New Year.

    Achieve Elegance with a Sleek and Straight Hairdo

    If you gravitate towards a sleek aesthetic, the sleek and straight hairstyle is a trending choice this January. This look emphasizes smoothness and shine, creating an elegant appearance that is suitable for any event. To attain this sleek finish, utilizing heat styling tools and products specifically designed to enhance shine and control frizz is essential to keeping your hair looking immaculate throughout the day.

    The beauty of the sleek and straight style lies in its versatility. It can serve as a classic option for the workplace or can be dressed up with chic accessories for a stylish night out. This hairstyle embodies sophistication and refinement, making it an ideal choice for those who wish to kick off the year with a fresh, polished look.

    As you embrace this trend, consider how a sleek finish can enhance your overall appearance, instilling the confidence needed to face any challenges that come your way with poise and grace.

    soft romantic waves hair trendsCapture the Essence of Romance with Soft, Effortless Waves

    As you explore new hair trends this January, embracing soft waves is an excellent choice for those desiring a romantic and effortless style. This hairstyle embodies the essence of natural beauty, allowing your hair to flow freely while introducing beautiful movement and texture that captivates.

    Soft waves can be crafted at any hair length and styled using a variety of techniques, including curling wands, braiding damp hair overnight, or opting for heatless styling methods. This January, the focus on soft waves is all about celebrating your natural texture while adding just the right amount of definition and bounce to your hair.

    This hairstyle is incredibly adaptable; whether you’re headed to brunch with friends or attending a formal event, soft waves can easily be dressed up or down to suit any occasion. As you embrace the theme of renewal this January, consider how soft waves can enhance your features, providing that effortlessly chic vibe that everyone aspires to achieve.

    Make a Statement with Bold and Vivid Hair Colors

    Showcase Your Personality with Daring Hair Hues

    If you’re eager to make a striking impression this New Year, bold and bright hair colours are dominating the scene in January, serving as a perfect canvas for expressing your individuality. From eye-catching reds to electric blues and striking purples, these vibrant colours provide an exciting way to showcase your unique personality and style.

    Choosing bold colours empowers you to stand out, instilling a sense of confidence that enhances your overall appearance. Opting for a vivid hue can rejuvenate your look, making you feel more vibrant and aligned with your personal style.

    Revitalize Your Look with a Touch of Color

    As you contemplate a hair makeover this January, think about how incorporating a splash of colour can invigorate your overall appearance and elevate your confidence. Embracing bold hues in your hairstyle doesn’t require a complete transformation; you might consider subtle highlights or colour accents that introduce brightness without overwhelming your look.

    This balanced approach allows you to enjoy the benefits of vibrant colours while maintaining harmony in your overall style. A strategically placed pop of colour can refresh your appearance, making you feel revitalized and ready to take on the challenges of the year ahead.

    Select a Color that Reflects Your Unique Style

    The secret to successfully incorporating bold colours into your hairstyle lies in choosing a shade that resonates with your personality and complements your skin tone. As you embrace this trend, keep in mind that vibrant colours symbolize transformation and renewal, aligning perfectly with the fresh start that the New Year brings.

    Finding the right hue can beautifully enhance your features, reflecting your unique style and adding an exciting element to your hair transformation this January.

    stylish curtain bangsElevate Your Look with the Trendy Allure of Curtain Bangs

    Curtain bangs are another exciting trend rapidly gaining popularity this January. They offer a soft and flattering frame for your face, characterized by their longer length that can be parted down the middle or slightly off-centre, resulting in an effortlessly chic look that pairs flawlessly with various hairstyles.

    Curtain bangs are versatile enough to enhance both long tresses and shorter cuts, making them a fantastic option for anyone looking to refresh their style. Their charm lies in their ability to soften facial features while introducing a playful element to your overall appearance, making them a must-try for the New Year.

    You can style them straight for a sleek finish or tousled for a more laid-back vibe. As you embark on your hair transformation journey this January, consider how curtain bangs can elevate your hairstyle while embodying the spirit of renewal that accompanies the start of the New Year.

    Refresh Your Hair with Trendy Shaggy Layers for a Carefree Vibe

    Lastly, shaggy layers are poised to be one of January’s hottest trends, providing a carefree yet stylish option for those eager to refresh their hair. This cut features choppy layers that add both volume and movement, creating an effortlessly cool vibe that’s perfect for any occasion. Shaggy layers are versatile and work beautifully with various hair lengths and textures, making them an excellent choice for anyone seeking a fresh start in the New Year.

    The allure of shaggy layers lies in their low-maintenance nature; they require minimal styling while still exuding effortless sophistication. You can wear them straight for a polished appearance or embrace your natural texture for a more casual, laid-back look. As you contemplate this trend for January, think about how shaggy layers can symbolize your transformation—allowing you to embrace change while maintaining a stylish and carefree demeanor as you confidently step into the New Year.

    Your Questions Answered: January Hair Trends FAQ

    What are the most popular hair trends for January?

    The leading hair trends for January include bold colours like vibrant reds and deep purples, alongside textured and layered haircuts that add volume and movement, catering to a variety of styles and preferences.

    Are there any trending hair accessories for January?

    Absolutely! Popular hair accessories for January include embellished hair clips, stylish headbands, and silk scarves that can be creatively styled as ties or fashionable headbands, enhancing your overall look with flair.

    What are some of the favored haircuts for January?

    Favored haircuts for January encompass the blunt bob, shaggy layers, and long, face-framing bangs. These versatile styles cater to different hair textures and face shapes, making them ideal options for many.

    What hair colours are in vogue for January?

    Trending hair colours for January include rich, warm tones like caramel and chestnut, alongside bold, eye-catching shades such as electric blue and neon pink, perfect for making a memorable statement.

    How can I incorporate the latest hair trends into my personal style?

    To seamlessly integrate the latest hair trends into your look, consult with a professional hairstylist who can help you identify which styles align best with your hair type, lifestyle, and personal aesthetic. Whether it’s a new haircut, vibrant colour, or chic accessory, there are numerous options available to refresh your look for the New Year.

    Presented By: Trendsetting Hair Styles

    The Article: Hair Trends to Try This January for a Fresh Look appeared first on Amitys Hair Salon.

    The Article January Hair Trends for a Fresh and Stylish Look Was Found On https://limitsofstrategy.com

  • Must-See Spots in Los Angeles: A 3-Day Itinerary Guide

    Crafting your itinerary for an unforgettable journey to Los Angeles is simplified with this comprehensive 3-day travel guide. This guide unveils the most effective strategies to navigate through this sprawling metropolis, highlighting everything from its stunning beaches to the glitzy attractions of Hollywood. You will have the chance to explore must-visit destinations such as Santa Monica Pier, Venice Beach, and the iconic Hollywood Walk of Fame, all easily accessible by car. This meticulously designed guide not only assists you in avoiding common tourist pitfalls but also ensures you maximize your time in LA. To fully immerse yourself in this vibrant city, arranging a rental car is crucial, as the main attractions are dispersed across various neighborhoods. Remember to pack your sunscreen and camera – your dream getaway in Los Angeles is just around the corner!

    Maximize Your LA Experience with These Essential Travel Tips

    A successful visit to Los Angeles relies heavily on careful planning and strategic foresight. It is crucial to determine the ideal time for your visit, investigate transportation options, and identify the most convenient areas for accommodations. Focus on organizing your itinerary by grouping attractions that are in close proximity to each other, allowing you to enhance your sightseeing experience while minimizing time spent in LA’s notorious traffic congestion.

    Optimal Times to Explore the Splendor of Los Angeles

    Los Angeles boasts a consistently pleasant climate, making it an inviting destination throughout the year. However, the best months to visit are typically March to May and September to November, when average temperatures hover around 75°F (24°C) and the influx of tourists is considerably lower. During these shoulder seasons, you will enjoy more favorable hotel rates and shorter wait times at popular attractions, significantly enhancing your overall experience in the city.

    Essential Transportation Insights and Car Rental Tips for LA

    Reliable transportation is key to a seamless exploration of LA. Here are some essential factors to consider:

    • Arrange rental car pickup at LAX Airport for maximum convenience.
    • Utilize a GPS navigation system to effortlessly navigate the city’s layout.
    • Use parking apps to conveniently find available parking spots.
    • Consider express toll passes for smoother highway travel.

    To secure the best rental rates, it is advisable to book your vehicle at least two weeks in advance.

    Understanding the complexities of LA’s transportation network will enable you to devise more effective travel routes:

    • Be mindful of rush hour times: 7-10 AM and 3-7 PM.
    • Familiarize yourself with parking regulations specific to different neighborhoods.
    • Identify alternative routes to bypass peak-hour traffic.
    • Locate free parking options near major attractions.

    Failure to comply with parking regulations can result in expensive fines or even towing, so always stay informed and vigilant.

    Day 1 Itinerary: Discover the Coastal Charms of Los Angeles

    Kick off your LA adventure early, dedicating your first day to uncovering the stunning beauty of the Pacific coastline. Expect to encounter renowned beachfront locales that epitomize the city’s laid-back coastal vibe, featuring famous landmarks and vibrant street scenes that truly encapsulate the essence of Los Angeles.

    Unforgettable Experiences at Santa Monica Pier and Beach

    Santa Monica Pier boasts some of LA’s most Instagram-worthy spots. Take a thrilling ride on the historic Pacific Wheel, which offers breathtaking ocean views from an impressive height of 130 feet. The pier attracts over 10 million visitors annually, solidifying its status as one of LA’s must-see attractions.

    Explore the Vibrant Atmosphere of Venice Beach and Its Unique Canals

    At Venice Beach, the lively atmosphere seamlessly blends beach culture with street life, featuring the iconic Muscle Beach outdoor gym and a bustling 2.5-mile boardwalk filled with talented street performers and local artisans showcasing their crafts.

    In contrast, the Venice Canals offer a serene escape from the energetic boardwalk. These man-made canals, constructed in 1905, span six blocks and provide a peaceful setting for a leisurely stroll. You’ll discover charming waterfront homes and can cross delightful footbridges that enhance the area’s picturesque allure.

    Experience the Electric Nightlife on the Sunset Strip

    If you’re in search of vibrant nightlife, the Sunset Strip is the ultimate destination, boasting world-famous music venues and diverse dining choices. This lively 1.5-mile stretch is home to many of LA’s most iconic entertainment hotspots.

    Gaining insight into the Strip’s rich history adds an intriguing layer to your experience. Notable venues like the Whisky a Go Go and The Roxy have hosted countless music legends over the decades. For your safety, consider utilizing designated rideshare pickup zones if you plan to indulge in the nightlife offerings.

    Day 2 Itinerary: Delve into Hollywood’s Legendary Icons

    To fully savor your Hollywood experience, start your day early to dodge crowds and traffic. Your second day focuses on exploring the legendary landmarks that have made Los Angeles a global sensation, including the Hollywood Sign and the star-studded Walk of Fame.

    Best Spots to Capture the Hollywood Sign

    While numerous locations offer the chance to admire this iconic landmark, Lake Hollywood Park stands out as one of the safest and most picturesque viewing areas. You can drive directly to the park, where you’ll find free parking and an unobstructed view of the Hollywood Sign.

    Wander the Hollywood Walk of Fame

    Your adventure continues along Hollywood Boulevard, where you’ll encounter over 2,700 stars spread across 1.3 miles. The optimal time for a visit is before 11 AM, as most shops begin to open and crowds remain manageable.

    Begin your journey at the TCL Chinese Theatre and wander the Walk of Fame at your leisure. You can obtain free guided maps from the Hollywood & Highland Center, which will aid you in locating the stars of your favorite celebrities.

    Indulge in Shopping and Dining at Beverly Hills and The Grove

    For a taste of luxury shopping and exquisite dining, head to these exclusive destinations. The Grove offers a unique outdoor shopping experience, while Rodeo Drive showcases high-end designer boutiques that attract fashion enthusiasts from all over the globe.

    To optimize your visit, make use of The Grove’s secure parking structure and take advantage of the complimentary trolley service connecting The Grove to Farmers Market, where you can enjoy local culinary delights and fresh produce.

    Marvel at Griffith Observatory’s Stunning Vistas

    Ascend to the Griffith Observatory, an iconic site that provides breathtaking views of the city and fascinating exhibits about space. Admission to the building and grounds is free, making it accessible to all visitors.

    The surrounding hills create a stunning backdrop for your Los Angeles photographs. The observatory features state-of-the-art planetarium shows and telescopes available for public use after sunset, ensuring an unforgettable experience.

    Day 3 Itinerary: Engage with LA’s Rich Cultural Heritage

    After two days spent at iconic landmarks, your final day is dedicated to immersing yourself in LA’s rich cultural tapestry. Discover world-class museums, indulge in diverse culinary offerings, and wrap up your day in the lively entertainment districts of the city.

    Embark on a Cultural Journey Through Museums and Art Galleries

    If you have a passion for art, kickstart your morning at The Broad, where you can admire over 2,000 contemporary artworks at no cost. Afterwards, head to the Los Angeles County Museum of Art (LACMA), which boasts an impressive collection of 150,000 works that span from ancient times to the present day.

    Explore the Diverse Culinary Landscape of Los Angeles

    LA’s culinary diversity is truly remarkable, representing cultures from around the world. Visit the Grand Central Market, where you can savor authentic ethnic cuisines from over 40 vendors, offering everything from Mexican tacos to Japanese ramen.

    To fully appreciate LA’s food culture, delve into its diverse neighborhoods. Investigate Little Tokyo for traditional Japanese delicacies, or enjoy Koreatown’s delightful BBQ restaurants and trendy cafes. Additionally, food trucks present unique fusion dishes that embody LA’s innovative culinary spirit.

    Experience the Vibrant Energy of the Entertainment District

    For your evening escapades, venture to the Arts District, where you’ll find transformed warehouses housing art galleries, boutiques, and craft breweries. This area also features live music venues and theater performances, creating a dynamic cultural scene.

    Experiences in the Entertainment District vary from watching independent films at local theaters to enjoying drinks at rooftop bars that offer stunning city views. The district comes alive at night, showcasing street performers and pop-up events that highlight LA’s creative energy.

    Effective Navigation Strategies for Exploring Los Angeles

    Your success in navigating Los Angeles hinges on implementing effective navigation strategies. The city’s extensive highway network connects all major attractions, but meticulous route planning is essential. Your GPS navigation system should be your primary tool while traversing LA’s sprawling streets. Anticipate needing at least 30-45 minutes to travel between significant destinations due to heavy traffic conditions.

    Comprehending Parking Guidelines for Popular Attractions

    When visiting popular sites such as Santa Monica Pier or Hollywood Boulevard, you’ll find an abundance of parking structures and metered spots available. Street parking rates typically range from $1-4 per hour, while parking structures usually charge between $10-25 for all-day parking. Always read parking signs carefully to prevent the risk of receiving tickets.

    Navigating the Traffic Maze of Los Angeles

    If you plan to drive during peak hours, be prepared for substantial congestion between 7-10 AM and 4-7 PM. The I-405 and I-10 freeways are infamous for heavy traffic.

    To effectively tackle LA’s traffic challenges, utilize traffic apps such as Waze or Google Maps to uncover alternate routes. By avoiding major highways during rush hours, you could potentially save up to 30 minutes on your journey.

    Strategic Route Planning for Optimal Efficiency

    Parking near metro stations and taking advantage of public transport can help you avoid downtown traffic jams. A wise strategy involves clustering nearby attractions and visiting them within the same day. Design your routes in a circular pattern to enhance efficiency.

    This approach allows you to maximize your time in LA. Aim to start your days early to avoid heavy traffic and consider scheduling indoor activities during peak traffic hours. Always have a backup route ready, as traffic conditions can change rapidly.

    Budget Smartly for Your Los Angeles Adventure

    Although Los Angeles has a reputation for being an expensive city, it’s entirely possible to experience your 3-day trip on a reasonable budget. Daily expenses can range from $150 to $300, depending on your choices regarding accommodations, activities, and dining options.

    Understanding the Costs of Attractions in LA

    While several attractions are free, such as Venice Beach, Santa Monica Pier, and Griffith Observatory, some locations charge admission fees. Budget approximately $25-35 per attraction, with certain places like Universal Studios Hollywood costing up to $109 per person.

    Dining Costs and Options in Los Angeles

    The cost of dining in Los Angeles can vary significantly. You can find quick meals at affordable spots like In-N-Out ($20 for two), while mid-range restaurants typically charge around $30-40 per person.

    Dining expenses also include tips (15-20%), and you’ll discover the best value in ethnic neighborhoods such as Koreatown or Little Tokyo. Food trucks are fantastic budget-friendly options, usually pricing meals between $10-15.

    Transportation Costs to Keep in Mind

    Clearly, renting a car is the most efficient transportation option in LA. Daily rental rates range from $40-60, in addition to $30-40 for fuel and $15-25 for parking.

    In attraction-heavy areas like Hollywood and Downtown LA, parking fees can escalate to $20-30 per day. Consider utilizing parking apps to find better deals and avoid overpriced hotel valet services.

    Your Ultimate 3-Day Los Angeles Adventure Awaits You

    Your 3-day journey through Los Angeles promises a delightful mix of iconic attractions and authentic local experiences. You will immerse yourself in the charm of Santa Monica Pier, explore the cultural landmarks along the Walk of Fame, and relish stunning vistas from Griffith Observatory. A rental car ensures smooth transportation between the vibrant scenes of Venice Beach and the upscale allure of Beverly Hills. With this meticulously curated itinerary, you will experience the best that LA has to offer, from its beaches and entertainment hubs to its rich cultural venues. This guide serves as your essential resource for planning the ultimate LA adventure, maximizing your time in this dynamic city.

    Frequently Asked Questions to Enhance Your LA Trip

    What is the most effective way to navigate Los Angeles during a 3-day visit?

    Renting a car is the most efficient method for exploring Los Angeles. Given the city’s vast layout and limited public transportation options, having a car enables you to visit key attractions like Santa Monica Pier, Hollywood Sign, and Griffith Observatory at your own pace. Major rental agencies such as Alamo and Enterprise are available throughout the city.

    Which attractions should I prioritize on the first day of my Los Angeles adventure?

    On your first day, begin your journey at Santa Monica Pier to enjoy Pacific Park and soak in the beach atmosphere. Next, head to Venice Beach to explore its famous boardwalk and picturesque canals. Wrap up your day on the Sunset Strip, where you can experience LA’s vibrant nightlife or enjoy dinner at In-N-Out Burger. These destinations are conveniently located near each other, making them ideal for your inaugural day itinerary.

    Where can I find the best views of the Hollywood Sign?

    The Hollywood Sign Vista Point offers the closest and most scenic views of this iconic landmark. You can drive there directly using GPS navigation. Alternatively, you can reach 3160 Canyon Lake Drive via a walk from Mulholland Drive. The sign is also visible from the Hollywood Walk of Fame and Griffith Observatory, although from a greater distance.

    The Article: Los Angeles 3-Day Itinerary Must-See Spots for a Perfect Road Trip appeared first on https://rentacar24.org/

    The Article 3-Day Itinerary for Must-See Spots in Los Angeles Was Found On https://limitsofstrategy.com

  • Must-Have Music Festival Checklist for Your Adventure

    Must-Have Music Festival Checklist for Your Adventure

    Careful planning for your music festival journey is essential to ensure that your experience remains safe and enjoyable. To achieve this goal, your festival checklist should cover everything from essential survival gear to important safety items. This comprehensive guide will help you prepare all the necessary supplies for a memorable festival adventure. You will discover the essentials that keep you comfortable, protected, and ready for any weather conditions. Whether you’re a festival first-timer or a seasoned attendee, this all-inclusive packing guide ensures you won’t miss any critical items for your upcoming musical journey.

    Must-Have Items for Thriving at Music Festivals

    To make your festival experience both safe and enjoyable, it’s vital to have a carefully curated toolkit of essential items. Your festival survival kit should include protection against the elements, reliable communication devices, and important personal documents. This guide will assist you in assembling a thorough checklist that guarantees a stress-free festival experience, allowing you to focus entirely on the music and fun.

    Essential Documentation for Your Peace of Mind

    The cornerstone of your essential items begins with your festival ticket, a valid photo ID, and a list of emergency contacts. It’s advisable to store digital copies of these documents on your smartphone while also keeping physical versions secured in a waterproof container. Additionally, remember to pack your insurance card and a small amount of cash for emergencies, rounding out your documentation essentials to provide you with peace of mind during the festival.

    Personal Safety Gear for a Secure Festival Experience

    To ensure optimal safety and comfort throughout your festival adventure, be sure to pack high-SPF sunscreen, effective insect repellent, and a well-stocked first-aid kit. Your protective gear should also include a reusable water bottle to prevent dehydration, along with clothing that’s suitable for the weather conditions you might encounter.

    Furthermore, it’s advantageous to include hand sanitizer, biodegradable wet wipes, and protective earplugs specifically designed for music events. These items are crucial for maintaining hygiene and protecting your hearing amidst crowded festival settings where sound levels can reach up to 110 decibels.

    Essential Tech Gear for Communication and Navigation

    Your tech kit should encompass a fully charged smartphone, a portable battery pack, and the necessary charging cables. In addition, having a compact flashlight or headlamp is invaluable for safely navigating dimly lit pathways during the festival’s evening hours.

    Since network coverage can often be unreliable during large events, it’s wise to pack a portable charger with a minimum capacity of 10,000mAh to keep your devices operational throughout the festival. You might also consider bringing a backup phone or arranging offline meeting points with your friends to ensure everyone stays connected.

    Essential Items for a Day Filled with Festival Fun

    A successful festival day relies on having a collection of critical items that merge personal care, comfort, and safety gear. Your daily kit serves as your mobile headquarters, enabling you to navigate up to 12 hours of outdoor festivities without any interruptions.

    Hydration and Hygiene Essentials for Your Comfort

    As you dance and bask in the sun, it’s vital to consume at least 2 liters of water daily. Packing a refillable water bottle, biodegradable wipes, hand sanitizer, and SPF lip balm is essential to staying clean and hydrated during lengthy days at the festival.

    Comfort Gear for an Enjoyable Festival Experience

    Before heading out, ensure you’ve packed your comfort essentials: a lightweight backpack, a portable fan, a cooling towel, and a foldable sitting pad. These items are crucial for enhancing your 8+ hour festival experience and ensuring your overall comfort.

    With average festival temperatures often reaching 85°F (29°C), these comfort items can prove to be lifesavers. A cooling towel can lower your body temperature by as much as 30 degrees when wet, and a portable fan will provide immediate relief during the hottest parts of the day.

    Your Emergency Preparedness Kit for Quick Response

    By including basic first aid supplies in your kit, you can protect yourself against common mishaps that might occur at festivals. Be sure to pack bandages, pain relievers, blister patches, and essential emergency contact information. These items will enable you to address minor medical issues swiftly and effectively.

    Statistics indicate that 75% of visits to medical tents involve minor injuries that could be resolved with basic first aid supplies. Therefore, your emergency kit should also include antiseptic wipes, medical tape, antihistamines, and any personal medications you may need.

    Your Comprehensive Strategy for Multi-Day Festival Success

    When attending a multi-day festival, your success relies on intelligent planning and organization. Prepare for 3-4 days of continuous outdoor activity, unpredictable weather conditions, and limited access to standard amenities. Your strategy should encompass daily schedules, designated rest periods, and contingency plans for unexpected occurrences.

    Camping Essentials for Your Comfort and Protection

    To protect yourself from the elements, you’ll require durable shelter and protection. Your camping setup should include a waterproof tent, a sleeping bag suitable for local temperatures, a sleeping pad, and appropriate clothing for the weather. It’s also wise to include a basic tool kit for any quick repairs or maintenance that may arise with your tent.

    Key Items for Extended Stays at the Festival

    Any multi-day festival requires careful preparation for personal care. Make sure to bring 3-4 changes of clothes, biodegradable soap, dry shampoo, and enough hygiene supplies to last throughout the entire event.

    Comfort extends beyond just the basics. Remember to pack microfiber towels that dry quickly, baby powder for freshness, and portable fans to help combat the heat. A compact mirror, basic first-aid supplies, and prescription medications in their original containers are also recommended for a well-rounded kit.

    Strategic Food and Lighting Plans for Your Festival Adventure

    Festival food expenses can add up quickly, so your food strategy should include non-perishable snacks, energy bars, and a water filtration system. For adequate lighting, combine headlamps, lanterns, and backup batteries to ensure visibility after dark.

    As darkness falls, a strategic lighting setup will keep you safe on the festival grounds. Position solar-powered stake lights around your campsite, keep a flashlight handy, and use glow sticks or LED markers to help identify your tent from afar. Additionally, plan for your food supplies to last 20% longer than expected to accommodate unanticipated delays or sharing with new friends.

    Mastering Festival Navigation for Optimal Enjoyment

    Every successful festival experience begins with a solid strategy. Understanding the layout of the festival, emergency exits, and established meeting points is critical for making your adventure both safe and enjoyable. Festival safety data indicates that 65% of reported incidents occur because attendees are unfamiliar with their surroundings.

    Gathering Essential Information Before the Festival

    Creating an effective strategy starts well before you arrive at the festival grounds. Download the official festival app, study the festival map, and save offline copies for convenience. Stay updated by checking social media for real-time information regarding entrance changes, stage relocations, or any schedule adjustments.

    Transportation Strategies for a Smooth Arrival

    Approximately 40% of festival-goers face transportation challenges. Therefore, it’s essential to carefully plan your arrival and departure. Consider utilizing shuttle services or carpooling options to minimize parking difficulties and reduce your carbon footprint.

    Timing your travel is also critical. Aim to arrive early to avoid the busiest rush—statistics indicate that peak entry times between 2-4 PM can lead to waiting periods of up to 2 hours. If possible, choose less crowded entry gates to reduce wait times.

    Efficient Time Management Amidst the Festival Excitement

    Once you enter the festival grounds, flexibility is essential. Plan to catch your must-see acts, but also leave space for spontaneous discoveries along the way. Research shows that 75% of festival-goers miss their favorite performances due to poor time management.

    Effective festival scheduling requires a balanced approach. Allocate 30-minute buffers between acts for food, restroom breaks, and unexpected delays. Establish meeting points with your group for specific times, and keep your phone charged for emergencies to ensure everyone stays connected.

    Essential Guidelines for a Positive Festival Experience

    Unlike everyday life, festivals come with their own set of crucial guidelines that should be followed. These principles will help you foster a safe and enjoyable experience for yourself and other attendees. From respecting personal space to prioritizing hydration, these unwritten rules are the foundation of festival culture.

    Prohibited Items to Ensure Safety and Enjoyment

    Most festivals maintain a strict list of banned items. Do not bring weapons, illegal drugs, or glass containers. Many venues also prohibit outside food, professional cameras, and drones. Always check the specific regulations of your festival to avoid having items confiscated at the entrance.

    Strategic Planning for Festival Success

    While navigating the festival grounds, your success relies on effective planning. Identify key locations such as water stations, medical tents, and restrooms during your initial walkthrough. This knowledge can save you valuable time and significantly enhance your overall experience.

    Your optimal strategy should include establishing a designated meeting point with your group, downloading the festival map, and organizing your daily itinerary around your must-see artists. It’s also crucial to locate the emergency exits and identify quieter areas for breaks and relaxation.

    Embracing a Survival Mindset for Festival Success

    The festival survival manifesto emphasizes staying vigilant, hydrated, and connected with fellow attendees. Your main focus should remain on preserving your physical and mental well-being throughout the event. Always trust your instincts and prioritize your safety at all times.

    Moreover, consider environmental factors that could affect your festival experience. Monitor weather conditions, maintain a consistent eating schedule, and take regular breaks to recharge. Listen to your body’s signals and avoid pushing yourself beyond your limits; pacing yourself will lead to a more enjoyable festival experience.

    Your Ultimate Festival Warrior’s Packing List for Success

    After analyzing countless festival experiences, your strategy for the perfect festival adventure must include these essential items for survival and enjoyment. This checklist encompasses everything from fundamental supplies to advanced gear, ensuring you are prepared for any scenario that may arise at the festival.

    Daily Essentials for Your Festival Mission

    In addition to your ticket and ID, be sure to pack these daily survival essentials: a water bottle (as festivals report that 75% of medical issues stem from dehydration), sunscreen with SPF 30+, a phone charger, comfortable footwear, and a compact backpack. Keep your quick-access items such as cash, hand sanitizer, and wet wipes readily available.

    Multi-Day Festival Gear for Extended Adventures

    Among your supplies for a multi-day festival, include a weatherproof tent, a sleeping bag suitable for local weather conditions, extra clothing items, and portable lighting solutions. Together, these essentials form the backbone of your base camp for a successful extended festival experience.

    Festival enthusiasts understand that proper preparation prevents poor performance. Your extended gear should include a first-aid kit, additional battery packs (with 90% of festival-goers reporting phone drainage by day’s end), and protective gear against various weather conditions. Don’t forget to pack high-energy snacks and a refillable water container to maintain your stamina throughout the event.

    Final Insights for Your Festival Experience

    Ultimately, achieving success at a music festival relies on thorough packing and strategic planning. Your packing list should encompass essential items such as tickets, ID, and cash, along with comfort essentials like sunscreen and portable chargers. For multi-day events, additional supplies like camping gear and extra clothing will be crucial. By preparing these items, adhering to festival guidelines, and maintaining a flexible schedule, you can focus on what truly matters—immersing yourself in fantastic music and creating unforgettable memories.

    Frequently Asked Questions About Music Festivals

    Q: What are the most essential items I should bring to any music festival?

    A: Basic essentials include your ticket, ID, cash or cards, and a smartphone with a portable charger. Additionally, make sure you have sun protection gear such as sunscreen, sunglasses, and a hat. A reusable water bottle is vital for hydration, and comfortable footwear is essential for extensive walking and standing.

    Q: How should I prepare for overnight camping at a music festival?

    A: Be sure to pack a tent, sleeping bag, and camping mat for a good night’s sleep. Bring along extra clothing, toiletries (such as a toothbrush, toothpaste, and deodorant), and a flashlight for nighttime visibility. Include trash bags to keep your campsite tidy and pack dry snacks and water to save on festival food expenses. Always check the festival’s camping regulations before packing to ensure compliance.

    Q: What safety and comfort items should I pack for a music festival?

    A: Consider including a small first-aid kit with bandages and basic medications. Bring earplugs to protect your hearing from loud performances. Hygiene items like hand sanitizer and wet wipes are essential, as is a blanket for sitting and weather protection. Keep cash in separate locations and bring a backup phone battery to prepare for emergencies.

    The Article: Essential Items for a Music Festival Complete Checklist for Your Adventure appeared first on https://rentacar24.org/

    The Article Music Festival Checklist: Must-Have Items for Your Adventure Was Found On https://limitsofstrategy.com

  • Third Party Insurance Benefits for Car Rentals Explained

    Third Party Insurance Benefits for Car Rentals Explained

    Many individuals who rent cars often underestimate the critical importance of fully understanding their insurance coverage when renting a vehicle. As you prepare for your next car rental experience, it is essential to consider Third Party Insurance, which serves to protect you against potential claims from other parties in the event of an accident. This vital coverage plays a crucial role in safeguarding your finances if you inadvertently cause damage to someone else’s property or injure others while driving your rental vehicle. While this insurance is generally mandatory in most countries, be aware that coverage limits can significantly differ. Your rental agreement typically includes basic third-party coverage, but it is wise to evaluate whether additional coverage is necessary for comprehensive protection based on your travel destination and planned activities.

    Unlocking the Importance of Third Party Insurance for Car Rentals

    A Third Party Insurance policy is your fundamental legal requirement when renting a vehicle. It is designed to protect you from damages you may cause to other people’s property or any injuries inflicted on others while operating the rental vehicle. This type of insurance forms the bedrock of your rental car protection, with coverage limits typically ranging from $1 million to $2 million. Understanding these limits is vital to ensuring you have adequate protection while on the road. Not only does this coverage meet legal requirements, but it also provides peace of mind, allowing you to focus on your journey rather than worry about potential liabilities.

    Understanding Third Party Insurance: Its Essential Role and Benefits

    Alongside your rental agreement, Third Party Insurance functions as your primary safeguard against liability claims. This coverage comes into play when you accidentally cause damage to someone else’s property or injure another individual while behind the wheel of your rental vehicle. However, it is important to note that this insurance does not extend to damage sustained by your rental car or any personal injuries you may incur. Understanding the specific benefits of this insurance can guide you in making informed decisions about your coverage options, ensuring that you are adequately protected during your travels.

    Exploring the Various Terms and Types of Third Party Insurance

    In the car rental sector, you will come across various terms for Third Party Insurance, such as Extended Protection (EP), Supplemental Liability Insurance (SLI), and Additional Liability Insurance (ALI). Each of these variations offers similar fundamental coverage but may come with specific policy limits that you should be aware of. Despite the different names, the core coverage elements remain consistent. Basic protection typically includes property damage liability and bodily injury liability, with major rental companies like Alamo, Enterprise, and National offering standardized $1 million coverage limits through their respective policies. Familiarizing yourself with these terms can help you choose the right policy for your needs.

    Examining the Coverage Features of Third Party Insurance

    One of the standout features of Third-Party Insurance is its comprehensive protection for damages incurred by third parties. Typically, your coverage extends up to $1 million in liability protection, which is essential for safeguarding you against potential financial losses stemming from accidents involving other people or their property. This level of coverage is crucial, especially in high-traffic areas or regions where accidents are more common, as it significantly reduces your financial exposure in the event of an incident.

    What Third Party Insurance Covers: Key Inclusions to Expect

    Regarding your Third-Party Insurance coverage, you can anticipate protection that includes third-party property damage, bodily injuries, and legal expenses. Your policy will cover medical expenses, repair costs, and legal fees if you find yourself involved in an accident affecting another party. This coverage applies to damages you cause to other vehicles, buildings, or structures, providing you with a safety net in various scenarios. Understanding these inclusions can help you better appreciate the breadth of protection available to you while driving a rental vehicle.

    Understanding the Limitations of Third Party Insurance: Key Exclusions

    It’s crucial to be aware that Third-Party Insurance does not cover damage to your rental vehicle or personal injuries sustained by you or your passengers. Additionally, any belongings inside the rental car are not protected under this policy. For example, if you are involved in an accident, Third-Party Insurance will not cover repairs to your rental car, theft of personal items, or medical expenses for yourself and your passengers. To address these gaps in protection, consider obtaining additional coverage options like CDW (Collision Damage Waiver) or personal injury protection, which can provide more comprehensive coverage for your rental experience.

    Legal Obligations Surrounding Third Party Insurance

    In many countries, mandatory Third-Party Liability insurance is a legal requirement for all vehicles, including rental cars. It is essential to understand that these regulations are in place to protect both you and other road users. Typically, your rental company will provide at least the minimum coverage required by local laws, which is usually included in your basic rental rate. Familiarizing yourself with these legal obligations can prevent misunderstandings and ensure compliance during your travels.

    What to Expect from Mandatory Coverage Laws

    Upon reviewing your rental agreement, you will likely notice that basic Third-Party Liability coverage is automatically included in most countries. You must meet the minimum coverage requirements, which can range from $15,000 to $50,000 in the United States. This basic coverage is designed to protect you from the legal consequences associated with driving without insurance. Understanding these requirements can help you navigate your rental experience with greater confidence and security.

    Regional Differences in Insurance Requirements: What You Need to Know

    Legal requirements for Third-Party insurance can vary significantly across different regions. For example, in the European Union, you are typically required to have higher minimum coverage levels compared to those in the United States. Your rental company will adjust the basic coverage to align with local regulations. Coverage requirements can even vary as you cross borders during your rental period. For instance, while Germany mandates a minimum of €7.5 million in coverage, the UK requires unlimited coverage for personal injuries. It’s important to verify the specific requirements for each country you plan to visit during your rental time to ensure compliance and adequate protection.

    Assessing the Financial Risks Associated with Third Party Insurance

    Failing to secure adequate third-party insurance can expose you to substantial financial risks. In the event of serious accidents, your potential liability could escalate to hundreds of thousands or even millions of dollars. The basic coverage included in your rental may only offer minimum state-required protection, which often ranges from $25,000 to $50,000, leaving you vulnerable to significant out-of-pocket expenses. Evaluating these risks can help you make informed choices about your insurance options and ensure that you are adequately protected during your travels.

    Understanding Coverage Limits: Important Information to Know

    In addition to the standard coverage, you have the option to purchase supplemental liability insurance that can offer protection up to $1 million. Your specific coverage needs will depend on a variety of factors, including your destination, the frequency of driving, and any existing insurance policies you may have. Most rental companies provide flexible options to help you choose the appropriate coverage levels that suit your needs, allowing you to tailor your insurance to your unique situation.

    Evaluating the Costs of Additional Coverage: Financial Considerations

    Any extra third-party insurance you consider will likely increase your daily rental rate. Typically, the cost ranges from to per day, and this can vary based on the rental company and location. It’s wise to compare this expense against the potential financial protection it affords you in case of an accident. When planning your finances for car rental, it is essential to conduct a thorough assessment of insurance costs. Although daily rates may appear high, they represent only a small fraction of the potential liability costs you could face without proper coverage. Additionally, review your existing insurance policies and any benefits offered by your credit card to ensure that you do not end up paying for duplicate coverage.

    Making Informed Choices: Comparing Insurance Options

    To make an informed decision, your understanding of Third-Party insurance options should involve a clear comparison of the different types of coverage and providers available. Here’s a simplified breakdown of the primary differences:

    Standard TPL Coverage Enhanced TPL Coverage
    Basic third-party protection Up to $1 million coverage
    Limited legal fees Full legal protection

    Analyzing Major Rental Companies and Their Coverage Offerings

    At prominent car rental providers, you will find standardized Third-Party Liability coverage included in your rental price. Enterprise, Hertz, and Avis typically offer additional coverage options that extend your protection beyond the basic limits. Your choice of rental company can significantly influence your insurance costs, potentially impacting them by 15-30%. Understanding how different companies structure their offerings can help you select a provider that meets your needs without exposing you to unnecessary financial risk.

    Identifying Coverage Differences Across Rental Providers

    Variations between rental providers can be substantial regarding coverage limits and exclusions. Some companies provide up to $1 million in protection, while others may limit coverage to state minimums. Your basic TPL coverage can differ based on your location and the provider you choose. To ensure you make the best choice for your specific needs, compare coverage limits and costs across various rental companies. Opting for higher coverage limits often results in only a 20-30% increase in costs compared to basic coverage, while providing significantly enhanced protection. Keep in mind that your rental location and duration will also affect the final insurance cost.

    Key Factors to Consider When Choosing Third Party Insurance

    After thoroughly evaluating your car rental needs, consider several key factors that should guide your decision regarding third-party insurance coverage. Your driving location, rental duration, and existing insurance policies are all critical aspects to weigh in this decision. It’s possible that your personal auto insurance already provides sufficient coverage for rental vehicles, so take the time to investigate this. Conducting a thorough assessment can ensure you select the best coverage for your specific situation.

    Conducting a Risk Assessment: Evaluating Your Driving Environment

    A primary step in your decision-making process should involve evaluating the potential risks associated with your rental location. Consider factors such as local traffic conditions, weather patterns, and accident statistics pertinent to the area where you will be driving. Additionally, your own driving experience and familiarity with local roads can significantly influence your overall risk level. By thoroughly assessing these factors, you can make a more informed decision regarding your coverage needs and potential liabilities.

    Reviewing Existing Coverage: Avoiding Unnecessary Expenses

    Approximately 65% of personal auto insurance policies extend some form of coverage to rental cars. It is prudent to review your current auto insurance policy and credit card benefits to ensure you are not paying for coverage you might already have. Furthermore, beyond examining your personal insurance, it is crucial to comprehend the coverage limits and exclusions present in your existing policies. Your credit card may provide up to $50,000 in coverage, while rental company policies typically offer $1 million in liability protection. Be sure to contact your insurance provider and credit card company to verify the specific details regarding your rental car coverage benefits.

    • Review your personal auto insurance policy thoroughly.
    • Check the coverage benefits associated with your credit card.
    • Compare coverage limits across different options.
    • Verify any policy exclusions that may apply.

    Valuable Insights on Third Party Insurance for Car Rentals

    After considering all the discussed points, your comprehensive understanding of Third Party Insurance for car rentals can lead to significant savings and protect you from unexpected expenses. It is imperative to check your existing insurance coverage before opting for additional protection for your rental. Your credit card or personal auto insurance may already offer sufficient third-party coverage. When renting a car, the basic Third Party Liability insurance provides essential protection against damage to others’ property and injuries incurred by third parties. You can always choose extra coverage based on your individual needs and travel objectives. This insurance empowers you to drive with confidence, knowing you are well-protected against third-party claims.

    Your Essential Questions Addressed: FAQ on Third Party Insurance

    What does Third Party Insurance cover in car rentals?

    Third Party Insurance covers damages you may cause to other people’s property or injuries suffered by others while you are driving the rental car. This includes the costs for repairs to other vehicles in the event of an accident, medical expenses incurred by injured third parties, damage to buildings or structures, and related legal expenses. However, this insurance does not extend to cover damage to the rental car itself or any injuries sustained by you or your passengers. Understanding this can help you better appreciate the value and limitations of your insurance coverage.

    How does Third Party Insurance differ from other rental car insurances?

    Third Party Insurance is specifically designed to protect against damages inflicted on others, while other insurance types serve different purposes. For instance, Collision Damage Waiver (CDW) covers damage to the rental car, and Loss Damage Waiver (LDW) protects against theft. Notably, Third Party Insurance is often mandated by law, whereas the other types of coverage are optional add-ons to your rental agreement. Recognizing these distinctions can help you make informed decisions about the insurance options best suited for your rental experience.

    What are the coverage limits for Third Party Insurance in rental cars?

    Coverage limits can vary depending on the rental company and location. Major rental providers like Alamo, Enterprise, and National typically offer $1 million in coverage through their supplemental liability insurance options. However, basic Third Party coverage may have lower limits, particularly in the United States. Renters should verify their specific policy limits and consider supplemental coverage if they feel the basic protection may not be sufficient. Being proactive about understanding these limits can help you avoid unexpected liabilities during your rental period.

    The Article: Third Party Insurance in Car Rental Explained Coverage Benefits and Key Details appeared first on https://rentacar24.org/

    The Article Third Party Insurance Explained: Benefits in Car Rentals Was Found On https://limitsofstrategy.com